

Tessa’s Recipe Rundown
Taste: Deeply chocolate, with a hint of sweetness and a touch of mint. Texture: Although the texture of these homemade thin mints isn’t exactly like the boxed versions, the cookie is still crumbly and the coating is still smooth. Ease: Not too many ingredients, and the steps are easy to follow. Appearance: Almost anything coated in chocolate is going to look scrumptious. Pros: These cookies aren’t full of unnatural ingredients, can be made anytime, and are a more rich and fresh version of the boxed variety. Cons: None. Would I make this again? After I’ve experimented with all the other girl scout cookie recipes!This post may contain affiliate links. Read our disclosure policy.
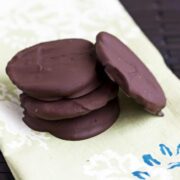
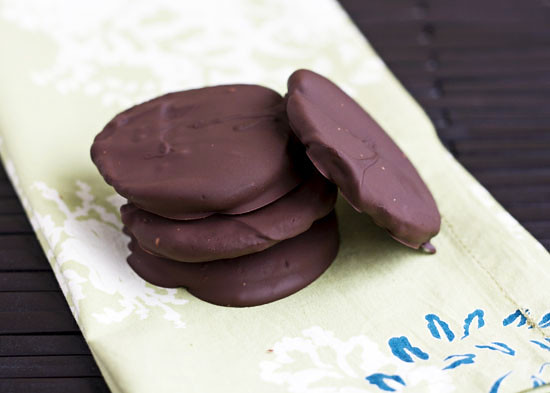
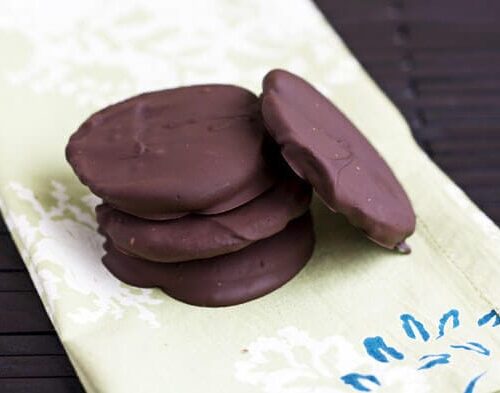
Homemade thin mints are richer and fresher than the boxed variety! Deeply chocolate-y, with a hint of sweetness and a touch of mint.
Now, you may be wondering if I’ve gone a little crazy here. I started this Eat Healthy series at the beginning of this year which focuses on healthy eating and yet, this is my second cookie recipe. Well, I haven’t gone crazy (I hope) but instead have come to a realization that something that is homemade is more likely to be healthier for your body something that is pre-packaged and store bought. You get to select what ingredients will go into your food and account for your health concerns and taste preferences. I doubt you would reach to sprinkle some high fructose corn syrup, diglycerides, or sodium nitrate over your next home-cooked family meal. So if you wouldn’t do it, why should you continuously buy from a company that does? Most store-bought items can be made easily at home and often taste better too. If you think you don’t have the time, try to cut out 2 hours of television or internet surfing a week. Or hell, even whip up some freshly baked bread or cookies while you’re watching TV. That will give you time to make your own grocery staples that will taste great, cost less, be healthier, and will impress your family and friends. I think that’s a win-win.
Now, I’d like to say that this does not mean an occasional packaged treat is unacceptable. Especially when the proceeds benefit a good cause, like the Girl Scouts. I actually have already purchased a few boxes of girl scout cookies this season because I know it will help the girls in my neighborhood do things that they wouldn’t otherwise have the opportunity to do. But for an everyday treat throughout the year, this thin mint recipe is a gem. Not too much sugar, whole wheat flour, and overall simple ingredients.
Homemade Thin Mints
Ingredients
Chocolate Wafers:
- 8 ounces butter, room temperature
- 1 cup powdered sugar
- 1 teaspoon natural vanilla extract
- 1 cup unsweetened cocoa powder
- 3/4 teaspoon fine grain sea salt
- 1 1/2 cups whole wheat pastry flour
Chocolate Peppermint Coating:
- 1 pound good quality semi-sweet chocolate, chopped
- natural peppermint oil to taste
Instructions
- Preheat your oven to 350. Racks in the middle zone.
Make the cookie dough:
- In a mixer cream the butter until it is light and fluffy. Add the powdered sugar and continue to cream, scraping the sides of the bowl a couple times if necessary. Stir in the vanilla extract, salt, and cocoa powder. Mix until the cocoa powder is integrated and the batter is smooth and creamy, resembling a thick frosting. Add the whole wheat pastry flour and mix just until the batter is no longer dusty looking but still a bit crumbly. Don’t overmix.
- Turn the dough out onto a clean counter, gather it into a ball, and kneed it just once or twice to bring it together into once nice, smooth mass. Place the ball of dough into a large plastic bag and flatten it into a disk roughly 3/4-inch thick. Place the dough in the freezer for 15 minutes to chill.
Rollout and bake:
- Remove the dough from the freezer and roll it out really thin, about 1/8-inch. These are called thin mints after all. You can either roll it out between two sheets of plastic, or dust your counter and rolling pin with a bit of flour and do it that way. Stamp out cookies using a 1 1/2-inch cutter (any shape or design you like). Place cookies on a parchment-lined baking sheet and bake for 10 minutes. Remove the cookies from the oven and allow them to cool completely on a wire rack.
Make the peppermint coating:
- Meanwhile, prepare your chocolate coating. Using a double boiler, slowly melt the chocolate, stirring occasionally until it is glossy and smooth. Alternatively, use a microwave in short 15-20 second bursts to melt the chocolate. Stir in the peppermint extract. If you think the chocolate needs a bit more peppermint kick, add more extract a drop or two at a time to taste – but don’t go overboard.
Finishing the cookies:
- Using a fork, gently drop the cookies, one at a time, into the chocolate coating. Flip to coat all sides. Lift the cookie out of the chocolate with the fork and bang the fork on the side of the pan to drain any extra chocolate off the cookie. You are after a thin, even coating of chocolate. Place on a parchment lined baking sheet, and repeat for the rest of the cookies. Place the cookies in the refrigerator or freezer to set. Best eaten straight from the freezer where they will keep almost indefinitely (not that they’ll last that long).


I’ve been looking for recipes to make that use Thin Mints, and am so happy to have also found this recipe for homemade Thin Mints. I love experimenting with copycat recipes!
[…] Homemade Thin Mints adapted from 101 Cookbooks originally seen on Handle the Heat […]
[…] from Handle the Heat […]
[…] from Handle the Heat […]
[…] Recipe Here: Homemade Thin Mints Homemade Thin Mints Source: Adapted from Handle the Heat, Makes 30-40 cookies Chocolate Wafers: · 1 cup butter, room temperature · 1 cup powdered […]
These look lovely 🙂 Will try!
These look great! I'll have to try them!
I'm making these this week too! 🙂
mmmmm…must try these!
Mmm, I love Girl Scout Cookies. This will come in handy when there are no more girls in front of the grocery store! Thanks!
Sweet! We just made some homemade samoas this weekend, so these are next up!