


Tessa’s Recipe Rundown
Taste: Deliciously rich and sweet cheesecake with a chocolate cookie crumb
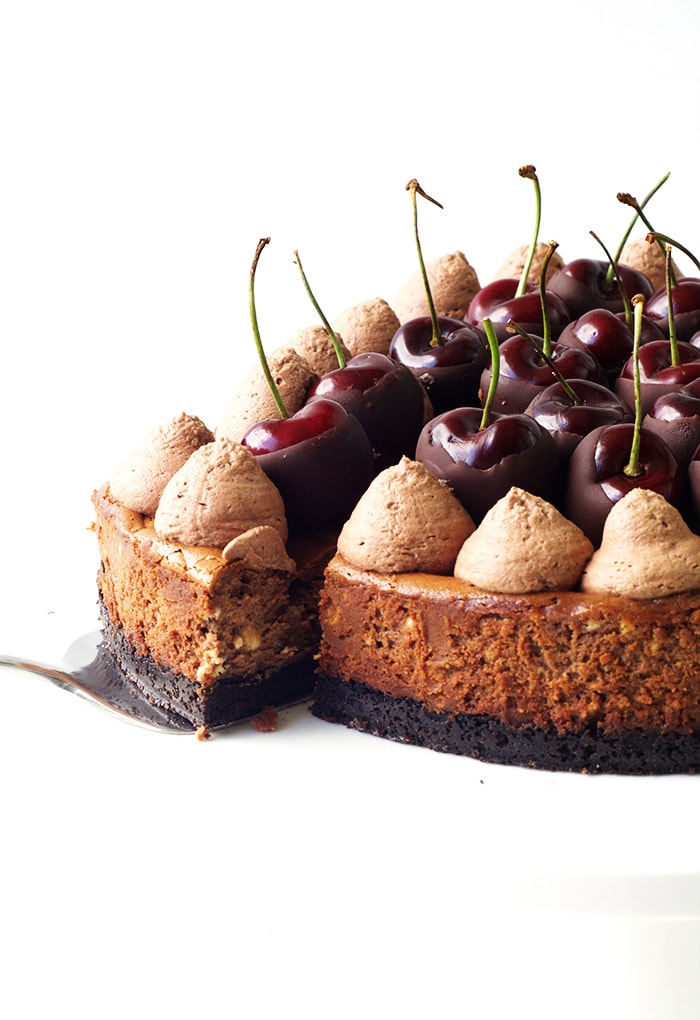
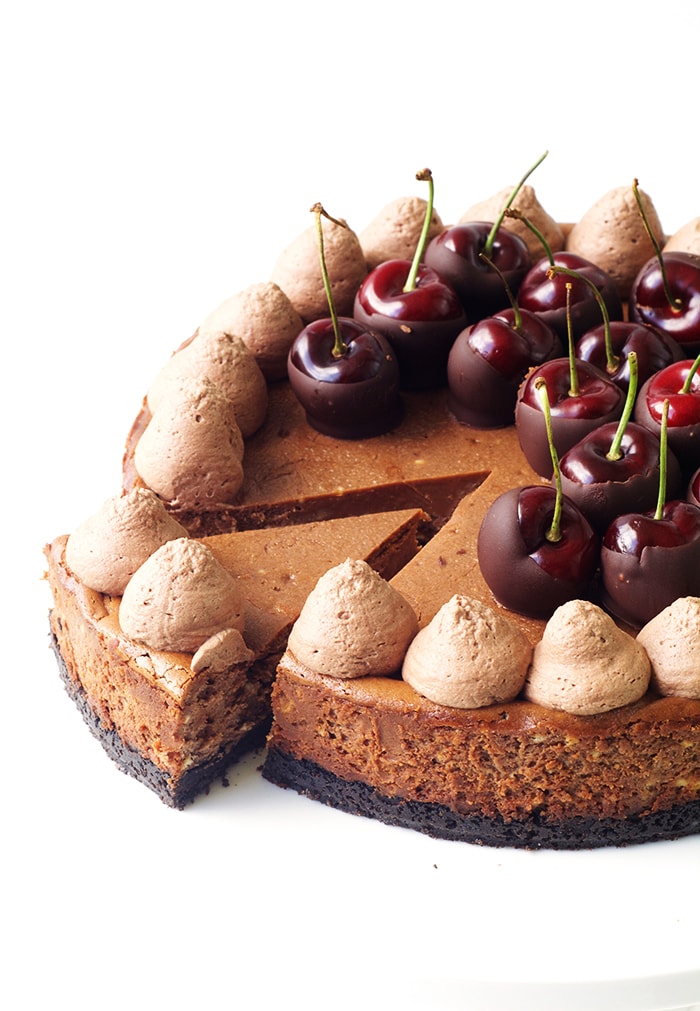
Texture: Light and creamy with a nice crunchy crust
Ease: Simple baked cheesecake
Appearance: What a stunner!
Pros: An easier baked cheesecake (no water bath needed)
Cons: It’s hard to stop at one piece!
Would I make this again? Yes!
This post may contain affiliate links. Read our disclosure policy.
Please welcome back Jess from Sweetest Menu as she shares this recipe for Black Forest Cheesecake! Be sure to visit her mouthwatering blog today. -Tessa
Hi friends! It’s Jess here from Sweetest Menu and I have a special dessert to share with you today. This Black Forest Cheesecake is beyond delicious and the perfect addition to your Christmas table.
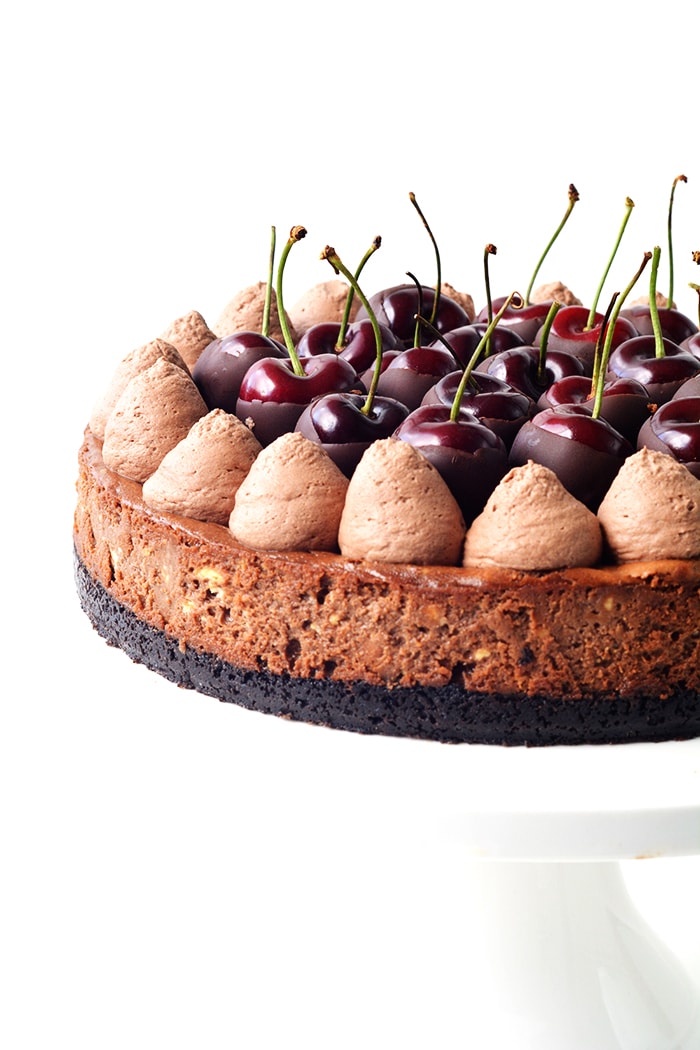
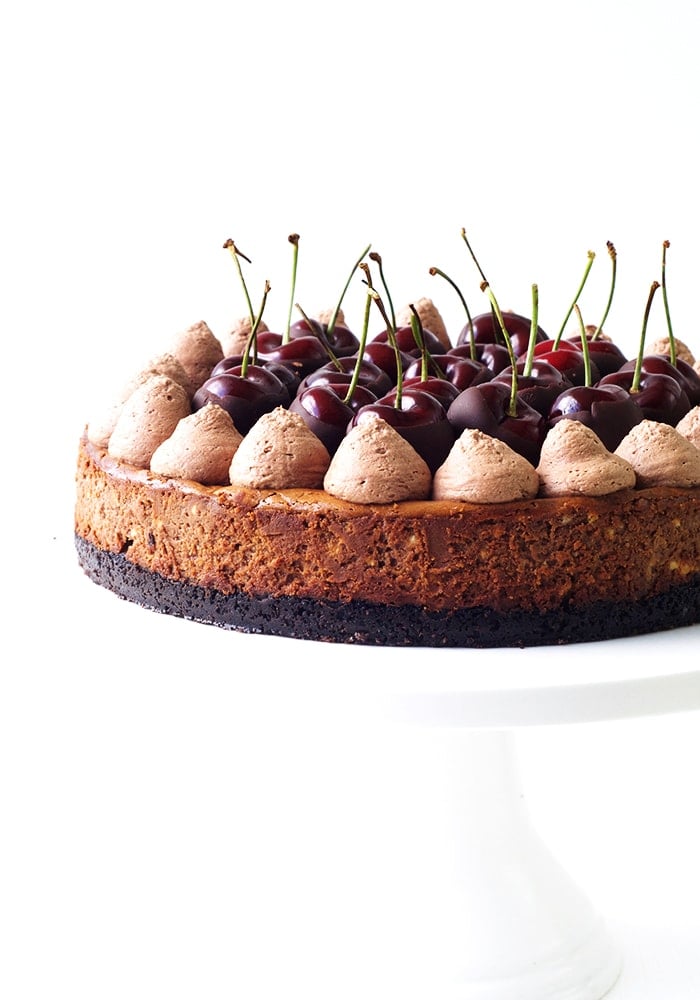
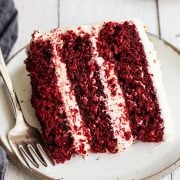
Creamy baked chocolate cheesecake featuring an Oreo crust, topped with chocolate dipped cherries and clouds of chocolate cream. What a showstopper am I right? And you’ll be glad to know it’s much easier than you’d think!
If you have been concerned about making baked cheesecakes in the past, you need to try this recipe. It’s really simple and you don’t even need a water bath! You’ll end up with a deliciously rich cheesecake that will be the hit of the party.
I photographed this cake early in the morning, when I have the best natural light in my apartment. And afterwards I tried this cheesecake and ended up eating a huge piece because it was THAT good – cheesecake for breakfast anyone? #thestruggleisreal
I have a few tips for creating the perfect cheesecake that I have learnt along the way. These include always making sure your ingredients are at room temperature – this includes the cream cheese, eggs and sour cream in this recipe.
Make sure you beat your cream cheese well to avoid any lumps in your final batter. To help avoid cracks in your cheesecake, you don’t want to over mix your batter but when you are first beating the cream cheese only, go for gold and get it very smooth before adding the extra ingredients.

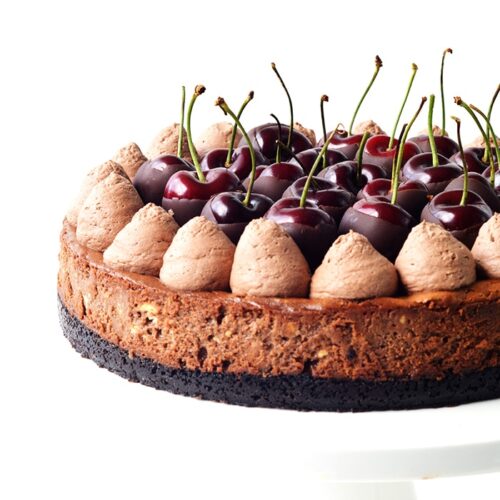
Black Forest Cheesecake
Ingredients
Cookie crust
- 30 Oreo cookies (300 grams)
- 1/2 cup (115 grams) unsalted butter
Chocolate cheesecake
- 2 and 1/2 cups (500 grams) full fat cream cheese, room temperature
- 1/2 cup (100 grams) caster or granulated sugar
- 1 teaspoon vanilla extract
- 3 large eggs, room temperature
- 1/2 cup (120 ml) full fat sour cream, room temperature
- 1 cup (150 grams) dark or semi-sweet chocolate
Cherries and chocolate cream
- 1 cup (150 grams) dark or semi-sweet chocolate
- 2 cups (250 grams) fresh cherries with stem
- 1 cup (240 ml) thickened or heavy cream
- 2 tablespoons cocoa powder
- 2 tablespoons icing or powdered sugar
Instructions
- Preheat your oven to 320 F (160 C). Lightly grease a 9 inch (23 cm) springform baking tin with a little butter and set aside. Add your Oreo biscuits (cream and all) to a food processor and blend until they resemble fine crumbs. Melt your butter in the microwave and then pour over your crushed Oreos and whiz again until the mixture resembles wet sand. Pour your Oreo crumbs into your prepared tin and press down gently using the back of a spoon to form an even layer. Pop in the fridge.
- Add your cream cheese to a large mixing bowl and beat well until smooth and creamy. Add your sugar and beat again. Melt your chocolate in the microwave and set aside to cool slightly. Then add your eggs to your cream cheese mixture, one at a time, until incorporated. Add vanilla extract and gently beat. Then stir in your sour cream and your melted chocolate. Stir until smooth but try not to over mix.
- Pour your cheesecake filling over your crust and smooth over the top. Bake in the oven for approximately 40-45 minutes or until it no longer wobbles in the middle. Try not to over bake it as it will continue to cook as it cools. Leave the cheesecake in the oven with the door ajar for at least one hour. Then remove and leave to cool slightly on a cooling rack before transferring to the fridge. The cheesecake is best left in the fridge for 3-4 hours (or overnight) until it cools completely and becomes nice and firm before slicing.
- To decorate, melt your chocolate in the microwave, stirring in-between 15 second bursts. Place a sheet of baking or parchment paper on a plate. Then dip your cherries using the stem and place them onto your prepared plate. Once you have done all the cherries, pop them into the fridge for at least 15 minutes to set.
- To make your chocolate cream, beat your cream until whipped, sift in the cocoa powder and sugar and stir until smooth. Add your chocolate cream to a piping bag with a large round tip and pipe clouds of cream around the edge of your cheesecake. Place the chocolate-dipped cherries in the middle. Enjoy!


Can I the replacement for eggs?
Amazing. This cake just looks amazing. The fruit on the top is looking great.
I am bowing internet for special cake recipe for my father’s birthday. Finally, I got One . I am going to bake this cake.
This cake looks so amazing. I just can’t wait to make this cake. Thanks for the recipe.
It looks really amazing, I am waiting some more recipes which is usefull for fitness purpose
do we need to make a water bath once we put the cheesecake in the oven?
Awe!!!! Black forest is one of my favorites 😀 This is really tempting me..
Doing more burpees for this cake is worthy…
I’m in. Thank you and have a Very Happy Holidays !