Tessa’s Recipe Rundown
Taste: They taste like, well, everything! I love this particular “everything” blend because it has a dash of caraway seeds. The nice thing about making your own bagels is that you can choose to put whatever you like on or inside them. Texture: Chewy, firm, bready, and slightly crisp/crunchy at the edges, especially when toasted. Ease: Not as hard as you might think but definitely a day-off work/school/whatever project. Appearance: They’re certainly not as robotically perfect as store-bought bagels but that’s what will let everyone you made them in your own kitchen! Pros: So much better than store-bought bagels. Cons: None! Would I make this again? Yes. Next time I think I’ll try a whole-wheat variety.This post may contain affiliate links. Read our disclosure policy.
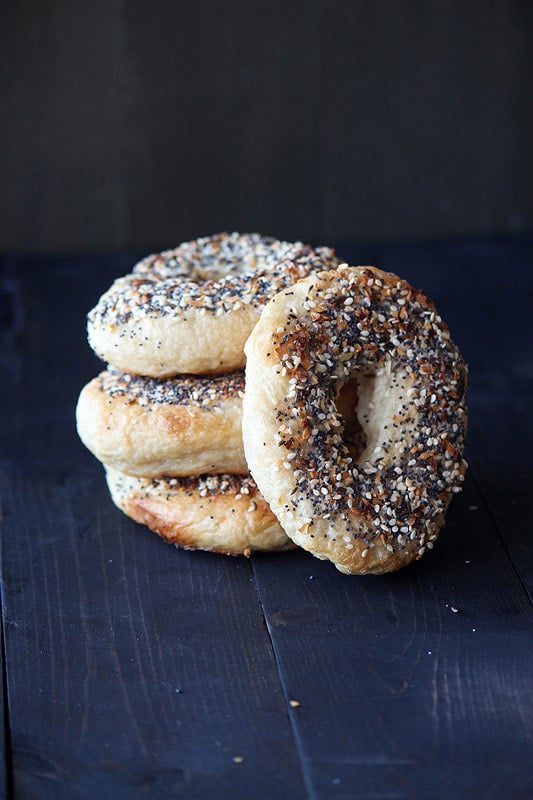
I am not a fan of our pantry. I’ve mentioned it before – it’s a set of small, dark, deep, and inaccessible cabinets that barely qualify as a pantry. However, it’s better than nothing (or so I try to tell myself). Recently I found a forgotten half-eaten bag of store-bought bagels in the depths of the pantry. I can’t even tell you how long the bagels have been in there. Let’s just say weeks and weeks. Somehow… they were perfect. Not stale, moldy, or stinky. How weird is that?? It made me seriously question the ingredients inside packaged bread goods and gave me one more reason to pull out my trusty KitchenAid mixer to embark on another bread-making journey.
What is the weirdest/grossest thing you’ve found lurking in your pantry? Please tell me I’m not the only one…
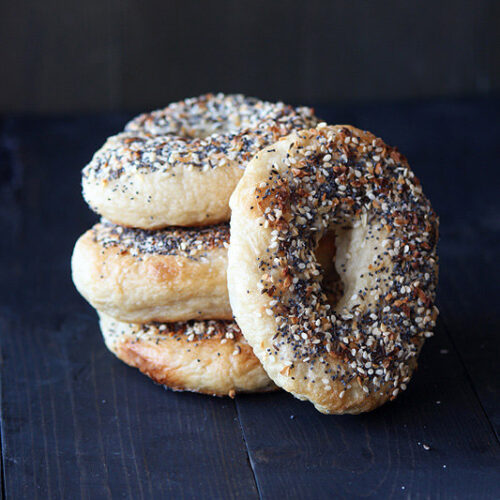
Everything Bagels
Ingredients
Dough:
- 1 tablespoon instant yeast
- 4 cups (17 ounces) bread flour
- 2 teaspoons salt
- 1 tablespoon non-diastatic malt powder, brown sugar, or barley malt syrup
- 1 1/2 cups lukewarm water
Water Bath:
- 2 quarts (64 ounces) water
- 2 tablespoons (1 ounce) non-diastatic malt powder, brown sugar, or barley malt syrup
- 1 tablespoon granulated sugar
Everything Topping:
- 1 egg white, beaten
- 2 teaspoons poppy seeds
- 2 teaspoons sesame seeds
- 2 teaspoons onion flakes
- 2 teaspoons garlic flakes or 1 teaspoon garlic powder
- 2 teaspoons kosher salt or coarse sea salt
- 1 teaspoon caraway seeds
Instructions
- Combine all the dough ingredients in the bowl of a stand mixer fitted with a dough hook. Knead on medium-low speed for about 10 minutes (or knead vigorously by hand for 12 to 15 minutes). The dough will be stiff and hold its shape without spreading. Place the dough in a lightly greased bowl, cover, and let rise until puffy but not necessarily doubled in size, 1 to 1 1/2 hours.
- Transfer the dough to a work surface and divide into eight pieces. Roll each piece into a smooth, round ball. Cover the balls with plastic wrap and let them rest for 30 minutes. They may puff up slightly.
- Meanwhile, prepare the water bath by heating the water, malt powder, and sugar to a gentle boil in a large, wide pan. Preheat the oven to 425°F.
- Use your index finger to poke a hole through the center of each dough ball then twirl the dough around your finger to stretch the hole to a 2-inch diameter. Place each bagel on a parchment-lined baking sheet. Transfer the bagels, 4 at a time, to the simmering water. Increase the heat to bring the water up to a gentle boil if necessary. Cook the bagels for 2 minutes, gently flip them over, and continue cooking for another minute. Use a skimmer to remove the bagels to the baking sheet and repeat with remaining 4 bagels. Beat the egg white with 1 tablespoon of water and coat each bagel with the mixture. Combine the remaining everything topping ingredients and sprinkle evenly over the bagels.
- Bake the bagels for 20 to 25 minutes, flipping them over after 15 minutes, or until they reach their desired brown color. Remove the bagels from the oven and cool completely on a wire rack.








Never mind just researched the flour used for bagels and bread flour it is. Lol
Can I use all purpose flour instead of bread flour?
I’m confused. You boil the bagel then bake them? I feel like it will fall apart in the water.
They definitely won’t! It’s also the method used to make soft pretzels. It’s how we learned it in culinary school. Here’s some background info behind the boiling-then-baking: http://www.thekitchn.com/food-science-why-bagels-are-bo-86711
i always questions bread products with so many preservatives. I have a dingy pantry too but just glad to have one i guess..bagels on my list to make – yours version looks so good.
Wowww… looks absolutely perfect.. Very beautiful picture too!!
Thank you for the recipe! I just made these and can’t stop eating them. But forget cooling them completely, right out of the oven is mandatory eating.
Everything bagels are my jam! I’m totally craving one now…!
They really do look perfect!
By the way, I didn’t realize that you poke and twirl to make the hole. Aha moment!
These look perfect Tessa!