


Tessa’s Recipe Rundown
Taste: Completely customizable based off your toppings, but the waffles themselves are definitely sweet. Texture: The best part. The bites of crunchy caramelized sugar pearls throughout are to die for when contrasted with the ultra fluffy yet slightly chewy texture. It’s difficult to describe but just trust me, if you’ve never had a Liege waffle you must try one. Ease: Not the quickest or the easiest, but that’s why I’ve created the video above and included all those tips & tricks. You can do it! Appearance: Who could pass up on a bite? No one! Pros: The best waffles ever, hands down. Cons: Definitely a special occasion recipe. I make this again? We’ve already dug into the leftovers!This post may contain affiliate links. Read our disclosure policy.

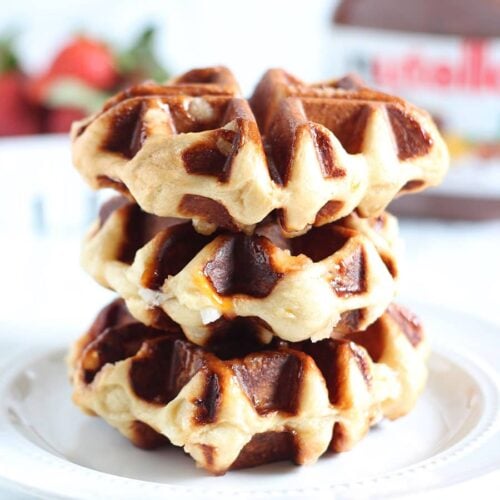
If you’ve never had a Belgian Liege Waffle at a restaurant, while traveling, or at a food truck, then you MUST try one asap. Luckily for you I’m sharing my favorite recipe, a step-by-step video, and all my best tips to help you make these incredible waffles.
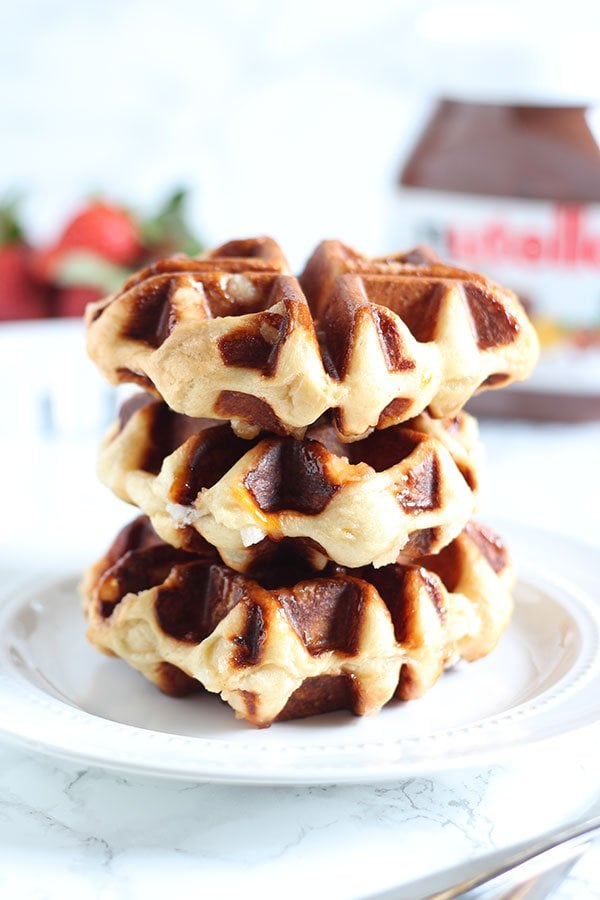
They’re made with dough instead of batter, and it makes ALL the difference. There’s also made with pearl sugar, which is like the best secret ingredient ever. My favorite part about these waffles, though, is that you can top them with whatever your heart desires for a truly delightful treat. Check out the video below to see how they’re made! Let me know if you have any questions in the comments.

Belgian Liege Waffle Recipe Tips
Although these waffles require a bit of time and patience, they are SO worth it. I’ve included all the recipe tips and advice I could think of for you just below. Comment with any other questions!
Dough?!
Yes, these waffles are made with a yeast raised dough, not a batter. This means they need a bit more love and attention than batter waffles but they are SO MUCH BETTER. Most dough recipes can be kneaded by hand if you don’t have a stand mixer, but I wouldn’t recommend it for this one. Watch the video above to see how cubes of butter are incorporated into this dough to make it ultra rich and flavorful. Doing this by hand would be challenging and messy.
The dough needs 2 hours for its first rise. Then, it needs to sit in the fridge overnight, or up to 24 hours. There’s no rushing this process if you want the best waffles. Plan ahead!
Instant yeast?
I always work with instant yeast because it’s so easy. It’s also called rapid-rise or quick-rise. If you don’t have it, you can always use regular active dry yeast. You’ll need to combine the active dry yeast with the warm milk and water for 5 minutes, or until frothy, before you can add proceed with the recipe.
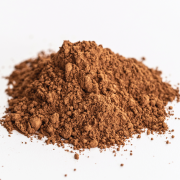
Pearl Sugar
Part of what makes a Belgian Liege waffle so special is the addition of pearl sugar. It translates to little bites of slightly crunchy, slightly caramelized sugary heaven. Pearl sugar is pretty difficult to find in the U.S., so I just order it on Amazon. The stuff isn’t exactly cheap, but it’s well worth it for a special occasion. If you don’t want to deal with that, you can also break up sugar cubes into smaller pieces. Not quite the same but close enough!
Cooking
Of course, these wouldn’t be Belgian waffles without a Belgian Waffle Iron! It might seem strange to cook dough instead of batter in a waffle iron, but it works beautifully. The pearl sugar starts to caramelize and can make a bit of a mess inside the waffle iron, so it’s a good idea to take a little wad of paper towels to wipe it down every few waffles. Just be careful not to burn yourself. Use heat resistant tongs (wood or silicone coated to avoid scratching the nonstick waffle iron surface) to remove the waffles to a baking sheet once cooked.
UPDATE: To those asking if you can use a regular waffle iron for this recipe, reader Judit recently gave it a try and reported, “definitely not disappointed!!! These are absolutely AMAZING!!!!” Check out her picture:

Make Ahead
The waffles can be kept warm in a 200°F oven until ready to serve.
If you want to freeze waffles, shave a minute or so off the cooking time so they won’t overcook when you reheat. Place the waffles on a baking sheet and pop into the freezer until solid. Remove to airtight containers and keep in the freezer for up to 2 months. Reheat in a 250°F oven, or until completely warmed through.
Toppings
The options for toppings are truly limitless here. My favorites include:
-Nutella (duh!)
-Peanut butter
-Cookie butter (see my post for making DIY Cookie butter here)
-Salted caramel
-Dulce de Leche
-Fruit (strawberries, bananas, and raspberries are my go-to’s)
-Whipped cream (always homemade)
-Ice cream
-Cinnamon sugar
-Lemon curd
Belgian Liege Waffles
Ingredients
- 1/2 cup whole milk, lukewarm
- 1/3 cup water, lukewarm
- 3 teaspoons instant yeast
- 2 large eggs, at room temperature and beaten
- 1 tablespoon vanilla
- 2 tablespoons honey
- 3 tablespoons light brown sugar
- 3/4 teaspoon fine salt
- 3 2/3 cups (16.5 ounces) bread flour
- 2 sticks (8 ounces) unsalted butter, cubed and at room temperature
- 1 1/2 cups (8 ounces) pearl sugar (or sugar cubes, broken into pieces)
Instructions
- In the bowl of an electric mixer fitted with the dough hook, combine the milk, water, yeast, eggs, honey, vanilla, sugar, and salt. Mix until well combined.
- On low speed, add in all but 1 cup of flour and mix until combined. On low speed, add the butter, one cube at a time, thoroughly kneading in each addition and scraping down the bowl as needed before adding in any more butter. Once all the butter has been incorporated, add the remaining flour and knead on low speed until the dough is smooth and elastic, about 5 minutes.
- Remove the dough to a lightly oiled bowl and cover tightly with plastic wrap. Let rise until doubled, about 2 hours. Punch the dough down, cover again with plastic, and place in the fridge overnight or up to 24 hours.
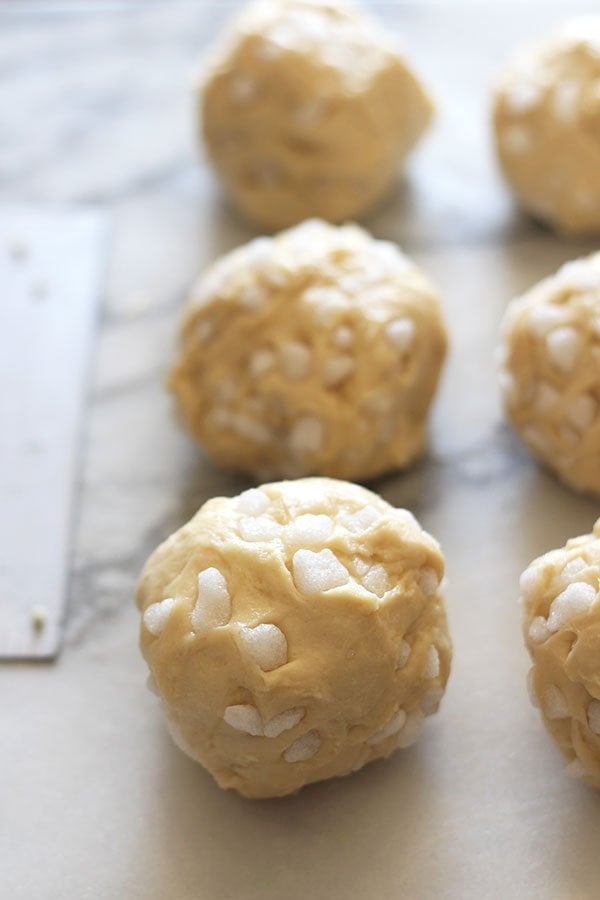
- When ready to cook, heat up a Belgian waffle iron. Remove the dough from the fridge and knead in all of the pearl sugar. Divide the dough into 10 equal pieces and roll each piece into a ball.
- Place first ball of waffle dough on grid and cook according to waffle maker’s instructions. Cook until deeply golden all over, about 4 to 5 minutes. Carefully transfer with tongs or a fork to baking sheet.
- Keep waffles warm in a 200°F oven if you plan to eat them right away. These waffles must be served warm or the pearl sugar will harden. Freeze any leftover waffles and reheat in a 200°F oven until warmed through.


Suggestion for those of you who are concerned about this recipe making a mess on your waffle irons. Any time a recipe has melted sugar perles or sweet fruits there will be burning of the sugar. I have not made this recipe, however I have made this style waffle many times. I suggest using a waffle iron that has removable plates … I use a Cuisinart Griddler with the Waffle Plates. Spray the plates with a nonstick spray, cook one round, wipe down the plates with a wet paper towel using a butter knife to work between the grates, spray again, and repeat. Once you have finished, these plates are easily soaked in the sink.
Hi, this recipe is amazing! I had to make this gluten-free and dairy free and wanted to give anyone who needs this, here are my changes: I used Minimalist Baker’s gluten free flour recipe (https://minimalistbaker.com/diy-gluten-free-flour-blend) in equal volumes. I also used soya milk and soya butter (Earth Balance) in equal volume and mass resp. (Never quite figured out what ounces were). I mixed in 7 teaspoons of xanthan gum into the liquids! And beat the elasticity into that dough. The dough ended up feeling like cookie dough but it held well. I used actual pearl sugar I got from a restaurant distributeur. The final product: delicious and texture was almost as good as store bought! I did taste a bit of the yeast but that probably has to do with my lack of expertise with yeast more than anything else. Happy baking everyone!
I do not have a kitchen mixer with a dough hook. What else could I use to mix these? Can I do this by hand?
Hi, I made this recipe several times and it is our family’s favorite waffle. However, will this work if I substitute Bob’s red mill gluten-free flour instead of bread flour? Discovering some possible gluten sensitivities.
Erika – prep refers to hands-on time in a recipe.
Yikes!! Did I ruin it? I went through the whole process… zrusing for 2 hours, placed in refrigerator, then realized I only used 2 2/3 cup of flour!!! I went back and added the other cup.., it looks ok. Will it still work? This is my first try at this!!
Well first off, these are amazing. Have made these about 6 times and it always gets the ladies. Growing up in Belgium, I looked for these and decided to make them myself and your recipe nailed it.
Also if you’re ever interested in getting your own apparel mocked up, we do this at College Hill and I believe you could sell a decent amount with a temporary pop up online store if interested!
Love this recipe. Super easy and amazingly good. One question I have is how long can the dough sit with the pearl sugar in it before it goes bad before cooking? If I only wanted to make 5 and have another 5 3 or 4 days later, is that ok? Or would the batter go bad?
Hi Tessa! This recipe looks amazing! So glad you put make ahead instructions – that’s so helpful. I have a question in this regard….I have a large group coming over for breakfast Sunday morning, and I want to serve these, but I’d like to make them ahead, and I’d prefer not to freeze them, as I imagine that hurts the flavor or texture at least somewhat…So my question for you is this: Could I make the waffles on Saturday and put them in the fridge and reheat them on Sunday? Thank you, Tessa! So great how take the time to help your readers out! – Elizabeth
Hola estoy armando una fabrica de wafles de llege que consejo con respecto a la cantidad de gluten debe tener la harina ? tengo fermentada y abatidos de temperatura ; te agradezco toda info al respecto saludos Ariel
Why do you need to buy pearl sugar off of amazon.com? It is probably expensive.
For your information,I just found a recipe on Pinterest on how to make your own pearl sugar. No buying pearl sugar already made.
You are welcome .
They were great, I left them to rise for twice the recomended time (for a total of 4 hours) and didnt have any pearl sugar, instead I added extra sugar while mixing and kneeding in the first stage and some granulated sugar when I was forming the balls of dough to go in the mixer, they tasted so similar to my Nanas recipe when cold, I would definitly recomend!