Tessa’s Recipe Rundown
Taste: All the s’mores flavors, no campfire required.
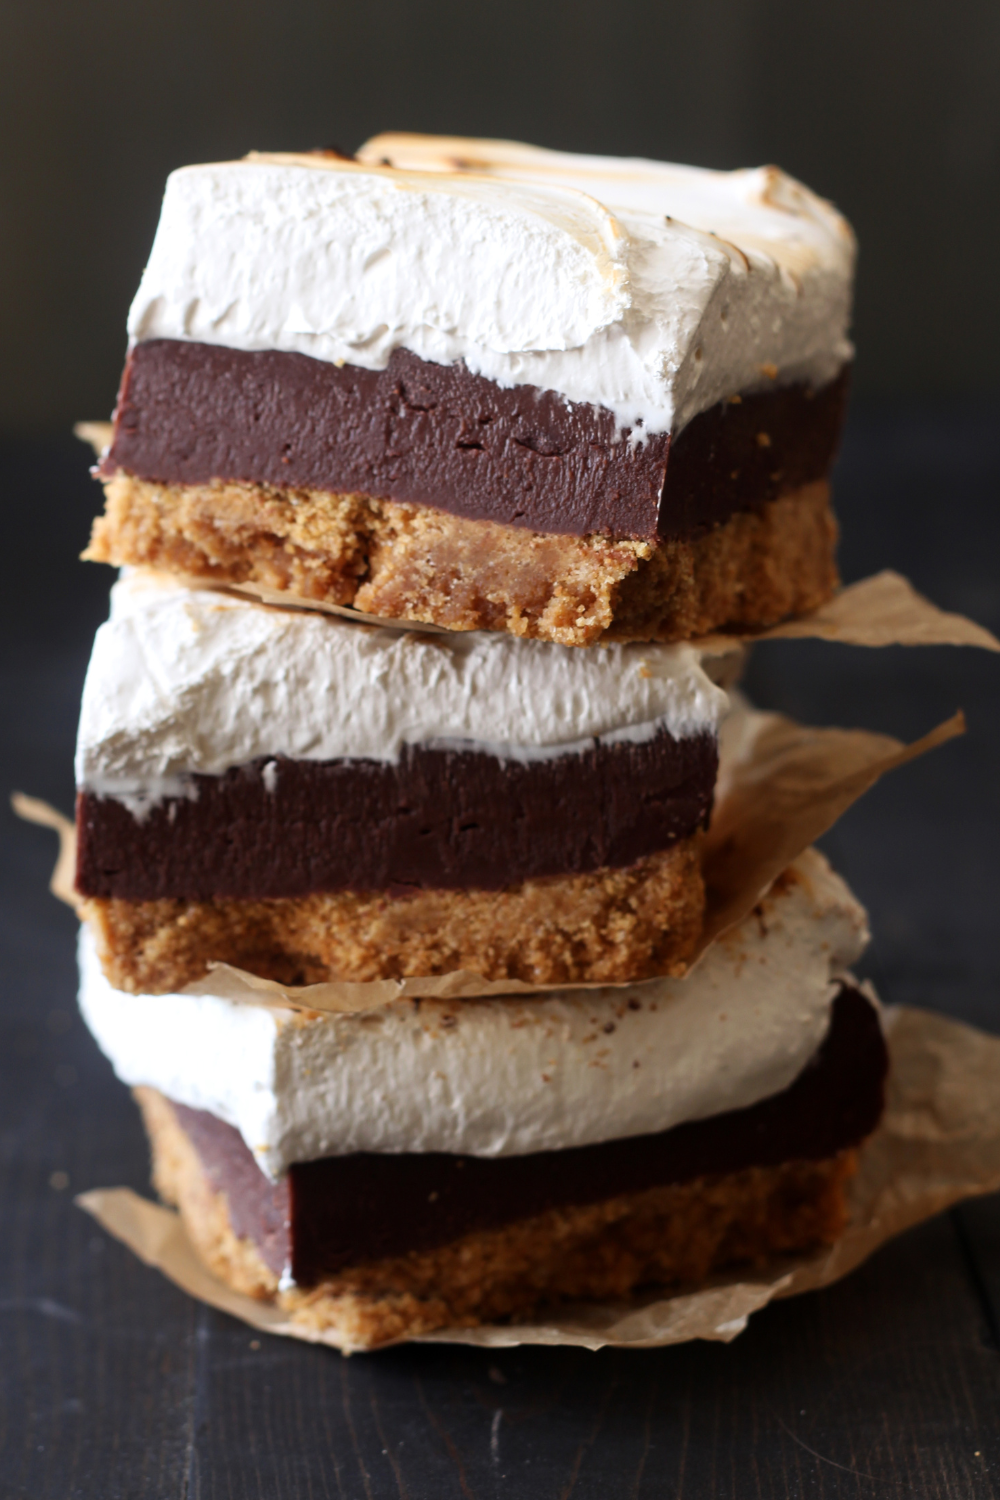
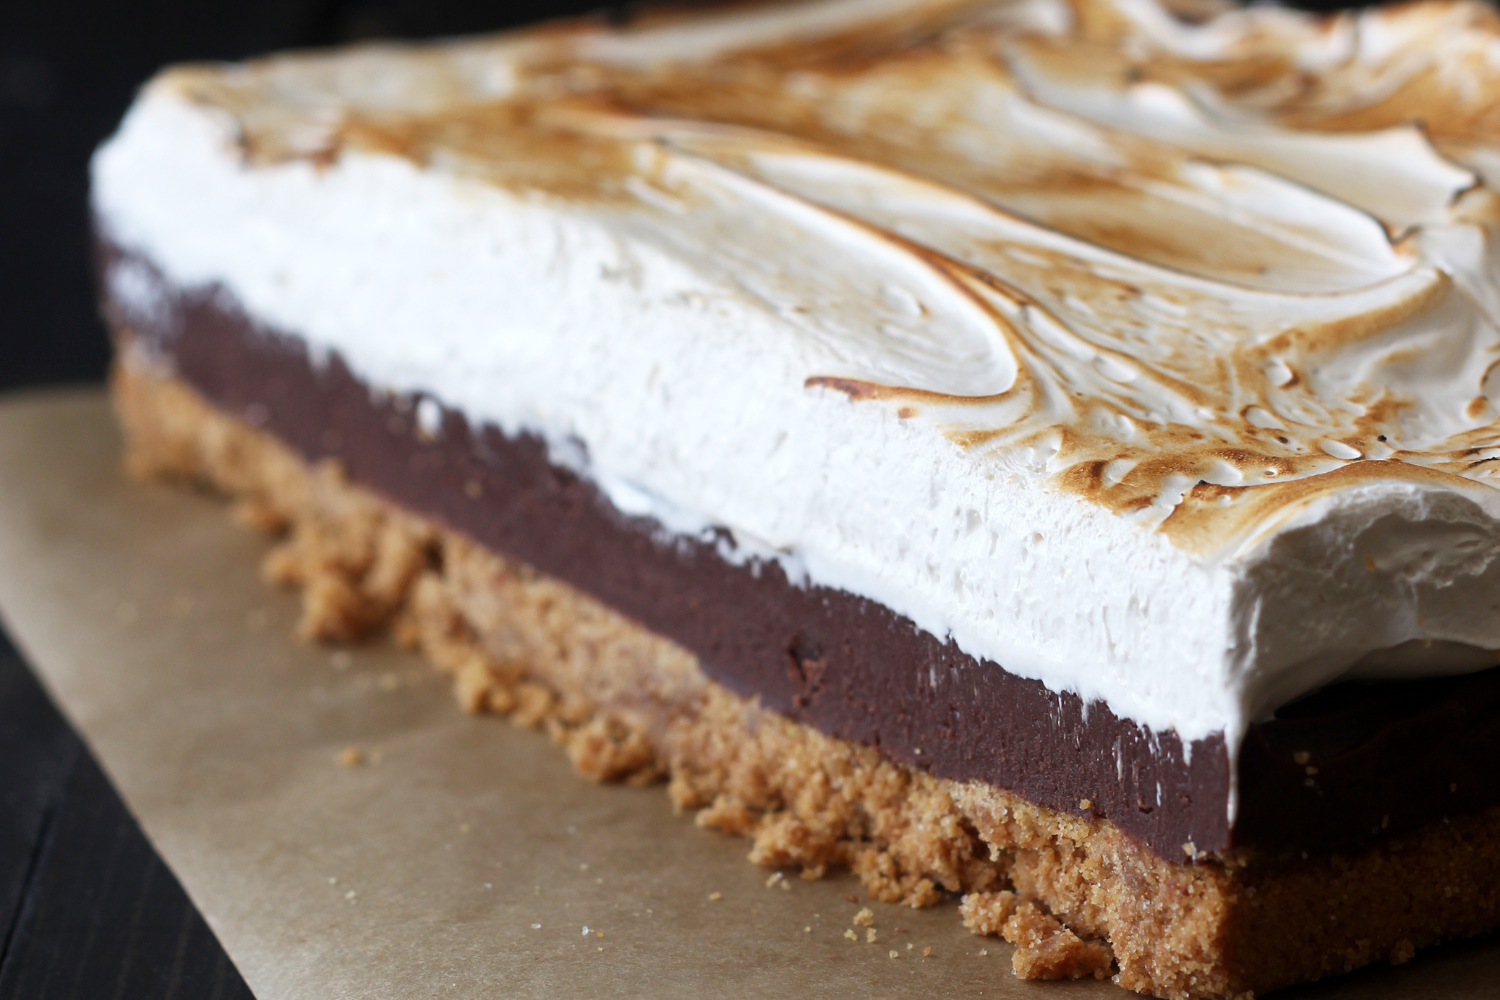
Texture: The crust is incredibly thick, buttery, and chewy, while the filling is rich and fudgy and the topping is sticky and gooey. A great array of textures in every bite!
Ease: The marshmallow topping might seem intimidating, but I promise, it’s super simple.
Pros: Classic summertime flavors packed into an easily transportable bar form.
Cons: This recipe will dirty a few dishes, but it’s totally worth it!
Would I make this again? Yes!
This post may contain affiliate links. Read our disclosure policy.
Is there anything more quintessentially ‘summery’ than a s’more?

Some of my fondest food memories involve the nostalgic flavor combination of chocolate + graham cracker + marshmallow. So much so that I’ve created many s’mores recipes, like my S’mores Cookies and No-Bake S’mores Mini Cheesecakes.
Like those recipes, these S’mores Bars are simple to make and huge crowdpleasers with adults and kids alike – and bonus, no campfire is needed! This is definitely one of my favorite summer treats.

Free Cookie Customization Guide!
The science-based guide so you can bake perfect cookies every time!
These S’mores Fudge Bars take that classic campfire treat and pack it all into a convenient, easily transportable, easy-to-serve bar you can enjoy year-round.

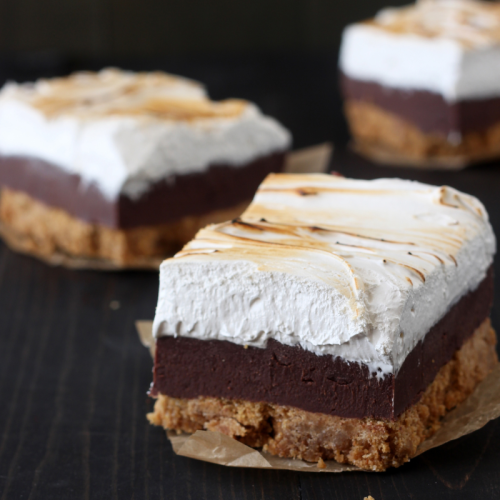
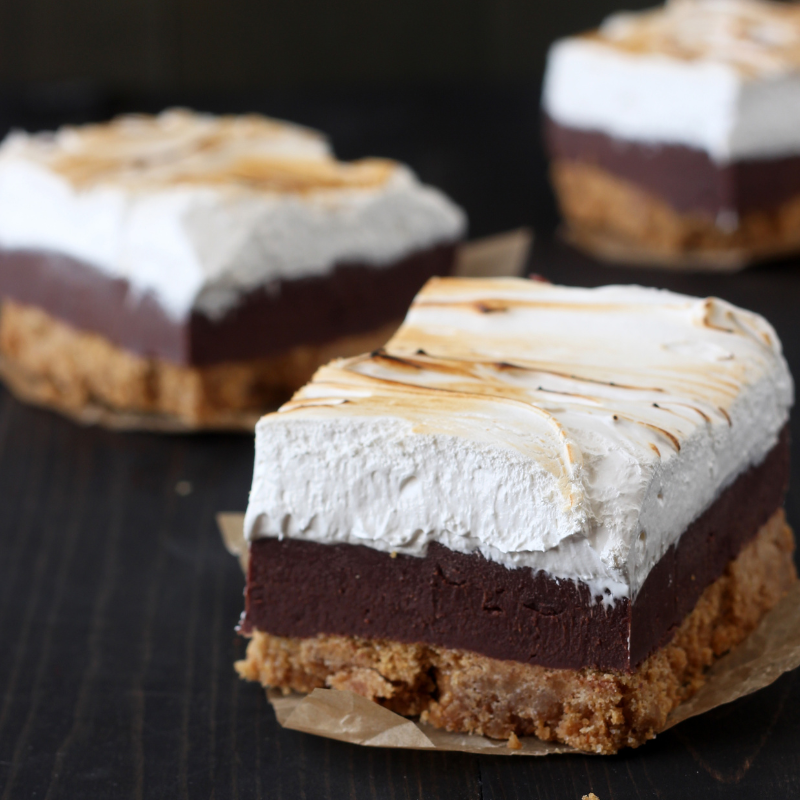
Deliciously buttery graham cracker crust, rich and silky-smooth chocolaty fudge filling, and perfectly sweetened homemade marshmallow topping. Plus, we get to use a kitchen torch, which is always a win!
The homemade marshmallow topping is so much better than store-bought marshmallow fluff, and I promise, it’s easier to make than you might think.

S’mores Fudge Bars are fun, adorable treats you can enjoy all year long. I hope you give this recipe a try for your next BBQ, cookout, or potluck!


Sprinkle of Science
How to Make S’mores Fudge Bars
Graham Cracker Crust Variations for S’mores Bars
Graham crackers are the classic s’mores cookie of choice, but if needed, use the same amount by weight of digestive biscuits, shortbread, gingersnaps, Biscoff cookies, or any crunchy cookie you like! Biscoff cookies are a little richer than graham crackers (which are drier), so add just enough melted butter until it holds together when pressed.
Crust Tips
Ensure your crust is firmly packed into your pan. The tighter the crust, the less likely it is to crumble. The bottom of a measuring cup or a tart tamper makes easy work of this.
Chocolate Fudge Layer
Feel free to use any type of chocolate you prefer for the chocolate layer. Both chocolate chips and baking chocolate work just fine here. I prefer to use semi-sweet, but milk or dark will also work – just note that this will alter the overall sweetness level of the bars. Learn more about Chocolate in Baking here.
Leftover Sweetened Condensed Milk
- If you can find it, grab a pouch of sweetened condensed milk instead of a can – they’re perfect for recipes like this! I found mine at Fry’s / Kroger, but they’re also available at Walmart, or easily available online here.
- If you buy a can of sweetened condensed milk, you will have about ⅓ of the can left over.
- You can freeze it for another use by placing it in an airtight container for up to 3 months.
- Alternatively, use the leftovers to try making Thai Iced Tea or Vietnamese Iced Coffee.
Homemade Marshmallow
The finishing touch for our S’mores Fudge Bars! Making marshmallow may seem intimidating, but I promise it’s surprisingly easy. Here are a few tips for homemade marshmallow:
- Be sure to use a candy thermometer to bring the sugar mixture to exactly 240°F, then slowly and cautiously drizzle the mixture in with your soft peak egg whites while your mixer runs on low (to avoid scrambling your egg whites).
- Don’t skip the cream of tartar – this helps stabilize the marshmallow.

Can I Skip the Corn Syrup?
Don’t skip the corn syrup here. Corn syrup is an invert sugar, which means it is liquid at room temperature, preventing grains of sugar from recrystallizing as the marshmallow cools. I haven’t tested any corn syrup substitutes in this recipe, but feel free to experiment with using golden syrup if needed.
Is the Marshmallow Safe to Eat?
- This marshmallow method cooks the sugar first, so when we add this hot syrup to the eggs, it raises the temperature to the point where they are safe to consume.
- If you or someone you’re serving is immune-compromised or pregnant, use a digital instant-read thermometer to verify that your egg mixture has reached 160°F.
- You could also try using pasteurized egg whites from a carton; however, we haven’t tested this, so we can’t guarantee that pasteurized egg whites will produce the same results as fresh egg whites.
Can I Use Marshmallow Fluff Instead?
If you really don’t want to make homemade marshmallow, you can use marshmallow fluff instead; however, it will be much sweeter and won’t look as pretty or slice as nicely. I also haven’t tried torching or broiling store-bought fluff, so I can’t say how well that works.
Tips for Torching or Broiling Your S’mores Bars
- I adore any excuse to break out my kitchen torch because it’s so FUN to use!
- If you don’t have a kitchen torch, you can pop the s’mores bars under the broiler – just watch them super carefully as they can burn in a matter of seconds. If possible, use a Low broil setting and keep the oven door cracked open to observe progress to avoid burning.
- Be sure to use aluminum foil and not parchment paper to line your pan. Parchment paper will catch fire when torching or broiling!

What’s the Best Pan for S’mores Fudge Bars?
This S’mores Fudge Bar recipe uses an 8 by 8-inch pan. This is my favorite pan for these bars, as well as brownies, blondies, and practically everything else! Do not use a glass pan if broiling the marshmallows; the direct heat can cause the glass to shatter.
Can I Double This Recipe?
Sure! Use a 9 by 13-inch pan and simply double all ingredients.
Do I Need a Stand Mixer for S’mores Fudge Bars? Can I Use a Handheld Electric Mixer?
I highly recommend using a stand mixer for the marshmallow portion of these S’mores Fudge Bars. Using a handheld electric mixer is possible, but it will be tricky to carefully drizzle the hot sugar mixture into the egg whites while you continue to beat the egg whites on low to avoid scrambling them. If this is your only option, it’s best to ask someone to assist you with this part.
How to Slice S’mores Fudge Bars
For perfect slices, allow the S’mores Bars to chill fully. Use a sharp knife and run it under hot water, carefully wiping it dry between each cut.
How to Store S’mores Fudge Bars
S’mores Bars can be stored in an airtight container in the refrigerator for up to 5 days.
Can You Freeze S’mores Fudge Bars?
Yes! S’mores Fudge Bars freeze well. Store them in an airtight container for up to one month. Thaw overnight in the fridge before serving. I recommend gently re-torching the top of the bars before serving, to slightly re-crisp the marshmallow.

More Sweet Treats You’ll Love:
- Peanut Butter S’mores Blondies
- No-Bake S’mores Mini Cheesecakes
- S’mores Cookies
- S’mores Pizookies
- Hostess Cupcake Cookies
- Chocolate Frosted Sugar Cookie Bars

S’mores Fudge Bars
Ingredients
For the Crust:
- 20 (308 grams) full graham crackers
- 1/4 cup (50 grams) granulated sugar
- 1/2 teaspoon salt
- 12 tablespoons (170 grams) unsalted butter, melted
For the Fudge Filling:
- 1 ⅓ cups (226 grams) semisweet chocolate chips
- 3/4 cup + 1 ½ tablespoons (265 grams) sweetened condensed milk
For the Marshmallow Topping:
- 2 large egg whites
- 1/4 teaspoon cream of tartar
- 3/4 cup (75 grams) granulated sugar
- 1/2 cup (168 grams) light corn syrup
- 1/4 cup (60 grams) water
- 1/4 teaspoon salt
- 1 1/2 teaspoons vanilla extract
Instructions
Make the crust:
- Preheat the oven to 350°F. Line an 8×8-inch baking pan with foil*.
- Place the graham crackers, sugar, and salt in the bowl of a food processor and pulse until finely ground. Add the melted butter and pulse until the mixture is moistened. Press the mixture into the bottom of the prepared baking pan. Bake for 10 minutes. Place the pan on a heat pad in the fridge to cool while you prepare the filling.
Make the filling:
- In a small heavy-bottomed saucepan set over medium-low heat, combine the chocolate chips and condensed milk. Stirring constantly, heat until the mixture is melted, thick, and smooth. Don’t walk away from it, as it can burn on the bottom quickly. Pour over graham cracker crust. Place in the refrigerator while making the marshmallow topping.
Make the marshmallow topping:
- In the bowl of an electric mixer fitted with the whisk attachment, beat the egg whites and cream of tartar until soft peaks form, about 7 minutes.
- Meanwhile, in a small saucepan set over medium-high heat, combine the sugar, corn syrup, water, and salt. Bring the mixture to a boil and continue to cook until a candy thermometer registers exactly 240°F, about 8 minutes. Immediately remove from heat.
- Turn the mixer on low speed and slowly but continuously add the syrup, pouring it between the side of the bowl and whisk. Increase speed to medium-high and beat until the mixture is very thick and looks like marshmallow fluff, about 6-7 minutes longer. Add vanilla and beat until combined.
Assemble:
- Spread the marshmallow topping evenly over the chocolate fudge layer. Use a kitchen torch to gently torch the marshmallow layer until lightly golden. Alternatively, place the pan under the broiler and broil for about 30 seconds, or until lightly golden, checking on it every few seconds (it can burn quickly!).
- Refrigerate the pan for at least 1 hour before cutting into squares and serving. The squares can be stored in an airtight container in the refrigerator for up to 5 days.
Love this recipe! It’s a huge hit – at home & for sharing! When I made this, my layers didn’t want to say together, particularly the crust was most dramatic, and not wanting to stick to the chocolate. Any thoughts? Maybe it was just a 1-off event. Thanks for sharing such a fun, great recipe!
Hmm, I’m not sure why they weren’t sticking together! Do you weigh your ingredients with a digital scale? I wonder if too much of an ingredient was added. I’m happy to hear you still enjoyed them!
He’s are absolutely delicious. Everyone kept having more over multiple days! Will definitely keep as a summer time recipe. So good! Thank you!
Better than a camp out! I made these and think they’re delicious – not to mention a fun alternative to a good s’more. My marshmallow topping was pretty sticky. It still tastes really good, but it sticks to everything. Do you think I cooked the syrup too short/too long or whipped it too much/too little? Any suggestions will be appreciated because I plan on making these again and again.
So happy to hear how much you loved them, Sharon! Yes it sounds like your marshmallow filling may have been under-whipped. Make sure you’re whipping the mixture for the full time listed. Or, if you whipped them for 6-7 minutes last time, be sure to follow the sensory indicators as well (until mixture is very thick and looks like marshmallow fluff). That way you’ll achieve bars that are so much easier to cut and nowhere near as sticky. You may have just needed an additional minute or two based on your kitchen climate 🙂
Made these over the weekend and they were delicious but my marshmallow was not fluffy, more gooey than fluffy. I followed the directions and used a clean bowl for the egg whites. It was still delicious, even without the height and fluff! Thank you for another fun recipe!
Can you use bagged marshmallows or marshmallow fluff if you don’t want to make the homemade marshmallows?
Can I use semi sweat chocolate baking bar instead of chips?
Sure!
A small typo: In your recipe above, you have written, “Turn the *mixture* on low speed” (asterisks mine for emphasis.) I suspect you intended to write “Turn the MIXER [not “mixture”] on low speed.” (Aren’t 80-year old retired teachers obnoxious?!)
Thanks for this recipe, which I shall secretly make for my grandchildren over the weekend. And their mother will have you to thank….
Depending on how you read it, I think it works either way (turning the mixture on to low speed means to mix the ingredients at low speed), but I just updated the verbiage for clarity 🙂 Thanks!
I was gifted these and OMG they’re amazing! Going to the store this weekend to make myself (and my 3 year old) another batch!
I was wondering if the marshmallow topping will start to weep or sweat after a certain amount of time? This seems to happen with meringue. I live in a very humid climate (Taiwan) so I would need to keep it in the fridge.
Hi Mario! While none of us at Handle the Heat live in a very humid climate to compare (Tessa lives in Arizona, which is in the desert, so it’s super dry!), the marshmallow topping will likely weep a little in your climate – but luckily, these bars can be stored in an airtight container in the refrigerator for up to 5 days, so that should prevent any issues. Happy baking 🙂
Good
Lol my children especially loved the homemade marshmallow fluff
Hi there. I’m just curious if these would turn out if I use milk chocolate chips instead of semi sweet. Thank you.
Hi Kerinsa! That will work just fine – just note that using milk chocolate will result in sweeter bars than using semi-sweet. Happy baking! 🙂
My sincerest apology’s….I meant that previous review to be for someone else and something else. YOUR recipe is PERFECTION!!!!! I modified the fudge slightly. Added. Tablespoon of butter and I used vanilla and caramel extracts. I already make my own marshmallows, so I cut up a few and added it to the fudge layer.
If you want to delete my wrong review, feel free…or you can keep it and laugh at my embarrassment…. Up to you. ~ Little Yummys
Hi Nancie! Thank you for correcting your review! I did remove your previous review, as I didn’t want other readers to get confused 🙂 I’m SO glad to hear that you enjoyed these bars, and thanks so much for your comments! Happy holidays 🙂