


Tessa’s Recipe Rundown
Taste: Like an apple pie! Tart, sweet, and spiced.
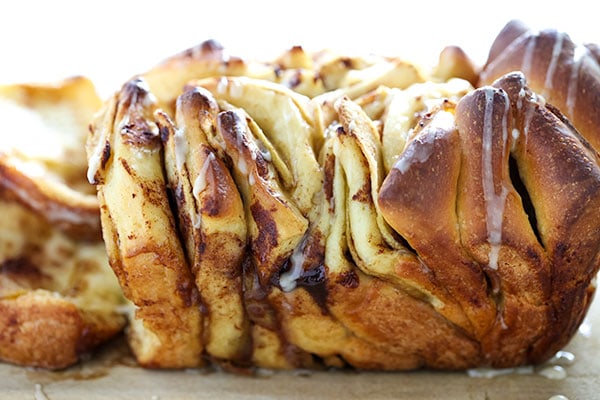
Texture: The layers of bread are fluffy and tender, kind of like cinnamon roll dough, while the apple pie filling is juicy and rich.
Ease: This recipe definitely requires hands-on work and time, which is why I’ve included some step-by-step pictures showing you how it’s done. It’s totally doable if you follow the recipe closely!
Pros: Impressive and gourmet fall dessert.
Cons: Requires some time and patience.
Would I make this again? Absolutely. I might add in some Biscoff cookie butter to the apple mixture next time!
This post may contain affiliate links. Read our disclosure policy.
This post is sponsored by OXO. All opinions provided are my own. Thanks for supporting me in working with brands I love to bring you new recipes!
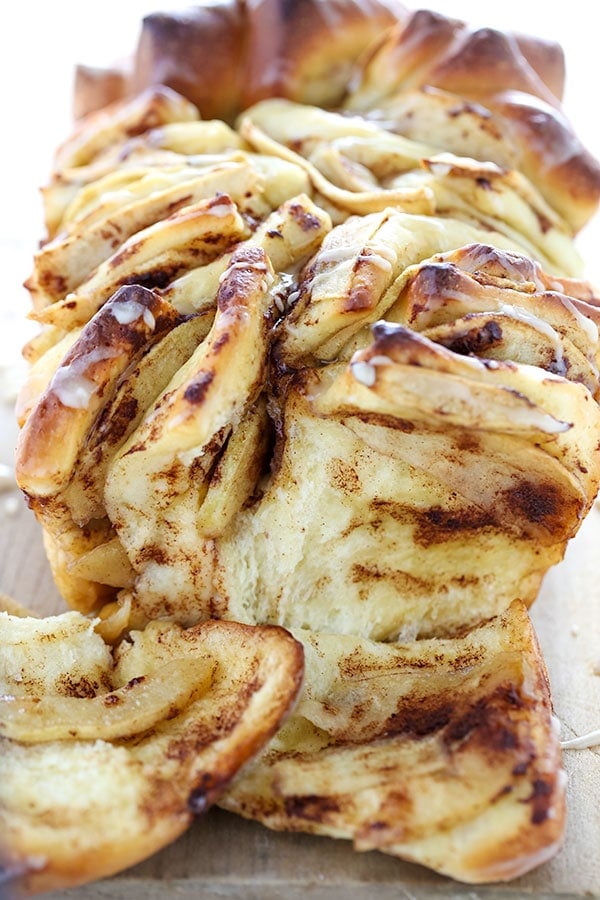
I have been waiting for weeks to share this recipe with you! It’s one of those recipes that looks so impressive and gourmet, but is way easier to make than you probably think. I’ve included step-by-step photos and baking tips below, as well as super detailed instructions in the recipe. When you pull off this Apple Pie Pull Apart Loaf, it’ll be a complete showstopper!
I’m beyond thrilled that OXO was interested in working with us to bring you fall-inspired recipes within the series. They’re one of our favorite kitchen brands, and one of yours too based on countless comments I’ve seen!
They graciously sent us the full line of their new Glass Bakeware to use throughout the entire holiday season.
The full 14 Piece Glass Bake, Serve & Store Set is such a great value and absolutely perfect for holiday baking because they come with LIDS! Not just any lids, but raised sloshproof lids. You can easily transport your goodies to any potluck, office party, or holiday celebration without worrying about smashing your food or getting stains all over your car seats or clothes.
But what I truly love about OXO’s line of Glass Bakeware is that it’s made of thermal shock-resistant borosilicate glass, which is basically a fancy way of saying you can take it from the freezer to the oven without worrying about thawing. This saves SO much time and hassle.
Apple Pie Pull Apart Loaf Recipe Tips
The dough element of this recipe is super straightforward and easy. You can knead it by hand if you don’t have a stand mixer. You can also use active dry yeast if you don’t have instant yeast, just proof it with the warm milk and water for 5 minutes before adding it to the mixing bowl!

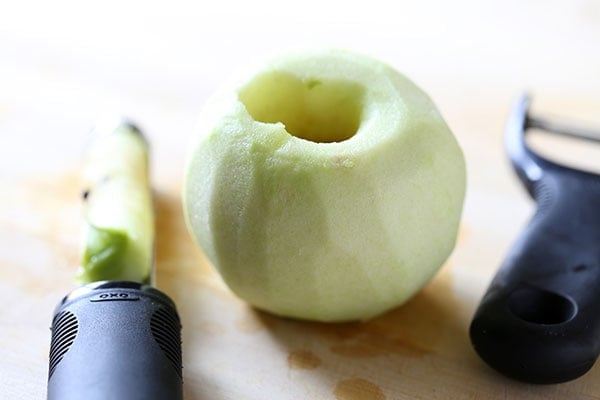
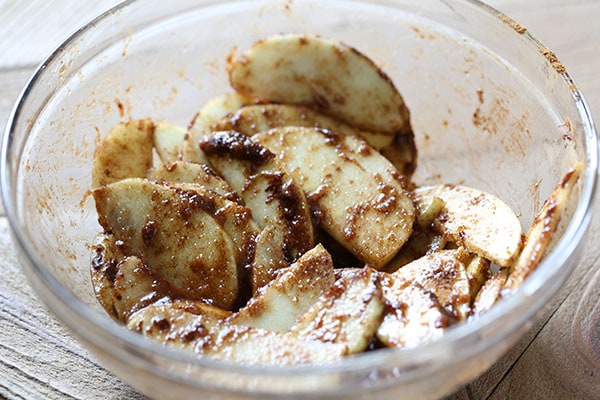
Like any good apple pie, start with apples that hold up to baking like Granny Smith Apples. I absolutely love my OXO Corer for making quick work of prepping the apples. I would have used my OXO Pop-Out Apple Divider, but since this recipe works best when the apples are thinly sliced I cut them by hand. To prevent browning as you cut, sprinkle and toss with the lemon juice called for in the recipe as you go.
Next toss with the goodness that is butter, brown sugar, and warm spices. This is going to smell positively heavenly as it bakes!
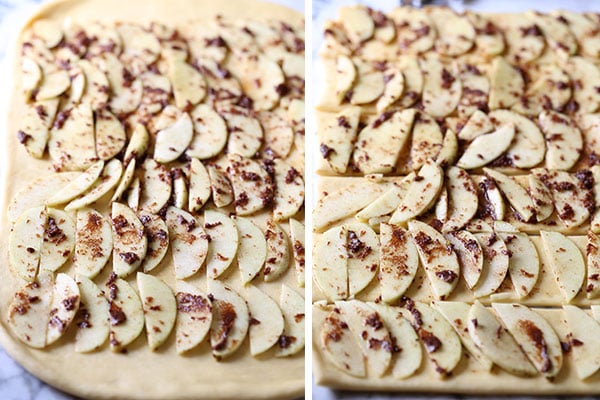
Take your dough and roll it out into about a 12-by-20-inch rectangle and spread the apple mixture evenly across. Since I’m a little crazy, I fanned the apple slices evenly. This makes it easier to cut the rectangle into six long strips.
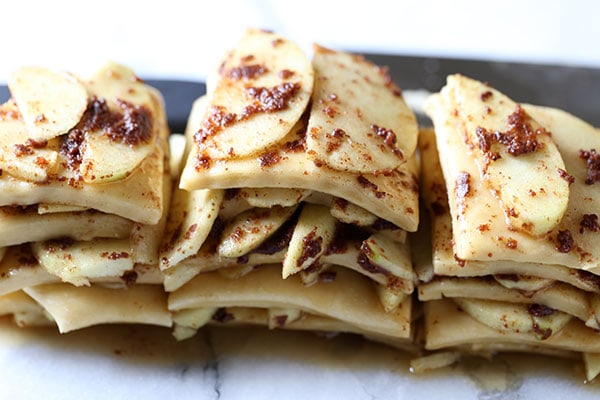
Then you stack your strips on top of one another and cut the stacks into 5 or 6 square pieces. This is how you make pull apart bread! It sounds more complicated than it is, which is why I made sure to include these photos.
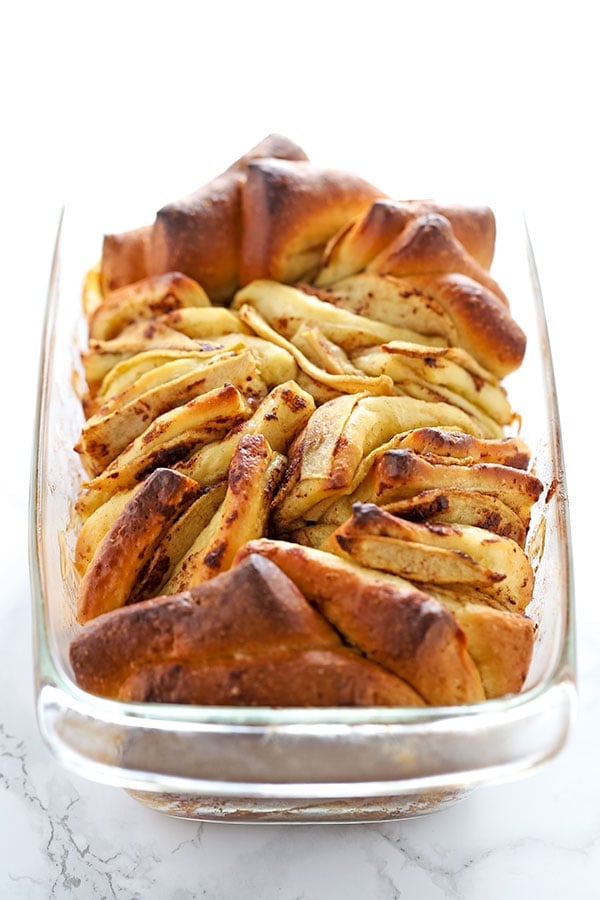
Squish all the pieces into your Glass 1.6 Qt Loaf Baking Dish (you may have to really squeeze them all in, it doesn’t have to be perfect) then bake for 30 minutes. Remove from the oven and tent with foil before baking for another 15 minutes. This helps prevent the top and sides from burning.
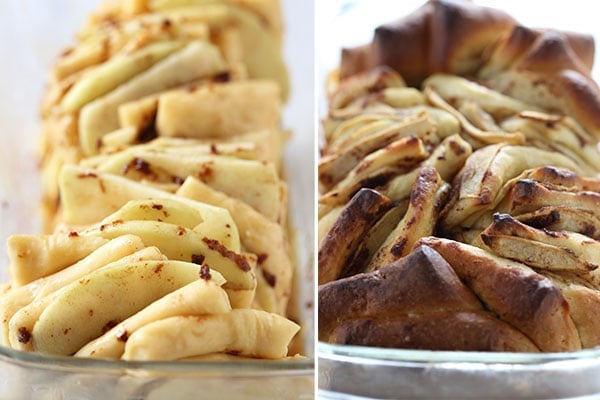
Next step: enjoy!!
This post is sponsored by OXO. All opinions provided are my own. Thanks for supporting me in working with brands I love to bring you new recipes!

Email This Recipe
Enter your email, and we’ll send it to your inbox.
Ingredients
For the dough:
- 4 tablespoons (57 grams) unsalted butter, melted, plus more for the pan
- 1/3 cup lukewarm milk
- 1/4 cup lukewarm water
- 1 large egg plus 2 egg yolks
- 1 teaspoon vanilla extract
- 1/4 cup (50 grams) granulated sugar
- 1 packet (2 1/4 teaspoons) instant yeast
- 3 cups (380 grams) all-purpose flour
- 1/2 teaspoon fine sea salt

For the filling:
- 2 medium green apples, peeled and cut into 1/4-inch slices
- 1 teaspoon lemon juice
- 2 tablespoons unsalted butter, melted
- 2 tablespoons packed light brown sugar
- 2 tablespoons granulated sugar
- 2 teaspoons ground cinnamon
- 1/8 teaspoon ground nutmeg
For the glaze
- 1/2 cup (63 grams) powdered sugar
- 2 tablespoons maple syrup
Instructions
Make the dough:
- In the bowl of an electric mixer fitted with the dough hook, combine the melted butter, milk, water, egg, egg yolks and vanilla. Add in the sugar and yeast and stir until the mixture is combined. Add in the flour and salt and stir until a shaggy mass forms.
- Turn the mixer to medium-low speed and knead until the dough is smooth and sticky. Avoid adding any extra flour, the dough is supposed to be slightly sticky.
- Transfer the dough to a large greased bowl. Cover with plastic wrap and let rise until doubled in size, about 1 hour.
- Generously grease an OXO Glass 1.6 Qt Loaf Baking Dish with butter.
Make the filling:
- In a large bowl, toss together all filling ingredients. Set aside.
- Gently punch down the dough and turn it out onto a lightly floured work surface. Sprinkle it with flour and knead a few times until no longer sticky. Cover and let rest for 5 minutes.
- Roll the dough out into about a 12-by-20-inch rectangle. Spread the apple mixture evenly over the dough.
- Cut the dough into six long 3 1/2-inch strips. Stack the strips and cut the stacks into five or six square pieces.
- Turn the pieces upright and squeeze them into the prepared loaf pan. Cover the pan with plastic wrap and let rise until puffy, about 30 to 60 minutes.
- MAKE AHEAD: You can refrigerate the loaf immediately after assembling for up to 1 day. Let it come to room temperature while you preheat the oven.
- Meanwhile, preheat the oven to 350°F.
- Bake for 30 minutes. Remove from the oven and tent with foil. Continue baking for another 10 to 15 minutes. Remove from oven and let stand until cool enough to touch. Turn it out of the pan onto the rack to cool.
Make the glaze:
- In a small bowl, combine the powdered sugar and syrup with a fork until a thick but pourable glaze forms. Drizzle over the loaf.
- Serve warm or at room temperature. The bread is best served the day it’s baked.


Ofcourse a 1.6 quart glass pan about the only pan I don’t own, 😬🙄would a 2 quart glass pan work. Or if I were to double the recipe could I use a bigger dish?
Hi Elyse! That pan may work just fine, but we haven’t tried it ourselves to confirm. I wouldn’t recommend doubling the recipe for a 2 quart pan. Let us know how it goes if you give this recipe a try 🙂
It looks so delicious. I like it
My dough won’t rise. It’s getting colder, so that’s probably the issue, but I was wondering if you have any tips to help my dough rise a little better in the cold house before we have heating turned on.
Hi Genevieve – a trick I learned somewhere on the internet was to preheat your oven for one minute. I preheat mine at 200 degrees Celsius. Then turn off your oven, pop whatever needs proofing in to the oven, and away you go.
Thank you for sharing 🙂
Hello. I liked your post. Thanks 🙂
It looks so delicious.
Thank you very much indeed the influence. I want to try.