


Tessa’s Recipe Rundown
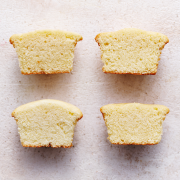
Taste: An ever so slightly sweet blank slate for any type of sandwich or even a smear of something deliciously spreadable. Texture: Obviously this is the best part. Unbelievably crunchy yet light, so you don’t feel like you’re going to scrape your gums just taking a bite. Perfection! Ease: Super simple, if not a little strange. The only inconvenient bit is that you’ll need rice flour. I’ve included some extra pictures and tips above, as long as you follow the recipe as written these should turn out beautifully. Appearance: Intriguingly mouthwatering. I love how you can just see the crunch. Pros: Just like the bread at Ike’s and in San Francisco, made right at home! Cons: None! Would I make this again? 1000% yes.This post may contain affiliate links. Read our disclosure policy.

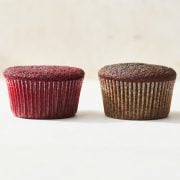
Dutch Crunch Bread is popular in the Bay area and I first had it recently at the sandwich chain Ike’s and fell completely in LOVE. It is, of course, unbelievably crunchy but in a way that’s light and crackling so as not to scrape your gums or make it difficult to actually eat. It is also called Tiger bread, or tigerbrood or tigerbol in Netherlands and giraffe bread in the U.K. This is due to the spots and strips the are created by covering normal bread dough with a unique topping of yeast, oil, and gluten-free rice flour.
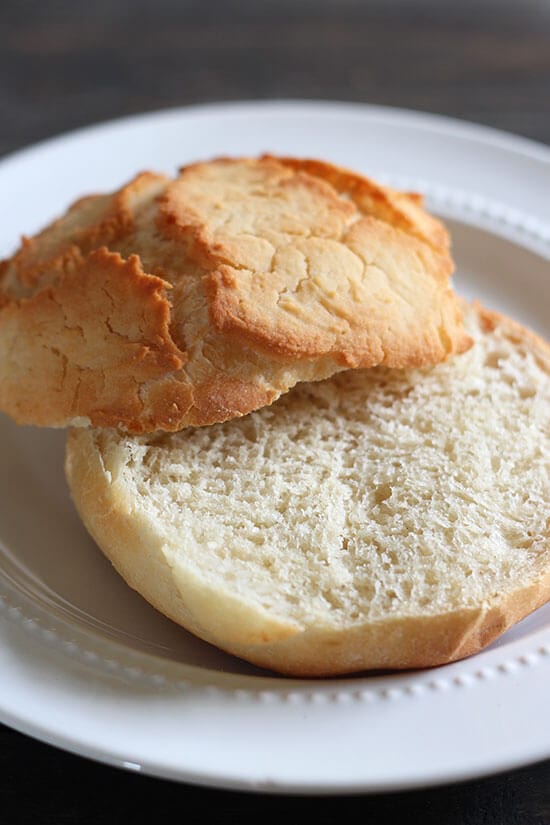
This topping is what creates that crunchy exterior, so it’s super important to follow the ingredients and directions as they are written. The rice flour’s starchy and fine consistency paired with its complete lack of gluten is what causes the topping to develop into a crackled crunchy layer. Rice flour can be found at most American grocery stores in the baking aisle, often near the other gluten-free flours and products. I do not know of anything that can be substituted for the rice flour that provides the same effect, so if you want to make this recipe you may need to make a grocery store run!

The texture of the topping is quite unique, so I made sure to include some photos so you know what it should look like. The mixture is kind of like a thick batter that inflates as you let it rest.
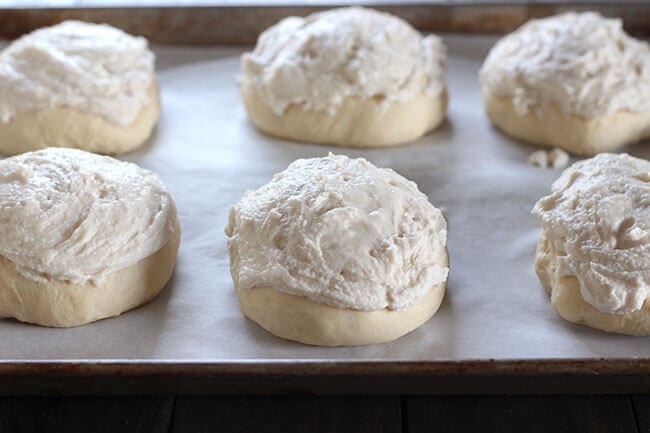
Then you simply spread it generously over the risen bread dough and watch it do its crazy thing in the oven!
Dutch Crunch Bread Rolls
Ingredients
For the rolls::
- 1 package (2 1/4 teaspoons) instant yeast
- 1/4 cup lukewarm water
- 1 cup lukewarm milk
- 1 tablespoon granulated sugar
- 2 teaspoons vegetable oil
- 3 cups (13.5 ounces) all-purpose flour
- 1 1/2 teaspoons fine salt
For the topping::
- 1 package (2 1/4 teaspoons) instant yeast
- 3/4 cup lukewarm water
- 1 tablespoon granulated sugar
- 1 tablespoon vegetable oil
- 1/4 teaspoon fine salt
- 1 cup (5 ounces) rice flour*
Instructions
For the rolls:
- In the bowl of an electric mixer combine yeast, water, milk, sugar, and oil. Gradually add in the flour and stir until moistened. Add in the salt. Fit the mixer with the dough hook attachment and mix on medium speed until the dough comes together in a smooth elastic ball, about 5 minutes. If the dough is unbearably sticky, add in more flour 1 tablespoon at a time. The dough can also be kneaded by hand.
- Transfer the dough to a lightly greased bowl and cover. Let rise in a warm place until doubled in size, about 1 hour.
- Turn the dough out onto a floured work surface and divide into six equal portions. Shape each portion into a tight ball and place on a parchment lined baking sheet. Cover and let rise while you prepare the topping.
- Make ahead: At this point the dough can be made ahead of time by covering tightly and refrigerating for up to 24 hours. Remove and let come to room temperature. If two fingers pressed into the dough leave indentations it’s ready.
For the topping:
- In a large bowl combine all the ingredients and let rest, covered, for 15 minutes, or until frothy.
- Make ahead: Store the topping in a covered but ventilated container in the fridge for up to a week. Let come to room temperature before using.
- Spread a generous layer of the topping all over the rolls, maintaining a thick coating. You should use almost all of the topping. Let rise uncovered for another 20 minutes.
- Meanwhile, preheat the oven to 400°F.
- Bake the rolls for 25 minutes, or until golden brown.
Recipe Notes


Hello Tessa,
I baked a batch of these wonderful and yummy rolls last weekend. While following the recipe everything came together perfectly. I baked the rolls on the center rack, I didn’t get them to brown in the suggested amount of time. Do I need to raise the rack up, so the rolls brown and crackle? I grew up in the SF Bay Area devouring my fair share of Dutch crunch and Sourdough. Dutch crunch is my most favorite bread for sandwiches and snacking on. I can’t get it where I live now, no one here has ever heard of it. Thank you Tessa for your time and your recipe.
Hi Brian, do you have an oven thermometer? I’d check and see if your oven was running at the correct temperature. Our last oven was always off by about 20°F, and our brand new oven says it’s preheated when it’s too cool so now I wait an extra 10 minutes. That might have been the problem!
Se ve muy rico el pan, lástima q no hay traducción.
Could you make 12 smaller rolls out of the batter rather than the 6 stated. They look like they would make yummy dinner rolls. Thanks.
Of course! Just reduce the baking time and keep a careful eye on them 🙂
IT looks interesting got to try this out soon.
I love your commentary on the bread. More than the intriguing recipe, I find that your words literally compel me to make this bread. I’m exited to give it a try – thanks!
Thanks Didi!! Hope you love it 🙂
Hi. Made the bread today. It was very good. The top is crunchy but not overly so. The main part of the bun was nice and soft. Only thing I did was increase the flour for the bun part. You stated 3 cups but only 13 ounces. I read somewhere that a cup of flour should be 5 ounces. The 15 ounces of flour was just perfect. The dough was just a bit sticky after the extra flour but was perfect when I rolled them in the individual rolls after an hour & a half of proofing. Topping was interesting looking at first but when it got baked it looked awesome. I baked mine 5 extra minutes (my oven temp is different). Thanks for the great recipe.
Glad you made it work! Just as a tidbit, many brands of flour say 1 cup = 4.5 ounces, but it can vary by brand and cookbook. And if you live somewhere humid, more flour will be necessary. Enjoy!
Hi! My topping was runny, but I followed the measurements. What did I do wrong? Thanks!
My topping was runny. What did I do wrong?
Just made tonight – the whole family loved it! Thanks for the recipe – no changes made and it was wonderful.
Just baked a batch of these rolls. I did have to add about five more teaspoons of flour while kneading, what with the dough being very, very sticky. They are wonderful!! We’re going to use the ones we haven’t already devoured for burgers tonight. This recipe is definitely going to become a staple around here!
I’ve never heard anyone or any shop call it giraffe bread and I’m from the UK. We call it tiger bread.
Fiona – UK – apparently a young lady (child) told Sainsbury’ that it was silly to call it Tiger bread, ‘cos it didn’t have stripes. It was more like a giraffe. I remember reading about it some years ago. So Sainsbury’s changed their name for it.
Actually, a high-gluten flour like “better for bread” would be better than ap flour for this (and any yeast-based dough) bread. Kneading the flour develops the gluten and gives it very a nice texture.