This post may contain affiliate links. Read our disclosure policy.
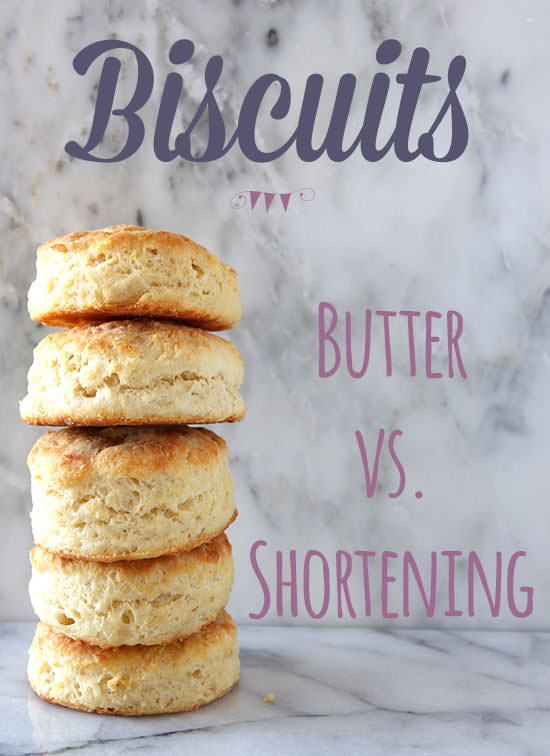
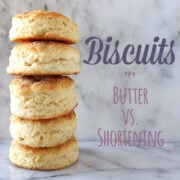
Butter or shortening? It’s a debate I’ve heard among many bakers and even within the comments of my blog so I decided to tackle another round of baking experiments. Recently Clabber Girl challenged me to use their baking powder in a series of posts all about biscuits throughout the rest of the year. What better subject for baking experimentation? Also, how cool is my job? To kick off this month’s biscuit post I’m experimenting with one of the most important ingredients of the biscuit and that’s the fat. We wanted to find out which fat is better for making the perfect biscuit: butter or shortening?
I wanted to go beyond showing you how to make biscuits and help you understand how the ingredients impact your final product. It seems so simple to just substitute out one ingredient with another but baking is truly a science and every change you make can result in a totally different product! Keep reading to find out how butter and shortening impact everything from the dough, appearance, taste, and texture of your typical buttermilk biscuits and to find out which was my favorite!
Be sure to follow Clabber Girl on Facebook for tons of baking recipes and tips and stay tuned for more posts all about biscuits!

Perhaps the best aspect of homemade biscuits is just how simple they are with just a handful of staple ingredients and a few steps. I’ll never understand how those processed canned biscuits became so popular since biscuit dough takes just minutes to whip up! Sure, you’ll have a few more dishes to clean but there’s nothing that compares to the unadulterated goodness of a homemade biscuit.
To experiment with butter versus shortening, I used the standard biscuit recipe (below), which is my go-to. I used the same techniques, ingredients (except the fat of course), baking times and temperatures to ensure consistency between the two batches.
All Butter Dough
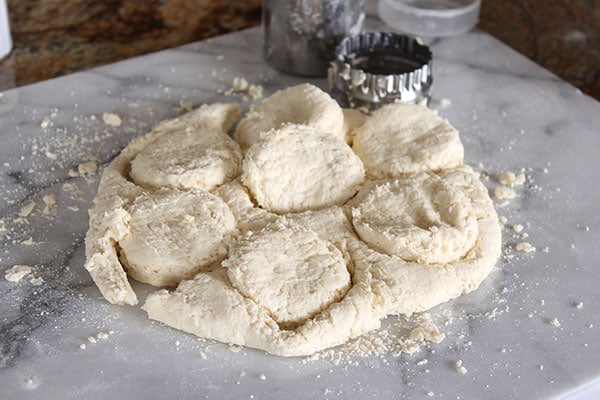
The all-butter dough was slightly less cohesive than the all-shortening dough, and I attribute this to the fact that the butter’s texture is firmer than shortening. Even when both fats were chilled in the same freezer for the same length of time, the butter was significantly more solid which made it easier to retain chunks of butter while mixing the dough.
The cold chunks of butter are important because as they melt into the biscuit while baking they create tiny pockets of steam that puffs and lifts the dough. These pockets turn into that beautiful light and flaky texture we crave with biscuits. The steam comes from butter’s water content, which is usually about 15 to 20 percent.
Those chunks of butter, while as glorious as they become while baking, do make the dough a little loose and slightly difficult to work with. Not to mention butter’s low melting point makes it more difficult to work with as it needs to be cautiously kept cold.
Shortening Dough
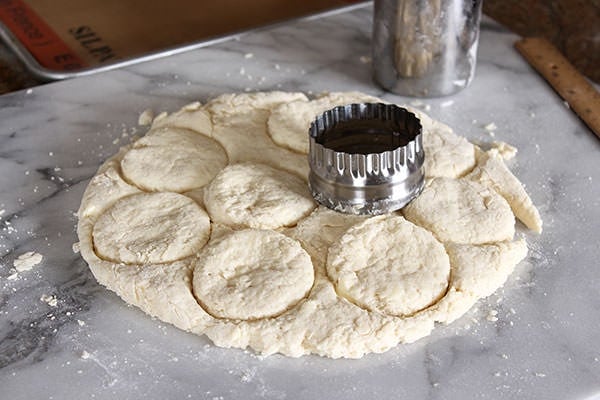
The shortening dough, on the other hand, came together much more easily. In fact, it came together almost too much. If you overwork biscuit dough you run the risk of getting tough and dense biscuits. With the shortening being so sticky itself, even when chilled, it made it hard to retain any sort of looseness in the dough. Instead, it all came together in a slightly sticky, shaggy mass.
This doesn’t matter as much as it does with the all-butter dough, however. Where butter is only about 80 percent fat and the rest is milk and water, shortening is 100 percent fat. There is no steam created in shortening dough that lends the same light, airy flakiness as with butter dough. While the shortening dough was nicely cohesive, the stickiness made it difficult to roll out and shape.
Any type of biscuit dough, or even pie dough which is very similar, is going to be more difficult to work with than a soft, smooth, and supple yeast dough. The pay off, however, is that it only takes about a half hour to make biscuits from start to finish!
Baking the Biscuits
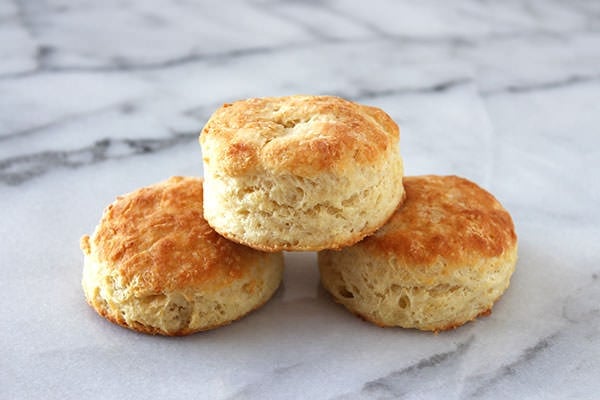
So, what happened when the biscuits came out of the oven? Well, upon first glance the butter biscuits were significantly more browned with flatter tops. When bitten into, the butter biscuits were moist and slightly spongier than the shortening biscuits. The best part was the flavor and slightly more crunchy exterior texture contrasted by that ultra tender interior.
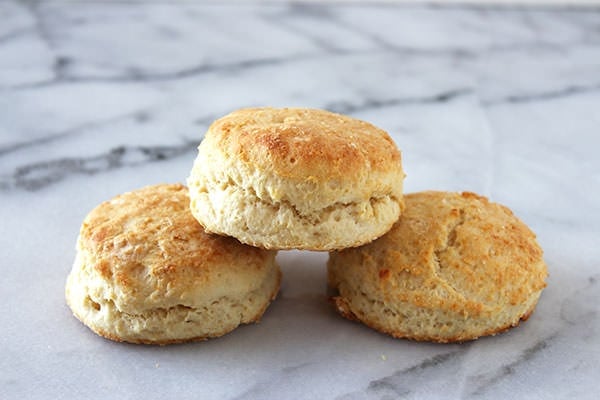
The shortening biscuits were much more pale, with slightly domed craggy tops. They also seemed a bit more irregular in height. The biscuits themselves were more crumbly when bitten into and lacked that characteristic butter flavor that simply cannot be replicated by anything artificial.
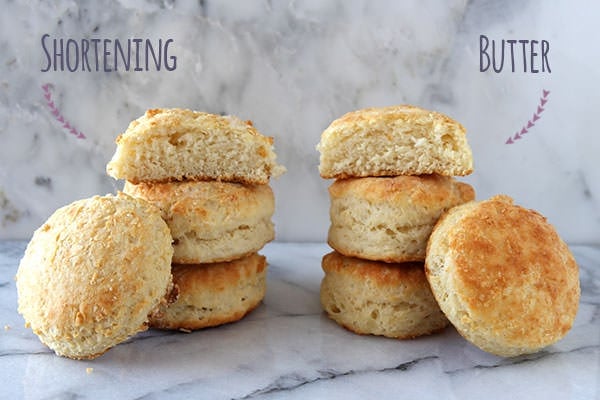
I offered two biscuits to Jared and made him guess which was butter and which was shortening and he got it right. You can definitely taste the difference and as a butter lover, I definitely preferred the butter biscuits. However, the shortening biscuits did remind me of biscuits I’ve had at Southern eateries in the past with their slightly drier, crumblier texture.
Since shortening has a higher melting point than butter, meaning it requires more heat to melt shortening than it does to melt butter, it makes shortening less challenging to work with. You don’t have to worry as much about it getting too warm in the dough and it brings together the dough more easily. However, that higher melting point can also be a very bad thing because it means that it doesn’t fully melt in the mouth like butter does, leaving behind an unpleasant waxy coating on the palate.
So what’s the final verdict?
Butter is the winner here. The butter biscuits were moister with that wonderful butter taste and melt-in-your mouth texture. I’d be curious to test out substituting half or just two tablespoons of the butter with shortening to see if you get the best of both.
Have you experimented with that? What do you prefer to use in your biscuits?
Like this post? Share it on Pinterest!
This post is sponsored by Clabber Girl. All opinions provided are my own.
Biscuit Recipe
Ingredients
- 2 cups (9 ounces) all-purpose flour, plus more for dusting
- 2 teaspoons granulated sugar
- 1 tablespoon Clabber Girl baking powder
- 1/4 teaspoon baking soda
- 1 teaspoon fine salt
- 6 tablespoons unsalted butter OR vegetable shortening, very cold
- 1 cup buttermilk, chilled
Instructions
- Preheat the oven to 450°F. Line a large baking sheet with parchment paper.
- In the bowl of a food processor, combine the flour, sugar, baking powder, baking soda and salt. Add the butter or the shortening and pulse the food processor several times to cut the fat into the flour until the mixture resembles coarse meal. You can also do this by hand with a pastry blender. The faster you do this the better, you want the fat to remain cold. Stir in the buttermilk until just combined. DO NOT overmix, the dough will be slightly sticky.
- Turn the dough out onto a floured surface and dust the dough with flour. Gently pat the dough out until it’s a 1/2-inch in thickness. Use a 2-inch round biscuit cutter to push straight down through the dough to cut out circles, try not to twist the cutter. Place the biscuits on the baking sheet, spacing 2-inches apart. Reform the scrap dough into 1/2-inch thickness, being sure to work with it as little as possible, before cutting out more circles. You should get 10 to 12 biscuits.
- Bake the biscuits until golden brown, about 12 to 15 minutes.








They look delicious! Being from North Carolina, we love biscuits. I rarely make them because I am so busy. I was just curious with this recipe can you make them and freeze? I would like to make a couple batches on a Sunday and reheat through out the week. Thanks!
You should be able to form the biscuit shapes from the dough and freeze those. Place them on a lined baking sheet and freeze until solid, then store in an airtight bag in the freezer. Bake from frozen, just add a few minutes onto the cooking time!
Totally random question – how well do your flour and sugar jars keep the ingredients fresh? I saw them in one the above photos and I’ve been searching for the right jars to use for my flours and sugars and goodies. What are you preferences? Thanks soo much!
Good comparison post. I would have loved to have seen lard thrown into the mix. Not the denatured crap sold at Safeway or Kroger, but the stuff sold in the neighborhood ethnic meat markets from pigs that had a life. Other than that, love you’re posts.
I need to make biscuits asap! Love this post!
I love it when you do these comparisons Tessa! And yeah, I’m a butter person myself. Did you try it with pork leaf lard though? That’s old school classic and would probably yield a really great Southern style biscuit…
I totally agree with you on butter in biscuits. Shortening doesn’t cut here.
This makes me proud that I only use butter in my biscuits! You’re right, the flavor just can’t be beat.
Love your recipes and testing. My biscuits tend to turn out like hockey pucks so I’m excited to follow along on your quest for the perfect biscuit! My Granny always made us scones, can you sneak in a scone recipe too! Awesome Tessa!
How about leaf lard? I’m giving that a try next time. I’ve recently made them like you did trying butter vs. shortening. A week apart though, so not as easy to compare. For mine I think the shortening ones were lighter.
BTW, White Lilly is available from Amazon or the Smuckers websites. The later actually being more reasonable, $10 for two 5lb bags and you can mix types. Shipping for we would be $6.95. https://onlinestore.smucker.com/display_category.cfm?cat_id=63
I purchased some White Lily and it does make for fluffier biscuits. I accidentally ordered the 12 two pound bags from Amazon. So, I’ve been sharing them around with my baking friends.
Butter FTW!
Oh that would be a toughy to decide which one is better because biscuits of any kind are amazing…but I think like you, i would have chosen the butter one 🙂
A very well written and obviously well researched topic. Thank you for that.
Now, a question. What about a third option? A combination of shortening and butter.
Anne