This post may contain affiliate links. Read our disclosure policy.
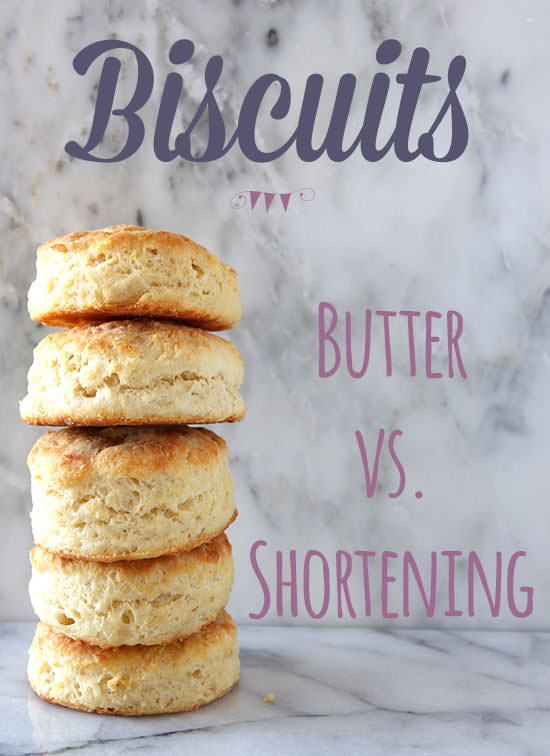
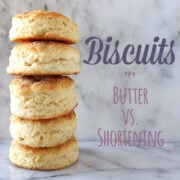
Butter or shortening? It’s a debate I’ve heard among many bakers and even within the comments of my blog so I decided to tackle another round of baking experiments. Recently Clabber Girl challenged me to use their baking powder in a series of posts all about biscuits throughout the rest of the year. What better subject for baking experimentation? Also, how cool is my job? To kick off this month’s biscuit post I’m experimenting with one of the most important ingredients of the biscuit and that’s the fat. We wanted to find out which fat is better for making the perfect biscuit: butter or shortening?
I wanted to go beyond showing you how to make biscuits and help you understand how the ingredients impact your final product. It seems so simple to just substitute out one ingredient with another but baking is truly a science and every change you make can result in a totally different product! Keep reading to find out how butter and shortening impact everything from the dough, appearance, taste, and texture of your typical buttermilk biscuits and to find out which was my favorite!
Be sure to follow Clabber Girl on Facebook for tons of baking recipes and tips and stay tuned for more posts all about biscuits!
Free Ingredient Measuring Guide!
The key to consistent baking success is a click away. Sign up to get instant access to my printable Ingredient Measuring Guide now!

Perhaps the best aspect of homemade biscuits is just how simple they are with just a handful of staple ingredients and a few steps. I’ll never understand how those processed canned biscuits became so popular since biscuit dough takes just minutes to whip up! Sure, you’ll have a few more dishes to clean but there’s nothing that compares to the unadulterated goodness of a homemade biscuit.
To experiment with butter versus shortening, I used the standard biscuit recipe (below), which is my go-to. I used the same techniques, ingredients (except the fat of course), baking times and temperatures to ensure consistency between the two batches.
All Butter Dough
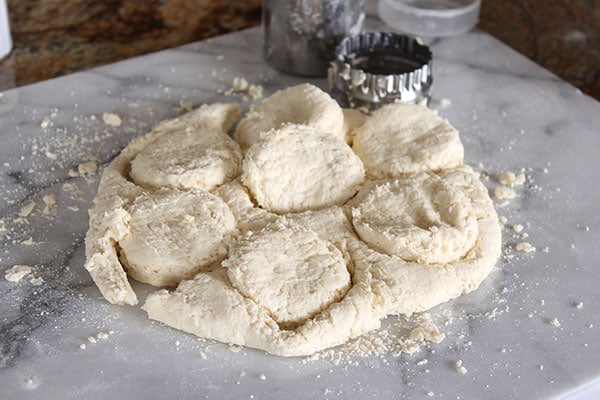
The all-butter dough was slightly less cohesive than the all-shortening dough, and I attribute this to the fact that the butter’s texture is firmer than shortening. Even when both fats were chilled in the same freezer for the same length of time, the butter was significantly more solid which made it easier to retain chunks of butter while mixing the dough.
The cold chunks of butter are important because as they melt into the biscuit while baking they create tiny pockets of steam that puffs and lifts the dough. These pockets turn into that beautiful light and flaky texture we crave with biscuits. The steam comes from butter’s water content, which is usually about 15 to 20 percent.
Those chunks of butter, while as glorious as they become while baking, do make the dough a little loose and slightly difficult to work with. Not to mention butter’s low melting point makes it more difficult to work with as it needs to be cautiously kept cold.
Shortening Dough
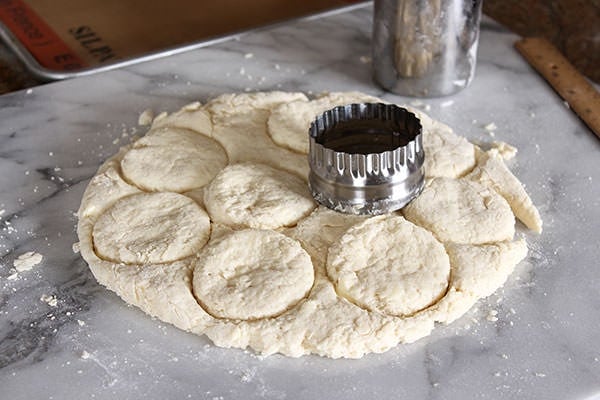
The shortening dough, on the other hand, came together much more easily. In fact, it came together almost too much. If you overwork biscuit dough you run the risk of getting tough and dense biscuits. With the shortening being so sticky itself, even when chilled, it made it hard to retain any sort of looseness in the dough. Instead, it all came together in a slightly sticky, shaggy mass.
This doesn’t matter as much as it does with the all-butter dough, however. Where butter is only about 80 percent fat and the rest is milk and water, shortening is 100 percent fat. There is no steam created in shortening dough that lends the same light, airy flakiness as with butter dough. While the shortening dough was nicely cohesive, the stickiness made it difficult to roll out and shape.
Any type of biscuit dough, or even pie dough which is very similar, is going to be more difficult to work with than a soft, smooth, and supple yeast dough. The pay off, however, is that it only takes about a half hour to make biscuits from start to finish!
Baking the Biscuits
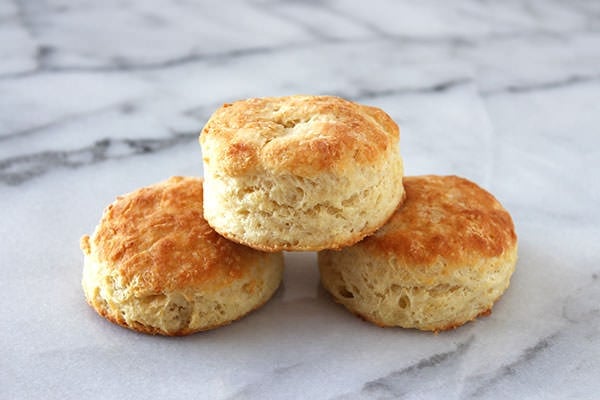
So, what happened when the biscuits came out of the oven? Well, upon first glance the butter biscuits were significantly more browned with flatter tops. When bitten into, the butter biscuits were moist and slightly spongier than the shortening biscuits. The best part was the flavor and slightly more crunchy exterior texture contrasted by that ultra tender interior.
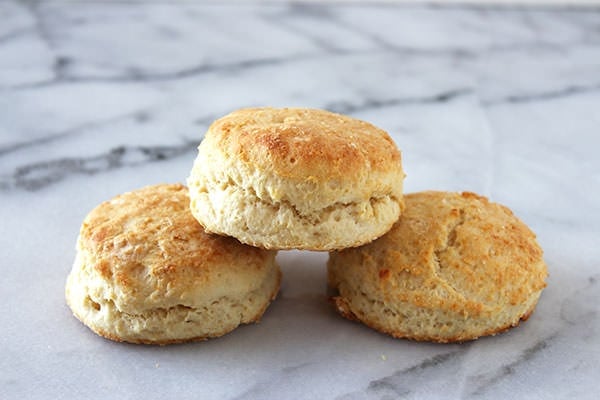
The shortening biscuits were much more pale, with slightly domed craggy tops. They also seemed a bit more irregular in height. The biscuits themselves were more crumbly when bitten into and lacked that characteristic butter flavor that simply cannot be replicated by anything artificial.
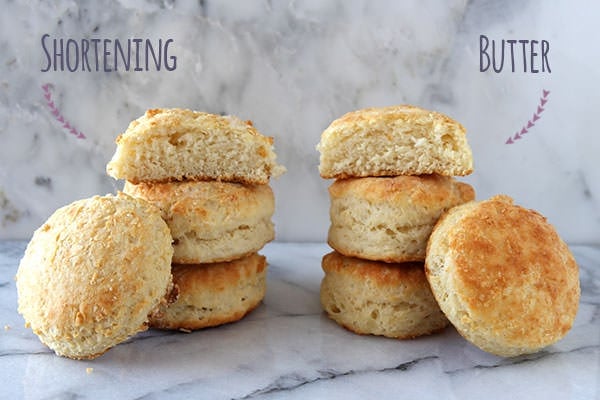
I offered two biscuits to Jared and made him guess which was butter and which was shortening and he got it right. You can definitely taste the difference and as a butter lover, I definitely preferred the butter biscuits. However, the shortening biscuits did remind me of biscuits I’ve had at Southern eateries in the past with their slightly drier, crumblier texture.
Since shortening has a higher melting point than butter, meaning it requires more heat to melt shortening than it does to melt butter, it makes shortening less challenging to work with. You don’t have to worry as much about it getting too warm in the dough and it brings together the dough more easily. However, that higher melting point can also be a very bad thing because it means that it doesn’t fully melt in the mouth like butter does, leaving behind an unpleasant waxy coating on the palate.
So what’s the final verdict?
Butter is the winner here. The butter biscuits were moister with that wonderful butter taste and melt-in-your mouth texture. I’d be curious to test out substituting half or just two tablespoons of the butter with shortening to see if you get the best of both.
Have you experimented with that? What do you prefer to use in your biscuits?
This post is sponsored by Clabber Girl. All opinions provided are my own.
Biscuit Recipe
Email This Recipe
Enter your email, and we’ll send it to your inbox.
Ingredients
- 2 cups (9 ounces) all-purpose flour, plus more for dusting
- 2 teaspoons granulated sugar
- 1 tablespoon Clabber Girl baking powder
- 1/4 teaspoon baking soda
- 1 teaspoon fine salt
- 6 tablespoons unsalted butter OR vegetable shortening, very cold
- 1 cup buttermilk, chilled
Instructions
- Preheat the oven to 450°F. Line a large baking sheet with parchment paper.
- In the bowl of a food processor, combine the flour, sugar, baking powder, baking soda and salt. Add the butter or the shortening and pulse the food processor several times to cut the fat into the flour until the mixture resembles coarse meal. You can also do this by hand with a pastry blender. The faster you do this the better, you want the fat to remain cold. Stir in the buttermilk until just combined. DO NOT overmix, the dough will be slightly sticky.
- Turn the dough out onto a floured surface and dust the dough with flour. Gently pat the dough out until it’s a 1/2-inch in thickness. Use a 2-inch round biscuit cutter to push straight down through the dough to cut out circles, try not to twist the cutter. Place the biscuits on the baking sheet, spacing 2-inches apart. Reform the scrap dough into 1/2-inch thickness, being sure to work with it as little as possible, before cutting out more circles. You should get 10 to 12 biscuits.
- Bake the biscuits until golden brown, about 12 to 15 minutes.




I love baking biscuits and have tried butter, shortening, and lard, which is how my grandmother made them. They are all good, but I have always preferred the Crisco brand butter flavored shortening. Recently, I tried something new because of my challenges with weight control and my age. I substituted the shortening for pureed chick peas. I sprayed my pan with Pam to prevent sticking. The end result was pretty amazing. No funny taste and you wouldn’t guess they were made with chick peas. Fresh out of the oven, they are flaky and taste just like a biscuit. Only 0 grams of fat if you also use fat free buttermilk. Many of the comments here are adding fat, but if you are middle aged, overweight, with high blood pressure, as all that fat is like a ticking time bomb for a heart attack.
Going to try your recipe, with butter, to see if it’s better than mine! They look delicious. Also,on the top of this page, green box, it says the cook time is 30 minutes. I thought that was too long for biscuits, but continued to the recipe. Recipe indicates 10 – 15 minutes, as I would have expected.
Thanks your website is very good info.
I have never been able to make buscuits..they were horrible. I tried your butter recipe, and my family can’t get enough! Thank you so much!!
That’s wonderful, Terri! 🙂
i miss biscuits made with milk…i am allergic to milk so thats a no go…i have to substitute with water..i have always used white lily self rising flour along with crisco shortening..never used the butter,will have to try that one..sounds good..i also make extras and freeze them..i have never used a cutter,i pinch off an amount and roll into shape..so is there a big difference between self rising and all purpose flour?
Self Rising has the salt and leavening agent premixed into the flour.
All Purpose (AP) is just flour.
My grandmother also made her biscuits with bacon grease. She would allow the grease to cool and use it just like vegetable oil. Occasionally, she would store the grease in the refrigerator and save it for biscuits the next day, but never froze it. I made your recipe tonight for my mother, husband, daughter, and grandson. We all thought they were fabulous! I used White Lily flour that I purchased while on a recent trip to Tennessee. I have not been able to buy White Lily here in the St. Louis metro area for about a year now. Thank you so much for the recipe and the baking powder freshness test.
Love hearing stories like that. I wish I had a grandmother who cooked with bacon grease, sounds like she made some delicious food! I’m so glad to hear you enjoyed the recipe with your family. Good idea to pick up some White Lily flour on your trip! I wish they would sell it everywhere in the US!
For authentic southern biscuits, no sugar (why add sugar?!), use lard and self-rising flour. Brush tops with butter.
If you want to improve your know-how simply keep visiting this site and be updated with the newest gossip posted here.
These are in the oven right now! Except I’m trying them as drop biscuits! Experimenting is good 🙂 I’m excited to try them!
I have found that using 2 cups of White Lily self-rising flour, an extra teaspoon of fresh baking powder, 1/4 – 1/3 cup of cold shortening cut into chunks, and about 3/4+ cup of cold full fat buttermilk works. I whisk the baking powder into the flour, make a well, drop shortening into the well, pour buttermilk over shortening, squish the shortening into buttermilk, then begin moving fingers in a slow rotary motion incorporating flour as you do so while turning the bowl until the flour is fully incorporated. Add a bit more flour or buttermilk if needed to get a cohesive slightly sticky dough ball. Add more flour to the bowl or on the side. Pinch off or choke some dough to make a biscuit, gently roll in cupped palms, and dip in extra flour. Shake off excess and place touching in a cast iron skillet that has melted shortening in it, coating both top and bottom. If you pat out dough and cut out the biscuits with a vented cutter, place in pan bottom side up. Old time biscuit makers did not measure flour because the number of biscuits is determined by the amount of liquid added. You just mix until it feels right. They kept the flour in a big wooden bowl and just added more shortening and buttermilk, but they made biscuits daily. This method uses fewer utensils, requires less cleanup, and if done correctly prevents overworking the dough while mixing and reworking scraps when cutting out biscuits. Getting the feel for the dough is the trick and that comes with practice. Notice I said they made biscuits daily. Alton Brown’s recipe uses half butter and half shortening. You can freeze the butter and shred then whisk into the flour. I never used bacon grease but it might work like recipes calling for vegetable oil rather than shortening. Leaf lard is the only lard to use but it is hard to obtain and expensive.
I was looking for a biscuit recipe without shortening. This recipe was delicious! I even bought a pastry blender.But for some reason my biscuits weren’t as tall. Other than that they came out beautiful! Thanks for sharing!
Wonderful! Is your baking powder fresh? You can test it by placing 1 teaspoon in a bowl with 1 cup hot tap water. If it bubbles up, it is fresh. If nothing happens, toss it. Otherwise, you can always pat the dough out so it’s thicker than a 1/2-inch if you want taller biscuits. Hope that helps!
Wow! These are wicked good!!! I used the butter instead of the shortening… the only thing I found (and I’m not sure if it has to do with the fact that I live in the tropics and the ingredients and humidity is very different…) but I needed a lot more flour than the recipe. Still turned out AMAZING ! They were gone in 10 minutes!! My fiancé and kids just gobbled them up! Thanks!!
I just did my own comparison bake-off between Crisco and Butter and the results were exactly as you stated. Not that I was doubting you, but I had to see the difference for myself. The ones made from butter were lighter and fluffier than the ones made from Crisco which were denser. I know Southerners swear by the shortening method, but my personal preference is the butter method. Mahalo for enlightening us with this comparison and explaining the reasons why the differences.