


Tessa’s Recipe Rundown
Taste: Just like sugar cookies from your favorite bakery!
Texture: Light and soft yet still sturdy enough to hold their shape and transport safely.
Ease: So much easier than traditional cut out sugar cookies and royal icing in my opinion!
Pros: Fun and easy way to make festive cookies for a crowd.
Cons: None!
Would I make this again? Absolutely yes.
This post may contain affiliate links. Read our disclosure policy.
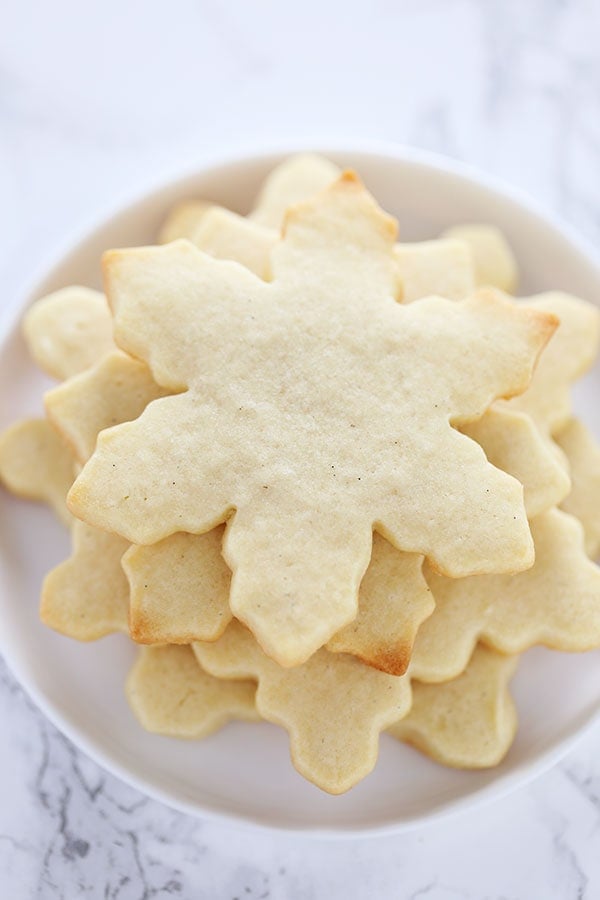
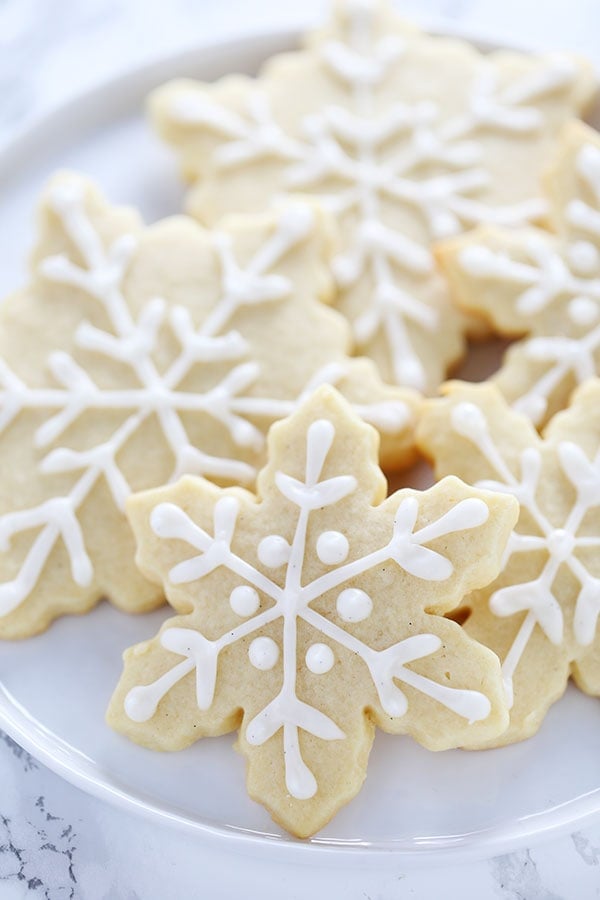
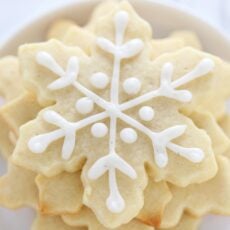
How festive and pretty are these Snowflake Sugar Cookies?
No one has to know (or will even believe) just how easy they are to make!
In the past, I’ve had virtually no patience for cut-out cookies. Sure, they’re beautiful. But why should I have to chill and roll and cut and chill again when I could just make drop cookies and eliminate all those extra steps?
Well, I’ve done some experimenting and have found a bunch of time-saving tips to make cut-out cookies so much quicker and easier. Plus, you don’t need to deal with royal icing to achieve these pretty cookies.
This recipe also makes about 40 cookies, so it’s perfect for any holiday party. You could even double it for a really big gathering, or easily halve it for a smaller group.

Sprinkle of Science
How to Make Snowflake Sugar Cookies
Chill Your Dough Before Baking
After rolling out and cutting the dough into snowflake shapes, I recommend chilling your dough for about 15 minutes before baking, to ensure your cookies maintain their shapes perfectly.
If you’ve ever encountered any issues with the cookies not keeping their shape, it’s likely because the dough wasn’t cold enough when it hit the oven – so don’t skip this step!
Measure Your Flour Correctly
Make sure to weigh your flour for precision. If you add too much flour, your cookies may be hard, dry, and lack flavor. If you don’t have a digital kitchen scale, use the spoon and level method instead. Learn more about how to measure ingredients here.
Use Cool Room Temperature Butter
If your butter is too warm, your cookies may spread, leaving your shapes unrecognizable. About 67°F is the perfect temperature for butter when creaming. Learn more about butter in baking here.
Check Your Baking Powder
Did you know that leavening agents can lose their effectiveness before the expiration date printed on the packaging? Learn more about Baking Powder vs. Baking Soda, and how to test for freshness, here.
How to Store Snowflake Sugar Cookies
These cut-out sugar cookies will keep in an airtight container at room temperature for 10 days. If you need to prep further in advance, check out the freezing instructions just below.
How to Freeze Snowflake Cookies
Baked, cooled Snowflake Cut-Out Sugar Cookies can be frozen for up to one month. I recommend placing between layers of parchment or wax paper, to prevent them from sticking together. Learn more about How to Freeze Cookies here. Thaw and allow to return to room temperature before decorating.
More Christmas Cookie Recipes You’ll Love:
Email This Recipe
Enter your email, and we’ll send it to your inbox.
Ingredients
For the cookies:
- 3 sticks (339 grams) unsalted butter, at a cool room temperature
- 1 1/2 cups (300 grams) granulated sugar
- 2 large eggs
- 2 teaspoons vanilla extract
- 1/2 teaspoon almond extract* (optional)
- 4 1/2 cups (572 grams) all-purpose flour**
- 1 teaspoon baking powder

For the icing:
- 2 cups (250 grams) powdered sugar, sifted
- 1 teaspoon vanilla extract
- 4 tablespoons water or milk
Instructions
Make the cookies:
- In a large bowl, use an electric mixer to beat the butter and sugar on medium-high speed until well-combined and smooth, about 3 minutes. Add the eggs, vanilla, and almond extract and beat until combined. On low speed, slowly add in the flour and baking powder and beat until incorporated.
- Divide the dough into 2 equal portions. Place one dough portion between two sheets of parchment and roll out to 1/4-inch thickness. Repeat with the remaining portion of dough. Place the two sheets of dough on a baking sheet and chill for at least 1 hour or up to 1 day. You can also freeze for 30 minutes.
- Preheat the oven to 350°F. Line large baking sheets with parchment paper or silicone baking mats.
- Remove the dough from the fridge and cut into shapes with a cookie cutter, rerolling any scraps and cutting more shapes. Transfer the shapes to the prepared baking sheets.
- Freeze for 15 minutes, or until firm.
- Bake for 10 minutes, or until the cookies are set and beginning to brown at the edges. Be careful not to over-bake. Let the cookies cool for 5 minutes before removing to a wire rack to cool completely. Baked un-iced sugar cookies can be frozen in an airtight container for up to 1 month.
Make the icing:
- In a small bowl, use a fork to beat together all the ingredients except the food coloring. The mixture should be very thick but still pourable.
- Transfer the icing to a squeeze bottle using a small funnel. You can also scoop into a pastry bag fitted with a very small plain tip. Before you begin icing any cookies, take a few moments to practice on a piece of parchment paper to get the feel of the icing.
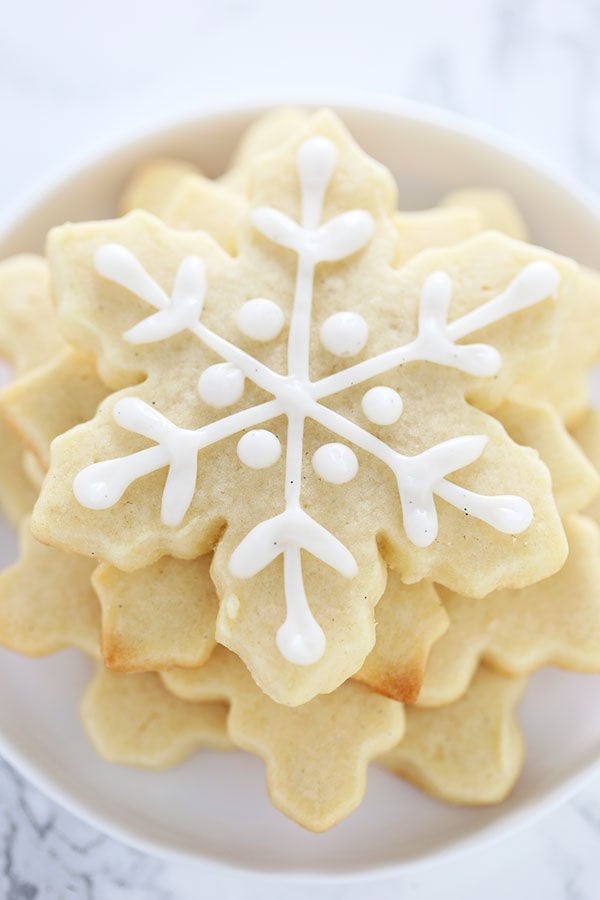
- Holding the bottle or bag tip directly over one corner of a cookie, create lines and dots to enhance the snowflake shape as seen in the photos. If desired, garnish with edible dragees, glitter, or sprinkles. Let the icing set before serving.


Hi! I am also wondering about the almond extract. We have a nut allergy in our house, so wondering if we could substitute for something else or just leave out.
I truly enjoyed this video and your recipes. . I have learned so much from you. Thank you so much!!!
These are next on my to do list..after a successful thanksgiving where I was in charge of desserts, you are one of my new heroes! People like you make learning fun..God bless and thank you!
Is there a substitute for the almond extract. Could I just add more vanilla extract to make up for the almond or would that be too much
Enjoy your videos, you explain in very easy to understand directions. how would you feel if I posted one of your videos to my site from time to time?
BTW my son and daughter in law are both red seal chefs so I know just how tough your profession is.
Hi Stu, that’s totally fine! I have no problem with people embedding my videos 🙂 Thanks for asking!
These cookies are beautiful and great video. Thanks!
These cookies look like winter wonderland! Love the recipe and that they can be made in advance 🙂 yum!!
Do you have a link to a frosting recipe that could be used to do sugar cookies the “old” way? Like, I have a four-year-old daughter whom I want to let decorate cookies with me this year, and we’re going to need the kind she can use a knife or something to spread on. I plan to make this cookie recipe (because whenever I make cookies I use your recipes!), but think I’ll need something different for frosting.
Different question: would waxed paper work for rolling out the dough instead of parchment paper? I don’t own the latter, since I use silicone baking mats I haven’t needed to but it.
Do you mean a standard buttercream recipe? If so, here you go: https://handletheheat.com/how-to-make-the-best-buttercream/
Wax paper or even your silicone baking mats should work!
I 2nd that motion, Next Food Network Star, though you’re already a STAR in your own right; an absolute natural. OR Great American Baking Challenge, you’d win hands down, no contest! Thank you for always sharing your easy tips, tricks, & fun/tasty recipes with everyone. You’re an inspiration Tessa (even got me to clean & organize a cupboard with your video). Thank you!
Thank you SO much, Kelli!! I truly appreciate your kind and encouraging comment! I’m so glad you’re enjoying everything I put it, it’s comments like these that keep me going 🙂
I can’t wait to try this recipe. I love cut out sugar cookies and dislike the hassle! I usually bake and make candy on Black Friday so I’ll be trying it soon!
What a fun tradition! Happy Thanksgiving, Amy!
Hi! I loved your video tutorial for the extra tips and your explanations are so clear and easy to follow 🙂
Quick question for you:
Your icing instructions mention food coloring (to not mix it with the rest of the icing ingredients), but the ingredient list doesn’t. If I wanted to use food coloring, would it be the liquid kind and how many drops? Also, when would the coloring be mixed in?
Thank you!
Always learn a TON when I watch your videos! You should try out for The Next Food Network Star!!!! You appear very comfortable in front of the camera and explain everything so clearly! Great tips, too!
Awe, thank you so much Liz!! I really appreciate that. You’re too sweet 🙂