


Tessa’s Recipe Rundown
Taste: Just like sugar cookies from your favorite bakery!
Texture: Light and soft yet still sturdy enough to hold their shape and transport safely.
Ease: So much easier than traditional cut out sugar cookies and royal icing in my opinion!
Pros: Fun and easy way to make festive cookies for a crowd.
Cons: None!
Would I make this again? Absolutely yes.
This post may contain affiliate links. Read our disclosure policy.
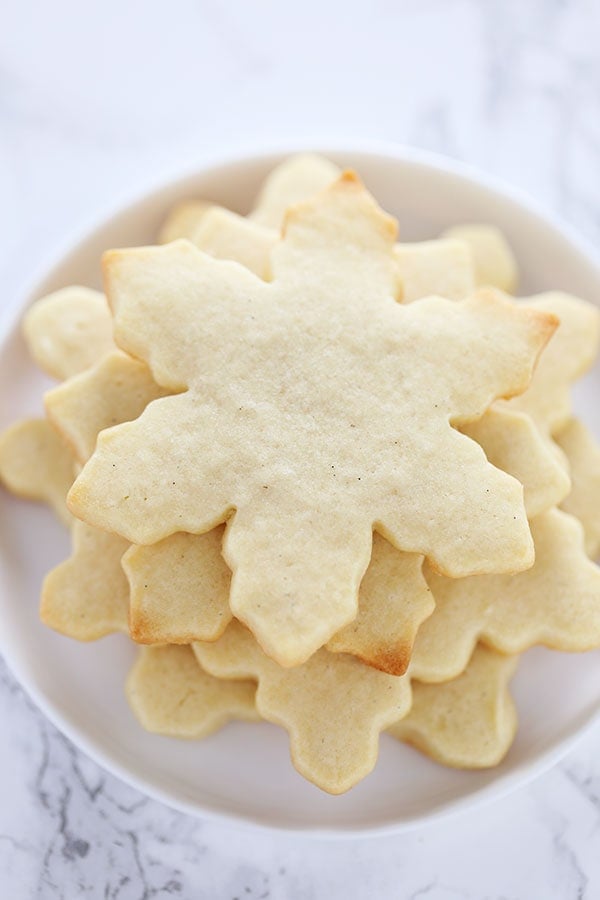
How festive and pretty are these Snowflake Sugar Cookies?
No one has to know (or will even believe) just how easy they are to make!
In the past, I’ve had virtually no patience for cut-out cookies. Sure, they’re beautiful. But why should I have to chill and roll and cut and chill again when I could just make drop cookies and eliminate all those extra steps?
Well, I’ve done some experimenting and have found a bunch of time-saving tips to make cut-out cookies so much quicker and easier. Plus, you don’t need to deal with royal icing to achieve these pretty cookies.
This recipe also makes about 40 cookies, so it’s perfect for any holiday party. You could even double it for a really big gathering, or easily halve it for a smaller group.

Sprinkle of Science
How to Make Snowflake Sugar Cookies
Chill Your Dough Before Baking
After rolling out and cutting the dough into snowflake shapes, I recommend chilling your dough for about 15 minutes before baking, to ensure your cookies maintain their shapes perfectly.
If you’ve ever encountered any issues with the cookies not keeping their shape, it’s likely because the dough wasn’t cold enough when it hit the oven – so don’t skip this step!
Measure Your Flour Correctly
Make sure to weigh your flour for precision. If you add too much flour, your cookies may be hard, dry, and lack flavor. If you don’t have a digital kitchen scale, use the spoon and level method instead. Learn more about how to measure ingredients here.
Use Cool Room Temperature Butter
If your butter is too warm, your cookies may spread, leaving your shapes unrecognizable. About 67°F is the perfect temperature for butter when creaming. Learn more about butter in baking here.
Check Your Baking Powder
Did you know that leavening agents can lose their effectiveness before the expiration date printed on the packaging? Learn more about Baking Powder vs. Baking Soda, and how to test for freshness, here.
How to Store Snowflake Sugar Cookies
These cut-out sugar cookies will keep in an airtight container at room temperature for 10 days. If you need to prep further in advance, check out the freezing instructions just below.
How to Freeze Snowflake Cookies
Baked, cooled Snowflake Cut-Out Sugar Cookies can be frozen for up to one month. I recommend placing between layers of parchment or wax paper, to prevent them from sticking together. Learn more about How to Freeze Cookies here. Thaw and allow to return to room temperature before decorating.
More Christmas Cookie Recipes You’ll Love:
Email This Recipe
Enter your email, and we’ll send it to your inbox.
Ingredients
For the cookies:
- 3 sticks (339 grams) unsalted butter, at a cool room temperature
- 1 1/2 cups (300 grams) granulated sugar
- 2 large eggs
- 2 teaspoons vanilla extract
- 1/2 teaspoon almond extract* (optional)
- 4 1/2 cups (572 grams) all-purpose flour**
- 1 teaspoon baking powder

For the icing:
- 2 cups (250 grams) powdered sugar, sifted
- 1 teaspoon vanilla extract
- 4 tablespoons water or milk
Instructions
Make the cookies:
- In a large bowl, use an electric mixer to beat the butter and sugar on medium-high speed until well-combined and smooth, about 3 minutes. Add the eggs, vanilla, and almond extract and beat until combined. On low speed, slowly add in the flour and baking powder and beat until incorporated.
- Divide the dough into 2 equal portions. Place one dough portion between two sheets of parchment and roll out to 1/4-inch thickness. Repeat with the remaining portion of dough. Place the two sheets of dough on a baking sheet and chill for at least 1 hour or up to 1 day. You can also freeze for 30 minutes.
- Preheat the oven to 350°F. Line large baking sheets with parchment paper or silicone baking mats.
- Remove the dough from the fridge and cut into shapes with a cookie cutter, rerolling any scraps and cutting more shapes. Transfer the shapes to the prepared baking sheets.
- Freeze for 15 minutes, or until firm.
- Bake for 10 minutes, or until the cookies are set and beginning to brown at the edges. Be careful not to over-bake. Let the cookies cool for 5 minutes before removing to a wire rack to cool completely. Baked un-iced sugar cookies can be frozen in an airtight container for up to 1 month.
Make the icing:
- In a small bowl, use a fork to beat together all the ingredients except the food coloring. The mixture should be very thick but still pourable.
- Transfer the icing to a squeeze bottle using a small funnel. You can also scoop into a pastry bag fitted with a very small plain tip. Before you begin icing any cookies, take a few moments to practice on a piece of parchment paper to get the feel of the icing.
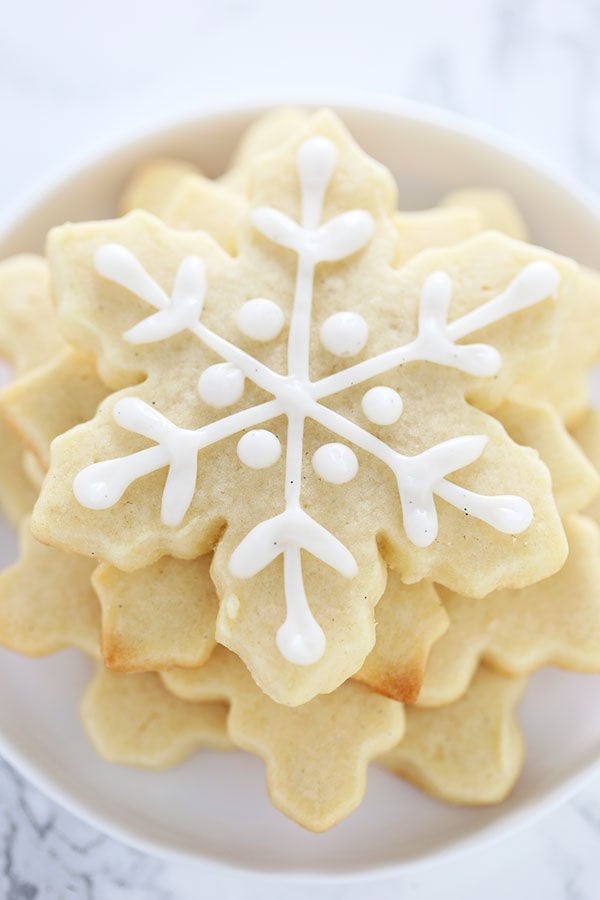
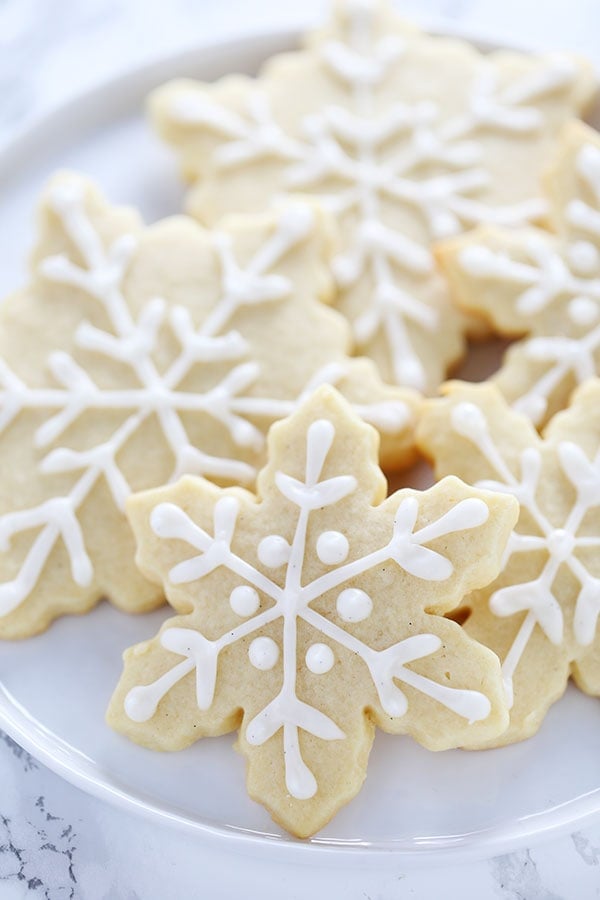
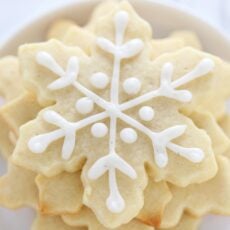
- Holding the bottle or bag tip directly over one corner of a cookie, create lines and dots to enhance the snowflake shape as seen in the photos. If desired, garnish with edible dragees, glitter, or sprinkles. Let the icing set before serving.


Could somebody please tell me the correct measurement for Almond Extract and Baking Powder in this recipe? The video has 1/4 tsp Almond Extract and the written recipe shows 1/2 tsp. The video has 1/2 tsp Baking Powder and the written recipe shows 1 tsp Baking Powder. I really want to make these cookies with the correct measurements. Thank You.
Hi Tessa,
Great video of snowflake sugar cookies but I have a question. Where do I get the same snowflake cutter that you used? I want my cookies to look like yours
Thanks so much,
Pam
Hi Pam! This is the set of snowflake cookie cutters Tessa has. It comes with five (5) cookie cutters, so you can pick whichever size you prefer, or make a mix of sizes! Let us know what you think of these cookies once you’ve given them a try! Happy baking 🙂
Kids Love these!
Hi Tessa,
I had left a comment on Dec. 3, 2018 on another recipe cite – Easy Cut Out Sugar Cookies – that does not have a video, but seems to be the same recipe as this one here for Easy Snowflake Sugar Cookies. My questions are the same as Allyson’s – what are the correct measurements for the almond extract and the baking powder? Please respond as I would really like to give this recipe a try. Thank You.
Hi, I will be making these cookies for the first time for the holidays and I had a small question about 2 of the ingredient mearsurements: in the video you add 1/4 teaspoon of almond extract and 1/2 teaspoon of baking powder; however in the written recipe it calls for 1/2 teaspoon of almond extract and 1 teaspoon of baking powder. This may or may not be a huge difference when it comes to making the dough but can you please tell me which way is better?
i loved it Tessa your recipe is a life saver
I didn’t see a link for the snowflake cookie cutter set you used.
Excellent! Easy to make–especially rolling the chilled dough between two pieces of parchment. Delicious flavor–both the cookie and the frosting. And thick enough to be firm for decorating and then stable for transporting. The icing sets up quickly. It really is like making bakery sugar cookies at home. I cut them out in snowflake shapes, baked them, and decorated them with the icing recipe, uncolored. The white on white look was very pretty and drew many compliments. This is my new ‘go-to’ sugar cookie recipe. Thank you for sharing it with us.
How long does it take for the icing to set? I want to put these in plastic bags and use them as napkin decorations at a luncheon.
Good recipe but the music in background over and over and over the same little ditty would make amyone nauseous…..
Sorry but it is the truth…
Avec ta recette j’ai faits les biscuits de Pâques (lapin,œuf,papillon et tulipe ).Très bon et simple a faire . la prochaine fois je vais ajouter au mélange des flocons d’érables pour le temps des sucres et certain glacer avec le beurre d’érable .Miammm. 🙂 Merci .
I have been eyeing this recipe since you posted it. I finally got a chance to make the cookies and they are amazing! I’ve never made homemade cut out cookies and your video and tips made it so easy! Thanks so much, Tessa!
So glad to hear that, Brandy!
I just made these cookies, you’re right they are so easy to make, they were delicious! One question, will the icing set so it doesn’t get messy when putting away for Christmas??