


Tessa’s Recipe Rundown
TASTE: Sweet without being cloying, with vanilla, almond, and that nostalgic floury flavor unique to Lofthouse cookies.
TEXTURE: Thick, soft, slightly cakey cookie with a creamy icing that sets perfectly and a slight crunch from the sprinkles on top.
EASE: Super easy recipe.
PROS: Festive, crowd-pleasing, and perfect for holiday gifting.
CONS: None.
WOULD I MAKE THIS AGAIN? Yes!
This post may contain affiliate links. Read our disclosure policy.


Christmas Lofthouse Cookies taste just like the ones from the store, but with way better flavor and without any of the bland cloying sweetness. The best part? They’re SO easy to make!

During the hustle and bustle of the holiday season, you need a simple, stress-free recipe that still delivers on festive charm. Not to worry, I’ve got you covered! These cookies are perfect for everything from office parties to cozy family get-togethers.
Their thick, soft, and slightly cakey texture comes together with basic pantry ingredients—no dough chilling or intricate decorating that takes hours. Just sweet deliciousness and lots of Christmas joy!

They also make a picture-perfect addition to any Christmas cookie box, alongside classics like Gingerbread Cookies, crowd-pleasing M&M Christmas Cookies, and colorful Red Velvet Cookies with Cream Cheese Frosting.
These copycat cookies will be a hit with kids and adults alike as the ultimate bites of holiday-themed nostalgia.


Sprinkle of Science
How to Make Christmas Lofthouse Cookies
What are Lofthouse Cookies?
Lofthouse Cookies are a popular treat found in most U.S. grocery stores, as well as larger retailers like Walmart and Target. These cookies are known for their thick, fluffy texture and very sweet taste, topped with a hard buttercream-style frosting and sprinkles. The classic version features pink icing and rainbow sprinkles, but seasonal varieties are available throughout the year.
Tips for Perfect Lofthouse Cookies
- Measure your flour correctly: I recommend using a digital kitchen scale. Too much flour will create dry, hard cookies that crumble. If you don’t have a scale, use the spoon and level method.
- Sour Cream + Cornstarch: Don’t skip or substitute these ingredients, as both are vital to creating soft, fluffy, cakey sugar cookies, just like a real Lofthouse Cookie.
- Butter temperature: Avoid greasy cookies that spread too much by ensuring your butter is at a cool room temperature – about 67°F is perfect. Learn more about butter temperature in baking here.
- Don’t overbake: Bake these cookies until they just look dry on top, but are still pale at the edges. Overbaking will cause dry cookies.
What Type of Food Coloring is Best?
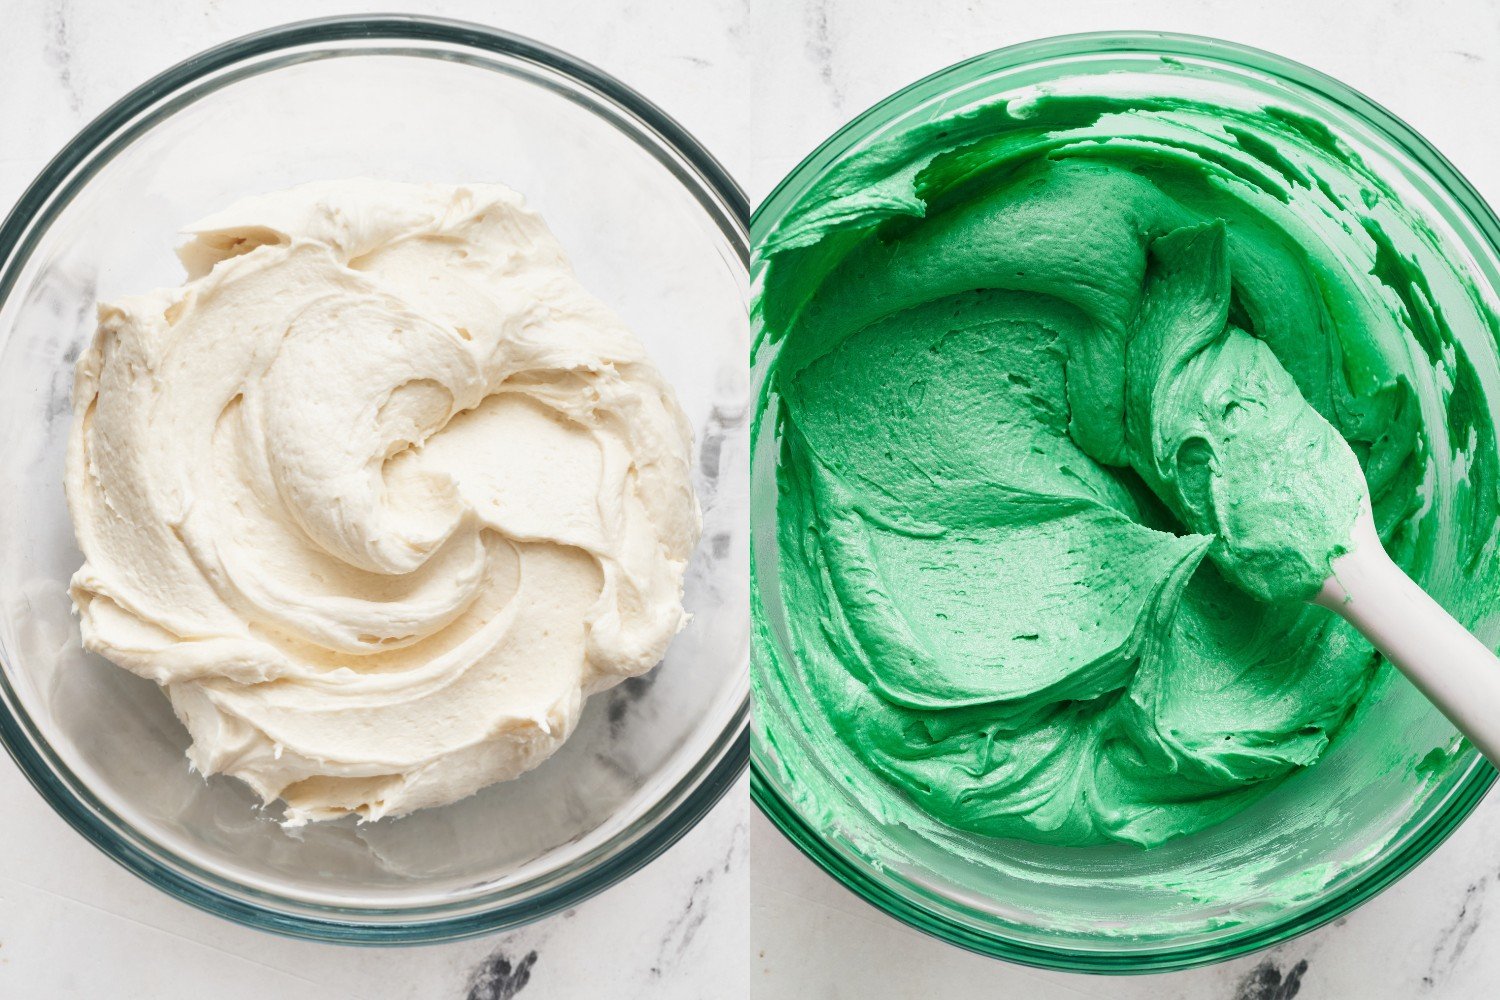
I recommend using a gel food coloring like Americolor Gel Food Coloring, for a bold color without adding too much excess liquid. It’s super fun and festive to use red food coloring or green food coloring in your icing – but feel free to skip the dye, if preferred, for a plain white cookie icing and get festive with the sprinkles instead!
What Type of Sprinkles Should I Use?
That’s totally up to you! You can use simple rainbow jimmies to maintain the Lofthouse Cookies look – or use a cute holiday sprinkle mix like this or this fun mix if preferred.
Don’t like sprinkles? Feel free to skip them completely!

Can I Halve This Recipe? Can I Double This Recipe?
Sure! Simply halve all ingredients to yield approximately 12 cookies, or double all ingredients to yield about 48 cookies. No other modifications needed.
Storing & Freezing Christmas Lofthouse Cookies
Store Christmas Lofthouse Cookies at room temperature inside an airtight container for up to 6 days. To freeze, place inside an airtight container with parchment or wax paper between layers to prevent sticking together. Freeze for up to 6 weeks. Thaw in the fridge overnight, then bring to room temperature before serving. Note that the sprinkles may bleed during thawing.

More Christmas Cookie Recipes You’ll Love:

Email This Recipe
Enter your email, and we’ll send it to your inbox.
Ingredients
For the cookies:
- 2 ¾ cups (350 grams) all-purpose flour
- ¼ cup (33 grams) cornstarch
- ¾ teaspoon baking soda
- ½ teaspoon baking powder
- ½ teaspoon fine sea salt
- 1 stick (113 grams) unsalted butter, at cool room temperature
- 1 cup (200 grams) granulated sugar
- 1 large egg, at room temperature
- ⅓ cup (75 grams) sour cream, at room temperature
- 1 tablespoon vanilla extract
- ¼ teaspoon almond extract, optional but highly recommended


For the frosting:
- 2 cups + 2 tablespoons (266 grams) powdered sugar, sifted
- 1 stick (113 grams) unsalted butter, at a cool room temperature
- 1/4 teaspoon fine sea salt
- 2 teaspoons pure vanilla extract
- 2 tablespoons (30 grams) heavy or whipping cream
- Gel food coloring, if desired
- Sprinkles, if desired
Instructions
Make the cookie dough:
- Preheat the oven to 350°F. Line baking sheets with parchment paper.
- In a medium bowl, whisk together the flour, cornstarch, baking soda, baking powder, and salt. Set aside.
- In the bowl of a stand mixer fitted with the paddle attachment, beat the butter and sugar on medium-high speed until light and fluffy, about 3 minutes. Scrape down the sides and bottom of the bowl with a rubber spatula. On low speed, add the egg, sour cream, vanilla, and almond extract (if using). Turn the speed to medium and beat until the mixture is thicker (will look slightly curdled), about 2 minutes. Scrape down the bowl again. On low speed, gradually add the flour mixture, beating until just combined.
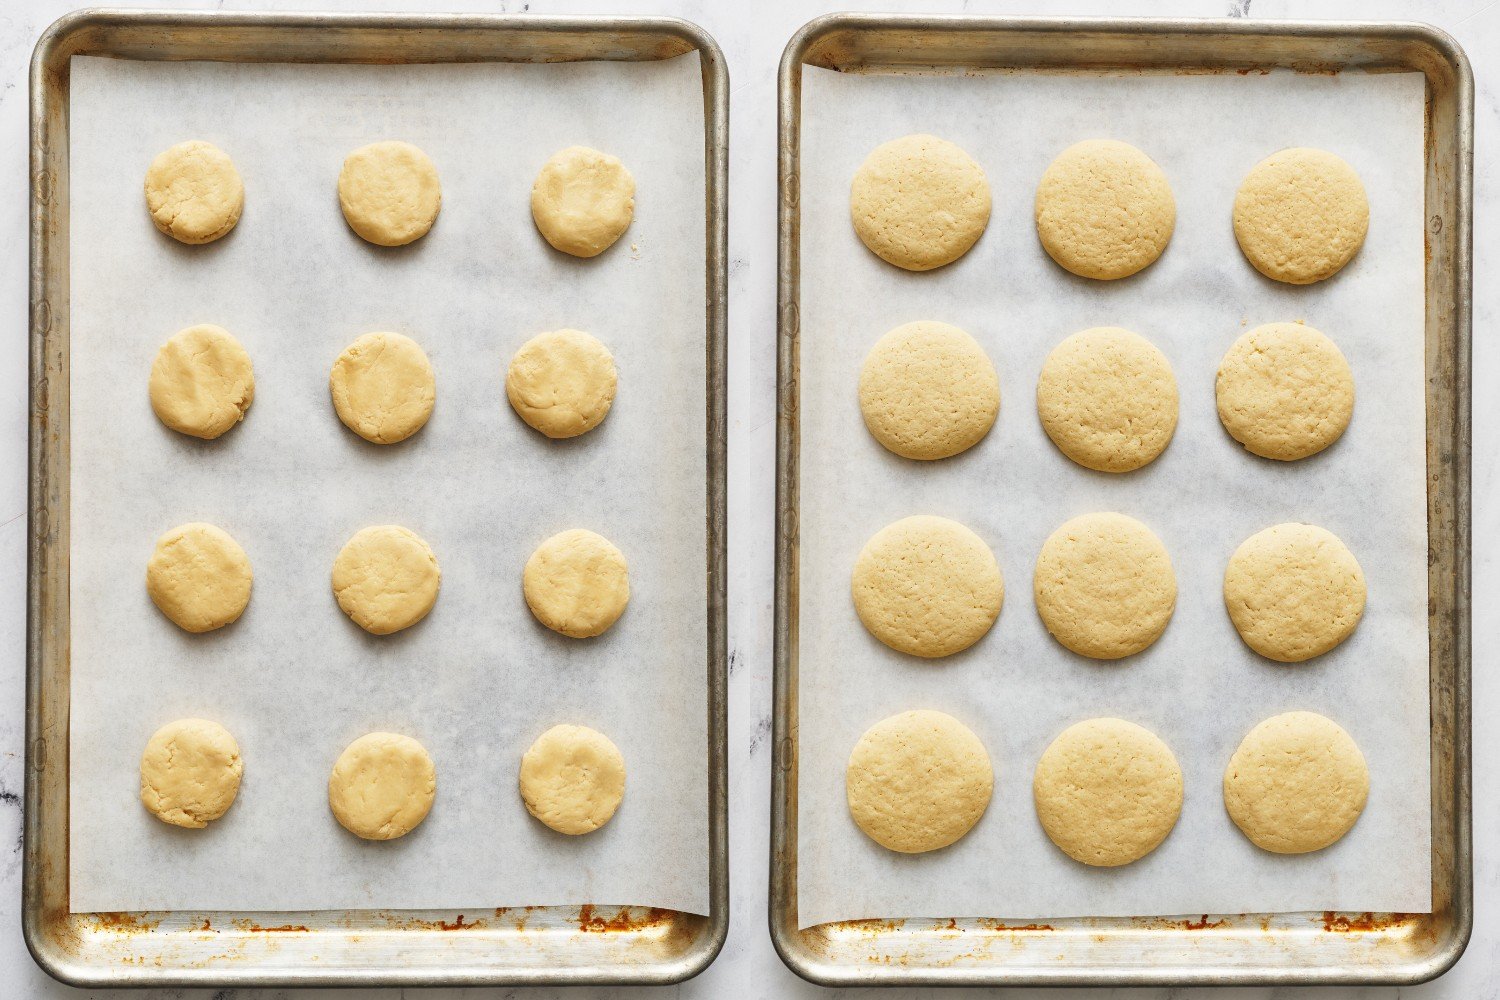
- Using a medium spring-loaded scoop (1 ½ tablespoons), drop balls of cookie dough onto prepared sheets in four rows of three. Roll each ball until smooth, then flatten them to ¼-inch thick with the palm of your hand. If the dough is too sticky, dampen your hands slightly as needed.
- Bake until the cookies appear dry on the top but still pale at the edges, about 11 minutes.
- Place on a wire rack to cool completely.
Make the frosting:
- In the bowl of a stand mixer fitted with the paddle attachment, add the sugar and butter. Mix on low speed until smooth and then increase the speed to medium and beat for another 3 minutes.
- Add the salt, vanilla, and cream and beat on medium speed for 1 minute, adding more cream if needed. Add the food color, if using.
- Frost each cookie with a heaping tablespoon of frosting. Use the back of a spoon or an offset spatula to spread it evenly. If you’d like to add sprinkles, do so right after frosting each cookie, as the frosting can set quickly. Allow the cookies to sit for about 4 hours or until the frosting is firm. This time may vary depending on your kitchen’s humidity.
- Store at room temperature in an airtight container for up to six days or up to six weeks in the freezer. Thaw in fridge overnight, then let come to room temperature before serving. Note that coloring of sprinkles may bleed when frozen and thawed.
Notes
Photos by Joanie Simon.


Love this recipe, and everybody loves these cookies! Simple, delicious, and tastes so much better than the store version.
What a great Christmas cookie recipe, tastes just like Lofthouse, but better!
Perfect texture and flavor!
Hello, I see the instructions for freezing the cookies fully decorated but was wondering if the dough can be made ahead and frozen or refrigerated? Or would you recommend baking the cookies, freezing and then decorating once they are ready to be used? I am trying to avoid any color bleeding. Thanks!
Ni Niki! Great question. For the best results, we recommend baking the cookies fresh. While freezing the baked, unfrosted cookies is an option, our tests showed that once thawed, the cookies lost some of their soft, fluffy texture and became slightly chewier-especially when thawed at room temperature. Thawing in the fridge first helped a bit, but the texture still wasn’t quite the same as freshly baked. We haven’t tested freezing the dough itself, but based on similar recipes, it’s likely the cookies would turn out thicker and chewier than intended. Since the dough comes together quickly, we suggest baking these cookies fresh for that perfect Lofthouse-like texture. And just a note that these cookies last beautifully in an airtight container at room temperature for up to six days, so you can still make them a bit ahead of time 🙂 I hope that helps!
Does the icing set up enough to be able to stack these cookies?
Linda
Hi, Linda! Yes, but only when fully set which can take several hours depending on the humidity of your kitchen. For storing, I’d still recommend stacking between layers of parchment or wax paper as mentioned above to ensure no food dye from the frosting or sprinkles bleeds onto neighboring cookies.