


Tessa’s Recipe Rundown
Taste: Ultra-fresh with the perfect balance of sweetness and tartness.
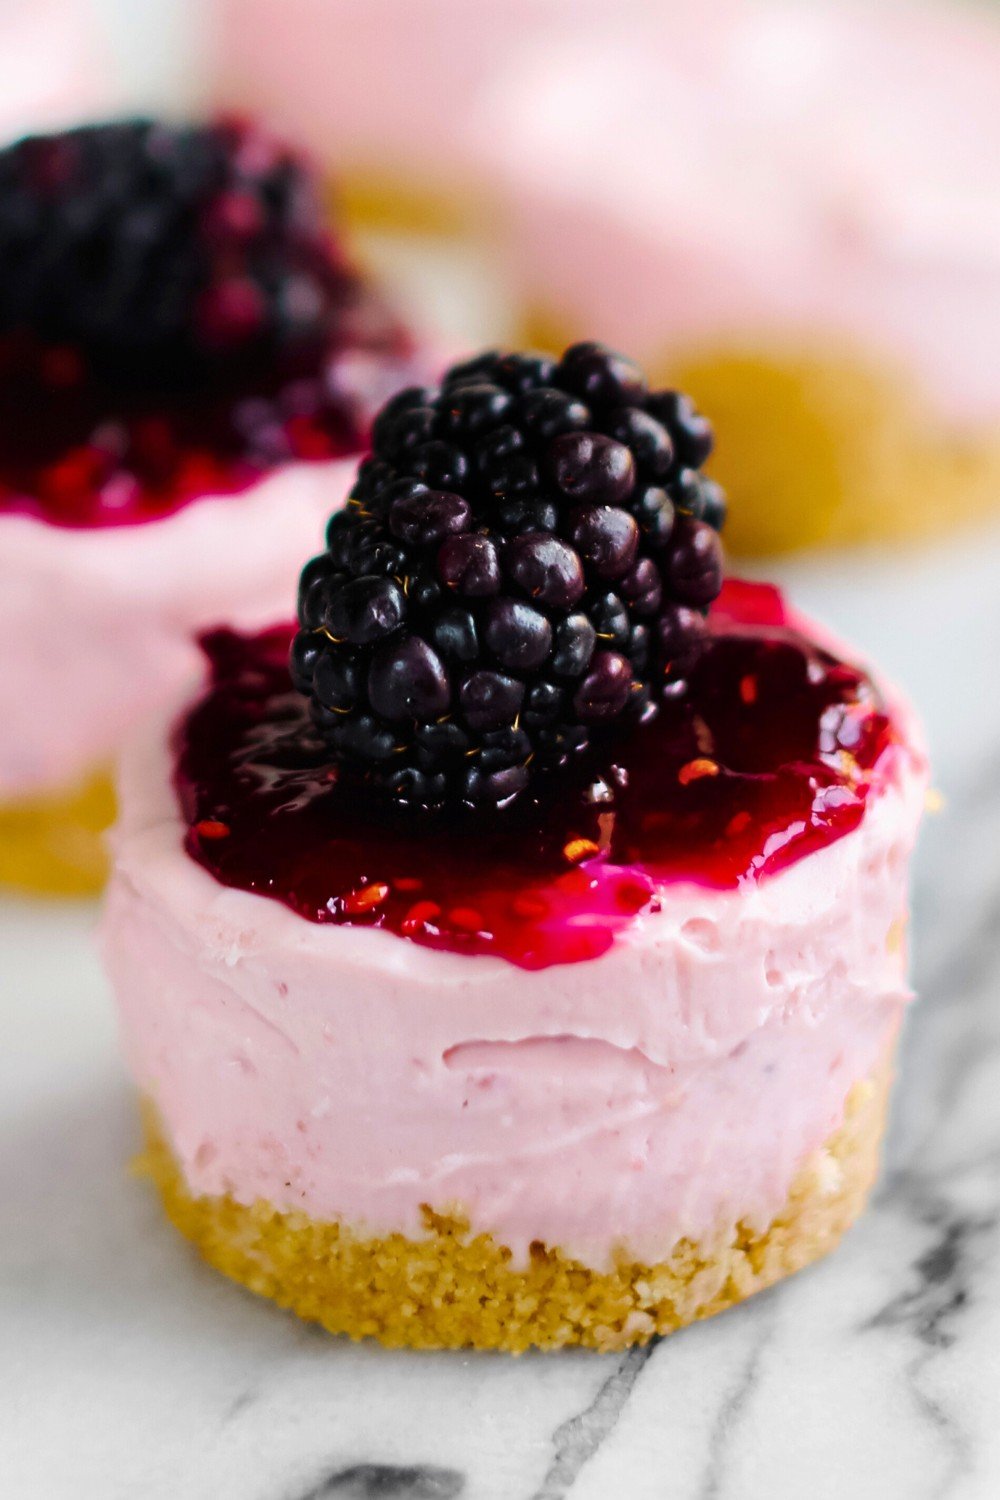
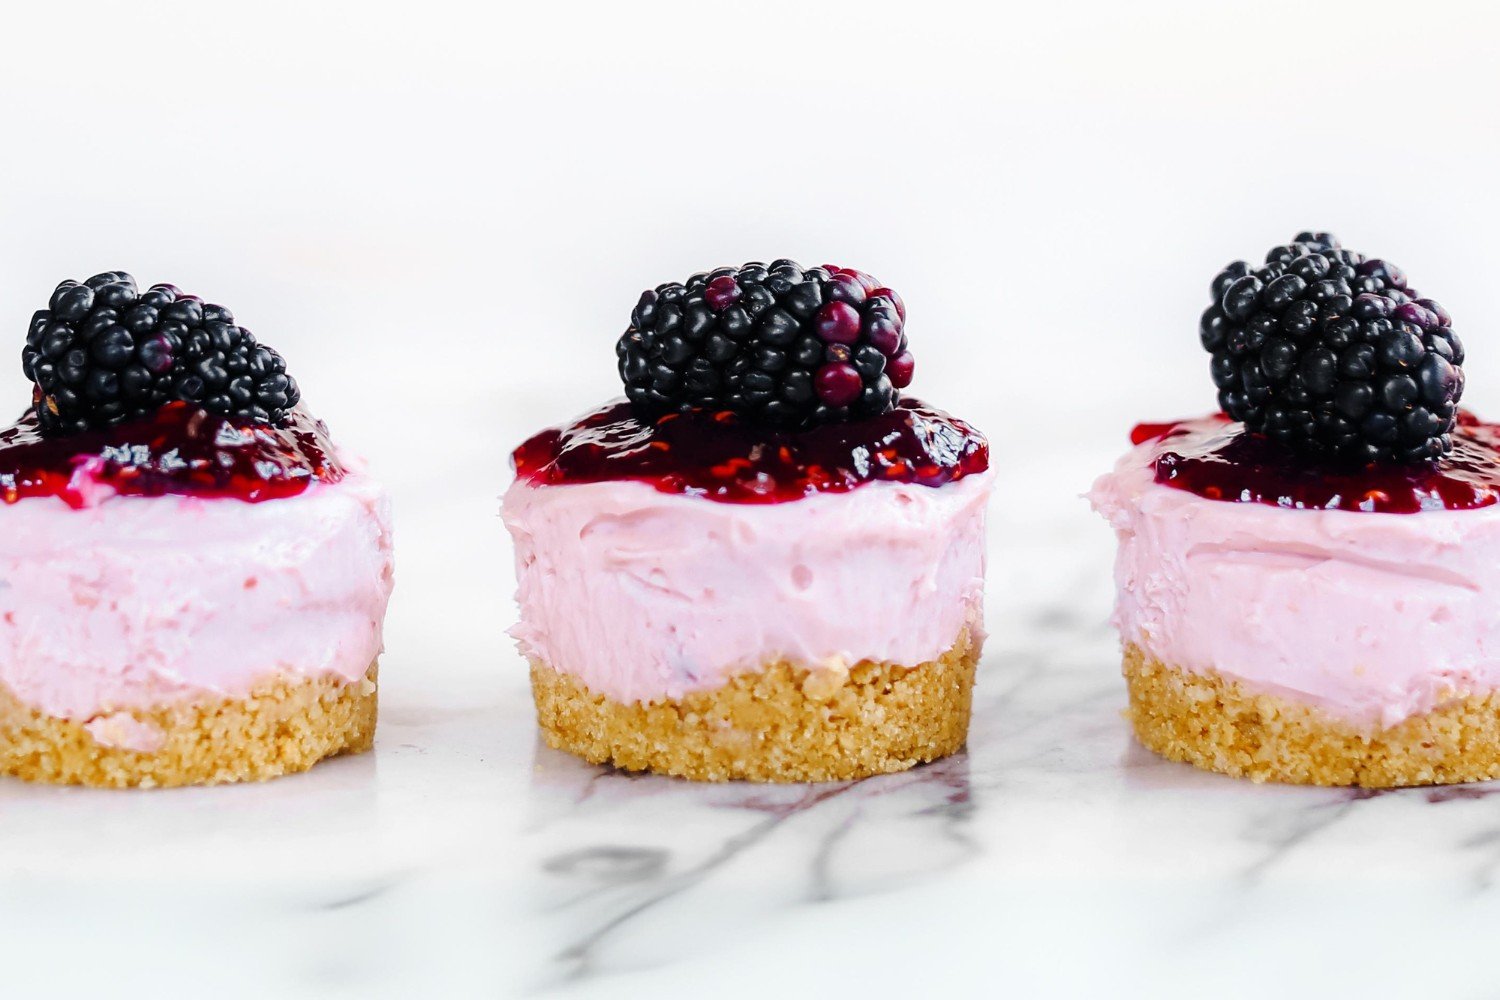
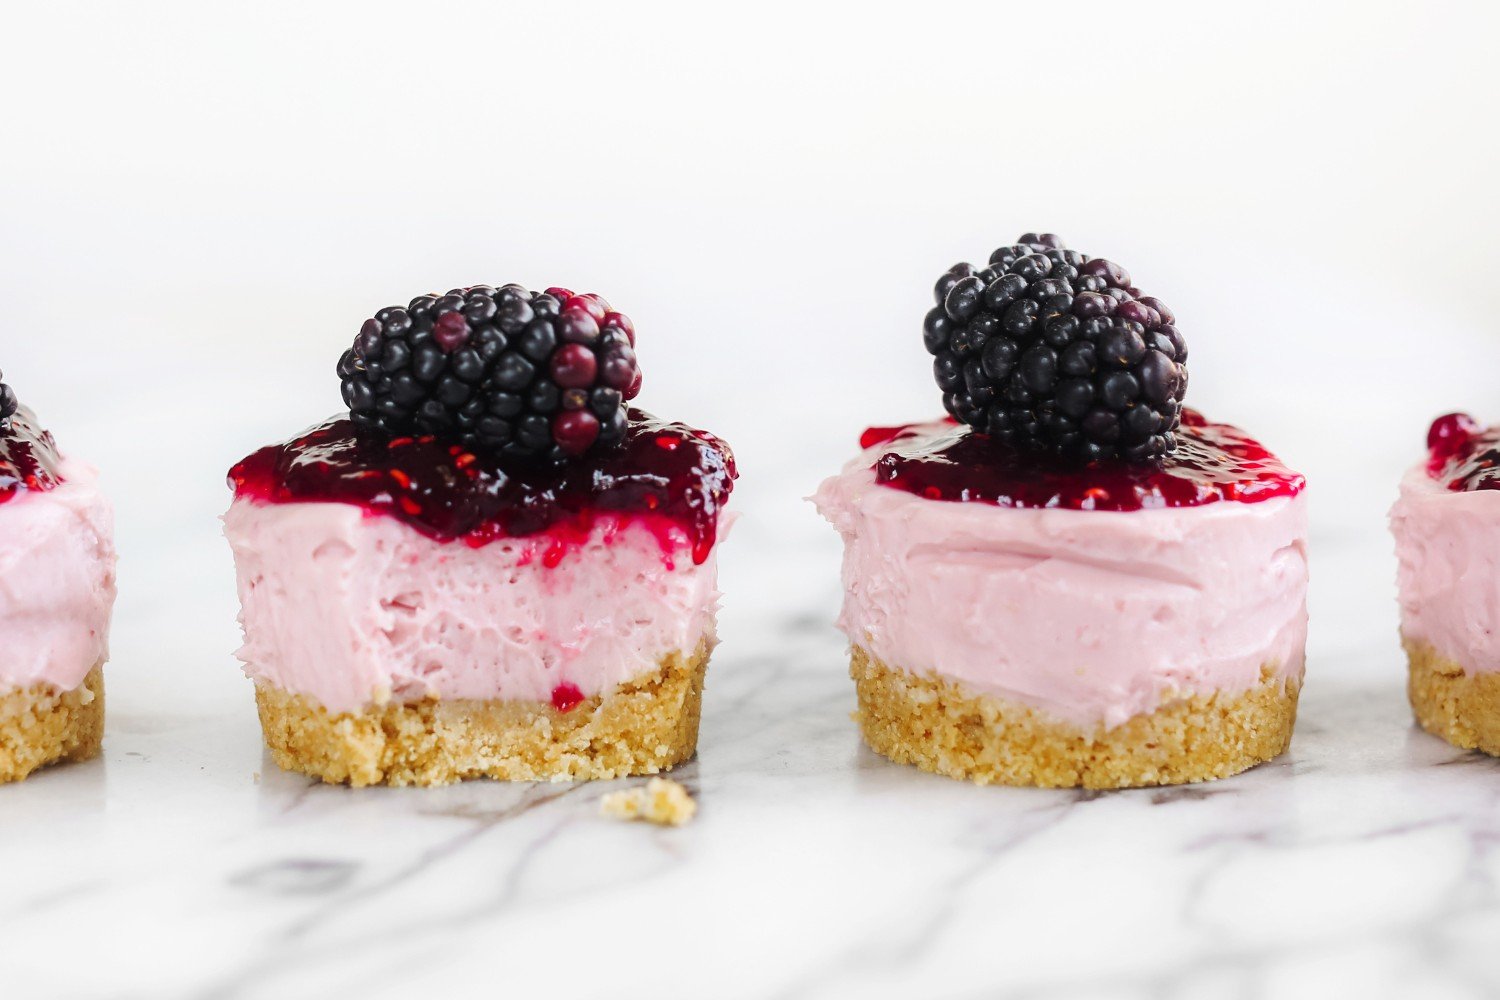
Texture: The crust is crunchy and buttery, while the cheesecake filling is super creamy, luscious, and rich.
Ease: Ridiculously easy. The hardest part is waiting for them to chill and set before eating!
Pros: Perfect spring or summer dessert. Fast, easy to transport, and requires no oven or stove use.
Cons: I’ve noticed if you don’t use high-quality bricks of cream cheese, you end up with extra moisture, making it harder for these cheesecakes to set firmly.
Would I make this again? Absolutely!
This post may contain affiliate links. Read our disclosure policy.
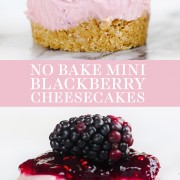
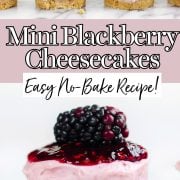
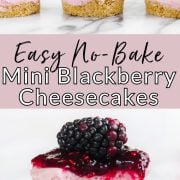

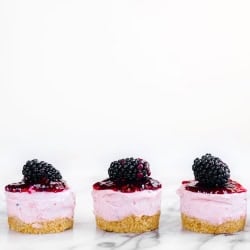
These No Bake Mini Blackberry Cheesecakes are the perfect treats to make this spring or summer!
When it’s 110°F or hotter here in Phoenix, the last thing I want to do is turn on the oven.
Sometimes I make that sacrifice in order to continue testing new recipes to share with you. It’s a small price to pay to wake up to my dream job every day!
That’s why I love thinking up new no-bake recipes once the temperatures start to soar.
I knew I wanted to create a no-bake recipe incorporating berries, and I’m so pleased with how delicious and beautiful these No Bake Mini Blackberry Cheesecakes are.
I’m a weirdo and would much rather eat berries raw and fresh than bake with them, so this recipe worked out perfectly to preserve the sweet and tart freshness of the blackberries.
I particularly love mini cheesecakes because they’re so much quicker and simpler to make and transport than full-sized cheesecakes. Plus it gives the illusion of moderation … that is, until you realize you’ve actually eaten 4 mini cheesecakes!

Sprinkle of Science
How to Make No Bake Mini Blackberry Cheesecakes
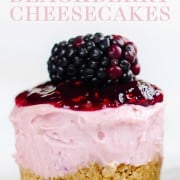
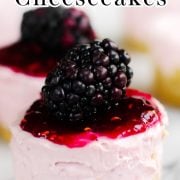
The Blackberries in No Bake Mini Blackberry Cheesecakes
To keep things simple, we’re using blackberry jam in the cheesecake itself. I find that adding fresh fruit to a no-bake cheesecake “batter” makes it too watery to set properly, so the jam is a perfect workaround.
An easy puree of fresh blackberries then gets dolloped on top. Feel free to use defrosted frozen blackberries in the puree, if preferred.
What Type of Cream Cheese is Best for No Bake Cheesecakes?
- Be sure to use blocks of full-fat, high-quality cream cheese.
- I recommend using a high-quality brand such as Philadelphia, for the best possible texture.
- Do not use reduced-fat cream cheese, or your mini cheesecakes may be watery, rubbery, or may not set properly.
- Don’t use whipped cream cheese or cream cheese for spreading on a bagel.
- Be sure your cream cheese is COMPLETELY softened to room temperature before beginning.
Graham Crackers Substitutions for the Cheesecake Crust
Feel free to use the same amount by weight of digestive biscuits, vanilla wafers, or any crunchy cookie you prefer.
What Type of Pan for No Bake Mini Blackberry Cheesecakes?
- For perfectly adorable mini cheesecakes, get yourself a mini cheesecake pan. The bottoms are removable, just like a springform or tart pan, so you can pop out each cheesecake and keep it perfectly intact.
- If you don’t have a mini cheesecake pan, use a muffin tin instead.
- Use high-quality liners to avoid the graham cracker crust crumbling and avoid the cheesecake sticking to the pan.
- Another super cute idea is to use mini mason jars to assemble and serve this recipe. You might end up with less than 12 cheesecakes, but they’d be perfect for a dinner party or BBQ.
Chilling No Bake Cheesecake
No Bake Mini Blackberry Cheesecakes need to chill for at least 4 hours to ensure the cheesecakes are fully set and hold their shape. I usually prepare the mini cheesecakes the day before I plan to serve them, just to ensure they’re fully set before serving.
How to Store No Bake Mini Blackberry Cheesecakes
Store No Bake Mini Blackberry Cheesecakes in an airtight container in the fridge for up to 2 days.
Can You Freeze No Bake Mini Blackberry Cheesecakes?
While we haven’t tried that, it should work just fine to freeze these un-topped mini cheesecakes. Place individual cheesecakes on a baking tray and freeze until solid, then move to an airtight container for up to 3 months. To thaw, place in the fridge overnight. Add the blackberry topping and fresh blackberries before serving.
More Recipes You’ll Love:
- Raspberry Lemonade Cheesecake Bars
- No Bake Strawberry Cheesecake Bars
- Homemade Strawberry Pop Tarts
- Baked Strawberry Lemon Doughnuts
- No-Bake S’mores Mini Cheesecakes
Email This Recipe
Enter your email, and we’ll send it to your inbox.
Ingredients
For the crust:
- 1 sleeve (9 crackers, 140 grams) graham crackers
- 4 tablespoons (57 grams) unsalted butter, melted
For the cheesecake:
- 12 ounces (340 grams) cream cheese, completely softened to room temperature*
- 1/2 cup (100 grams) granulated sugar
- 3/4 cup (180 grams) heavy cream
- 1 teaspoon lemon juice
- 1/4 cup (80 grams) blackberry preserves
For topping:
- 1 cup (145 grams) blackberries, fresh or thawed frozen
- 1 tablespoon granulated sugar
- 2 teaspoons lemon juice
- Fresh blackberries, for garnish
Instructions
For the crust:
- Thoroughly grease a mini cheesecake pan. Place the graham crackers in the bowl of a food processor and pulse until finely ground. Add the melted butter and pulse until moistened. Divide the mixture among the cavities of the cheesecake pan, about 1 heaping tablespoon in each. Firmly press into the bottom of each cavity (a shot glass or tart tamper are perfect for this). Set aside.
For the cheesecake:
- In the bowl of an electric mixer, beat the cream cheese and sugar on medium-high speed until creamy and well combined. Add the cream, lemon juice, and blackberry preserves, and continue beating for 2 to 3 minutes, until well combined and thickened, with a texture similar to frosting. Divide the mixture among each cavity and cover with plastic wrap.
- Chill until firm, at least 4 hours or overnight. The cheesecake can be stored in the fridge in an airtight container for up to 2 days.
For the topping:
- Combine the berries, sugar, and lemon juice in the bowl of a blender or food processor and pulse until pureed. Top each cheesecake with a dollop of the sauce. Garnish each mini cheesecake with fresh blackberries. Serve.
Notes
This post was originally published in 2017 and has been updated with additional baking tips. Photos by Constance Higley.


Can I use fresh blackberries and puree them instead of preserves? Or will they be too watery and throw off the consistency of the mini cakes?
I love mini cheesecake! Thank you for sharing the recipe! Can’t wait to try it!
Hi! If you don’t use the cream cheese meant for bagels then which one do u prefer? I only see Philadelphia or store brands. But nothing else fancy lol so many just let me know what brand?! Thanks! Excited to try these;)
Any brick of cream cheese should work! Just not the spreadable kind 🙂
These look perfect to add to the Wedding Dessert Table for my Granddaughter.
I’m looking to make at least 36.
Do you think I could use the Wilton mini baking cups as liners successfully?
Hi Christi! I’m not sure, I’ve never tried. I don’t like using a mini muffin tin for these because they’re so shallow you barely get any cheesecake! But that’s my personal preference.
question for you…. down here in Australia we don’t have sticks of butter can you please tell me how much I stick of butter is in grams.
thankyou
1 stick butter = 113 grams, and I included the gram measurements here 🙂
definitely going to make these I have been wanting to do your monthly challenges for a while now but could not find the time, so I have made a promise to myself to find time for me one day a week. I just love this your site I have made your swiss meringue butter cream and it was just awesome piped on cupcakes.
so thankyou for your page.
your fellow happy baker
I made the No Bake Mini Blackberry Cheesecake, and people were really enjoying them. I ended up using paper muffin-type liners (?). I got them at Home Goods. Really cute, much stronger than regular cupcake liners. I also made a batch of raspberry cheesecakes. I didn’t try the blackberry, but the raspberry was very good. I’d like to send you a photo, so I’ll try to figure it out. Thanks, I love your recipes.
So happy to hear that, Deb!
Hey Tessa, so how firm were these things supposed to get? I made them and they are currently sitting in the fridge right now after a little over 4 hours and they don’t feel any more firm than when I put them in fridge to begin with. (They feel like that thick frosting you buy at the store) Just wondering if that’s how it’s supposed to be or if I did something wrong.
I find in some fridges they don’t get cold enough to firm up as quickly. Try to chill them overnight and see if they firm up more! However, I will say these definitely aren’t quite as firm as baked cheesecakes but you should be able to move them without anything falling apart.
Hi Tessa,
I am planning to make this over the weekend for my daughters first bday. But I don’t have mini cheese cake pan.
1. Can I make in normal fudge pan and then slice it in pieces? (Might take longer chilling time)
2. Its winters here in NZ, wont get fresh berries. Can I use frozen?
Thanks
I love reading your blog. So many great tips and recipes. I have found that when I make mini cheesecakes, I use 4 oz. jelly jars because I can freeze them right in the jar and also they are so easy to transport if going to a potluck function. The lids to the jelly jars also protect the cheesecakes when transporting them.
Tessa I SWEAR I had just been wondernig where you’ve been and was gonna jump on your site – now I know!!!! Awesome that you got to go to Australia!
xoxoxo
Haha! It was so much fun, but glad to be back and have so many new recipes that will be publishing in the coming weeks 🙂
These looks amazing! I have been wanting a mini cheesecake pan for a while…love making cheesecakes. So, I took the plunge and ordered one so I can make these lovely minis. Love your blog and recipes. Keep them coming!
Yay!!! I think you’ll love it.