This post may contain affiliate links. Read our disclosure policy.
It’s been quite a while since I’ve created a new Ultimate Guide post so I figured it was time to get experimenting and make another huge mess in my kitchen in pursuit of recipe perfection!
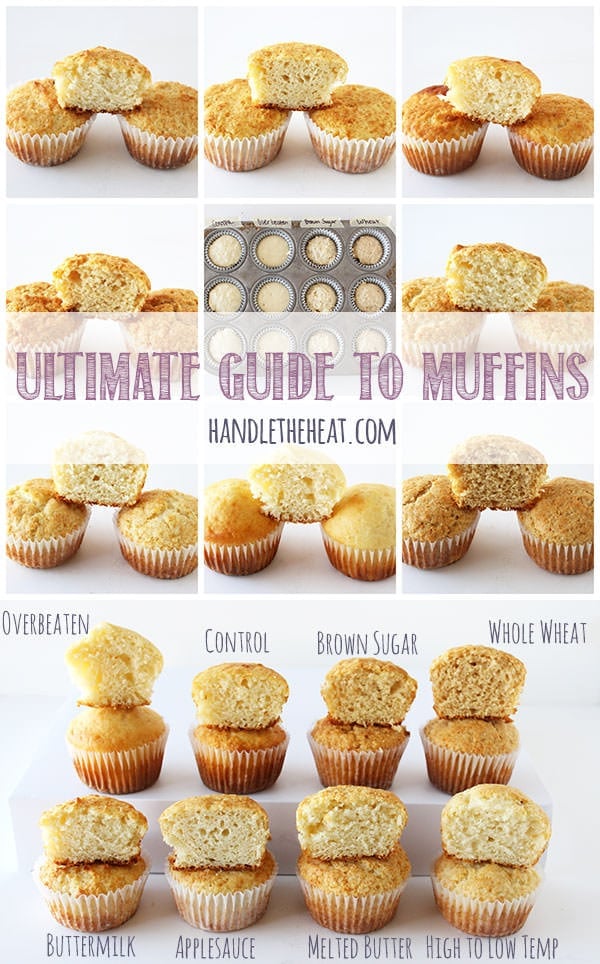
I do these posts, which may make me seem like a lunatic baker to anyone watching, because I think that actually seeing and reading about how a single ingredient or technique can impact a baking recipe is SO immensely helpful. Based off your feedback, it seems like you guys find these posts helpful too! I believe everyone should be able to create their ultimate version of any recipe, that baking shouldn’t be a source of confusion or frustration, and I want to help you by sharing my experiments.
So today I’m diving into the magnificent world of muffins. I’ve had a few requests for an Ultimate Guide to Muffins and I’m happy to say it was such a blast to experiment with them! If you’ve ever had questions about muffins, or wondered why your muffins turn out too short, crumbly, dry, bland, etc., you’ve got to read this post! Some secrets to ultra tender, moist, flavorful, and beautifully tall muffins are just below.
Tools and Ingredients Used:
I made every effort to replicate each batch as perfectly as possible, using the same exact tools and ingredients whenever applicable. I used a food scale to measure ingredients to ensure 100% accuracy and used an oven thermometer to gauge exact baking temperatures. Each batch was baked for exactly 20 minutes, except the high to low temperature batch which I’ll get to in a moment. I used paper liners for each batch and coated them with nonstick baking spray to ensure the muffins wouldn’t stick.
–Chicago Metallic Uncoated Standard Muffin Tin
-Large (3-Tablespoon) Spring-Loaded Cookie Scoop
–Oven thermometer
–Escali Digital Food Scale
–Best Quality Reynold Standard White Cupcake Liners
–Pillsbury No-Stick Baking Spray with Flour
-Gold Medal All-Purpose Flour
-Table salt
-Large eggs
-Whole dairy milk
Control Recipe
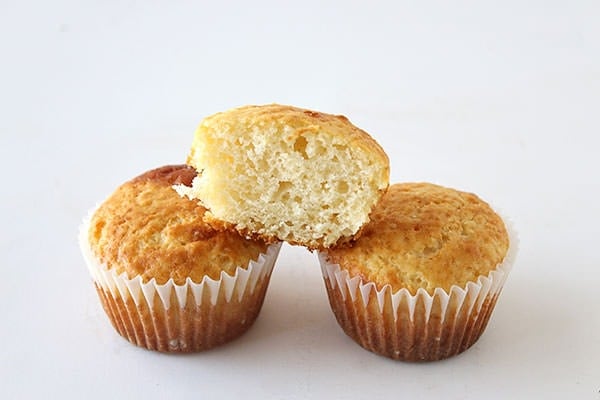
Whenever I do these Ultimate Guide experiments, I base every experimental batch off one control recipe that I feel represents the most basic and standard recipe possible and the same goes for this muffin control recipe. I decided to bake just plain muffins, with nothing mixed inside to give the most pure results. Every batch following this control will include one small change, keeping everything else the same so we can see how that change impacts the final result.
Yield: 12 muffins
Ingredients:
2 cups (254 g) all-purpose flour
½ cup granulated sugar
½ teaspoon fine salt
1 tablespoon baking powder
1 cup whole milk
¼ cup vegetable oil
1 large egg
Directions:
Preheat the oven to 400°F. Line a standard muffin tin with paper liners or coat with nonstick cooking spray (or both).
In a large bowl combine the flour, sugar, salt, and baking powder. In a liquid measuring cup beat together the milk, oil, and egg. Pour into the dry ingredients and stir JUST until combined, do not overmix. Divide evenly among the muffin tin cups. Bake for 20 minutes, or until golden brown and a toothpick inserted in the center comes out clean.
Overbeaten
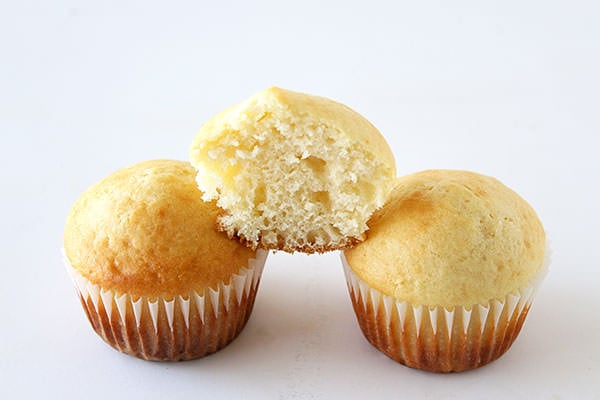
When it comes to mixing up a muffin batter, things couldn’t be simpler. Muffins are easy peasy. Yet, there is one rule that can make or break your muffins: do not overbeat. You can stir the dry ingredients and the wet ingredients separately as much as your heart desires, but once they’re combined you should only beat until they are JUST combined. Streaks of flour remaining is actually fine. So I wanted to try out a batch where I intentionally over-beat the batter to show you the results, so you can understand exactly why this rule exists.
As you can see right off the bat, these muffins are by far the tallest with the most dramatic domes. They are also the most pale in color. While they make look nice and tall and smooth (almost like cupcakes), these muffins were dry and they were dense. Not pleasant at all. If there were any questions about overbeating muffin batter, I think these muffins here answered them. Don’t do it unless you want dry little hockey puck muffins!
High to Low Baking Temperature
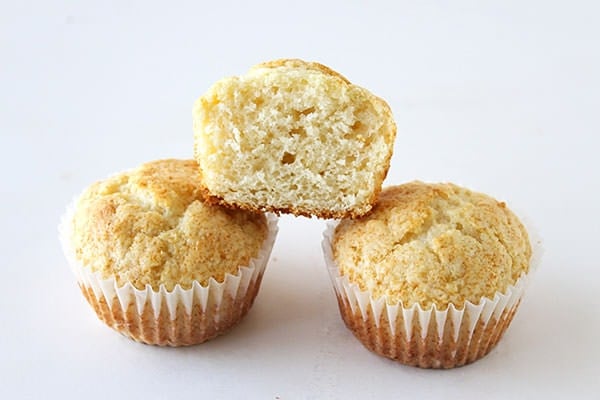
This batch was based off a few pins I’ve seen floating around Pinterest that show how much taller and domed muffins and cupcakes are if you start them off in a hot oven then turn the temperature down slightly. This made sense to me in theory, knowing that baking powder is partly activated by heat. So for this batch I took the control recipe and started it off by baking for 5 minutes at 450°F, then turned the temperature down to 400°F and continued baking for slightly less than 15 minutes. These muffins were beautifully tall, attractive, moist, and soft. Win!
Brown Sugar
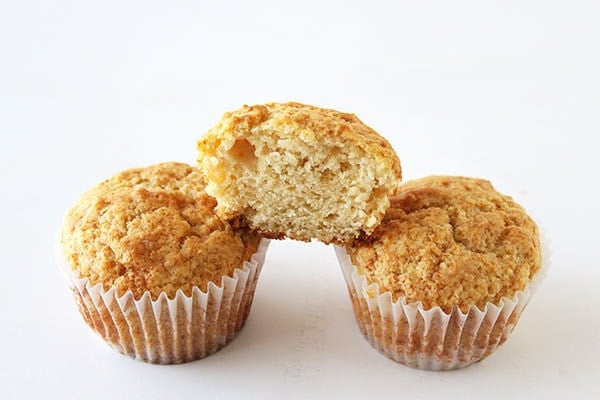
For this batch I removed the 1/2 cup granulated sugar from the control recipe and replaced it with 1/2 cup packed light brown sugar. The resulting muffins were slightly darker, with a more craggy rough appearance which made for a slightly crunchy exterior which I quite enjoyed. Not to mention the flavor was really nice and well rounded. I liked the brown sugar muffins a lot!
Whole Wheat
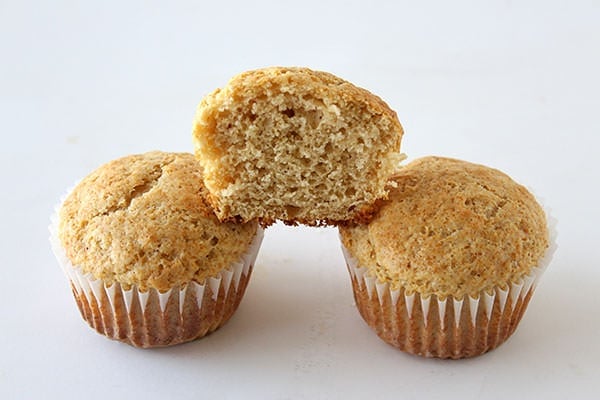
I decided testing out a batch of whole wheat muffins would be interesting. Since muffins are often eaten for breakfast, I wanted to see if it was possible to make them a little bit lighter and “skinner.” So I removed all the 2 cups of all-purpose flour and substituted in 2 cups of King Arthur White Whole Wheat Flour. I used white whole wheat flour because it has the same nutritional value as regular whole wheat with a more subtle wheat flavor, perfect for muffins in theory. These muffins were definitely darker, I was actually surprised by how dark they were considering I used white whole wheat flour.
This batch had a lovely tall domed top with a firm, slightly crumbly texture and slightly nutty flavor. Overall the result was good, though if I were to make muffins with white whole wheat flour again I’d probably add a touch more liquid since wheat flour absorbs more moisture. These muffins were lacking just a bit of moisture.
Buttermilk
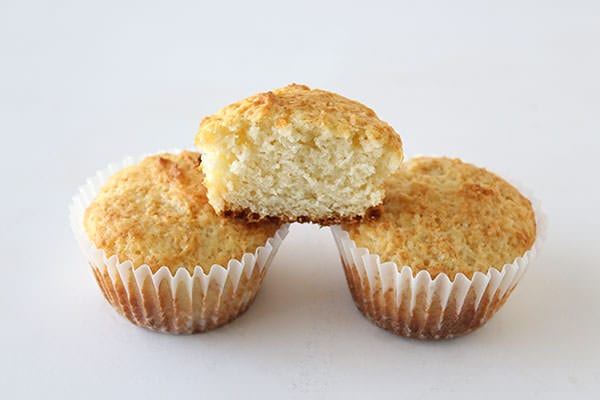
The control recipe calls for 1 cup of whole milk, so I was curious to see how switching that out for 1 cup of buttermilk would impact the muffins. The buttermilk muffins had a finer crumb texture, meaning they weren’t as loose and filled with holes. However, they were SUPER moist and flavorful. I absolutely loved this batch and don’t think I’ll make muffins without buttermilk again, which surprised me. I didn’t think I’d be such a huge proponent of buttermilk because it means grabbing an extra ingredient at the store, but it’s so worth it!
Learn more about the science of baking with buttermilk here.
Applesauce
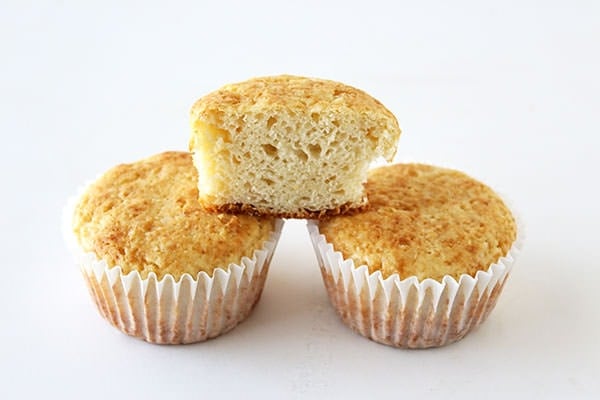
For the last 2 experiments I wanted to play with the fat in the control recipe, the 1/4 cup vegetable oil. First I wanted to see if I could again make the muffins a little lighter by substituting the oil with 1/4 cup plain (unsweetened) applesauce. I really thought this would work wonderfully, but was sadly surprised by how tough and strangely chewy these muffins were. Since there is a relatively small amount of oil in muffins, I think I’ll stick with normal fat. Using applesauce, at least in this way, was not worth the nutritional payoff at all. Muffins should not be chewy!
Melted Butter
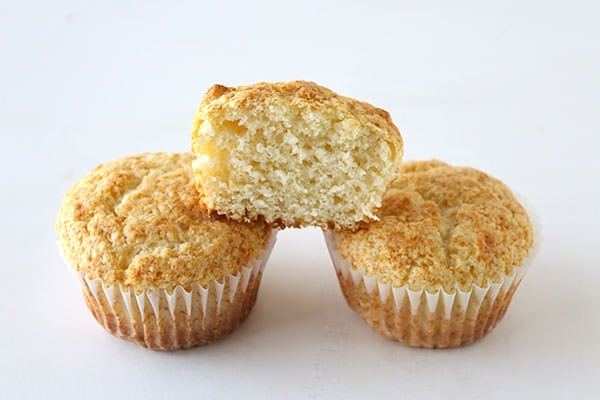
After the sad applesauce batch, I wanted to see if using butter instead of oil would possibly improve the control recipe. I melted 4 tablespoons of unsalted butter to replace the oil, proceeding with the recipe normally. The melted butter muffins were beautifully moist and had wonderful flavor. It was a win!
Side-by-Side Comparison:
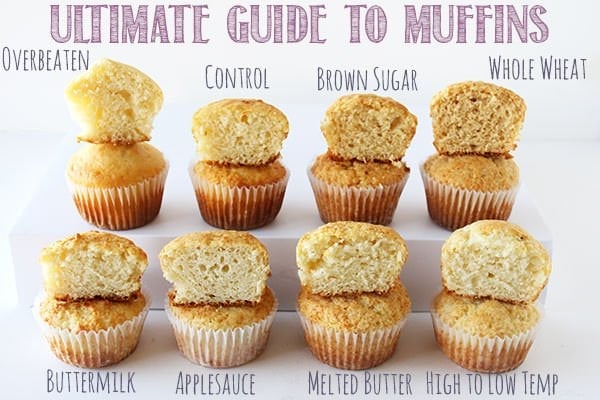
So which was the best?
The buttermilk muffins were my favorite, though overall all the muffins were pretty bland since there were no mix-ins! I also really liked the effect of the high to low temperature method, and will absolutely be using that for muffins and cupcakes in the future. Stay tuned for this Friday, I’ll be sharing my Ultimate Muffin Recipe based on the results of my experimenting! Which would be your favorite? How do you bake your muffins?
More Ultimate Guides:
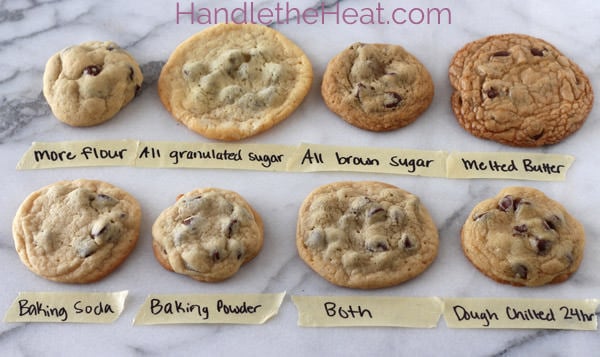 Ultimate Guide to Chocolate Chip Cookies
*This post contains affiliate links.


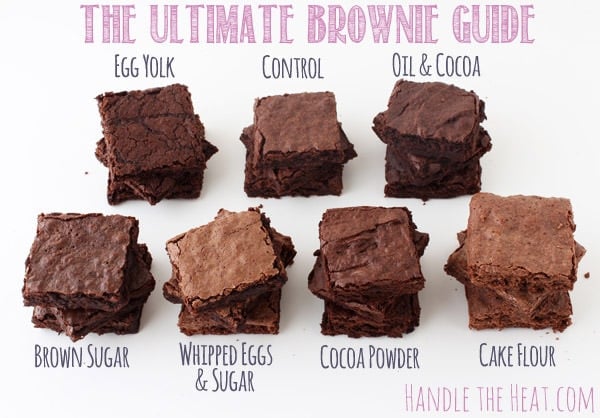 Ultimate Brownie Guide
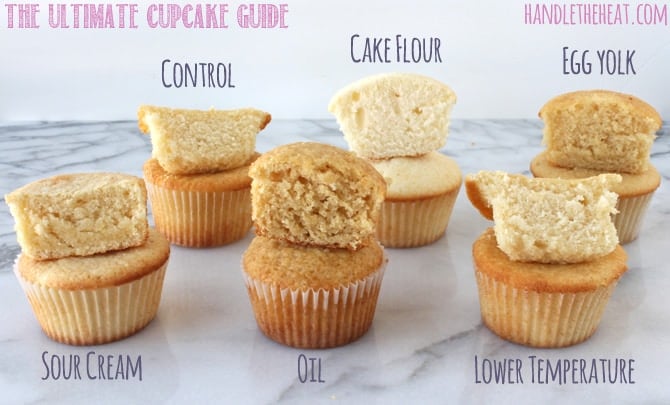 Ultimate Cupcake Guide






Listen up everyone, “low-fat” is no good! Everyone is overlooking the major difference between healthy fats and unhealthy fats. Saturated and unsaturated fats help you lose weight, it’s trans fats and carbs that make you gain weight! Examples of good fats are egg yolks, real butter, milk fat, unrefined oils (extra virgin), lard, nuts, olives, avocados and fish. Examples of bad fats are Crisco, canola oil, “vegetable” and frying oil, cooking spray, margarine, and oleo. Also keep in mind that animal products are very sensitive to how the animal was raised and what it was fed. Ensure that your animals are not treated with or fed any antibiotics or hormones, that they are organic, free range, and grass fed with dairy. Having sick animals (anything from the grocery store) means unhealthy milk, butter or eggs. People used to cook with lard and there were no pesticides or margarine, and they were FAR healthier and lived much longer. Since the invention of hydrogenated oils we’ve become scared of fat and because of it we are all suffering. I encourage everyone to look into these subjects because I care deeply. Thanks for the wonderful muffin guide, I’d like to see muffins baked with brown sugar and buttermilk using the high to low heat method! Thanks for reading.
Love this! Thank you
I’m a little late to the party, but I love what you’re doing here! Im always making up my own recipes and modifications, but I also lack in baking chemistry knowledge! So this is very helpful.
Hi!
Thank you for this guide, it has been so helpful! Question for you though — I made a batch of muffins recently using a very similar base (2c flour, 1c milk, 1Tbs baking powder, etc.). However, about two days later my muffins turned terribly bitter! Do you have any reason why this might’ve happened, and/or any troubleshooting tips? Thank you! 🙂
My daughter made a batch of muffin so I am unsure of what ahe did wrong. But the top of the muffins are completely holey, like honeycomb looking.
I read somewhere that allowing the muffin dough to rest for a bit before scooping and baking also helps. What is your experience with this?
Hello. Would you happen to know reasons for some cupcake/muffin liner problems?
First of all, peeling of the liner? I let my cupcakes/muffins sit for 5min after baking in the tin before removing and sometimes they peel.
Secondly, bottom of the cupcake/muffin is hollow. Baking started about 1/2 centimetre up from the bottom of the tin. The bottom 1/4 of the cupcake/muffin is typically raw looking (not as fluffy as the top).
Lastly, the last problem I sometimes see is that the liner sucks in at the sides.
I am not sure why this sometimes does or doesn’t happy. Any help would be great.
Thank you 🙂
Thanks for sharing this information–being able to see each muffin variation helps a lot! I absolutely agree about the buttermilk. It improves texture and has the added benefit of less fat than whole milk. (It does change the acid/base balance of the batter, though–something to keep in mind when adding other ingredients.)
A word on using applesauce: its high water content means that evaporation will cause baked goods to rise before the interior is set enough to either support the rise or hold the moisture. The result is a dry, chewy texture. To make it work, reduce the temperature by 25°F and the baking time by 5-10 minutes.
Hi Tessa, love your site btw! I recently made double chocolate muffins which called for plain yogurt and milk as well as oil. They were a bit dry though. What can I do to ensure they’re moist next time around since the chocolate flavor was really nice and rich?
Measure your flour by weight! It’s really easy to accidentally add too much when measuring with measuring cups.
This guide is awesome. Thank you so much for all of the info. Now I know why the one time I made muffins with applesauce were disgusting. I have a question about substitutions between yogurt and sour cream. How would that work like for instance you have one as opposed to the other.
Yogurt and sour cream swap out really well. The sour cream will be a tad richer and tangier in flavor, but that’s a super easy sub 🙂
Hi Tessa!
I want to know if it’s possible to sub the all-purpose flour for self-rising and if so would I still use the same quantity flour minus the baking powder of course.
My son-in-law and one grandson are allergic to dairy. I substitute almond milk. The flavor is fine but sometimes the texture is not as soft. Any suggestions?