


Tessa's Recipe Rundown
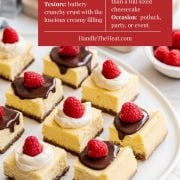
Taste: Sweet and tangy with a hint of both lemon and vanilla for perfect balance.
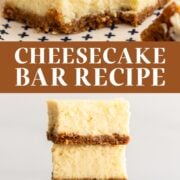
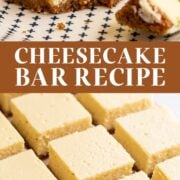
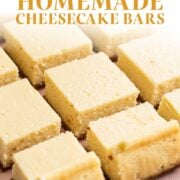
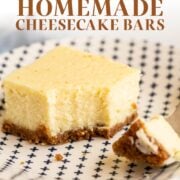
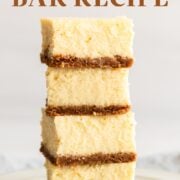
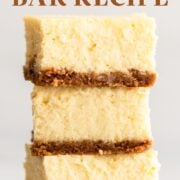
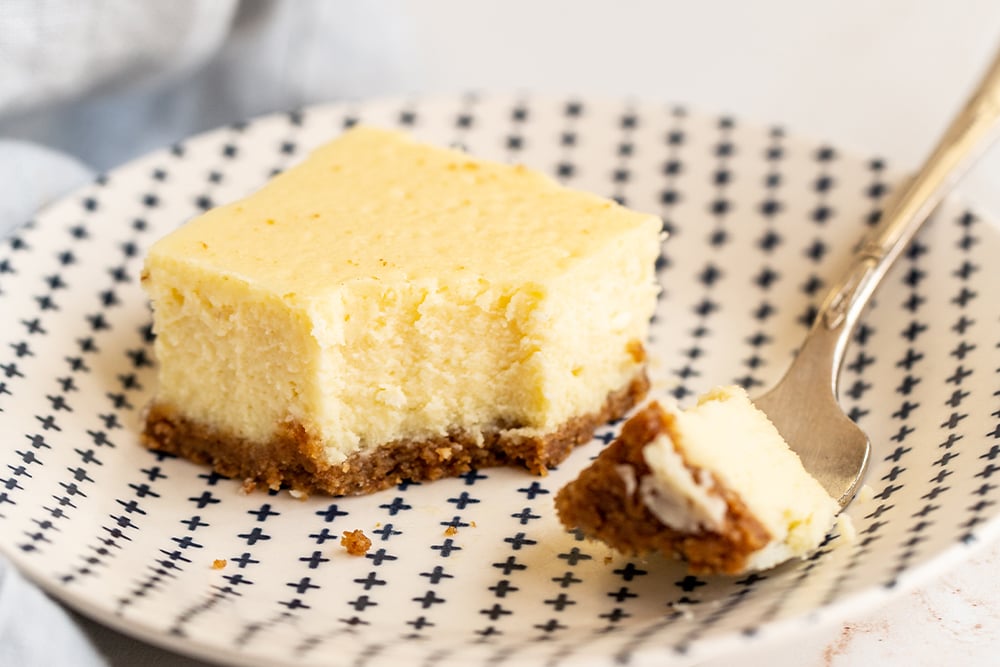
Texture: Creamy and rich without being heavy with a crisp buttery crust.
Ease: Much easier than a full-sized cheesecake, no springform pan or water bath required!
Why You’ll Love This Recipe: You get all the flavor of classic cheesecake in neat, portable squares that bake fast and slice beautifully.
This post may contain affiliate links. Read our disclosure policy.
As much as I love a tall, dramatic cheesecake, they can be finicky. Water baths, cracked tops, guessing if the center is done… it can be a headache.
These cheesecake bars remove all of that stress.
Because they’re thinner, they bake more evenly and cool faster. There’s less risk of dramatic cracking, no need for a water bath, and slicing is simple thanks to the parchment overhang.
In my testing, this format is significantly more forgiving for home bakers, especially if this is your first time making cheesecake.
If you’ve ever been intimidated by cheesecake, this is where to start.
Reader Love
I LOVE this recipe!!!!! This is my go to recipe when I want cheesecake but not the hassle of the water bath and stuff. I also love how well they cut into bars which is perfect for entertaining. I added some mini Chocolate Chips a few times and that was a huge hit! Great recipe! Thank you for sharing!!!!
–
Reader Love
These are PERFECT!!! No toppings needed! DELICIOUS! Everyone raved about them! Follow the instructions and you’ll have a perfectly perfect tray of cheesecake bars to die for!!!
–

Sprinkle of Science
Ingredient Notes
A few key ingredients truly determine whether your cheesecake bars turn out creamy or disappointing:
- Graham Crackers: Finely ground crumbs are essential. Large crumbs create a crumbly mess when sliced. A food processor works best for even texture. Feel free to use store-bought crumbs.
- Cream Cheese: Use full-fat blocks, not tubs. Make sure it’s completely softened to room temperature. Quality matters here! I prefer Philadelphia.
- Sour Cream: Adds tang and softens the texture slightly. Without it, the bars are noticeably denser. You can use full-fat plain yogurt instead if needed.
- Eggs: Essential for structure. I have yet to find a suitable substitute. Make sure they’re at room temperature so they blend into the batter smoothly.
- Lemon Juice: You won’t taste lemon directly — it enhances the cheesecake’s tang and balances sweetness.
How to Make Cheesecake Bars (Step-by-Step)
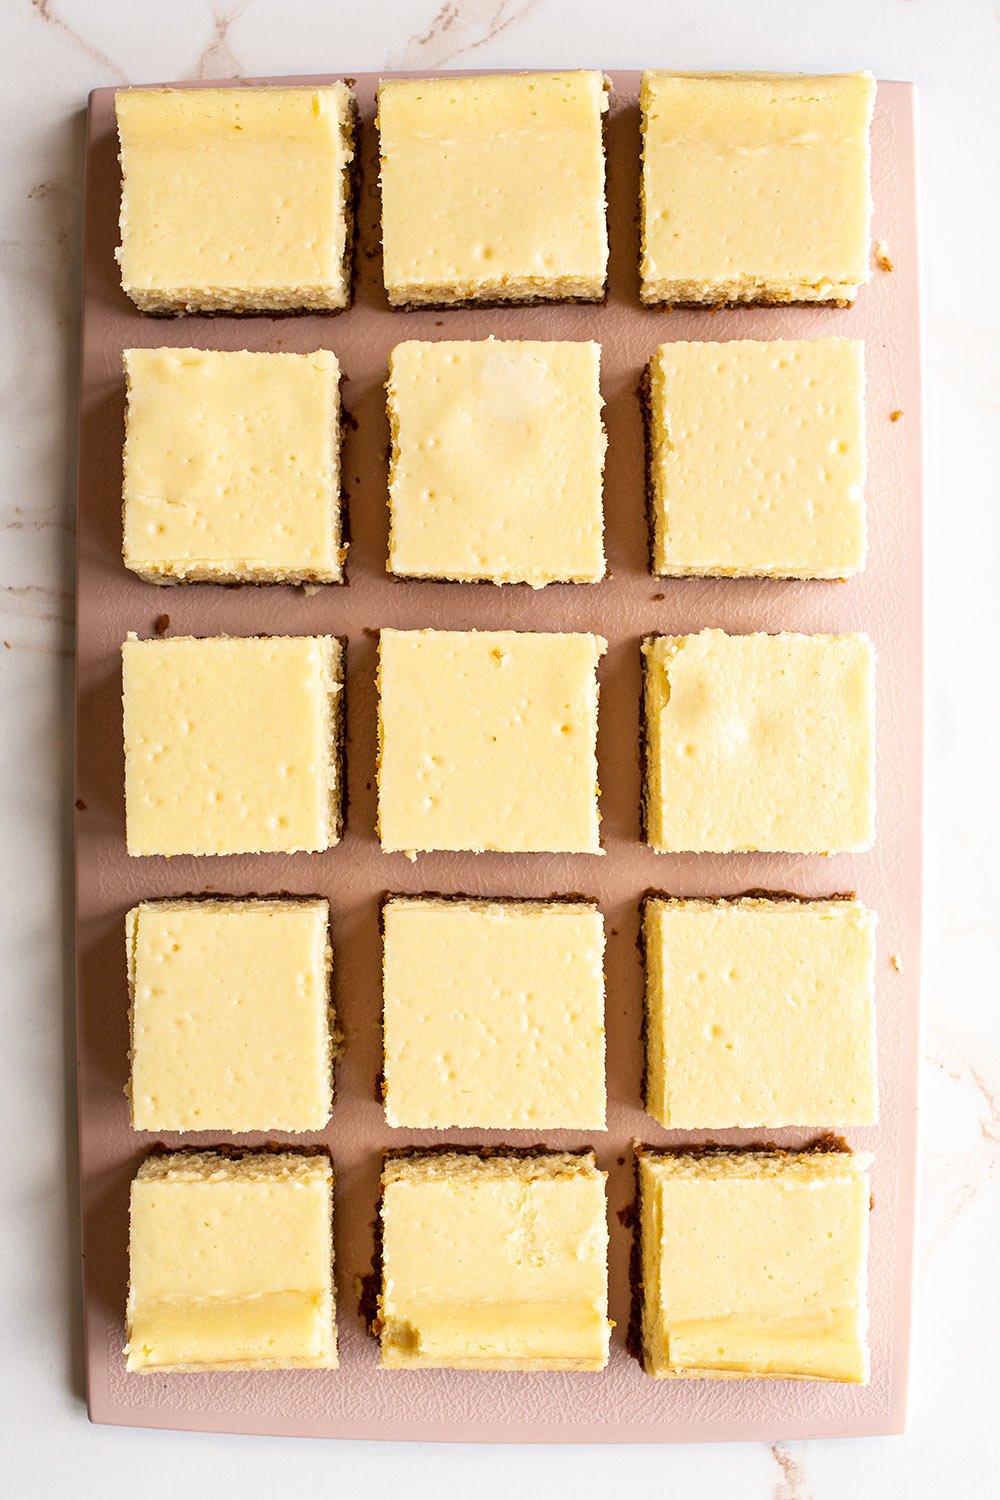
- Prepare the pan. Preheat the oven to 350°F and line a 9 by 13-inch pan with parchment paper, leaving an overhang on two sides for easy removal and slicing. I prefer metal pans because they create straight edges and bake more evenly.
- Make the crust. Pulse the graham crackers in a food processor until very fine (or use premade crumbs). Add melted butter and pulse until moistened. The mixture should hold together when squeezed between your fingers. Press firmly into the pan with the bottom of a measuring cup so it won’t crumble later. Bake for 10 minutes. Reduce oven to 325°F.
- Beat the cream cheese and sugar. Using an electric mixer fitted with the paddle attachment, beat the softened cream cheese and sugar for at least 1 full minute, or until completely smooth. Scrape down the bowl.
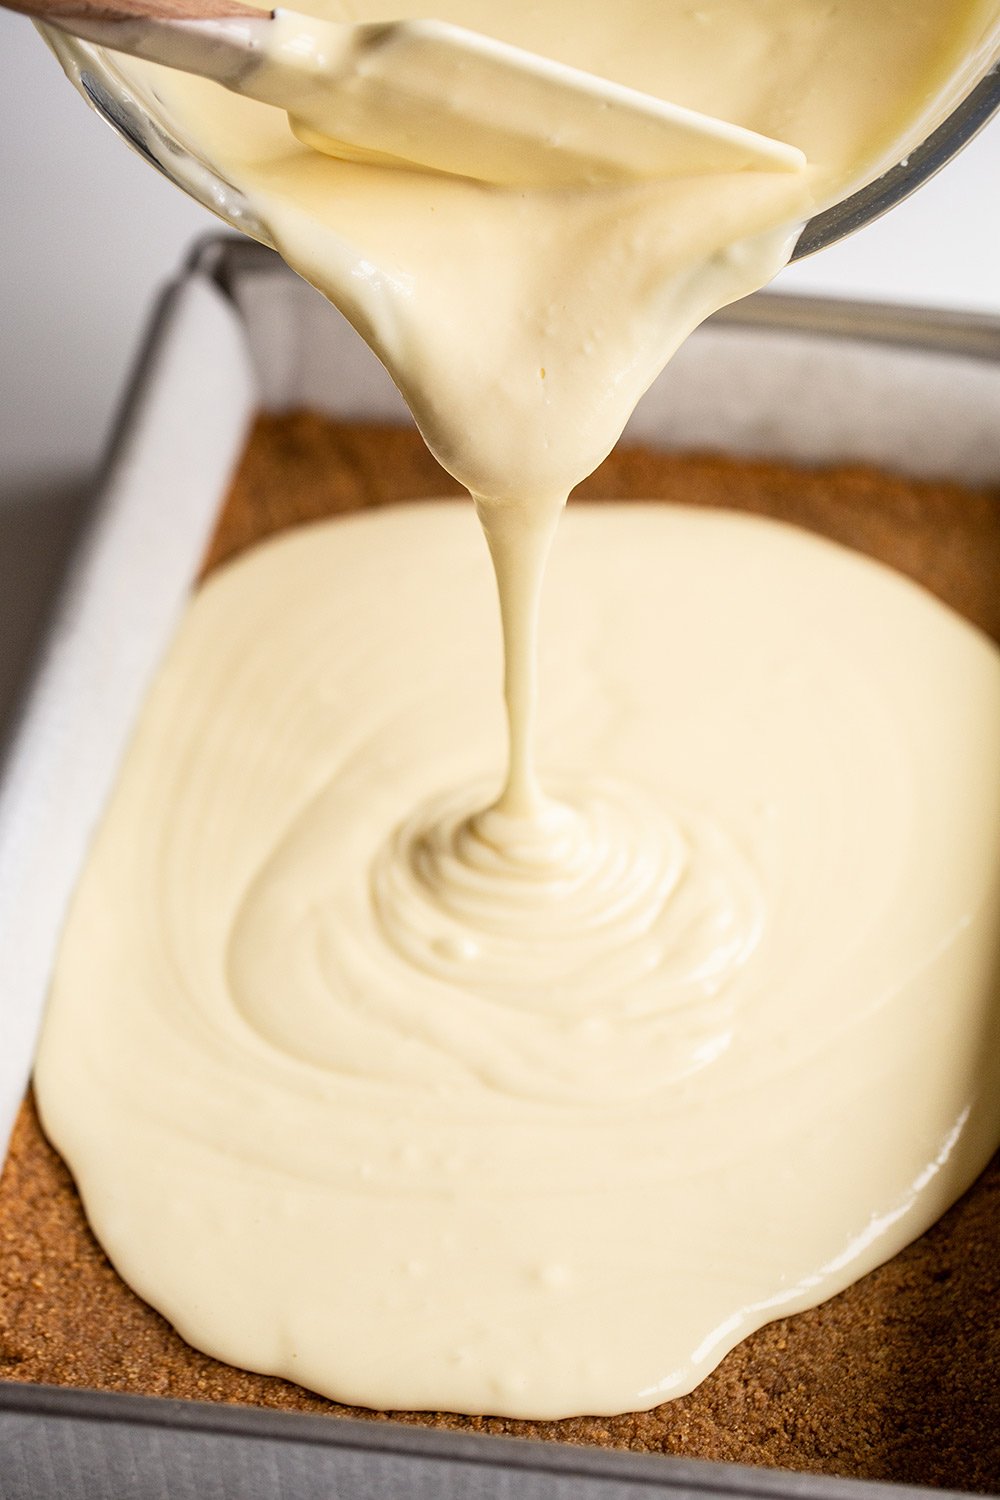
- Add remaining ingredients. Mix in the sour cream, then the eggs one at a time. Don’t overmix once the eggs are added. Stir in the vanilla, lemon juice, and salt. The batter should be thick and smooth.
- Bake. Pour into the cooled crust then tap the whole pan on the counter to release air bubbles. Bake for 40-45 minutes, until:
- Edges are slightly puffed and look dry
- The center jiggles and wobbles just slightly when shaken
- The internal temperature reaches about 150-155°F
- Cool & chill. Cool completely at room temperature, then cover and refrigerate for at least 6 hours or overnight. This is essential to well-set bars with balanced flavor. Use a large sharp knife and wipe it off in between cutting for clean slices.
Storage & Make Ahead
These bars can be made and refrigerated 2 days ahead of time or frozen in an airtight container for up to 2 months. Defrost overnight in the fridge or on the counter for a couple of hours before serving.
FAQs
You can use the same amount (2 cups or 270g crumbs) of digestive biscuits, vanilla wafers, Biscoff cookies, or any crunchy cookie you’d like! Please note that Biscoff cookies are a little richer than graham crackers (which are drier), so add just enough butter until it holds together when pressed.
No. Because they are thinner than a traditional cheesecake, they bake more evenly and are less prone to cracking.
Watery cheesecake bars are usually caused by underbaking, using reduced-fat or generic cream cheese, or not chilling long enough. I always bake with Philadelphia brand cream cheese. The center should reach about 150–155°F before cooling.
Yes, halve all ingredients and bake in an 8×8-inch pan. Reduce bake time slightly and look for the same visual doneness cues.
Email This Recipe
Enter your email, and we’ll send it to your inbox.
Ingredients
For the crust:
- 18 (270 grams) graham crackers
- 12 tablespoons (170 grams) unsalted butter, melted and slightly cooled
For the filling:
- 32 ounces cream cheese, completely softened to room temperature
- 2 cups (400 grams) granulated sugar
- 1/2 cup (114 grams) sour cream, at room temperature
- 6 large eggs, at room temperature
- 4 teaspoons vanilla extract
- 2 teaspoons fresh lemon juice
- 1/2 teaspoon fine sea salt

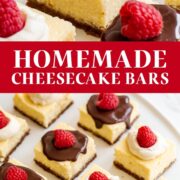
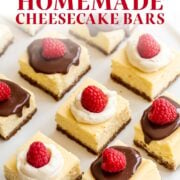
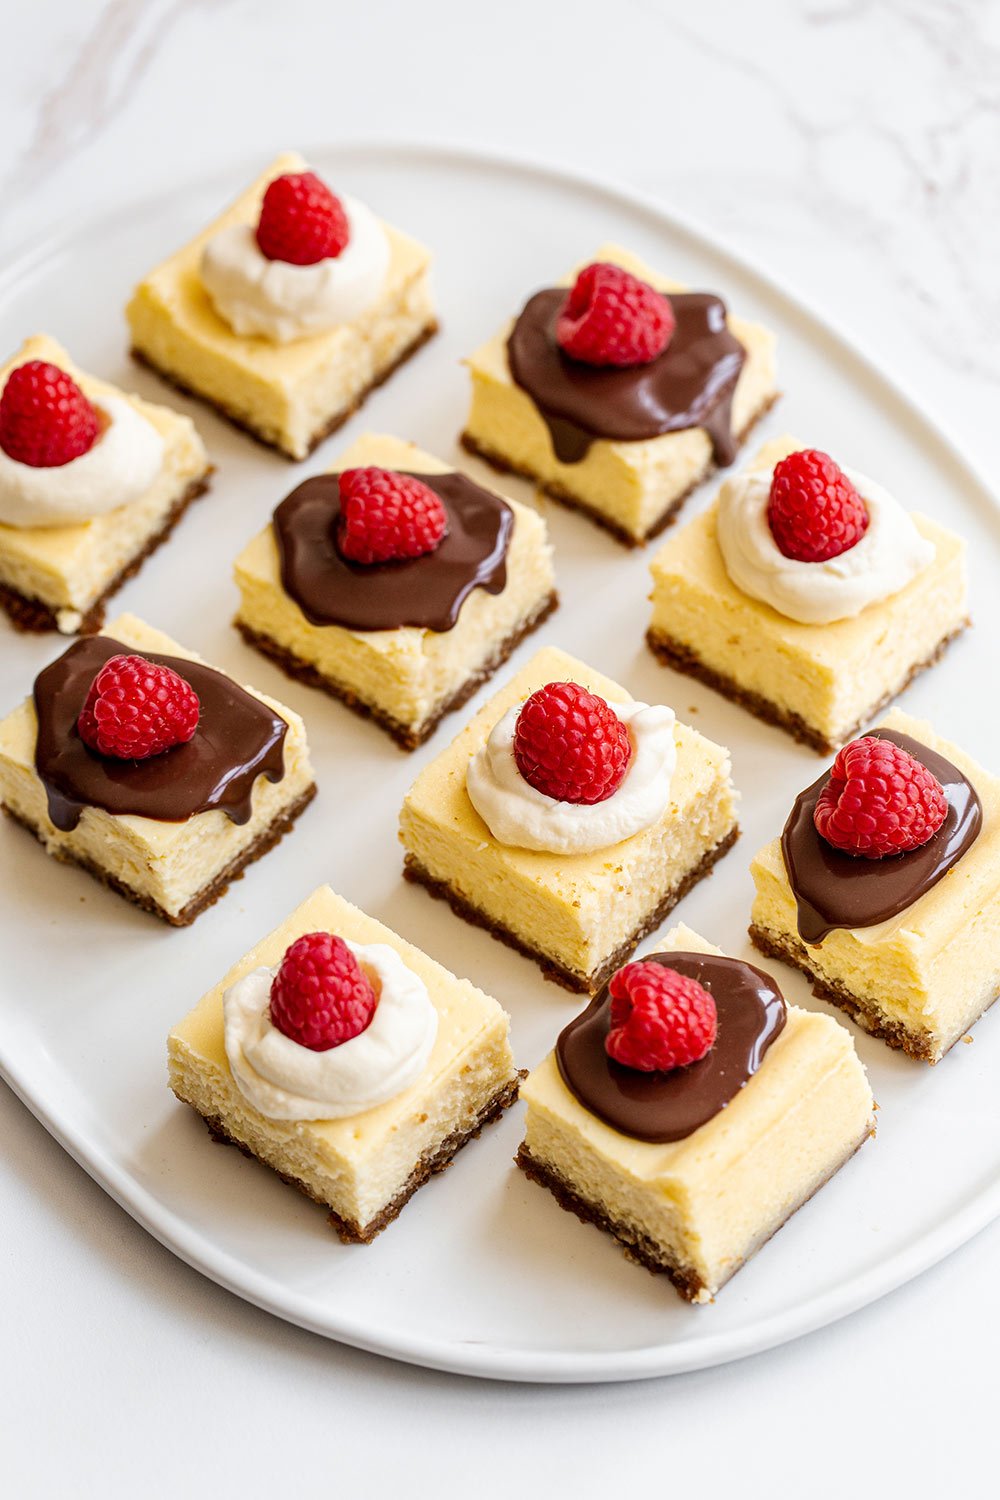
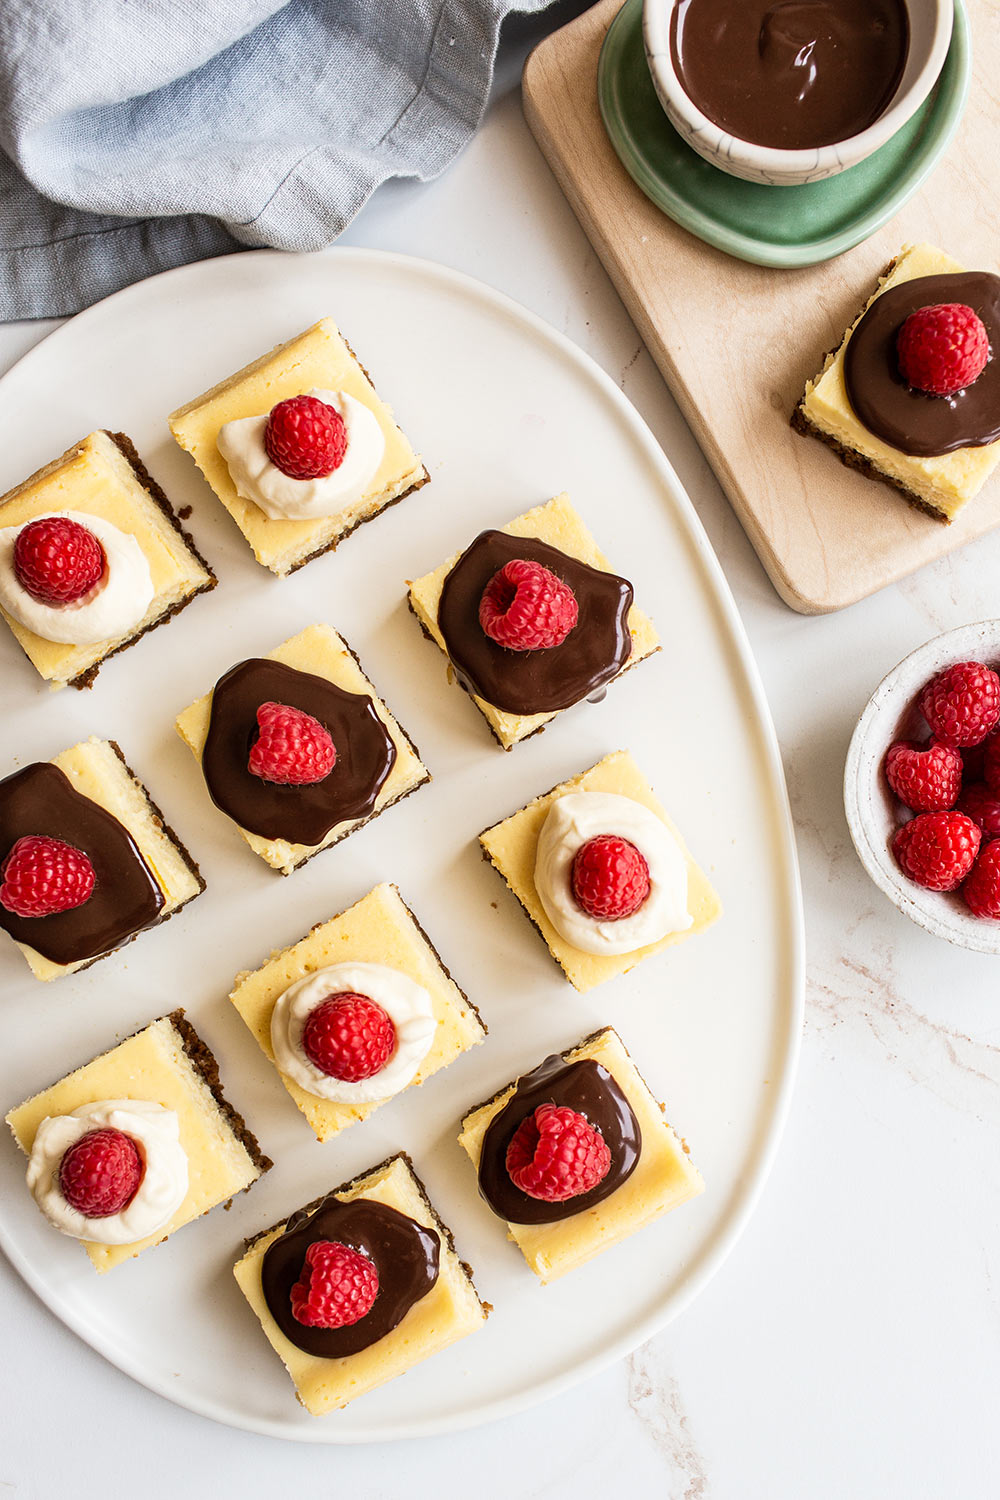
Topping options:
Chocolate ganache (use 1:1 ratio) Salted caramel sauce Butterscotch sauce - Fruit preserves
- Whipped cream
- Fresh fruit
Instructions
Make the crust:
- Preheat the oven to 350°F. Line a 9 by 13-inch baking pan with parchment, leaving an overhang.
- In a food processor, pulse the crackers until finely ground. Add the butter and pulse until moistened. Press the crumb mixture into the bottom of the prepared pan using the bottom of a measuring cup or glass. Bake until fragrant, about 10 minutes (longer if using a glass dish). Place on a cooling rack to cool completely. Reduce oven temperature to 325°F.
Make the filling:
- In a large bowl, use an electric mixer to beat the cream cheese and sugar until smooth and creamy, scraping down the sides of the bowl often, for at least 1 minute. Add the sour cream, then the eggs one at a time, blending after each addition until combined. Scrape down the sides of the bowl. Add in vanilla, lemon juice, and salt, and blend until just combined. Don’t over-mix.
- Spread batter evenly over cooled crust. Tap against the counter a few times to release air bubbles. Bake at 325°F until just set in center and edges are puffed and slightly cracked, about 40 to 45 minutes (longer if using a glass dish). Transfer to rack to let cool completely.
- Cover with foil and refrigerate for at least 6 hours or overnight before slicing into squares.
- The cheesecake can be made and refrigerated 2 days ahead of time or frozen in an airtight container for up to 2 months.
More Cheesecake Bar Recipes You’ll Love:
- Nutella Cheesecake Bars
- Creme Brulee Cheesecake Bars
- Chocolate Stout Cheesecake Bars
- Raspberry Lemonade Cheesecake Bars
- Chocolate Chip Cookie Cheesecake Bars
Photos by Ashley McLaughlin.


Can I only use a cup of sugar in the creamcheese
Reducing the sugar by half will drastically affect the taste and texture of the cheesecake bars, I wouldn’t recommend it.
Can I use low-fat creamcheese
We recommend using full-fat, high quality cream cheese for the best results. Using reduced fat cream cheese may result in cheesecake bars that are watery, rubbery, or otherwise lackluster.
Delicious! I will make again and again! I topped with cherry pie filling and whipped topping, which is the family favorite. Everyone loved it.
these are so yummy and feed a crowd. We don’t even make a crest anymore. We just lay graham cracker planks in the bottom of our pan and nobody seems to even notice. Makes it go a lot faster.
These are PERFECT!!! No toppings needed! DELICIOUS! Everyone raved about them! Follow the instructions and you’ll have a perfectly perfect tray of cheesecake bars to die for!!!
These cheesecake bars are the quickest way to make a fancy looking dessert with zero fuss. This recipe doesn’t require a water bath and you don’t have to worry about sinking! Pictured is my plain square, but my favorite thing about this recipe besides the ease is how versatile it is with different toppings, even from the same pan!
That’s one perfect-looking cheesecake bar, Kate! So glad you enjoy this recipe 🙂
I made this for a birthday celebration. It was a hit and the best cheesecake I’ve ever made. So thankful I came across this recipe!
This recipe is always a hit!
Wondering… could I cut the recipe in half and use a 8×8 pan?
Hi Rashida! Yes, feel free to cut the recipe in half and bake in an 8×8-inch pan. You may need to bake for a little less time, but we haven’t tested this ourselves, so I can’t say exactly how long to bake. Let us know how it goes 🙂
My new go to cheesecake recipe!!! Easy to make and a real crowd pleaser. My father in law said they were the best he has ever had.
I was going to make Limoncello cheesecake square and saw this recipe. It is somewhat similar but 1/2 the size (16 oz cream cheese). It already has fresh lemon juice like your but an additional 1/2 cup of Limoncello. That sounds like it would make a big difference if added to your recipe. How much would you suggest? Or how can I incorporate Limoncello into your recipe.
Hi Gena! We haven’t tried that, but yes, adding 1/2 a cup of liquid would make a big change to the texture of any recipe. Feel free to experiment as you like, but to play it safe, I would recommend adding only a tablespoon or two at most, and add a limoncello-spiked lemon curd to the tops of the bars before serving. Let us know how it goes!
BEST MY SON IN LAW HAS EVER TASTED HE SAID
Do you know if these can be made without the crust? I’m looking for a cheesecake layer for between two chocolate cakes, but wondering if this would stick to the pan?
Hi Sarah! We haven’t tried that, so I can’t say for sure – but you could certainly give it a try. Line your pan with foil or parchment paper, leaving an overhang so you can easily lift the cheesecake out. If you make sure your pan is fully lined with parchment/foil, you shouldn’t have to worry about it sticking to the pan. Run a knife or thin spatula around the edges of the cheesecake, where it meets the foil/parchment, once it’s out of the oven, to prevent cracks and make for easier removal from the foil/parchment. Alternatively, a no-bake cheesecake filling might be easier for filling a cake – it just depends what flavor you’d want. Check out Tessa’s No Bake Chocolate Peanut Butter Cheesecake or No Bake Strawberry Cheesecake Bars or No Bake Mini Key Lime Cheesecakes. There are lots more no-bake cheesecake recipes on our site, too! I hope this helps! Happy baking 🙂