


Tessa's Recipe Rundown
TASTE: Chocolate + ginger is slightly unexpected, but positively addictive.
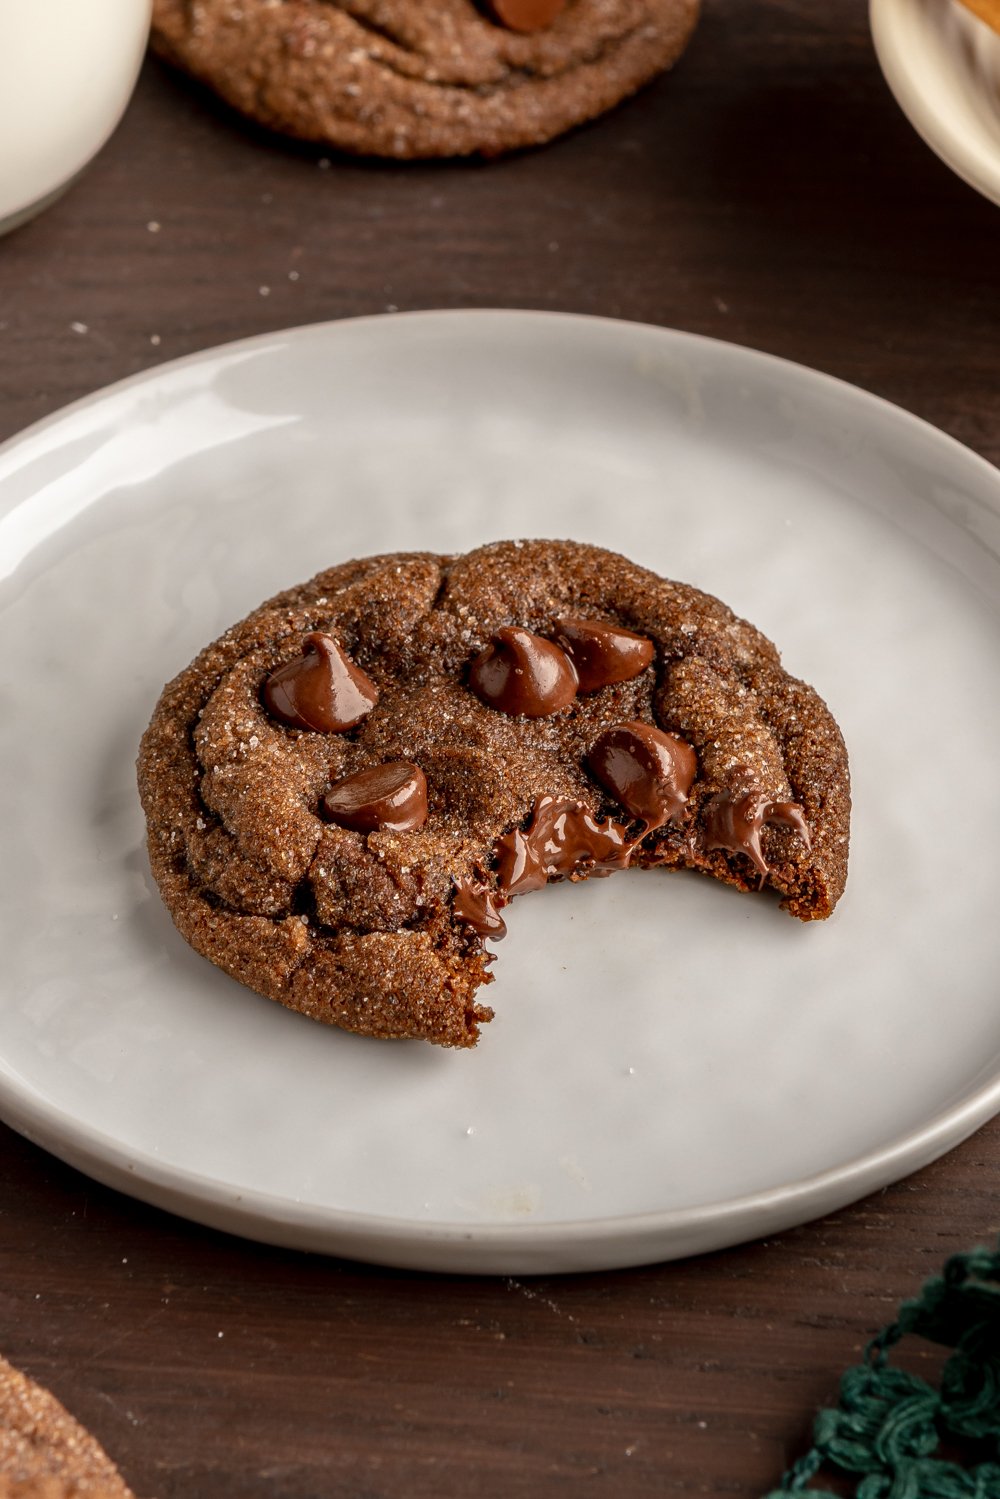
TEXTURE: The molasses adds SO MUCH CHEWINESS to these cookies, and helps keep them soft for days!
EASE: 30-minute recipe, no chill time required. No chopping chocolate.
WHY YOU’LL LOVE THIS RECIPE: You won’t be able to get enough of these!
This post may contain affiliate links. Read our disclosure policy.


This is one of those holiday cookie recipes you will not want to share. You’ll want to keep these cookies all to yourself.
If you do plan to take them to a Christmas party, potluck, or cookie exchange, do yourself a favor and hide a few beforehand. I’m telling you, they will not last long otherwise!
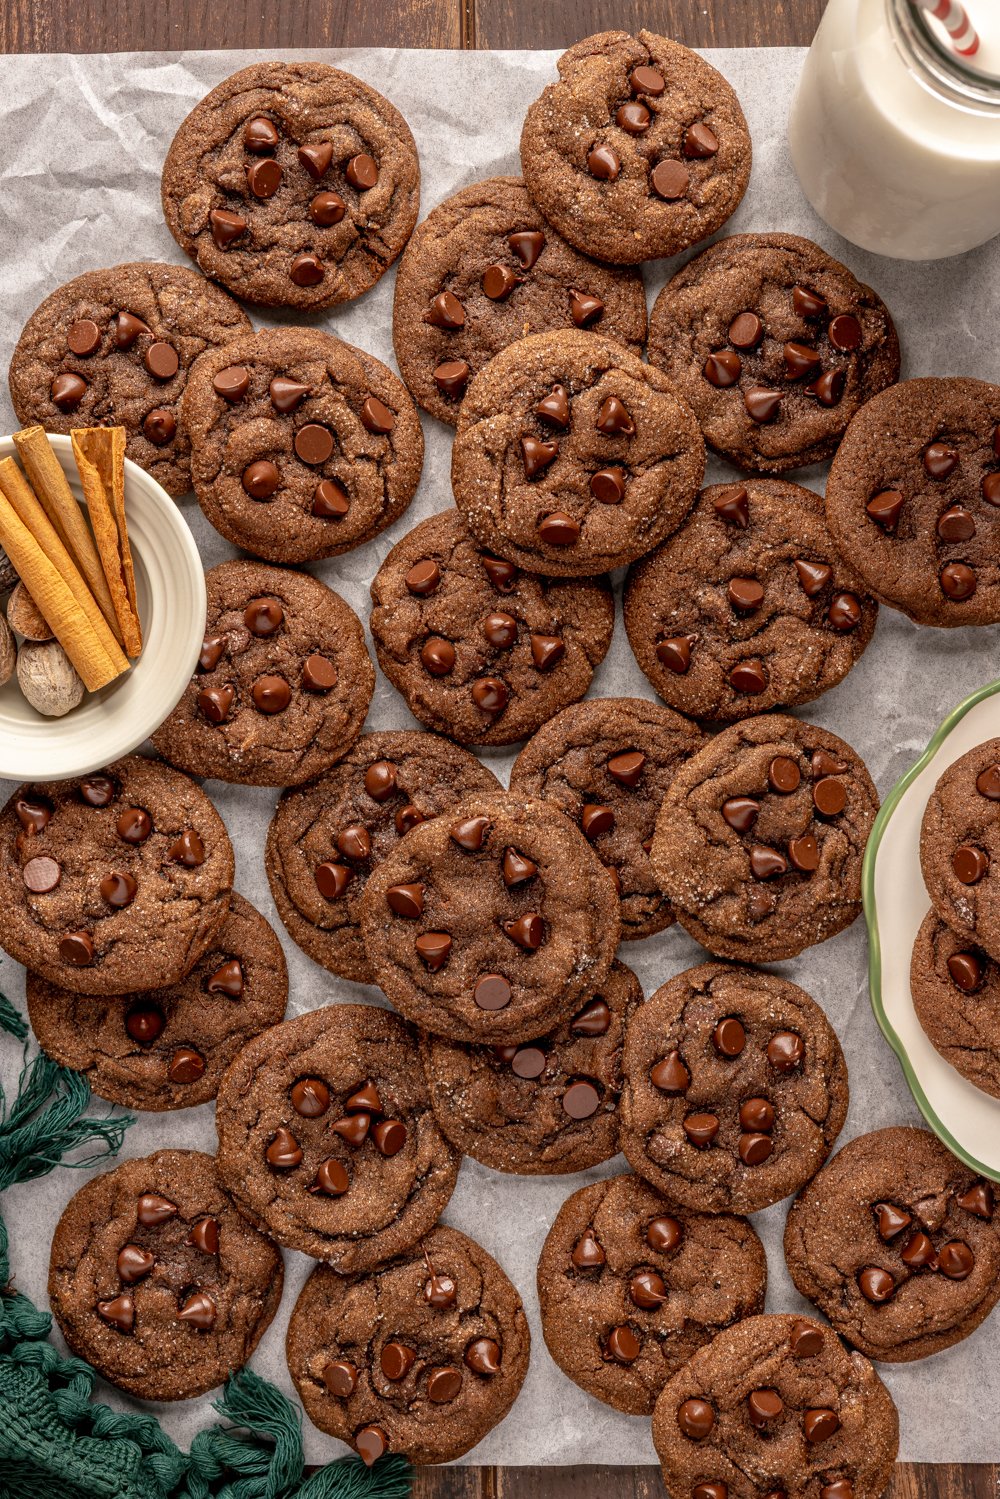
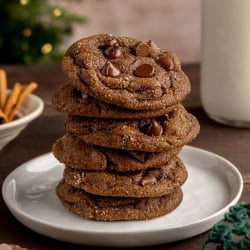
They’re incredibly chewy yet soft and thick and perfectly balanced in flavor.
I originally posted this recipe in 2009 (!) after having tweaked it from Martha Stewart’s Cookies. Since then, quite a few readers have had issues with their cookies spreading too thin.
I decided to take the recipe back to the drawing board to ensure nice thick cookies, and to also see if I could eliminate the original required chilling time. And the need to chop any chocolate!
Well, I’m happy to say I succeeded on both fronts! I pulled some ratios from my Chewy Gingersnap cookie recipe found in my own cookie cookbook, added eggs, and increased the flour and cocoa powder to thicken the cookies and strengthen the chocolate flavor.
The result is a delightfully beautiful, festive, flavorful, and addictive cookie I hope you’ll love.

Sprinkle of Science
Ingredient Notes for Success
Do I Really Need Fresh Ginger and Ground Ginger?
Yes! The combination of both is what makes this recipe truly something special. It’s worth the extra few minutes of prep, promise.
TESSA’S TIP: I always keep big knobs of ginger in a resealable bag in the freezer. Not only does this extend its life so you have ginger whenever you need it for cooking and baking, but frozen ginger is super easy to peel and grate. Just note, the frozen grated ginger will appear more voluminous than it is immediately after grating. Press it a bit in the measuring spoon to get a more accurate measurement.
What Can I Use Instead of Molasses?
I highly recommend sticking with molasses as it’s essential to the taste and texture of this recipe. If you cannot get molasses where you live, you can try substituting golden syrup, though the results will not be the same.
The Spices
Check your spices to ensure they’re not expired. They should release a strong aroma when the container is opened. Older spices will be less flavorful so you may need to add more.
The Chocolate Chips
I recommend sticking with semisweet chocolate, or even something darker (like bittersweet). For extra pretty cookies, dot the cookie dough scoops with extra chocolate chips after rolling in sugar.

Do I Need to Chill the Cookie Dough?
Nope! I re-engineered this recipe to eliminate the chilling step. However, if you would like to chill, which will intensify the flavors and thicken the cookie’s texture, feel free.
You can either cover and chill the entire mass of dough for up to 3 days and let it come to room temperature before scooping (this may take several hours).
Or, you can wrap the pre-scooped dough in plastic and chill for up to 2 days. Roll in sugar just before baking to avoid the dough absorbing the sugar as it sits.
The Best Baking Pans for Cookies
I always use unlined aluminum half-sheet pans lined with pre-cut parchment for baking cookies. Never use dark-colored pans to bake cookies, as they tend to overly brown or even burn the bottoms of the cookies. Learn more about the best baking pans here.
Storage Notes:
Place in an airtight container at room temperature and store for up to 5 days (if they last that long!).
To freeze, scoop dough balls and place on a rimmed baking sheet. Press chocolate chips on top, then freeze until solid. Transfer to an airtight container and store in the freezer for up to 1 month.
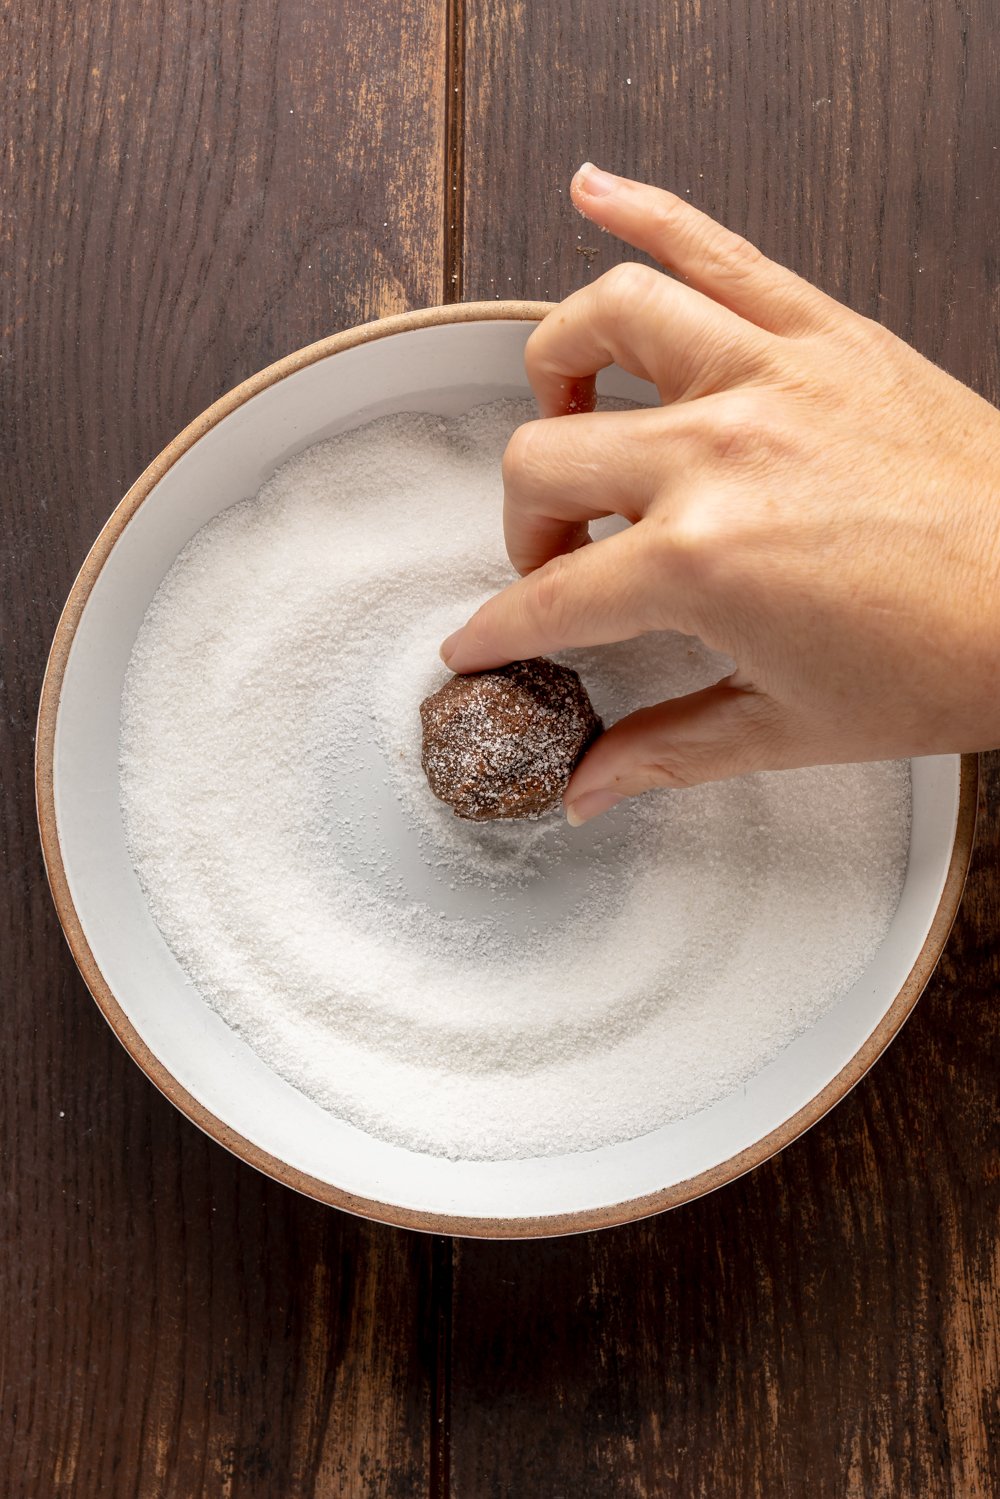
When ready to bake, smooth each dough ball between your palms, then roll in granulated sugar. Bake at 325°F for 12-13 minutes.
More Christmas Cookie Recipes:
Email This Recipe
Enter your email, and we’ll send it to your inbox.
Ingredients
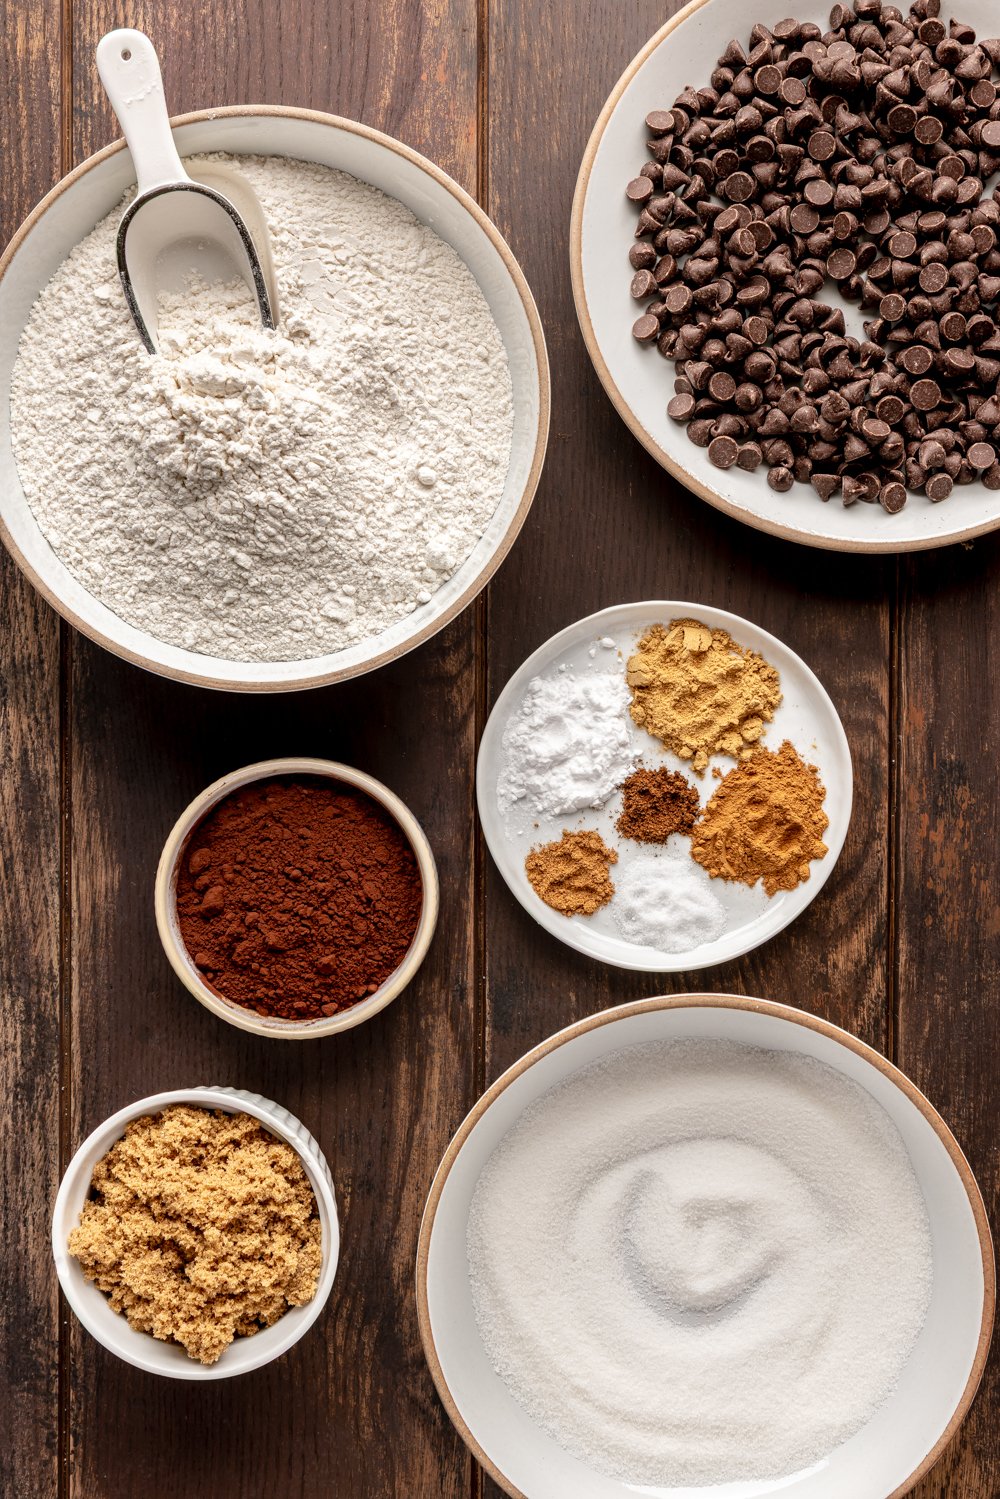
- 2 ¼ cups (286 grams) all-purpose flour
- ¼ cup (22 grams) Dutch-process cocoa powder
- 1 teaspoon baking soda
- 1 1/4 teaspoons ground ginger
- 1 teaspoon ground cinnamon
- 1/2 teaspoon fine sea salt
- 1/4 teaspoon ground cloves
- 1/4 teaspoon ground nutmeg
- 1 stick (113 grams) unsalted butter, at cool room temperature (67°F — warm butter will make your cookies spread)
- 1 tablespoon peeled and grated fresh ginger
- 1/2 cup (100 grams) lightly packed dark brown sugar
- 1/2 cup (170 grams) unsulphured molasses
- 1 large egg, at room temperature
- 1 teaspoon vanilla extract
- 8 ounces (227 grams) semisweet chocolate chips, divided


For rolling:
- 1/2 cup (100 grams) granulated sugar
Instructions
- Preheat the oven to 325°F. Line baking sheets with parchment paper.
- In a medium bowl, whisk together the flour, cocoa powder, baking soda, ginger, cinnamon, salt, cloves, and nutmeg until combined.
- In the bowl of an electric mixer fitted with the paddle attachment, beat the butter and fresh ginger on medium speed until fragrant, about 2 minutes. Add the brown sugar and beat until light and fluffy, about 2 to 3 minutes, scraping down the sides and bottom of the bowl as needed.
- Add the molasses and beat until combined. Then add the egg and vanilla, beating until very well combined. Scrape down the sides and bottom of the bowl again.
- On low speed, gradually add the flour mixture. Stir in three-quarters of the chocolate chips (170 grams) until just combined. Dough will be sticky.
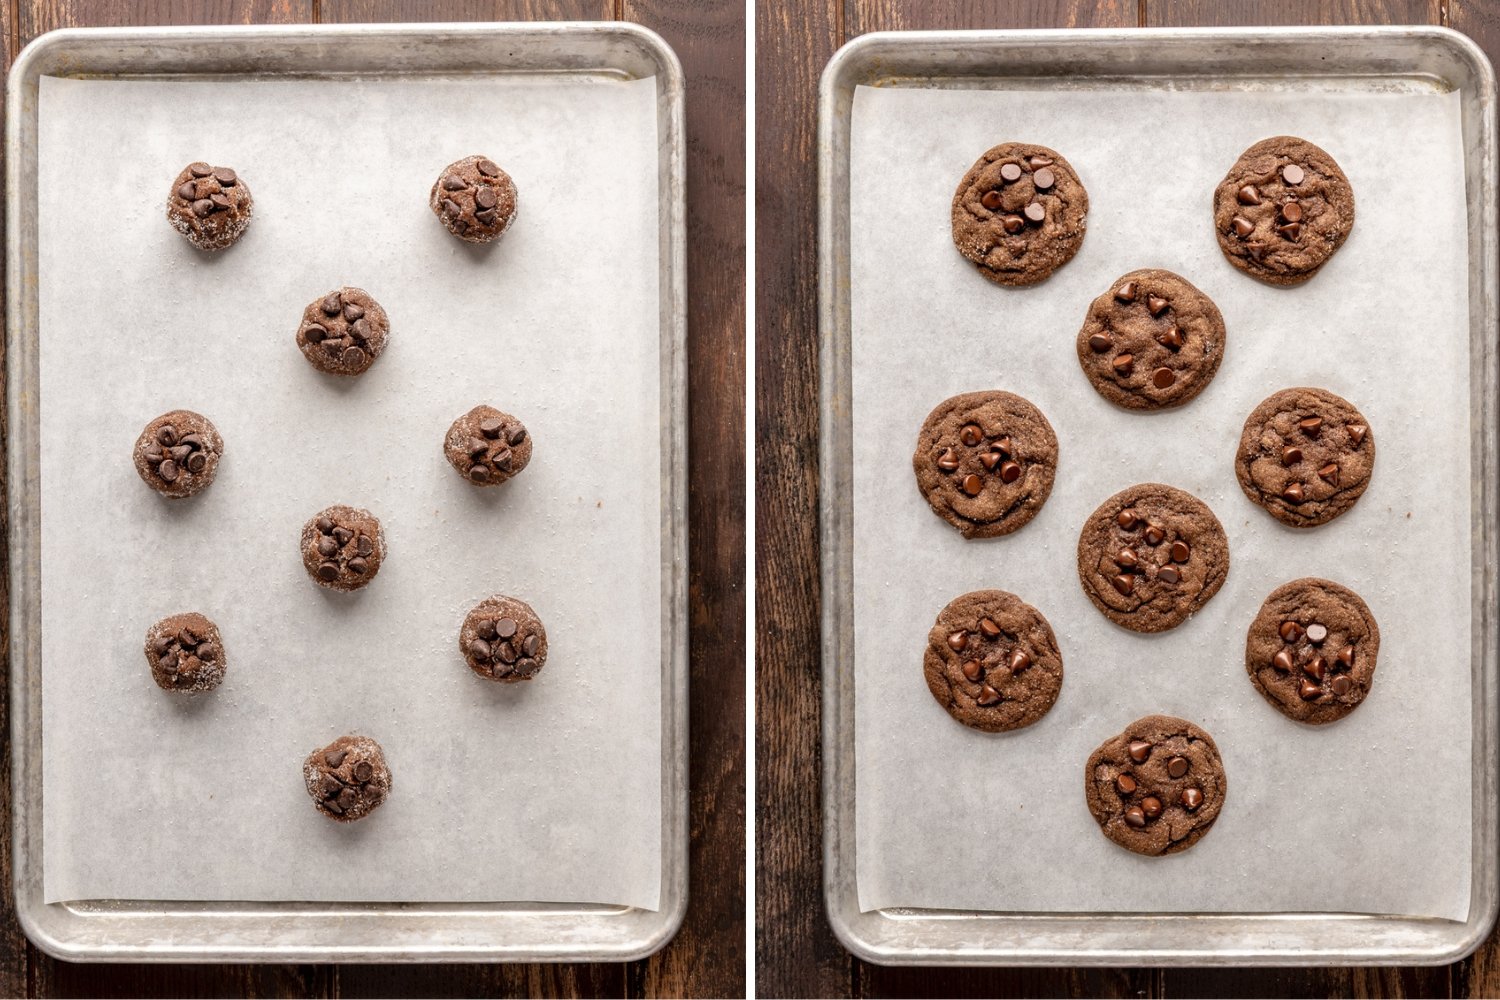
- Using a medium spring-loaded scoop, divide the dough into 1 1/2-tablespoon-sized scoops.
- Place sugar in a shallow dish and roll each scoop in the sugar. Gently form each scoop into circular balls before placing on baking sheets. Dot each scoop with a few chocolate chips.
- Bake for 10 minutes, or until the tops are set.
- Let cool on the baking sheets for 5 minutes before removing to cooling racks to cool completely. Cookies can be stored in an airtight container at room temperature for up to 3 days.
Notes
This post was originally published in 2009 and has been updated with recipe improvements and new photos. Photos by Jess Gaertner.


Hi Tessa
Thanks for all your great recipes.
You quite convinced me to try this one, but unfortunately I dont have molasses, nor do I know where to find it here in France. What do you think could be a good enough substitute ? Honey ? Maple syrup ? Thx in avance. Keep up the good work
So good! They turned out perfectly. I rolled them in cinnamon sugar instead of regular sugar because I just love cinnamon. Thanks for the recipe!
Those gingerbread cookies look to die for! They will definitely be on my list for next year!
Please see my comment to Kim below 🙂
You are exactly right Kim, warm pans plus dough that hasn’t been adequately chilled will lead to increased spreading and thin cookies. If you have this problem often, try shaping the dough into tall mounds then instead of balls then chill to get a thicker cookie.
I’ve got BAGS of pumpkin Hershey kisses. Would that work?
I don’t see why not!
Yep!
I’ve never had chocolate and gingerbread together–I know, crazy, right? 🙂 Well, I almost died over the looks of these cookies so it’s probably happening tomorrow! Pinned!
Those gooey centers are calling my name!!!
Dying over the chocolate oozing out! I feel like i wanna face plant in there. I was never curious to try the gingerbread and chocolate combo, but girl you had me convinced! These look A-MAZING!
I love pairing seasonal flavors with chocolate and gingerbread is at the top of my list right now! So so good! These cookies look fantastic! Packed with chocolate! Pinning!
Tessa, your pictures are always amazing! And you’ve totally convinced me to try these. They look perfect!