


Tessa’s Recipe Rundown
Taste: Sweet, nutty, and delicious.
Texture: Perfectly crunchy with a slight candy chew.
Ease: Just 3 ingredients and 15 minutes prep and cook time.
Pros: Such a fun DIY!
Cons: None.
Would I make this again? Absolutely, I like to make a double batch and sprinkle them on everything I bake for weeks.
This post may contain affiliate links. Read our disclosure policy.


I adore toffee.
Like butterscotch, toffee seems to be caramel’s forgotten cousin. To me, it deserves as much adoration as caramel. Maybe more!
As much as I love a buttery toffee recipe on its own, my favorite is when it’s added to something already delicious.
It’s the perfect addition to a chocolate chip cookie, blondie, brownie or even banana bread. Or sprinkle the toffee on cupcakes, French toast, or ice cream. Plus, you likely already have the simple ingredients on hand to make it from scratch.
Bonus: this toffee recipe is also a great treat for giving as delicious holiday gifts during the holidays or Christmas!

Sprinkle of Science
What is Toffee?
Toffee is a crunchy, sweet, buttery, cooked sugar candy, similar to caramel and butterscotch. These three classic dessert components seem very similar – so how do they differ?
- Caramel: Based on white granulated sugar. Typically, butter, milk/cream, and vanilla are added for flavor and to produce a thick, creamy caramel. Caramel can be heated less for a sauce consistency, longer for a chewy soft caramel, or even longer for a crunchier hard caramel. I have a recipe for caramel sauce here.
- Butterscotch: Similar process to caramel, but made with brown sugar instead of granulated white sugar. Cream and vanilla are also often added. I have a recipe for butterscotch sauce here.
- Toffee: Just like butterscotch, toffee starts with brown sugar – but the difference between butterscotch and toffee is the temperature it’s heated to. Toffee is cooked longer to a much higher temperature – all the way to the ‘hard crack’ stage. This means that toffee will harden completely as it cools, and can then be cut or broken into pieces, to be added to other delicious desserts, or simply enjoyed by itself!
What are Toffee Bits?
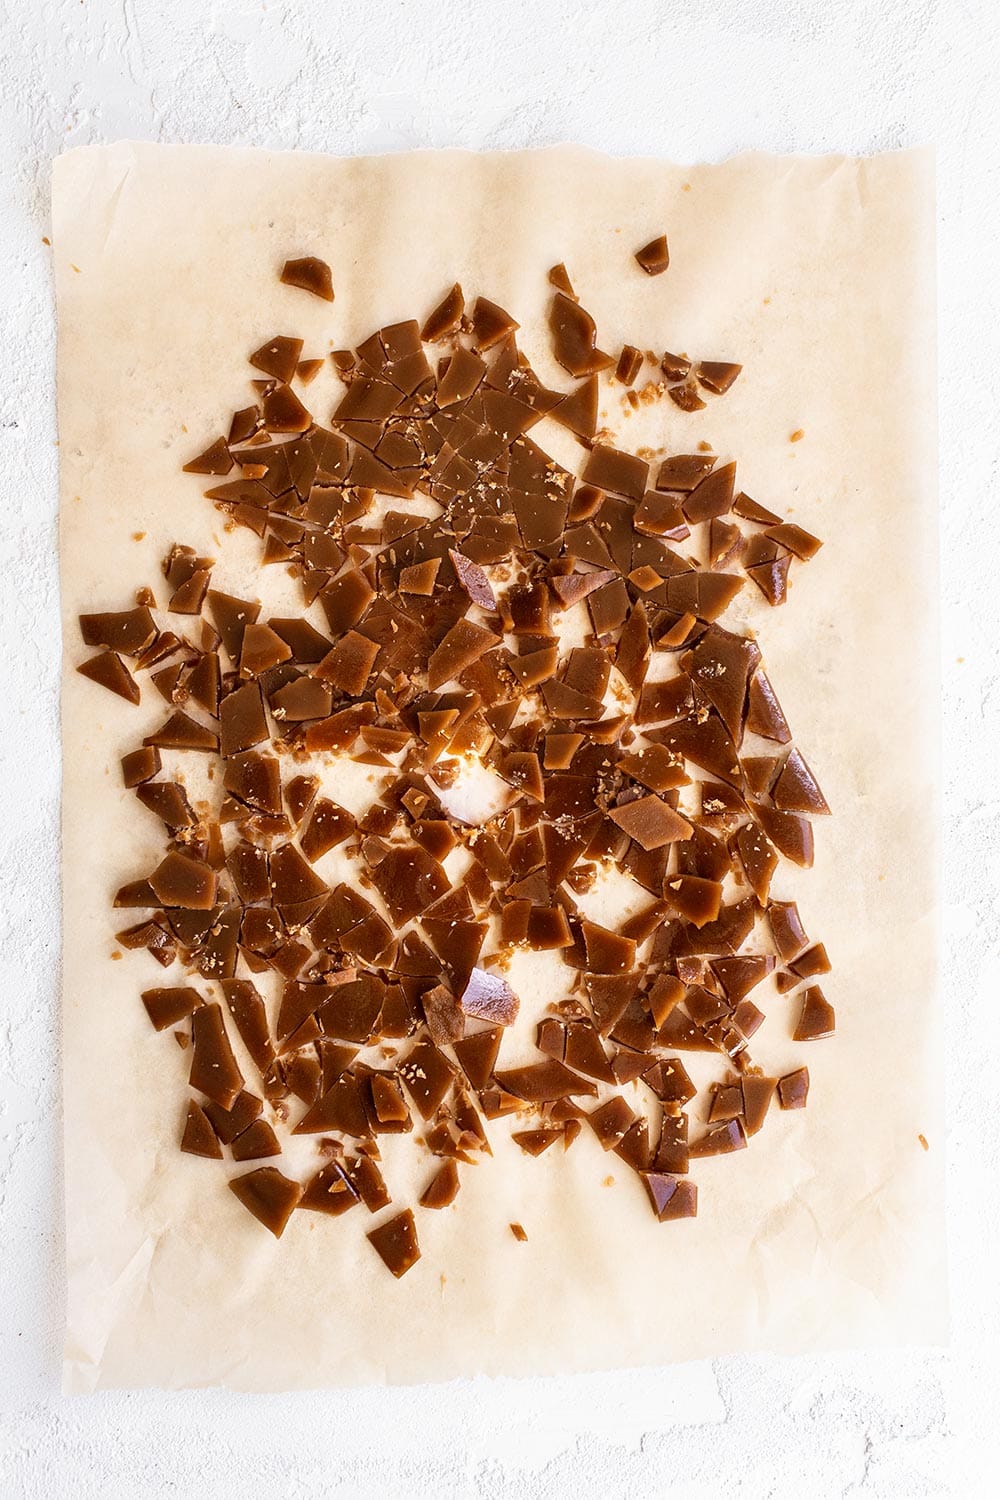
Just what it sounds like! Bits of crunchy sweet toffee, chopped or broken into pieces about the same size as chocolate chips.
Can’t You Just Buy These?
Yes, you can buy them in the baking aisle under the Heath brand. However, they can be difficult to find in some regions and stores. Additionally, many stores only carry chocolate-covered toffee bits, which you may not always want.
But trust me, this homemade toffee recipe is even tastier than the Heath version! Plus, no preservatives or artificial flavors in these homemade sweet morsels!
Only 3 Ingredients:
- Butter (more on this below)
- Light brown sugar
- Salt
Why American-Style Butter?
European-style butter (such as Kerrygold) contains a higher butterfat percentage, compared to American-style butter. This lack of water content in European-style butter results in the toffee separating, and/or refusing to set fully. Any butter over 80% butterfat will cause these issues unless you add in 1-2 tablespoons of water to the melting butter.
Step by Step:
- Line a baking sheet with parchment paper.
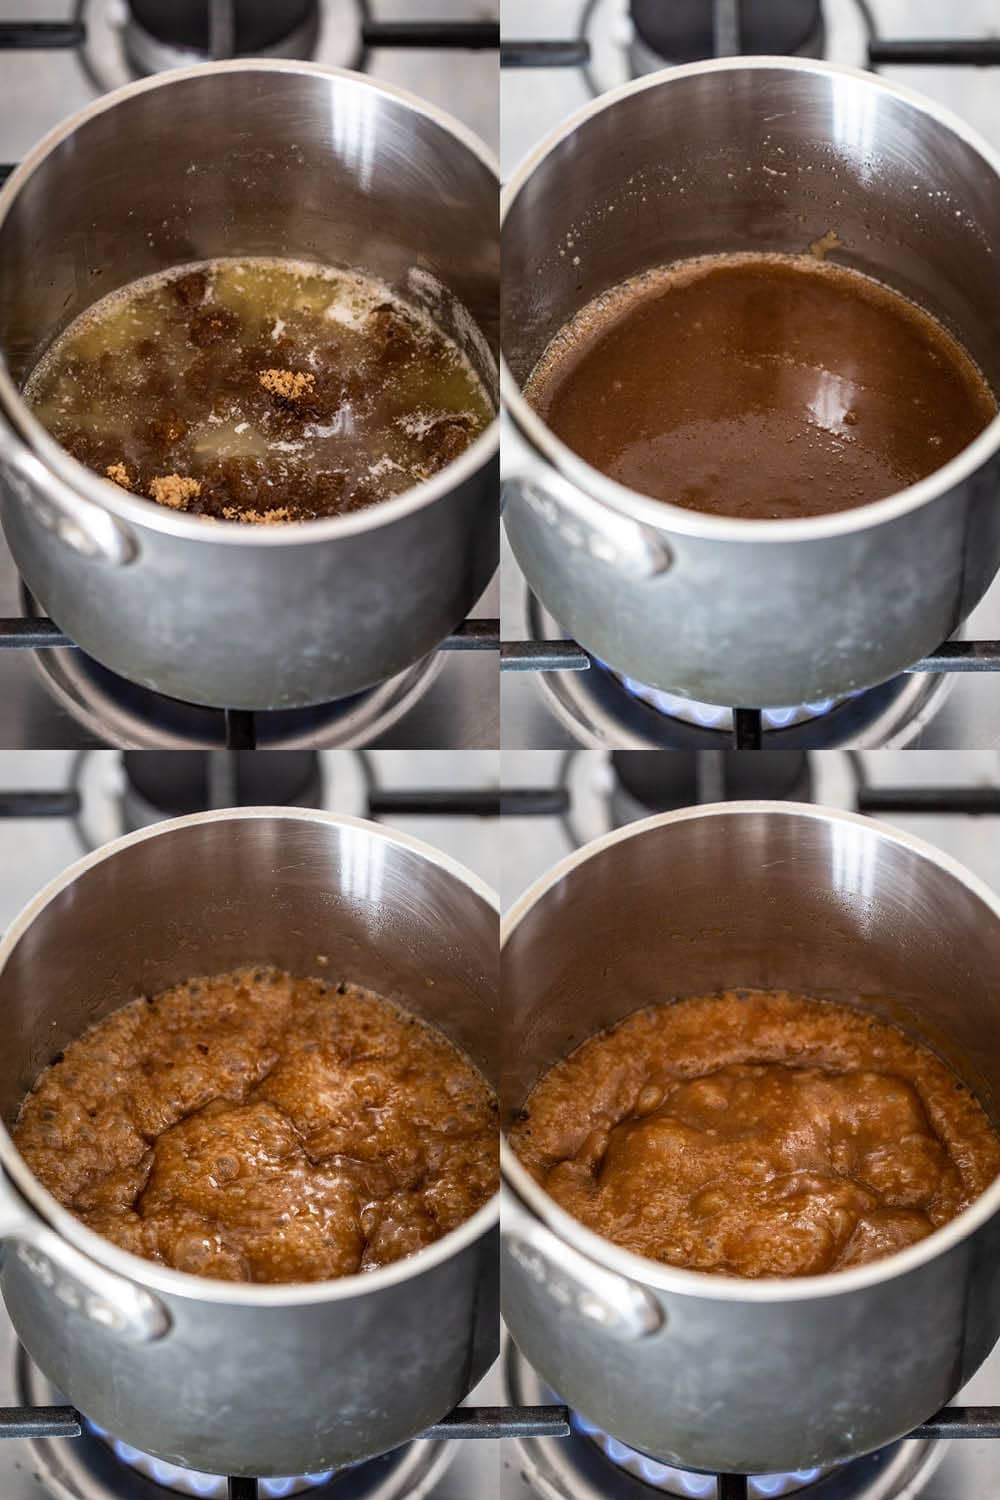
- In a small saucepan, melt the butter. Then, add the sugar and salt and whisk until combined. Continue whisking for about 10 minutes, or until the mixture looks like melted peanut butter (reference the picture below). Make sure it doesn’t stick to the bottom of the pan or pot.
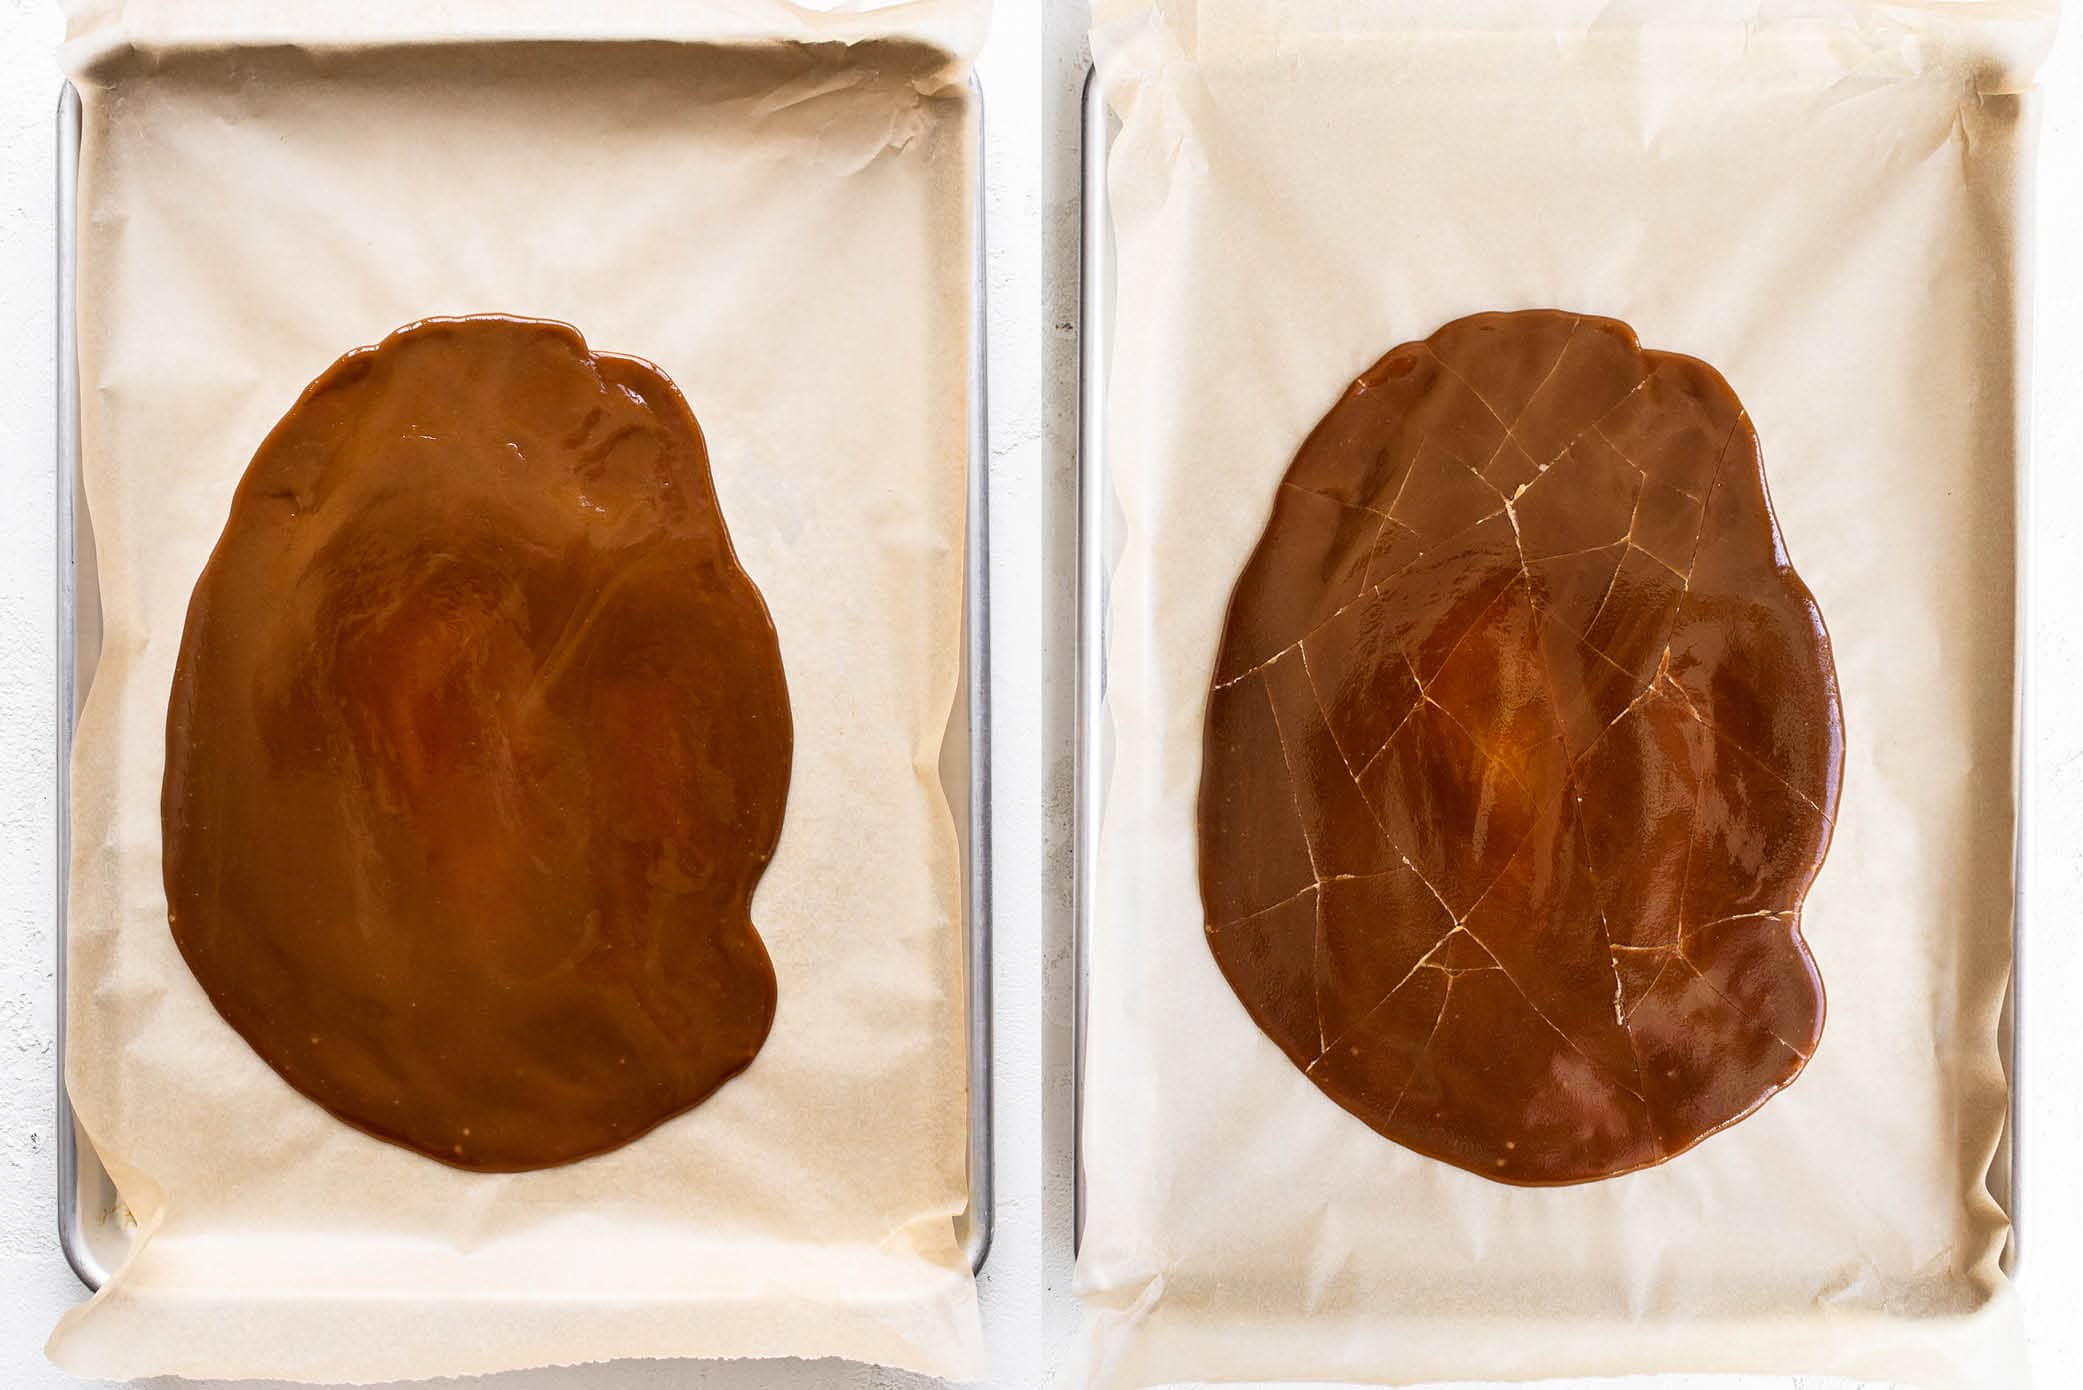
- Pour the toffee onto the prepared baking sheet pan, allowing it to spread. Let cool for about 20 minutes.
- Use a mallet, rolling pin, or heavy object to crack the batch of toffee into small bits.
- You can now use your toffee pieces to amp up the flavor in cookies, brownies, streusel toppings, sprinkled on top of vanilla ice cream, you name it!
Tips for Making Toffee:
- Before you start the recipe, line a rimmed cookie sheet with parchment paper or a silicone mat. It’s best to do this first because you will need to pour the finished toffee onto the prepared pan immediately.
- Use a heavy-bottomed saucepan. Pans with thinner bottoms will heat too aggressively and may cause separation or scorching.
- Never step away from the toffee while it’s on the stove. It can burn quickly.
- Do not try to touch or taste the sugar while it’s cooking, as it will be extremely hot.
- Separated toffee can sometimes be saved by removing the saucepan from the heat and whisking vigorously until it comes back together into a smooth mixture. You may need to add a tablespoon of water to re-emulsify.
- A candy thermometer is so helpful in making toffee. This is my favorite candy thermometer.
- Make sure to let the toffee cool completely before you break it into bits and store it.
- If the toffee is flexible instead of hard, it wasn’t cooked long enough. You can break into pieces, return to the stove, and re-melt and cook to 295-305°F.
How to Store Toffee Bits
Once cooled and cut or broken into pieces, store in an airtight container in a cool, dry place for up to 1 month. Alternatively, freeze in an airtight container or zip-top bag for up to 3 months. Allow to thaw at room temperature before enjoying or adding to cookie dough, streusel or other baked goods.
Try Next: Dutch Apple Pie With Caramel Streusel Topping or Homemade Marshmallow Fluff to keep your candy-making skills sharp!

Email This Recipe
Enter your email, and we’ll send it to your inbox.
Ingredients
- 1 stick (113 grams) unsalted American butter*
- 1 cup (200 grams) light brown sugar
- 1 teaspoon fine sea salt

Instructions
- Prepare your pan first: Line a rimmed baking sheet with parchment paper or a silicone baking mat. This will make it easy to pour and cool the toffee later.
- Melt the butter: Place butter in a small, heavy-bottomed saucepan over medium heat and let it melt gently. Heating over high heat may cause the mixture to separate.
- Add sugar and salt: Once the butter is partially melted, stir in the brown sugar and salt, then use a whisk to whisk vigorously for 1 full minute until smooth and evenly combined. The sugar won't be fully dissolved yet—that's normal.
- Cook carefully: Keep the pan over medium heat, stirring constantly, including the edges to scrape up any sugar that sticks. The mixture will bubble, thicken, and look like smooth, melted peanut butter.⚠️ Important: Don't leave the pan unattended or stop stirring, even for a moment. Toffee can burn very quickly if ignored.
- If the mixture separates: If the butter and sugar split at any point (see Notes), remove the pan from heat and whisk vigorously until smooth. Return to medium heat, stirring constantly, to finish cooking.
- Check for doneness:*With a candy thermometer: 295°F-305°F (about 8-10 minutes)*Without a thermometer: Watch and smell closely. The mixture is ready when all three of these happen: the mixture is very smooth and glossy, the color turns a deep golden-brown, and a rich, toasty caramel aroma fills the air.
- Pour and spread: Immediately pour the hot toffee onto the prepared pan and use a spatula to spread evenly. Be careful, it's very hot! Let cool and harden, about 20 minutes.
- Break into pieces and store: Once hardened, crack into small pieces with a mallet, rolling pin, or heavy object, or cut with a sharp serrated knife. Store in an airtight container in a cool, dry place for up to 1 month.
Notes
- Butter: American-style butter gives the best texture and flavor. If using European-style butter ( 82% or more fat), add 1 tablespoon (14 g) of water as it melts to compensate for the lower water content. Cook to 300°F. The resulting toffee may be slightly greasier and is best used immediately.
- Salt: Don’t skip it! Salt helps stabilize the mixture and enhances the flavor overall.
- Pan: Heavy-bottomed pans distribute heat evenly. Avoid thin-bottomed or cheap pans, which can create hot spots and cause separation or burning.
- Heat: Keep medium heat consistent. Avoid abrupt changes or cooking on higher temperatures to speed up.
- Timing: Cooking time depends on your pan and stove. If separation happens within the first few minutes or your toffee cooks much faster than the time listed, your heat is likely too high. Always rely on sensory cues — texture, color, and aroma — rather than the clock alone.
- Toffee not hardening? If your toffee hasn’t set and is bendy, it likely didn’t cook long enough. To fix it, simply return the mixture to the pan over medium heat and cook while following the three sensory cues listed in the recipe — texture, color, and aroma — to know when it’s ready.
Recipes Using Toffee Bits:
Photos by Ashley McLaughlin. Recipe instructions updated in December 2025 for clarity.


I have made your toffee several times. If I take it slow, it turns out almost perfect. The only problem I have is when it cools and hardens, I break it into pieces and store it. I want the toffee to melt when I bite into it. Instead, it tends to stick to my teeth. Any suggestions? I have a thermometer and cook it to right above 300 degrees. I use Kroger butter and Kroger brown sugar. I also add just a teaspoon of water.
Hi Marcie! This recipe is designed to make crunchy toffee bits (similar to store-bought toffee bits), so they won’t have that melt-in-your-mouth candy texture. If you’re looking for a softer, more buttery toffee that melts as you bite into it, I’d recommend trying a traditional toffee candy recipe instead. I wouldn’t recommend cooking this one any less, since it won’t set properly and may end up greasy or too soft.
Hi! Have you ever tried this recipe with vegan butter/dairy free butter/margarine?
Hi Catherine! Other readers have used lactose-free butter with success. I’ve also experimented with Miyoko’s vegan butter (following the European-style butter instructions in the recipe notes), and while it does work, the toffee was a little greasier. I was using it to make a dairy-free toffee streusel for a pie, and the flavor of the butter was a little too prominent for my taste. If you’re used to vegan butter, though, you might love it! Let us know if you experiment with any other brands 🙂
Thank you so much Emily!
Been addicted to toffee since childhood…so was my mom! All the recipes I tried were 2 sticks of butter, and 1 cup sugar..a bit of a greasy after taste..Tess, I tripled this recipe, place roasted sliced almonds on a silicone mat, mat is placed in a 13×9 pan…so 3 sticks butter and 3 cups (not packed) light brown sugar..I cook to 298 degrees…pour toffee over nuts on mat…after couple minutes I put milk chocolate chips on top, and then spread the melted chips across the toffee…the residual heat from toffee softens/melts the chocolate chips…let cool on counter, then stick in fridge..break into pieces, and store in Tupperware in the fridge…the best almond butter crunch candy I have ever had, and that includes the fancy candy stores. Even my husband, who is not a toffee lover, is addicted to this recipe.
Yum, that sounds delicious. We’re thrilled to hear this toffee turned out perfectly for you after so many failed recipes!
Amazing toffee! My first time and it went perfectly! Tastes just like the toffee from my favorite candy shop. Its also good with chocolate on top.
Hi Tessa! Would brown sugar work for this recipe?
Brown sugar is one of the three ingredients needed, so yes! 🙂 We recommend light brown sugar for the best results.
Sorry, it was a typo, can I use dark brown sugar?
Disaster. Did everything it said to do. Would not set, tried to re-boil, up to temperature and still not set!! Now in the bin.
The recipe itself is fine, but I ran into the issue of the butter separating a lot from the sugar. The recipe said to “take it off heat and whisk vigorously” if that happened, but taking it off heat only made the sugar start clumping and separating further. The only thing that fixed it (for me at least) was to put it back on the heat *and whisk it*. There’s a possibility that it was a problem with my brown sugar or butter (I’m in Brazil, different standards?), but if you find yourself in the same situation, doing that fully mixed the toffee again.