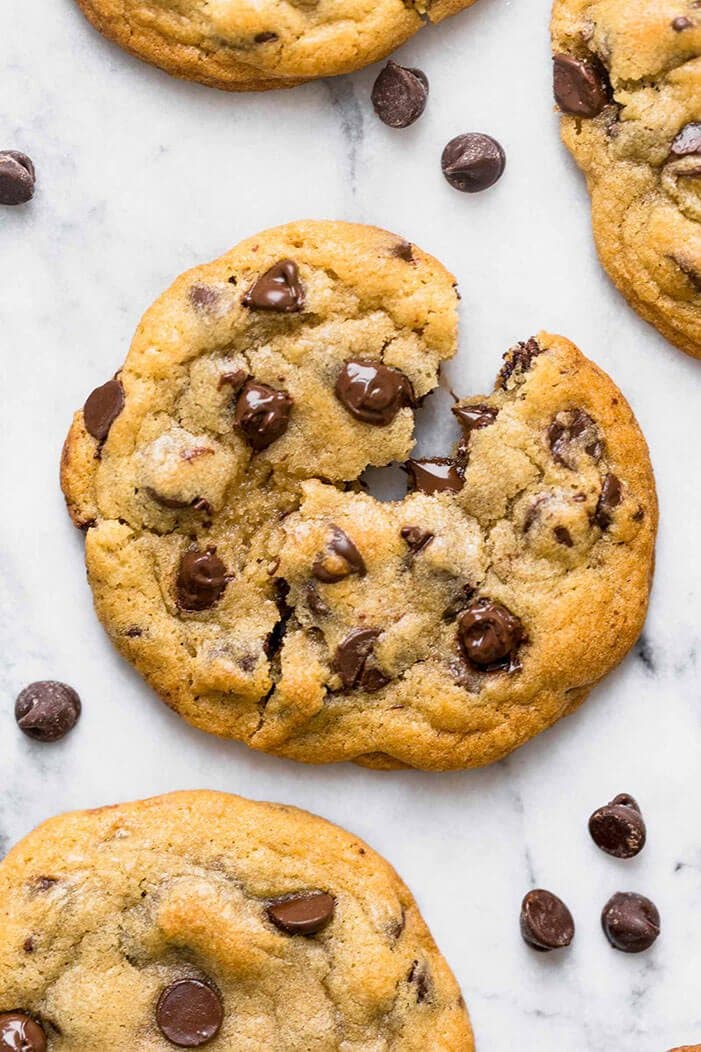
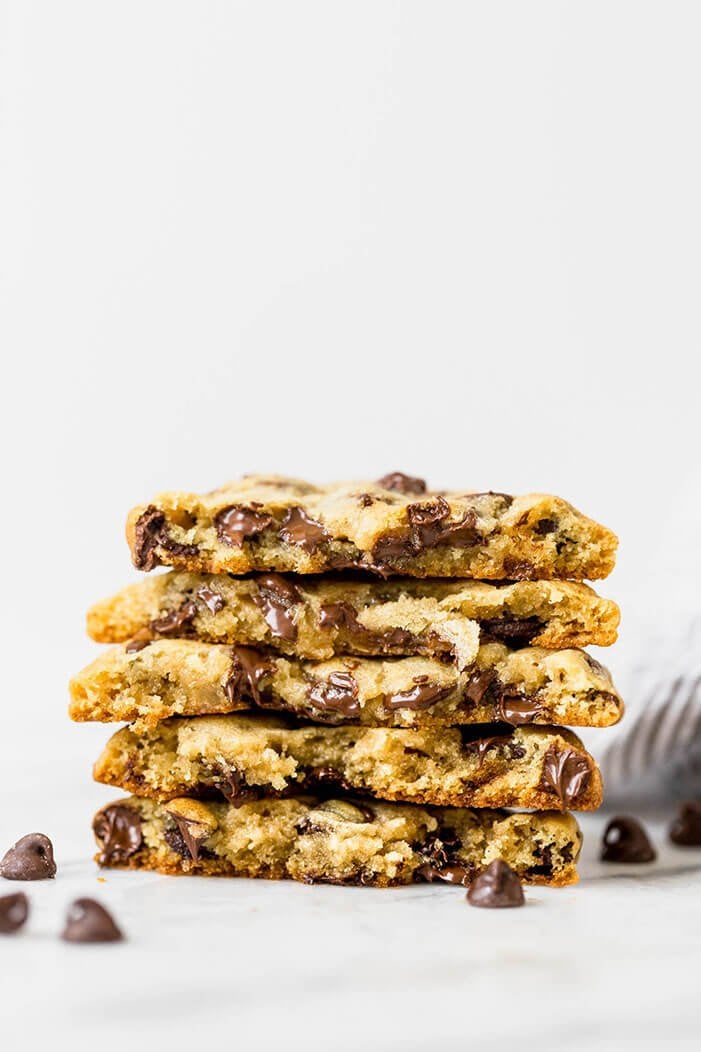
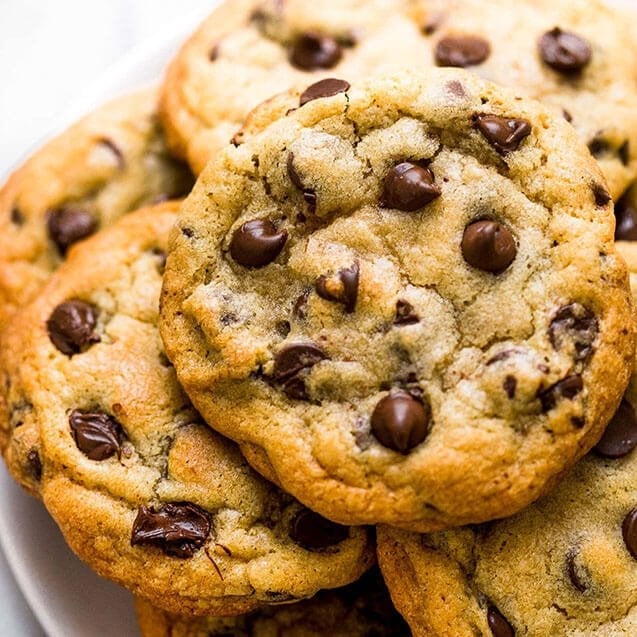
Ultra thick Bakery Style Chocolate Chip Cookies feature golden brown edges with ooey and gooey centers. This easy recipe can be made in 30 minutes! Download my free Cookie Customization Guide here!
Yield:
26 cookies
Prep Time:15minutes
Cook:15minutes
Tessa's Recipe Rundown...
Taste: Full of sweet butterscotch & chocolate flavors, exactly how a chocolate chip cookie should taste! Texture: Thick and chock full of gooey chocolate with slightly crisp edges. Ease: No special ingredients, equipment, or skills needed! Pros: Easy everyday delightful chocolate chip cookie recipe. I think you’ll love this one. Cons: None. Would I make this again? I’ve already made this recipe many times and have the dough in my freezer for when the craving strikes.
My favorite type of recipe to bake is absolutely COOKIES. They’re so fun and simple and can teach us SO much about the science of baking.
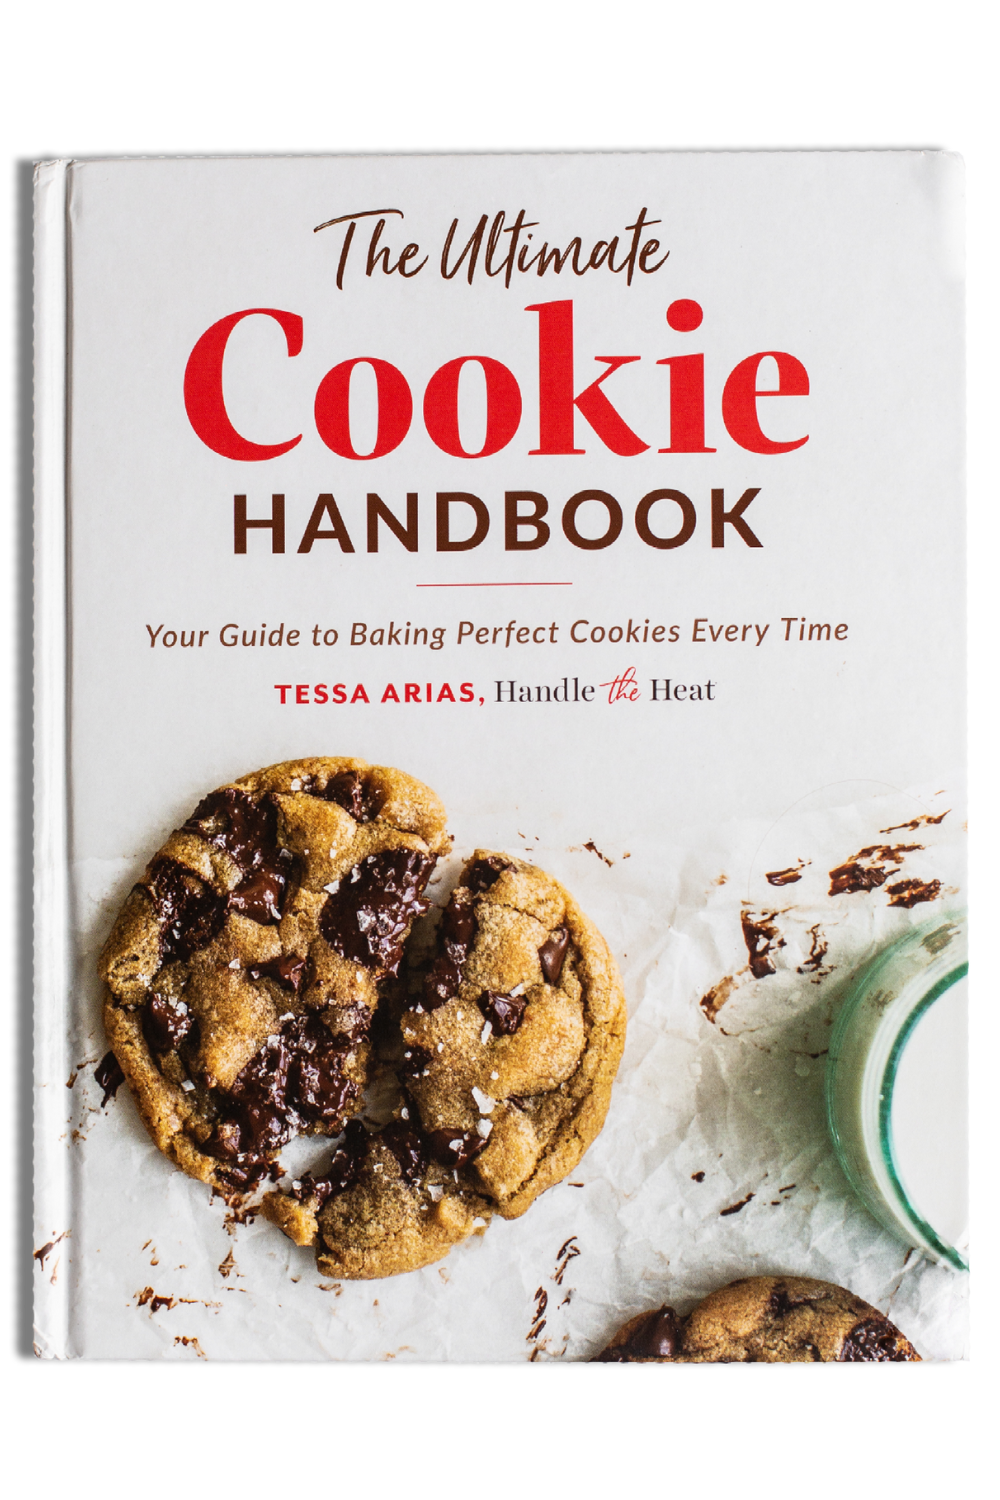
That post inspired the creation of my second cookbook, The Ultimate Cookie Handbook. And since THOUSANDS of you have purchased that cookbook, I think it’s clear that we’re all obsessed with cookies here.
That’s why I’m SO thrilled to be sharing this recipe for Bakery Style Chocolate Chip Cookies with you today. In my opinion, it’s the perfect easy everyday chocolate chip cookie recipe. This homemade recipe is simple to make and yields thick, beautiful golden brown cookies, crisp at the edges and gooey at the center.
Watch the video below to step into my kitchen and see exactly how to bake these delicious cookies with me. I give tons of tips and tricks for getting perfectly thick cookies with chocolate chunks, and you can see what every step of this recipe should look like!
There’s actually a time-lapse video shot of these cookies cooling right after I took them out of the oven. You can see that they hardly shrink or deflate as they cool. If you only beat the butter and sugar for 2 to 3 minutes max, your cookies shouldn’t deflate!
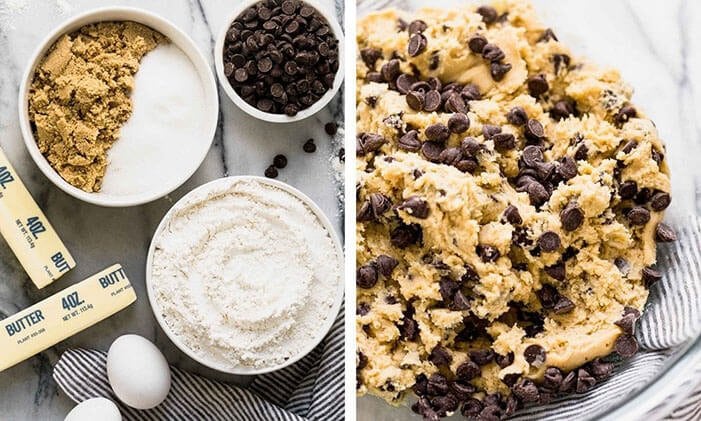
How to Make The Best Bakery Style Chocolate Chip Cookies
How to make soft chocolate chip cookies:
The key to the best soft cookies is to take the chocolate chip cookies out of the oven just before they look like they’re done baking. They should still appear slightly wet in the very center. The residual heat of the oven and pan will finish cooking the cookies through to soft perfection once you allow them to cool completely.
Also, measure your flour correctly to improve your baking forever. Too much flour will lead to dry, dense, or crumbly chocolate chip cookies that barely spread.
Why are my chocolate chip cookies flat?
When making cookies, be sure your butter is at a cool room temperature before beating with your sugar. It shouldn’t be greasy or overly soft otherwise it’ll melt and spread the cookies too much.
The warmer your chocolate chip cookie dough is when it enters the oven, the thinner and flatter your cookies will be. To prevent flat cookies, try freezing your balls of cookie dough while your oven preheats. Learn more about how to bake THICK cookies here.
Better yet, refrigerate your chocolate chip cookie dough for 24 to 48 hours. This ‘marination’ process will transform your chocolate chip cookies by making them thicker, chewier, and more flavorful! Plus, this is a perfect way to make your delicious cookies ahead of time. Read more about the magic of chilling your cookie dough here.NOTE: chilling is OPTIONAL for this recipe but using chilled dough will enhance your cookies!
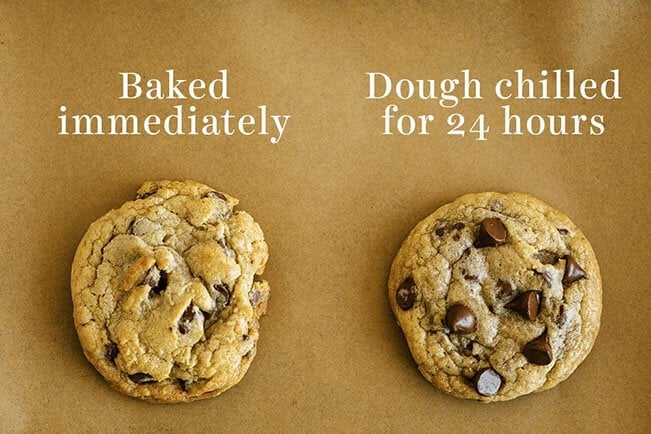
How to make chewy chocolate chip cookies:
One of the keys to CHEWY chocolate chip cookies is to use more brown sugar than granulated sugar. The molasses in the brown sugar draws in more moisture, making the cookies thicker, softer, and chewier.
For extra chewy cookies, try adding an extra egg yolk to this recipe. You can also replace half or all of the all-purpose flour in this recipe with bread flour for an ultra chewy bite.
How to bake chocolate chip cookies:
For the BEST chocolate chip cookies, make the recipe below keeping these top tips in mind:
Use a kitchen scale to measure your ingredients for the BEST most consistent results.
Make the recipe exactly as written, without substitutions, at least the first time you bake it.
Use the correct baking pan and a spring-loaded cookie scoop for bakery-quality cookies at home. More on that below!
Why use a cookie scoop?
Using a stainless steel spring-loaded cookie scoop when portioning out cookie dough is one of the KEYS to beautiful, uniform, evenly-shaped and evenly-baked cookies. My cookie scoop is one of my most frequently used kitchen gadgets. A spring-loaded scoop saves you *so much time* in forming the balls of dough. When using a scoop, you ensure each ball is evenly sized so the cookies bake evenly, meaning you don’t have any small overbaked cookies or large underbaked cookies. Learn more about Cookie Scoops and how to use them here!
What’s the difference between baking soda and baking powder?
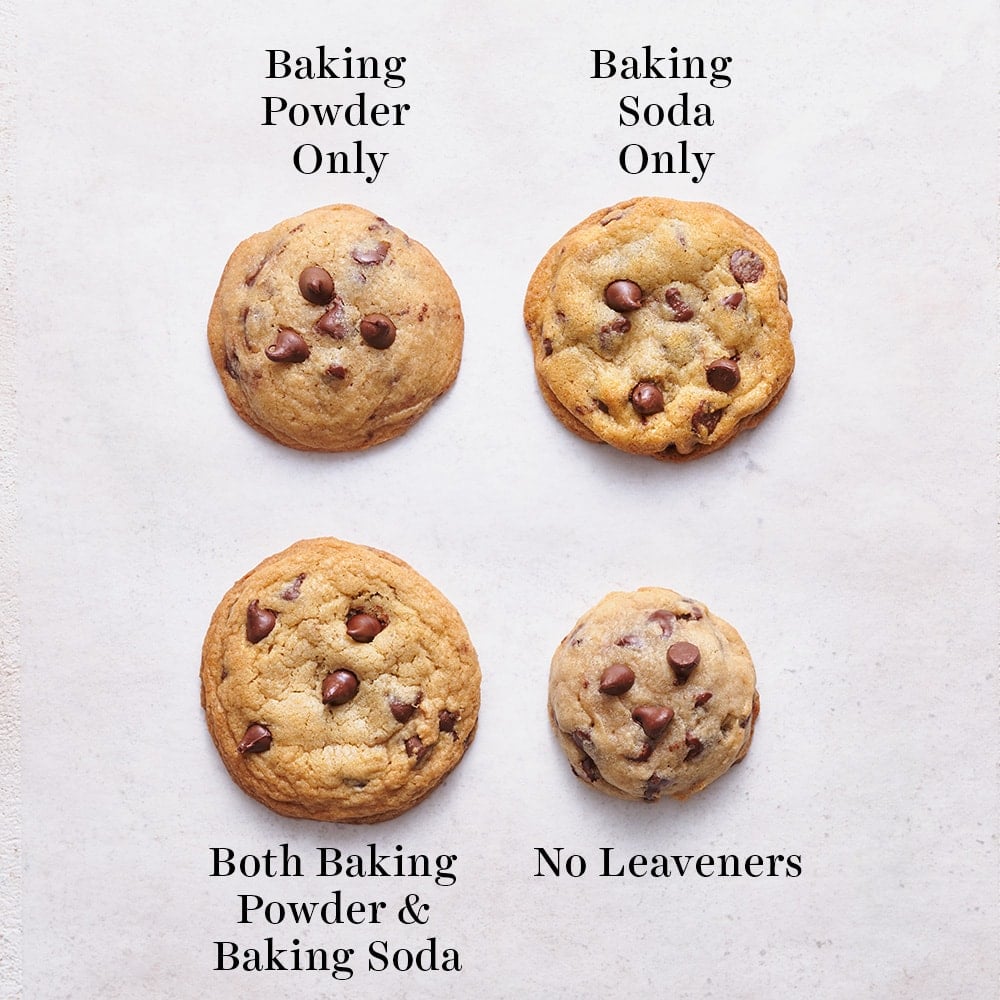
Baking powder and baking soda are both chemical leaveners that work to create light textures in baked goods.
Although baking powder actually contains baking soda, the two leaveners are very different. Baking powder and baking soda are not interchangeable – just take a look at the impact the type of leavener used had on each of the cookies below!
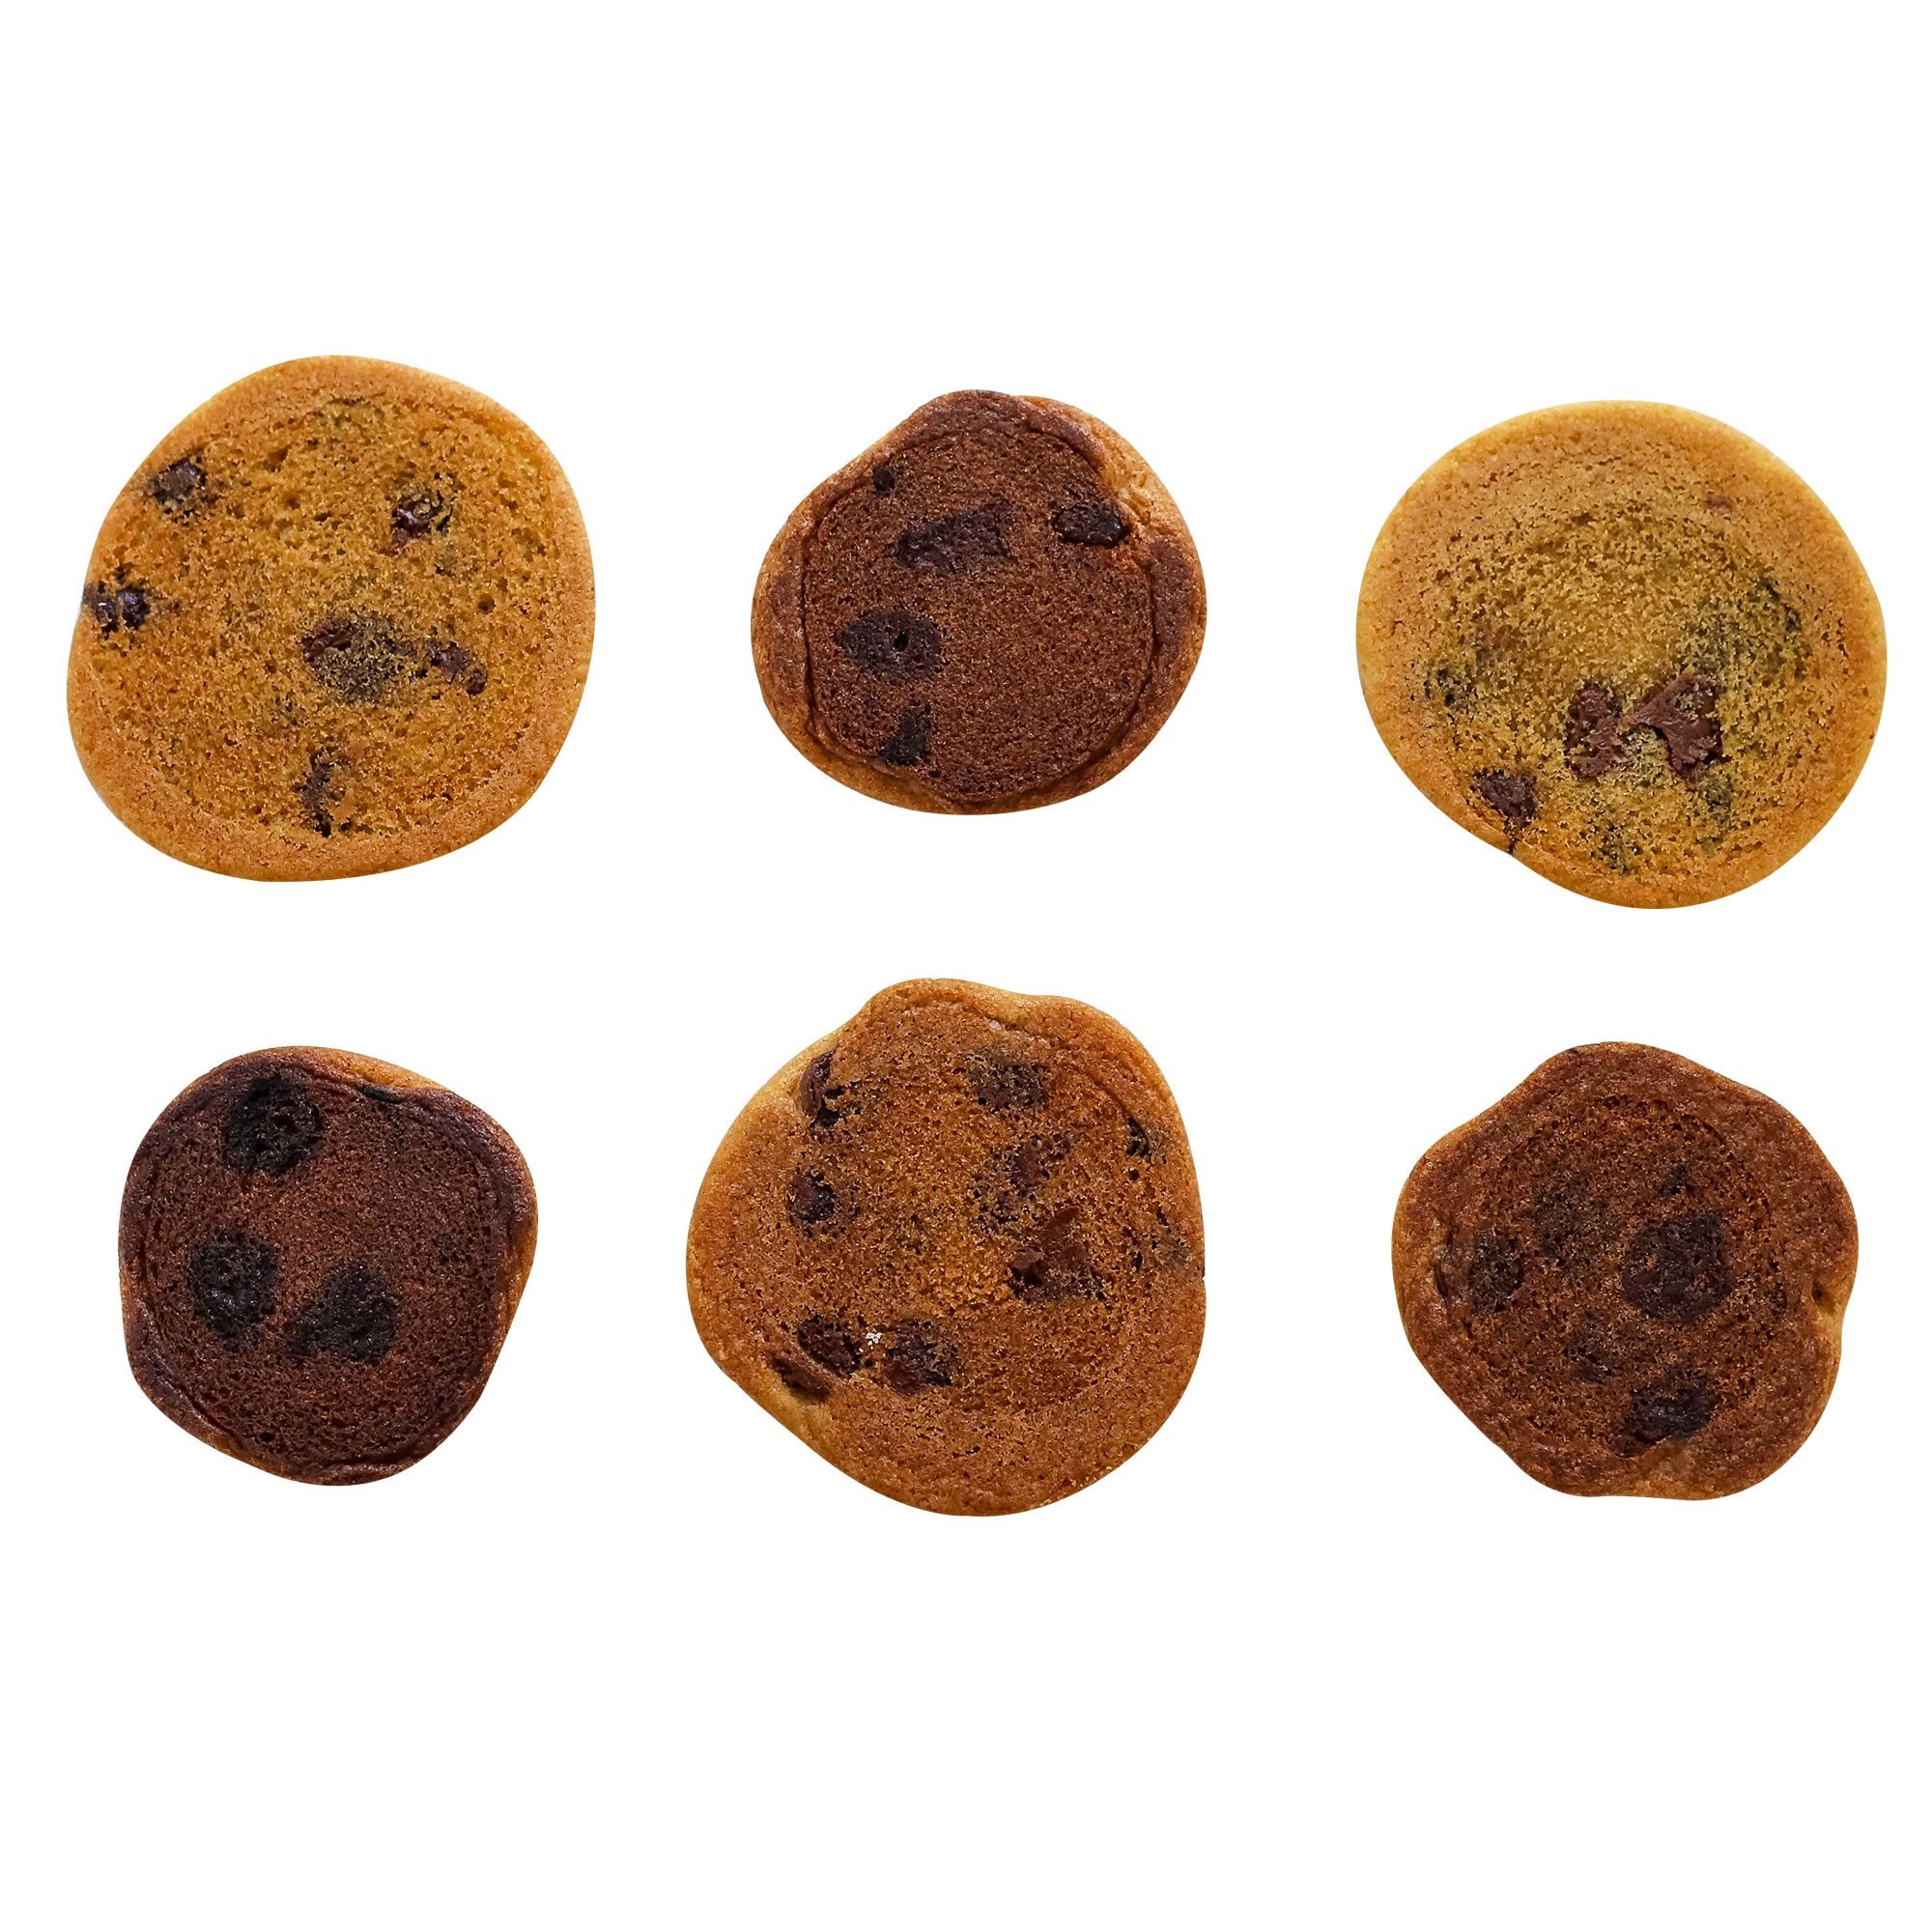
Take a look at the chocolate chip cookies below. These cookies are all the same batch of cookie dough, baked at the same temperature of 350°F, baked for the same amount of time of 12 minutes. The only difference? The type of baking pan used!
The best cookies are the freshest, there’s no magical way around that. However, here’s a few tricks to keeping them fresh and soft for as long as possible!
Can you freeze chocolate chip cookies?
I love the taste of cookies straight from the oven the best. I always keep pre-scooped balls of chocolate chip cookie dough in a resealable bag in my freezer, so I can bake cookies off and have them warm from the oven in a matter of minutes whenever I want. Here are more tips for freezing cookie dough.
But for those times when you need to keep already-baked cookies soft, see below for my tips. First of all, most cookies can be stored in an airtight container at room temp for up to 5 days. Be sure they are completely cooled before storing.
How to keep cookies soft:
To keep your baked chocolate chip cookies soft, you can add an apple wedge, piece of bread, or a tortilla on the top and bottom of the cookies to the container a day or two after baking them, or whenever you find the texture starting to harden. The moisture from the bread or apple will migrate to your cookies, making them soft and chewy again.
A tortilla is a favorite of mine because it takes up much less room than a slice of bread, and doesn’t transfer any flavors or aromas like an apple wedge. Not to mention, it fits into a round cookie tin pretty perfectly.
How to refresh stored cookies:
What I like to do is reheat and refresh the cookies in a 350°F oven for 3-5 minutes. Your toaster oven should work just fine. This improves the texture and there’s nothing like a warm chocolate chip cookie!
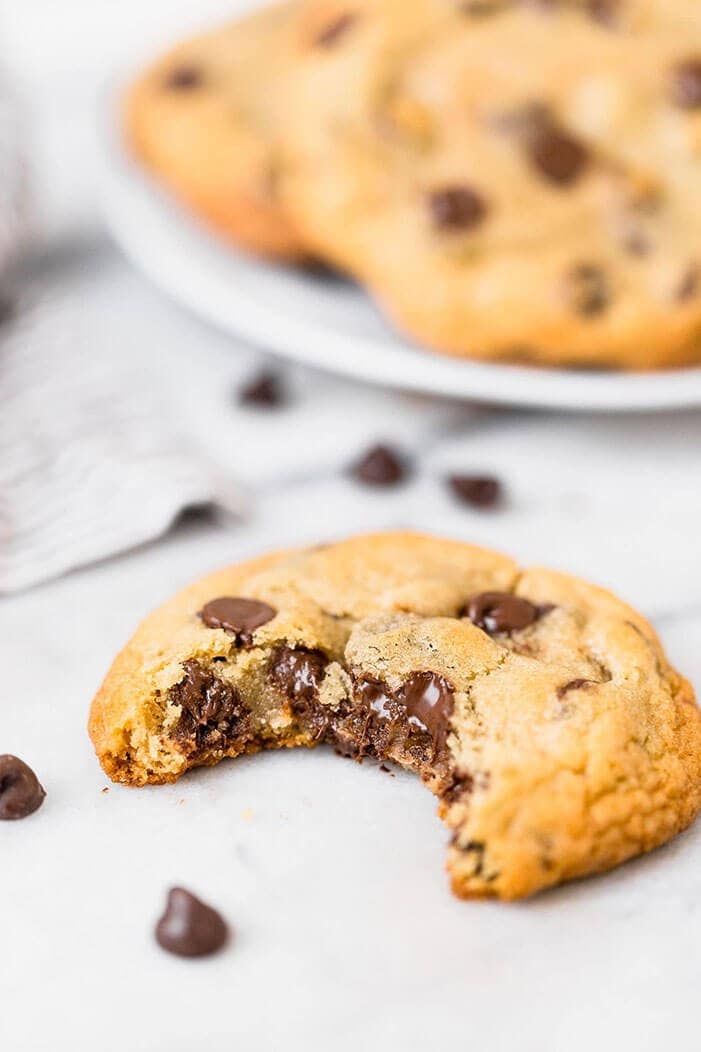
Ultra thick Bakery Style Chocolate Chip Cookies feature golden brown edges with ooey and gooey centers. This easy recipe can be made in 30 minutes! Download my free Cookie Customization Guide here!
Ingredients
3cups(380 grams) all-purpose flour
1teaspoonbaking soda
1teaspoonfine sea salt
2sticks (227 grams) unsalted butter, at cool room temperature (67°F)
1/2cup(100 grams) granulated sugar
1 1/4cups(247 grams) lightly packed light brown sugar
2teaspoonsvanilla
2large eggs, at room temperature
2cups(340 grams) semisweet chocolate chips
Directions
Preheat oven to 350ºF. Line baking sheets with parchment paper.
In a medium bowl, combine the flour, baking soda, and salt.
In the bowl of an electric mixer, beat the butter, granulated sugar, and brown sugar until creamy, about 2 minutes. Add the vanilla and eggs. Gradually beat in the flour mixture. Stir in the chocolate chips.
If time permits, wrap dough in plastic wrap and refrigerate for at least 24 hours but no more than 72 hours. This allows the dough to “marinate” and makes the cookies thicker, chewier, and more flavorful. Let dough sit at room temperature just until it is soft enough to scoop.
Divide the dough into 3-tablespoon sized balls using a large cookie scoop and drop onto prepared baking sheets.
Bake for 11-13 minutes, or until golden brown. Cool for 5 minutes before removing to wire racks to cool completely.
Although I prefer cookies fresh from the oven, these can be stored in an airtight container for up to 3 days. See post for storage tips.
Recipe Video
Course :
Dessert
Cuisine :
American
Keyword :
chocolate chip cookies, chocolate chips, chocolate cookies, cookies
I share trusted baking recipes your friends will LOVE alongside insights into the science of sweets. I'm a professionally trained chef, cookbook author, and cookie queen. I love to write about all things sweet, carb-y, and homemade. I live in Phoenix, Arizona (hence the blog name!)
About Tessa...
I share trusted baking recipes your friends will LOVE alongside insights into the science of sweets. I'm a professionally trained chef, cookbook author, and cookie queen. I love to write about all things sweet, carb-y, and homemade. I live in Phoenix, Arizona (hence the blog name!)
Best cookies ever! These have been my go to since December. My whole family request on a regular basis! Thanks for the recipe! Btw definitely not dry like a prior comment said, they must have not followed steps correctly.
Kiersten @ Handle the Heat
— March 27, 2023 at 8:37 am
Hi Michelle! We haven’t tried that, so I can’t say for sure sorry! I don’t see why it wouldn’t work – it just might take a little experimenting to get the bake time perfect in your oven 🙂 Let us know how it goes if you give this a try!
These cookies are so good and even better after they are out of the oven for awhile! I made some without refrigerating the dough and one with. I like it better when the dough is cold, I think the cookies come out thicker!
Kiersten @ Handle the Heat
— March 24, 2023 at 9:43 am
Hi Marie! I’m sorry these cookies weren’t as chewy as they should be. How do you measure your ingredients? By volume (using cups), or by weight (using a digital kitchen scale)? When measuring by volume, it’s so easy to mis-measure ingredients (particularly flour) and throw off the entire chemistry of a recipe. Excess flour will cause cookies to be drier and heavier than they should be, and may prevent chewiness from developing. Check out Tessa’s article here, where she talks about how to best measure ingredients to ensure accuracy every time.
If you didn’t already try it this time, we also recommend refrigerating the dough (as mentioned in the pink tip box, above the recipe) if you want to encourage some more chewiness – the tips above will explain why in greater detail 🙂
I hope you’ll give these another try, Marie – they really are so good! Happy baking 🙂
This is our families favourite cookie recipe. We have swapped out white sugar for cane sugar and also swapped the eggs for ground flax seed substitute. They’re amazing, soft and chewy. We love them!
They were a little too cake like for me. I think I prefer a flatter chewier cookie. Also, I felt like it was missing something. Like lacking a flavor? I don’t know what that could be since it has all the right ingredients.
Kiersten @ Handle the Heat
— March 20, 2023 at 11:51 am
Hi Sarah! It definitely sounds like something went wrong along the way, as these cookies shouldn’t be cakey at all. This recipe is usually a nice, chewy cookie with a perfect thickness (not too thin and not too thick). How do you measure your ingredients? By volume (using cups), or by weight (using a digital kitchen scale)? When measuring by volume, it’s so easy to mis-measure ingredients (particularly flour) and throw off the entire chemistry of a recipe – which will give you cakier cookies, and also can make it feel like they’re lacking in flavor. Check out Tessa’s article here, where she talks about how to best measure ingredients to ensure accuracy every time. I hope that helps, Sarah, and I hope you give these cookies another try sometime – they really are delicious! 🙂
The first time I made these cookies, they were the best cookies I’ve had in my life! Since then, I’ve tried it 2-3 times and the cookie part of the cookie is lacking flavor and I have no clue what I’m doing different. Any thoughts?!
Kiersten @ Handle the Heat
— March 17, 2023 at 7:04 am
Hi Brittany! Yes, you can make that switch for the same amount of sugar, but using dark brown sugar will give the cookies a darker color and a deeper, more pronounced butterscotchy flavor, thanks to the extra molasses in dark brown sugar. They should still be delicious though! Let us know what you think if you give this a try!
Omg these cookies are amazing. Best recipe I have made….and I have tried many chocolate chip cookie recipes… I made some large ones and small ones for my grandsons… i couldn’t wait to try them….still a little warm bite into it and talk about chewy and gooey…yummy!! I made them with bread flour all 3 cups…anyway you have me hooked… thank you for your delicious recipe
Fantastic cookie recipe. I used salted butter and all way fine. 10/10 also makes a good number of cookies. I pulled out at 11am let them set for 5 then on to cooling rack. I like soft cookies.
I made these cookies and they have great flavor, but they were all very flat. I even tried freezing them and waited to cook them again and they came out flat…
Kiersten @ Handle the Heat
— March 7, 2023 at 9:53 am
Hi Ashley! I’m sorry to hear that your cookies turned out flat. There are a few reasons why this can happen:
– How do you measure your ingredients? By volume (using cups), or by weight (using a digital kitchen scale)? When measuring by volume, it’s so easy to mis-measure ingredients (particularly flour) and throw off the entire chemistry of a recipe. Check out Tessa’s article here, where she talks about how to best measure ingredients to ensure accuracy every time.
I hope something here helps, Ashley, and I hope you give these cookies another try – they’re really amazing!! For thickest, most delicious results, follow Tessa’s recommendation for chilling the dough for 24-72 hours before baking (this cannot be rushed in the freezer – learn more here). You’ll love them 🙂
My chocolate chip cookies always turned out flat and crispy. I prefer thick, crispy around the edges with a soft slightly chewy center. I’ve been searching for a recipe that would produce these results and finally my search is over! I’ve found the main “secrets”” are chilled dough and removing from the oven when they don’t look quite done. Super delicious perfection!
This is an amazing recipe!! I thought for sure it would be too much flour and not enough granulated sugar but it all balance out perfectly. I make a cookie cake with it and it was perfect!!
I made these today. They are simply amazing. I will continue to make them. I followed all the directions exactly and I am so pleased they turned out so well. Thank you for a great recipe!
Listen. This is hands down THE BEST COOKIE RECIPE ON THE PLANET. When I tell you that EVERY. SINGLE. TIME. I make these, I get at least 5 compliments on how delicious these cookies are. I have had so many people ask me for the recipe. It deserves an award. I have made this recipe probably at least 100 times. I listen to anything she says in her recipes because she knows what she’s doing. Spectacular baker.
The best chocolate chip cookie I’ve ever made and I have been cooking for a long time! I loved the salty/sweet ration. I am a food service manager of a large camp and will definitely add this recipe to our repertoire.
These didn’t flatten and were so dry. They taste like a scone or a biscuit and we’re such a waste. Had to throw them out because they were simply inedible. Showed my whole family and they all agreed and were disgusted by the dry texture and taste of these cookies. Don’t quite understand why this was at the top of the list on google search because these cookies are just awful.
Sorry you experienced issues with your cookies! When cookies don’t flatten and are dry, dense, or crumbly, it is because too much flour has been added to the dough. I highly encourage you to use a digital scale when measuring your ingredients, especially the flour, to ensure accuracy. It’ll improve your baking forever! Find out more details HERE. I really hope you give this recipe another try so you can enjoy the cookies the way they’re meant to taste. Please let us know how it goes if you do!
I have made this exact recipe dozens of times and they turn out amazing, every single time. I’ve even been paid to make them for friends, as well, because that’s how good this recipe is. It must be a bakers mistake honestly because I’ve never had them flat, dry, or taste like a scone or taste disgusting. I’m thinking you just need to measure properly in order for it to turn out the way they should. One pointer would be sure to use a spoon to fill each cup of flour & level with the back of a butter knife. Definitely seems like you’re using way too much flour and perhaps scooped your measurements of flour.. just a few pointers so you could maybe get it right to see how perfect this recipe truly is.
LOVE this recipe! I love to double it with m&ms and freeze cookie dough for a quick weeknight cookie fix! Weighing my ingredients like a real baker has been a game changer! This is my go to favorite recipe!! Thanks so much!
These taste great, but came out totally flat, therefore similar to other chocolate chip cookie recipes. I only chilled my dough for about 18 hours since I needed them sooner than the suggested 24-48 hour chill time. However, I measured my flour in grams using a scale as suggested, and bought brand new baking soda. Also used an “airbake” cookie sheet, which have always been great at preventing browned bottoms and helping maintain ideal temperatures… not sure what went wrong.
Kiersten @ Handle the Heat
— February 22, 2023 at 6:14 am
Hi Alyssa! I’m sorry to hear that these cookies were not as thick and delicious as they should be! One of the leading causes of over-spread cookies is under or over-creaming your butter and sugars, and how warm your butter was at this time. Both have a huge impact on a cookie’s outcome. Have a look at this article, where Tessa discusses both and the repercussions on the resulting baked goods. While I doubt it’s entirely the cause of your overspreading, the Airbake pan likely isn’t helping matters. While Airbake pans do prevent the bottoms of the cookies from over-browning, Tessa has found that they don’t conduct heat terribly well, which could cause some overspreading. Have a look at this article where Tessa performed a ton of experiments on cookie pans, with pictures and info. I also recommend checking out Tessa’s article here on How to Bake THICK cookies, full of helpful tips and information. I hope something here helps, Alyssa, and I hope you give these cookies another try sometime – they really are SO good! 🙂 Happy baking!
These are easy and delicious! I didn’t refer the dough just mixed it and rolled into golf balls size rounds! They didn’t spread like some cookies do! Which I liked! Will make again
I have tried this recipe twice and both times my butter and sugar mixture does not get very creamy the butter is more clumpy. When I add the eggs it more creamy but not smooth. Any tips?
Kiersten @ Handle the Heat
— February 21, 2023 at 10:33 am
Hi Ashlinne! Hmm, that’s super strange. What temperature is the butter when creaming? It sounds like your butter might be a little too cold. You also might not be creaming your butter and sugar quite long enough – learn more about that here. I encourage you to check out all Tessa’s tips and info in the pink tip box above this recipe. I hope you give this recipe another try – these cookies really are soooo good (especially after the dough has rested 24-72 hours in the fridge!).
Thankyou so much for all the explanation on the importance of ingredients. I do have a question and that is using cooking oil instead of butter. Have you tried and what’s your advice on using oil and how much? I’m planning on trying your recipe with canola oil so I’ll let you know how it goes
Kiersten @ Handle the Heat
— February 21, 2023 at 10:18 am
Hi Carm! I recommend checking out Tessa’s article here about Oil vs. Butter in baking. We haven’t tested this recipe with anything but real butter and we don’t recommend using oil instead, as the flavor and texture will completely change – but feel free to experiment as you wish! Let us know how it goes!
Kiersten @ Handle the Heat
— February 17, 2023 at 12:29 pm
Hi Amber! It actually says this right at the top of the recipe card. This recipe makes 26 cookies 🙂 let us know what you think of the recipe, once you’ve given these cookies a try! 🙂
Not impressed. I was hoping the the sugar ratios would be the key to a chewier cookie, compared to a cakier one, but that wasn’t the case. They didn’t taste bad, just not the texture i was looking for.
Kiersten @ Handle the Heat
— February 15, 2023 at 10:04 am
Hi Ashlee! This recipe should definitely yield a chewier cookie, and definitely not a cakey cookie. I’m just wondering – how do you measure your ingredients? By volume (using cups), or by weight (using a digital kitchen scale)? When measuring by volume, it’s so easy to mis-measure ingredients (particularly flour) and throw off the entire chemistry of a recipe, and end up with a dense or cakey cookie. Check out Tessa’s article here, where she talks about how to best measure ingredients to ensure accuracy every time. Refrigerating your dough for 24-72 hours will also help the texture immensely, as Tessa explains in the pink tip box above the recipe, and more in-depth in this article here! Alternatively, I recommend trying Tessa’s Ultimate Chewy Chocolate Chip Cookies, which use some bread flours and ratios to ensure an ultra chewy, delicious cookie. I hope that helps! Happy baking 🙂
Hello
Love this recipe. Can I wrap them put in the freezer for an hour or two instead of 24 hours in fridge?
Also can I cut them in slices from the log?
Thank you.
Kiersten @ Handle the Heat
— February 13, 2023 at 12:52 pm
Hi Soozee! You can try forming the dough into a log and slicing – we haven’t tried it ourselves, but it should work. Sliced cookies often don’t look as pretty, because of the way some of the chocolate chips get cut off, and the different way they will spread out in the oven – but if that’s the way you’d prefer to portion out the dough, by all means, give it a try! As for the fridge vs the freezer, it doesn’t work the same way unfortunately. To gain all the benefits in texture, flavor and even color, the dough needs to be refrigerated 24-72 hours. Freezing just can’t give those same benefits. Read more about this here! Happy baking 🙂
I wanted to make less cookies, is it okay to cut the ingredients in half and yield the same results (texture, taste, etc)? Also would anything change with the chewiness if I add less chocolate chips?
I’m super excited to make this and thought your recipe stood out to many others I’ve researched (:
Kiersten @ Handle the Heat
— February 10, 2023 at 9:48 am
Hi Julianne! Yes, you can absolutely cut this recipe in half – just be sure to double-check each ingredient as you add it, just to be sure you didn’t accidentally add the wrong amount (I know I’ve done that before haha!). Cutting the recipe in half won’t change the texture – but if time permits, we definitely recommend refrigerating these cookies 24-72 hours before baking, for maximum chewiness! Check out all of Tessa’s tips in the pink tip box above the recipe for more info 🙂 Let us know what you think once you’ve given these cookies a try – we think you’ll love them! 🙂
tks for sharing.. instead of scoop the dough, i weigh it for 75g per ball.. baked freezed dough straight from freezer at 156 degree for 16min (preheat 20min+).however still found it bit under cook. able to advise what will be the good temp & duration to archive ideal cookie? TIA
Kiersten @ Handle the Heat
— February 8, 2023 at 12:38 pm
Hi Doreen! Since we measure these out by size and not weight, I cannot tell you exactly how long they will bake for (and every oven is different, as well as most ovens not actually running at the temperature they say they are!) so I can only guide you to bake until golden brown. Tessa’s article here on baking cookies from frozen may help you too 🙂 You can always bake off one test cookie, see how that tastes, and adjust the timing from there, until you perfect the level of baking to your satisfaction! I hope that helps. Happy baking!
Kiersten @ Handle the Heat
— January 31, 2023 at 8:59 am
Hi Sue. I’m sorry to hear that your cookies did not turn out as they should, but I can assure you that the 700+ fantastic reviews you see here are from our real readers, and not bots. I am more than happy to assist you in troubleshooting what went wrong here, so we can help you make perfect cookies that spread beautifully next time! Here are some common issues that you may have encountered as you made these cookies:
The cookies came out beautiful, and with a nice crunch around the edges. Will definitely make them again. However, i would like to know which sugar to reduce if I wanted to reduce. Both my sister and I found them very sweet.
Kiersten @ Handle the Heat
— January 30, 2023 at 11:46 am
Hi Pumla! We are glad to hear that you enjoyed these cookies, but before you experiment with cutting down on the sugar, I highly recommend reading this article about the function of sugar in baking. I would recommend trying a darker chocolate chip, such as a bittersweet chocolate, rather than lowering the sugar.
Finally!!!! Perfect recipe and my little guys are happy…I used a big cookie scoop and they made ice cream sandwiches. By the way, my little guys are 22 and 24. 😉
This is the best recipe! I did chill the dough overnight and I made cookie bars instead and they turned out perfect. My go to recipe frim now in. Thank you!
Kiersten @ Handle the Heat
— January 23, 2023 at 10:13 am
Hi Patsy! While we do prefer to use our 3-Tablespoon scoop for these delicious cookies, using a smaller scoop shouldn’t result in your cookies sinking. Here are a few reasons why this may be happening to you:
– How do you measure your ingredients? By volume (using cups), or by weight (using a digital kitchen scale)? When measuring by volume, it’s so easy to mis-measure ingredients (particularly flour) and throw off the entire chemistry of a recipe. Tessa talks about how to best measure ingredients to ensure accuracy every time, in this article here!
– Finally, are you chilling your dough before baking? Even if you’re skipping this step, that shouldn’t result in your cookies sinking (and it’s not crucial for this recipe), but we advise you chill pretty much all cookie doughs for 24 – 72 hours to maximize the flavor. It not only improves the flavor of your cookies, but it improves structure immensely. Check out Tessa’s article explaining the science behind this step.
Hopefully something here helped! Feel free to reach back out to us with any further questions – we are always happy to help!! 🙂
Kiersten @ Handle the Heat
— January 19, 2023 at 2:32 pm
Hi Taylor! We’re so glad to hear that you enjoy Tessa’s recipe so much! We don’t have nutritional information for our recipes, as we believe that dessert should be an indulgence! You should be able to find a nutritional calculator online to assist with this, if you wish! 🙂
I have made these cookies numerous times. Five stars, is not enough. I even went as far as making the dough and freezing it in balls, then giving them like that as Xmas gifts. I even did your sugar cookie recipe the same way. My entire family and extended family have raved and raved about all of them! Will continue to make these ALWAYS!
As a trained chef and cookbook author, I share trusted baking recipes your friends & family will love alongside insights into the science of sweets. I help take the luck out of baking so you *always* have delicious results! Learn more here.
Over 200 pages with 50+ cookie recipes that'll make
you a COOKIE PRO. Discover how to turn your biggest cookie flops into WINS by mastering the
sweet science of baking. Even learn how to customize your own recipes! Beautiful, hardcopy,
full color, photos of every recipe so you know EXACTLY how your cookies should look. Order
now to have the book delivered to your doorstep!
Do you want a more delicious life?
Instead of digging through cookbooks and magazines and searching the internet for amazing
recipes, subscribe to Handle the Heat to receive new recipe posts delivered straight to your
email inbox. You’ll get all the latest recipes, videos, kitchen tips and tricks AND my
*free* Cookie Customization Guide (because I am the Cookie Queen)!
I was worried it was too much flour and would be dry. It was a thicker cookie and was delicious. My new favorite recipe. Highly recommend.
Best cookies I’ve ever made! Thank you so much. I ended up adding walnuts to half of my dough and it came out super yummy.
Best cookies ever! These have been my go to since December. My whole family request on a regular basis! Thanks for the recipe! Btw definitely not dry like a prior comment said, they must have not followed steps correctly.
These cookies were absolutely phenomenal. just wondering if I could do a bar version?
Hi Michelle! We haven’t tried that, so I can’t say for sure sorry! I don’t see why it wouldn’t work – it just might take a little experimenting to get the bake time perfect in your oven 🙂 Let us know how it goes if you give this a try!
These cookies are so good and even better after they are out of the oven for awhile! I made some without refrigerating the dough and one with. I like it better when the dough is cold, I think the cookies come out thicker!
Was really good but a little too dry. My friends loved them. I personally expected them to be chewier.
Hi Marie! I’m sorry these cookies weren’t as chewy as they should be. How do you measure your ingredients? By volume (using cups), or by weight (using a digital kitchen scale)? When measuring by volume, it’s so easy to mis-measure ingredients (particularly flour) and throw off the entire chemistry of a recipe. Excess flour will cause cookies to be drier and heavier than they should be, and may prevent chewiness from developing. Check out Tessa’s article here, where she talks about how to best measure ingredients to ensure accuracy every time.
If you didn’t already try it this time, we also recommend refrigerating the dough (as mentioned in the pink tip box, above the recipe) if you want to encourage some more chewiness – the tips above will explain why in greater detail 🙂
I hope you’ll give these another try, Marie – they really are so good! Happy baking 🙂
Great recipe, easy to make, thanks
Hands down the best cookies I’ve not only ever made, the best cookies I’ve ever EATEN!! Thank you for the amazing recipe! My family is obsessed.
This is our families favourite cookie recipe. We have swapped out white sugar for cane sugar and also swapped the eggs for ground flax seed substitute. They’re amazing, soft and chewy. We love them!
I have made this cookies 5 times in the past 3 weeks for family and they absolutely love them! I will continue making them by this recipe.
Yay!! That’s so wonderful to hear, Lila! So glad these are such a hit with your family 🙂
They were a little too cake like for me. I think I prefer a flatter chewier cookie. Also, I felt like it was missing something. Like lacking a flavor? I don’t know what that could be since it has all the right ingredients.
Hi Sarah! It definitely sounds like something went wrong along the way, as these cookies shouldn’t be cakey at all. This recipe is usually a nice, chewy cookie with a perfect thickness (not too thin and not too thick). How do you measure your ingredients? By volume (using cups), or by weight (using a digital kitchen scale)? When measuring by volume, it’s so easy to mis-measure ingredients (particularly flour) and throw off the entire chemistry of a recipe – which will give you cakier cookies, and also can make it feel like they’re lacking in flavor. Check out Tessa’s article here, where she talks about how to best measure ingredients to ensure accuracy every time. I hope that helps, Sarah, and I hope you give these cookies another try sometime – they really are delicious! 🙂
The first time I made these cookies, they were the best cookies I’ve had in my life! Since then, I’ve tried it 2-3 times and the cookie part of the cookie is lacking flavor and I have no clue what I’m doing different. Any thoughts?!
Am I able to sub dark brown sugar for the light brown sugar? If so, how would it change the cookie and would it be the same measurement?
Hi Brittany! Yes, you can make that switch for the same amount of sugar, but using dark brown sugar will give the cookies a darker color and a deeper, more pronounced butterscotchy flavor, thanks to the extra molasses in dark brown sugar. They should still be delicious though! Let us know what you think if you give this a try!
Omg these cookies are amazing. Best recipe I have made….and I have tried many chocolate chip cookie recipes… I made some large ones and small ones for my grandsons… i couldn’t wait to try them….still a little warm bite into it and talk about chewy and gooey…yummy!! I made them with bread flour all 3 cups…anyway you have me hooked… thank you for your delicious recipe
These are amazing! Best chocolate chip cookies. Follow recipe exactly. I did have to cook about 16 min and added Maldon flaky salt on top.
Fantastic cookie recipe. I used salted butter and all way fine. 10/10 also makes a good number of cookies. I pulled out at 11am let them set for 5 then on to cooling rack. I like soft cookies.
Best chocolate chip cookie ever!
I made these cookies and they have great flavor, but they were all very flat. I even tried freezing them and waited to cook them again and they came out flat…
Hi Ashley! I’m sorry to hear that your cookies turned out flat. There are a few reasons why this can happen:
– How do you measure your ingredients? By volume (using cups), or by weight (using a digital kitchen scale)? When measuring by volume, it’s so easy to mis-measure ingredients (particularly flour) and throw off the entire chemistry of a recipe. Check out Tessa’s article here, where she talks about how to best measure ingredients to ensure accuracy every time.
– How old are your leavening agents? If your baking soda/powder are not fresh, they won’t do their jobs and your baked goods can not rise properly, fall after baking, and much more. Tessa talks about the science behind leavening agents, and how to test for leavener freshness, in this article here!
– Another thing could be how long you creamed your butter and sugars together for, and how warm your butter was at this time. Both have a huge impact on a cookie’s outcome. Have a look at this article, where Tessa discusses both and the repercussions on the resulting baked goods!
I hope something here helps, Ashley, and I hope you give these cookies another try – they’re really amazing!! For thickest, most delicious results, follow Tessa’s recommendation for chilling the dough for 24-72 hours before baking (this cannot be rushed in the freezer – learn more here). You’ll love them 🙂
My chocolate chip cookies always turned out flat and crispy. I prefer thick, crispy around the edges with a soft slightly chewy center. I’ve been searching for a recipe that would produce these results and finally my search is over! I’ve found the main “secrets”” are chilled dough and removing from the oven when they don’t look quite done. Super delicious perfection!
This is an amazing recipe!! I thought for sure it would be too much flour and not enough granulated sugar but it all balance out perfectly. I make a cookie cake with it and it was perfect!!
At what temperature and how long should I bake these on a convection oven? Thank you so much!
Hi Pn! The rule of thumb is to lower the temperature of your oven by 25°F if baking with convection (some ovens lower the temperature by this much automatically). Check for doneness at least 3/4 of the way through. Every oven is different, so exact bake times will vary. Check out Tessa’s article on ovens for more info on this, and why using an oven thermometer really help SO much with any baking or cooking! I hope this helps! Happy baking 🙂
I made these today. They are simply amazing. I will continue to make them. I followed all the directions exactly and I am so pleased they turned out so well. Thank you for a great recipe!
Listen. This is hands down THE BEST COOKIE RECIPE ON THE PLANET. When I tell you that EVERY. SINGLE. TIME. I make these, I get at least 5 compliments on how delicious these cookies are. I have had so many people ask me for the recipe. It deserves an award. I have made this recipe probably at least 100 times. I listen to anything she says in her recipes because she knows what she’s doing. Spectacular baker.
The best chocolate chip cookie I’ve ever made and I have been cooking for a long time! I loved the salty/sweet ration. I am a food service manager of a large camp and will definitely add this recipe to our repertoire.
My go to recipe! Everyone loves them when I make them 🙂 Thank you for sharing! God bless 🙂
Yay! So happy to hear that, Justine!
Made them once so far and now everyone asks for the recipe! Making more today, they are perfect!
These didn’t flatten and were so dry. They taste like a scone or a biscuit and we’re such a waste. Had to throw them out because they were simply inedible. Showed my whole family and they all agreed and were disgusted by the dry texture and taste of these cookies. Don’t quite understand why this was at the top of the list on google search because these cookies are just awful.
Sorry you experienced issues with your cookies! When cookies don’t flatten and are dry, dense, or crumbly, it is because too much flour has been added to the dough. I highly encourage you to use a digital scale when measuring your ingredients, especially the flour, to ensure accuracy. It’ll improve your baking forever! Find out more details HERE. I really hope you give this recipe another try so you can enjoy the cookies the way they’re meant to taste. Please let us know how it goes if you do!
I have made this exact recipe dozens of times and they turn out amazing, every single time. I’ve even been paid to make them for friends, as well, because that’s how good this recipe is. It must be a bakers mistake honestly because I’ve never had them flat, dry, or taste like a scone or taste disgusting. I’m thinking you just need to measure properly in order for it to turn out the way they should. One pointer would be sure to use a spoon to fill each cup of flour & level with the back of a butter knife. Definitely seems like you’re using way too much flour and perhaps scooped your measurements of flour.. just a few pointers so you could maybe get it right to see how perfect this recipe truly is.
I had the same experience with the dry, unflattened, tasteless cookie. What a bummer. I’ll look into the digital scale!
LOVE this recipe! I love to double it with m&ms and freeze cookie dough for a quick weeknight cookie fix! Weighing my ingredients like a real baker has been a game changer! This is my go to favorite recipe!! Thanks so much!
Woohoo!! We’re so happy to hear that, Kat!
Turned out perfectly!
These taste great, but came out totally flat, therefore similar to other chocolate chip cookie recipes. I only chilled my dough for about 18 hours since I needed them sooner than the suggested 24-48 hour chill time. However, I measured my flour in grams using a scale as suggested, and bought brand new baking soda. Also used an “airbake” cookie sheet, which have always been great at preventing browned bottoms and helping maintain ideal temperatures… not sure what went wrong.
Hi Alyssa! I’m sorry to hear that these cookies were not as thick and delicious as they should be! One of the leading causes of over-spread cookies is under or over-creaming your butter and sugars, and how warm your butter was at this time. Both have a huge impact on a cookie’s outcome. Have a look at this article, where Tessa discusses both and the repercussions on the resulting baked goods. While I doubt it’s entirely the cause of your overspreading, the Airbake pan likely isn’t helping matters. While Airbake pans do prevent the bottoms of the cookies from over-browning, Tessa has found that they don’t conduct heat terribly well, which could cause some overspreading. Have a look at this article where Tessa performed a ton of experiments on cookie pans, with pictures and info. I also recommend checking out Tessa’s article here on How to Bake THICK cookies, full of helpful tips and information. I hope something here helps, Alyssa, and I hope you give these cookies another try sometime – they really are SO good! 🙂 Happy baking!
These are easy and delicious! I didn’t refer the dough just mixed it and rolled into golf balls size rounds! They didn’t spread like some cookies do! Which I liked! Will make again
I have tried this recipe twice and both times my butter and sugar mixture does not get very creamy the butter is more clumpy. When I add the eggs it more creamy but not smooth. Any tips?
Hi Ashlinne! Hmm, that’s super strange. What temperature is the butter when creaming? It sounds like your butter might be a little too cold. You also might not be creaming your butter and sugar quite long enough – learn more about that here. I encourage you to check out all Tessa’s tips and info in the pink tip box above this recipe. I hope you give this recipe another try – these cookies really are soooo good (especially after the dough has rested 24-72 hours in the fridge!).
Thankyou so much for all the explanation on the importance of ingredients. I do have a question and that is using cooking oil instead of butter. Have you tried and what’s your advice on using oil and how much? I’m planning on trying your recipe with canola oil so I’ll let you know how it goes
Hi Carm! I recommend checking out Tessa’s article here about Oil vs. Butter in baking. We haven’t tested this recipe with anything but real butter and we don’t recommend using oil instead, as the flavor and texture will completely change – but feel free to experiment as you wish! Let us know how it goes!
Can anyone tell me how many cookies this recipe makes using the 3TBS scoop?
Hi Amber! It actually says this right at the top of the recipe card. This recipe makes 26 cookies 🙂 let us know what you think of the recipe, once you’ve given these cookies a try! 🙂
Not impressed. I was hoping the the sugar ratios would be the key to a chewier cookie, compared to a cakier one, but that wasn’t the case. They didn’t taste bad, just not the texture i was looking for.
Hi Ashlee! This recipe should definitely yield a chewier cookie, and definitely not a cakey cookie. I’m just wondering – how do you measure your ingredients? By volume (using cups), or by weight (using a digital kitchen scale)? When measuring by volume, it’s so easy to mis-measure ingredients (particularly flour) and throw off the entire chemistry of a recipe, and end up with a dense or cakey cookie. Check out Tessa’s article here, where she talks about how to best measure ingredients to ensure accuracy every time. Refrigerating your dough for 24-72 hours will also help the texture immensely, as Tessa explains in the pink tip box above the recipe, and more in-depth in this article here! Alternatively, I recommend trying Tessa’s Ultimate Chewy Chocolate Chip Cookies, which use some bread flours and ratios to ensure an ultra chewy, delicious cookie. I hope that helps! Happy baking 🙂
Hello
Love this recipe. Can I wrap them put in the freezer for an hour or two instead of 24 hours in fridge?
Also can I cut them in slices from the log?
Thank you.
Hi Soozee! You can try forming the dough into a log and slicing – we haven’t tried it ourselves, but it should work. Sliced cookies often don’t look as pretty, because of the way some of the chocolate chips get cut off, and the different way they will spread out in the oven – but if that’s the way you’d prefer to portion out the dough, by all means, give it a try! As for the fridge vs the freezer, it doesn’t work the same way unfortunately. To gain all the benefits in texture, flavor and even color, the dough needs to be refrigerated 24-72 hours. Freezing just can’t give those same benefits. Read more about this here! Happy baking 🙂
Hi Kiersten!
I wanted to make less cookies, is it okay to cut the ingredients in half and yield the same results (texture, taste, etc)? Also would anything change with the chewiness if I add less chocolate chips?
I’m super excited to make this and thought your recipe stood out to many others I’ve researched (:
Hi Julianne! Yes, you can absolutely cut this recipe in half – just be sure to double-check each ingredient as you add it, just to be sure you didn’t accidentally add the wrong amount (I know I’ve done that before haha!). Cutting the recipe in half won’t change the texture – but if time permits, we definitely recommend refrigerating these cookies 24-72 hours before baking, for maximum chewiness! Check out all of Tessa’s tips in the pink tip box above the recipe for more info 🙂 Let us know what you think once you’ve given these cookies a try – we think you’ll love them! 🙂
They came out SO GOOD!!! Helped my daughter make them for a 4H competition. Fingers crossed she takes them to school tomorrow.
These are the best! Wish I could share my picture of them! Won’t go back to any other recipe
tks for sharing.. instead of scoop the dough, i weigh it for 75g per ball.. baked freezed dough straight from freezer at 156 degree for 16min (preheat 20min+).however still found it bit under cook. able to advise what will be the good temp & duration to archive ideal cookie? TIA
Hi Doreen! Since we measure these out by size and not weight, I cannot tell you exactly how long they will bake for (and every oven is different, as well as most ovens not actually running at the temperature they say they are!) so I can only guide you to bake until golden brown. Tessa’s article here on baking cookies from frozen may help you too 🙂 You can always bake off one test cookie, see how that tastes, and adjust the timing from there, until you perfect the level of baking to your satisfaction! I hope that helps. Happy baking!
Great recipe
Substituted one of the white flour cups for wholemeal, turned out great.
Cookies do not flatten. Followed recipe perfectly. Don’t know where all these 5* reviews came from. Perhaps from bots.
Hi Sue. I’m sorry to hear that your cookies did not turn out as they should, but I can assure you that the 700+ fantastic reviews you see here are from our real readers, and not bots. I am more than happy to assist you in troubleshooting what went wrong here, so we can help you make perfect cookies that spread beautifully next time! Here are some common issues that you may have encountered as you made these cookies:
– How do you measure your ingredients? By volume (using cups), or by weight (using a digital kitchen scale)? When measuring by volume, it’s so easy to mis-measure ingredients (particularly flour) and throw off the entire chemistry of a recipe. Cookies containing too much flour won’t spread properly, and bake as heavy, dense bricks. Check out Tessa’s article here, where she talks about how to best measure ingredients to ensure accuracy every time.
– How old are your leavening agents? If your baking soda/powder (soda in this case) are not fresh, they won’t do their jobs and your baked goods can not spread properly, fail to brown evenly, and much more. Tessa talks about the science behind leavening agents, and how to test for leavener freshness, in this article here!
– What type of pan are you baking on? Different materials of pans conduct heat differently, so some will cook the bottom quickly, and not leave the cookie appropriate time to spread out gently and evenly. Tessa discusses this and shows the differences between a variety of baking pans in this article here!
– Another thing could be how long you creamed your butter and sugars together for, and the temperature your butter was at this time. Both have a huge impact on a cookie’s outcome. Have a look at this article, where Tessa discusses both and the repercussions on the resulting baked goods!
I hope something here helped, Sue, and I hope you give these cookies another try sometime – they really are delicious!! Happy baking 🙂
The cookies came out beautiful, and with a nice crunch around the edges. Will definitely make them again. However, i would like to know which sugar to reduce if I wanted to reduce. Both my sister and I found them very sweet.
Hi Pumla! We are glad to hear that you enjoyed these cookies, but before you experiment with cutting down on the sugar, I highly recommend reading this article about the function of sugar in baking. I would recommend trying a darker chocolate chip, such as a bittersweet chocolate, rather than lowering the sugar.
Finally!!!! Perfect recipe and my little guys are happy…I used a big cookie scoop and they made ice cream sandwiches. By the way, my little guys are 22 and 24. 😉
Thanks.
This is the best recipe! I did chill the dough overnight and I made cookie bars instead and they turned out perfect. My go to recipe frim now in. Thank you!
what do we preheat the oven too? i didn’t see it!
Hi James! It’s the first line under ‘Directions’ in the recipe itself. Preheat oven to 350ºF. Happy baking 🙂
Made it with my 5 year old grandaughter and it was a huge success!! She loved it ( me too!) !!
Very descriptive recipe and absolutely delicious cookies. Definitely my favorite!!
Why do my Bakery Chocolate Cookies sink after cooling? I do use a medium scoop instead of a large scoop. Does that make a difference?
Hi Patsy! While we do prefer to use our 3-Tablespoon scoop for these delicious cookies, using a smaller scoop shouldn’t result in your cookies sinking. Here are a few reasons why this may be happening to you:
– How do you measure your ingredients? By volume (using cups), or by weight (using a digital kitchen scale)? When measuring by volume, it’s so easy to mis-measure ingredients (particularly flour) and throw off the entire chemistry of a recipe. Tessa talks about how to best measure ingredients to ensure accuracy every time, in this article here!
– How old are your leavening agents? If your baking soda/powder are not fresh, they won’t do their jobs and your baked goods can not rise properly, fall after baking, and much more. Tessa talks about the science behind leavening agents, and how to test for leavener freshness, in this article here!
– Another thing could be how long you creamed your butter and sugars together for, and how warm your butter was at this time. Both have a huge impact on a cookie’s outcome. Have a look at this article, where Tessa discusses both and the repercussions on the resulting baked goods!
– Finally, are you chilling your dough before baking? Even if you’re skipping this step, that shouldn’t result in your cookies sinking (and it’s not crucial for this recipe), but we advise you chill pretty much all cookie doughs for 24 – 72 hours to maximize the flavor. It not only improves the flavor of your cookies, but it improves structure immensely. Check out Tessa’s article explaining the science behind this step.
Hopefully something here helped! Feel free to reach back out to us with any further questions – we are always happy to help!! 🙂
Hi,
I LOVE LOVE LOVE this recipe! However, I can’t figure out how many calories are in these cookies. Would you happen to know? Thanks!!
Hi Taylor! We’re so glad to hear that you enjoy Tessa’s recipe so much! We don’t have nutritional information for our recipes, as we believe that dessert should be an indulgence! You should be able to find a nutritional calculator online to assist with this, if you wish! 🙂
I have made these cookies numerous times. Five stars, is not enough. I even went as far as making the dough and freezing it in balls, then giving them like that as Xmas gifts. I even did your sugar cookie recipe the same way. My entire family and extended family have raved and raved about all of them! Will continue to make these ALWAYS!
Can this dough be frozen?
Hi Kyana! Yes, you can freeze this cookie dough – but we highly recommend chilling your dough in the fridge for 24-72 hours, and then bake or freeze. Tessa goes into this in more detail about the science behind this, in this article here! You can also check out Tessa’s article here about freezing cookie dough, thawing and baking from frozen! Let us know what you think once you’ve given it a try 🙂