


This post may contain affiliate links. Read our disclosure policy.
Today we’re tackling one of my favorite subjects: organization! I don’t know about you but I would gladly spend hours tidying and organizing over cleaning.
Kitchen and food organization in particular is so important. The last thing you want is to be frantically trying to find an ingredient when you’re in the middle of a recipe. Or to continuously buy food you didn’t realize you already have on hand. Or to waste food in general!
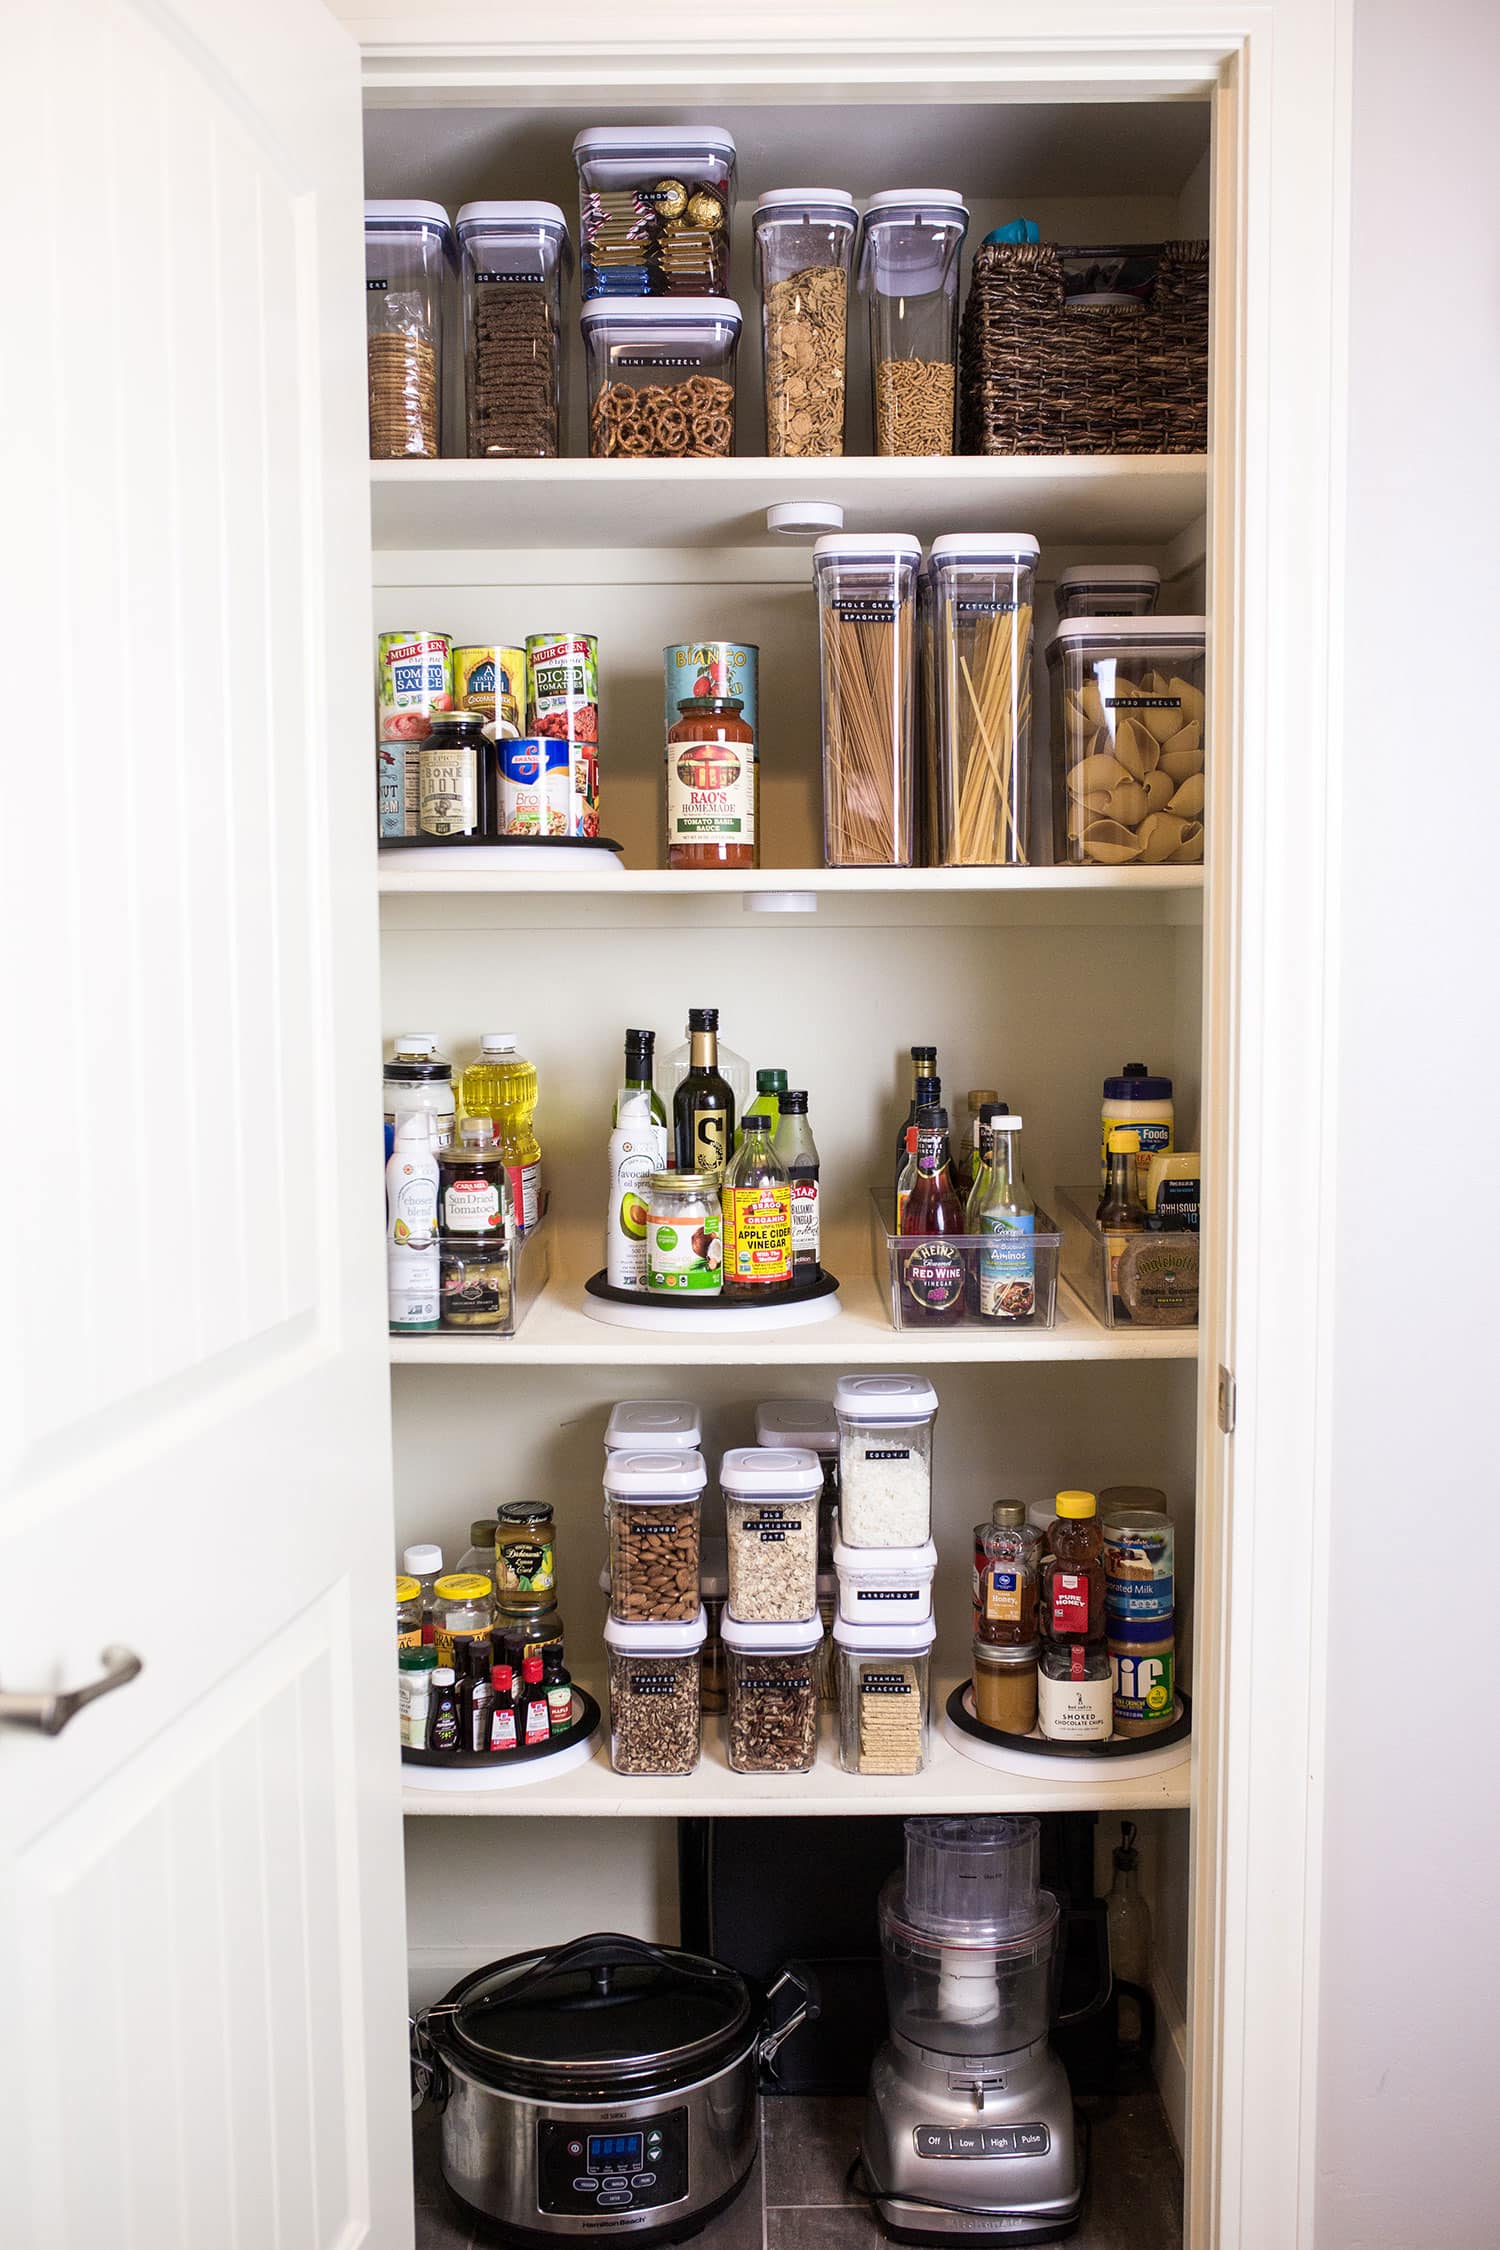
Which is why I’m so excited to be partnering with OXO to share with you my pantry organization. You’ll see both my pantry and my baking cabinet in this post, and how I organize them to look pretty and be functional. AND, how to keep it all organized for longer than a week.
So let’s go ahead and dive right in with step number one:
Gather Your Supplies
Below are all of the items I used to organize my pantry. Start creating your shopping list now! Or better yet, start adding these items to your online cart!
If you’re going out to the store to buy your supplies, I would take photos and measurements of the space you want to organize. That way you buy things that will actually fit and reduce the likelihood of having a ton of returns.
Food Containers
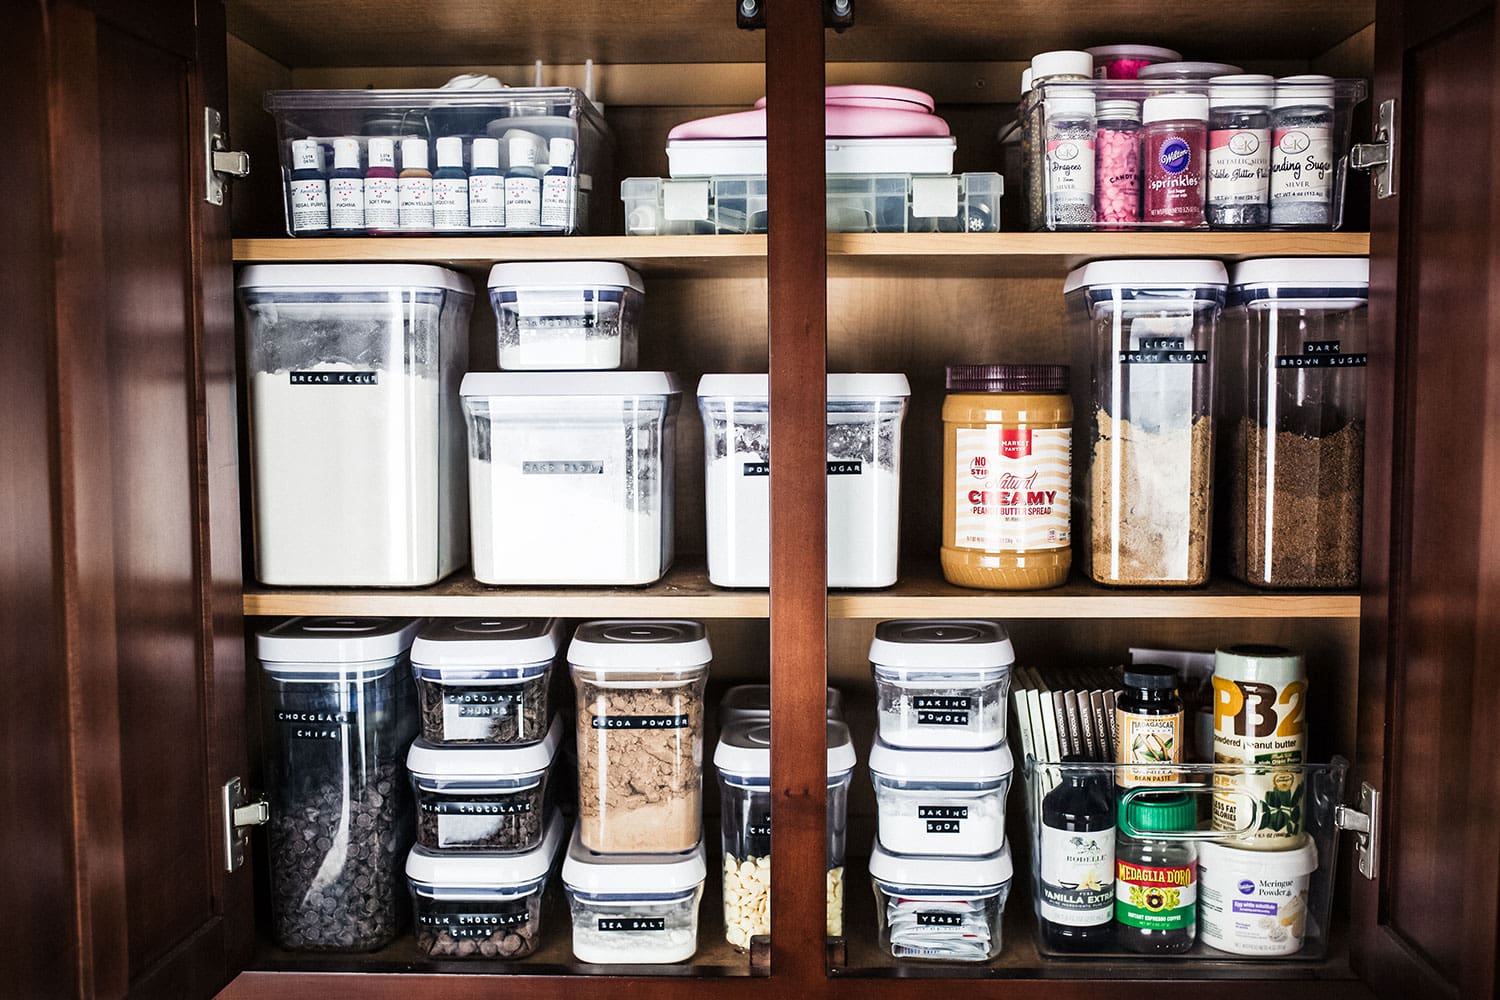
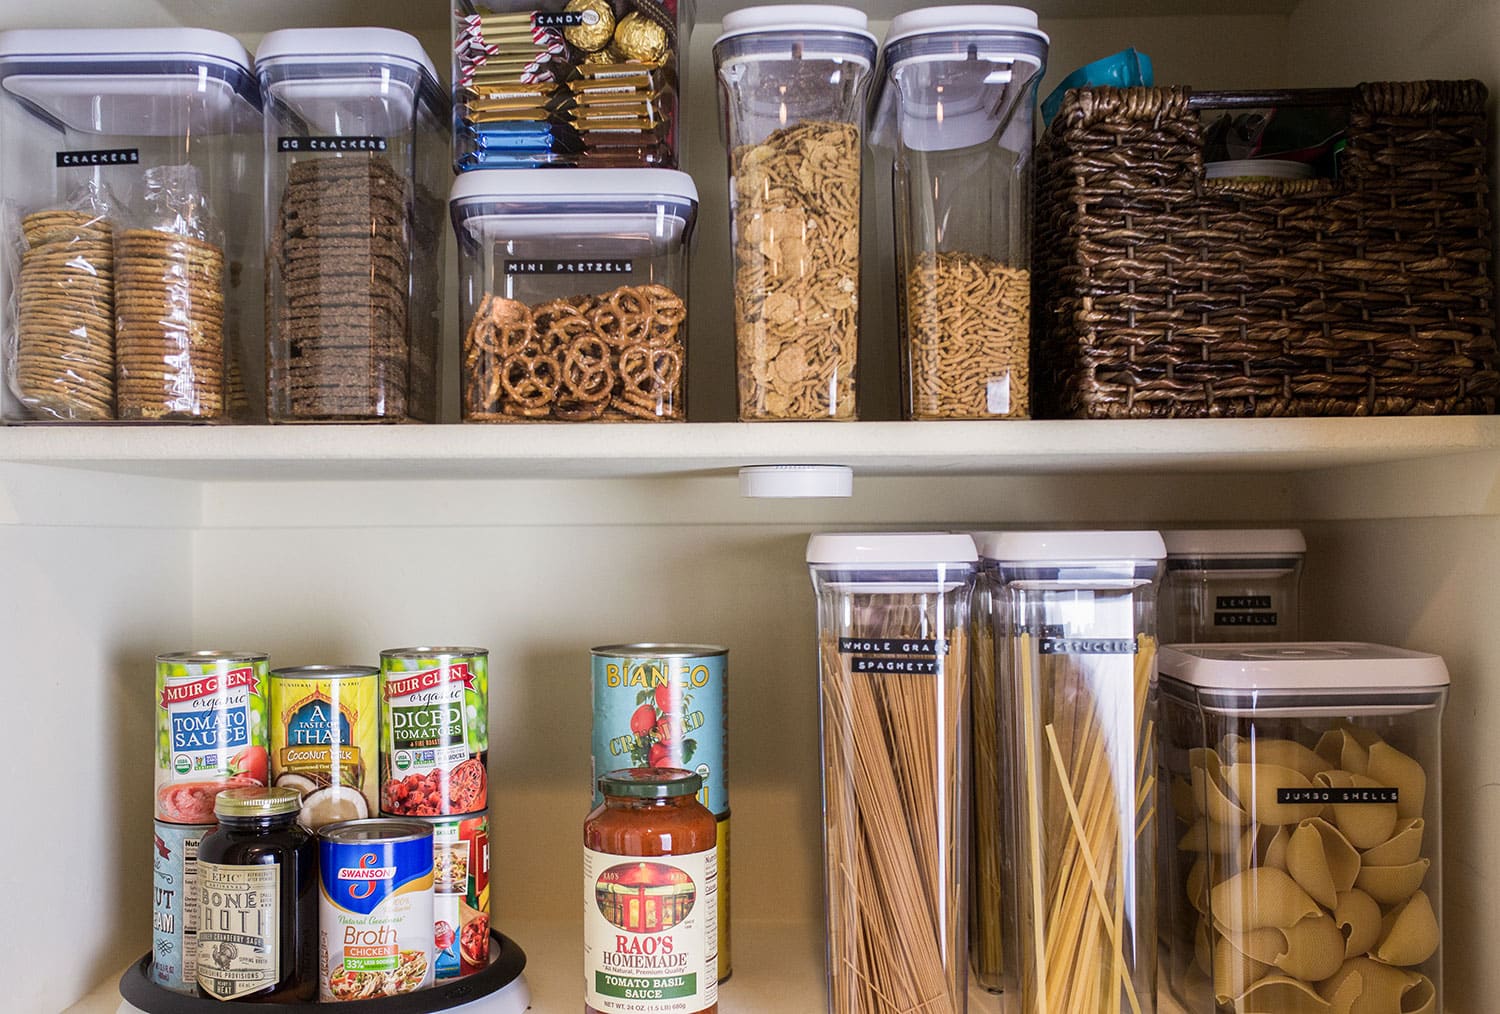
I can’t even tell you how excited I am to be partnering with OXO for this post. I’ve been obsessed with their POP Containers since I worked at Sur la Table in college. They’re ideal for pantry storage and organization.
First, they’re clear. You can easily see what you have on hand and what you’re running low on. When you’re whipping up dinner or making a grocery shopping list it’s so much easier to find things.
Second, they’re not breakable like glass. This is really nice if you have kids in the house… or if you’re like us and prone to breaking anything glass (embarrassing but true).
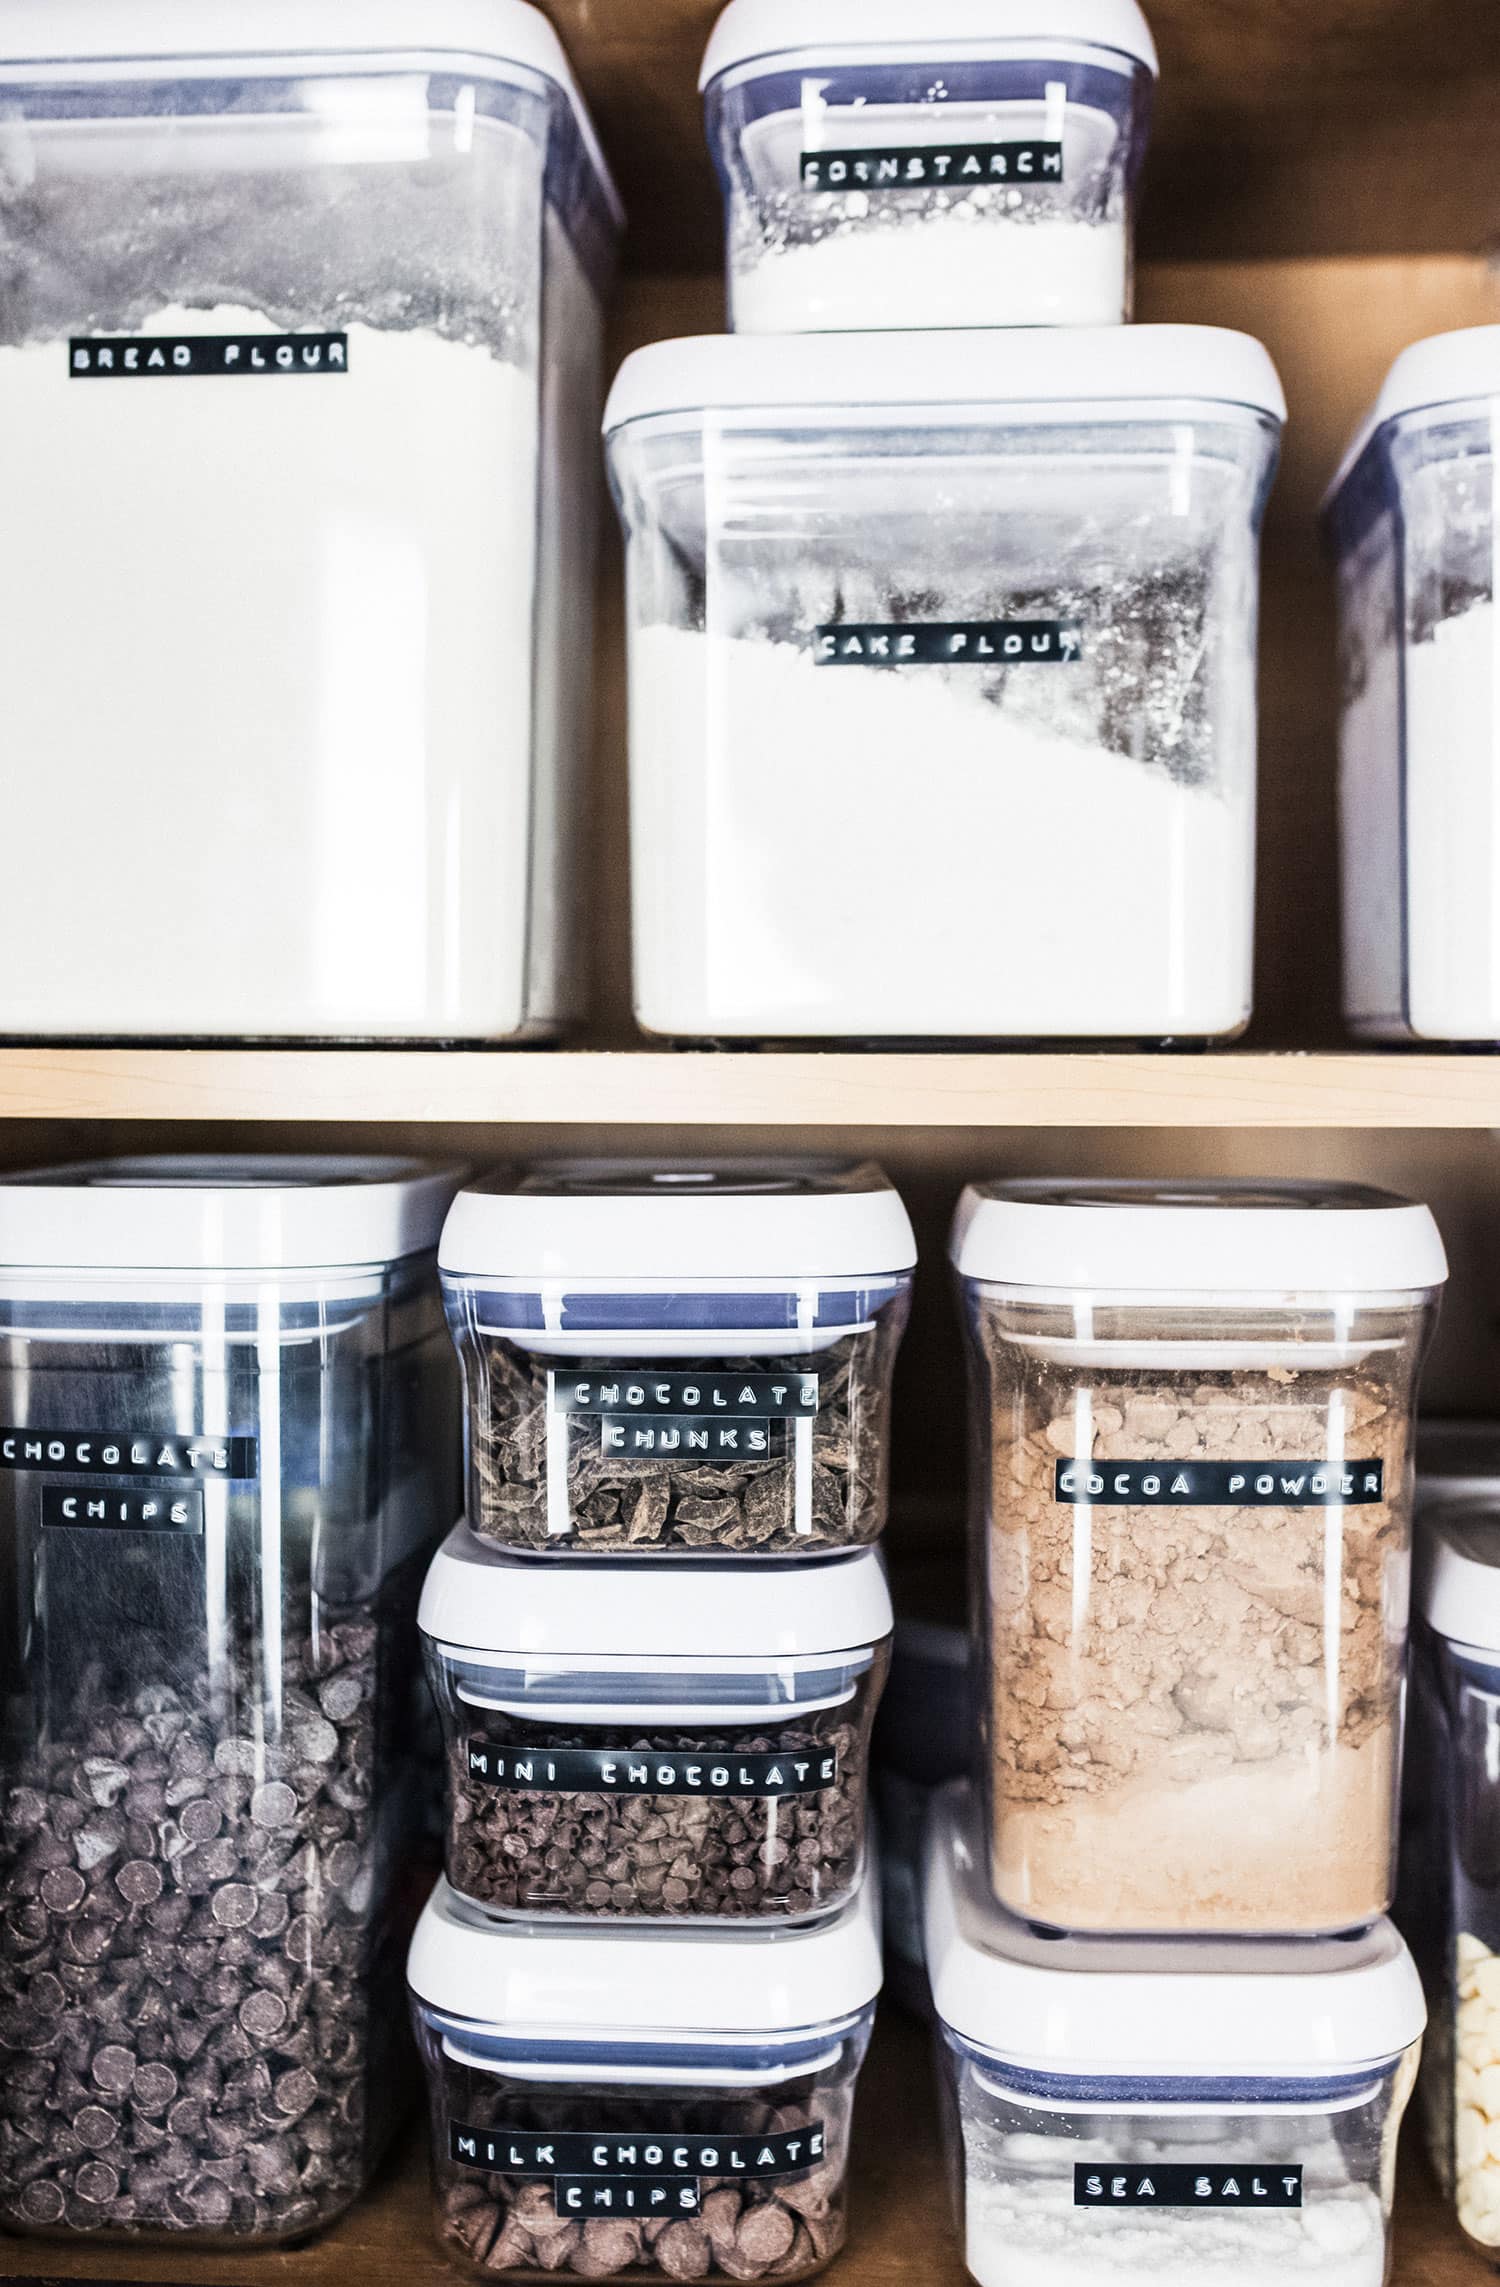
Third, the containers are modular so they stack and store brilliantly. There are so many sizes and shapes available to customize to your space and needs. This truly allows you to really take full advantage of whatever space you’re working with, no matter how wide or tall or deep it is.
Lastly? They create an airtight seal with just one push! It’s so fun and satisfying, way easier than other containers I’ve used in the past. You can be certain the airtight seal is keeping your ingredients fresh. The lids even come apart so you can thoroughly clean them.
OXO also creates some specialty containers, such as cereal containers and round canisters!
Turntables
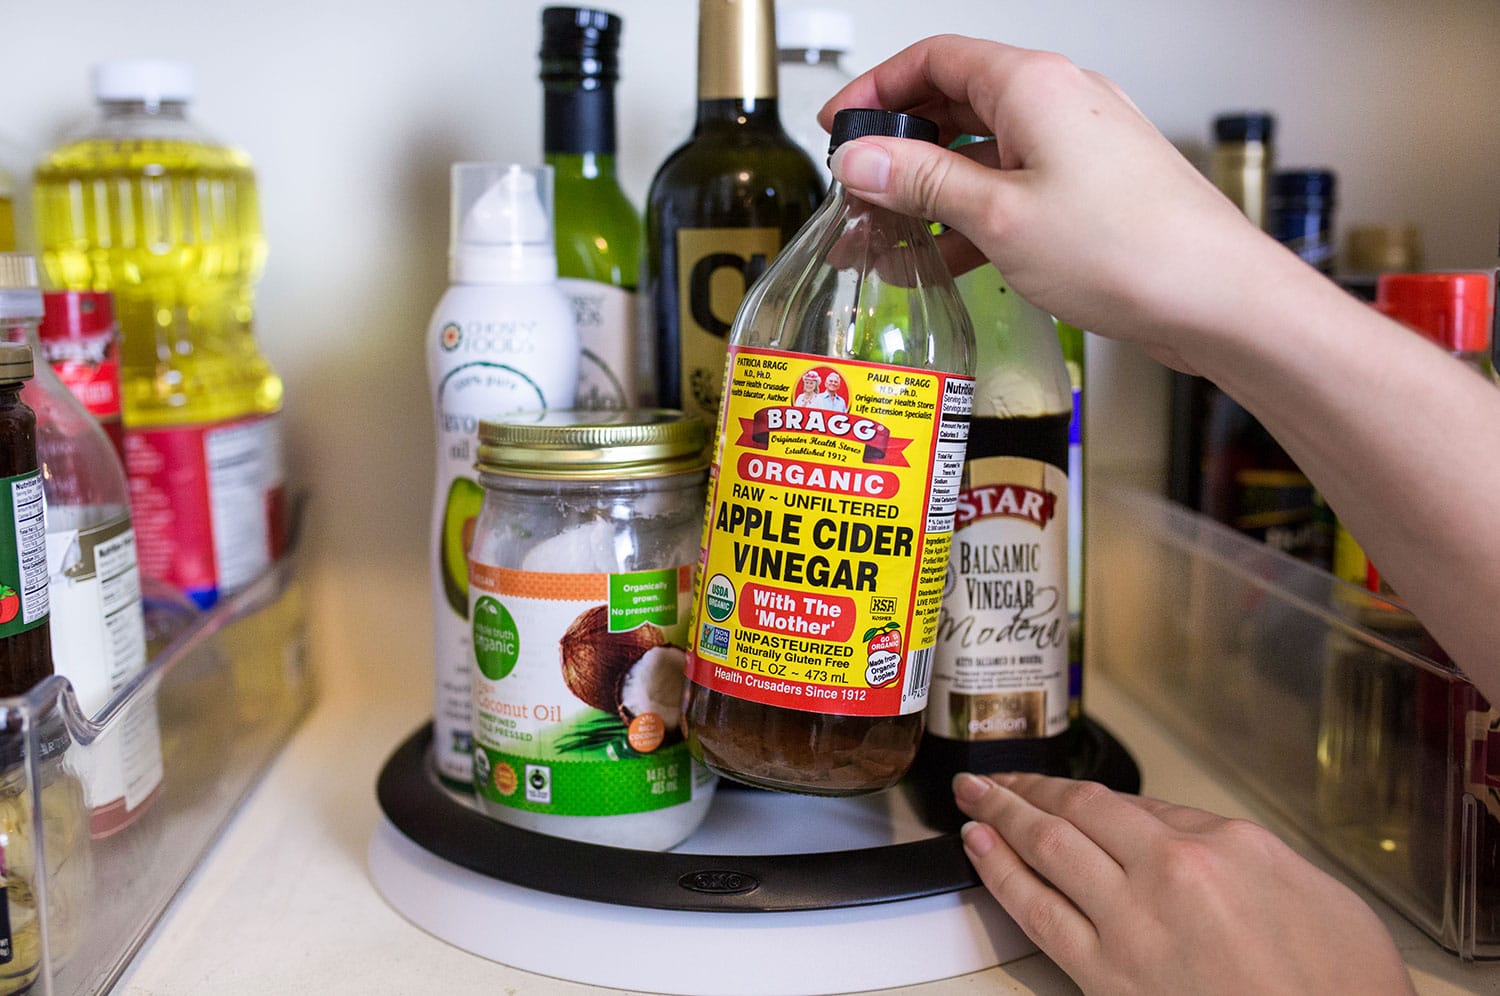
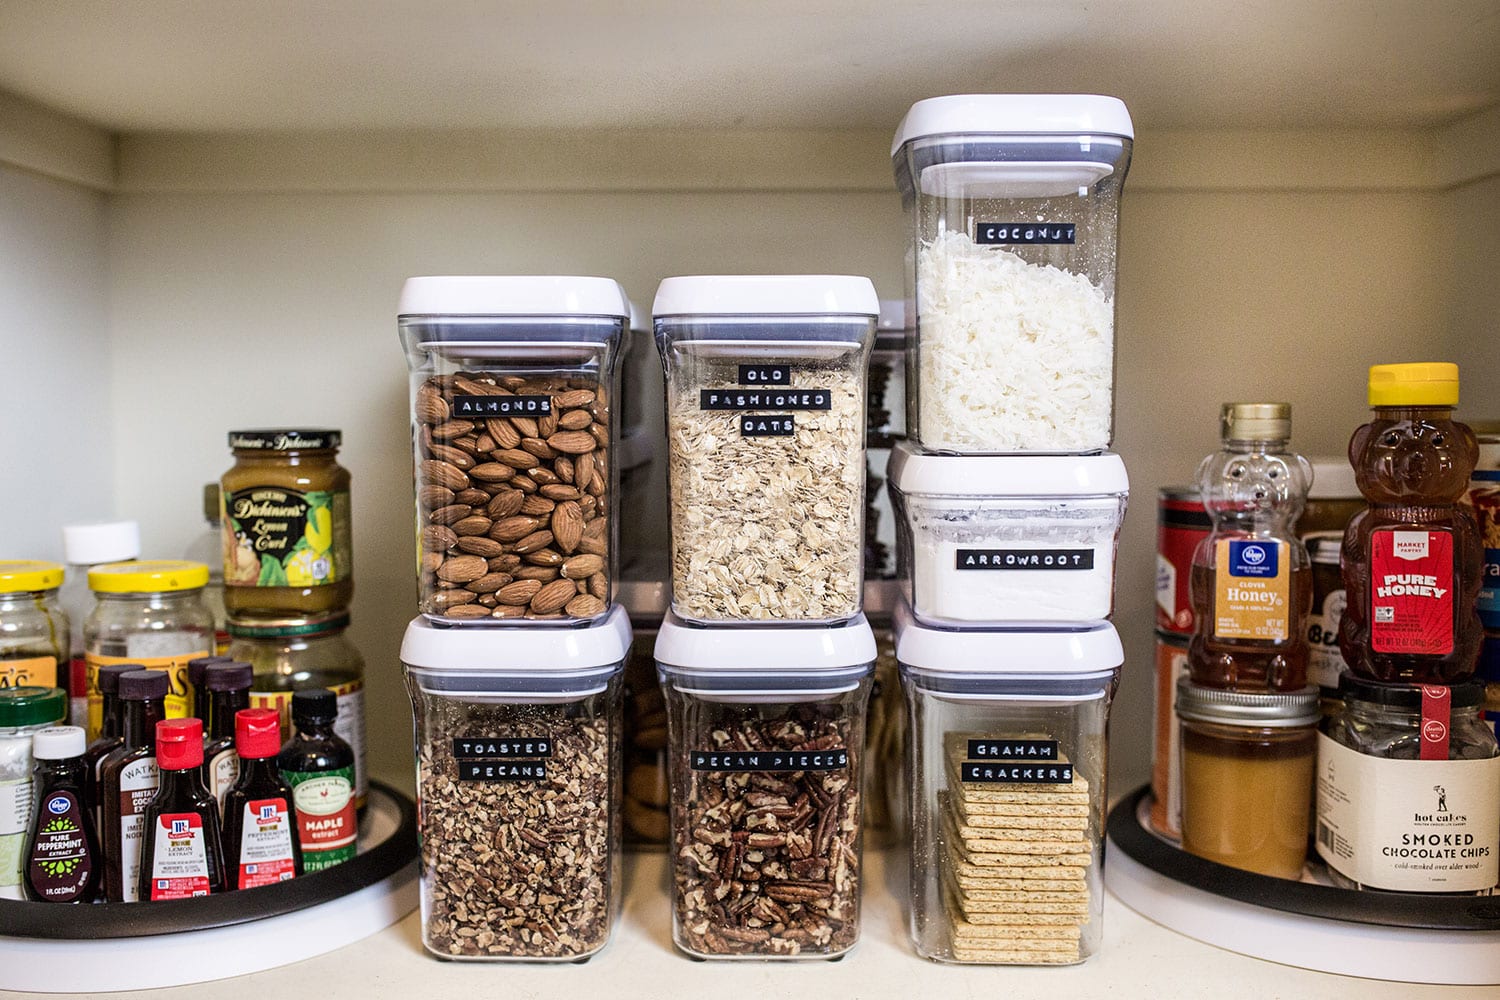
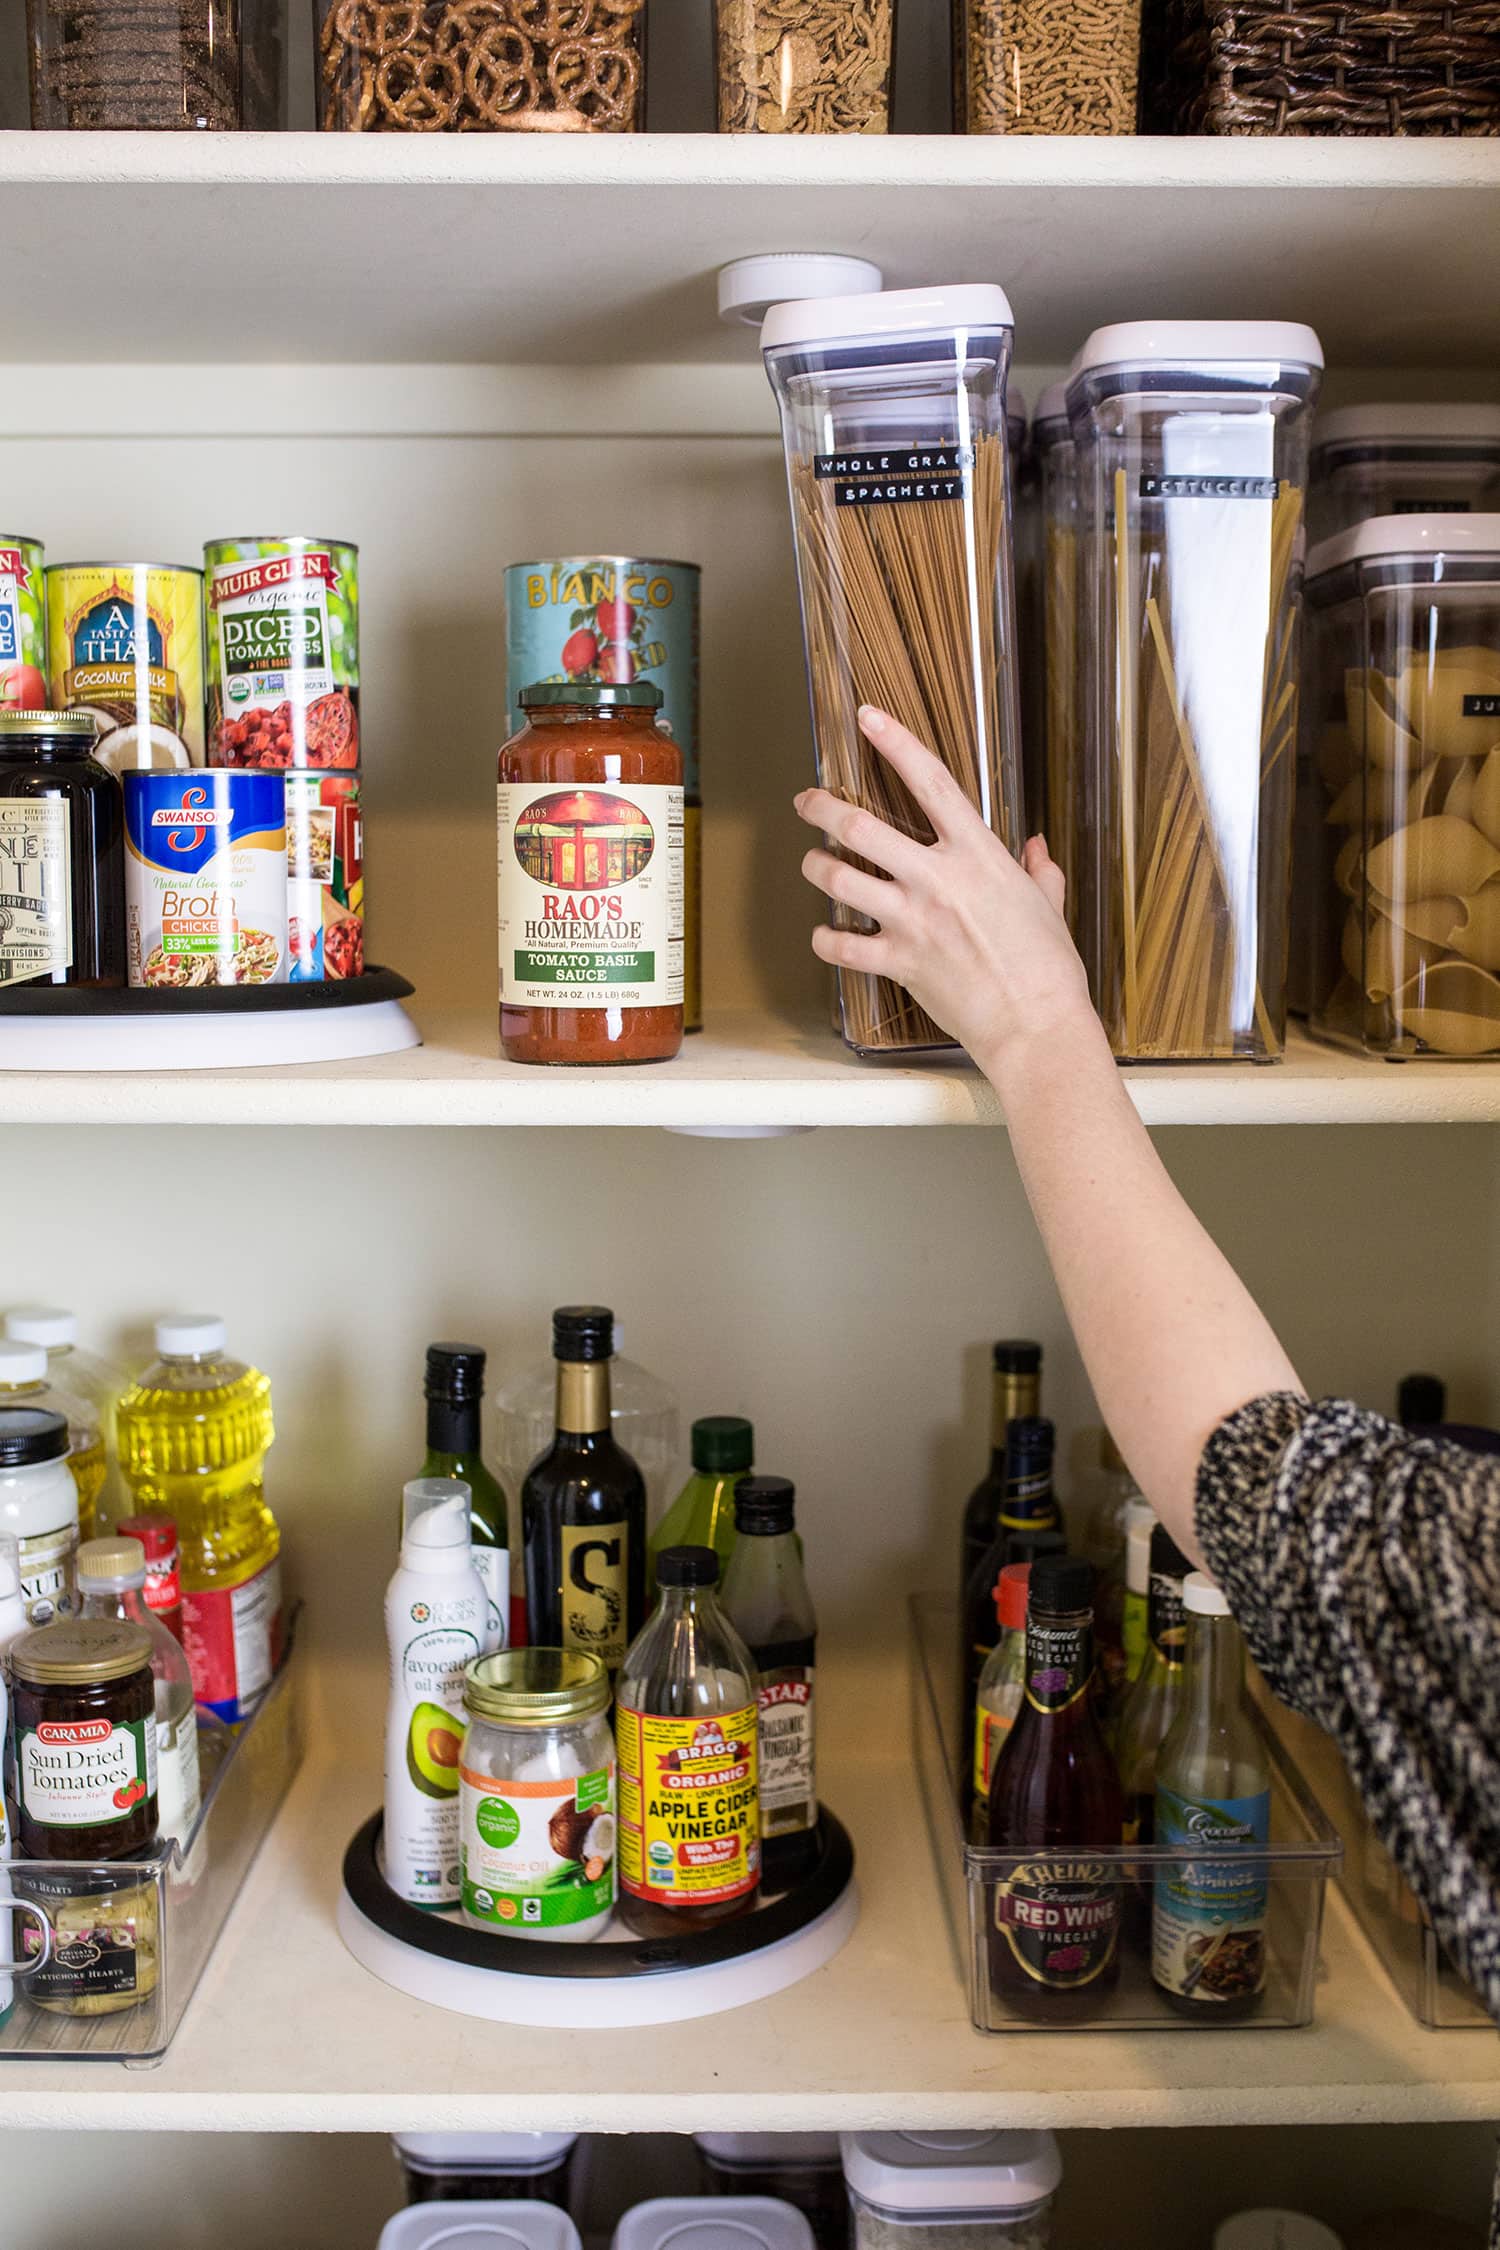
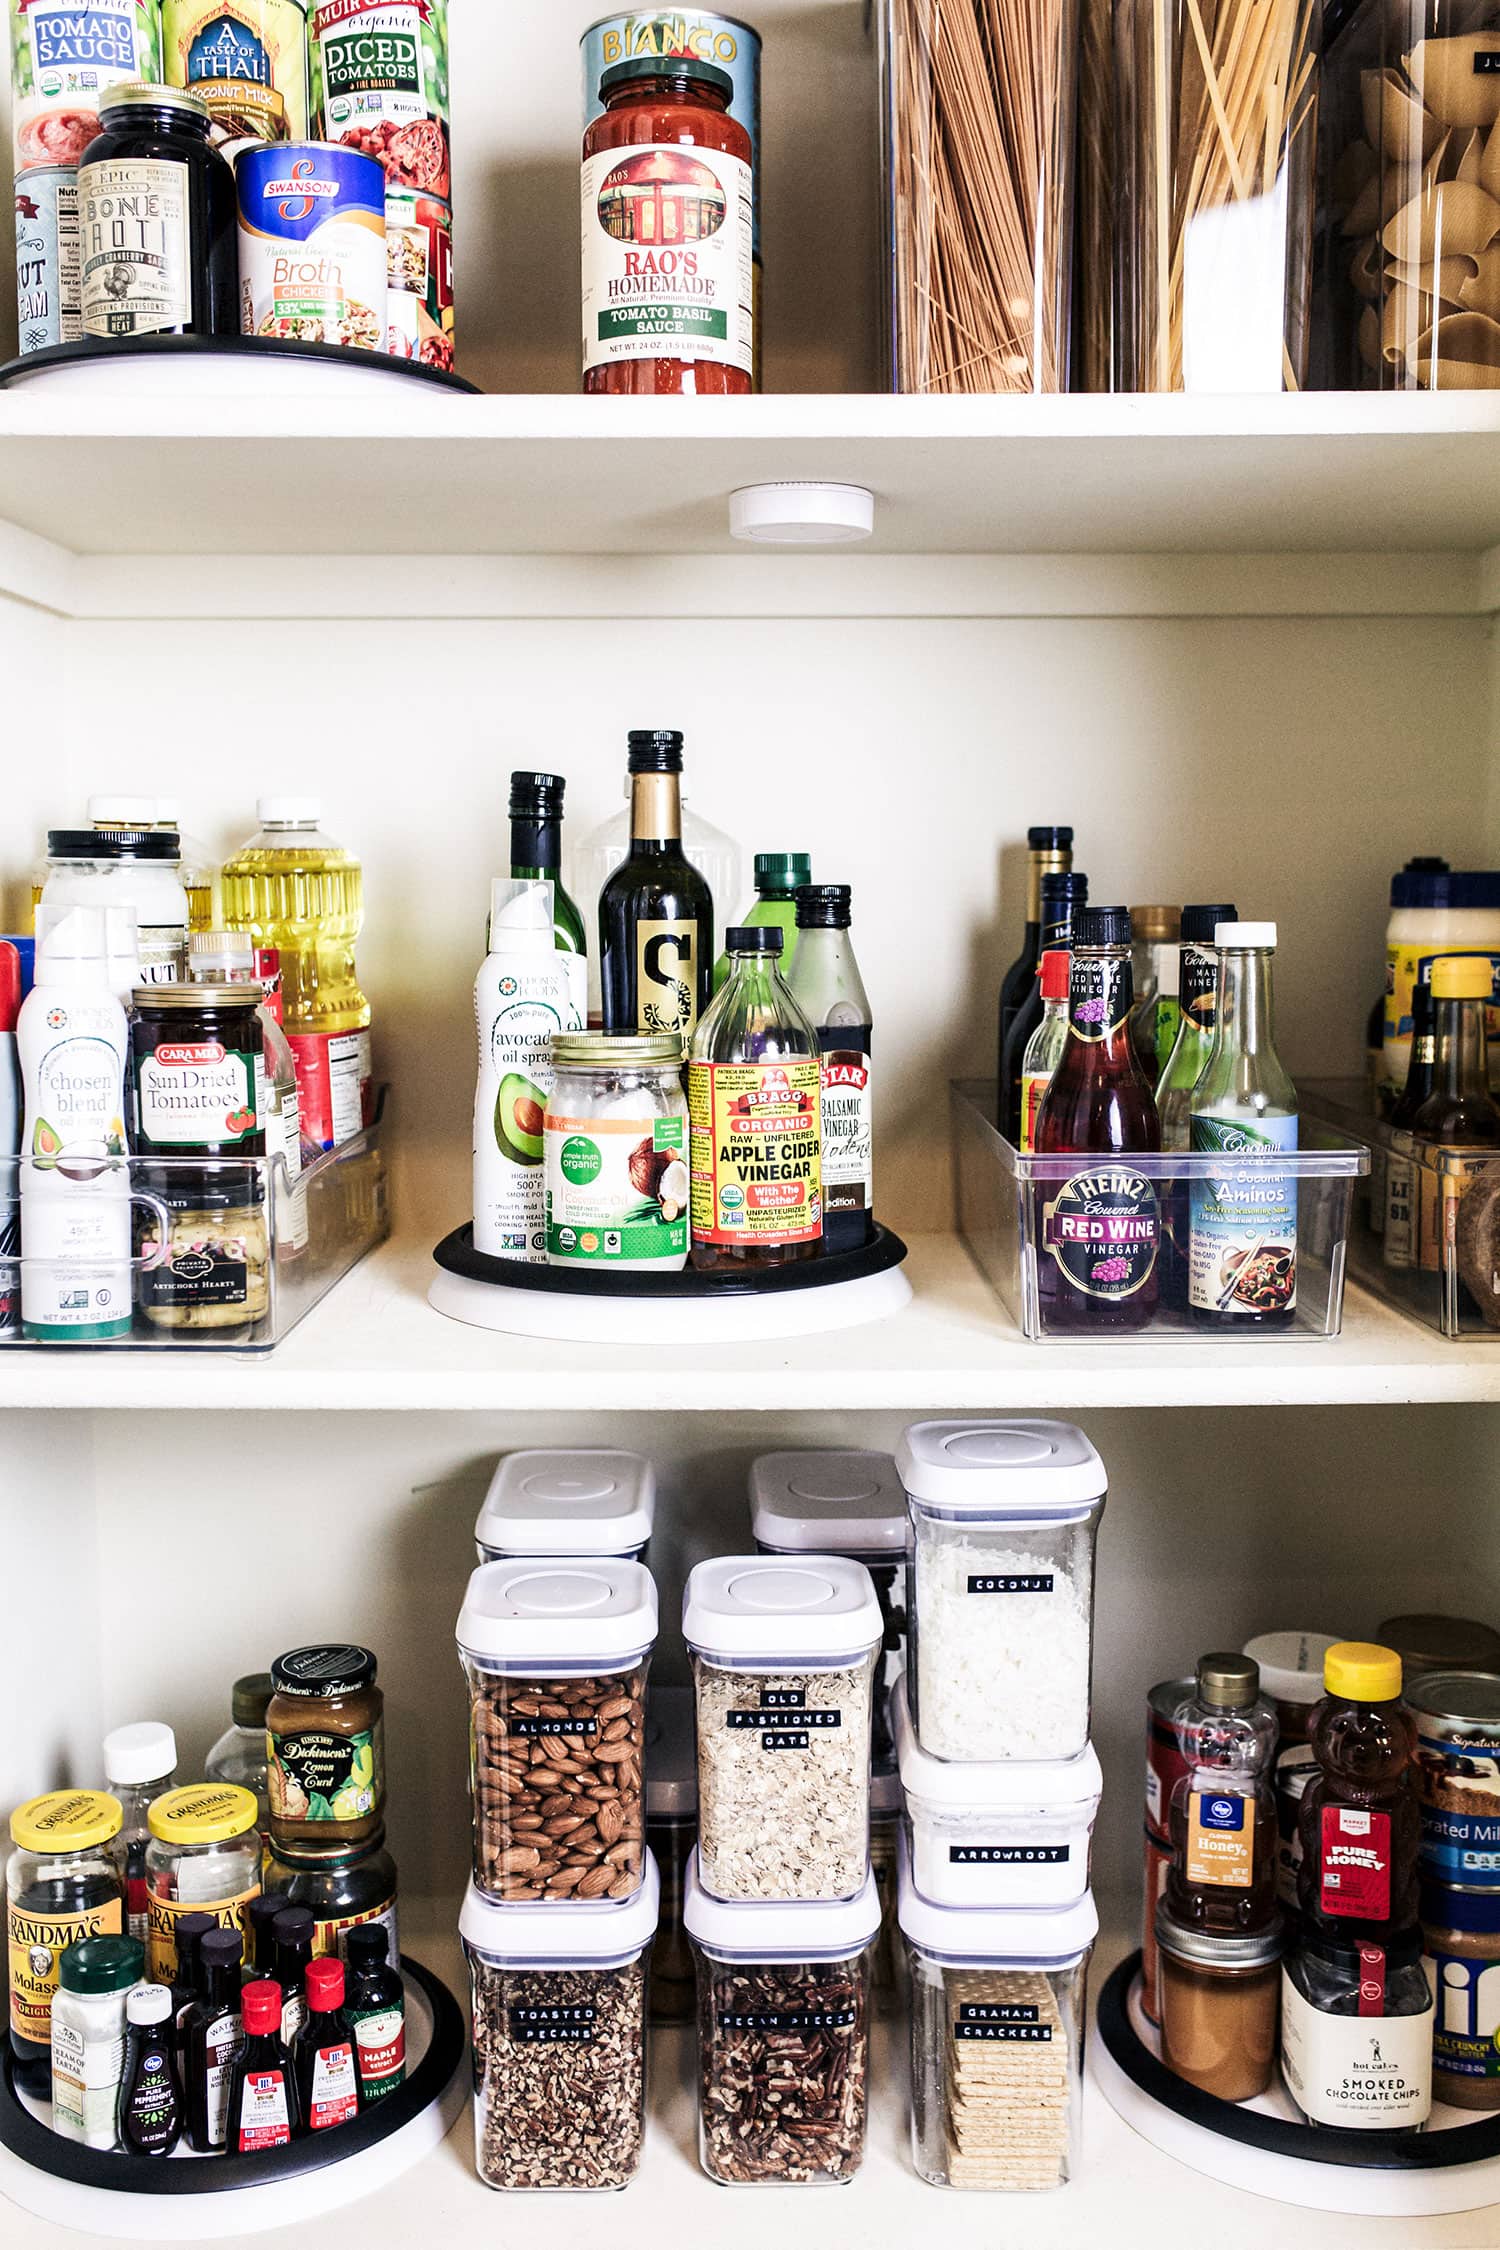
The turntables you see in these photos are also by OXO! These are the 11” ones, but OXO also makes larger 16” ones. Turntables are really nice to make the most out of a space so you can easily access your most frequently used foods. The OXO turntables particularly are really well designed so they don’t wobble and your items are kept securely in place.
I also love these because the last turntable we had was made from wood and it got molasses and honey stuck to it everywhere and made a huge mess that was impossible to clean.
Bins & Baskets
I like to use acrylic bins to organize bottles. This keeps them neat and tidy, while also making it easy to see what’s what. Group together like items, or items you use together (such as oils + vinegars). You can simply pull the entire bin forward to get to something in the back instead of trying to grab something without starting a domino reaction of knocking all of the other bottles over.
For more awkward packages or specialty equipment you don’t use often, wicker baskets are perfect. They’re sturdy enough to hold bulky items and maneuver. They add some texture to the look of your pantry, but also hide what’s inside if it’s not that pretty.
Labels, Scoops, and other Odds & Ends
I touch on labels further below, but definitely be thinking of these as you create your shopping list. For foods like flour or sugar, I love to have these OXO Scoops inside my containers. They’re so handy! Especially since I like to weigh my ingredients for baking.
Depending on your pantry, you might also want racks, hooks, drawers, additional shelves, etc.
Purchasing everything you’ll need to create an organized pantry is an investment. However it makes staying organized, reducing food waste, and being efficient in the kitchen so much easier. For me, and for anyone who spends a fair amount of time in the kitchen, this is beyond worth it.
Empty Out Your Pantry
Depending on the current state of your pantry, you might have to do this step before you start to create a shopping list and gather all of your supplies.
I rolled our moveable kitchen cart over to the pantry and literally emptied everything inside. This allowed me to clearly see what I was working with. Toss foods that are expired. Create a donation pile for foods you won’t eat. Find space elsewhere for items that are taking up too much room or don’t belong.
Start to group together similar items or items that cook or bake together. The shelves and cabinets that are easiest to access are where the items you use most frequently should go.
Before you place anything back on your shelves, wipe them down first! Get rid of any crumbs and spills so you’re starting fresh and clean.
First in, First Out
This is a principle we learned in culinary school. It means you rotate older food to the front of your pantry so you eat it before you eat the new food. This helps to save money and reduce food waste. It also helps you keep better track of what you have on hand so you don’t end up with more than will fit.
Since you’re likely moving things to new containers, labeling the expiration date as I describe below can be super helpful here.
Labels
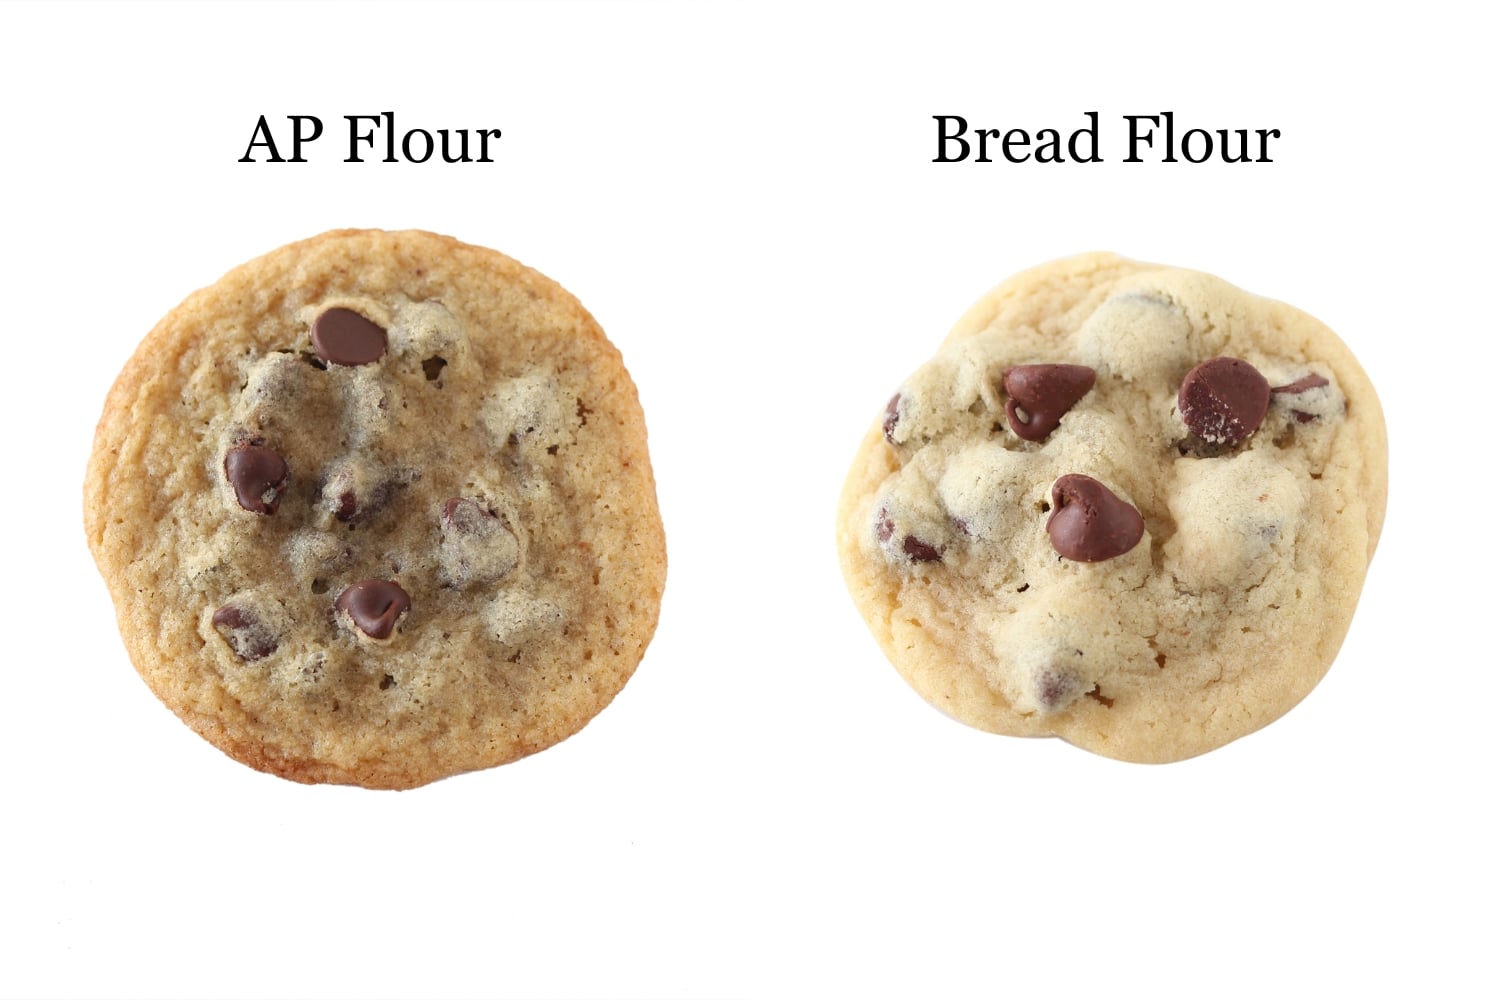
Labeling your containers might not be necessary in all instances since the OXO POP Containers are clear and easy to see through. However, for similar looking items (bread flour vs. all-purpose flour) I find this is totally essential. Plus, it helps give you a quick visual inventory of what you’re running low on. It also helps other people in your household know what’s what.
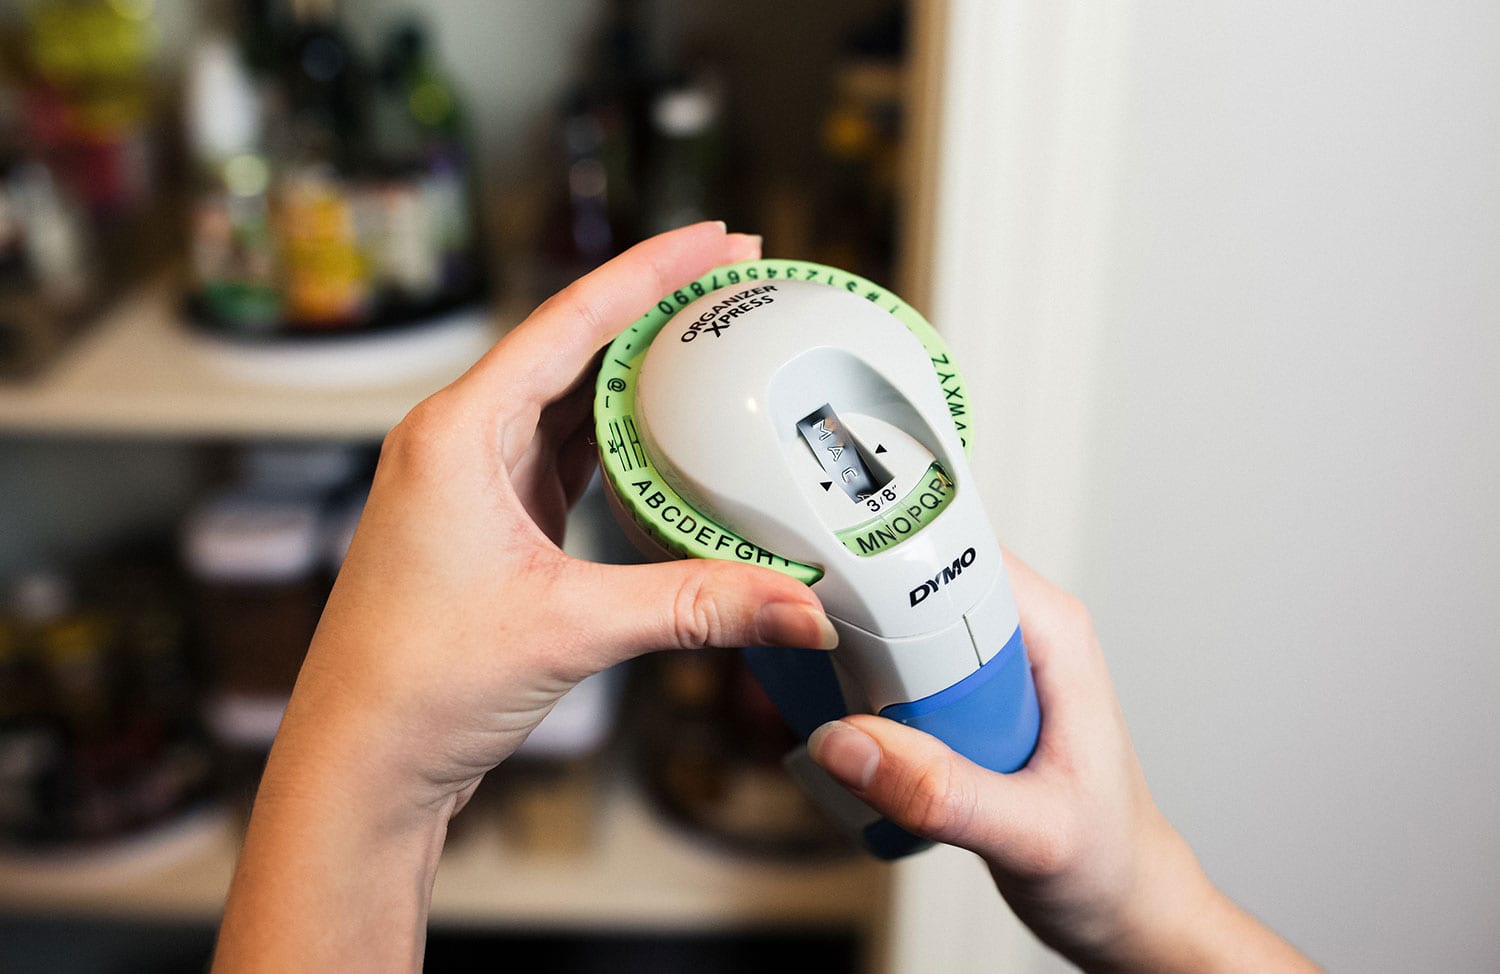
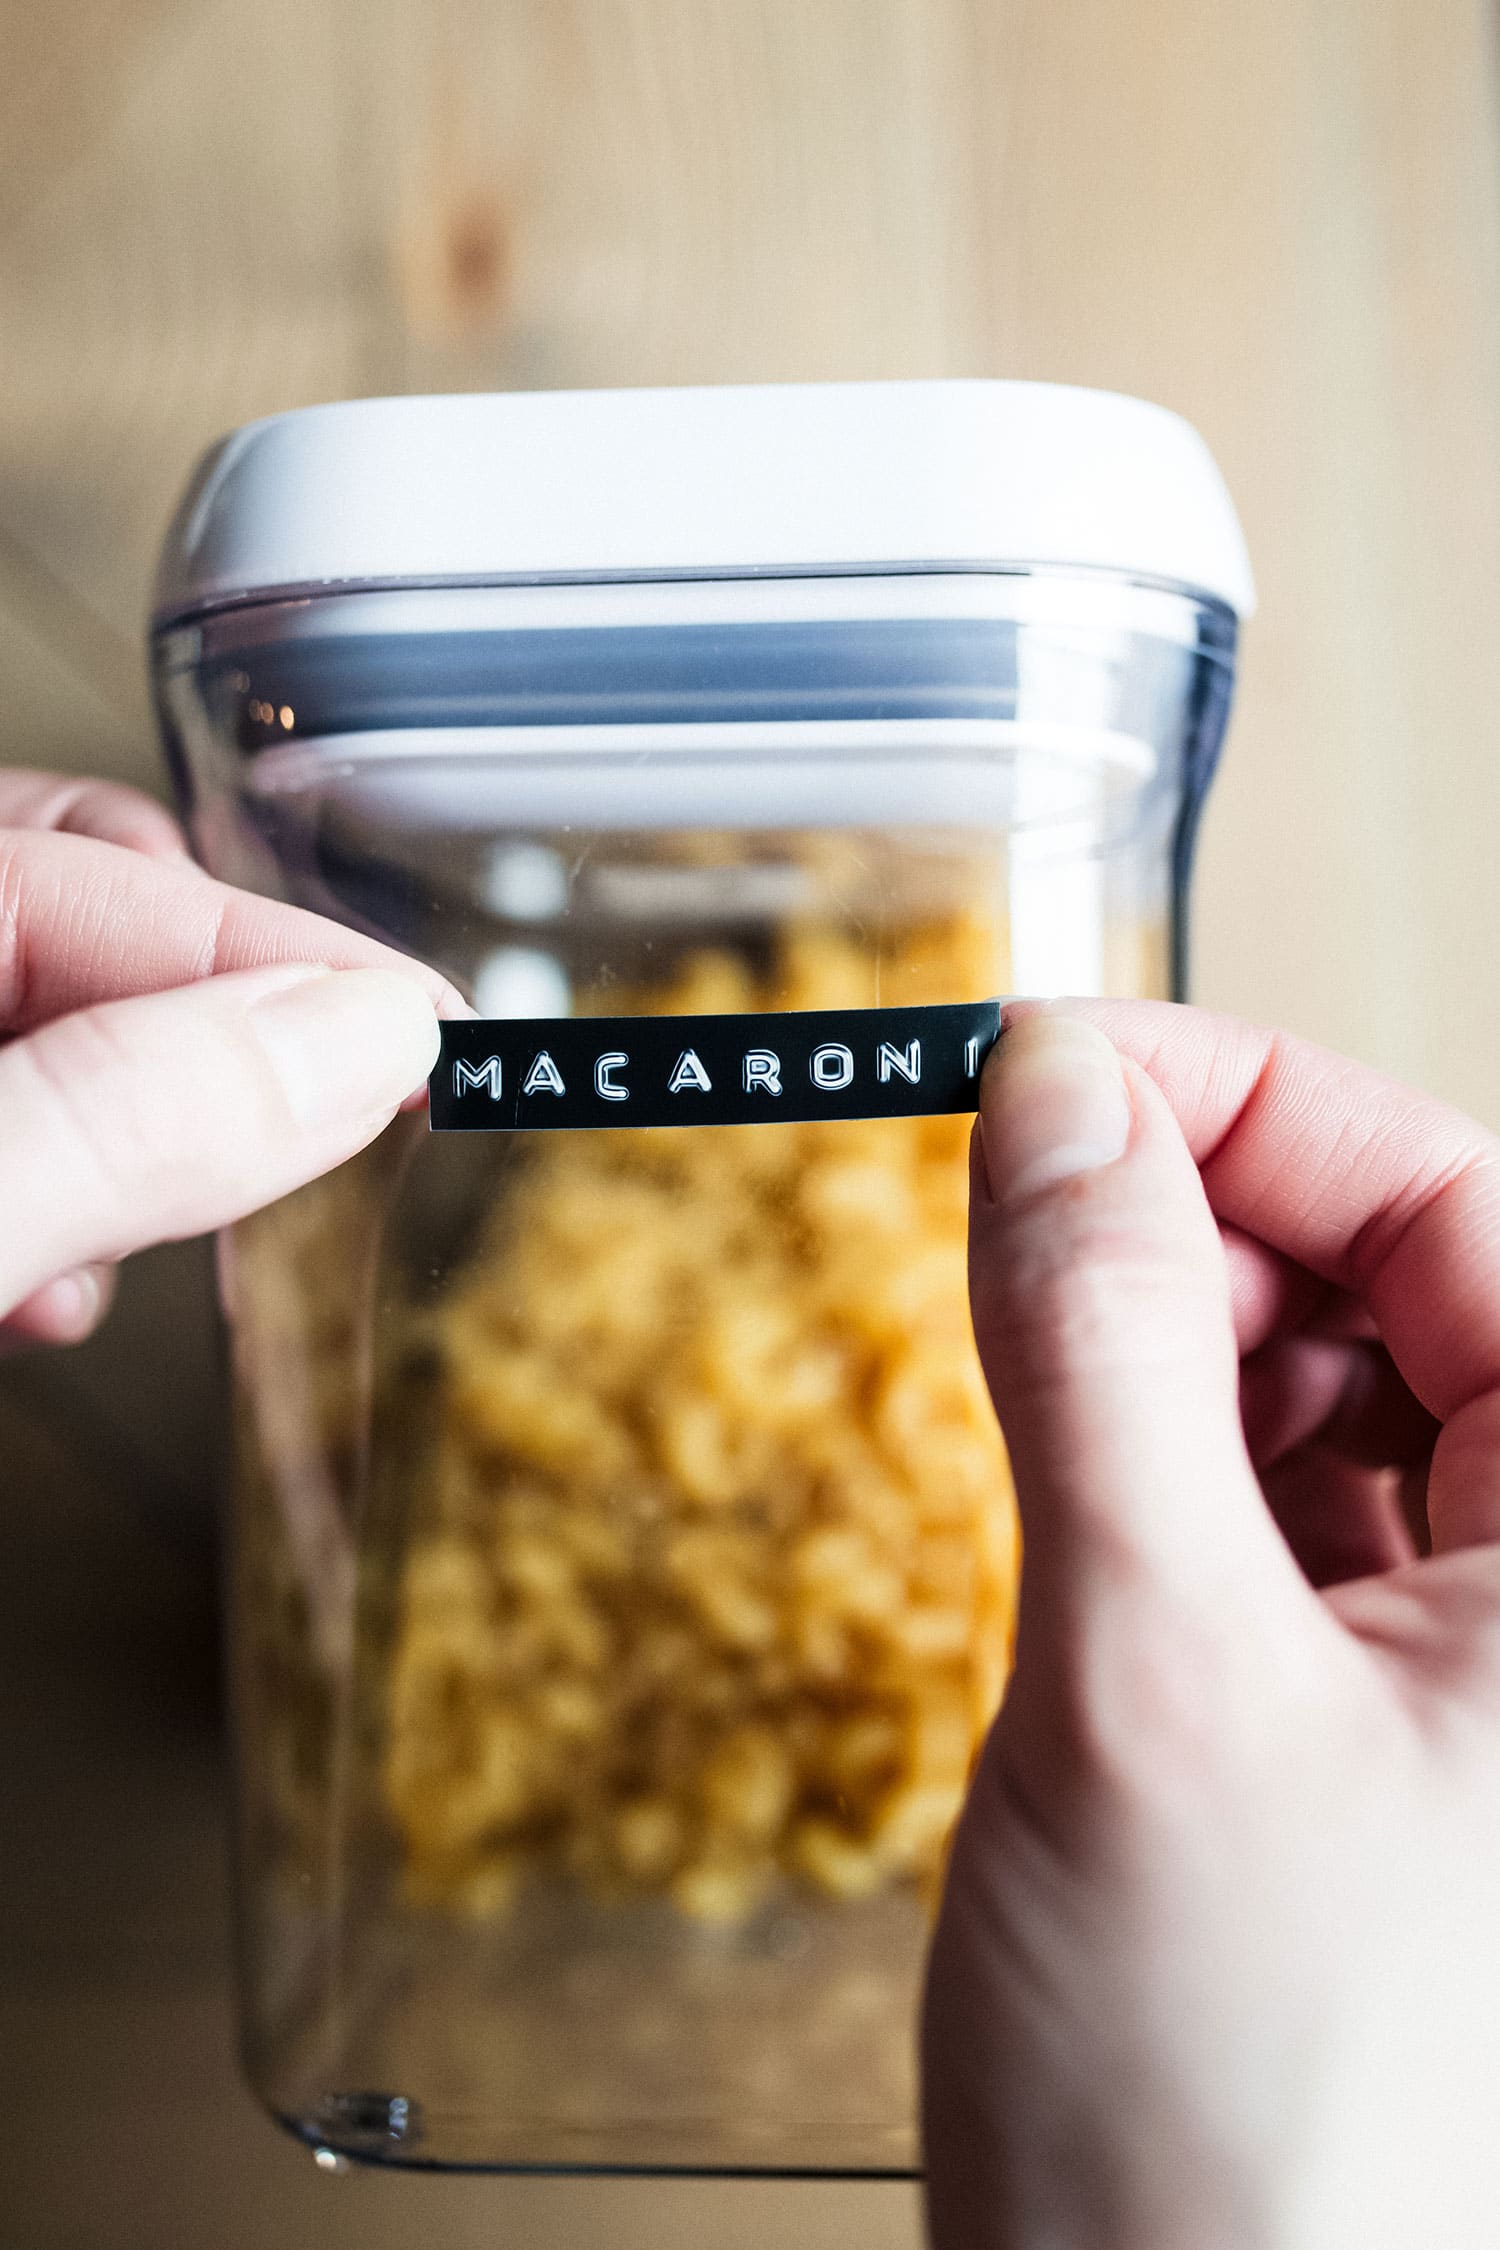
I loved using an embossing label maker. The one I used was the brand Dymo, I picked it up for less than ten bucks at The Container Store. I think it gives the pantry a really unique and fun vibe to mix the modern containers with a more vintage label. It has the added bonus of hiding the fact that I don’t have the prettiest handwriting (true story).
I’ve also printed out labels onto clear sticker paper in the past and have used chalk labels with success. I think this just depends on the look you’re going for and what’s more functional for your family.
How will I know the cooking time? Expiration date?
If you’re removing the packaging for pasta, rice, grains, and the like, that also means you’re removing the directions for how to cook the food. That’s why I like to attach a sticker on the bottom of the lid that specifies any cooking details.
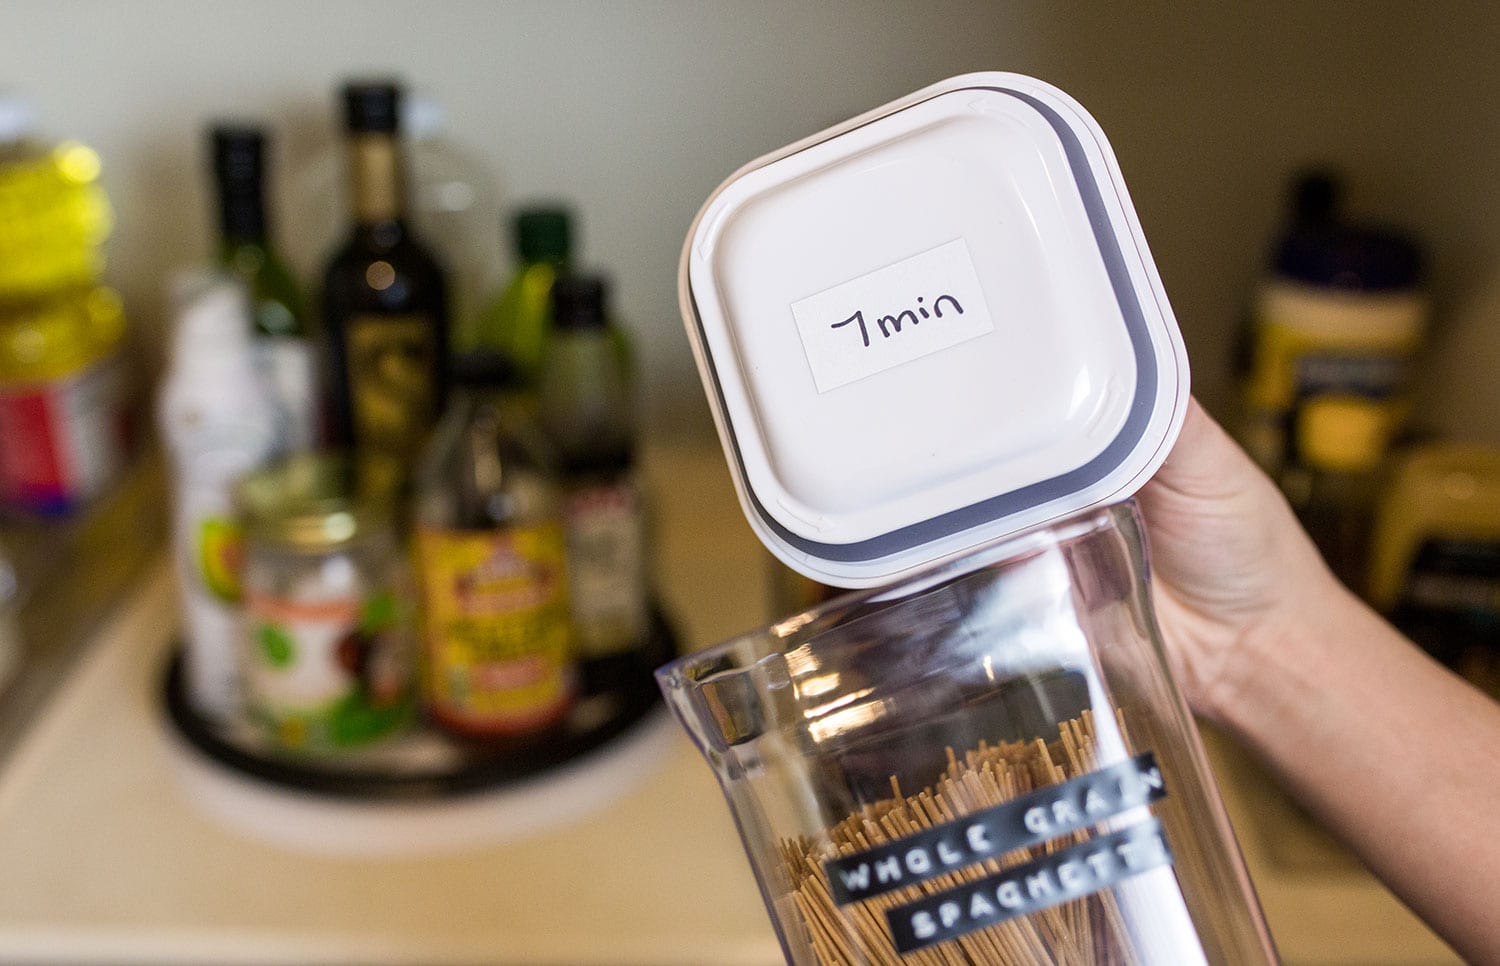
Typically it’s just the cooking time, since I know the technique required. But if there’s something else important to note, such as “rinse first” for quinoa, here’s the perfect discreet place to do so. You can also do the same with important expiration dates!
Lights
Those small battery-powered touch lights that can be affixed anywhere are a must for our pantry. It’s pretty dark and deep in there, and having at least one light for every shelf makes it so much easier to find something. This is definitely worth the little bit of extra time and money it costs!
Keeping Your Pantry Organized!
Be conscious not to throw things in random spots when you’re in a rush or distracted.
If you tend to do this, then every time you make a grocery list take 5 to 10 minutes to reorganize and tidy up your pantry. Do this before you go to the store because you might find something you had added to your list! It will also make it easier to put things back in order while unloading the groceries.
It might take an extra ten minutes a week, but this keeps your pantry and cabinets looking wonderful and staying functional.
I’d love to hear from you! Do you have any pantry organization tips or tricks? Share them in a comment below!
If you take on a pantry organization project then be sure to snap a picture and tag #handletheheat and #oxobetter so we can see.


Thank you for all the work and research and helpful tips on organizing a pantry. I really thought my pantry was organized … until I saw yours !!! Now I’m ordering some of those clear acrylic bins (I had been using very old Tupperware cracker containers, which are Halloween orange and you can’t see what’s in them), some battery operated lights, and some turntables. Yes, I have plastic … I think old Rubbermaid … turntables from the 1960s but they are old, small, noisy and stained with balsamic vinegar, molasses, etc.
I did recently spend a small fortune on the storage containers, like your Oxo but these are Better Home & Gardens from Wal-Mart. Same concept … just a different type of closure on the lid (which I personally prefer).
Anyway … thank you. Can’t wait to get my order from Amazon (where else ???) and get to work with yet MORE organizing. People who know me say organizing should be my middle name.