


Tessa Arias, Chef and Cookbook Author
This post may contain affiliate links. Read our disclosure policy.
One of the first things we learned in my baking class in culinary school was how to temper chocolate.
I was SO excited to learn because it always really intimidated me.
Turns out, it’s actually easy. All it takes is a little practice, precision, and patience.
Learning how to temper chocolate is the key to shiny, smooth chocolate that snaps when you break it and stays firm at room temperature (no refrigeration required).
I’ll walk you through the exact temperatures, best chocolate to use, microwave and seeding methods, and how to fix common mistakes so your chocolate sets perfectly every time.
Reader Love
We made this today, for Valentine’s family activity. We had so much fun!
I tempered in microwave. Followed every step and it worked. Thank you so much. They turned out delicious and pretty. Thank you so much.
–

Sprinkle of Science
What does it mean to temper chocolate?
Tempering chocolate is the process of heating and cooling chocolate to specific temperatures so the cocoa butter forms stable crystals.
When properly tempered, chocolate:
- Sets firm at room temperature
- Looks shiny and smooth
- Snaps cleanly when broken
- Resists white streaks (fat bloom)
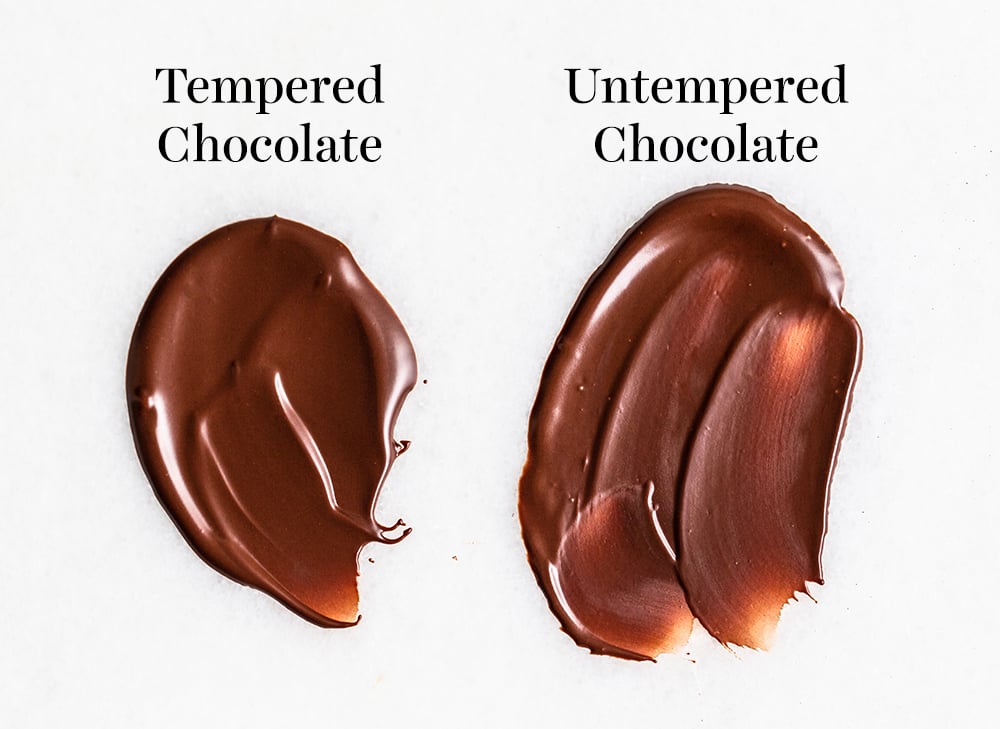
Without tempering, melted chocolate dries dull, soft, and streaky — and often needs refrigeration to stay firm.
I’ve included two methods for tempering chocolate in the recipe card below: stovetop and microwave.
Why & When to Temper Chocolate
If you’re dipping strawberries or making homemade candy like truffles or peanut butter cups, tempering gives you a professional finish, without adding stabilizers or refrigerating.
If you’re simply adding chocolate to brownies, mousse, or ganache, tempering is not necessary.
Two Rules for Melting Chocolate
These apply whether you’re melting or tempering.
1. Don’t Overheat It.
- Dark chocolate: never above 120°F
- Milk or white chocolate: never above 110°F
Overheating damages flavor and prevents proper crystal formation.
2. Keep Water Away.
Even a drop of water will cause chocolate to seize and turn grainy.
If your recipe includes butter, liqueur, or coffee, melt it together with the chocolate — not after.
Best Chocolate for Tempering
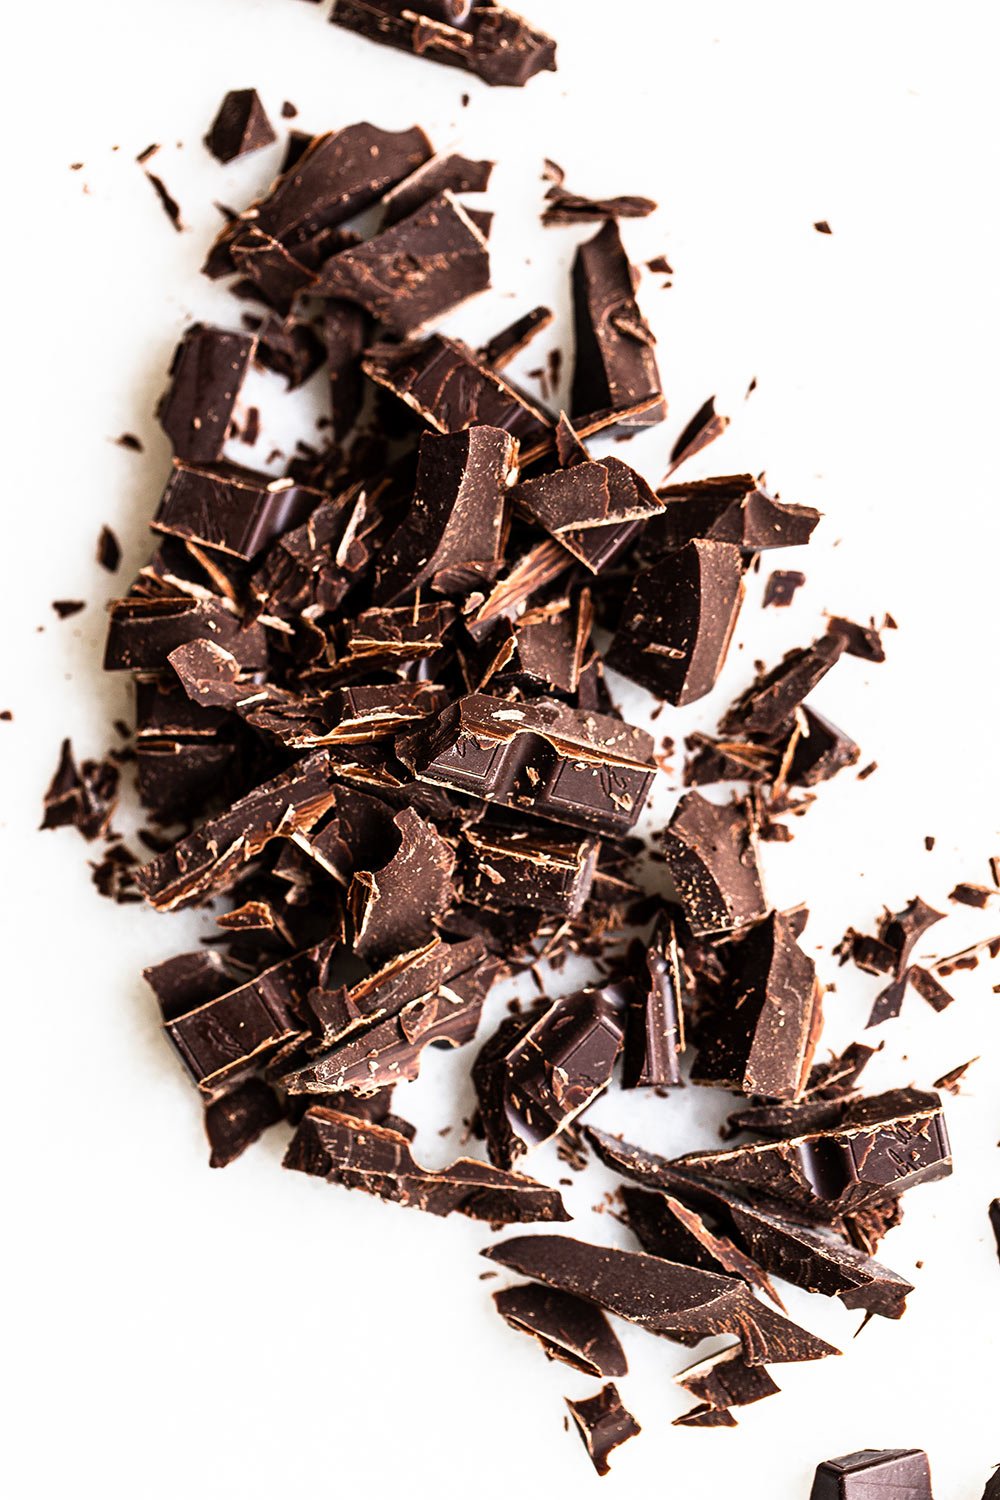
Use high-quality baking bars or couverture chocolate, NOT chocolate chips.
Good options (chop finely with a serrated knife):
Best option (no chopping required!):
DO NOT use chocolate chips. They contain stabilizers to hold their shape, which interferes with smooth tempering.
For a full breakdown, see my Chocolate in Baking Guide.
Do you need a thermometer?
Yes. I strongly recommend one.
Tempering is about precise temperature control. Guessing increases failure risk — and chocolate isn’t cheap.
A digital instant-read thermometer works perfectly.
Baking Success Tips
- Temper at least 16 ounces.
- Finely chop chocolate for even melting.
- Avoid glass bowls if possible, they retain heat longer.
- Work in a cool, low-humidity room.
- If chocolate thickens too much, gently rewarm to working temp.
- If temperature rises too high, add more chopped chocolate.
- Don’t refrigerate finished dipped items unless necessary.
Storage & Make-Ahead
Tempered chocolate can be reheated and re-tempered multiple times.
Store tempered chocolate creations at a cool room temperature in a dark dry environment. Do not refrigerate unless absolutely necessary.
FAQs
The process involves controlling the melting, cooling, and reheating of chocolate within specified temperature ranges depending on the kind of chocolate.
The goal of tempering chocolate is to ensure the development and longevity of Form V crystals, one of the six types of cocoa butter crystals.
This type of fat crystal is stable and contributes to the coveted textural properties of a delicious chocolate treat!
Maintaining and controlling the development of Form V crystals is also crucial to avoid the unpleasant white, chalky appearance that can form on chocolate when recrystallization occurs.
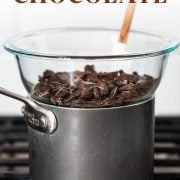
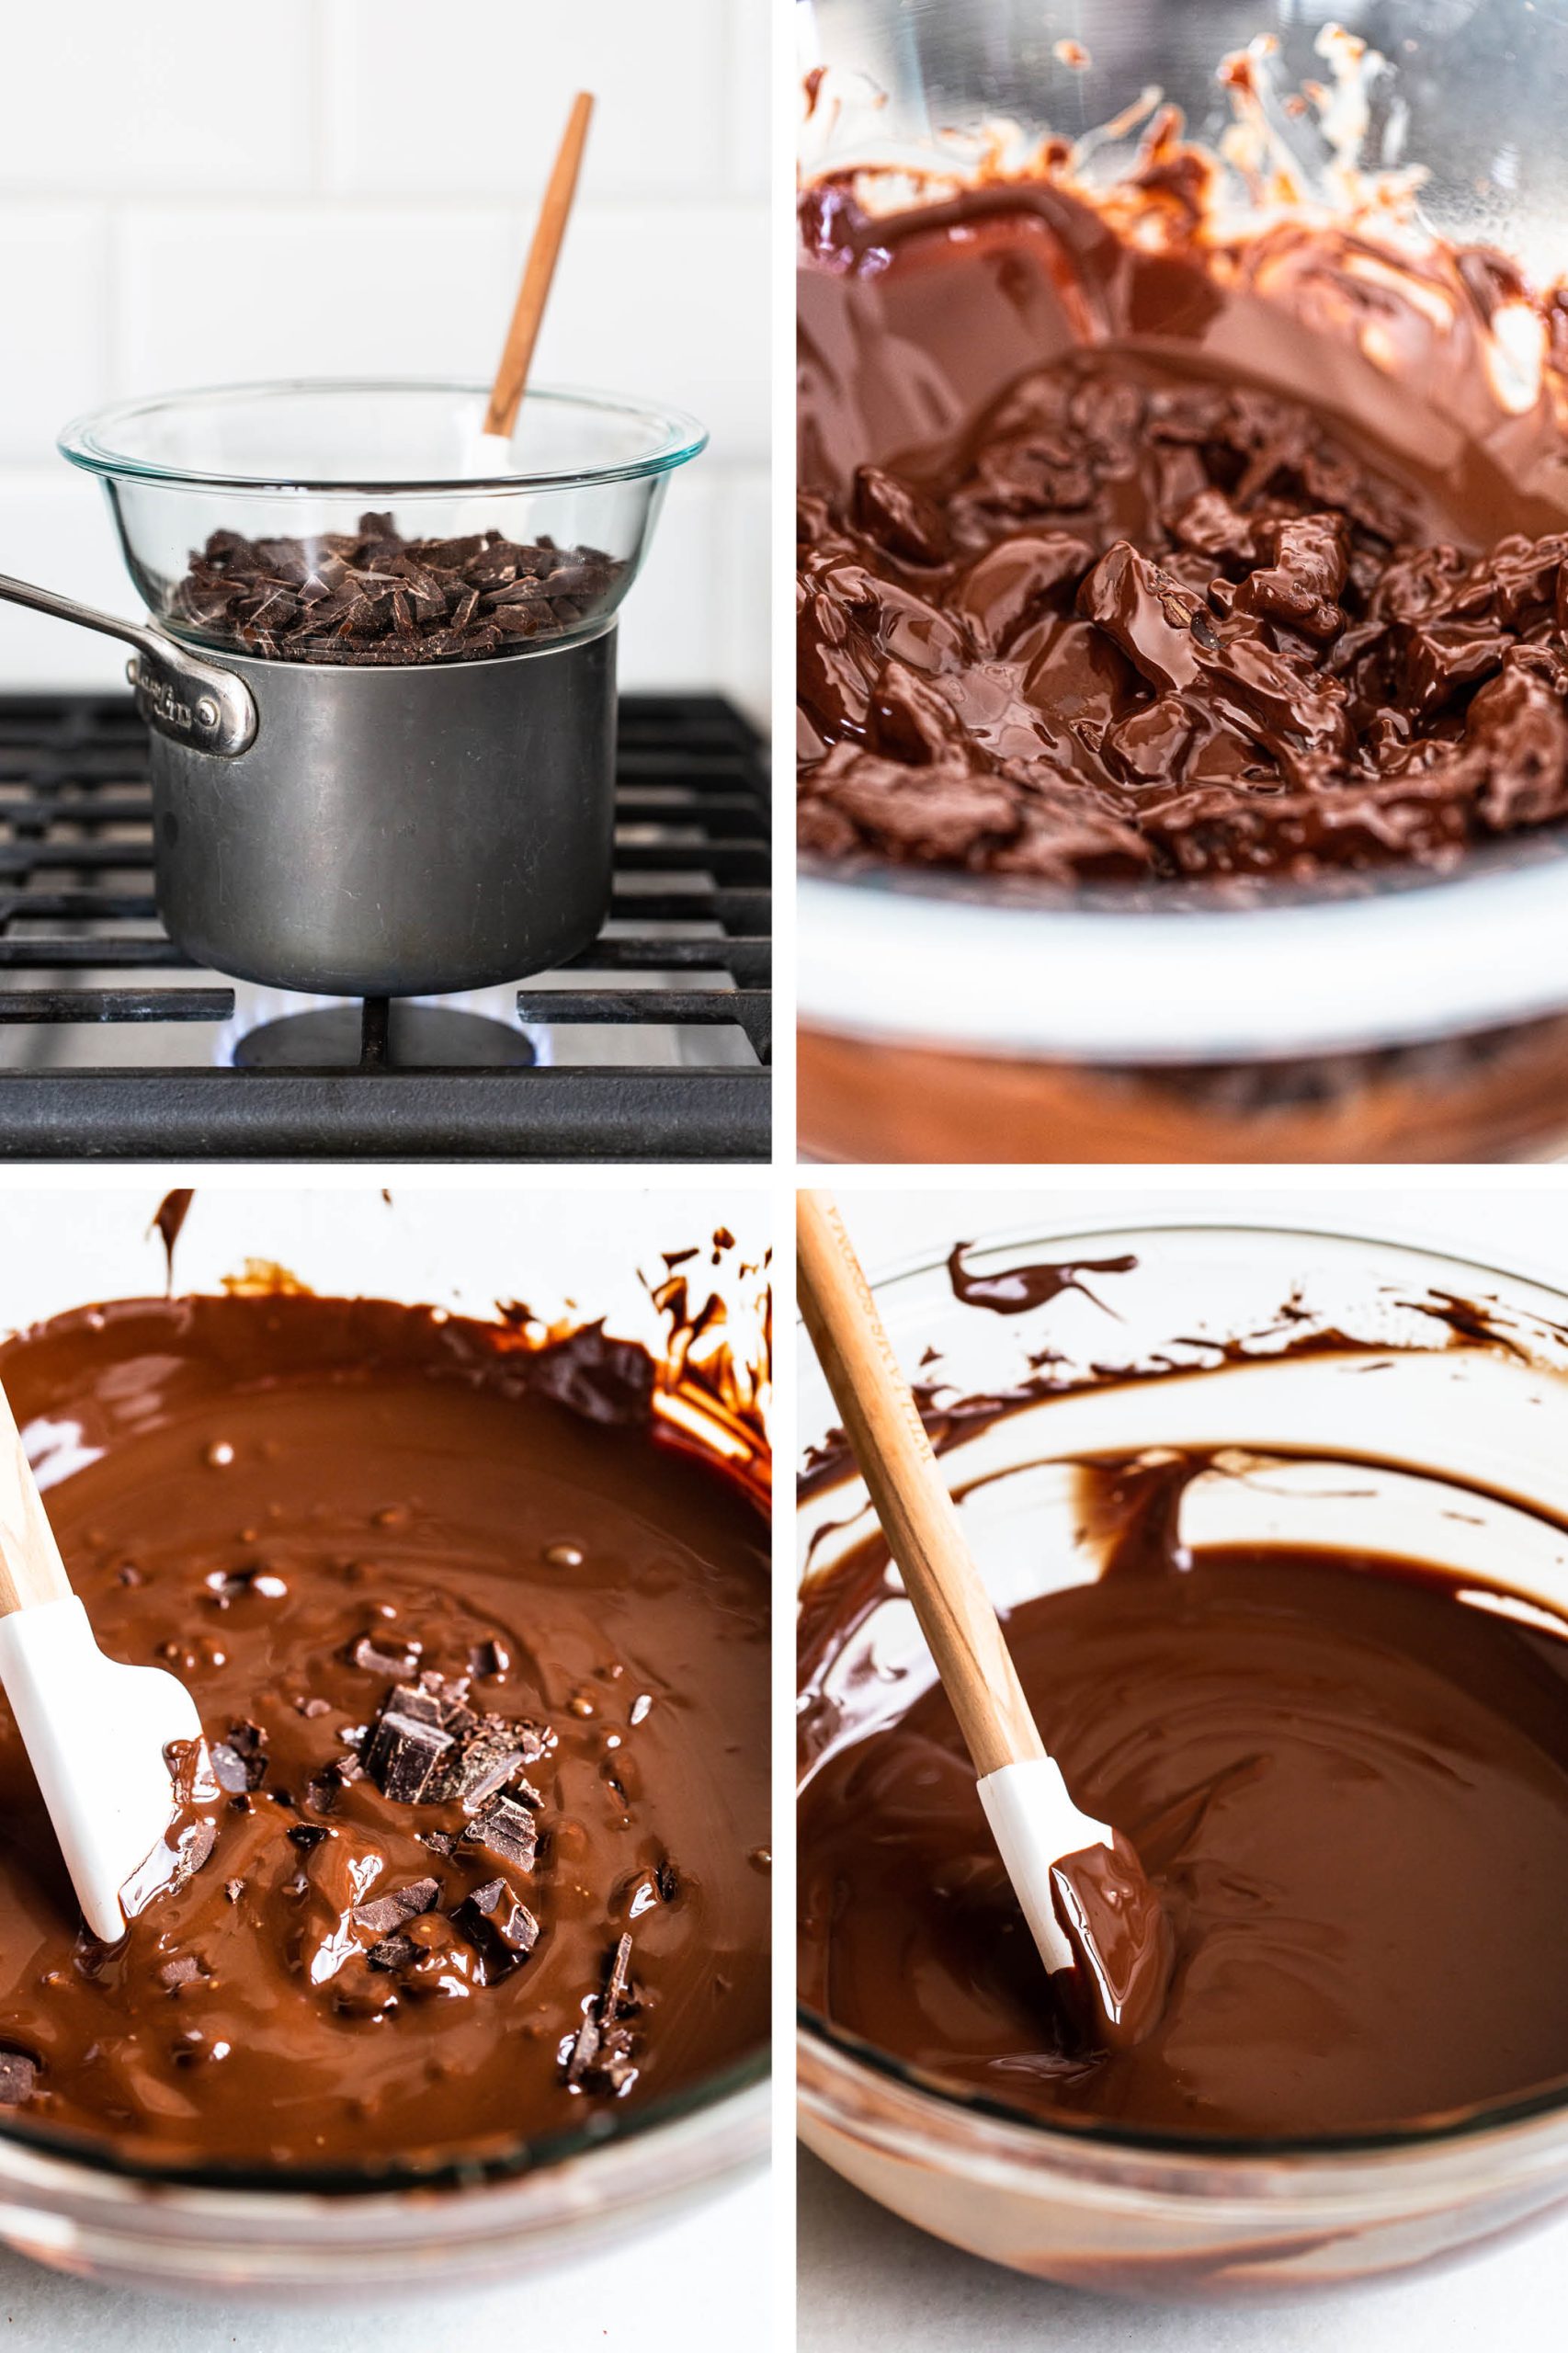
A double boiler is simply a heatproof bowl set over a saucepan filled with about an inch of simmering water.
You just want to make sure the bowl on top doesn’t touch the water.
This allows the chocolate to be melted gently by the heat.
You can use metal or glass bowls for the top part of the double boiler.
Glass will take longer to cool down as required to temper in Step 2.
I don’t recommend it. They contain added ingredients to help them hold their shape and have a lower concentration of cocoa butter, which will interfere with smooth tempering.
Yes, but not for tempering. The way to fix seized chocolate is completely counterintuitive. Stir in a little bit of melted butter, oil, or water back into the mixture. The fixed melted chocolate should only be used for chocolate sauce or hot chocolate and not for tempering.
Streaks usually mean the chocolate wasn’t fully tempered or the temperature went too high. Reheat gently, add more seed chocolate, and repeat the cooling process.
Dark chocolate should be worked at 88–90°F, milk chocolate at 85–87°F, and white chocolate at 82–84°F. These temperatures maintain stable crystals without melting them.
‘Chocolate’ candy melt products available at many stores produce a similar crunchy coating when dipped. However, most chocolate compound products aren’t actual chocolate because the cocoa butter has been replaced by hydrogenated industrial oils. They taste artificial and don’t provide the same satisfaction.
Email This Recipe
Enter your email, and we’ll send it to your inbox.
Ingredients
- 16 ounces (454 grams) baking chocolate, finely chopped
Instructions
Tempering Chocolate by Seeding:
Tempering Chocolate by Seeding:
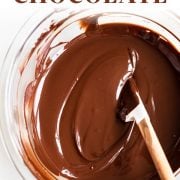
- In a double boiler, melt 2/3 of the chocolate, stirring often, until the thermometer registers around 115°F, but absolutely no higher than 120°F. If tempering milk or white chocolate, heat to 110°F. Remove from the double boiler. Make sure all equipment that comes in contact with the chocolate remains completely dry. Any water will cause the chocolate to seize.
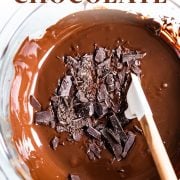
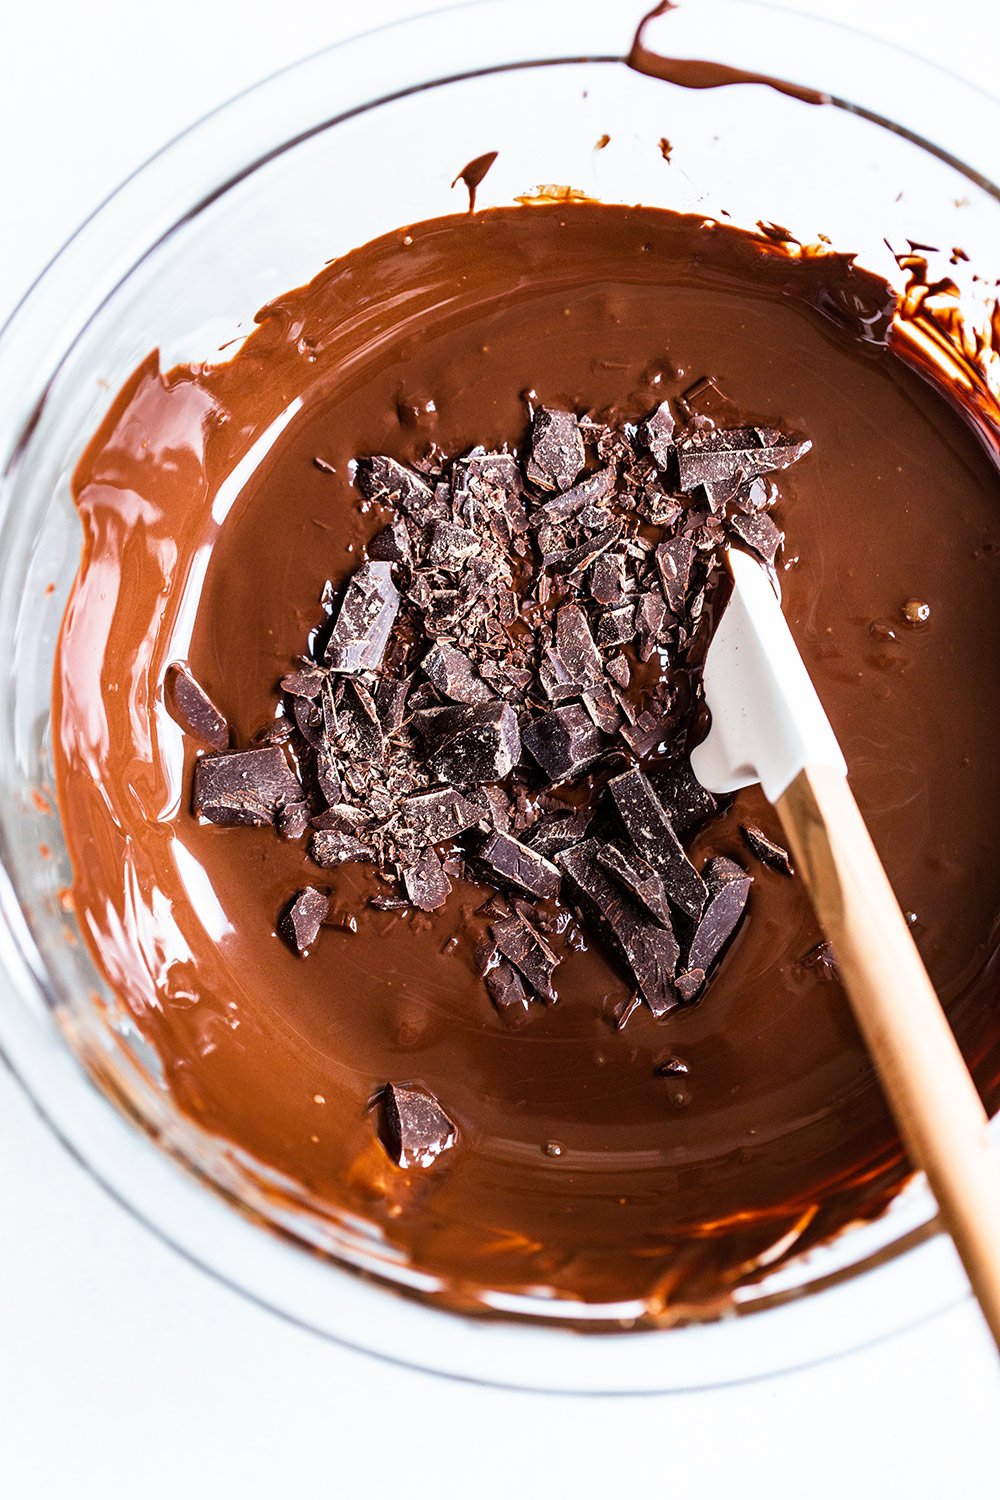
- Gradually seed in the remaining chocolate to bring the temperature down, stirring vigorously and constantly. Stir until the temperature drops to 84°F. This can take some time, usually about 15 minutes, so just be patient – it will come down to temperature! A glass bowl will take longer to cool. Speed this process up by carefully placing the bowl of chocolate into an ice bath, making sure not to get ANY water in the chocolate.
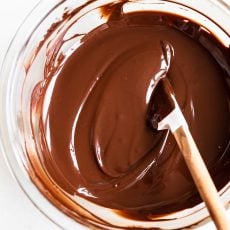
- Reheat the chocolate briefly by placing the bowl back over the double boiler for 5 to 10 seconds at a time, stirring, until it reaches 89°F. This is the “working temperature.” Do not leave the chocolate over the water or let it exceed 91°F.
- You’re done! Test your temper by dipping a small piece of parchment into your chocolate. Let it sit at room temperature for a few minutes. The chocolate should be smooth and firm. If it’s streaky or runny, try stirring in more chocolate to the mixture to bring the temperature down further.
- Tempered chocolate can be tempered over and over again. You want to keep the working temperature of about 89°F when working with it. If it goes far below that temperature, set it back over the double boiler until it is 89°F again. If it goes much above that temperature, add more seed chocolate to drop the temperature.
Tempering Chocolate by Microwave:
Tempering Chocolate by Microwave:
- Put 2/3 of the chocolate in a microwave-safe bowl. Melt at 50% power in 1-minute intervals, stirring between each interval, until melted and smooth. The chocolate should only be between 100 – 110°F.
- Add remaining chocolate in small amounts while stirring. Be sure that the pieces are completely melted before adding more.
- The chocolate will thicken and become cool, shiny, and smooth as you continue stirring and “seeding” it by adding additional small amounts. When it has reached the range 84-91°F, the chocolate will be tempered and ready to work with.
Notes
Fun Uses for Tempered Chocolate:
This post was originally published in 2013 and updated with more tips and new photos in 2020 and 2023. Photos by Ashley McLaughlin.
Article Credits:
- Written by Tessa Arias
- Edited by Jessie Bruce, Master’s of Public Health Nutrition and Dietetics Candidate at UC Berkeley
Sources:
- Industrial Chocolate Manufacture And Use (2009). In Beckett S. T. (Ed.), (Fourth ed.). United Kingdom: Blackwell Publishing Ltd.
- Amendola, J. (2002). Understanding Baking: The Art and Science of Baking (3rd Edition). Wiley
- Global Education US. VitalSource
- Brenner, M., Sorensen, P., & Weitz, D. (2020). Science and Cooking: Physics Meets Food, From Homemade To Haute Cuisine (First ed.). New York, NY: W. W. Norton & Company, Inc.
- Lonchampt, P., & Hartel, R. W. (2006). Surface bloom on improperly tempered chocolate. European Journal of Lipid Science and Technology, 108(2), 159-168.
doi: Wiley - McWilliams, M. (2016). Foods (8th Edition). Pearson Education (US). VitalSource
- Reaver, A. (2021, Nov. 10). Lipids II – classification, function [Course Lecture]. Introduction and Application of Food Science, University of California, Berkeley, Berkeley, CA, United States.
- Culinary Institute of America. (2022). Tempering Chocolate for Homemade Candy. Retrieved March 20, 2022, from CIA Foodies


Is this same method for using chocolate to decoration?
Tempered chocolate is less susceptible to heat and humidity and doesn’t melt…it also has a shiny flawless appearance. Not technically necessary for writing in chocolate, but I’d recommend it ☺️
Attempted—did not come out the way I had hoped, but no fault of the video (issues with my thermometer and first attempt). Video and directions clear—will definitely try again.
I’m so glad everything was detailed enough for you, hopefully next time your chocolate will turn out perfect! 🙂
Thank you!
Hi Tessa thank you so much, this is really informative.
I have a question, say you’re coating a lot of truffles and it will take about 30mins to an hour, how often should you check the temperature to make sure it’s 89°. And what’s the lowest temperature chocolate can be whilst still being able to temper.
I hope that makes sense and thank you so much!
I’d recommend keeping a thermometer in the chocolate to watch it 🙂 You want to keep the working temperature of about 89°F when working with it — If it cools to about 84°F to 86°F and is still fairly liquid, it can be reheated to a liquid consistency. It would still be considered tempered chocolate; however, if it has cooled and solidified, it would need to be re-tempered. If you keep your chocolate at its working temperature, it will stay in temper for many hours. Good luck!
Very helpful and informative! Her explanation helped me understand the science. It takes a little time to master getting the right temperature, but it happens.
So happy to hear this helped you, Norene!
Are the directions the same in the microwave as the stove top when the temperature has dropped down and you want to temper the chocolate again? Thanks
I am working on an old family recipe for a chocolate cake. It has three thin cookie layers separated by a chocolate cream. Then, on top a chocolate glaze. The way I remember it from childhood, the glaze was a hard dark shiny layer. I tried to make it last night. Clearly the “glaze” did not come out as such. My daughter told me about tempering chocolate, which brought me here.
The recipe I have from my mother is really just an ingredients list. For the glaze 75g chocolate, 85g sugar, and 100g water. Does that make any sense to you? Seems that just chocolate and sugar would make more sense and that the water may have been a misunderstanding from somewhere along the passing down of the recipe.
Hello,
Just to let you know I finally go around to getting a thermometer and doing this, after about my 1st attempt I started to get a reasonable routine going and it all went well, the 3rd batch being the best of the lot.
Many thanks, Maria
So glad to hear that!
I have a question— I want to create chocolate shards, which I saw on the British Baking Show on Netflix. The bakers would pour the chocolate on waxed paper and let it cool and harden. Is this tempering? Or do I have it confused with something else? Also, after I am through cooking, can I add sugar and alcohol to it before I pour on the waxed paper? I apologize if this question is off-topic. Thank you. Shoshana Powell
Hi Shoshana, yes that sounds like the bakers were tempering chocolate! If you want a full tutorial on how to make chocolate curls, I’ve got a step by step video for this saved to my Instagram highlights: https://www.instagram.com/stories/highlights/17862094313208357/
Hi Tessa,
Is it necessary to temper chocolate in order to make hot chocolate bombs?
Thank you!
Hi Tessa, I have made a couple of attempts to make a good fruit and nut chocolate bar. Learning how to temper the chocolate was easy with your directions… and the bars came out just great…such a difference when tempered! Yes is has that look and crisp snap to it. I did it in my double boiler and just added in the fruit and nut mixture to the melted chocolate, then poured it all out on a tray…so easy so good.. I am 72 years old and love trying new things like this. I am already thinking of more possibilities using the tempered chocolate and you have mentioned a few…so more experimenting! Thank you William
This is amazing! I’m so glad you found this article helpful.
Thank you