

This post may contain affiliate links. Read our disclosure policy.
In this post I’m going to share with you how various ingredients and techniques can affect the taste, texture, and appearance of your chocolate chip cookies. This will hopefully help you understand how chocolate chip cookie recipes work so you can make the PERFECT batch every time, whatever you consider to be perfect. This information will allow you to alter or create your own chocolate chip recipe that produces cookies just the way YOU like them. You’ll be an expert on the anatomy of the chocolate chip cookie.
I used the Nestle Tollhouse Chocolate Chip Cookie recipe as my control and made little changes and variations in techniques and ingredients to show you how they affect the cookie.
I halved and adapted the original Tollhouse recipe. I kept everything the same through each recipe test, changing one key thing to see its effect and photographing the results for you. Be sure to check out my free Cookie Customization Guide to truly perfect your cookies!
Cookie Tools and Ingredients Used:
Tools and Ingredients Used (when applicable):
-Spring-Loaded Cookie Scoop (Medium or 1 1/2-Tablespoon size)
–Chicago Metallic sheet pans
–Escali Digital Food Scale
–KitchenAid 5-quart Stand Mixer
–Oven thermometer
–Unbleached parchment paper
-Gold Medal All-Purpose Flour
-Fine sea salt
-Light brown sugar
-Large eggs
-Unsalted butter at a cool room temperature
Control Recipe
Ingredients:
1 cup plus 2 tablespoons (142 grams) all-purpose flour
1/2 teaspoon baking soda
1/2 teaspoon salt
1 stick (113 grams) unsalted butter, at room temperature
1/4 cup plus 2 tablespoons (75 grams) granulated sugar
1/4 cup plus 2 tablespoons (75 grams) packed light brown sugar
1/2 teaspoon vanilla
1 large egg
1 cup (170 grams) semi sweet chocolate chips
Directions:
Preheat oven to 350°F. Line baking sheets with nonstick baking mats or parchment paper.
In a medium bowl combine the flour, baking soda, and salt.
In the bowl of an electric mixer beat the butter, granulated sugar, and brown sugar until creamy, about 2 minutes. Add the egg and vanilla, beating well to combine. Gradually beat in the flour mixture. Stir in the chocolate chips. Scoop 1 1/2 tablespoon-sized balls and place onto prepared baking sheets.
Bake for 9 to 11 minutes, or until golden brown. Cool for 2 minutes before removing to wire racks to cool completely.
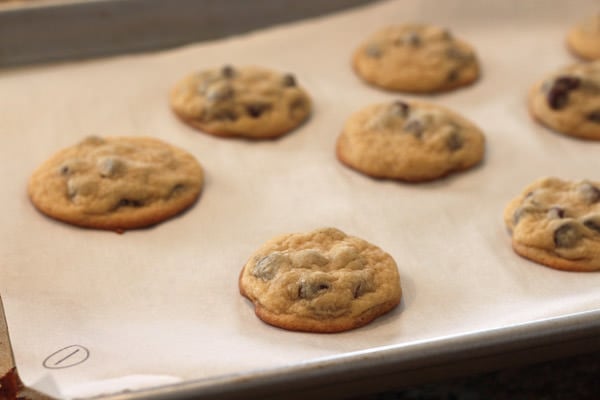
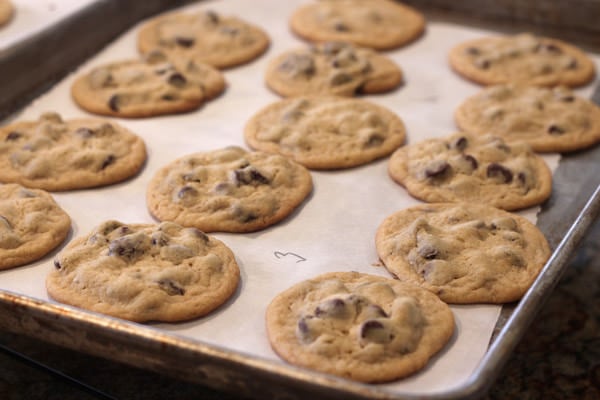
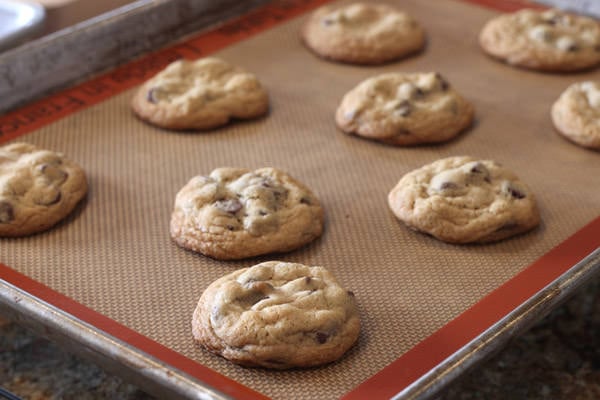
Here is the control, an adapted version of the Nestle Tollhouse recipe. The full recipe I used to base all of the tweaks on is at the bottom of this post.
Baking Powder:
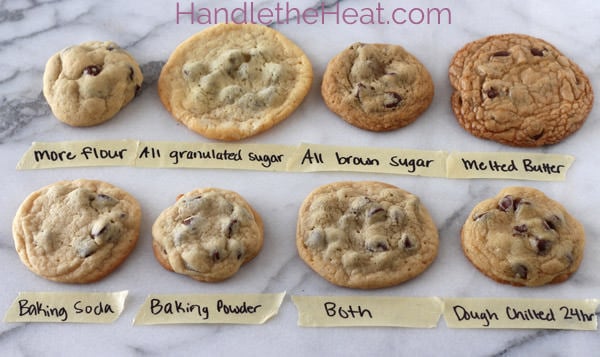
Removed baking soda from recipe and used 1/2 teaspoon baking powder. This produced results that were more cakey and puffed while baking.
Baking Powder AND Baking Soda:
Used 1/4 teaspoon baking powder and 1/4 teaspoon baking soda. This produced results that were crisp at the edges, soft in the middle, with a good amount of spread. The combination of the two leaveners produced the best results in my opinion.
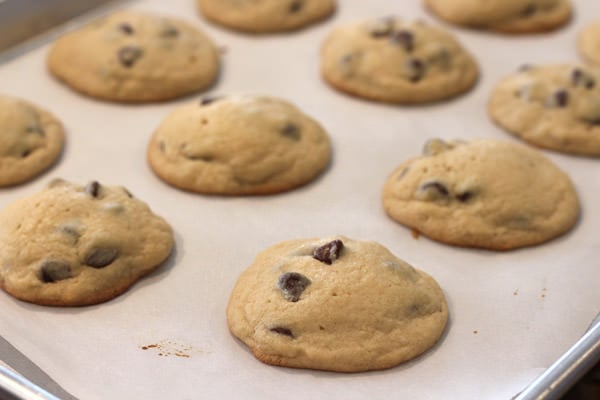
MORE Flour:
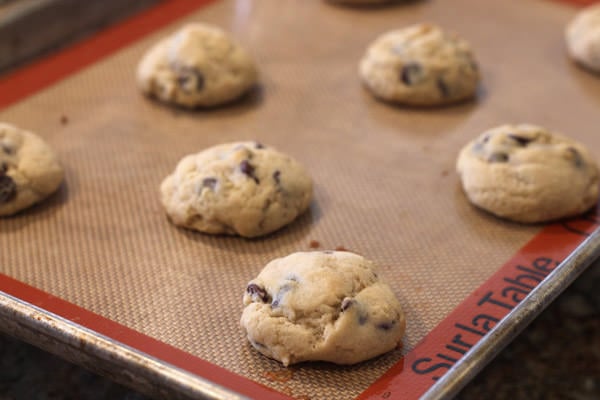
Increased the flour to 2 cups (250 grams) which created a more crumbly dough and very little spread. The cookies were small yet thick and relatively undercooked (ooey and gooey) in the middle.
MELTED Butter:
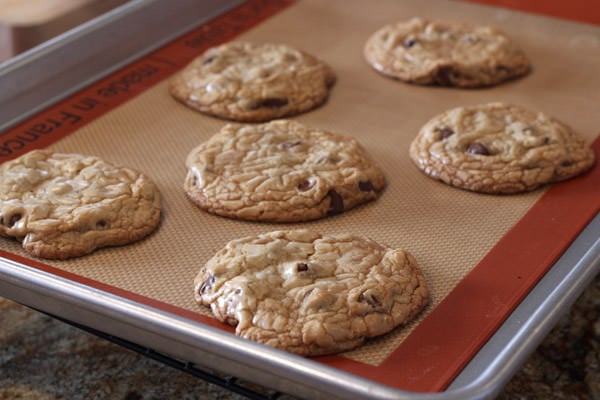
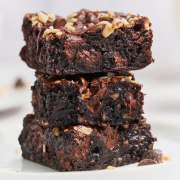
I replaced the room temperature butter with melted and cooled butter. Instead of creaming the butter and sugar with an electric mixer, I simply stirred the butter and sugars together then let sit for 5 minutes, until the sugar was better absorbed by the butter. This produced flatter cookies that had a shiny, crackled top reminiscent of brownies. They were also more crisp at the edges.
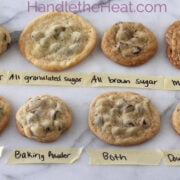
All Granulated Sugar:
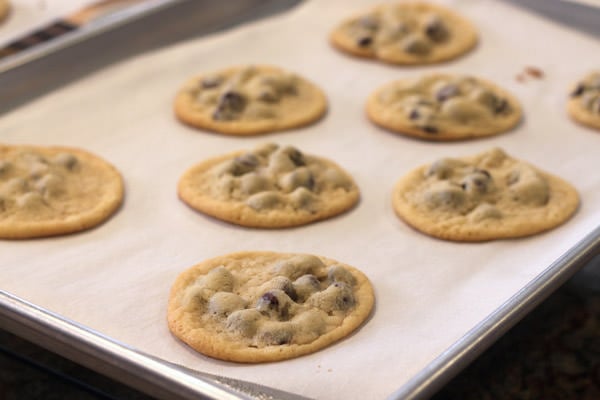
I used 3/4 cup granulated sugar (150 grams) in this recipe which produced flat, white, chewy, and slightly crunchy cookies but with little flavor. Since baking soda (called for in the control recipe) requires an acid (such as brown sugar) to react, these cookies fell very flat as you can see by the way the chocolate chips protrude.
All Brown Sugar:
I used 3/4 cup (150 grams) packed light brown sugar in this recipe which produced thick, brown, and soft cookies with an intense butterscotch flavor. The original control recipe uses an even ratio of granulated and brown sugars. If you prefer your cookies to be flatter, chewier, or crisper, use more granulated sugar. If you prefer your cookies to be softer and thicker and have a pronounced butterscotch flavor, use more brown sugar.
24 hour CHILLED Dough:
I used the control recipe but chilled it in the fridge for about 24 hours before shaping and baking. This produced cookies that were slightly thicker, chewier, darker, and with a better depth of butterscotch flavor. If you have time, try chilling your next cookie dough for at least 24 hours, or up to 48 hours.
Final Comparison:


This is a great post. Thanks for doing all the research and work. This will now be my guide to the perfect ccc.
Love love love this post Tessa! Really breaks everything down so nicely!
Thank you SO much for this!! I am a big food science lover and chocolate chip cookies are a special favorite so it’s like you wrote this for me!! LOL!!! 😉
I’m a recent convert to your melted butter recipe!! I _love_ the cookies that recipe produces!! I thought that I noticed that mixing time made a difference with that recipe. I have used a stand mixer and done it by hand and the cookies made with the stand mixer, and mixed a lot longer, seemed to have a better finished product. Do you think mixing (and maybe aerating) the batter effects the final cookie?
That is very possible! I read something from a Cooks Illustrated publication while doing research for this post that when using melted butter + sugar in baking, the longer the sugar has to absorb into the butter the better the flavor and texture will be because the caramelization process will begin quicker.
Such a fabulous post and resource, Tessa! I’ve been wanting to do something like this myself just for fun, but it’s always seemed like such a daunting task. What did you do with all of those cookies?? 🙂
Wow, thanks for this! It’s so helpful and lots of great tips!
This was so helpful!! I’ve been making a family homemade chocolate chip recipe for years and could never figure out why I couldn’t ever have two similar batches. I never accounted for the state of the butter when added would play such an integral role. Hopefully now I can make the recipe more consistent and pay better homage Grandma’s good ol’ homemade chocolate chip cookie recipe! Thanks so much!
This is great! So much great information! I have always wanted to know how certain elements effected cookies. Thank you so much!
What a great experiment Tessa, I love seeing the way a small change can really impact the outcome of the recipe!
Recently I had the dilemma of “sad” chocolate chip cookies as our chef likes to call theme when I used granulated sugar. Second round I found chilling the dough with brown sugar helped a ton and they looked awesome!
I was wondering if you had experience baking in high altitudes? By the way hope you don’t mind if I share this post in my class 🙂
I bet those cookies are awesome! I totally don’t mind – hope your class finds it helpful. I have absolutely 0 experience with high altitude baking so I’m of no help there.
Thank you for this! I have always wandered what ways are best to make cookies and I think I am more of a baking soda and baking powder girl. Those cookies look perfect!
Such a great post!
That explains why my cookies are sub-par with melted butter. I’ll have to try chilling the dough. I’ve read about that in a couple baking books. Maybe I’ll give it a shot!
Thanks for sharing!
My fav are in the 1st picture. Is that basic or with more flour?
Those are the control recipe – I took that picture a day later though.