


Tessa Arias, Chef and Cookbook Author
This post may contain affiliate links. Read our disclosure policy.
In this post I’m going to share with you how various ingredients and techniques can affect the taste, texture, and appearance of your chocolate chip cookies. This will hopefully help you understand how a Chocolate Chip Cookie Recipe works so you can make the PERFECT batch every time, whatever you consider to be perfect. This information will allow you to alter or create your own chocolate chip recipe that produces cookies just the way YOU like them. You’ll be an expert on the anatomy of the chocolate chip cookie.
I used the Nestle Tollhouse Chocolate Chip Cookie recipe as my control and made little changes and variations in techniques and ingredients to show you how they affect the cookie.
I halved and adapted the original Tollhouse recipe. I kept everything the same through each recipe test, changing just one key thing to see its effect and photographing the results for you.
Cookie Tools and Ingredients Used:
Tools and Ingredients Used (when applicable):
-Spring-Loaded Cookie Scoop (Medium or 1 1/2-Tablespoon size)
–Chicago Metallic sheet pans
–Escali Digital Food Scale
–KitchenAid 5-quart Stand Mixer
–Oven thermometer
–Unbleached parchment paper
-Gold Medal All-Purpose Flour
-Fine sea salt
-Light brown sugar
-Large eggs
-Unsalted butter at a cool room temperature
Control Recipe
Ingredients:
1 cup plus 2 tablespoons (142 grams) all-purpose flour
1/2 teaspoon baking soda
1/2 teaspoon salt
1 stick (113 grams) unsalted butter, at room temperature
1/4 cup plus 2 tablespoons (75 grams) granulated sugar
1/4 cup plus 2 tablespoons (75 grams) packed light brown sugar
1/2 teaspoon vanilla
1 large egg
1 cup (170 grams) semi sweet chocolate chips

Directions:
Preheat oven to 350°F. Line baking sheets with nonstick baking mats or parchment paper.
In a medium bowl combine the flour, baking soda, and salt.
In the bowl of an electric mixer beat the butter, granulated sugar, and brown sugar until creamy, about 2 minutes. Add the egg and vanilla, beating well to combine. Gradually beat in the flour mixture. Stir in the chocolate chips. Scoop 1 1/2 tablespoon-sized balls and place onto prepared baking sheets.
Bake for 9 to 11 minutes, or until golden brown. Cool for 2 minutes before removing to wire racks to cool completely.
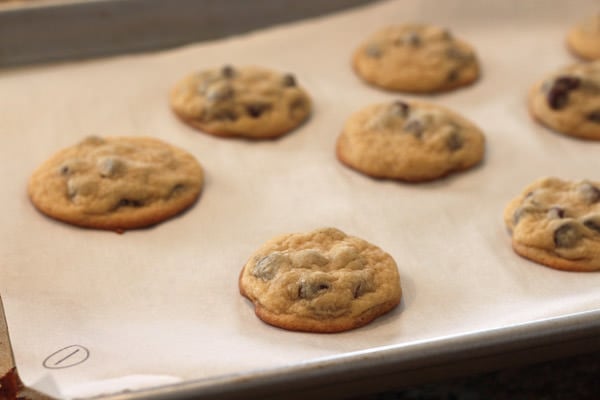
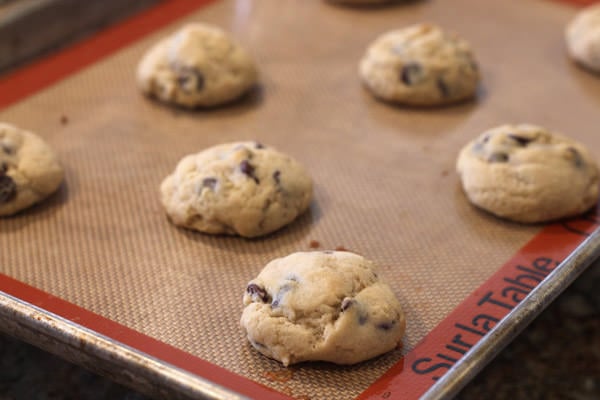
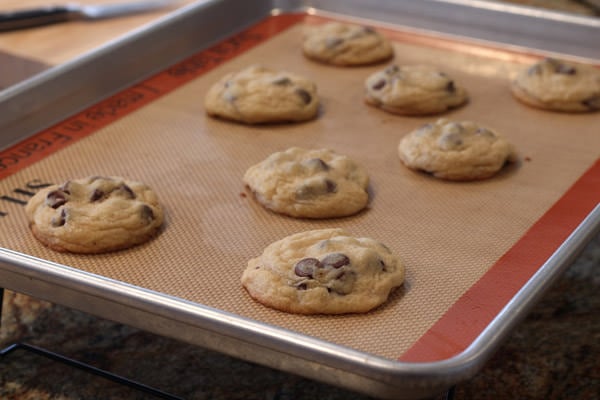
Here is the control, an adapted version of the Nestle Tollhouse recipe. The full recipe I used to base all of the tweaks on is at the bottom of this post.
Baking Powder:
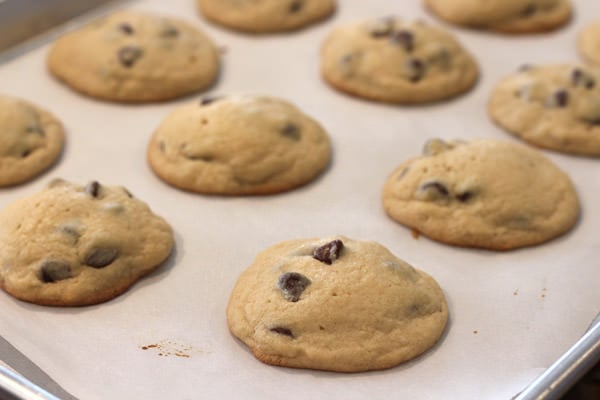
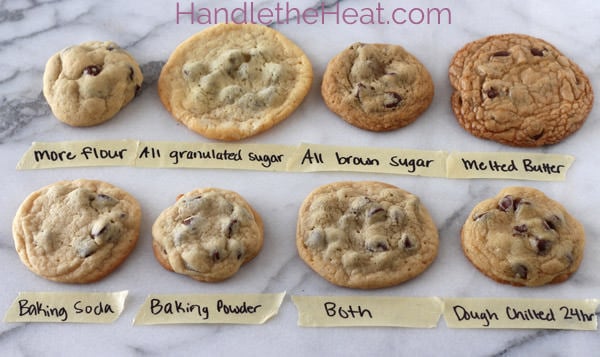
Removed baking soda from recipe and used 1/2 teaspoon baking powder. This produced results that were more cakey and puffed while baking.

Baking Powder AND Baking Soda:
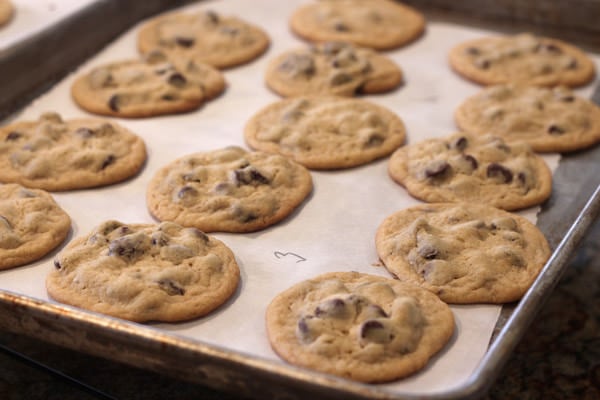
Used 1/4 teaspoon baking powder and 1/4 teaspoon baking soda. This produced results that were crisp at the edges, soft in the middle, with a good amount of spread. The combination of the two leaveners produced the best results in my opinion.
MORE Flour:
Increased the flour to 2 cups (250 grams) which created a more crumbly dough and very little spread. The cookies were small yet thick and relatively undercooked (ooey and gooey) in the middle.
MELTED Butter:
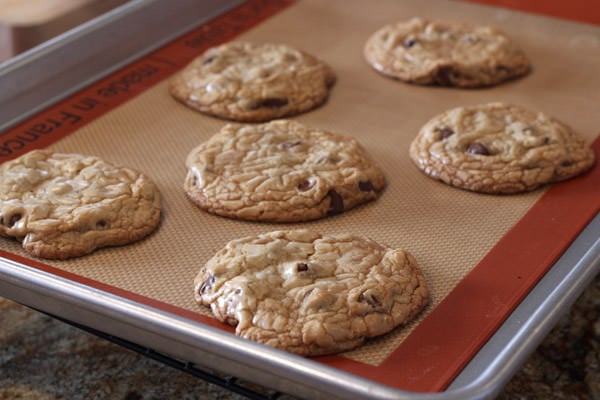
I replaced the room temperature butter with melted and cooled butter. Instead of creaming the butter and sugar with an electric mixer, I simply stirred the butter and sugars together then let sit for 5 minutes, until the sugar was better absorbed by the butter. This produced flatter cookies that had a shiny, crackled top reminiscent of brownies. They were also more crisp at the edges.
All Granulated Sugar:
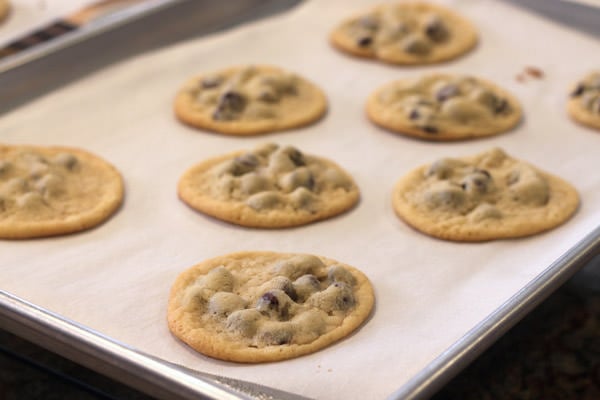
I used 3/4 cup granulated sugar (150 grams) in this recipe which produced flat, white, chewy, and slightly crunchy cookies but with little flavor. Since baking soda (called for in the control recipe) requires an acid (such as brown sugar) to react, these cookies fell very flat as you can see by the way the chocolate chips protrude.
All Brown Sugar:
I used 3/4 cup (150 grams) packed light brown sugar in this recipe which produced thick, brown, and soft cookies with an intense butterscotch flavor. The original control recipe uses an even ratio of granulated and brown sugars. If you prefer your cookies to be flatter, chewier, or crisper, use more granulated sugar. If you prefer your cookies to be softer and thicker and have a pronounced butterscotch flavor, use more brown sugar.
24-hour CHILLED Dough:
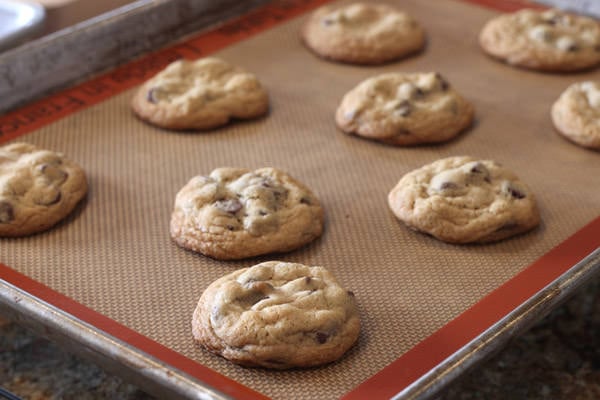
I used the control recipe but chilled it in the fridge for about 24 hours before shaping and baking. This produced cookies that were slightly thicker, chewier, darker, and with a better depth of butterscotch flavor. If you have time, try chilling your next cookie dough for at least 24 hours, or up to 48 hours.
Final Comparison:


Have you considered trying gluten free flour recipes? I am still learning and have always baked with bread and cake flours with my cookies, but now I have to stay away from those flours. Any advice would be appreciated!
THANK YOU SO MUCH! <333 I was finally able to whip up the perfect batch of cookies with this guide! They were soft and gooey and thick and had a beautiful spread to it. Thanks so much!!! 😀
Now these cookies just made the cookie monster in me raving-mad hungry! I’ll try the dough chilled in 24 hours with baking soda and granulated brown sugar. Thanks so much for sharing this! Seeing how the cookies look like when different methods are used make it easier to choose the best method for our personal taste 😀
Great experiment, can’t wait to see more.
Made these cookies and they were not great! They didn’t flatten out like the one in the picture.
in your opinoin…what is the best combo?
@rumorasit: Look more carefully. It’s the same recipe, except it was halved and nuts weren’t added. Math.
I have the fondest memories of making Nestle’ Toll House Chocolate Chip Cookies with my Gramma. We thought we had it to a tee. But something is different nowadays. We didn’t want a thick or crispy, we liked a softer, more spread cookie. The only way I can get this now is leaving out the baking soda until I mix the flour in. If I put the soda in flour and set aside as directed, then they’ll get big and crunchy. Have any suggestions why?
I just saw someone post this on facebook without giving you credit…I left the link to here, but thought you might like to know. It’s on the Solution for Every Day Problem page
my chocolate chip cookies are always hard after they cool completely, that i wind up throwing them out. Also my peanut butter cookies taste more like flour than peatnut butter, HELP!
Thank you so much for this! I looooove baking, but pretty much stopped two years ago when I had to go gluten free (paleo) for health reasons (autoimmune issue). I’ve recently started experimenting with alternate ingredients, and I find posts like this (and your sequel) REALLY USEFUL. Learning the principles of each ingredient will definitely make reinventing the wheel a lot easier. (And before someone suggests it, I find most gluten free flour blends kind of gross, so just no.)
I look forward to any other experiment posts that you do!! And you’ve definitely inspired me to do some experimenting of my own. Thank you!!
I just made chocolate chip cookies over the weekend and messed up the order – I mixed the eggs into the sugars, before adding the butter! It took forEVER to get the butter mixed into the egg+sugars, actually it was pretty full of butter-lumps when I started sifting in the flour mixture.
The result? Flat, crispy, kinda greasy-textured cookies. Still totally edible though!