


This post may contain affiliate links. Read our disclosure policy.
In this post I’m going to share with you how various ingredients and techniques can affect the taste, texture, and appearance of your chocolate chip cookies. This will hopefully help you understand how chocolate chip cookie recipes work so you can make the PERFECT batch every time, whatever you consider to be perfect. This information will allow you to alter or create your own chocolate chip recipe that produces cookies just the way YOU like them. You’ll be an expert on the anatomy of the chocolate chip cookie.
I used the Nestle Tollhouse Chocolate Chip Cookie recipe as my control and made little changes and variations in techniques and ingredients to show you how they affect the cookie.
I halved and adapted the original Tollhouse recipe. I kept everything the same through each recipe test, changing one key thing to see its effect and photographing the results for you. Be sure to check out my free Cookie Customization Guide to truly perfect your cookies!
Cookie Tools and Ingredients Used:
Tools and Ingredients Used (when applicable):
-Spring-Loaded Cookie Scoop (Medium or 1 1/2-Tablespoon size)
–Chicago Metallic sheet pans
–Escali Digital Food Scale
–KitchenAid 5-quart Stand Mixer
–Oven thermometer
–Unbleached parchment paper
-Gold Medal All-Purpose Flour
-Fine sea salt
-Light brown sugar
-Large eggs
-Unsalted butter at a cool room temperature
Control Recipe
Ingredients:
1 cup plus 2 tablespoons (142 grams) all-purpose flour
1/2 teaspoon baking soda
1/2 teaspoon salt
1 stick (113 grams) unsalted butter, at room temperature
1/4 cup plus 2 tablespoons (75 grams) granulated sugar
1/4 cup plus 2 tablespoons (75 grams) packed light brown sugar
1/2 teaspoon vanilla
1 large egg
1 cup (170 grams) semi sweet chocolate chips
Directions:
Preheat oven to 350°F. Line baking sheets with nonstick baking mats or parchment paper.
In a medium bowl combine the flour, baking soda, and salt.
In the bowl of an electric mixer beat the butter, granulated sugar, and brown sugar until creamy, about 2 minutes. Add the egg and vanilla, beating well to combine. Gradually beat in the flour mixture. Stir in the chocolate chips. Scoop 1 1/2 tablespoon-sized balls and place onto prepared baking sheets.
Bake for 9 to 11 minutes, or until golden brown. Cool for 2 minutes before removing to wire racks to cool completely.
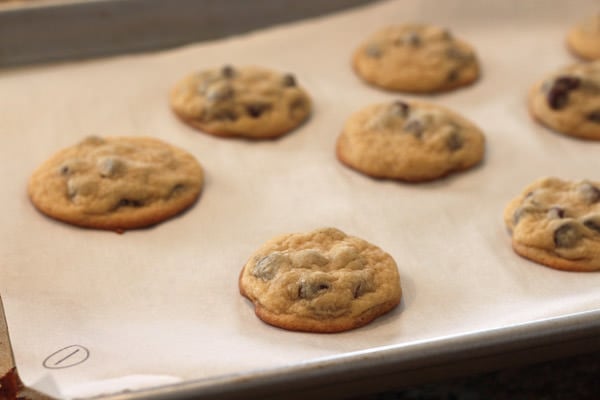
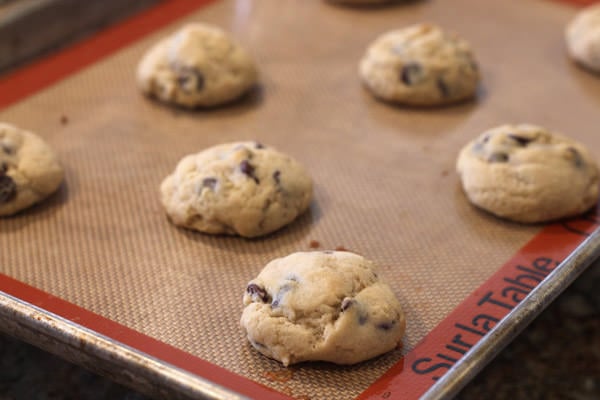
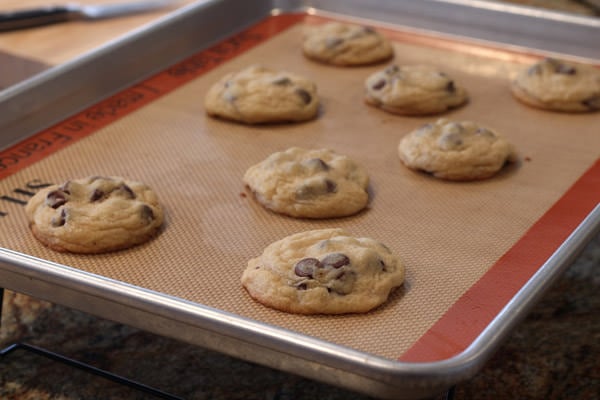
Here is the control, an adapted version of the Nestle Tollhouse recipe. The full recipe I used to base all of the tweaks on is at the bottom of this post.
Baking Powder:
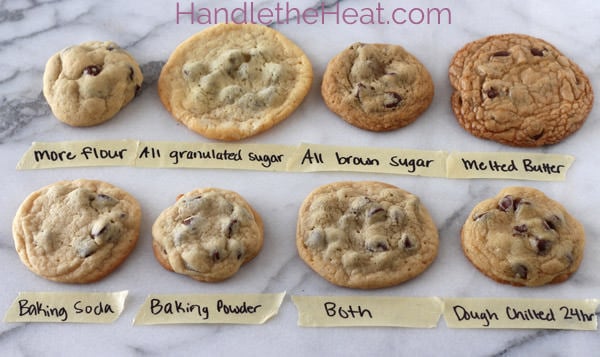
Removed baking soda from recipe and used 1/2 teaspoon baking powder. This produced results that were more cakey and puffed while baking.
Baking Powder AND Baking Soda:
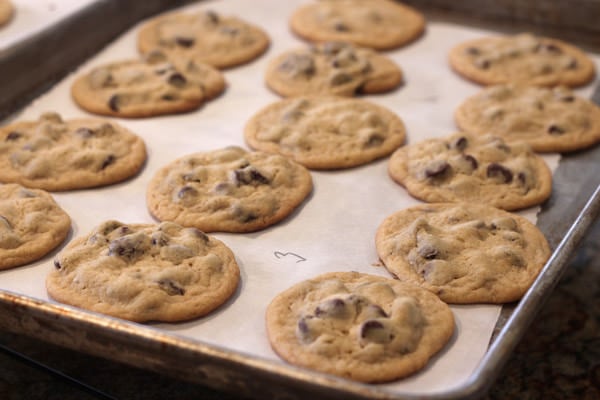
Used 1/4 teaspoon baking powder and 1/4 teaspoon baking soda. This produced results that were crisp at the edges, soft in the middle, with a good amount of spread. The combination of the two leaveners produced the best results in my opinion.
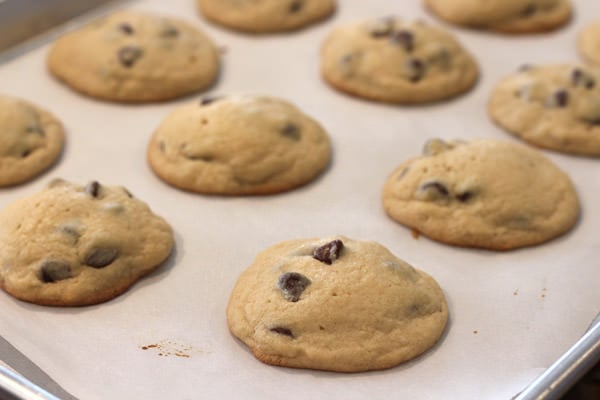
MORE Flour:
Increased the flour to 2 cups (250 grams) which created a more crumbly dough and very little spread. The cookies were small yet thick and relatively undercooked (ooey and gooey) in the middle.
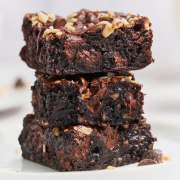
MELTED Butter:
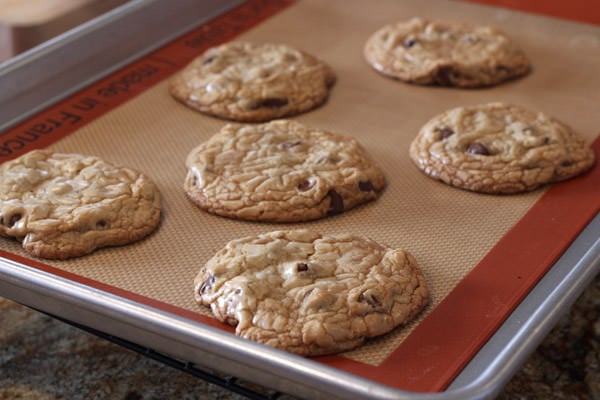
I replaced the room temperature butter with melted and cooled butter. Instead of creaming the butter and sugar with an electric mixer, I simply stirred the butter and sugars together then let sit for 5 minutes, until the sugar was better absorbed by the butter. This produced flatter cookies that had a shiny, crackled top reminiscent of brownies. They were also more crisp at the edges.
All Granulated Sugar:
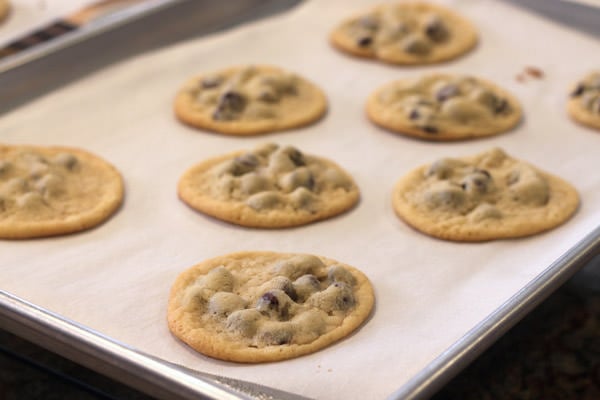
I used 3/4 cup granulated sugar (150 grams) in this recipe which produced flat, white, chewy, and slightly crunchy cookies but with little flavor. Since baking soda (called for in the control recipe) requires an acid (such as brown sugar) to react, these cookies fell very flat as you can see by the way the chocolate chips protrude.
All Brown Sugar:
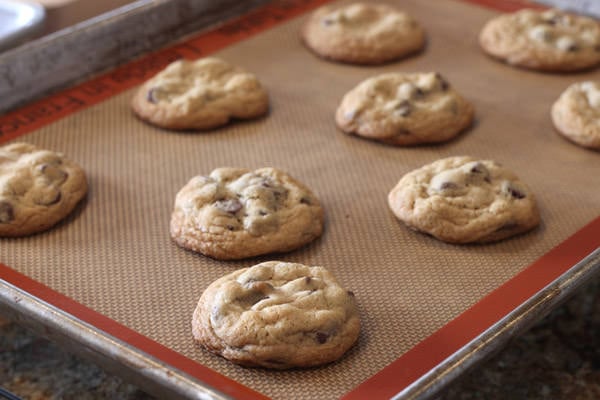
I used 3/4 cup (150 grams) packed light brown sugar in this recipe which produced thick, brown, and soft cookies with an intense butterscotch flavor. The original control recipe uses an even ratio of granulated and brown sugars. If you prefer your cookies to be flatter, chewier, or crisper, use more granulated sugar. If you prefer your cookies to be softer and thicker and have a pronounced butterscotch flavor, use more brown sugar.
24 hour CHILLED Dough:
I used the control recipe but chilled it in the fridge for about 24 hours before shaping and baking. This produced cookies that were slightly thicker, chewier, darker, and with a better depth of butterscotch flavor. If you have time, try chilling your next cookie dough for at least 24 hours, or up to 48 hours.
Final Comparison:


just curious– which one do you think tasted best?
The funny thing is that there were little things I liked and didn’t like about each batch. I think the best *taste* goes to the 24-hour chilled dough but I also liked the butterscotch flavor of the brown sugar cookies.
I loved this … I rarely follow a recipe and this explains so much. I have one chocolate chip recipe that always worked well for me, even with substituting whole wheat flour and using honey rather than white sugar. But the “family’s” favorite has always been the Toll House Recipe that Grams used. Grams always followed the recipe … 😉
This is so great! I am on a quest for the perfect chocolate chip cookie, and will be experimenting very soon! I was wondering what are your thoughts about the amount of eggs? It didn’t seen like you tested that and I was wondering what an extra egg would do… Guess I’ll have to see! Lol
THIS IS AWESOME!! I’m a huge fan of chocolate chip cookies and have tried so many variations. I feel like I was nodding the whole time reading this because I’ve been there, done that with all of this!!! 🙂 Thank you!
Tessa thanks to you for taking on this experiment. I pity the poor taste testers in your life 😉 . Ive been hunting for the perfect chocolate chip cookie and this should help me. I’m going to try the soda + powder, a titch more brown than white sugar and chill for 24 hours. In my family one recipe calls for using vegetable shortening rather than butter. Have you tried this substitution before?
I am not a fan of shortening so I may be a little biased but in my experience I think butter is the better choice for a few reasons:
1. Butter has a lower melting point (right around body temperature) than shortening which is why things with lots of butter seem to “melt in your mouth” whereas shortening can often leave a filmy residue on the tongue.
2. Butter offers better flavor.
3. Because butter has a high moisture content, it provides moisture to the cookies and encourages spread (which can be good or bad depending on your preferences). Cookies made with shortening tend to be drier/crumblier and thicker.
I CAN ONLY IMAGINE!!! how many dozens and dozens of cookies you made in the process of this ‘little’ experiment, Tessa! It’s amazing what you’ve done and thank you!!!!
I love posts like this and comparisons and could take cookie science forever. I am loving this post, so much.
For me, I am in love with adding 2 tsp of cornstach to my dough b/c it creates softbatch-style cookies, minus any cakiness. I have also tried many of the popular recipes out there for cookies, i.e NYTimes and many others and keep coming back to the cornstarch trick. I have about 10 versions and recreations with various add-ins on my site.
Pinned to group boards! Thank you for this post!
Thanks Averie!! I think I’m going to do a part II post and include a test on that cornstarch trick because I’ve seen it in your recipes and also on Sally’s Baking Blog. Thanks for the tip!
I’m going to try the half baking soda and half baking powder. I like mine a little thick, chewy and crispy around the edges
My favorite are warm and chewy. I usually make a big batch for the week to store in the fridge. I scoop out enough for a couple of trays so they are warm and chewy when I want them.
What an amazing experiment, its incredible to see the difference amongst the cookies. I will definately try the tollhouse recipe with the baking powder and baking soda the next time I make these.
Thank you for sharing.
This post is absolutely brilliant! I loved how you ran a control, then tweaked just one variable at a time. Pure, mad-sciency genius, and for a great cause: the search for the perfect cookie. I can’t wait to share this with my readers!
Dan @ Casual Kitchen
Thank you for the visual on this! I love my cookies puffy and thick with minimal spread, so I’m going for the chilled 24 hour version.
Great post! What a nice resource for any cookie recipe.
LOVE this post. Such a great idea, using a control recipe that pretty much everyone, their mother, and their grandmother have made. Such a good resource 🙂 especially for those that may not know how different ingredients react with one another!