


Tessa’s Recipe Rundown
Taste: Quintessential dreamy fall flavors.
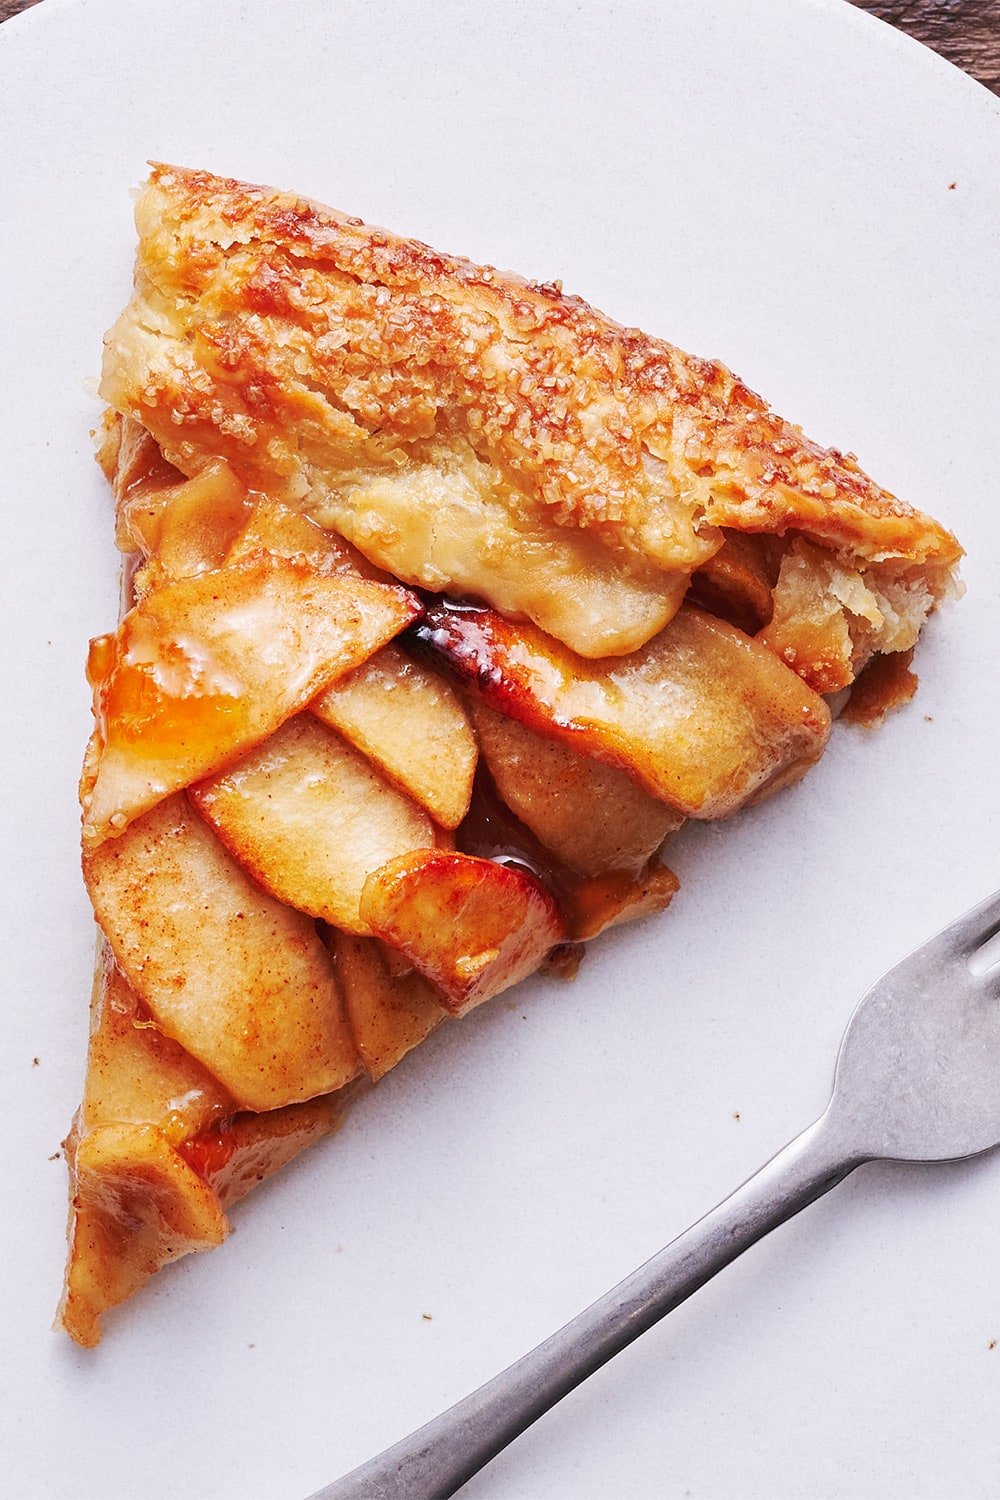
Texture: The crust is perfectly crisp and flaky (no sogginess whatsoever!) and the filling is soft without being mushy.
Ease: Significantly easier than a whole pie.
Pros: Faster, quicker, and easier than a whole pie with all the same flavors.
Cons: None at all.
Would I make this again? I’ve already made this several times!
This post may contain affiliate links. Read our disclosure policy.


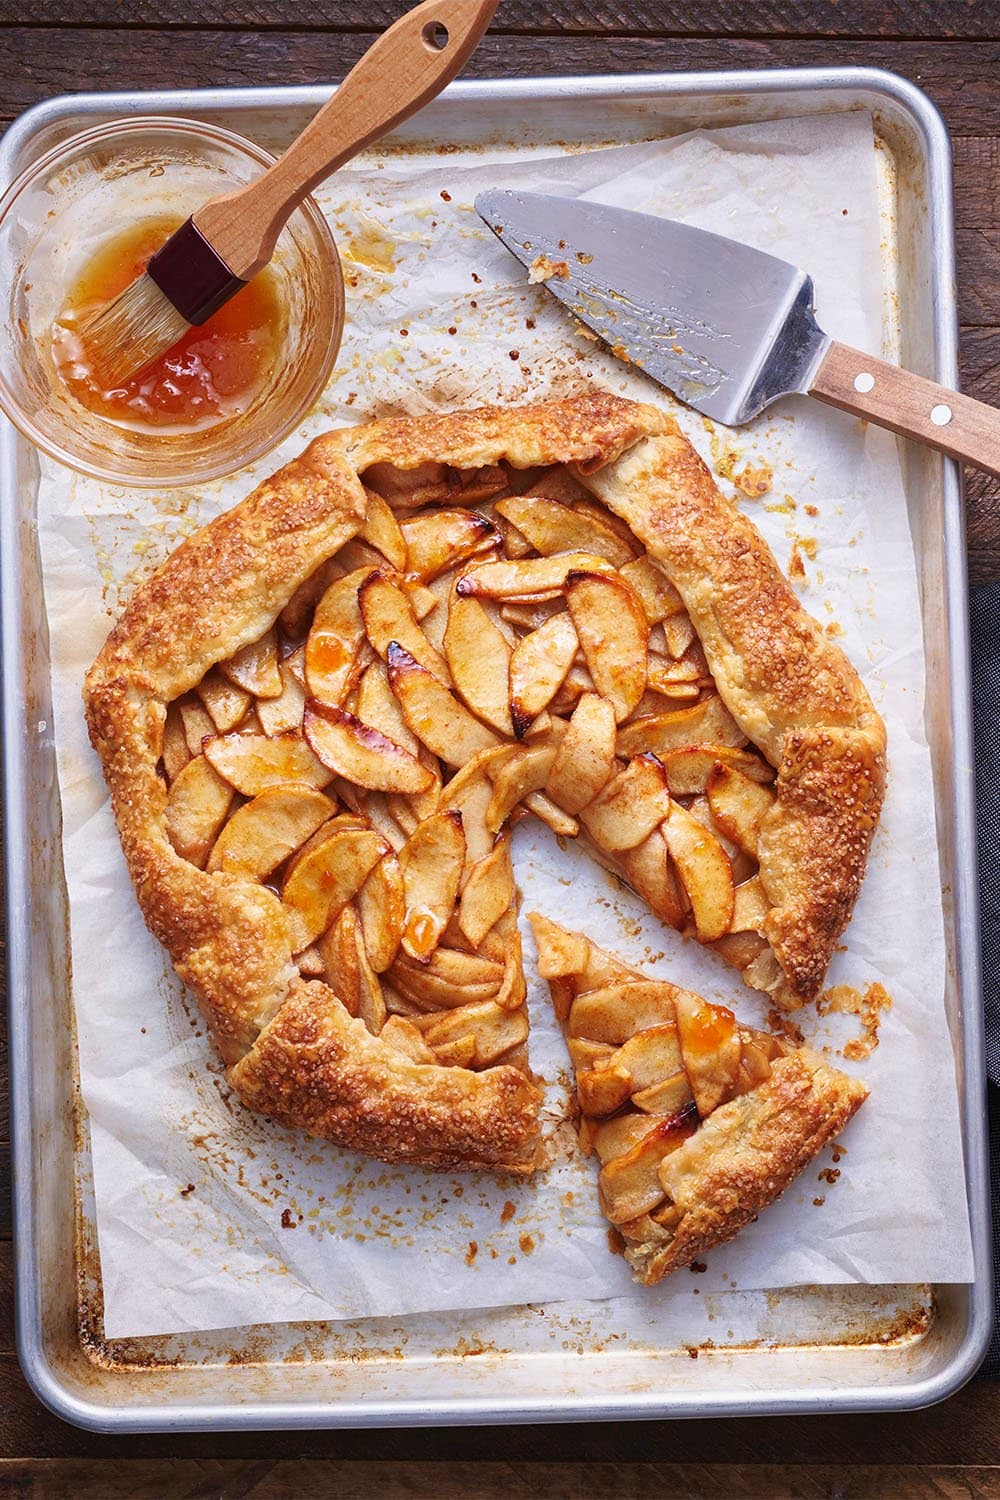
Apple Galette features all the flaky, buttery, fruity goodness of an apple pie – but with half the work!
I can’t believe how long it took me to get on the Galette train. They’re AMAZING.
And you know what? This Apple Galette was a HUGE hit with team Handle the Heat. Everyone raved about it!
Truly the best part is how simple it is to make. And if you always make a double or triple batch of pie dough whenever you’re baking it and keep extra in the freezer, you’ll never be too far off from a beautiful galette coming out of your oven.
I hope you love this apple galette recipe as much as we do! Get your vanilla ice cream ready because I’m answering tons of galette baking questions below.

Sprinkle of Science
How to Make Apple Galette
What is a Galette?
This is a French term to describe what’s essentially a free-form pie. An Apple Galette is a free-form apple pie that is much easier, quicker, and less temperamental than a traditional apple pie. No pie pan, no fluting or crimping, no cooking the filling, no awkwardly cutting that first slice; instead, the pie crust is simply and informally folded up around the edges to form a border and create a rustic appearance. It’s the perfect impressive treat for entertaining, or bakers who are intimidated by pie!
Tips For Rolling Out Pie Dough
Here are my top 3 tips for rolling out pie dough, but there are lots more tips in my Pie Crust post here.
- Make sure to keep everything as cold as possible. If your kitchen is warm, fill freezer bags with ice and a little water and set them on your work surface for 10 minutes to chill it, before rolling out your pie dough.
- Flour your work surface, the dough itself, and your rolling pin throughout the process. I recommend investing in a flour shaker and bench scraper. The flour shaker lets you easily add flour wherever sticking might be happening. The bench scraper allows you to easily keep the dough moving as you roll it out, which is essential to prevent sticking.
- If at any point the butter begins to get melty and sticky, return the dough to the fridge or freezer immediately.
What Type of Apple Should I Use?
- Granny Smith and Golden Delicious both bake up beautifully and have the perfect balance of sweetness to tartness.
- Honeycrisp, Fuji, or Gala apples are other great options.
- Feel free to use a mixture of apples!
Do I Need to Peel the Apples?
It’s really a matter of personal preference, but as I don’t prefer the texture of cooked apple skins, I always opt to peel my apples. If that texture doesn’t bother you, feel free to skip peeling the apples to save time.
The Spices in Apple Galette
Note that older spices carry less flavor and fresh spices will carry a LOT more flavor – so check to make sure your spices have not expired. If they have expired, toss them and purchase new containers.
What Kind of Baking Sheet Do You Need For a Galette?
- A rimmed half-sheet pan, preferably one that’s unlined and light in color, will work best!
- I like to line mine with parchment paper so it won’t stick or make a mess.
- Avoid dark-colored pans which may brown the bottom too much.
- Learn more about baking pans here.
How to Serve Apple Galette
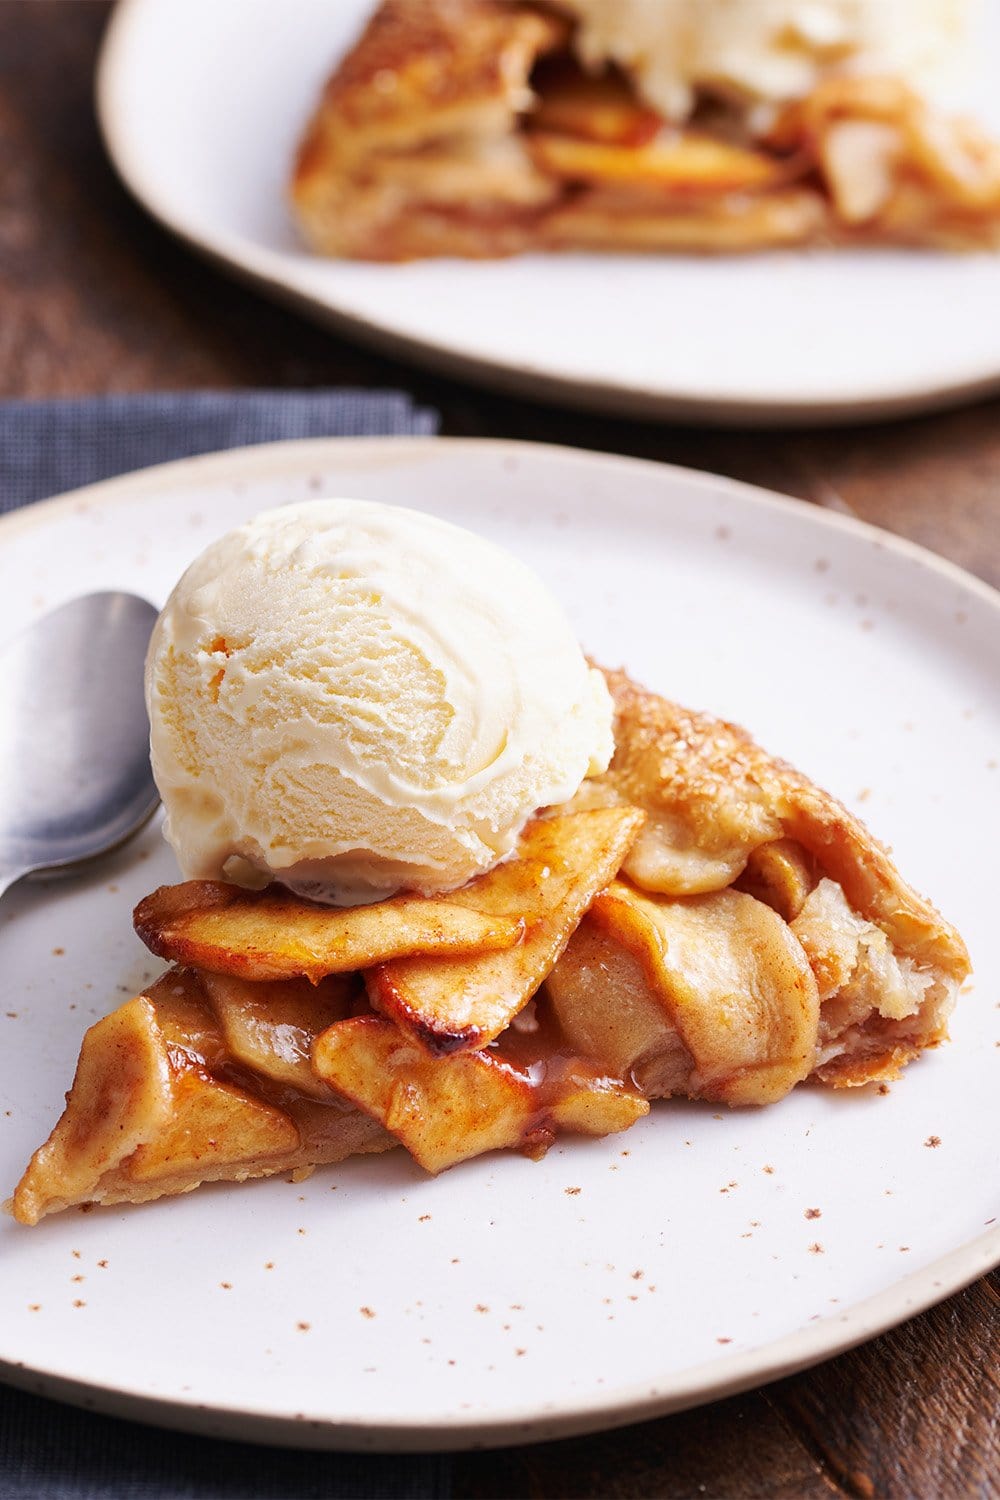
- As with most apple dessert recipes, a scoop of vanilla ice cream is simple perfection.
- If you’re looking for additional indulgence, add a drizzle of my homemade caramel sauce.
- Candied nuts and whipped cream also make for tasty finishing touches.
How to Store Apple Galette
Store any leftover Apple Galette in an airtight container at room temperature for 1 day or in the fridge for up to 3 days. If you like, you can refresh your galette in a 300°F oven for 5 to 10 minutes before serving again.
Can You Freeze Apple Galette?
Yes! There are two ways to freeze a galette.
- Freeze Apple Galette after assembling but before egg washing or baking. Freeze on a sheet pan until solid, then move to an airtight container. Bake from frozen, adding about 5 extra minutes to the baking time.
- Freeze Apple Galette after baking. Let cool completely, then freeze on a sheet pan until solid. Wrap in plastic wrap and store inside an airtight container. Let thaw to room temperature then refresh in a 300°F oven for about 10 minutes or until warmed through.
More Recipes You’ll Love:
- Caramel Apple Streusel Pie
- Peach Galette
- Apple Crisp
- Caramel Apple Coffee Cake
- Brown Butter Peach Cobbler
- Homemade Cranberry Sauce
- Dutch Apple Pie With Caramel Streusel Topping

Email This Recipe
Enter your email, and we’ll send it to your inbox.
Ingredients
- 1 (single crust)
Best Ever Pie Crust - 1 1/2 pounds (680 grams) baking apples (about 3 large apples), peeled and cut into 1/4-inch thick slices
- 5 tablespoons (63 grams) lightly packed light brown sugar
- 1 tablespoon fresh lemon juice
- 2 teaspoons cornstarch
- 1 teaspoon ground cinnamon
- 1/2 teaspoon ground ginger
- 1/8 teaspoon fine sea salt
- 1/2 teaspoon vanilla extract
- 1 large egg, beaten
- 1 1/2 teaspoons water, divided
- Coarse sugar, for sprinkling
- 1 tablespoon apricot jam or jelly
- Vanilla ice cream, for serving if desired

Instructions
- Line a rimmed baking sheet with parchment paper.
- Remove the pie crust from the fridge to soften slightly while you prepare the filling.
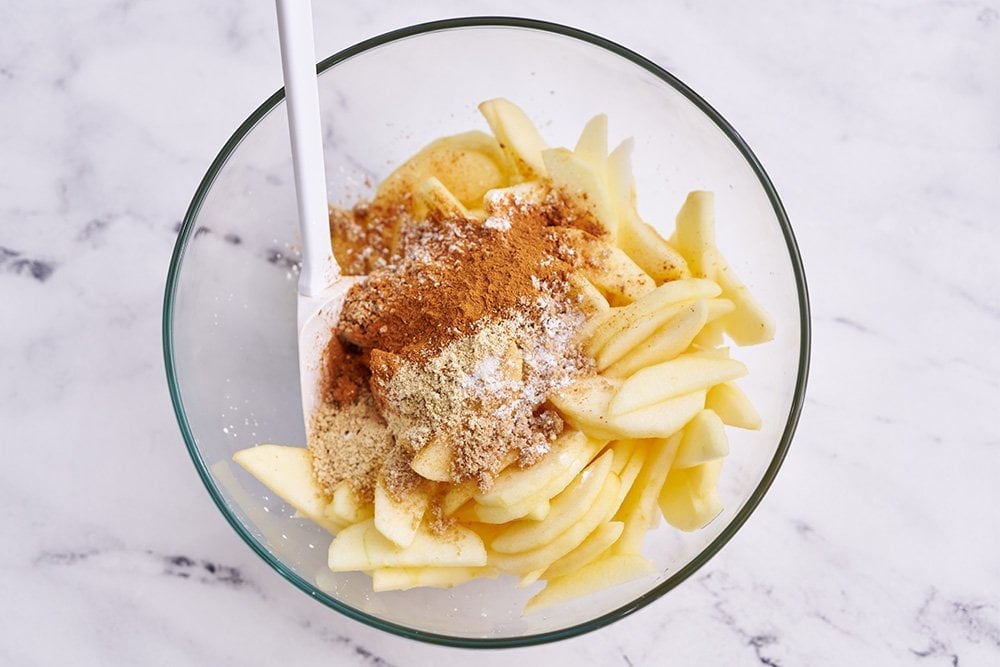
- Gently toss apples, sugar, lemon juice, cornstarch, cinnamon, ginger, salt, and vanilla together in bowl.
- Roll out the prepared dough into a 13-inch circle on lightly floured counter, then transfer to prepared pan.
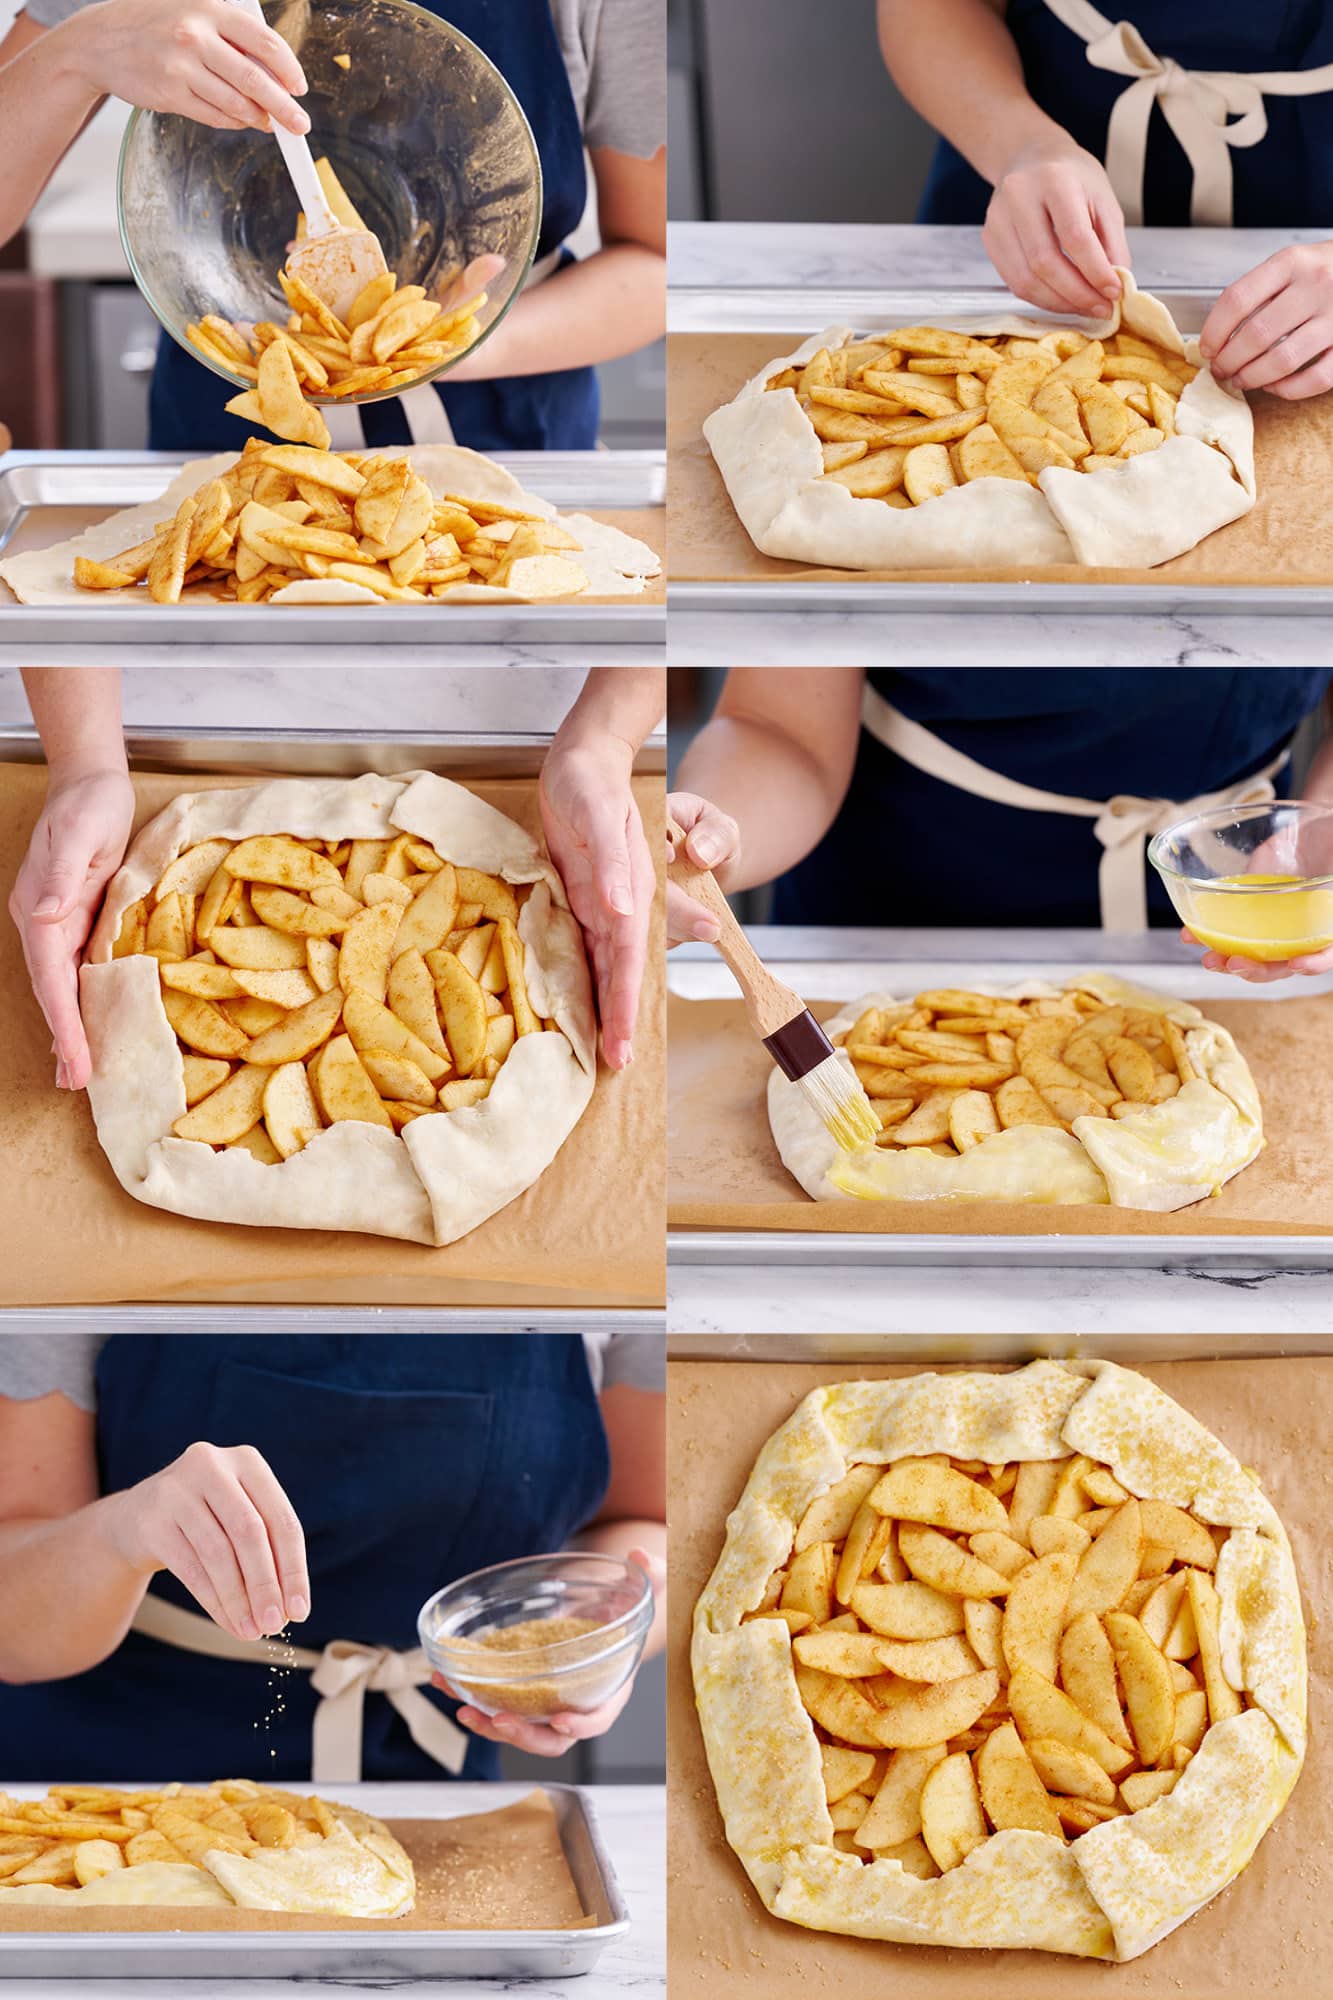
- Using a slotted spoon, pick up the apples from the bowl, leaving the excess juices behind, and arrange them in the center of the dough, leaving a 2-inch border around edge. Set aside 1 tablespoon of excess juice for step 7. Carefully grasp 1 edge of dough and fold up 2 inches over apples. Repeat around circumference of tart, overlapping dough every 2 inches; gently pinch pleated dough to secure, but do not press dough into fruit.
- Place in the fridge and chill while you preheat the oven. Adjust oven rack to lower-middle position and heat oven to 375 degrees. If you have a baking stone, place on the rack to preheat with the oven.
- Once preheated, beat the egg with 1/2 teaspoon of water. Brush all over the unbaked crust. If desired, brush about 1 tablespoon of the remaining apple juices over the apples. Sprinkle the crust with coarse sugar. Bake until crust is deep golden brown and fruit is bubbling, 50 minutes to 1 hour.
- Using two spatulas, carefully transfer the baked galette (still on parchment) to a wire rack and let tart cool for 10 minutes.
- While the galette cools, combine the apricot jam and 1 teaspoon of water in a small glass bowl. Microwave for 15 to 20 seconds or until bubbling. Brush over the apples.
- Loosen tart from parchment and carefully slide onto wire rack using two spatulas; let cool until warm, about 30 minutes. Cut into wedges and serve with vanilla ice cream, if desired.
- Store leftovers in an airtight container at room temperature for 1 day or in the fridge for up to 3 days. Refresh in a 300°F oven for 5 to 10 minutes before serving if desired.


I used a pizza peel to transport it from board to sheet pan. And instead of an egg wash, I did melted butter then cinnamon and sugar. My mom always made apple pies with that on the top!
Happy Thanksgiving!
Going to bring this to a friend’s house tomorrow. While we enjoy pre dinner munchies and wine then dinner should I put it in the fridge or leave on counter?
Made crust tonight and will finish it tomorrow.
Thank you-
Nancy
Oh that sounds fantastic! Leaving it out at room temp will be completely fine. I typically don’t place it in the fridge unless it’s not finished within a couple of days (it always is!). Let us know what you think of the recipe, hope it’s a huge hit!
Thank you so much for this wonderful recipe! I never leave comments on these occasions, but this one was so good that I feel like I owe you this. It was literally my best baking experience and BTW, I bake a lot!
Really a fun thing to do and so much easier for a quick dessert. Or sharing with a neighbor and no pie plate to return! Wonderful instructions and recipe. Have you tried individual sized ones? I am thinking a 6” round. Any ideas?
That should work just fine! You would just have to experiment a bit with the baking time since it would likely need far less time.
Thank you for the quick reply. Will let you know next week it’s a picture! Holidays are almost here.
Made this this morning. Don’t have a picture but it was beautiful.. The crust was buttery and crispy, just like I hoped it would be. The apricot was the icing on the cake. Thank you for the recipe
I made these for Christmas a day ahead and refrigerated them (2). Yes, the bottom got soggy, but I popped them in the oven when the roast was done with the oven off. By the time the dishes were done and we were ready for dessert, they were warm and the crust was crispy and delicious! There wasn’t a morsel left, and I got rave reviews!
This is my third time making the apple galette recipe. It’s super easy and comes together so quickly. The flavor is amazing.
This was my first attempt at making pie crust or a galette and it turned out fantastic! I used a food processor and I grated the butter as instructed. The instructions are so clear and detailed. I made the double pie crust and froze the other half. It was easy to defrost overnight in the fridge and roll out the next day. I already made two galettes and the 2nd was even better than the first.This recipe is so good and the galette is amazing. I can’t wait to try it with peaches and blueberries next summer. Thank you!
Baking stone is mentioned only about preheating. Does the baking occur on baking stone directly or does the pan go on the baking stone?
I have not tried this recipe yet.
Hi Joanne! If you have one, a baking stone is used to ensure a golden crispy bottom crust and avoid any sogginess. You’ll place the galette onto the prepared baking sheet as mentioned in Step #4, then place the baking sheet in the oven in Step #7 onto the hot baking stone (or onto the oven rack if you don’t have a baking stone). I hope that helps!
I’m so afraid that I’m about to ask the kind of question that in a 3rd grade classroom would get a hefty round of “Duh, John!” But 3rd grade was more than 70 years ago, and I’m tougher (or at least crustier) (heh heh) so I’m going to ask it. I had a brief moment of panic – well, consternation – when I finished rolling out my FIRST pie crust (!), measuring exactly the 13 prescribed inches (in at least several directions) in your galette recipe, and attempted to move on to your next step, to wit: “then transfer to prepared pan”, to discover that my pan, which I bought with your recommendation (Nordicware Natural Aluminum Half Sheet Pan) was narrower by slightly more than an inch than my 13-inch crust. Yoiks! said the old novice baker! Now what?! Of course I fiddled things and draped dough over edges and whatnot. And the 2-inch border is now folded over the apples, which makes it fit the pan, of course, and the galette is chilling out in the fridge. But I sure would love to know how I should have done all that more elegantly – like the way you probably do. Maybe I even would have liked to be warned about that size discrepancy. Such as in a little video, or something, on your Best Ever Pie Crust page. Which I read top to bottom. Four times. Getting up the courage to make my FIRST PIE CRUST! Anyway, it smells great before it’s even seen the inside of the oven. And I’m giving this recipe 5 starts in anticipation. Thank you!
Galettes aren’t meant to be elegant. They are definitely more rustic which is exactly what I love about them. There is no wrong way to what they look like. This recipe is so good that no one will care how it looks!😉
Made this using a mix of apples I had and it turned out great! Nice amount of sweetness and warm spices. It’s a keeper.