


Tessa's Recipe Rundown
TASTE: Like a chocolate chip cookie and a buttery scone had a baby! Butterscotch flavors with a slight tang from the buttermilk, and, of course, lots of mini chocolate chips.
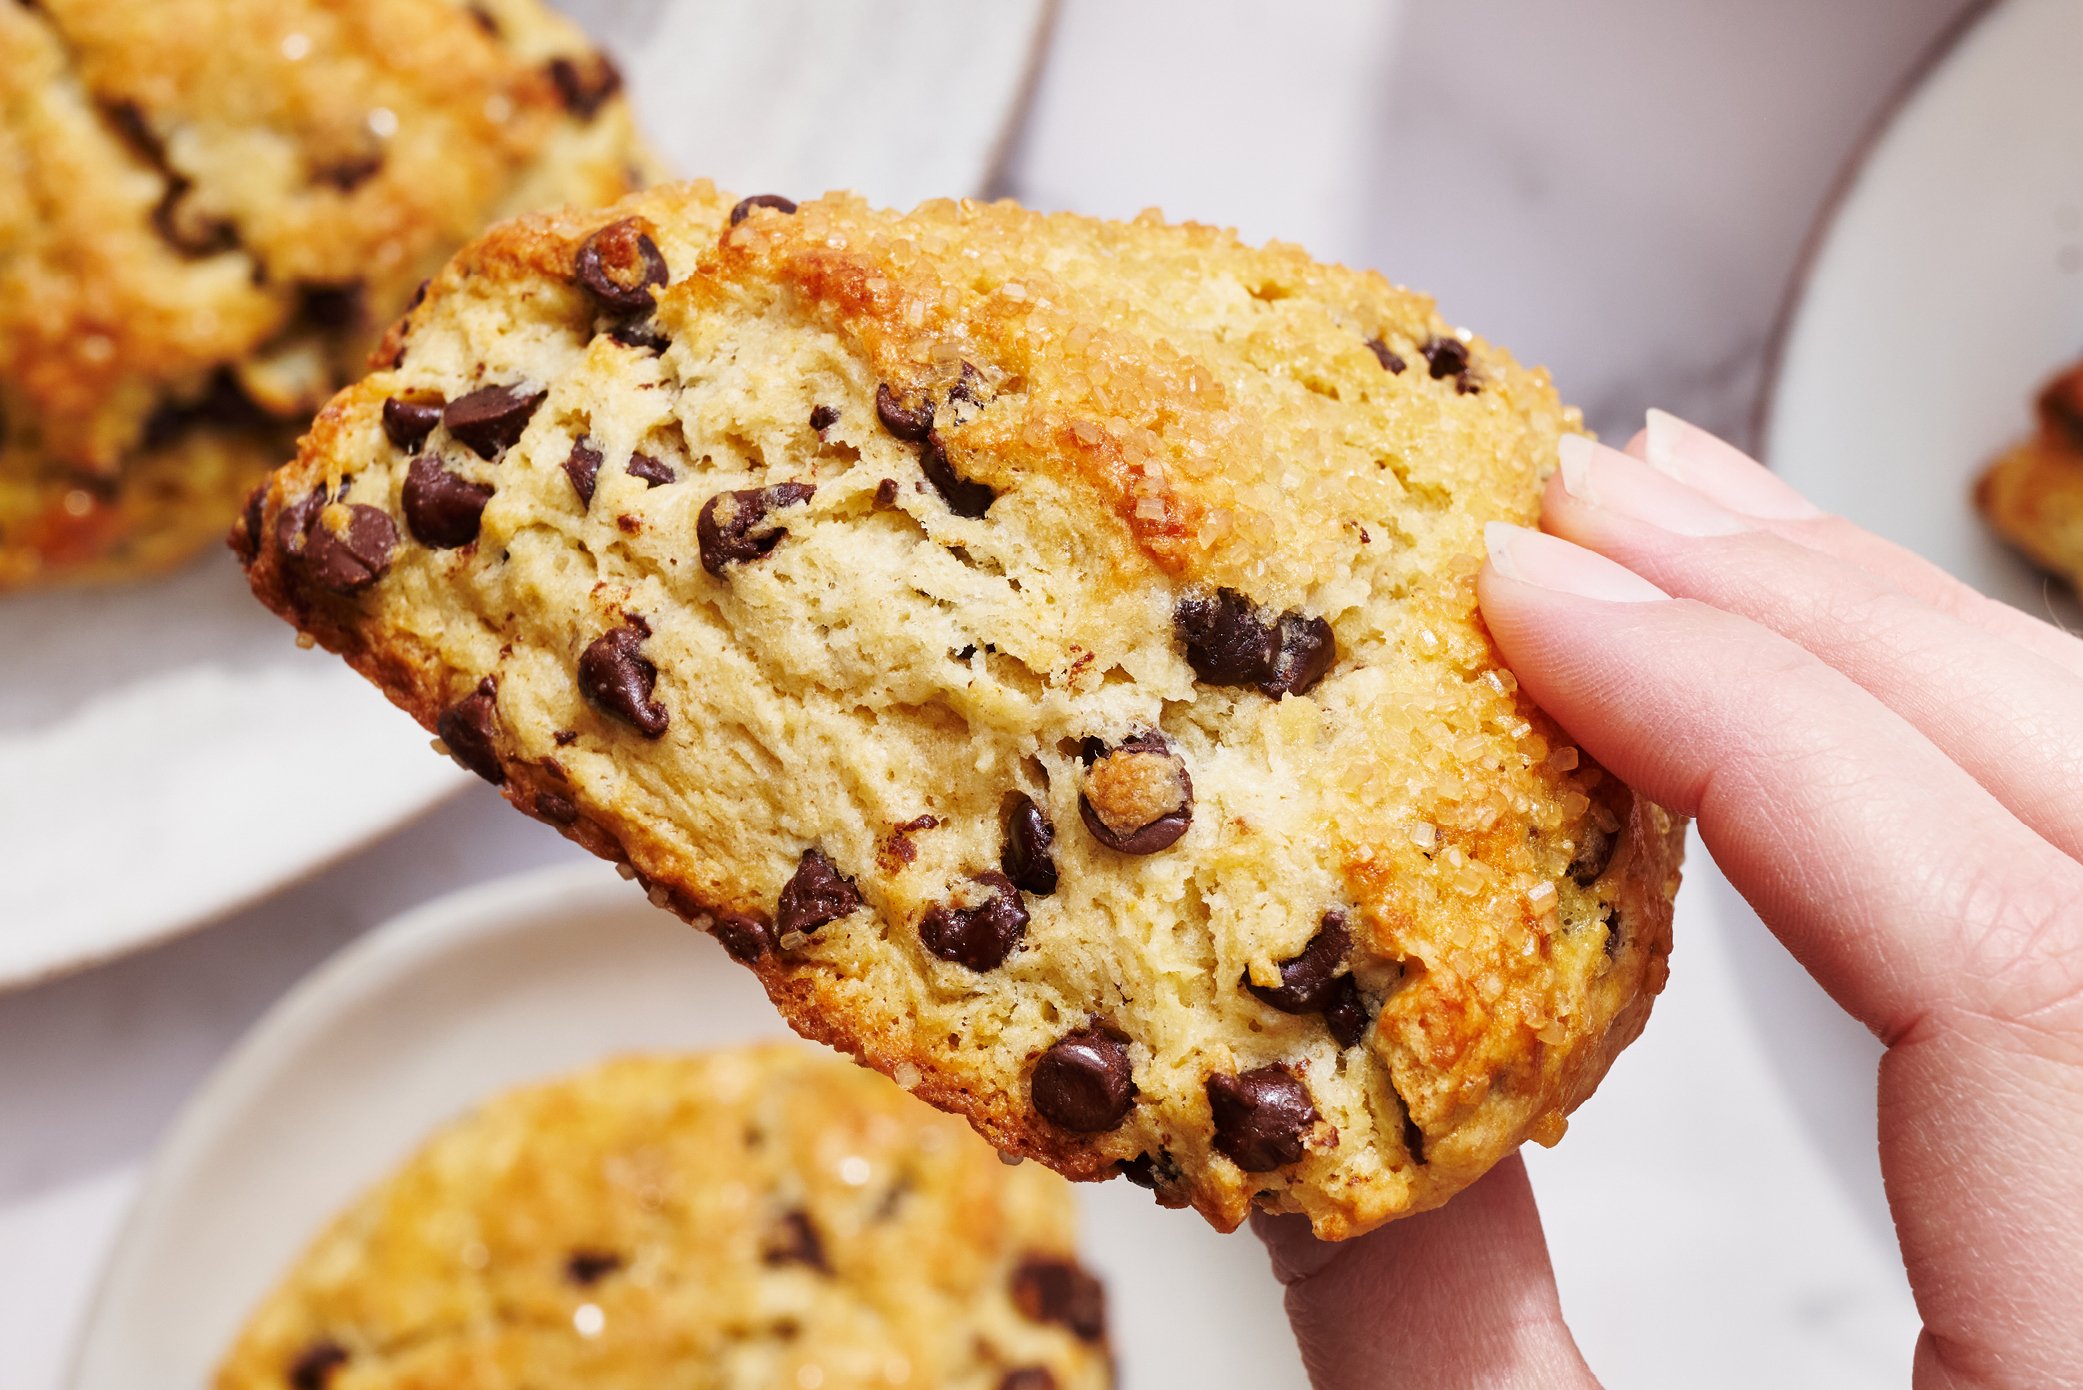
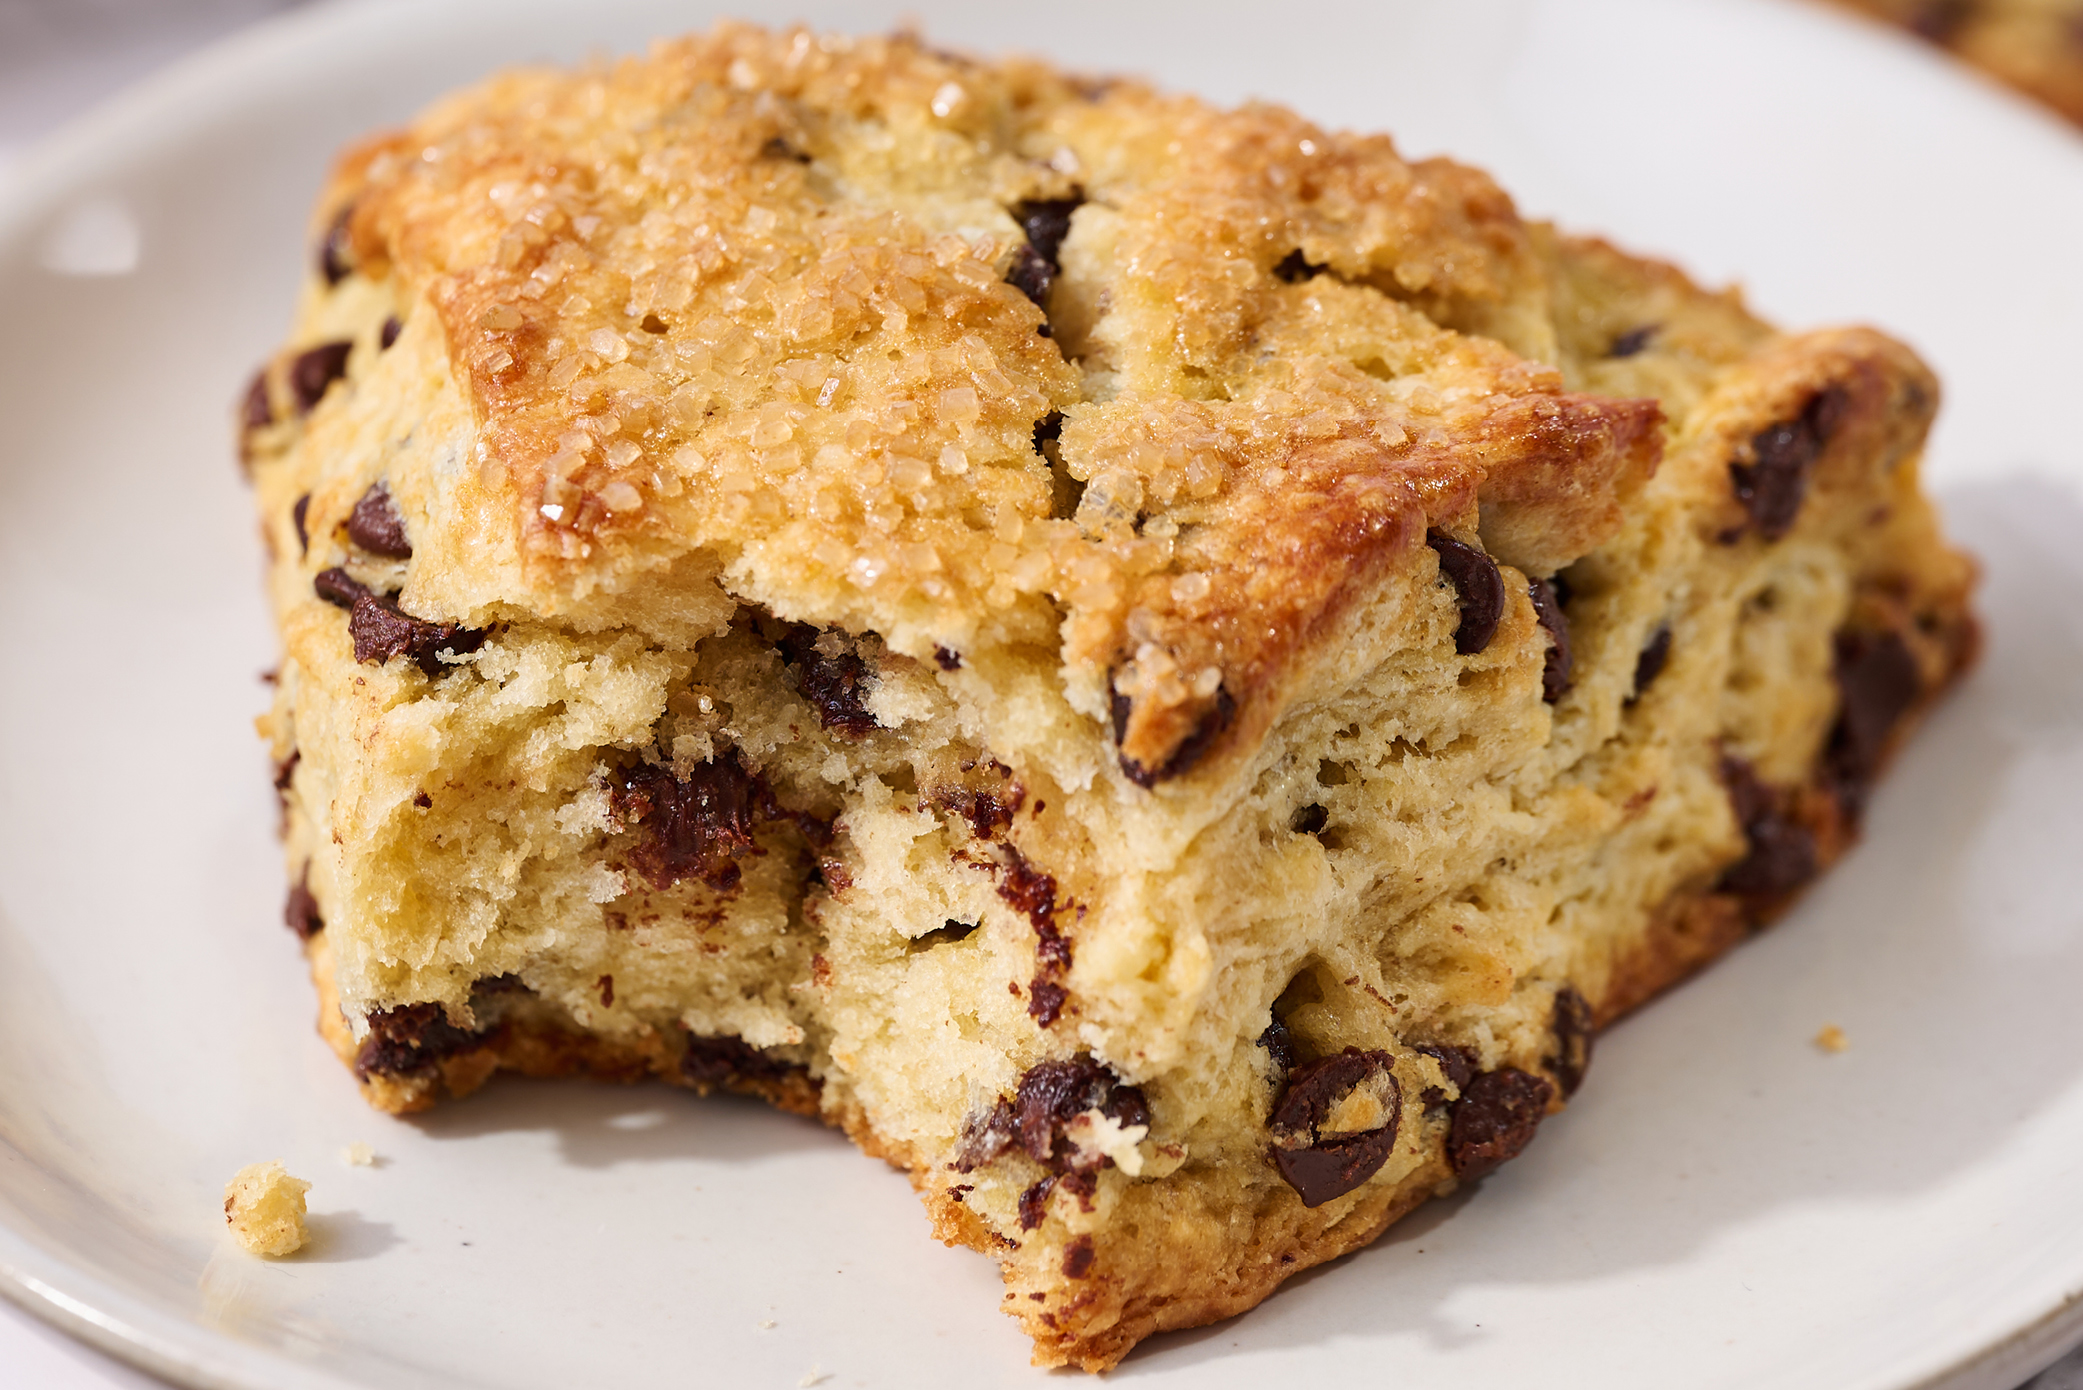
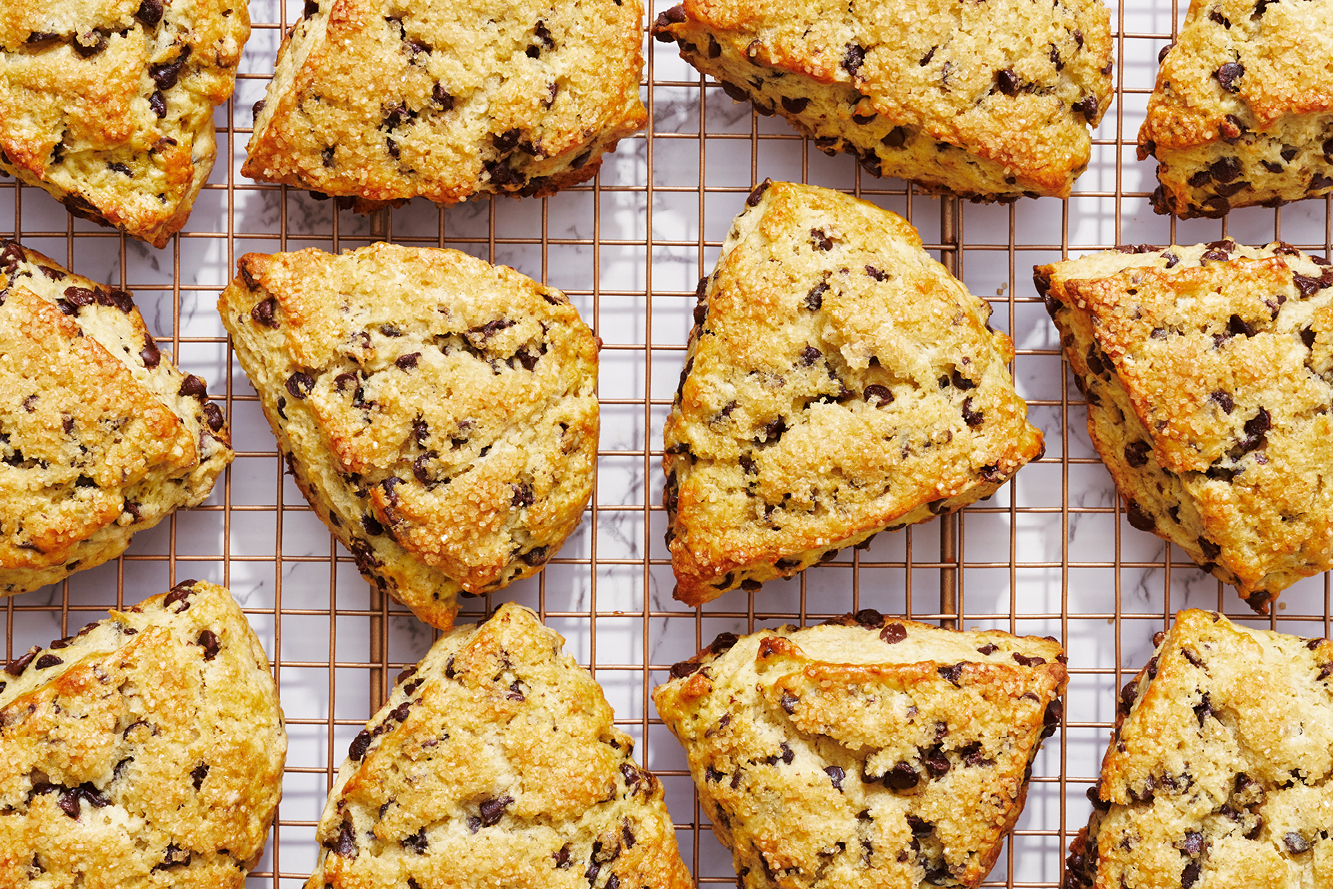
TEXTURE: Soft, tender, and light in the middle, yet perfectly crisp and caramelized on the outside, with gooey mini chocolate chips studded throughout.
EASE: So easy, and make-ahead friendly.
WHY YOU’LL LOVE THIS RECIPE: A fun twist on the classic.
This post may contain affiliate links. Read our disclosure policy.


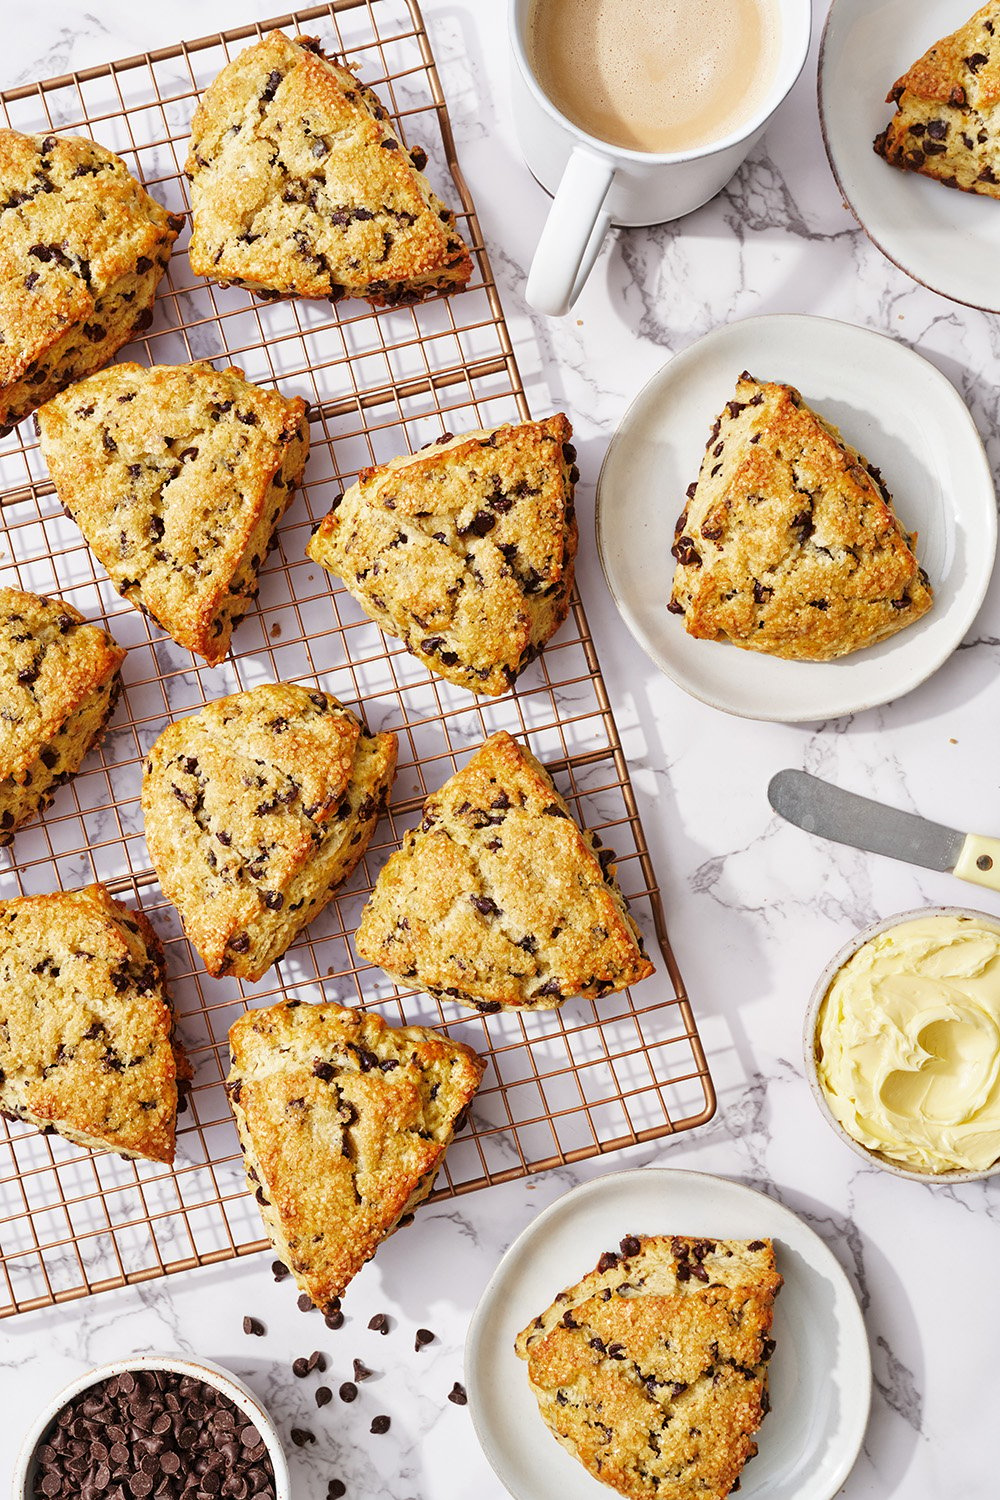
These Chocolate Chip Scones capture the rich and comforting butterscotchy flavors we all love in a chocolate chip cookie and pack them into a buttery, flaky, and ultra-light scone.
I knew my super popular Classic Scone Recipe would be a great base for this recipe – but it took a little tweaking to achieve the exact flavor I craved.
First, I changed out some of the granulated sugar for light brown sugar and added additional vanilla extract. This provided the perfect cookie flavor I wanted! Mini chocolate chips proved the best option for chocolate in every bite without it being overpowering.
Ideal for breakfast, brunch, or after-school snacks, this scone recipe is destined to become a favorite in your household.
This recipe was super easy to follow and made wonderful scones. I froze mine and bake for 15 minutes and they were perfect for Easter! Everyone raved about them.
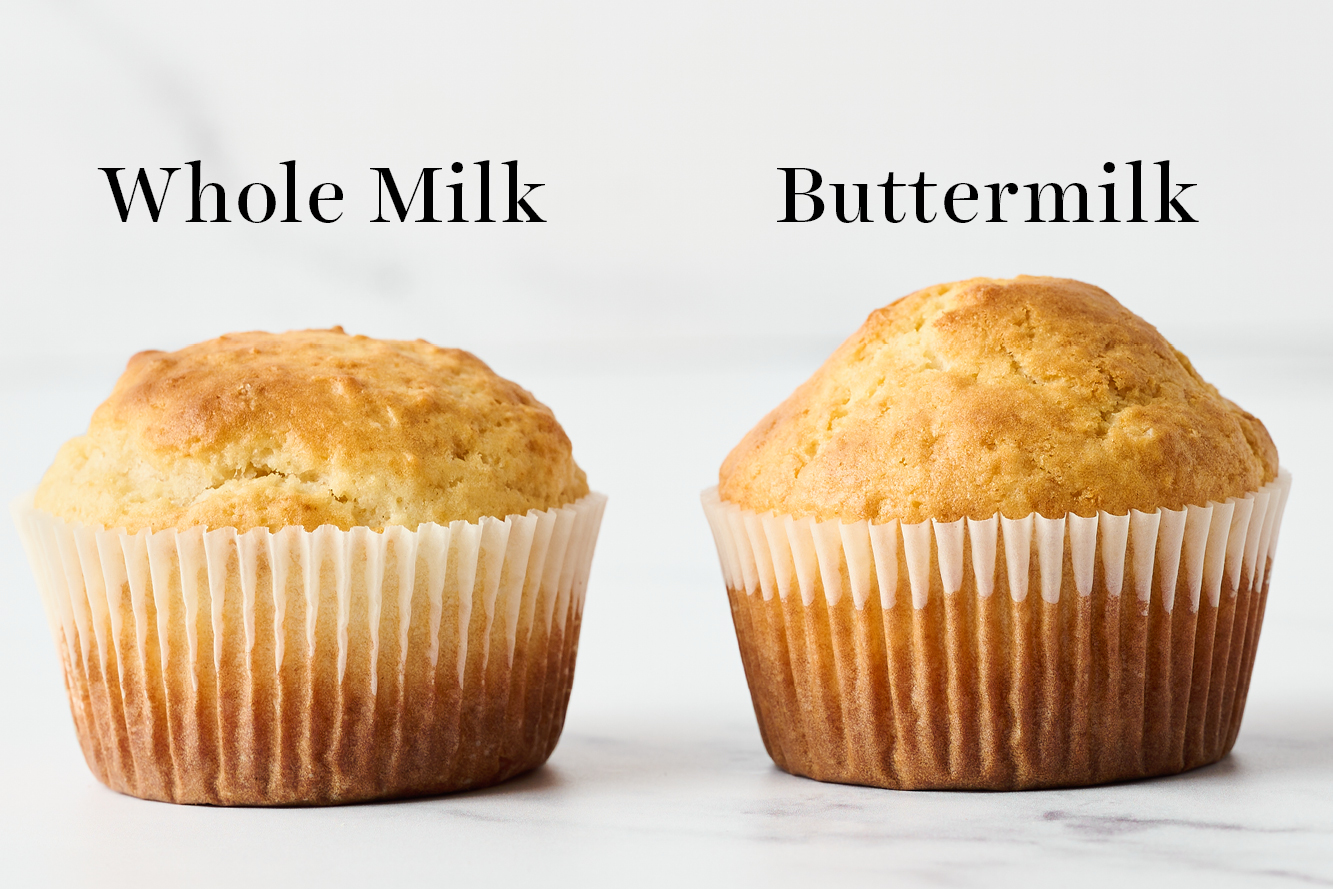
Buttermilk is the secret!
I highly recommend using real buttermilk in Chocolate Chip Scones. It creates tender, tall scones because of how its acidity reacts with the baking powder and tenderizes the dough overall. It also adds a lovely tang, creating a wonderful depth of flavor. Whole or low-fat both work perfectly. If you can’t find it, plain Kefir is a great 1:1 substitute.

Sprinkle of Science
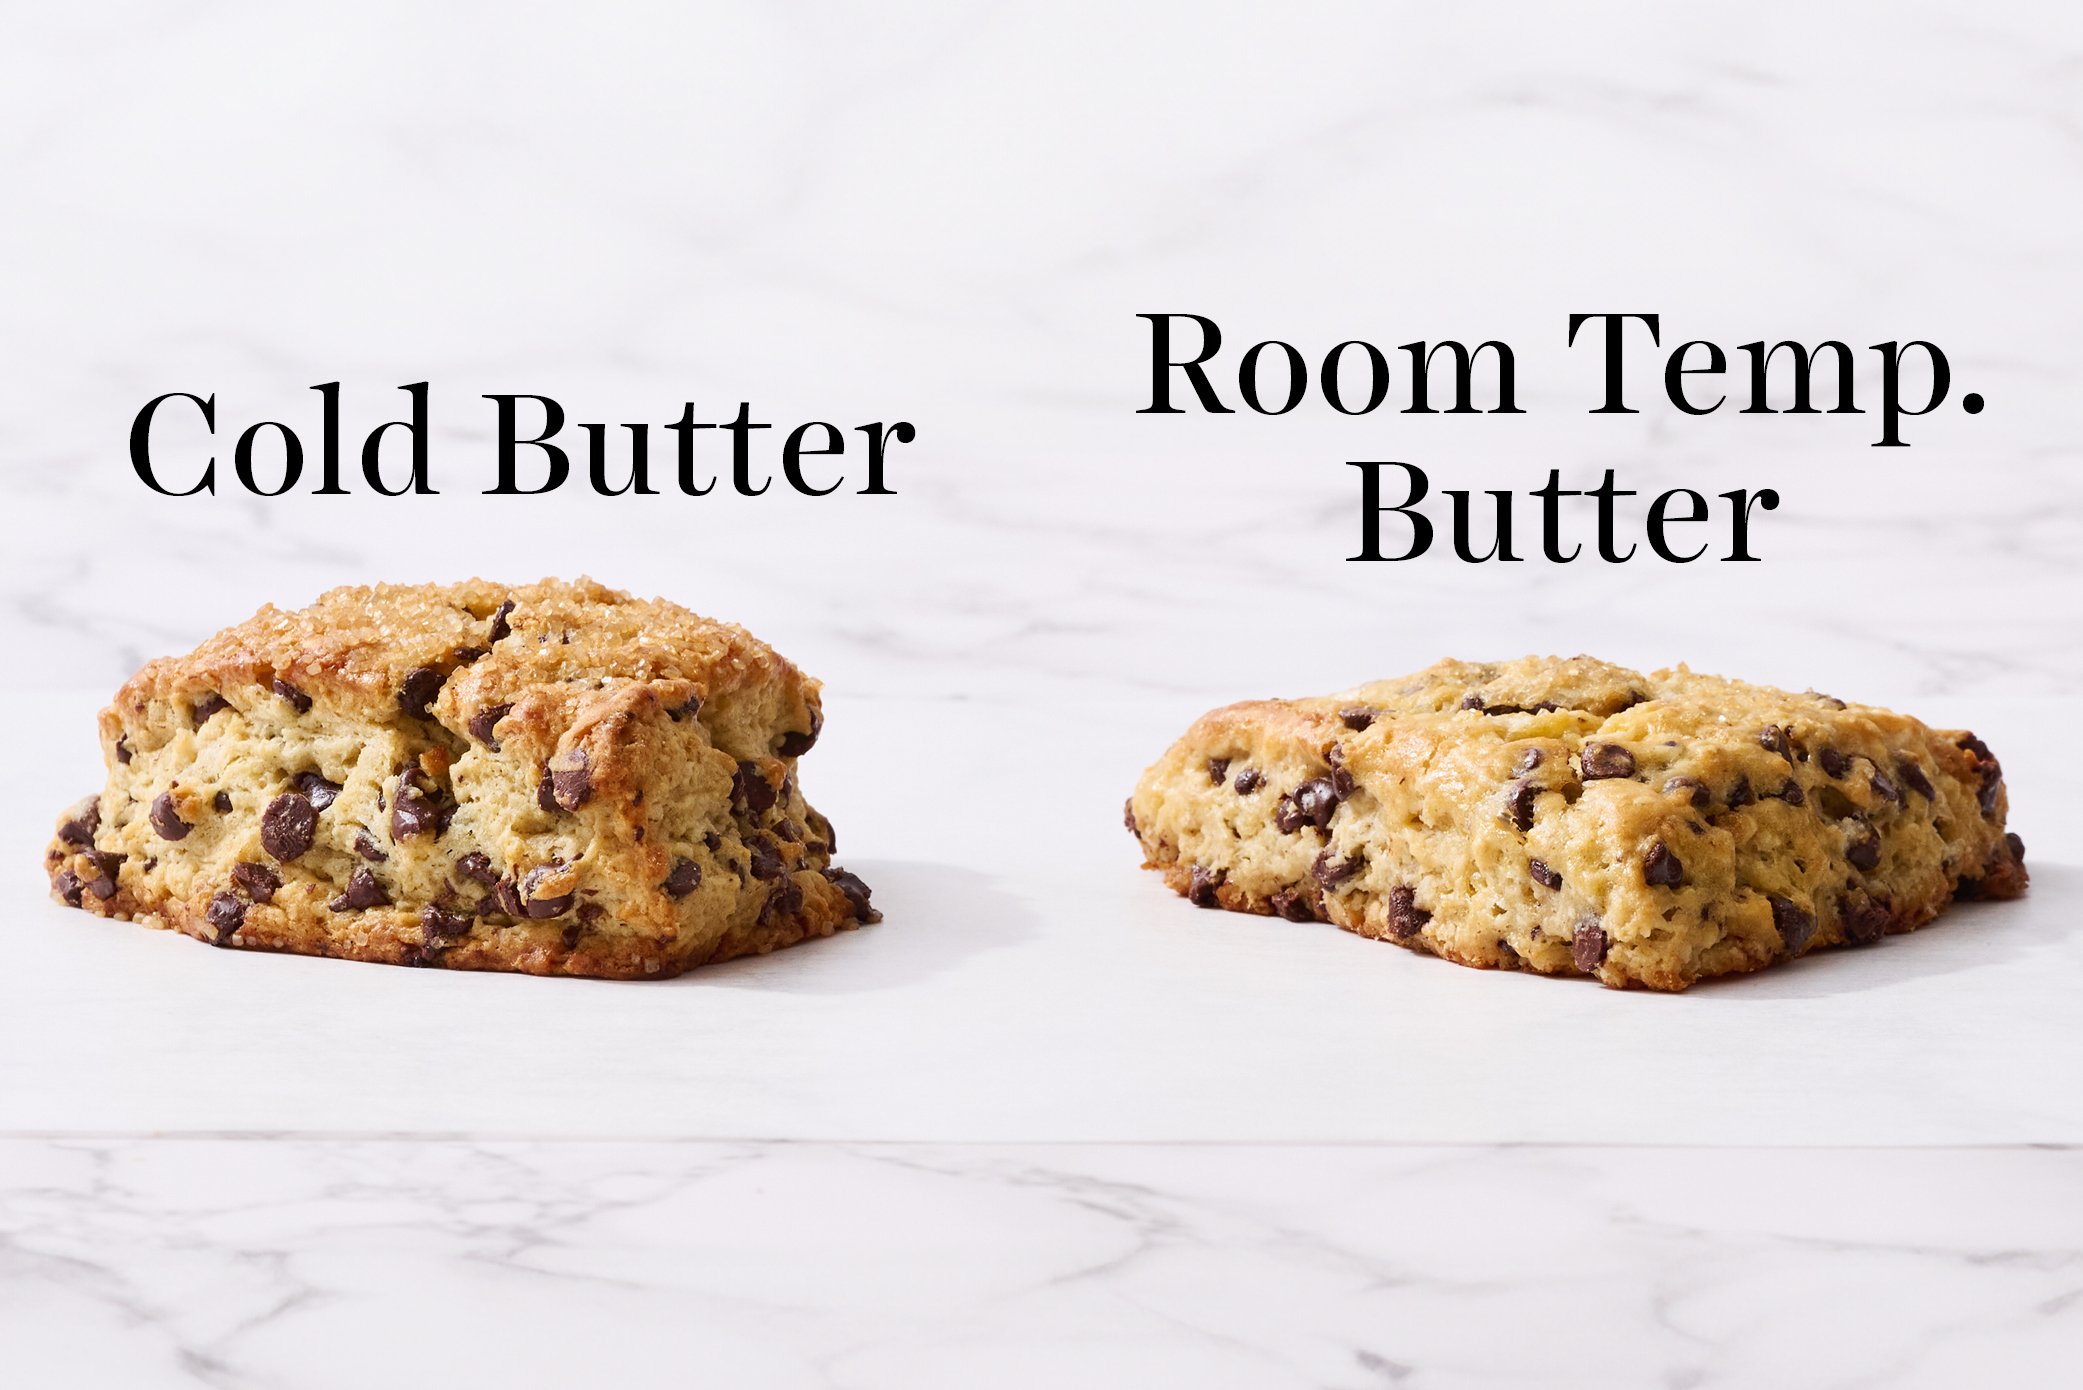
The butter and scone dough must be kept as cold as possible until the moment the scones hit the oven.
The cold butter melts upon entering the oven and the water content in butter evaporates as steam. As the steam escapes, it puffs up and creates that beautiful tall, flaky, fluffy texture.
If the butter softens and becomes at all greasy at any point, pop the dough back into the fridge or freezer for 10-15 minutes before proceeding.
While the oven preheats, you can also place the baking sheet of shaped, unbaked scones in the fridge or freezer to ensure the butter remains nice and cold.
I call for laminating the scone dough in this recipe. This basically means taking the dough and folding it into a trifold, like a letter, before flattening and stamping out your scone shapes. Learn more about why this is an important step here!

Storage & Make ahead
Make Ahead: Once shaped, the unbaked scones can be covered with plastic wrap (to prevent them drying out) and refrigerated overnight. Bake from the fridge as the recipe directs.
Serving Tips: I recommend allowing the scones to sit for 30-60 minutes after baking (if you can resist them that long!). The chocolate chips will still be gooey, but waiting a little helps the flavor develop. Serve as they are, or with butter, jam, or Nutella, if desired.
To Store: Scones are best served fresh, within a few hours of baking. Store any leftovers inside an airtight container at room temperature for up to 3 days. Reheat in a 400°F oven for a few minutes to re-crisp the outside, if desired.
To Freeze: Place shaped, unbaked Chocolate Chip Scones in an airtight container and freeze for up to 1 month. If baking from frozen, add about 2 minutes to the baking time.
FAQs
If you can’t find real buttermilk, kefir is the best substitute. As a last option, use milk or heavy cream in its place – just note that the texture won’t be quite as tender and the flavor won’t have that slight tang. I don’t recommend substituting buttermilk with a DIY alternative (milk + lemon or vinegar). You can find out why, plus read more about how buttermilk works here.
I wouldn’t recommend that, unless you’re game for some experimenting! Cocoa powder is very starchy and tends to zap moisture. Adding it to the dough without shifting the overall ratio of wet to dry ingredients would likely result in a crumbly dough, and dry scones.
Yes!
You can swap out some or all of the semisweet chips for milk chocolate, white chocolate, or dark chocolate. Keep in mind that this will alter the overall sweetness of the scones.
To make orange chocolate scones, add the zest of an orange to the wet ingredients. If using vanilla glaze, replace milk with fresh orange juice.

Email This Recipe
Enter your email, and we’ll send it to your inbox.
Ingredients
- 3 cups (381 grams) all-purpose flour
- ¼ cup (50 grams) granulated sugar
- ¼ cup (50 grams) lightly packed light brown sugar
- 1 ⅛ teaspoon fine sea salt
- 1 tablespoon baking powder
- ½ teaspoon baking soda
- 1 10- ounce bag (283 grams) mini semisweet chocolate chips1
- 1 ½ sticks (170 grams) unsalted butter, cold and cubed (keep chilled until added to dry mixture)
- 1 cup (237 grams) buttermilk, cold
- 2 large eggs, divided
- 2 teaspoons vanilla extract
- Coarse sugar, optional for topping


Instructions
- Adjust the oven rack to the center position and preheat to 400°F. Line two baking pans with parchment paper.
- In a large bowl, combine the flour, sugars, salt, baking powder, baking soda, and chocolate chips.
- Add the butter and cut with a pastry cutter or fork until the butter is the size of large peas.
- In a separate bowl, whisk together the buttermilk, 1 egg, and vanilla extract.
- Make a well in the middle of the dry mixture and add the liquid mixture. Mix until just combined. Don’t over-mix.
- Transfer the dough to a floured surface. Shape dough into a rectangle. Fold the rectangle in half like a piece of paper. Flatten it out into a rectangle again. Fold in half once more, but in the opposite direction. This gently ‘kneads’ the dough, making it cohesive without overmixing.
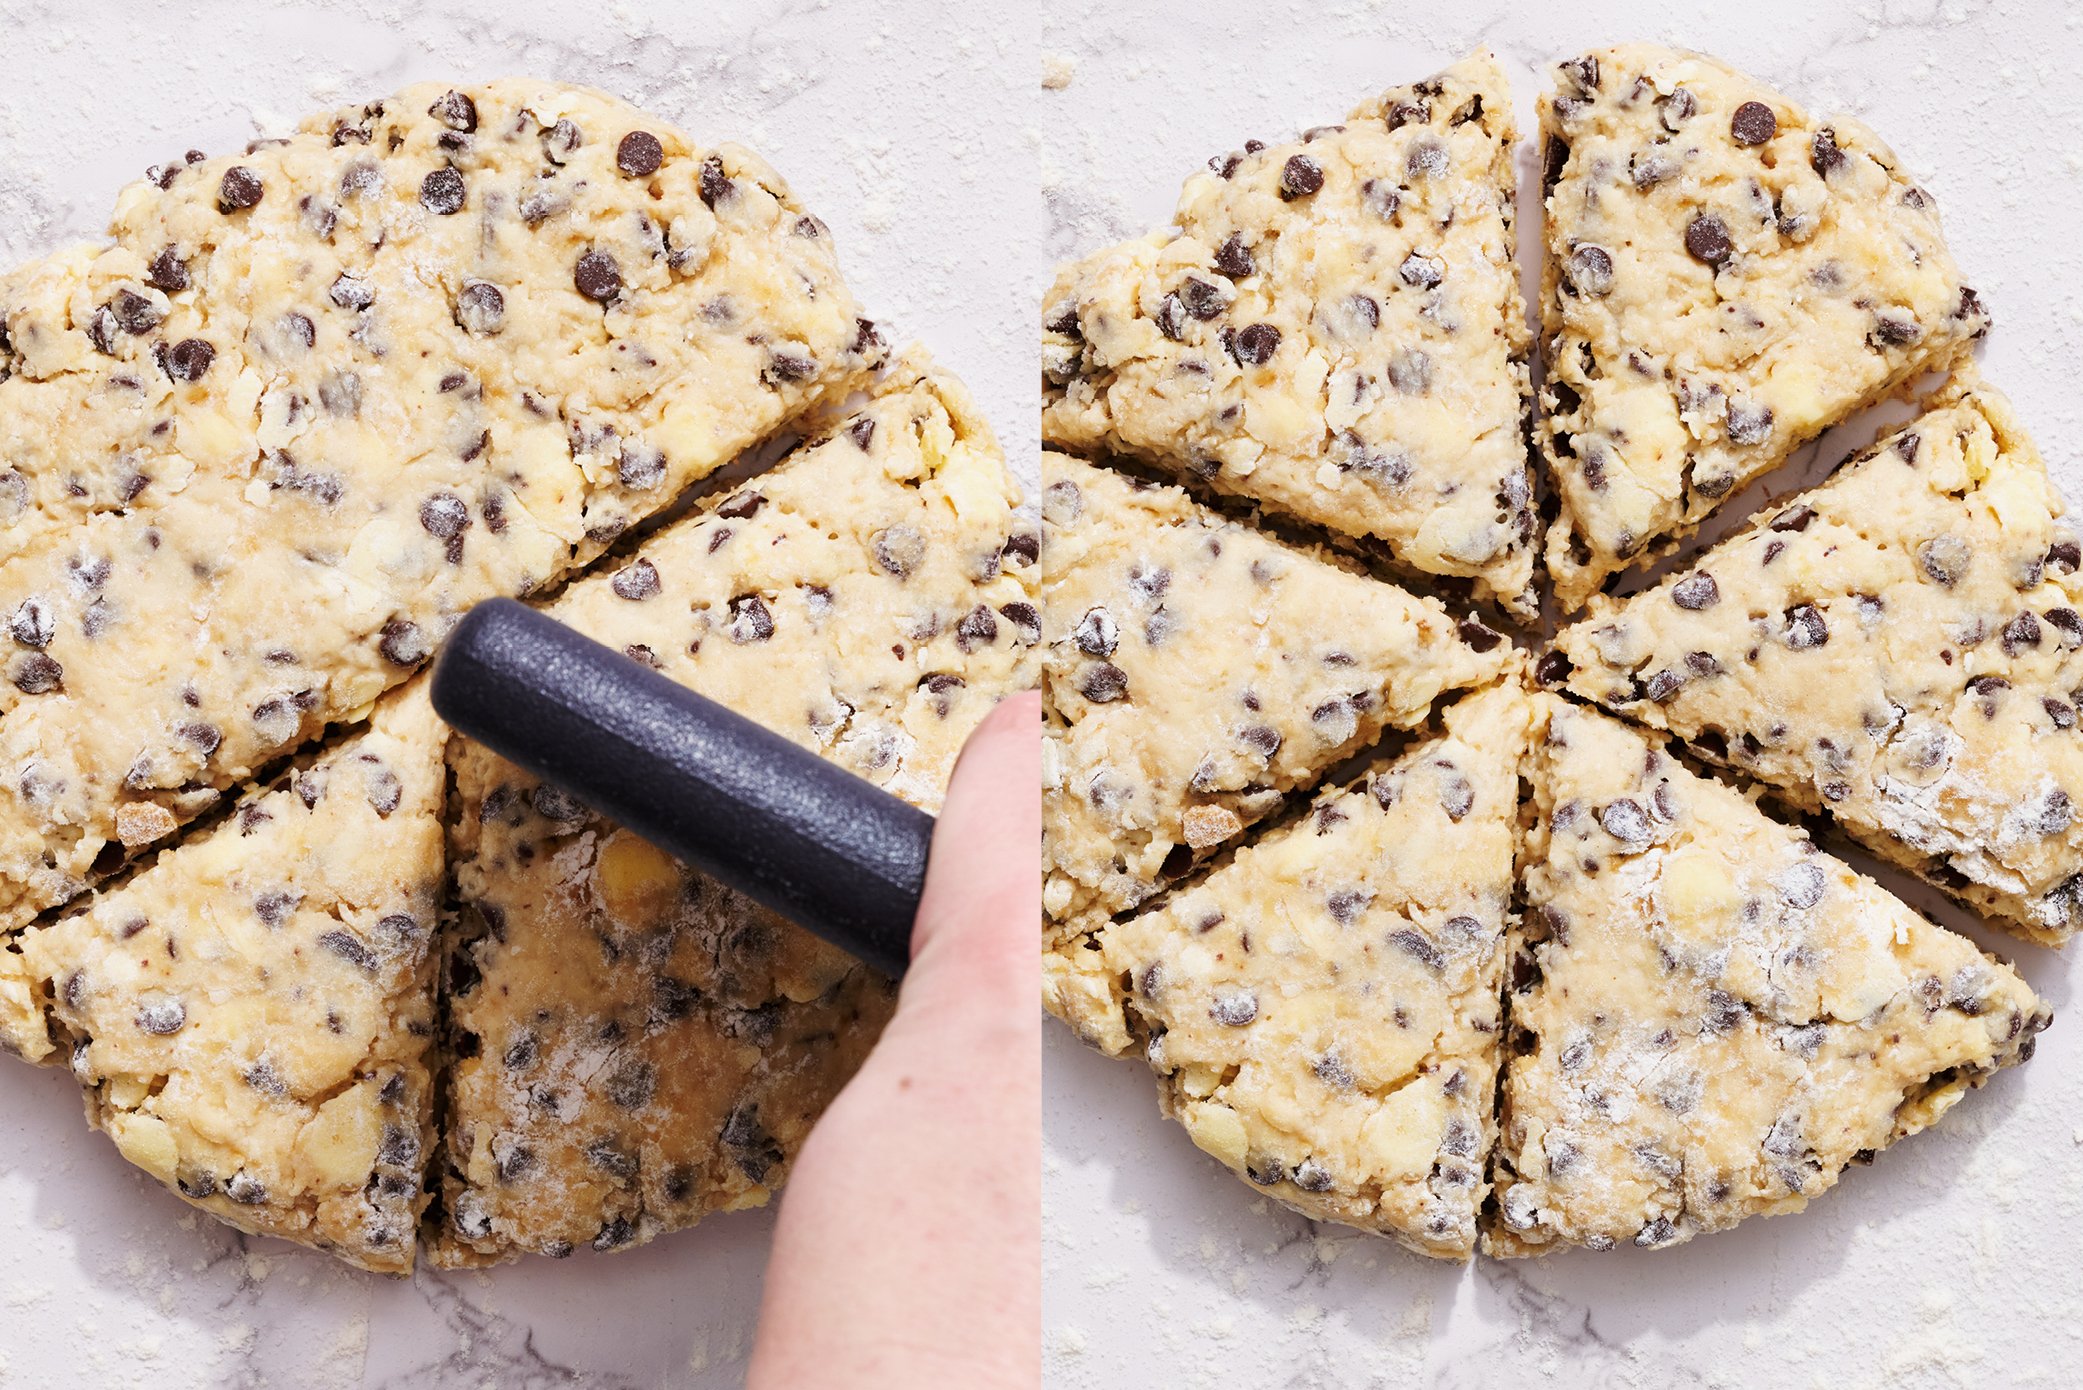
- Divide into 2 equal parts. Gently press each dough into a 1 ½-inch tall round. Using a bench scraper or knife, cut each part into 6 wedges and place on your prepared baking pans. Space them out about 2 inches apart.
- If you notice the dough becoming warm at any point, place in the freezer for 10-20 minutes before continuing.
- MAKE AHEAD: At this point, the unbaked scones can be refrigerated overnight, or sealed and frozen for up to 1 month. If baking from frozen, add about 2 minutes to the baking time.
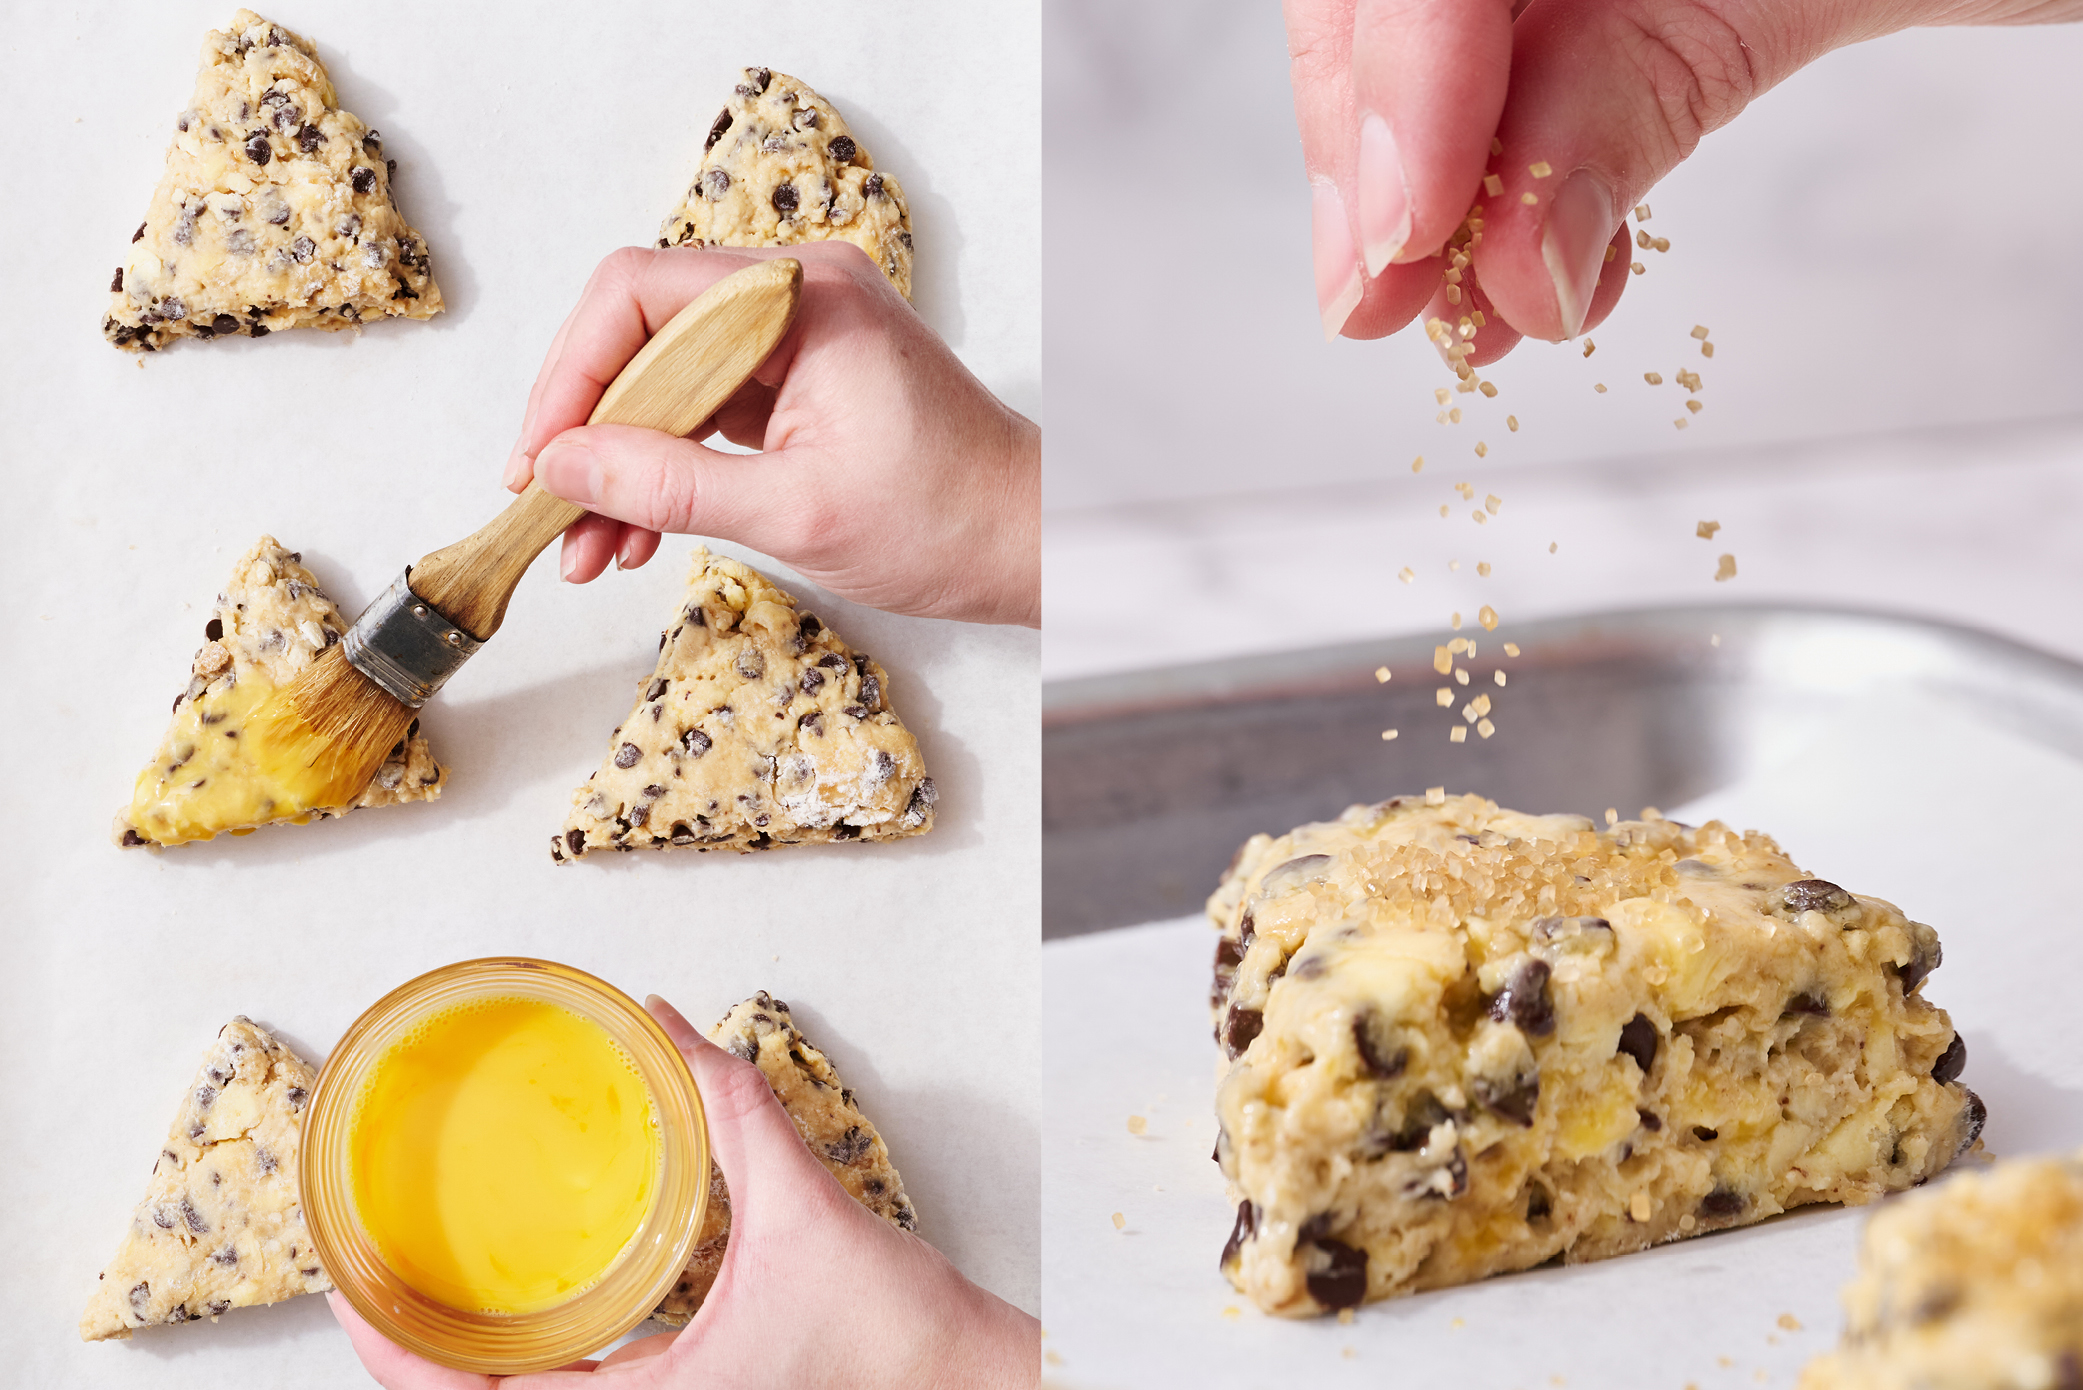
- In a small bowl, combine the remaining egg with 1 teaspoon water. Brush over the scones. Sprinkle with coarse sugar.
- Bake for 18 to 20 minutes, or until lightly browned. Allow to sit 30-60 minutes before serving.2
- The scones are best served warm or within a few hours of baking. Once cooled, store at room temperature in an airtight container for up to 3 days.
Notes
- Melted chocolate drizzled on top
- Dipped or drizzled in vanilla glaze after baking (skip the coarse sugar)
- Vanilla glaze: 1 cup (125 grams) powdered sugar, 2-3 tablespoons milk or heavy cream, ½ teaspoon vanilla bean paste (or vanilla extract), pinch of salt. Whisk to combine.
More Scone Recipes You’ll Love:
- Classic Scones
- Blueberry Scones
- Pumpkin Scones
- Cranberry Orange Scones
- Shallot, Jalapeño, Goat Cheese and Honey Scones
Photos by Joanie Simon.


My husband didn’t think he liked scones…until I made these!
These are delish and super easy to make
Great recipe. My dough seemed extra sticky when I turned it out in the counter so I found it difficult to accurately fold the dough. I guess I’ll have to make them again!
I’m glad you liked the result despite the sticky dough! There could be a few reasons for a sticker-than-normal dough, including the heat and humidity of your kitchen and the brand of flour you use. I tested this recipe with Gold Medal Bleached All-Purpose flour which absorbs water nicely (compared to unbleached flour) and doesn’t contain too high of a protein percentage (compared to King Arthur Flour) for tender scones. Thanks for joining the challenge!
This is like a bigger version of soft chocolate chip cookie but only fluffier. I made a savory and sweet version for brunch and these were a hit!
So yummy! And easier than expected
These made my house smell amazing! Not to mention they were delicious. I still have half in the freezer and can’t wait to bake them.
I have never made scones before, and I found these to be very easy to make! They’re super delicious also!!
For someone who has never liked scones, I would 100% make these again. They’re perfect!
This recipe is delicious! I used gluten free flour and added 1tbsp extra milk and it turned out perfect!!!
LOVE this take on the original scone recipe – so good, will definitely be making again!
Very good!! I laminated the dough and it created an amazing texture. I also topped them the classic way, brushing the tops before baking with cream instead of egg. I used regular size chocolate chips and they were fine. Very fluffy and pretty!
These scones are always a hit, whether they are plain or filled with chocolate chips, cranberries etc.