


Tessa’s Recipe Rundown
Taste: The combination of cookies and tangy cheesecake is a near-perfect pairing!
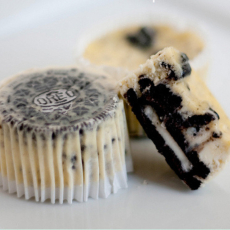
Texture: The slightly crunchy Oreo cookie on the bottom of each cupcake plus the Oreo bits suspended inside the creamy, sweet cheesecake goodness are the best part of this treat.
Ease: Way easier than you might think. Watch the video to see how they’re made!
Why You’ll Love This Recipe: Adorable little cheesecakes that are easy to make and even easier to enjoy!
This post may contain affiliate links. Read our disclosure policy.
Look no further than my Cookies and Cream Cheesecake Cupcakes for your next party!
Featuring a crowd-pleasing combination of luscious, slightly tangy vanilla cheesecake and sweet Oreo cookies, these adorable treats are the perfect combination of nostalgia meets sophistication.
Whether enjoyed at a party or just as a personal indulgence, Cookies and Cream Cheesecakes are creamy, slightly crunchy, and so darn tasty.
These mini cheesecakes are absolutely delicious, simple to make, and a total hit with adults and kids alike. Bonus: they’re super easy to transport, too!
If you’re feeling extra fancy, feel free to top each cheesecake cupcake with a swirl of piped-on homemade whipped cream and a sprinkle of crushed Oreos – but I think they’re super cute even without that.


Sprinkle of Science
How to Make Cookies and Cream Cheesecake Cupcakes
Baking Cookies and Cream Cheesecake Cupcakes
- Yes, 275°F is the right temperature!
- You want to bake these in a cooler oven to avoid having overbaked or cracked cupcakes.
- Bake these for 22 minutes, or until the cheesecake is set.
- If the batter is still slightly jiggly in the middle, that is fine.
- Err on the side of underbaking vs. overbaking.
- However, you may still need to add an extra minute or two of baking time if your oven runs cold.
- Learn more about ovens and why oven temperature is so important here.
Cupcake Liners
I ran out of paper liners in the making of this video, but definitely use them if you have them. The cupcakes will still turn out without them, but they’re much prettier, easier to transport, and easier to clean with them. I like to use these white paper cupcake liners so the Oreo on the bottom peeks through.
Chilling the Cookies and Cream Cheesecake Cupcakes
Allow the cupcakes to come to room temperature before chilling in the fridge for at least 4 hours. I like to chill overnight.
Can I Substitute the Sour Cream?
You can substitute full-fat plain Greek yogurt for the sour cream if you can’t find sour cream where you live. I do prefer the flavor sour cream brings to these cheesecakes, but yogurt will work in a pinch.
What Type of Cream Cheese Should I Use?
- Be sure to use blocks of full-fat, high-quality cream cheese.
- Do not use reduced fat or your mini cheesecakes may be watery, rubbery, or otherwise lackluster.
- Definitely don’t use whipped cream cheese or cream cheese meant for spreading on a bagel.
- Opt for the best brand you can find as some generic brands have too much water content.
How to Store Mini Cookies and Cream Cheesecakes
- Since these are made with cream cheese, they need to be stored in the refrigerator.
- If you plan on bringing them to a party or potluck, that’s fine. Just be aware that they shouldn’t sit at room temperature for an extended period of time.
- Store in an airtight container in the fridge for up to 3 days.
Can I Freeze Mini Cookies and Cream Cheesecakes?
Wrap each cheesecake cupcake well in plastic and store inside an airtight container in the freezer for up to 1 month. Defrost in the fridge overnight before serving.
More Recipes You’ll Love
- Homemade Oreos
- Oreo Cheesecake (full-sized cheesecake!)
- No-Bake S’Mores Mini Cheesecakes
- Cheesecake Bars
Email This Recipe
Enter your email, and we’ll send it to your inbox.
Ingredients
- 21 Oreo cookies, 15 left whole, 6 coarsely chopped
- 1 pound (2 8-ounce packages) cream cheese, softened to room temperature
- 1/2 cup granulated sugar
- 1/2 teaspoon vanilla extract
- 2 large eggs, at room temperature
- 1/2 cup sour cream, at room temperature
- 1/8 teaspoon fine sea salt

Instructions
- Preheat the oven to 275°F. Line 2 standard muffin tins with 15 paper liners. Place 1 whole Oreo cookie in the bottom of each lined cup.
- In a large bowl, use an electric mixer to beat the cream cheese until smooth. Add the sugar and beat until combined. Beat in the vanilla then add the eggs, one at a time, beating until combined. Beat in the sour cream and salt. Do not overmix. Stir in the chopped Oreo cookies.
- Divide the batter among the cookie-lined cups, filling each almost to the top. Bake until the filling is set, about 22 minutes. Transfer to wire racks to cool completely inside the muffin tins. Refrigerate at least 4 hours, or overnight, before serving. These can be stored in an airtight container in the fridge for up to 3 days or in the freezer for up to 1 month. Defrost in the fridge overnight before serving.


I have made these numerous times. The last time I made 60 of them for my sons basketball team. He told me they were fighting over them.