


Tessa’s Recipe Rundown
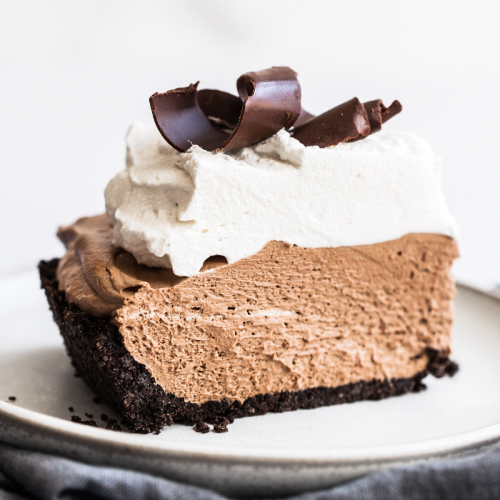
Taste: Tons of deep chocolate flavor without any cloying artificial sweetness like the pre-made frozen silk pies from the store.
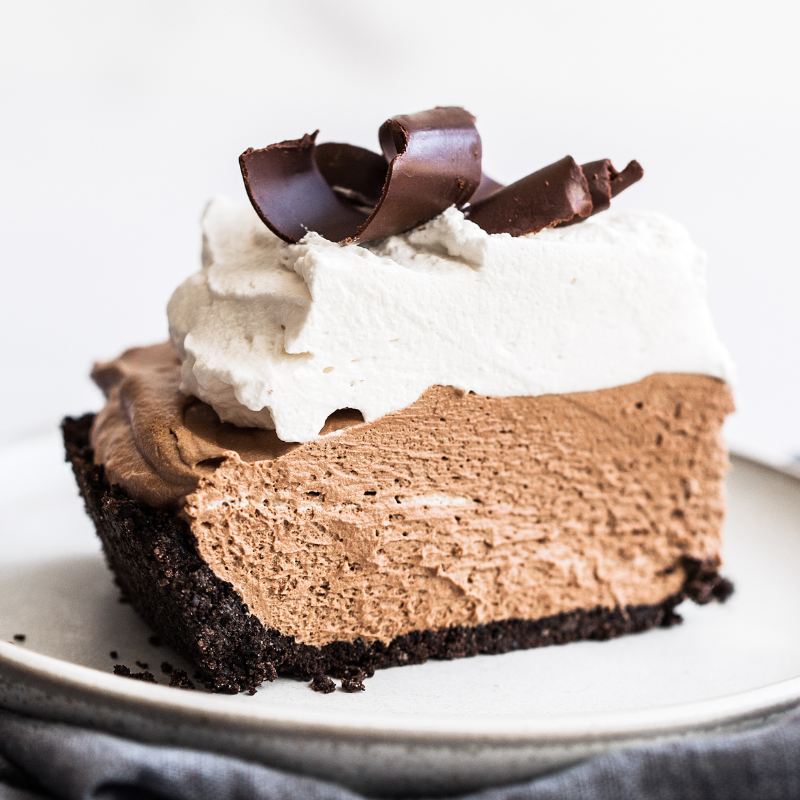
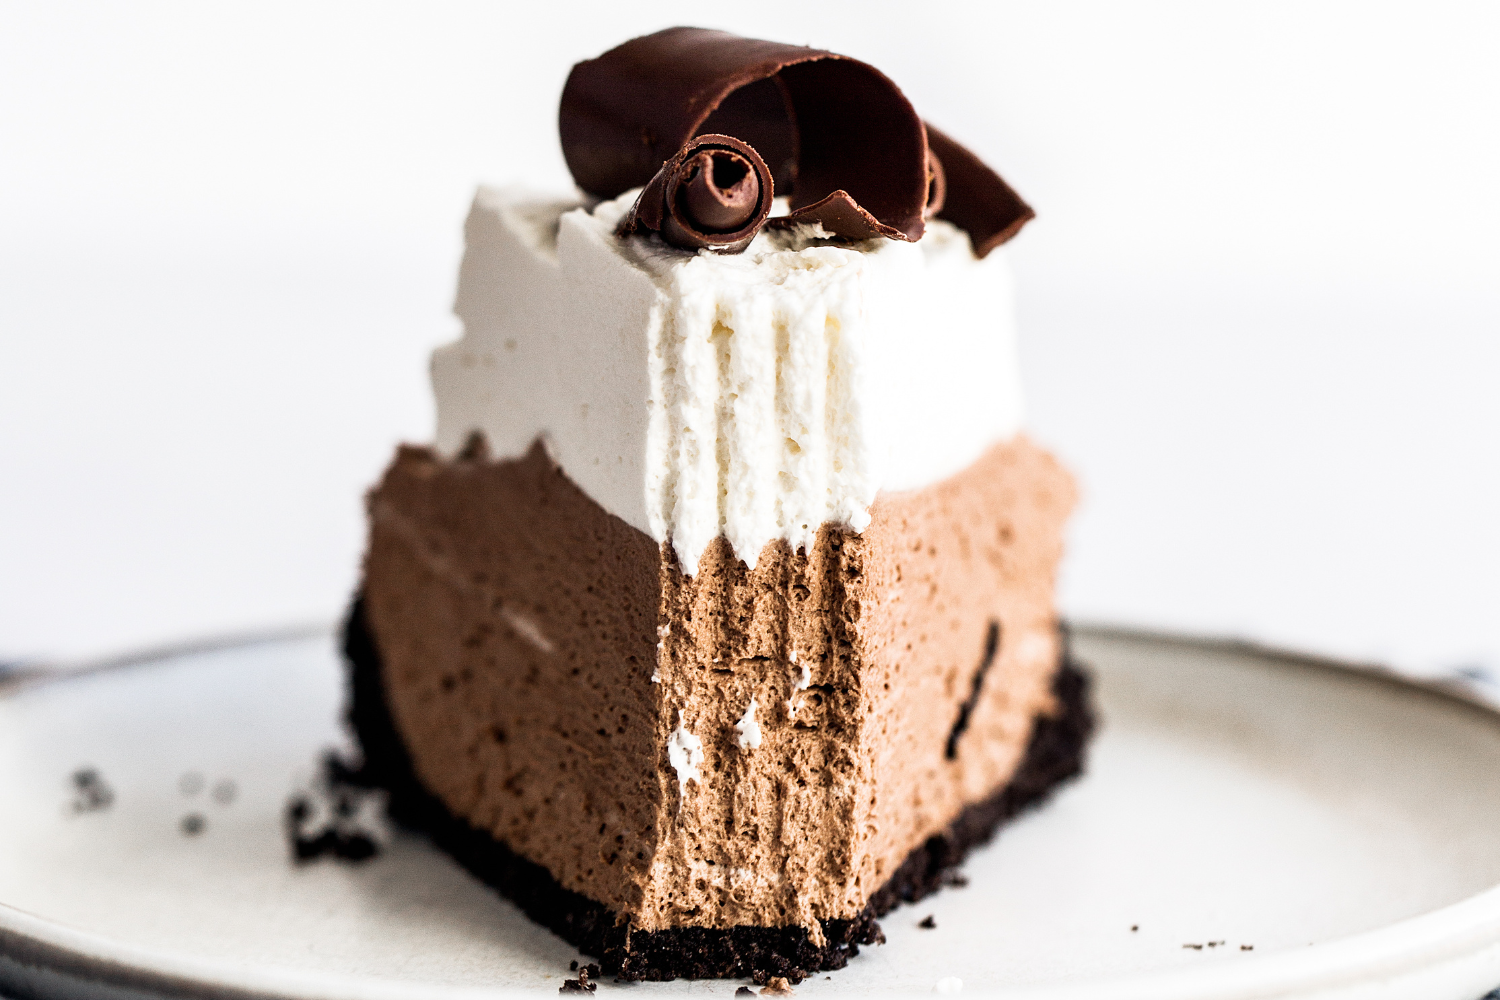
Texture: The filling is so rich, creamy, and decadent and pairs perfectly with the slightly crunchy crust and ultra-light whipped cream.
Ease: This recipe does make a bit of a mess, but the good news is that it’s made ahead of time so it’s perfect for entertaining or bringing to a party.
Pros: A classic recipe without any raw eggs that your family will request for every holiday.
Cons: A bit involved and messy to make, but one bite of the final pie will convince you it was all worth it.
Would I make this again? Absolutely!
This post may contain affiliate links. Read our disclosure policy.
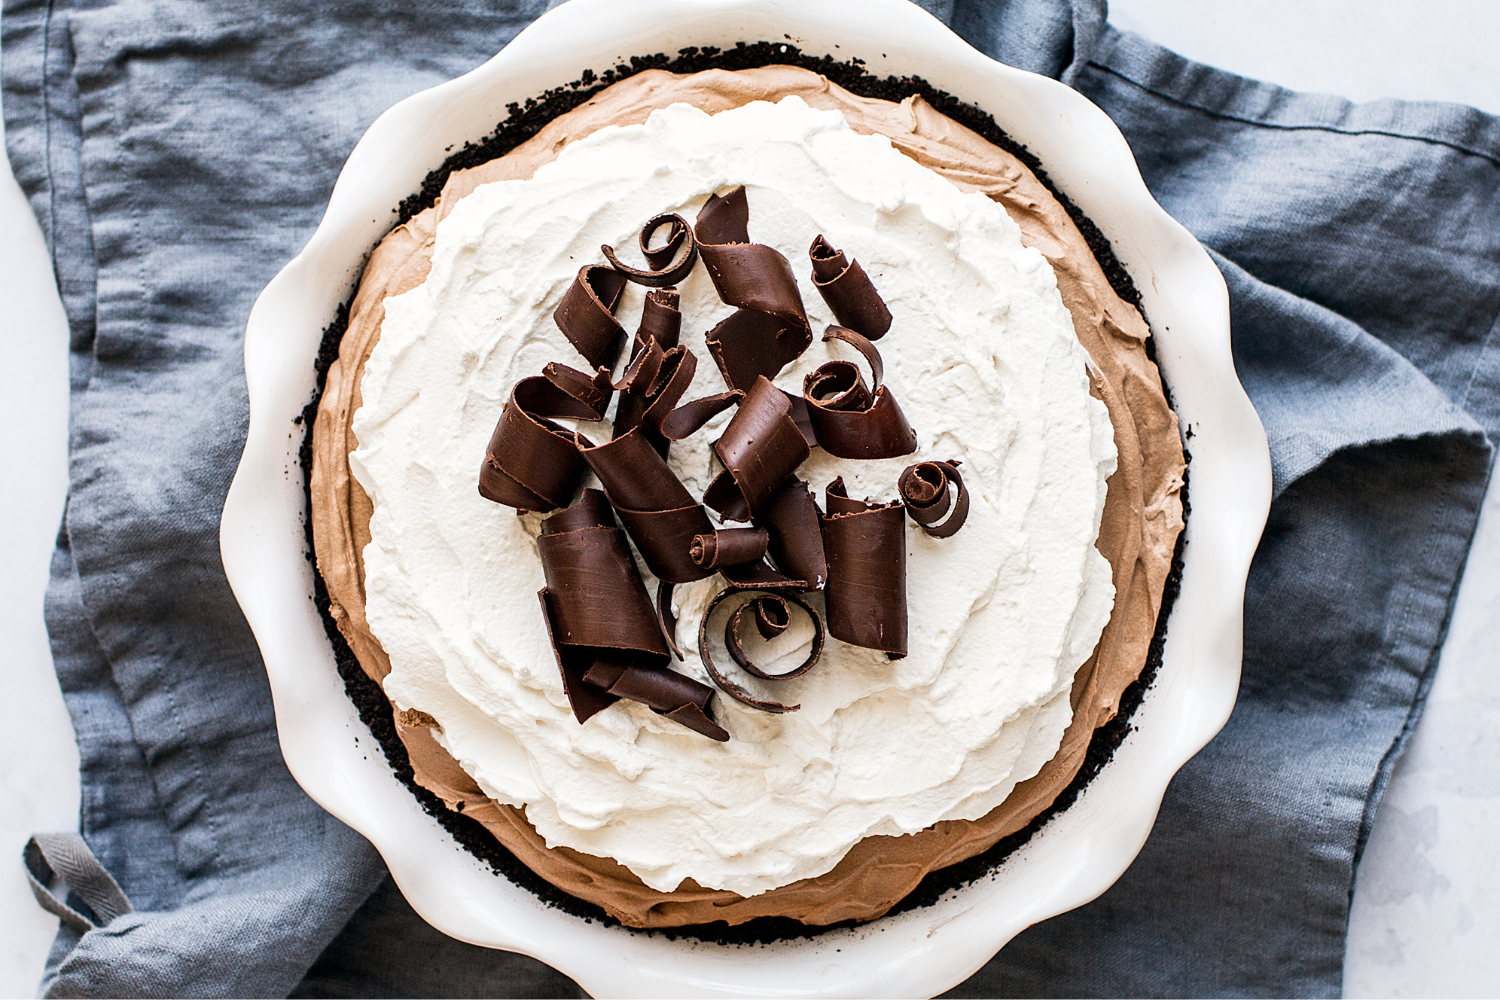
Growing up, it wasn’t a holiday without a French Silk Pie with those chocolate curls on top.

Whether it was Easter, Thanksgiving, or Christmas, we always had to have something chocolate. You see, I come from a long line of chocoholics. My dad and my grandma love chocolate and sweets just as much as I do.
However neither of them bake, so we always got those frozen silk pies from the grocery store.
A few years ago, I decided to finally make a chocolate French silk pie from scratch for Thanksgiving and it was the most popular pie of the evening! So I knew I had to share the recipe with you ASAP.
I hope it becomes a family favorite and maybe even a holiday tradition in your home as well!
How to Make French Silk Pie
The Crust
I love an Oreo crust for this recipe! It’s so much easier than traditional pie dough and adds an extra dose of CHOCOLATE! Use regular-stuff Oreos with the filling intact. If you’d prefer to use a pastry crust, check out my Best Ever Pie Crust recipe here and follow the directions for pre-baking.
French Silk Pie Filling
Since this recipe doesn’t use raw eggs, it’s safe to serve to everyone.
However, there are a few extra steps and bowls you will dirty while making this recipe – but it’s SOOO worth it. I’d highly recommend reading the recipe through completely before you get started. You’ll need an electric mixer (handheld or stand) and an instant-read thermometer for best results.
What Type of Chocolate Will I Need?
I love using bittersweet chocolate in this French Silk Pie recipe. It brings an intensely rich chocolate flavor. Use high-quality chocolate baking bars, not chocolate chips, for best results. If you’d prefer something more mild, feel free to use semisweet chocolate instead (1:1 ratio).
Whipped Cream Topping for French Silk Pie
- Be sure to top the pie with the whipped cream no more than a few hours before serving, so it looks its best.
- The whipped cream will begin to deflate and weep if topped too far in advance.
- Garnish with chocolate curls (see just below) or a sprinkling of cocoa powder for a pretty presentation.
How to Make Chocolate Curls
Taking the time to make chocolate curls, instead of just shaving a block of chocolate or garnishing with a dusting of cocoa powder, really makes this French Silk Pie look gourmet. Here’s a super helpful step-by-step video on how to make chocolate curls.
What Type of Pie Pan Should I Use?
- This recipe was designed for a 9-inch deep dish pie plate, like this one.
- If you don’t have a deep-dish pie pan, you may have some filling leftover (hellooo, little snack for you!)
- Because this pie doesn’t go in the oven, the pie pan material doesn’t matter as much as it would for a baked pie – but if you choose instead to make a pastry pie crust, I recommend checking out my Best Pie Pan article for more information and tips.
Can I Make French Silk Pie Ahead of Time?
Yes! This pie actually needs to be chilled for 6 hours before serving, so it’s the perfect make-ahead dessert! You can make it up to 2 days ahead of time. Keep covered in the fridge, then top with whipped cream shortly before serving.
Can I Freeze French Silk Pie?
We haven’t tested freezing this French Silk pie, but readers have done so with success. Just note that freezing may slightly alter the texture after thawing. Place inside an airtight container and freeze for up to one month. Thaw overnight in the refrigerator before adding whipped cream, chocolate shavings, and serving.
More Chocolate Pie Recipes:
- Chocolate Peanut Butter Pudding Pie
- Chocolate Pecan Pie
- Chocolate Pudding Pie
- No Bake Frozen Chocolate Raspberry Pie
French Silk Pie
Ingredients
For the crust
- 20 Oreo (230 grams) cookies (regular-stuffed, keep filling intact)
- 3 tablespoons unsalted butter, melted
For the filling
- 1 1/3 cups (266 grams) granulated sugar
- 4 large eggs
- 8 ounces (227 grams) bittersweet baking chocolate, melted
- 2 teaspoon vanilla extract
- 10 tablespoons (142 grams) unsalted butter, at room temperature
- 1 1/3 cups heavy cream, cold
- 4 teaspoons powdered sugar
For the topping
- 1 cup heavy cream, cold
- 2 tablespoons powdered sugar
- 1 teaspoon vanilla extract
- Chocolate shavings or cocoa powder, for garnish if desired
Instructions
Make the crust:
- Preheat the oven to 350°F. Spray a 9-inch deep pie dish with cooking spray.
- Place the Oreo cookies in the bowl of a food processor and pulse until finely ground. Add in the melted butter and pulse until moistened. Press the mixture into the bottom and up the sides of the prepared pie dish. Bake for 10 minutes, or until fragrant and set. Let cool completely on a wire rack.
Make the filling:
- In a small saucepan, whisk together the granulated sugar and eggs. Set over medium-low heat and cook, whisking constantly, until the mixture reaches 160°F and coats the back of a metal spoon. Remove from heat and stir in the melted chocolate and vanilla until smooth. Cool to just warm, stirring occasionally.
- Using an electric mixer, beat the butter until light and fluffy, about 2 to 3 minutes. Gradually add in the cooled chocolate mixture then beat on high speed for 5 minutes, or until light and fluffy.
- In a clean bowl, use an electric mixer to beat the cream until it begins to thicken. Add the powdered sugar and beat until stiff peaks form. Fold into the chocolate mixture.
- Pour the mixture into the pan, smoothing evenly. The pie will be tall with filling. Chill for 6 hours. At this point, the pie can be stored for up to 2 days ahead of time.
Make the topping:
- Use an electric mixer to beat the cream, powdered sugar, and vanilla on high speed until stiff peaks form. Top pie with whipped cream and garnish with chocolate shavings or dust with cocoa powder.
This post was published in 2019 and has been updated with additional recipe tips. Photos by Ashley McLaughlin.
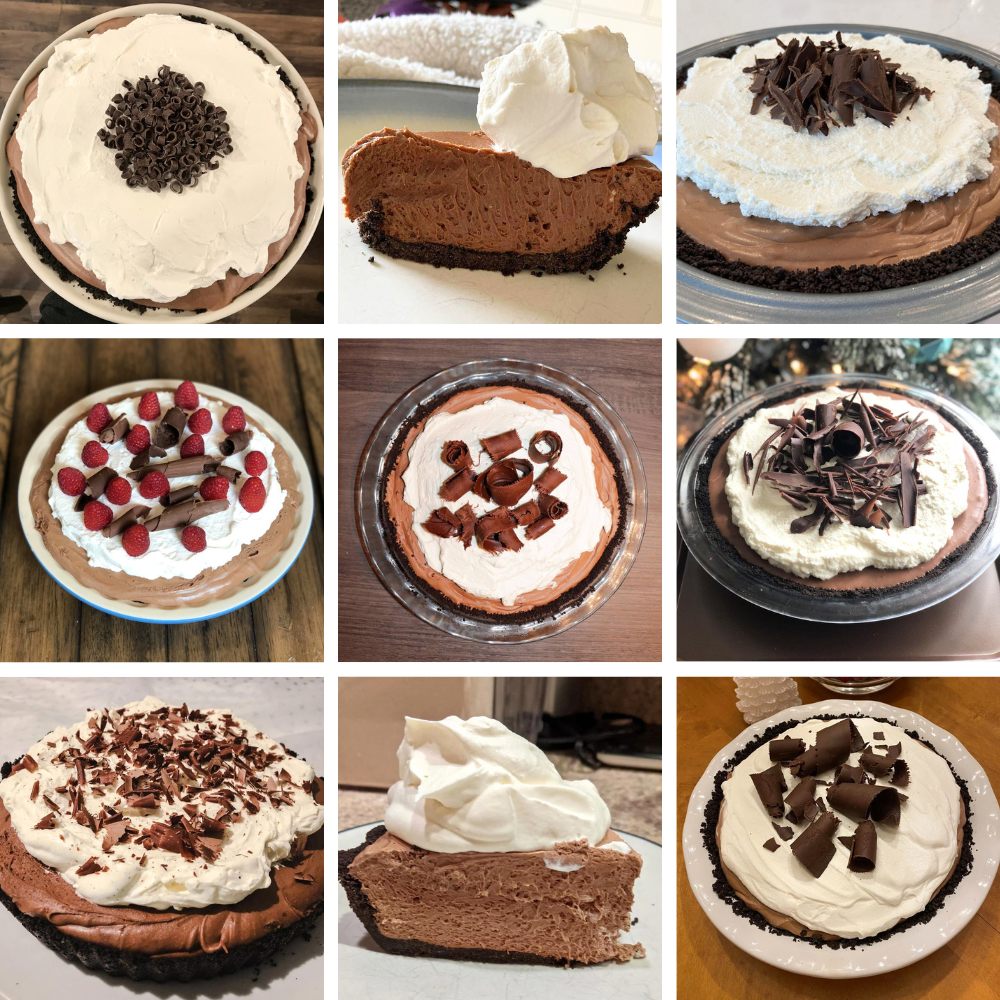
December 2020 Baking Challenge
This recipe was the December 2020 pick for our monthly baking challenge! Every month you can join the challenge by baking the recipe and snapping a photo for a chance to win prizes! Learn more about my monthly baking challenges here. Check out everyone’s pies:


I have 4oz of bittersweet chocolate, recipe calls for 8 oz – can I use the 4oz bittersweet and 1/2 cup semisweet choc chips ?
Hi Sam! Yes, that should work just fine – just keep in mind that semi-sweet chocolate is sweeter than bittersweet chocolate, so that will alter the overall sweetness of your pie.
I hope that helps! Happy baking 🙂
Hi Tessa! I don’t own a pie dish. can I use a 9inch springfoam pan instead?
Hi Tina! Other readers have used a springform pan with success 🙂 Good luck! Let us know what you think of this recipe when you give it a try.
Can I make the whipped cream ahead of time, put it on the pie and refrigerate until I’m ready to serve?
Hi Donna! Yes, but we recommend topping with whipped cream no more than a few hours ahead, if possible, for best results. You can prep the rest of the pie up to two days ahead (and store refrigerated), and just top with your freshly whipped cream a few hours ahead of serving. I hope that helps! Let us know what you think of this pie once you have tried it 🙂 Happy baking!
I made this recipe at thanksgiving and I loved it!!! I was wondering if this would work as a cake filling? Thank you
Hi , If you don’t have a round pie glass dish what can you use ?
Hi Eti! Feel free to use an aluminum or ceramic dish if you don’t have glass (readers have used springform pans too!). The type of dish doesn’t matter, but the depth does. If you only have a smaller pie dish, you may not be able to use all of the filling; however, any leftovers can be used to make mini pies or just enjoyed with a spoon 🙂 I hope that helps!
Hands down the best dessert I’ve ever made. I wouldn’t say it’s easy to make but it’s 100% worth it. I find that I’m always left with a lot of extra filling so you could either cut down by like a quarter for the filling OR what I do is I make little mini pies in silicone tart molds and they come out soooo good. Even better crust to filling ratio with the minis!
3rd option eat the extra filling with a spoon over the next week 🙂 I absolutely have done that.
haha we’ve also done the 3rd option 🙂 Thrilled to hear how much you loved this recipe!
Amazing! A must try!
This recipe popped up in my email box, so I thought I’d give it a try despite having go-to chocolate mousse and silk pie recipes. I made it twice. The first time exactly as written, the second making some adjustments based on my experience with the first trial. First, the crust. The recipe instructs to use regular Oreo’s, filling and all. If you do not care for Oreo “stuff,” you may not care for this crust, as its favor is somewhat prominent. Second, the filling & topping. There’s a lot of heavy cream used, and it shows. The pie plus topping is extremely rich. To distinguish between the filling and topping, I ate a few small spoonfuls of filling before topping the pie and asked, “would I want to eat this as a stand-alone chocolate mousse?” The answer was no.There was something off about both the flavor and texture (this was not user error, as I have I lot of experience making various different types of chocolate mousses for different applications, nor was it the chocolate, as a high quality couverture with a cocoa butter content suitable for mousse was used). The pie also lacked salt to round out flavor. For the second pie, only the chocolate wafers of the Oreos were used and a bit of salt added. This was an improvement, but a regular old blind baked pastry crust would have been a good option. The filling and topping were not altered for the second pie because any alterations would have departed too much from the original recipe and not have been a fair comparison, but only a small quantity of whipped cream topping was piped onto the base of each envisioned piece using a piping bag instead of topping the entire pie. This reduced the overall richness. In the end, I gave a three star rating because I can see how the pie might appeal to many, but to my palate the overall pie is too rich, and the filling is no more than average and not worth the (significant) calories.
Wow. Just wow.
Turned out great! Will definitely be making again!
we don’t have any bittersweet chocolate available. will semi-sweet work?
Hi Kari! Yes, that will work just fine – the pie will just be a touch sweeter. Be sure to check out tips on this and so much more, in the pink tip box above the recipe! 🙂
I made this once and it was amazing! Everyone said it was the best French silk pie they have had so I decided to make it for Easter. Do you think I can double this recipe since I need to make multiple pies or should I make one pie at a time? I know some fillings you can double and others are better to do separately.
Hi Nicole! Yay, we’re so happy to hear that you love this pie! I would recommend simply making this pie twice, as it makes quite a lot of filling, and most mixer bowls won’t hold that much – and they may not mix everything thoroughly without overmixing, too. Let us know how it goes! 🙂
This pie is dangerously good. Not many recipes make it in our “vault”, but this one did immediately. We all love it and it is officially replacing our old favorite chocolate pie.
The recipe was very easy to follow. My ten and three year old helped and it still ended up being a quick recipe too.
I’m so happy to have found this recipe. My foodie heart is so delighted.
10/10, 5 stars, highly recommend.