


Tessa’s Recipe Rundown
TASTE: Slightly sweet dough with a super light hint of nutmeg, covered in a light, sweet glaze.
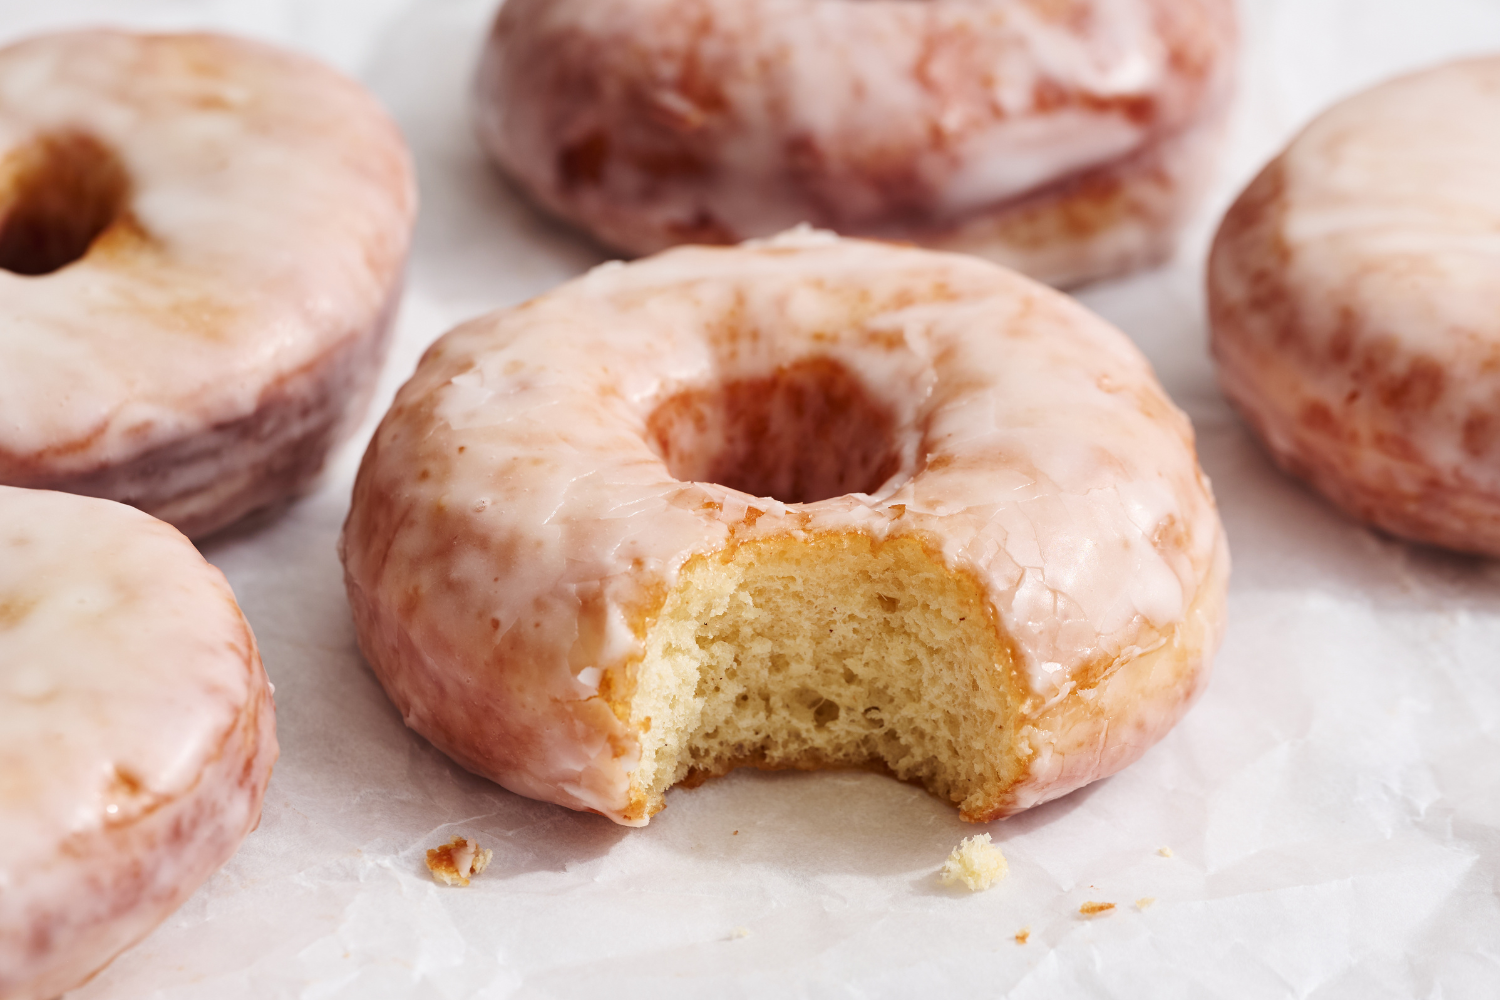
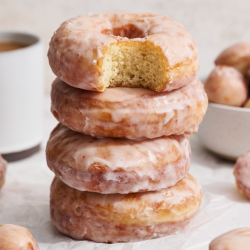
TEXTURE: The doughnut is soft and light, with a slightly crisp exterior and a little chewiness inside. The glaze is thin and crackles as you dig in!
EASE: As with any yeast-raised dough, there’s some patience involved – but it’s easier than you might think, promise.
PROS: All of the delicious flavors and textures of a Krispy Kreme doughnut without the artificial ingredients – and you can even prep the dough up to 24 hours in advance!
CONS: The proofing and frying time makes this more of a weekend baking project.
WOULD I MAKE THIS AGAIN? Definitely!
This post may contain affiliate links. Read our disclosure policy.


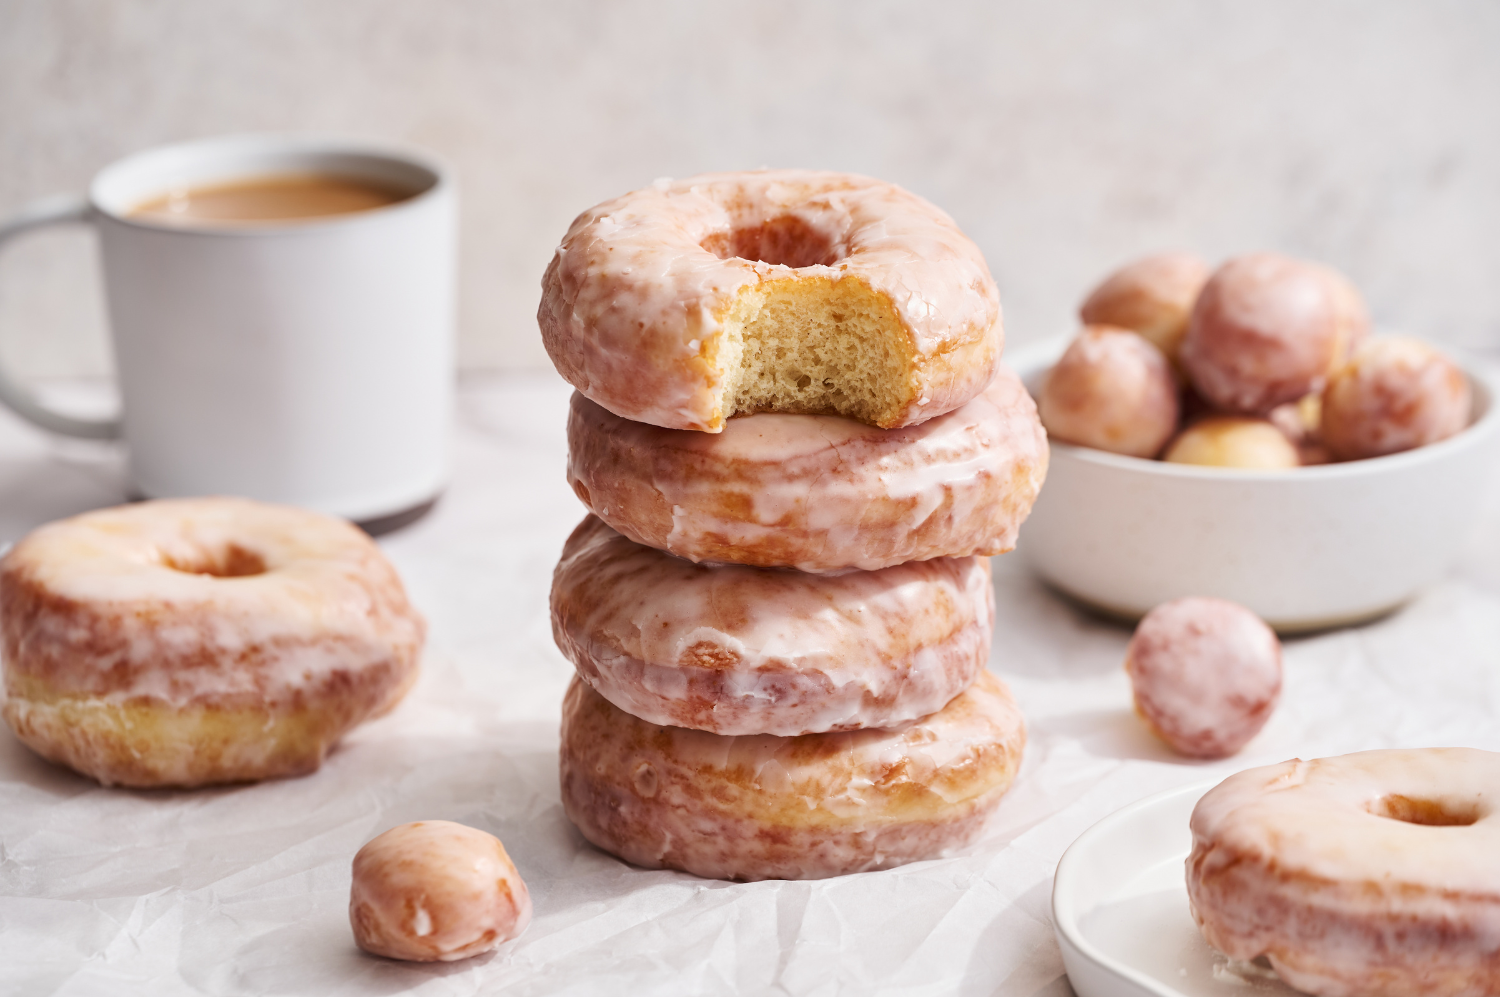
These Krispy Kreme Copycat Glazed Doughnuts offer the nostalgic flavors of a storebought Krispy Kreme doughnut without all the artificial and cloying flavor!
It was such a treat to visit Krispy Kreme as a kid, especially if you were lucky enough to get freshly baked, warm, glazed doughnuts.
Their heavenly light-as-air, melt-in-your-mouth texture paired with that crackly glaze was practically otherworldly at the time.
When I set out to revamp my own Glazed Doughnuts Recipe, I knew I wanted to achieve everything I remembered as a kid. But better.
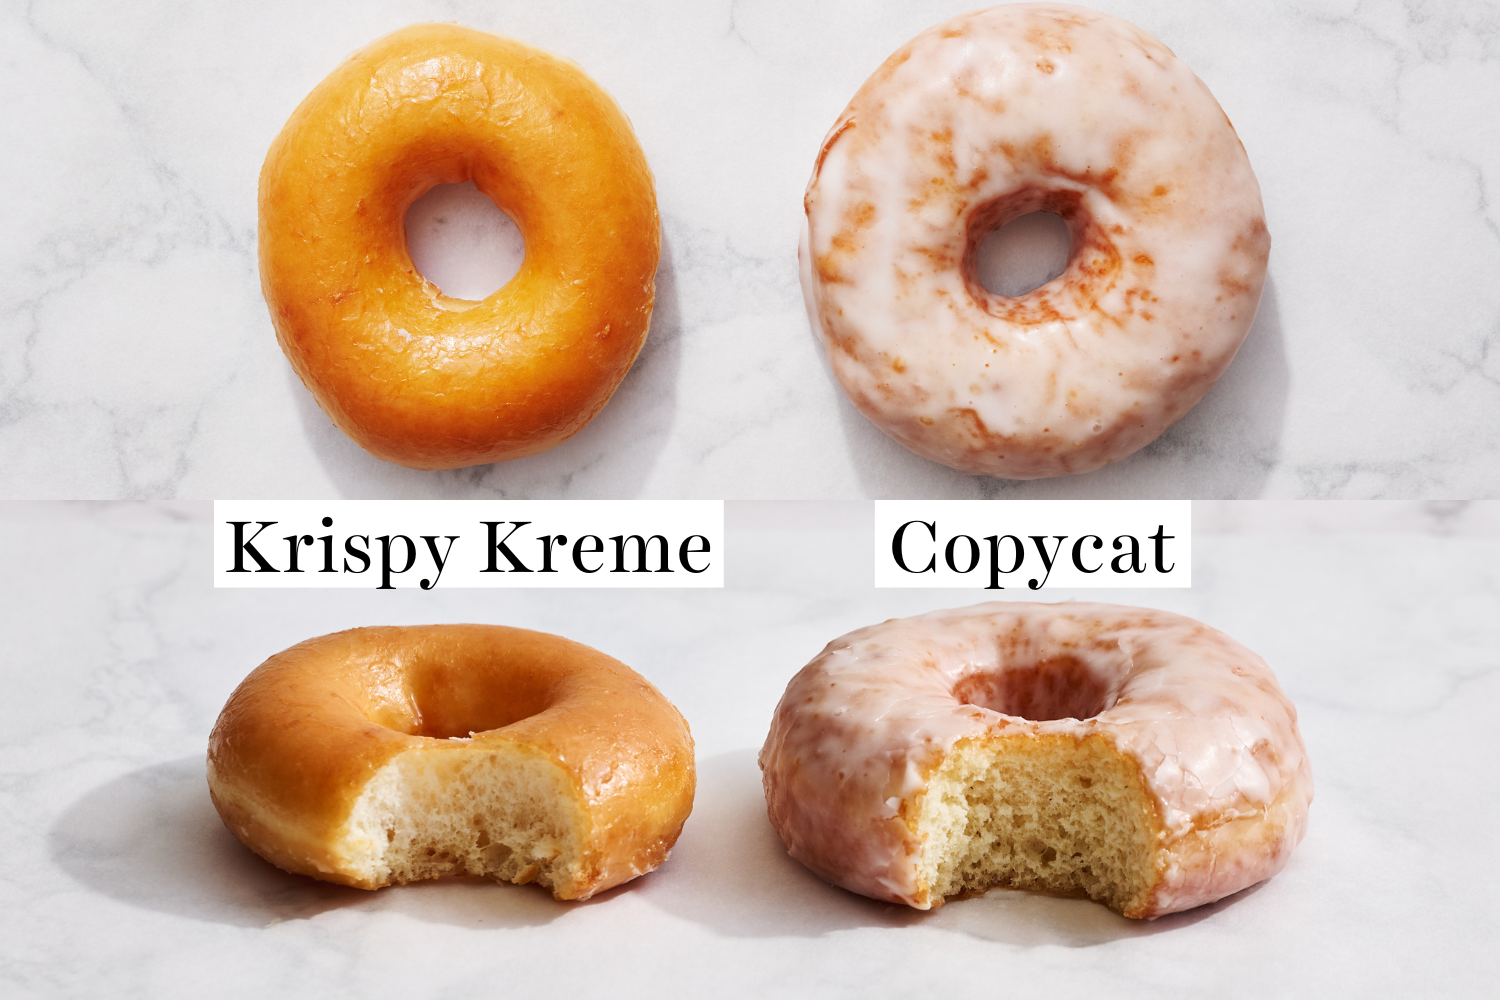
I modeled my ideal outcome on a copycat version of Krispy Kreme’s Original Glazed Doughnut, and after a few tests (including rolling our dough even thicker!), I know we made a doughnut that’s even better!
Pillowy-soft, thick doughnuts fried to perfection, with a slight crisp to the outside yet still light as air on the inside, and covered in a super thin crackly glaze that’s heavenly to eat.
I bought a dozen Krispy Kreme doughnuts to compare my version in the studio, and I was slightly horrified by their flavor. Of course, everything tastes better homemade – but what I remembered as a child was gone, leaving me with only a cloying sweetness and a very unpleasant artificial aftertaste.
So, if you’re looking for the ultimate Krispy Kreme copycat recipe, one that’s reminiscent of your childhood but BETTER, I’ve got you covered.
If you’re intimidated by frying, check out my notes below for baking and air frying alternatives – just note they won’t be exact Krispy Kreme replicas with these cooking alternatives.

Sprinkle of Science
How to Make Krispy Kreme Copycat Glazed Doughnuts
Do I Really Need to FRY These Doughnuts?
Krispy Kreme Copycat Glazed Doughnuts are only truly copycat Krispy Kreme doughnuts if you fry them, but there are alternative methods if you don’t want to fry them. Just note that the texture and appearance of your doughnuts will change. More on this below.
Tips for Frying Krispy Kreme Copycat Glazed Doughnuts
- Use a thermometer for the oil. Always use a deep fry thermometer to ensure your oil is at the perfect temperature throughout the process.
- Be sure your oil is at 350°F the whole time. Too cold, and your doughnuts will be greasy. Too hot, and your doughnuts will be overly browned on the outside and undercooked in the center. I like to preheat my oil about 5-10°F hotter to account for the temperature drop when adding the shaped dough to the oil. Then, adjust your stove slightly as needed throughout the frying process, to ensure your temperature is consistent. Electric stove tops will need more anticipatory adjusting of temperature since they take longer to heat or cool. Note: never leave hot oil unattended.
- Use a Dutch oven for frying. They’re heavy and sturdy, so a great choice for a large amount of hot oil. The size and shape avoids oil splatter and allows you to flip your doughnuts easily without having them stick to the bottom of the pot.
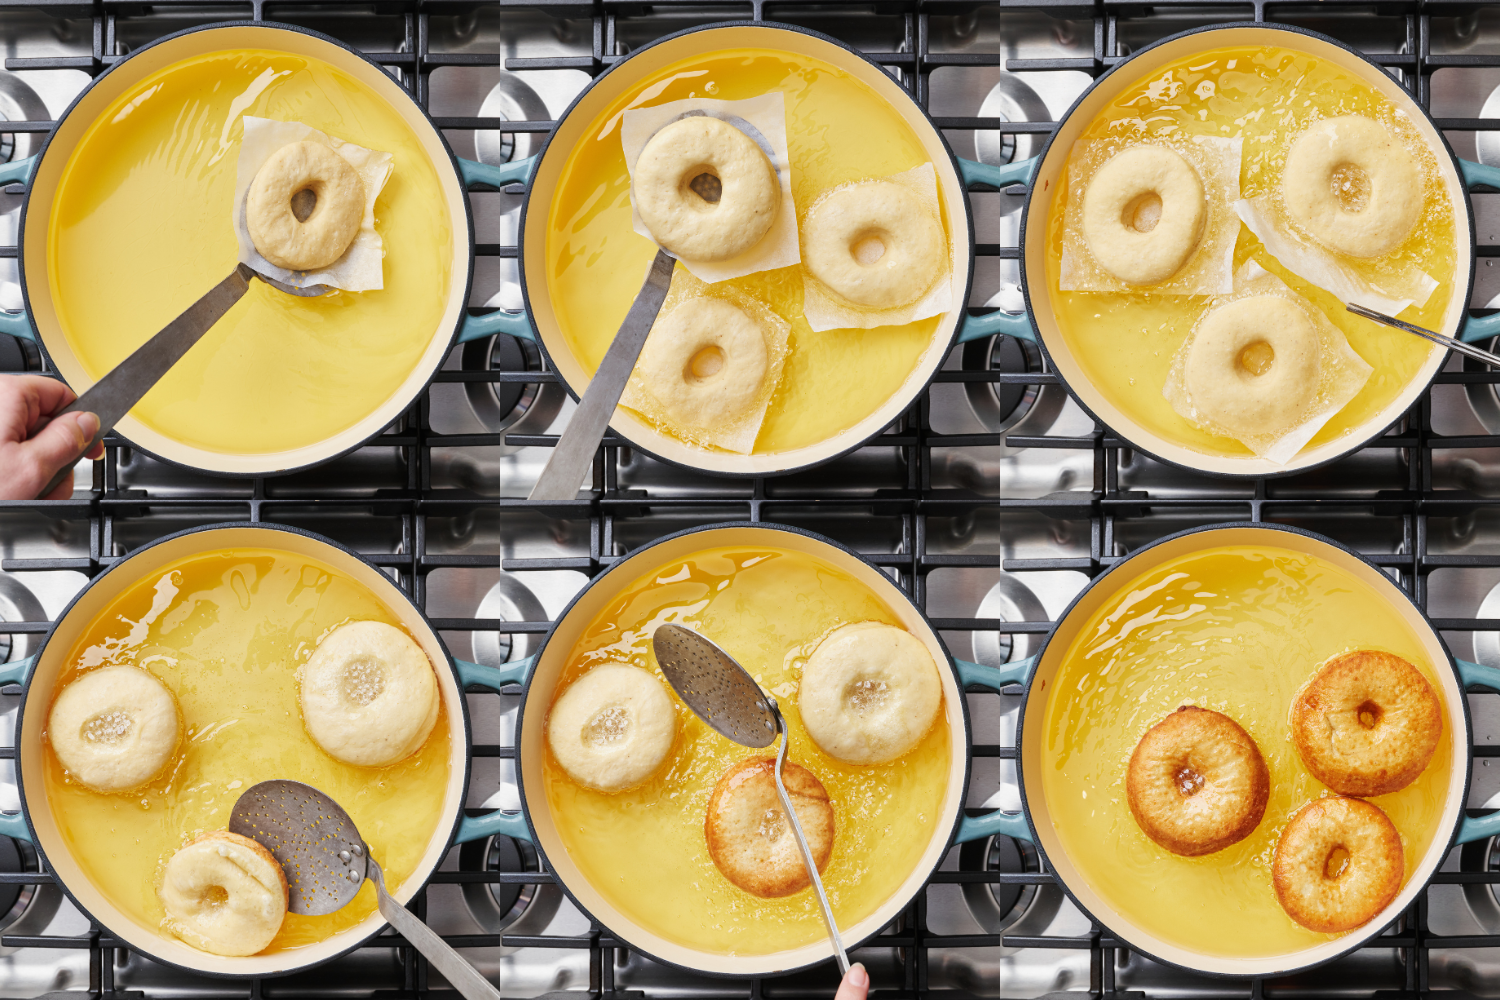
- Pro tip for placing your doughnuts in the oil: Once your doughnuts have risen on a parchment lined pan, cut parchment squares around each proofed doughnut. Use the parchment paper squares to carefully drop the doughnuts into the oil. After a few seconds, the parchment will release and you can use tongs to remove it from the oil as the doughnuts cook. This allows the doughnuts to stay intact without accidentally deflating or damaging them.
Do I Have to Use Vegetable Oil for Frying?
I recommend using vegetable oil because of its neutral flavor. You can also use vegetable shortening for frying. Feel free to experiment with other oils if preferred. Avoid strongly flavored oils or oils with a low smoke point, such as olive oil.
Can I Bake or Air Fry Doughnuts?
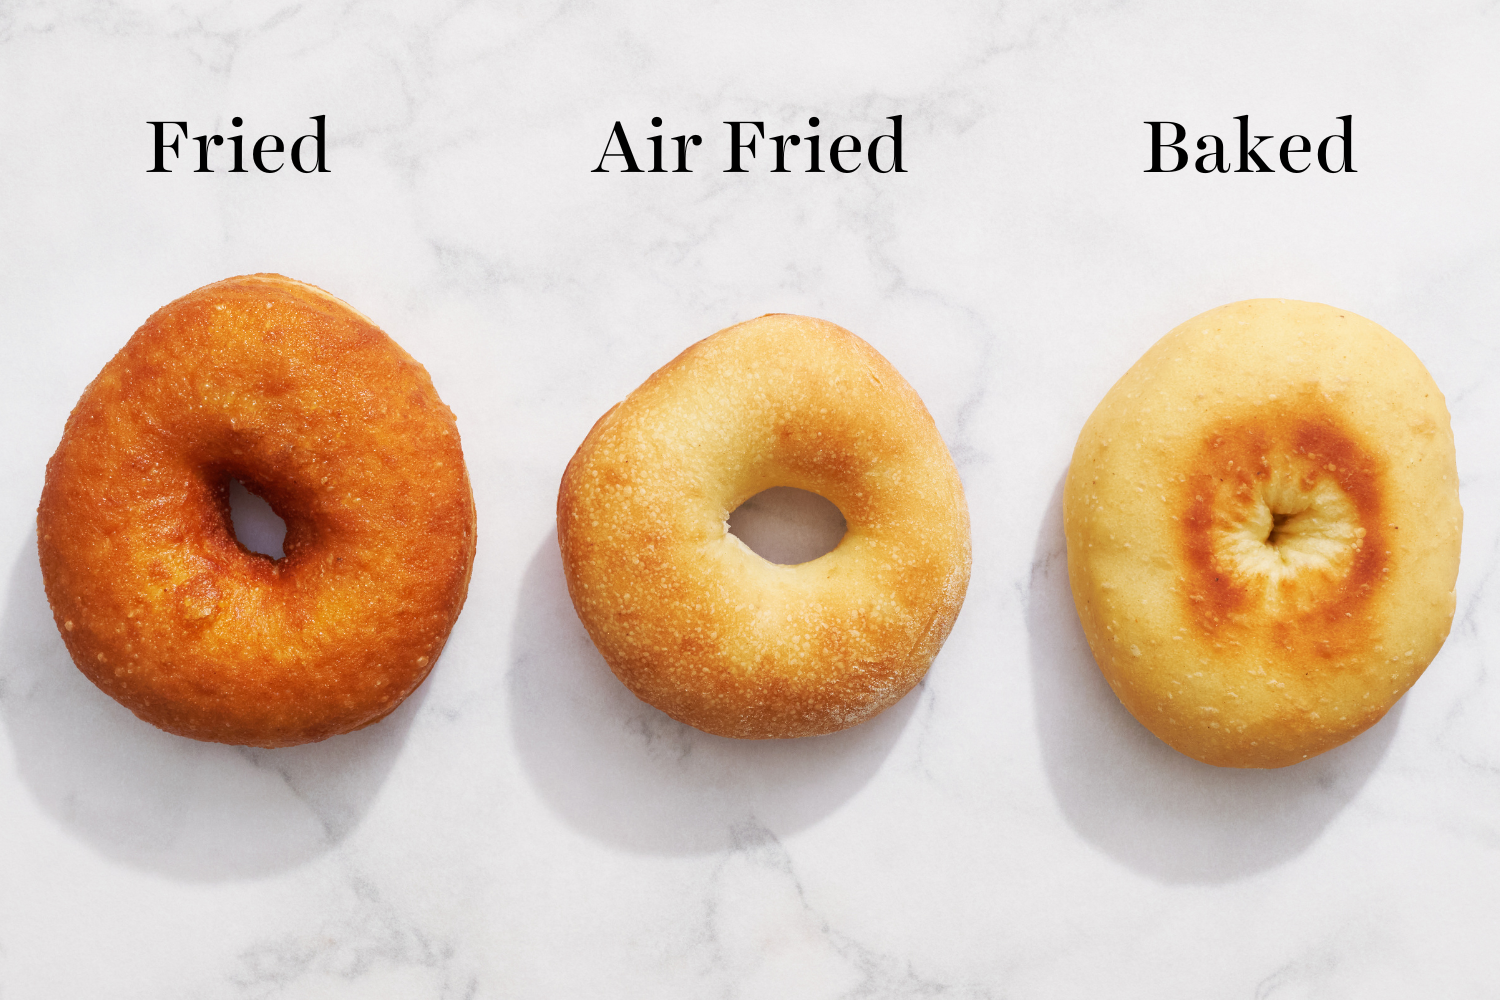
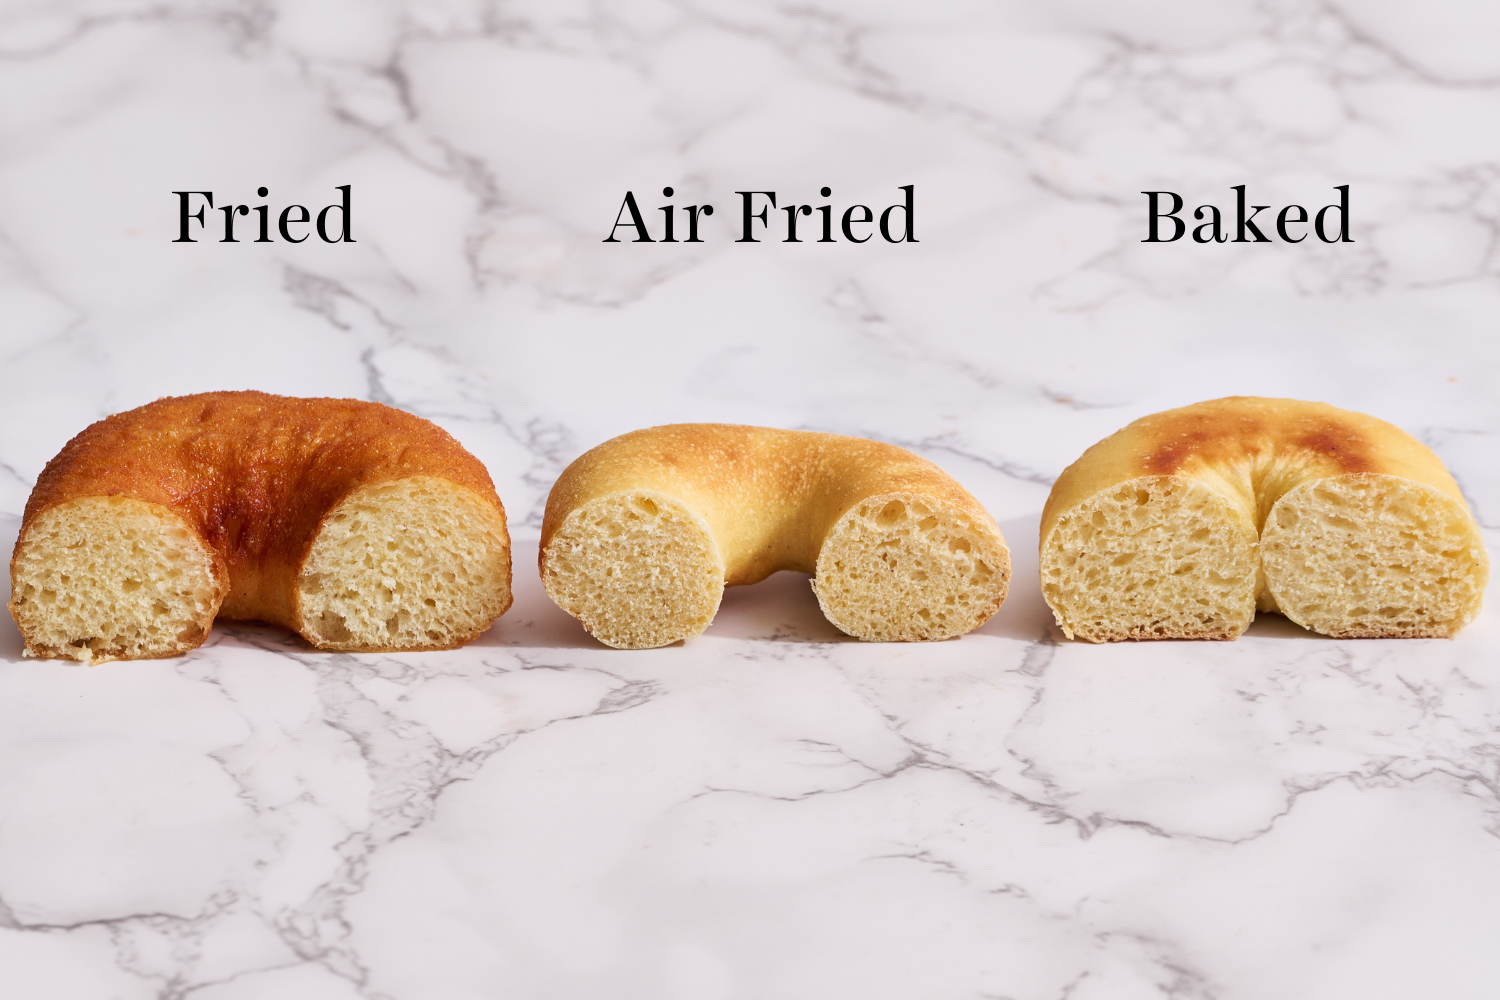
We tested these doughnuts fried, baked, and air-fried, and found some surprising results.
- Basically, nothing beats a fried doughnut! The fried doughnuts were thick, perfectly chewy, and delicious.
- The baked doughnuts were my second favorite. Baked doughnuts will not have the same texture or flavor as fried doughnuts nor develop as much of a crisp exterior. The middles of your doughnuts where the doughnut hole has been cut out may close up and look similar to a bagel (see the pictures below), but they will still taste great.
- The air-fried doughnuts dried out more and developed a thicker ‘skin’ as they baked and felt more like a bread roll, so I actually recommend baking in the oven instead of air-frying.
- Instructions for baking and air-frying just below.

How to Bake Krispy Kreme Copycat Glazed Doughnuts
- Preheat oven to 350°F.
- Bake doughnuts on a parchment paper-lined baking tray for about 14 minutes, flipping at the 10-minute mark, until lightly golden brown.
How to Air Fry Krispy Kreme Copycat Glazed Doughnuts
- Heat air fryer to 350°F.
- Bake doughnuts two at a time (without parchment paper) for about 6 minutes, or until golden brown.
- Place on paper towel-lined plate to cool.
- Feel free to bake more at a time if your air fryer has a larger capacity, but don’t bake them too close together as the doughnuts rise while they bake.
Do I Need a Stand Mixer? Can I Knead by Hand?
Yes, but it may be a bit of a workout. This doughnut dough is enriched with sugar, butter, and eggs, which makes it delicious but requires a significant amount of kneading to achieve a smooth consistency. My team found that 6 to 8 minutes on a stand mixer with a dough hook was perfect, but if you don’t have a stand mixer, learn How to Knead Dough here.
Do I Have to Use Nutmeg?
Nutmeg isn’t included in Krispy Kreme’s ingredient list, but it adds a lovely doughnutty flavor that I find essential, even if you don’t like nutmeg. Feel free to lower the amount or skip it entirely if preferred.
Help! I Don’t Have a Doughnut Cutter!
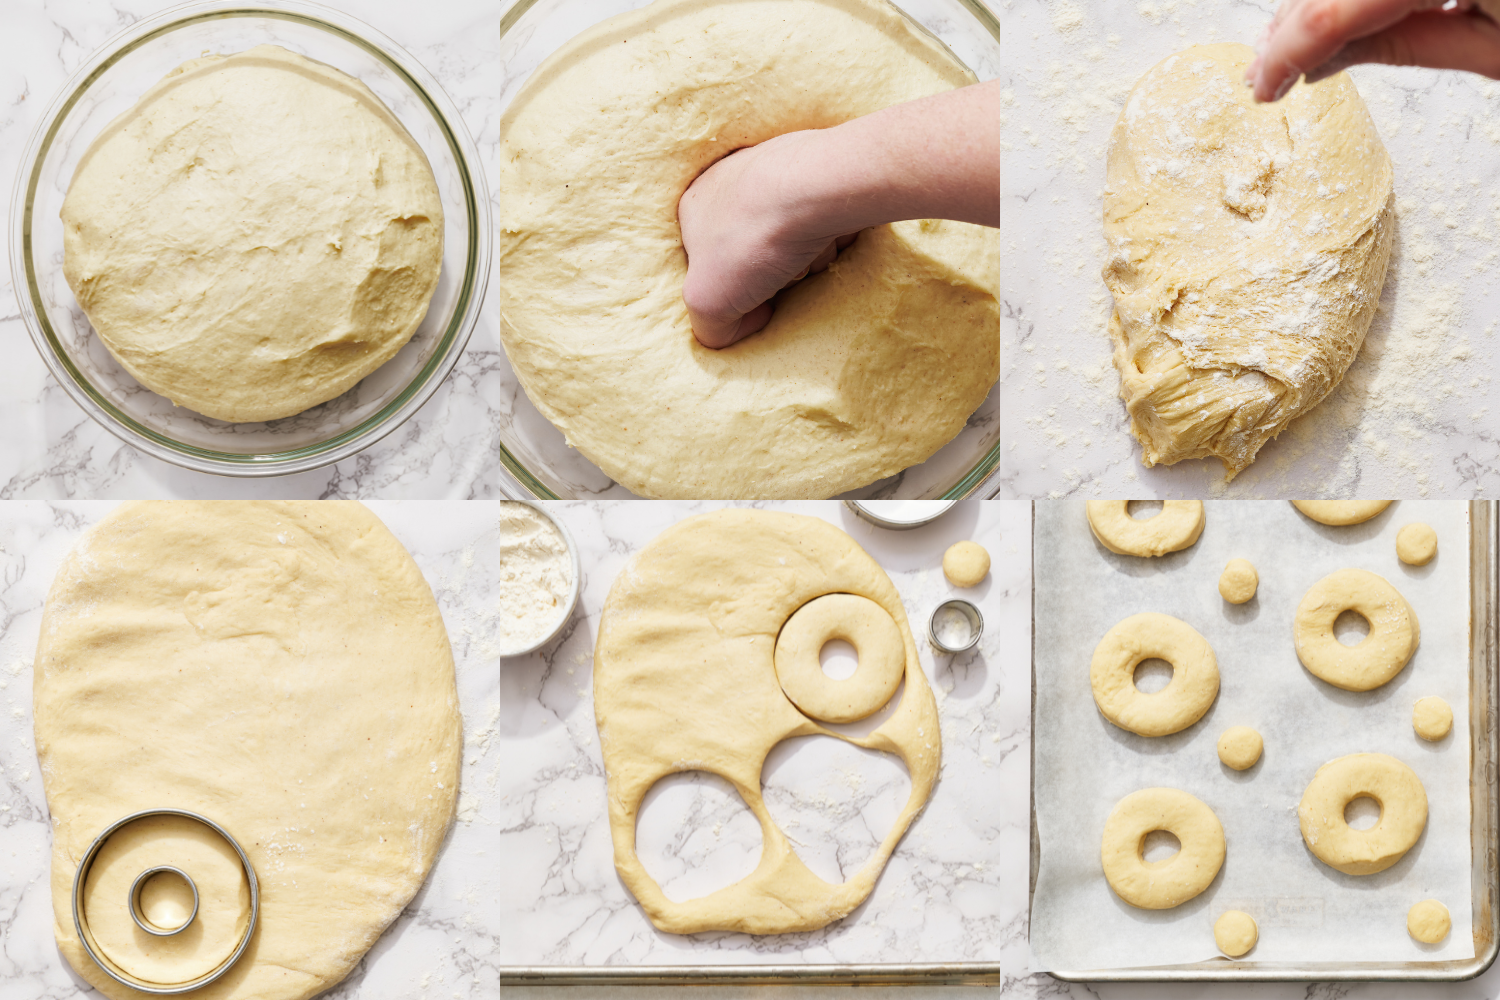
If you don’t have a doughnut cutter, you can use a biscuit cutter and a piping tip or bottle cap to cut out your doughnuts – or a larger + smaller round cookie/biscuit cutter. They don’t have to be perfect, and it’s totally okay to improvise. Alternatively, purchase a doughnut cutter online here.
Can I Make Glazed Doughnuts Ahead of Time?
Yes! The dough can be made, shaped, and risen in the fridge overnight. Let the dough come to room temperature as your oil preheats. Please note that doughnuts prepped ahead of time may need a slightly longer fry time (about 10 seconds longer per side).
How to Store Krispy Kreme Copycat Glazed Doughnuts
Like most fried foods, Krispy Kreme Copycat Glazed Doughnuts are best served the day they’re made. Once your glaze has set, serve as soon as possible for the most delicious treat ever.
Can You Freeze Krispy Kreme Copycat Glazed Doughnuts?
I haven’t tried freezing these Krispy Kreme Copycat Glazed Doughnuts. If you need to freeze these doughnuts, I would recommend shaping them and then freezing on a parchment-lined baking tray until solid before moving them to an airtight container and freezing for up to 1 month. Transfer the doughnuts back to a parchment-lined tray and cover with plastic wrap, allowing to proof in the fridge overnight. Allow to come to room temperature before frying, glazing, and serving as directed in the recipe below.

More Donut Recipes You’ll Love:
- Old-Fashioned Sour Cream Doughnuts
- How to Make Beignets
- Classic Cake Doughnuts
- Chocolate Old Fashioned Doughnuts
- Baked Creme Brulee Doughnuts
Email This Recipe
Enter your email, and we’ll send it to your inbox.
Ingredients
- 3 cups (380 grams) all-purpose flour, dependent on kitchen climate, see notes*
- 1/4 cup (50 grams) granulated sugar
- 2 1/4 teaspoons (1 package) instant yeast**
- 1/2 teaspoon fine sea salt
- 1/4 teaspoon ground nutmeg, optional***
- 1 cup (237 grams) whole milk, lukewarm (~100°F)
- 1 large egg, at room temperature
- 2 tablespoons (28 grams) unsalted butter, melted and cooled until just warm
- 1/2 teaspoon vanilla extract
- 6 cups peanut or vegetable oil or 2 1/2 pounds shortening, for frying


For the glaze:
- 3 1/2 cups (438 grams) powdered sugar, sifted
- 1/4 teaspoon fine sea salt
- 1/2 teaspoon vanilla extract
- 1/3 cup + 1 tablespoon (93 grams) hot water
Instructions
Make the dough:
- In a large bowl, mix together all ingredients from flour to vanilla extract until well combined. Let the dough rest for 5 minutes. Knead the dough with an electric mixer fitted with a dough hook or by hand until the dough is smooth, elastic, soft, and no longer sticking to the sides of your mixer, about 6 to 8 minutes. Dampen hands with water, then transfer the dough to a large oiled bowl. Cover with plastic wrap and let rise in a warm place until doubled in size, about 1 1/2 to 2 hours.
- Prepare two baking sheets with parchment paper. Punch the dough down and turn it out onto a lightly floured work surface. Roll the dough out into 1/2-inch thickness and cut with a doughnut cutter or with a large round cutter and a small cutter for the holes. Place doughnuts on baking sheets. Cover with a clean kitchen towel and let rise until doubled in size, about 1 hour (unless following the Make Ahead instructions below).
MAKE AHEAD INSTRUCTIONS
- To make ahead, once the doughnuts are cut, cover with plastic wrap or place in an air-tight container and allow to rise in the fridge overnight, or up to 24 hours. Let come to room temperature before frying.
Fry the doughnuts:
- Using a large, deep, and heavy pan such as a Dutch oven, heat the oil on medium to 350°F. When ready, use scissors to cut the parchment around each doughnut. Place three doughnuts (including the parchment paper) in the oil at a time and fry until golden brown, about 1 minute per side. Once the parchment paper separates from the dough, use tongs to pull it out. Do not overcook the doughnuts. Drain on a paper towel-lined plate.
Make the glaze:
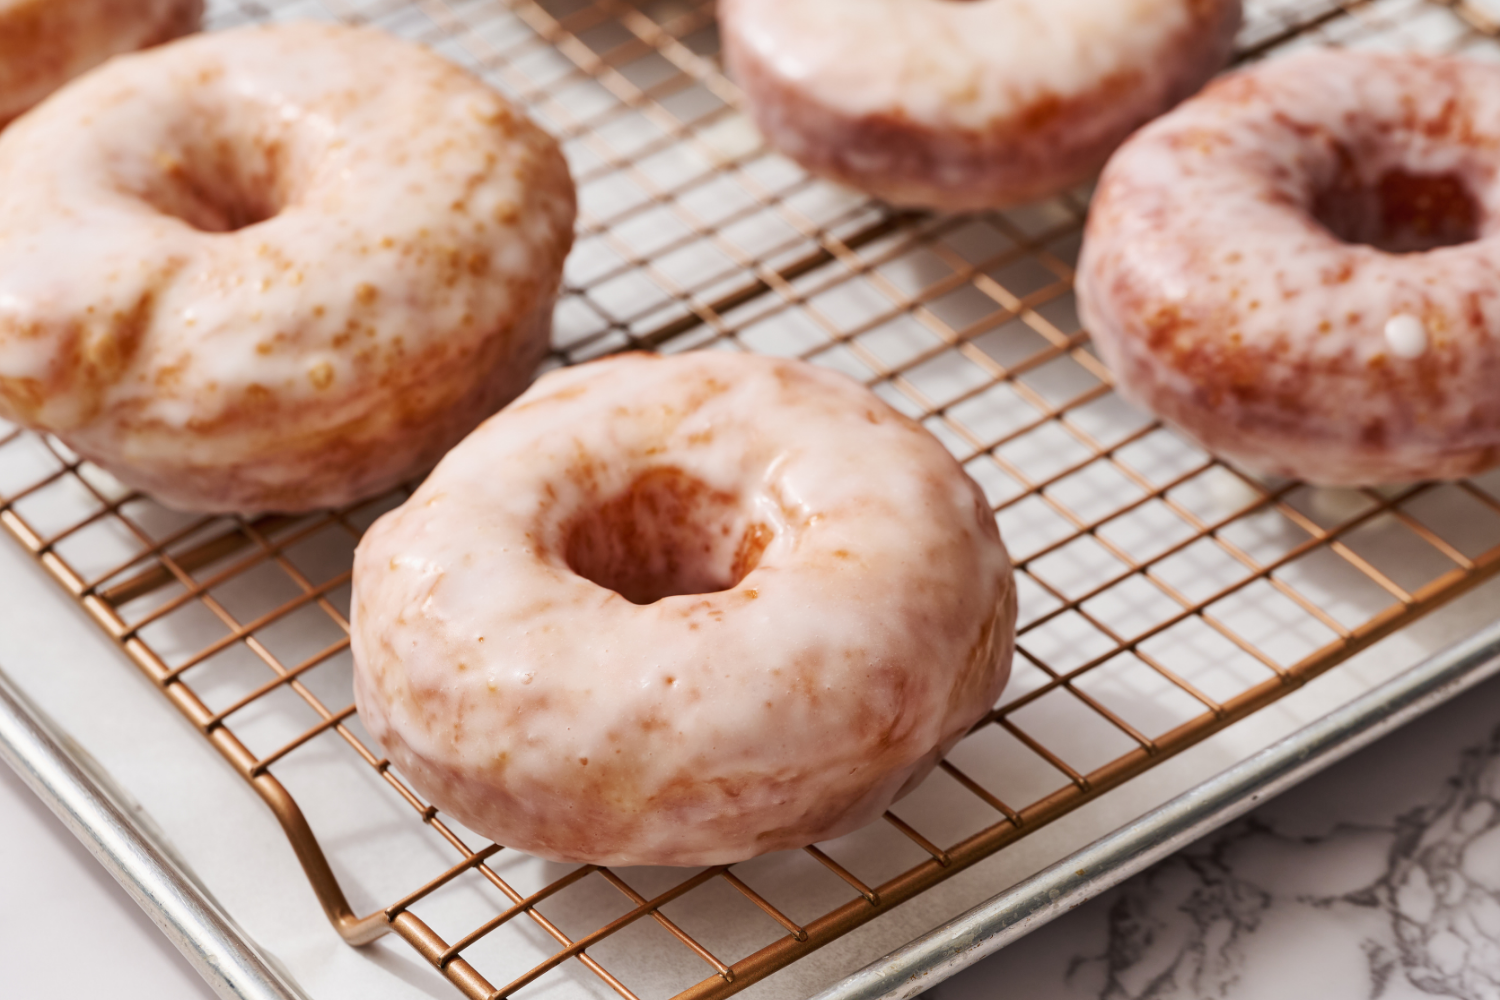
- In a medium-sized deep bowl, mix all ingredients with a whisk until smooth. Immerse each doughnut into the glaze. Flip the doughnut if necessary to cover completely. Place glazed doughnuts on a wire rack above a lined sheet pan to catch any excess glaze. Let sit until glaze is set before serving, about 40 minutes.


Is the overnight fridge part after the cutting and shaping? Or to replace the 1 hour rise?
Hi Talia! The overnight rise in the fridge will replace the 1-hour rise in step #2. You will still cut out the doughnuts before placing them in the fridge. Enjoy!
Can you fry the donuts in a deep fryer ?