


This post may contain affiliate links. Read our disclosure policy.


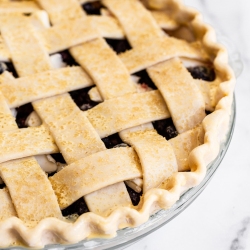
When I want a pie that looks beautiful and feels extra special, I make a lattice crust. In pie baking, a lattice is a woven top crust made by arranging strips of dough in an over-under pattern across the filling. It used to intimidate me like crazy, but once I learned the weaving, everything clicked
.I’ve broken down the exact steps for making a lattice pie crust, complete with photos and a video guide. Making this bakery-worthy lattice top at home is totally doable and it adds a beautiful finishing touch to any pie.
What You’ll Need to Make It
Here’s a breakdown of the key ingredients and tools I use for the perfect lattice crust:
- Pie dough: I use my Best Ever Pie Crust recipe, an all-butter crust that’s flaky and full of flavor. Make a double batch to have enough for the bottom layer and enough strips for the top of the pie.
- Flour: A little all-purpose flour helps keep the dough from sticking to the counter and rolling pin. I like to keep a small pile on my work surface and sprinkle as needed, just enough to prevent sticking without drying out the dough.
- Rolling pin: A good rolling pin helps get an even thickness for both the bottom crust and the lattice strips. Roll the dough gently and turn it often to keep it uniform.
- Ruler: A ruler or straight edge is perfect for cutting evenly sized lattice strips. It doesn’t have to be exact, but uniform strips make the lattice look more polished and help it bake evenly.
- Pastry wheel, pizza cutter, or sharp knife: Any of these works to cut the dough into strips. A fluted pastry wheel adds a decorative touch, while a pizza cutter or knife gives clean, straight edges.
- Baking tray, cutting board, or marble slab: These are handy for chilling the dough before rolling or cutting. I like to roll out the dough on a surface that can go straight into the fridge, so the butter stays cold and the dough doesn’t get sticky.
Step-By-Step: How to Lattice a Pie Crust
A beautiful lattice top can completely transform a pie. Follow my step-by-step tutorial for how to weave a lattice pie crust and make any filled pie look and taste extra special.
1. Roll Out the Dough
After rolling out the bottom layer of pie dough and placing it in a pie pan, add the pie filling in the center of the pie. Then take the remaining dough from the fridge, and roll it out on a floured surface, turning it often so it doesn’t stick and stays an even thickness.
Add a little flour to the dough, counter, and rolling pin as needed. I aim for a roughly 13-inch circle at about 1/8-inch thick. It’s still thick enough to handle but thin enough so the overlapping lattice strips bake through and stay flaky.

2. Cut Even Strips
Use a ruler and a pastry wheel, pizza cutter, or sharp knife to cut even strips. I usually shoot for 1-inch strips, but the width depends on your design. If the dough becomes too warm to handle, transfer it to a cutting board or baking sheet and chill it until it’s firm again.

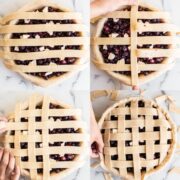
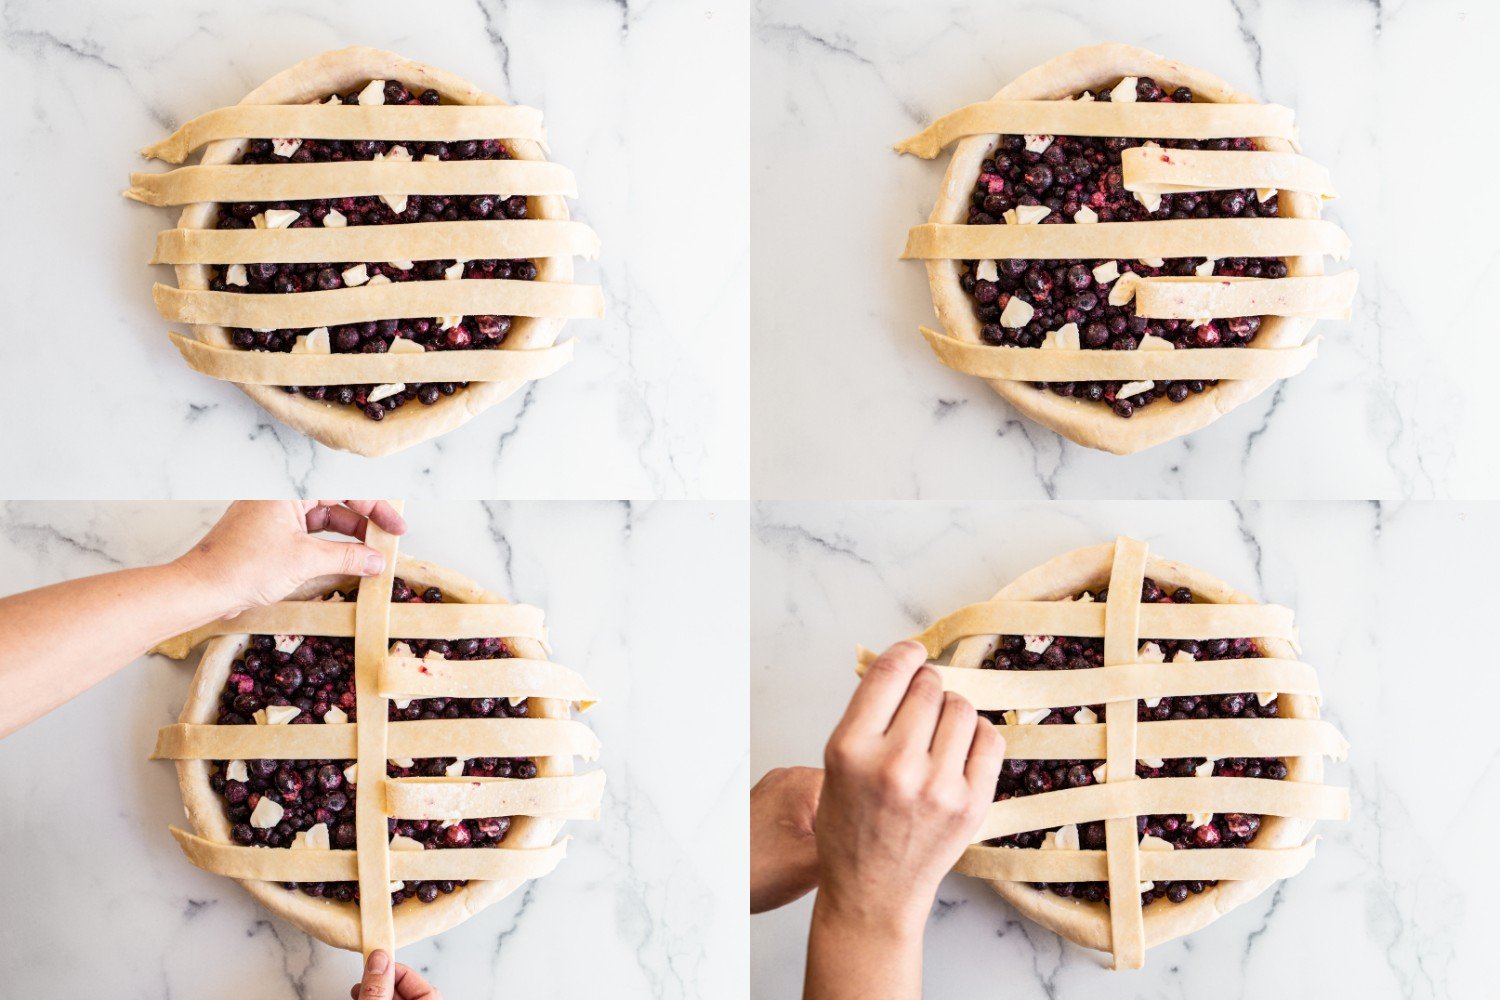
3. Weave the Lattice
Next, lay half the strips of dough across the pie, spaced evenly. It’s time to start the lattice pattern! Fold back every other strip, place a long strip running in the opposite direction, and unfold the originals over the top. Then fold up the alternating set and add another strip.
Repeat this over-under pattern until the top is fully woven. If this part feels confusing, I get it. I needed visuals to really get the hang of the lattice design. Follow my step-by-step photos here or watch the video below for an easy-to-follow option.


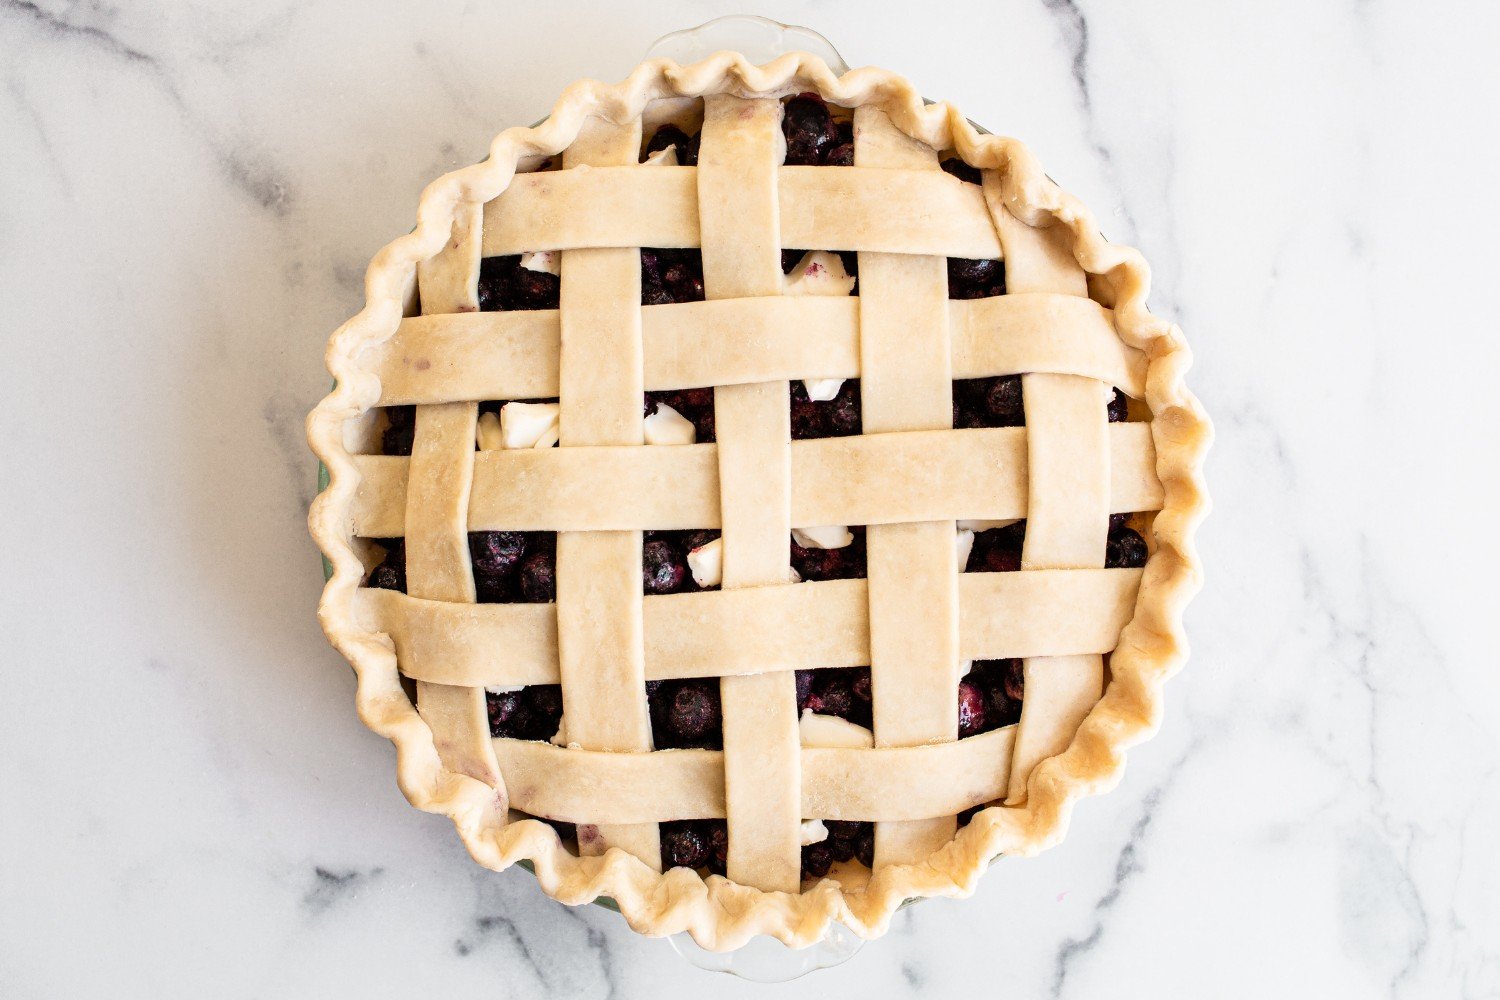
4. Trim and Seal the Edges
Trim any longer strips or excess dough hanging over the edge of the pie so they’re slightly less than flush with the bottom piece of dough. This is key so the border isn’t too thick to cook through and to keep the border from slumping over the side of the pie.
Gently tuck everything together to form a clean border. I like to crimp the edges using my fingers and exaggerate the pattern a bit because it softens slightly in the oven.


5. Chill Before Baking
Transfer the pie to the fridge or freezer for 15 to 30 minutes before baking. Cold dough means the butter stays solid as it hits the heat. This is what creates those flaky, well-defined layers and a lattice that holds its shape.
Tips for Perfect Crust
A few bonus pie tips can make the difference between a good homemade pie crust and a bakery-worthy lattice crust, especially if it’s your first time:
- Chill the dough ahead of time. I usually make my pie dough the day before and let it rest, covered, in the fridge overnight. This gives the gluten a chance to rest, so pie dough rolls out easily without springing back.
- Keep the dough cold but workable. Aim for about 67°F. If the butter starts to look wet or melty, I pop it back in the fridge. A quick trick I use is placing large Ziploc bags filled with ice-cold water on my countertop for 10 minutes before rolling to keep the surface cool.
- Cut even strips and handle gently. Uniform dough strips make the lattice look polished and help it bake evenly. If a strip tears, I patch it with a small piece of extra dough. It usually bakes right in.
- Prevent burning. I often create a foil tent over the pie during the last 20 minutes, or place a baking sheet on the rack above to shield it from direct heat. Not sure how to tent a pie? Cut a large piece of foil, fold the edges over, and carefully tent it over your pie.
- Chill before baking. After weaving the lattice and trimming the edges, I always chill the whole pie for 15-30 minutes before baking. Cold dough keeps the butter solid, resulting in flaky, beautifully defined layers.
Creative Designs to Try
Once you’ve mastered the basic lattice, there are lots of fun ways to play with the design:
- Experiment with different widths. Traditional lattice keeps strips to an inch, but wider strips can give your favorite pies a more modern look. You can also play with pie lattice patterns and alternate vertical strips with diagonal ones.
- Use a decorative fluted pastry wheel. I love using these to cut my lattice strips when I want a pie to look extra special with almost no extra effort. The scalloped edges give the lattice a professional, bakery-worthy finish without looking too fussy.
- Play with cutouts. Use mini cookie cutters to cut circles, leaves, stars, or whatever festive shape matches your pie and season. (Leaves are so charming for Thanksgiving pies!) Use these either as a tile along the border of the pie or as a decorative accent.
Ways to Use Your Lattice Pie Crust
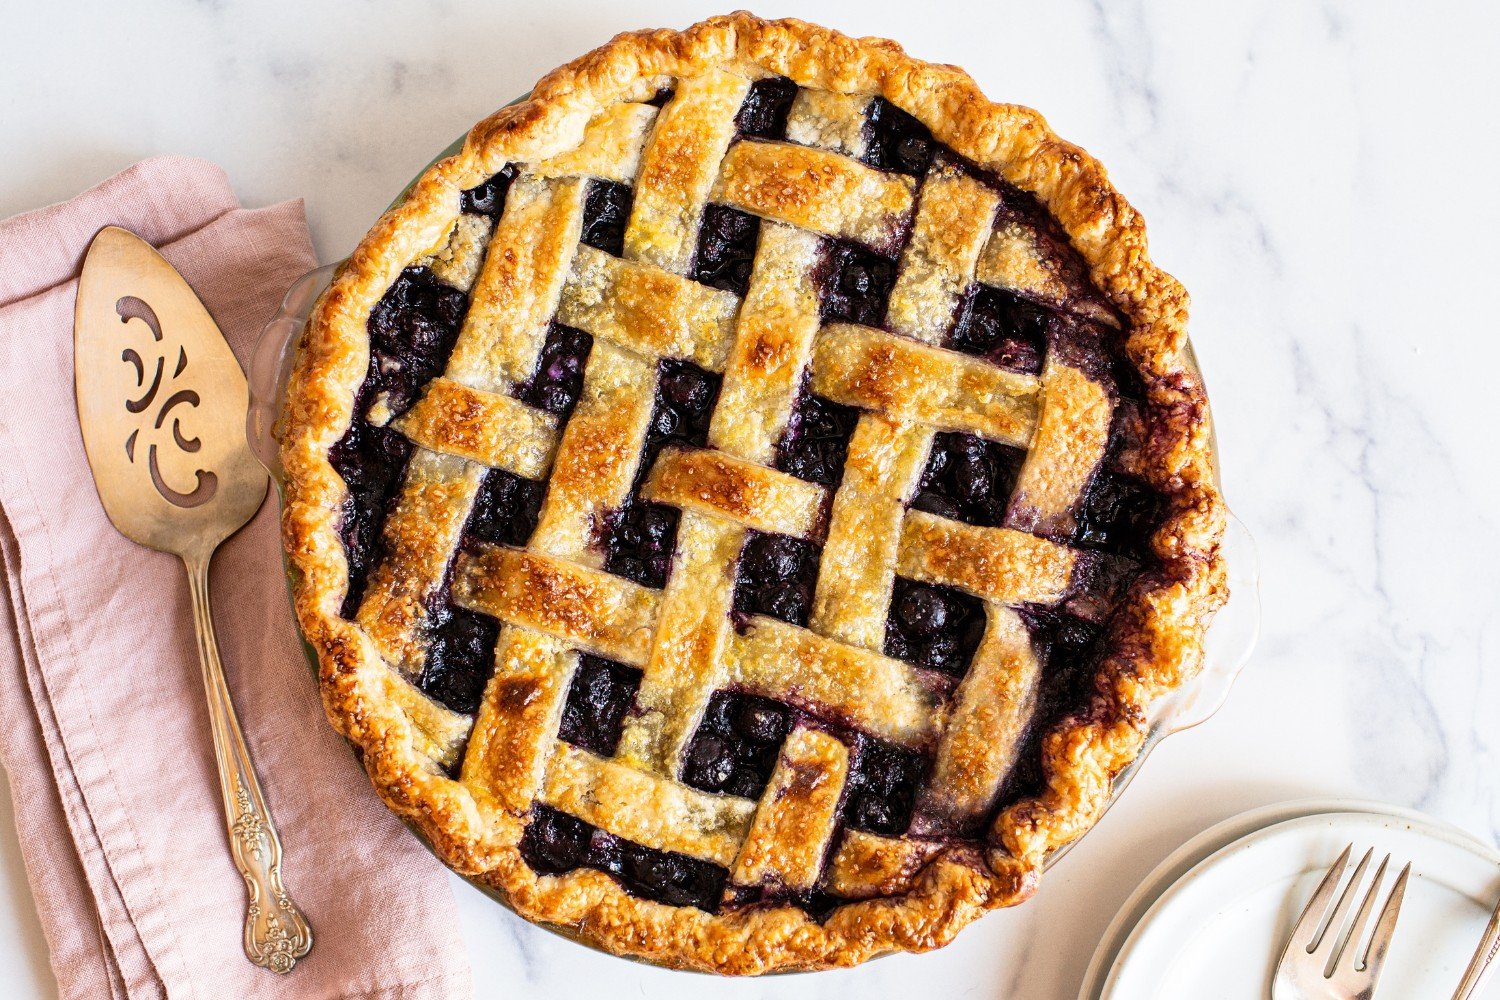
A lattice pie crust topping works beautifully with any fruit pie or tarts. I love using it on my Blueberry Peach Pie, Blueberry Pie, or Double Crust Apple Pie. Feel free to try it with any fruit, like a classic cherry pie. The strips let the filling peek through while keeping the crust perfectly flaky and golden.
Storing & Freezing
Store lattice-topped pie for up to 2 days at room temperature or in the fridge for up to 5 days. Slices can be refreshed in a 350°F oven for 5-10 minutes to crisp the crust.
For a make-ahead pie, prep the pie dough a few days ahead of time, or freeze it for up to 2 months. Keep the top crust and bottom crust separated by parchment paper. Thaw in the fridge overnight or on the counter for same-day use.
You can also freeze a fully baked pie. Just wrap it in plastic and foil and bake from frozen at 375°F until it’s heated through. It should take about 1-1 ½ hours. Let it cool for another hour before slicing.
More Pie Recipes You’ll Love
FAQs
You can absolutely add a lattice top crust to a store-bought or premade pie crust to make it look more impressive. The bottom crust just won’t be quite as flaky as an all-butter homemade crust. Make one batch of dough instead of 2, and follow my recipe for the lattice top from there.
I always use butter for the best pie crusts, including a lattice crust pie. Butter gives the dough a richer flavor and that flaky, tender texture in every bite. Shortening can be easier to work with, but it lacks the flavor that butter delivers.
Yes, brushing your lattice crust with an egg wash before baking can give it a glossy finish. I use a simple mix of one beaten egg with a teaspoon of water or milk.
You don’t usually need to bake the bottom crust for a classic apple pie recipe or other double-crust pies before adding the filling. I do recommend blind baking for certain styles, like my Dutch Apple Pie, where the topping and filling benefit from a sturdier, pre-baked base.
Email This Recipe
Enter your email, and we’ll send it to your inbox.
Ingredients
- Best Ever Pie Crust (double batch)
Instructions
- Roll out the chilled top crust on a lightly floured surface, turning as you go to prevent sticking. Aim for a 13-inch circle about 1/8-inch thick.
- Use a ruler and a pastry wheel, pizza cutter, or knife to cut even strips, about 1 inch wide. Chill the strips briefly if they become too soft.
- Lay half the strips evenly across the filled pie.
- Fold back every other strip, place a strip in the opposite direction, and unfold.
- Repeat the over-under pattern until the lattice is complete.
- Trim the overhang so the strips are just shy of the bottom crust’s edge.
- Tuck and press to seal, then crimp or finish the edge as desired.
- Chill the assembled pie for 15 to 30 minutes before baking.


Looking forward to cooking another of your delicious dishes for my next social outing, planned for 3 October, by when we hope we’ll be out of lockdown. I took one of your dishes to an outing with this group earlier this year and it was received rapturously.
Clever way of weaving, folding back some of the strips.
Thanks for commenting, Meredith! Be sure to tag us in your bake on Instagram (#handletheheat) so we can see your final result!
These look amazing! Love how juicy they look! Love the cookie method!
Thanks, Tessa
Thanks!
Thank you for taking the painstaking effort to provide the video. Seeing the process makes me more able to want to complete a lattice crust. I will try this on my next pie!
I’m so happy that helped! I’m a visual person as well, and sometimes directions can be slightly confusing when you’ve never made something before 🙂 Let me know how your first lattice pie crust goes! 🙂