Tessa’s Recipe Rundown
Taste: Buttery tangy goodness, perfect for topping with jam, gravy, or honey.
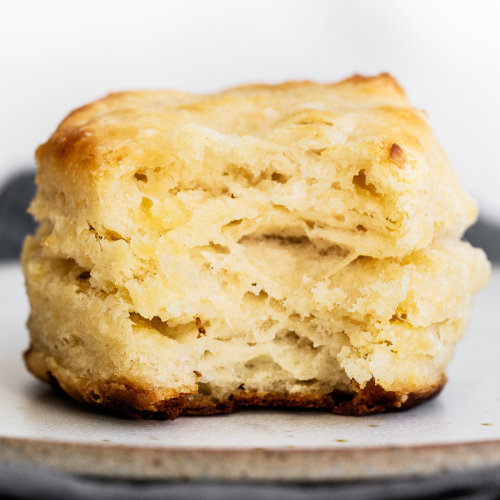
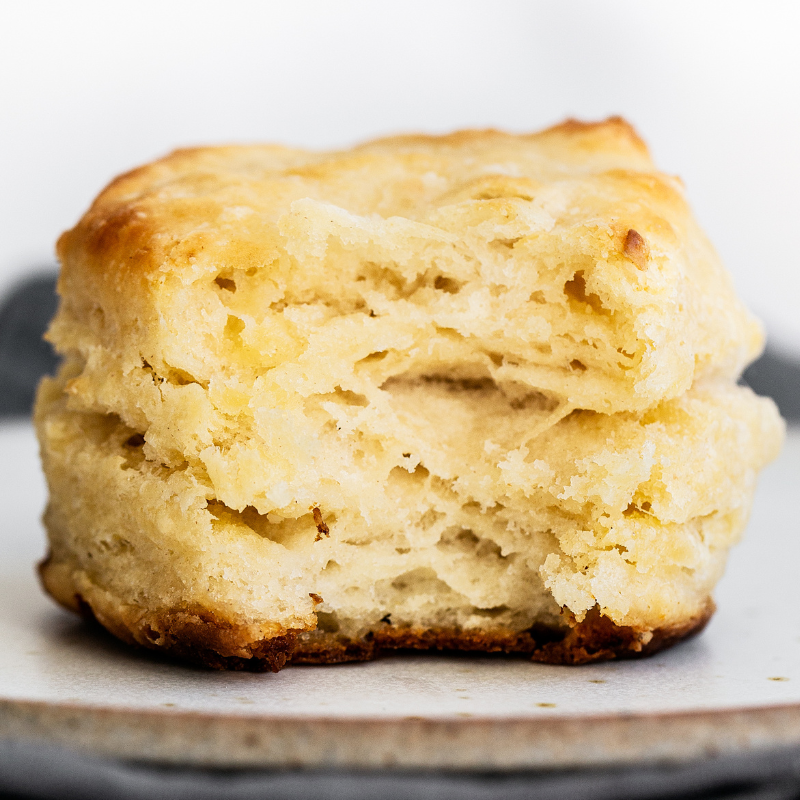
Texture: The outside is slightly crisp, while the inside is super light and fluffy, with perfectly flaky buttery layers throughout. No hockey puck biscuits here!
Ease: Super duper easy, and I’ve included tons of tips and insights into the science of biscuits below.
Pros: Quick comfort food.
Cons: Probably not an everyday indulgence.
Would I make this again? I’ve made this recipe many times!
This post may contain affiliate links. Read our disclosure policy.
Perfectly tender, buttery Buttermilk Biscuits are one of those treats where you just can’t stop at one!
Sadly I didn’t grow up eating biscuits. Really the only time we ate them was when we got a KFC family meal, and I didn’t even like those biscuits.
I didn’t learn how to make biscuits until culinary school. It was then that I realized just how amazing real, buttery homemade biscuits could be.
I’ve come a long way since those bland KFC biscuits!
I’m sharing my favorite buttermilk biscuit recipe, alongside all the tips and tricks you need to make tender, flaky, light, and golden brown biscuits. I promise these will knock your socks off!
One of my favorite ways to serve these biscuits is either with some blueberry lavender jam or with some salted honey. They also make for great mini breakfast sandwich sliders!
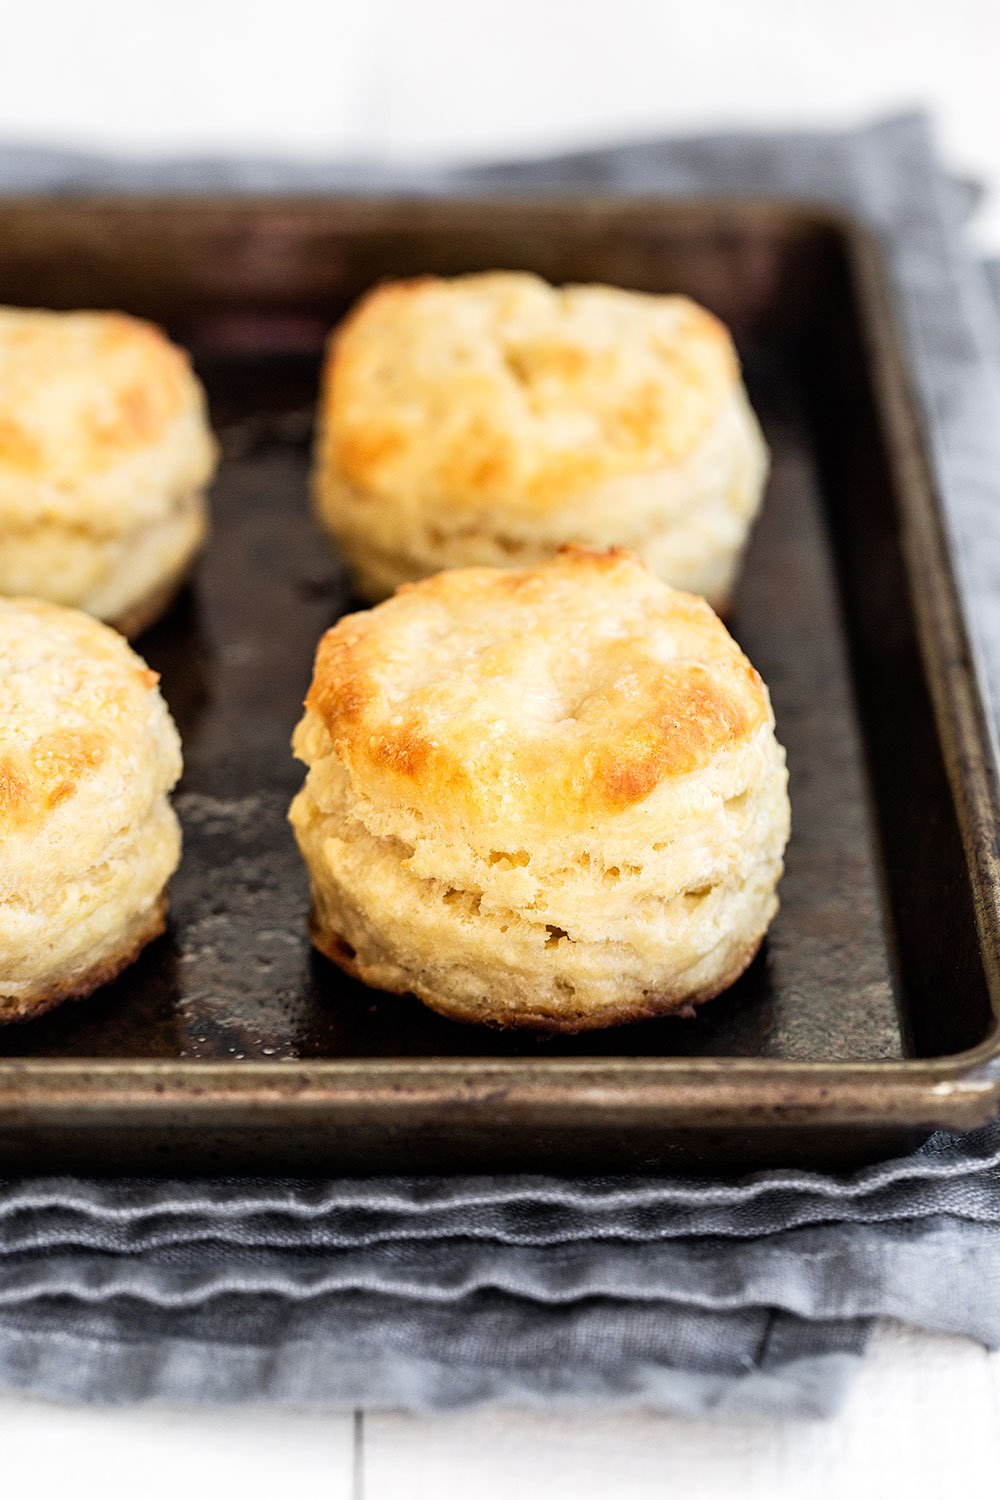
How to Make Perfect Buttermilk Biscuits
Do I Have to Use Buttermilk in These Buttermilk Biscuits?
- To create the best flavor AND texture, yes. I highly recommend using real buttermilk.
- I’ve done extensive side-by-side testing on buttermilk vs. buttermilk substitutes, including powdered buttermilk, and vs. regular milk.
- You can read about my science of baking & buttermilk experiments here: Buttermilk 101.
- At the end of the day, I find nothing quite compares to the tangy taste and thick texture of the real thing.
- If you can’t use real buttermilk, you can use this substitute: 1 scant cup whole milk + 2 teaspoons distilled vinegar or lemon juice.
- If you’re using this substitute then I’d recommend adding some other flavor additions to the dough, such as shredded cheese, diced jalapeno, garlic powder, green onion, or everything bagel seasoning.
How to Make TENDER Buttermilk Biscuits
- This all comes down to be super gentle with the dough.
- I usually make biscuits by hand with a pastry cutter because you’re less likely to overwork the dough and it’s still super quick and easy.
- I’ve also included instructions for using a food processor in the recipe below, if you prefer.
- I like my biscuits to be slightly crunchy on the outside and tender and fluffy on the inside, which is what this recipe produces.
- However, if you like very tender biscuits, try using a southern-style flour such as White Lilly, which has a lower percentage of protein. If you can’t find that, you can create a ratio of All-purpose flour combined with pastry flour to get a similar result.
- Whichever flour you use, make sure to MEASURE CORRECTLY. Too much flour will result in dense, dry, and tough biscuits.
Butter or Shortening for Biscuits?
I’ve also done side-by-side testing with biscuits made with butter vs. shortening and found I really prefer the taste and texture of 100% butter. However, biscuits made with shortening create a more traditional Southern-style texture. If you want, use half shortening and half butter.
How to Make TALL Buttermilk Biscuits
- Tall biscuits require tall dough: 1-inch in height to be exact. You could even pat the Buttermilk Biscuits dough out to 1 1/4-inches for mile-high biscuits – but note you’ll end up with fewer biscuits.
- Use a metal biscuit cutter: You want to create sharp edges when you shape the biscuit dough so nothing prevents the biscuits from rising. A round cookie cutter also works.
- Do NOT twist the biscuit cutter as you shape the dough.
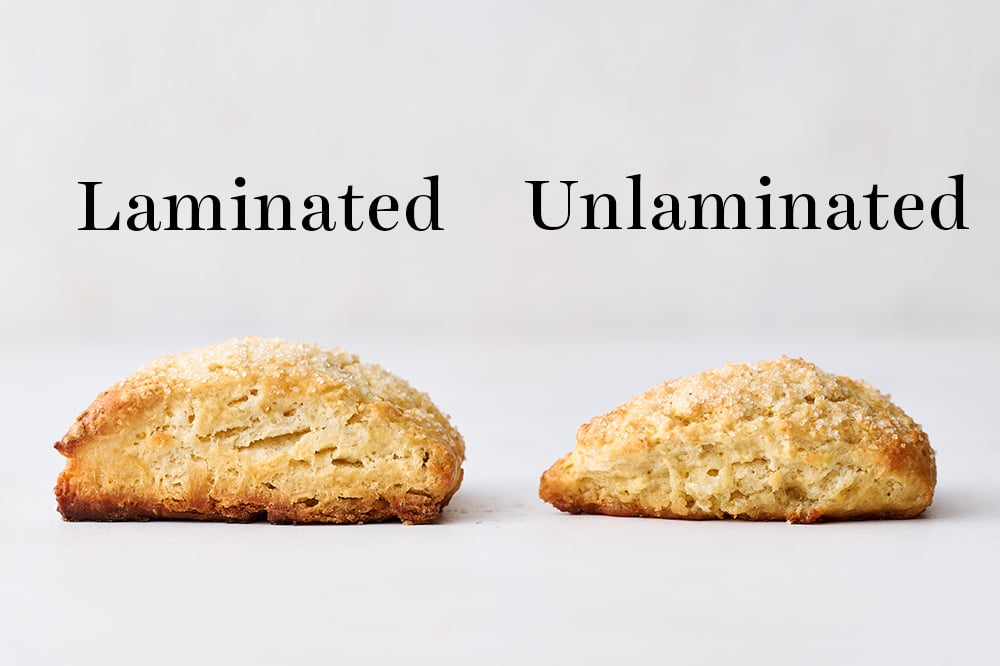
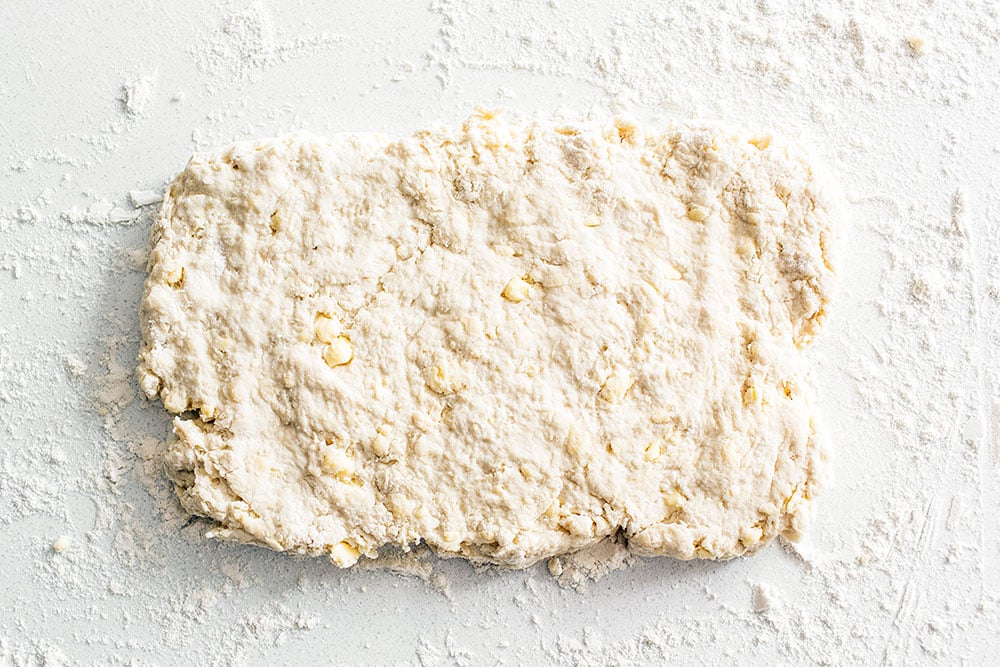
- Lamination: The most important step in creating tall biscuits is to do a quick “lamination” of the dough. Basically, you pat the dough out into a rectangle, then fold it up into thirds (like you’re folding a letter to put in an envelope), then repeat that process.
- This trick applies to scones too.
- This step ensures your biscuits will bake up tall, with distinct layers of flaky goodness.
- This step is optional. If you don’t want to spend the time or energy on it, the biscuits will still come out great.
- Take a look at the picture below to see what a difference laminating your dough makes, and then check out my How to Make Tall Scones & Biscuits article for even more tricks!
Baking Buttermilk Biscuits
- A great trick to further ensure tall & flaky Buttermilk Biscuits is to pop the tray of unbaked shaped biscuits in the freezer while your oven preheats.
- This keeps the butter extra cold.
- When the biscuits hit the heat of the oven, the steam from the water in the butter creates those tall flaky layers.
- It’s the same idea as pie dough.
- I prefer my biscuits to develop a golden crust, but I also know some people prefer their biscuits to be super pale and tender all the way through.
- Adjust the baking time for your unique oven and preferences.
- Whatever you do, just make sure your oven is fully preheated and hot enough. This is what helps the biscuits rise tall.
- Play it safe by waiting at least 10 minutes after your oven tells you it’s preheated.
- Learn more about ovens, and why preheating for longer than the preheat beep is important, here.
How to Laminate Biscuit Dough
1. Turn the dough out onto a floured surface and dust the dough with flour. I like to use a powdered sugar shaker to dust the perfect amount of flour without using too much. Gently pat the dough out into a 1/2-inch thick rectangle using your hands. You don’t need to use a rolling pin if you don’t want to!
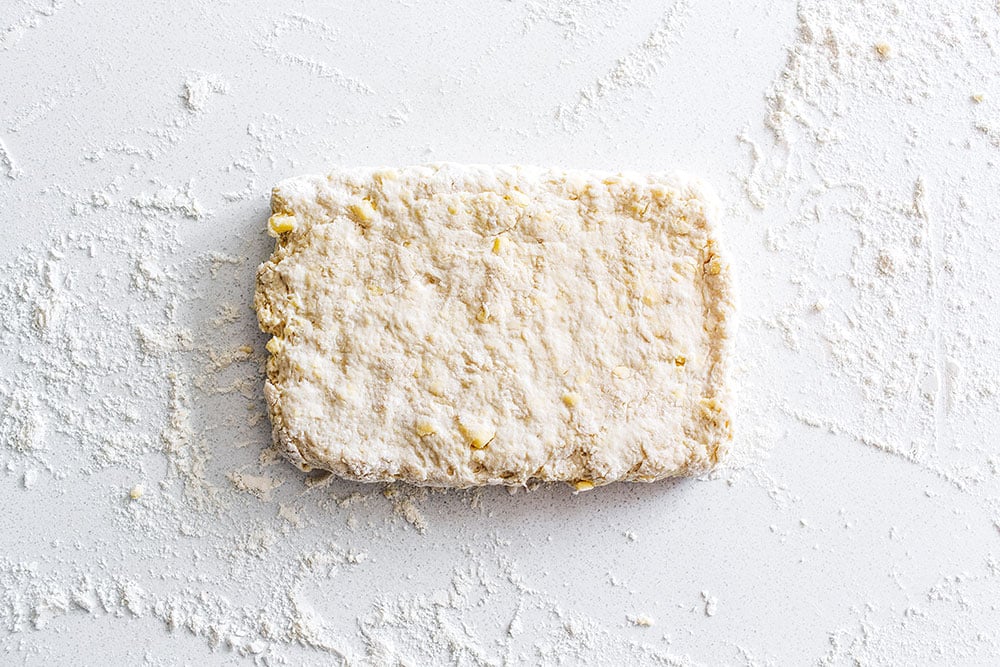
2. Fold the dough into thirds like a letter. Don’t worry if it’s not absolutely perfect. You want to be quick and gentle with the dough and only use as much flour as necessary to prevent it from sticking. Adding too much flour will create dense and tough biscuits. A bench scraper makes easy work of moving the dough without having it stick.
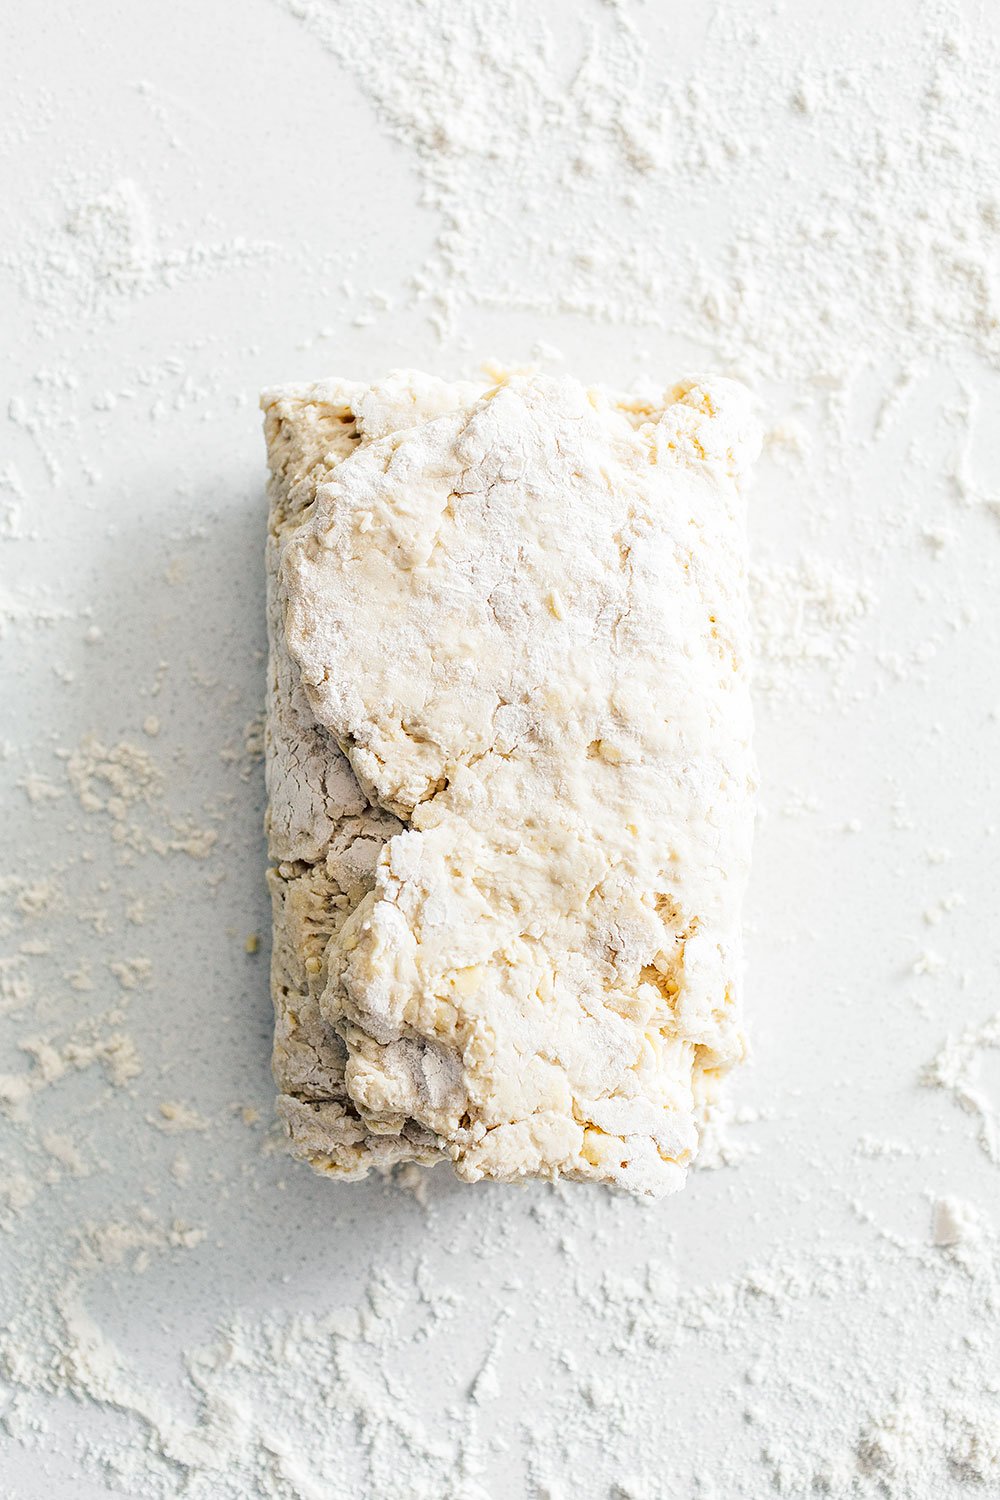
3. Repeat this process two more times, rotating the dough 90 degrees before each fold. By the time you’re done, you will have created layers of butter similar to a croissant, so the biscuit bakes up perfectly tall and SO flaky!
How to Make Buttermilk Biscuits Ahead of Time
Since Buttermilk Biscuits are best served the day they’re baked, use these instructions for making them ahead of time. You can do this with the whole batch, or whatever you don’t want to eat in a day.
- Place the unbaked shaped Buttermilk Biscuits dough on a parchment-lined baking sheet and freeze until solid.
- Remove to an airtight container and freeze for up to 2 months.
- Bake as directed, adding an additional 5 minutes to the baking time, or until golden brown.
More Recipes You’ll Love
- Chicken Pot Pie with Biscuits
- Copycat Homemade Cheesy Garlic Biscuits
- How to Make Perfect Scones
- Homemade Burger Buns
Perfect Buttermilk Biscuits
Ingredients
- 2 cups (254 grams) all-purpose flour, plus more for dusting
- 2 teaspoons granulated sugar
- 1 tablespoon baking powder
- 1/4 teaspoon baking soda
- 1 teaspoon fine salt
- 6 tablespoons (85 grams) very cold unsalted butter, cut into small cubes
- 1 cup buttermilk, chilled
Instructions
- In a large bowl, combine the flour, sugar, baking powder, baking soda, and salt. Using your fingertips or a pastry blender, cut the butter into the flour mixture until it resembles coarse meal. You can also do this in a food processor. The faster you do this, the better, as you want the butter to remain cold. Stir in the buttermilk until just combined. DO NOT overmix. The dough will be sticky.
- Turn the dough out onto a floured surface and dust the dough with flour. Gently pat the dough out into a 1/2-inch thick rectangle. Fold the dough into thirds like a letter. Repeat this two more times, rotating the dough 90 degrees before each fold.
- Pat the dough out into a final 1-inch thickness. If at any point the dough becomes too warm, pop it in the fridge until it’s firmed up slightly.
- Use a sharp 2-inch round metal biscuit cutter to push straight down through the dough to cut out circles, trying not to twist the cutter at all. If you don’t have a sharp cutter, use a knife and cut squares instead.
- Place the biscuits on a parchment-lined baking sheet, spacing 2-inches apart. Reform the scrap dough into 1-inch thickness, being sure to work with it as little as possible, before cutting out more circles.
- Freeze the uncooked biscuits while you preheat the oven to 450°F.
- At this point, the unbaked biscuits can be frozen and stored in an airtight container in the freezer until ready to bake. Bake straight from the freezer, adding a couple minutes to the baking time.
- Bake the biscuits until golden brown, about 12 to 15 minutes.
Recipe Notes
This post was originally published in 2014 and recently updated with recipe changes and improvements and new photos. Photos by Ashley McLaughlin.












Easy for a beginner baker. Delicious and a new family favorite.
I’d say, I found the best biscuit recipe!
I followed all directions and it came out PERFECT! Soft and buttery inside, a little leaves a little crust on the bottom and top of the biscuit
Made these with gravy tonight. Literally the best biscuits I’ve ever made. Reminded me of KFC!
I’m not a skilled baker by any stretch. Used bread flour, because it’s what I had, and followed the directions. Biscuits turned out perfect! Will definitely be making these again!
I’ve been making homemade biscuits for a while but this tops all of the recipes. Just the right texture, flaky, a bit sweet. Buttery goodness. I wish I could post a photo they came out so beautifully! I did just post on IG @elicbrowndesigns
Great recipe. I made an almost identical recipe with a southern friend a few weeks ago (they use self rising flour) and was looking for the recipe online. Came across your recipe and the results are fantastic. Thank you!
So glad you enjoyed these biscuits!
Made these twice: per the recipe and then without the sugar and with 2tbsp of a combo of thyme, rosemary, chives, parsley… both turned out fantastically and my family is clamoring for me to make them again… weekly if they had their way!
I do lower the temp to 400 degrees for 20 mins (better for my oven) and I just cut into squares (less fuss) but the recipe is PERFECT!
So happy to hear that works so well for you, Mari!! 🙂
These did not rise for me either. Flavor was good but they were flat
Hi Jan! Oh no, it definitely sounds like something went wrong here! Just in case you’re interested in troubleshooting at all, here are a few thoughts as to why these might have failed to rise.
– One or both of your leavening agents could no longer be active. If your baking/soda powder are not fresh, they won’t do their jobs and your baked goods cannot rise properly. Tessa talks about the science behind leavening agents, and how to test for leavener freshness, in this article here!
– How do you measure your ingredients? By volume (using cups), or by weight (using a digital kitchen scale)? It’s so easy to add extra flour/sugar/etc to a recipe and throw off the entire chemistry of a recipe if measuring by volume. Tessa talks about how to best measure ingredients to ensure accuracy every time, in this article here!
– Did you use real buttermilk, or a DIY substitute? In our experience, the DIY version won’t work as well to activate the baking soda, and will therefore fail to rise much.
– If you have not already done so, I recommend reading all the tips Tessa has included on this recipe page, in the pink tip box above the recipe. There’s so much incredibly helpful information there, as well as the lamination technique Tessa developed that adds so much height to these biscuits!
I hope something here is helpful! If not, please feel free to reach back out to us – we are always more than happy to help!! Happy baking 🙂
How many times can the scrap be re-used? If at all?
Hi Sarah! We recommend just re-using the scraps once. You can absolutely try baking off anything that remains after that, but just know that it likely will have gotten overworked and be less flaky and tougher than the first ones. Let us know what you think when you try these! 🙂
This is a great recipe. My husband loves biscuit style chicken pot pie, but he was diagnosed with celiac a few years ago. I’ve tried dozens of biscuit recipes and this is the first one that actually makes fluffy, tender, tall, gluten free biscuits. I can hardly tell the difference. Thank you so much!!
FYI I usually just use cup4cup all purpose mix.
So happy that worked for you, Kimberly!! 🙂
Amazing! This has become a family Favorite with my grandchildren. I plait the biscuit dough so it is in flaky layers. I use the smallest of my biscuit cutters and they are just perfect for toddler hands! I LOVE THEM!
Aw, so fun! Happy to hear you’re baking memories with your grandkids 🙂