


Tessa's Recipe Rundown
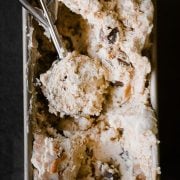
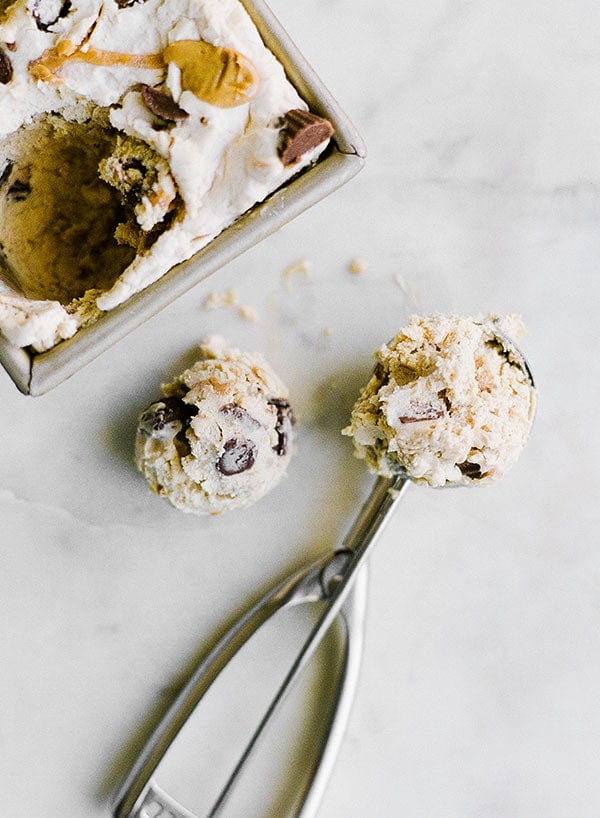
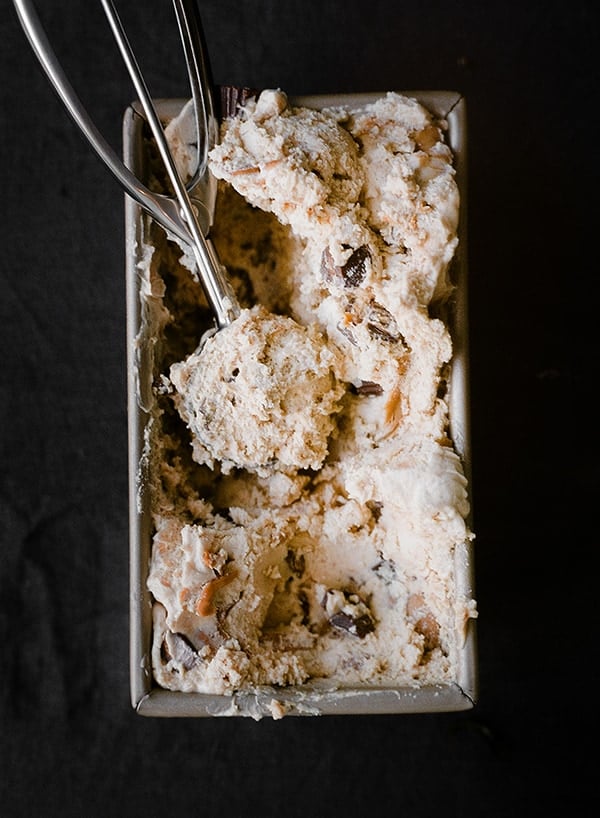
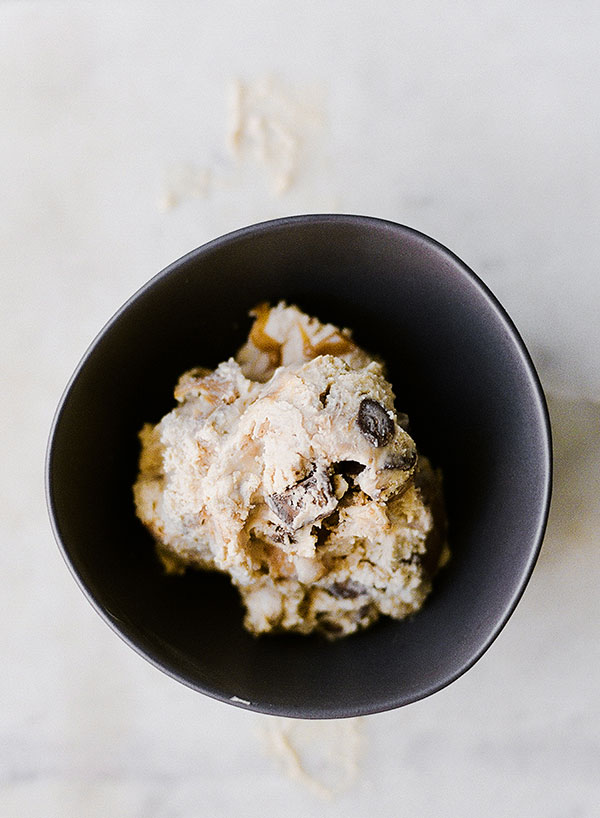
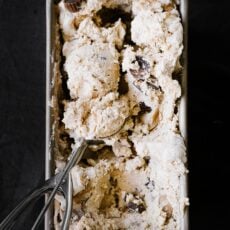
Taste: So much peanut butter flavor! It comes in three forms: peanut butter in the base of the ice cream, melted peanut butter swirled in, and mini peanut butter cups. Heavenly!
Texture: Ultra-rich, thick, and creamy. You don’t need much to be satisfied!
Ease: Super duper easy.
Pros: Takes no time before you have homemade ice cream!
Cons: This shortcut approach to ice cream is very rich, and there’s no good substitute I’ve tried for the sweetened condensed milk.
Would I make this again? Absolutely!
This post may contain affiliate links. Read our disclosure policy.


If you’re a peanut butter lover like me, this No Churn Peanut Butter Ice Cream is for you!
I truly adore peanut butter. I eat the stuff every single day (no exaggeration).
I’m always finding new ways to incorporate peanut butter into any recipe. I have countless delicious peanut butter recipes, from my viral Peanut Butter Chocolate Chip Cookies, to my decadent Peanut Butter Stuffed Brownies, and my super-easy, crowd-pleasing Peanut Butter Pie.
I often can’t resist the perfect flavor combination that is chocolate and peanut butter.
However, in this ice cream recipe, the PB is the absolute star.
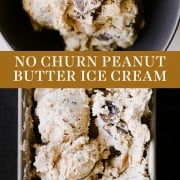
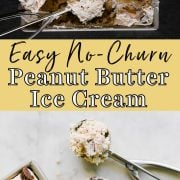
No Churn Peanut Butter Ice Cream is the easiest ice cream ever, sure to satisfy the biggest peanut butter cravings. I hope you love it as much as I do!

Sprinkle of Science
How to Make No Churn Peanut Butter Ice Cream
The No-Churn Method
- This No Churn Peanut Butter Ice Cream uses the 2-ingredient no-churn technique to make this recipe as simple as possible (full how-to post + video on How to Make Ice Cream without a Machine here).
- In this technique, freshly whipped cream is combined with condensed milk – and in this case, peanut butter. Add in some vanilla, melted peanut butter swirls, and chopped mini peanut butter cups (buy the ones already out of the wrappers to make it quicker) and you’re done!
- No eggs, no custard, no cooking, no churning. Once the mixture is made it just needs to freeze, preferably overnight.
- The peanut butter flavor intensifies as it chills, becoming increasingly delicious.
- If you prefer a ‘soft serve’ consistency, feel free to dig in sooner.
- Check out my step-by-step video below (at the bottom of the recipe card).
What Kind of Peanut Butter is Best for Ice Cream?
I recommend using a conventional creamy peanut butter for this ice cream recipe, such as Skippy or Jif. I haven’t tried natural PB in this ice cream, but it should work just fine – just be sure it’s extremely well stirred, so it’s smooth and cohesive with no hard or oily bits, before using.
Can I Use Almond Butter Instead?
I haven’t tried that, but I don’t see why not! Simply swap the peanut butter for the same amount of almond butter. I recommend doubling the vanilla, as almond butter doesn’t carry quite as much flavor, and the extra vanilla will help round out the flavors better.
How to Perfectly Scoop and Serve Ice Cream
- Allow the ice cream to soften by placing it in the fridge for 30 minutes before serving. This allows it to soften evenly, rather than letting it sit at room temperature where it’ll soften most at the edges and remain hard at the center of the container.
- Next, get a good quality ice cream scoop like this OXO one or this Zeroll one. It makes a huge difference! Make sure it’s totally dry before using.
How to Store No Churn Peanut Butter Ice Cream
Store No Churn Peanut Butter Ice Cream for up to 2 weeks. The longer the ice cream is stored, the more flavorful it will become! However, the longer it’s stored, the harder it will become as well. Be sure to store the ice cream in a well-sealed container, to prevent it from becoming icy (recommendations for this just below).
My Favorite Ice Cream Packaging
Homemade ice cream is a wonderful thing, but it’s a little awkward to find a container to store in the freezer that will keep a good seal, so your ice cream doesn’t get hard and icy. I absolutely LOVE my white pint size ice cream containers from Amazon. They’re basically blank Ben & Jerry’s containers! They’re stackable and come with lids that offer a nice seal. They also make for perfect gifts.
More Recipes You’ll Love:
- Strawberry Cheesecake Ice Cream
- Death by Chocolate Ice Cream
- Peanut Butter Chocolate Chip Cookies
- No Bake Chocolate Peanut Butter Cheesecake
- Peanut Butter Pie
Email This Recipe
Enter your email, and we’ll send it to your inbox.
Ingredients
- 1 (14 ounce) can sweetened condensed milk, chilled
- 1 1/2 cups (405 grams) creamy peanut butter, divided
- 2 cups (480 grams) heavy cream, chilled
- 1/2 teaspoon vanilla extract
- 1 cup mini peanut butter cups, chopped
Instructions
- In a large bowl, combine the condensed milk and 1 cup of peanut butter until smooth.
- Place the remaining 1/2 cup peanut butter in a heatproof bowl and microwave in 30-second bursts, stirring between bursts, until melted and smooth. Set aside to cool slightly.
- In the bowl of an electric mixer fitted with the whisk attachment, beat the cream and vanilla on high speed until stiff peaks form. Fold the whipped cream into the peanut butter mixture until combined. Gently stir in the peanut butter cups.
- Layer the ice cream in a freezer-safe container with dollops and drizzles of the melted peanut butter. Once all of the ice cream and peanut butter is inside the container, use a knife to gently swirl the mixture.
- Cover the surface with plastic wrap before sealing the container. Freeze for at least 6 hours, or until firm and the flavor has ripened.
Notes
Photos by Constance Higley.


This was absolutely DELICIOUS!!!! I added Reese peanut butter chips also. It is so so GOOD!!!!
Unfortunately this didnt work for me. Its was more mousse like than ice cream. Wish there was another recipe.I wouldnt be making this again.
Hi Aruna! I’m sorry to hear this ice cream did not turn out as you had hoped! It sounds like something definitely went wrong along the way – perhaps it was not frozen long enough, or maybe the whipped cream did not reach stiff enough peaks? If you wish to troubleshoot further, please let us know and we would be more than happy to help! 🙂
OK ladies… you keep saying “watch the video”… I click the link to the video and it takes me to just another recipe, no video image. Your formatting is somewhat bewildering with all the various pink highlights and boxes. You should have one color for reading text, which you do… another color for direction to instruction… and at least a third color for links to videos. I scanned a comment by a lady who said she couldn’t find the link to the No Churn recipe, as I can’t, and your reply was it’s above the “pink box”… LOL… that’s like saying it’s next to the brown tree in the forest… there is one large bold pink RECIPE VIDEO just above your cookie advertisement but it doesn’t do anything… I’ve been looking for a video for approximately 10-15 minutes and giving up… maybe you should hire a better web designer…
Thanks, Tony, for your feedback! We are currently updating our recipe templates and are going to be correcting this issue so that our videos are easy to find! This recipe does include a video specific to the peanut butter ice cream, it’s just below the second image under the title “Recipe Video”. I hope that helps!
I am looking for a plain peanut butter ice cream recipe. Can I leave out the peanut butter swirl & the peanut butter cups, or will it affect the flavor of the ice cream? This looks so good, really want to try it.
what do you think?
I haven’t tried this recipe without the swirl and peanut butter cups. Leaving out the peanut butter cups should be fine, but the peanut butter swirl adds quite a bit of flavor, so I really can’t guarantee the same flavor outcome. You’ll have to experiment! Let me know how it goes 🙂
Oh my goodness! This tastes like premium ice cream. Wont buy ice cream ever again
Hi Tessa,
I have 8 Grandsons i want to make the peanut butter recipe for and cannot print it. It looks awesome and want to give it a try.
Thank you Lauretta
Thank you for great recipe.
This is a divine ice cream. For a bit of crunch, I added some chopped nuts.
Thanks for sharing.
Made this for friends fabulous! Super creamy and peanut buttery!
Will make again and again!!!
I made this (without the peanut butter cups). I served it with marshmallow on the top to make “Fluffernutter” (it’s a New England thing) Sundaes. I love this recipe. It worked great and I will definitely make it again.
I make a peanut butter ice cream but it needs to churn!! I have stopped making it now because it separates each time I make it!! I really don’t know why? Any ideas please? I am looking forward to trying your recipe.
This was, AMAZING. I love my peanut butter, and this was the ice cream I’ve always been looking for. So peanut buttery, not too sweet, and so easy to make. Thank you!! I took this on a Girls Weekend, and everyone wanted to make another batch 🙂