


Tessa's Recipe Rundown
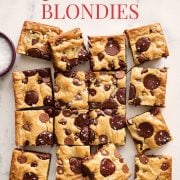
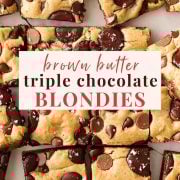
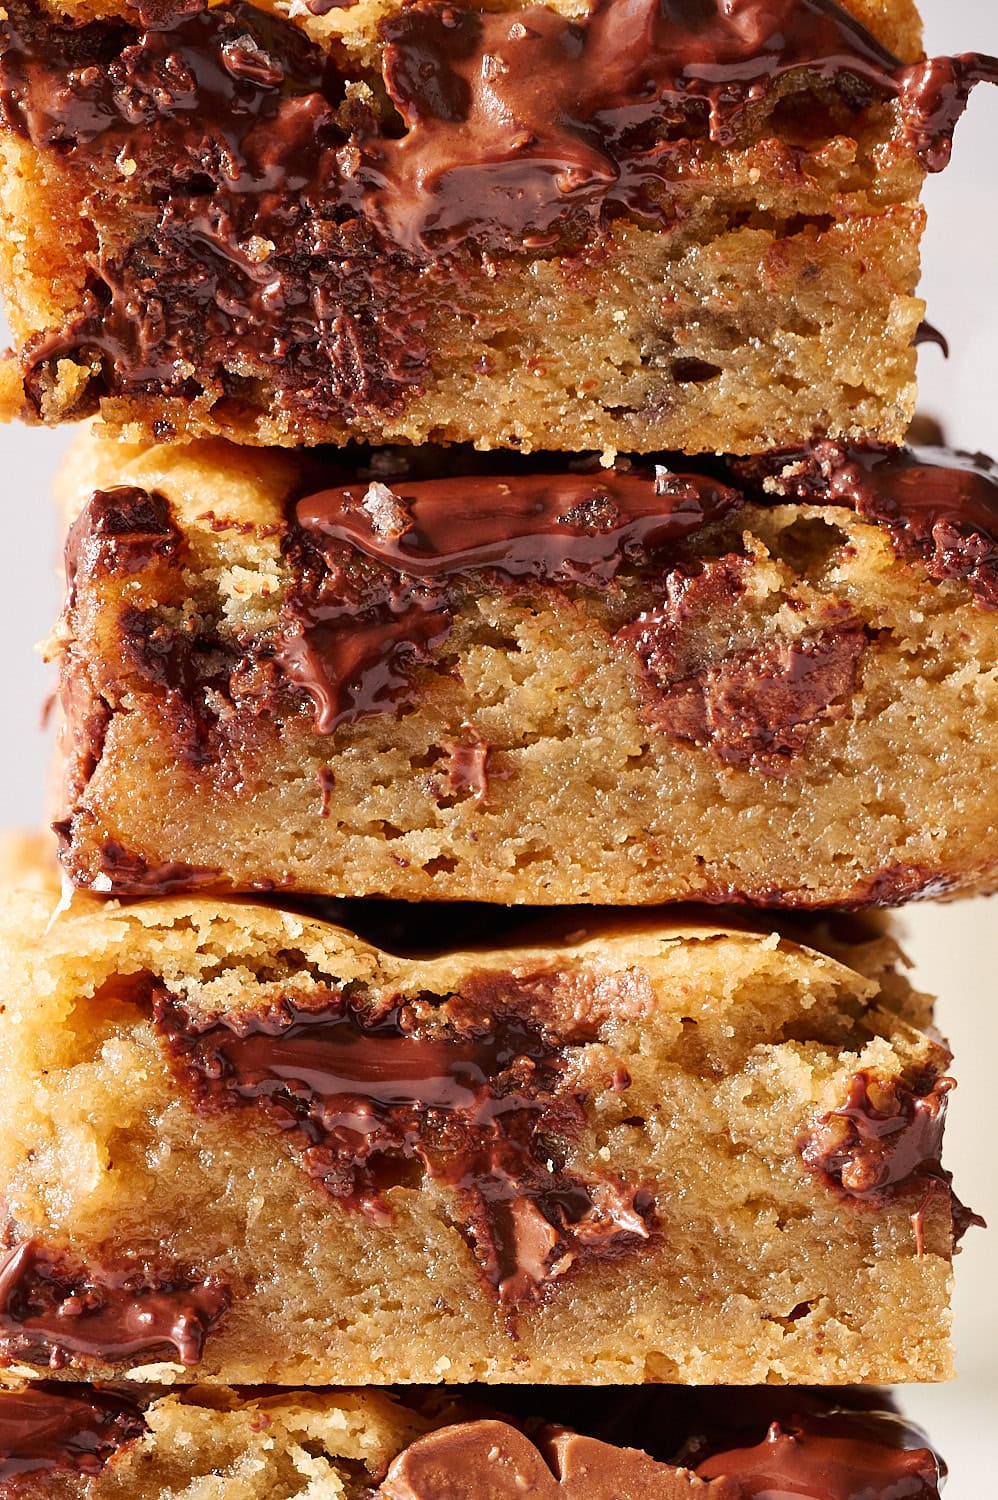
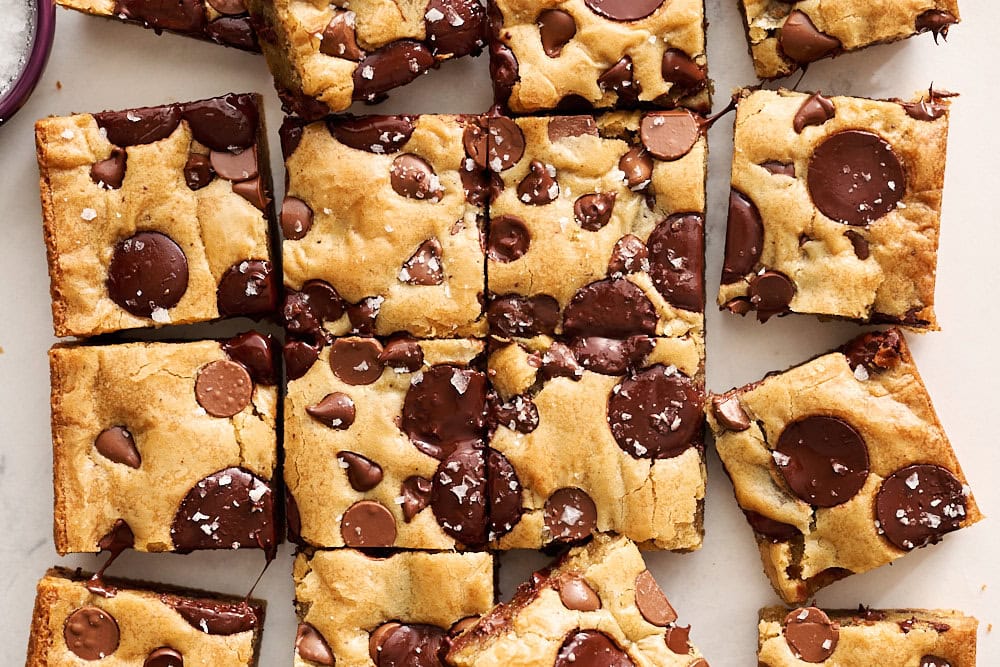
Taste: Dark brown sugar + browned butter create rich butterscotch and caramel notes, balanced by milk, semisweet, and dark chocolate… It’s a flavor lover’s dream come true!
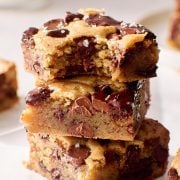
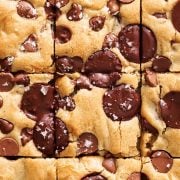
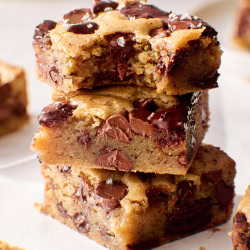
Texture: Ultra chewy and slightly gooey.
Ease: No waiting for ingredients to come to room temperature, and no stand mixer required.
Why You’ll Love This Recipe: A more grown-up, flavor-forward take on classic blondies.
This post may contain affiliate links. Read our disclosure policy.

I first published this recipe in 2015, and recently went back to the kitchen to rework it. My goal was simple: thicker blondies, more chew, and deeper browned butter flavor.
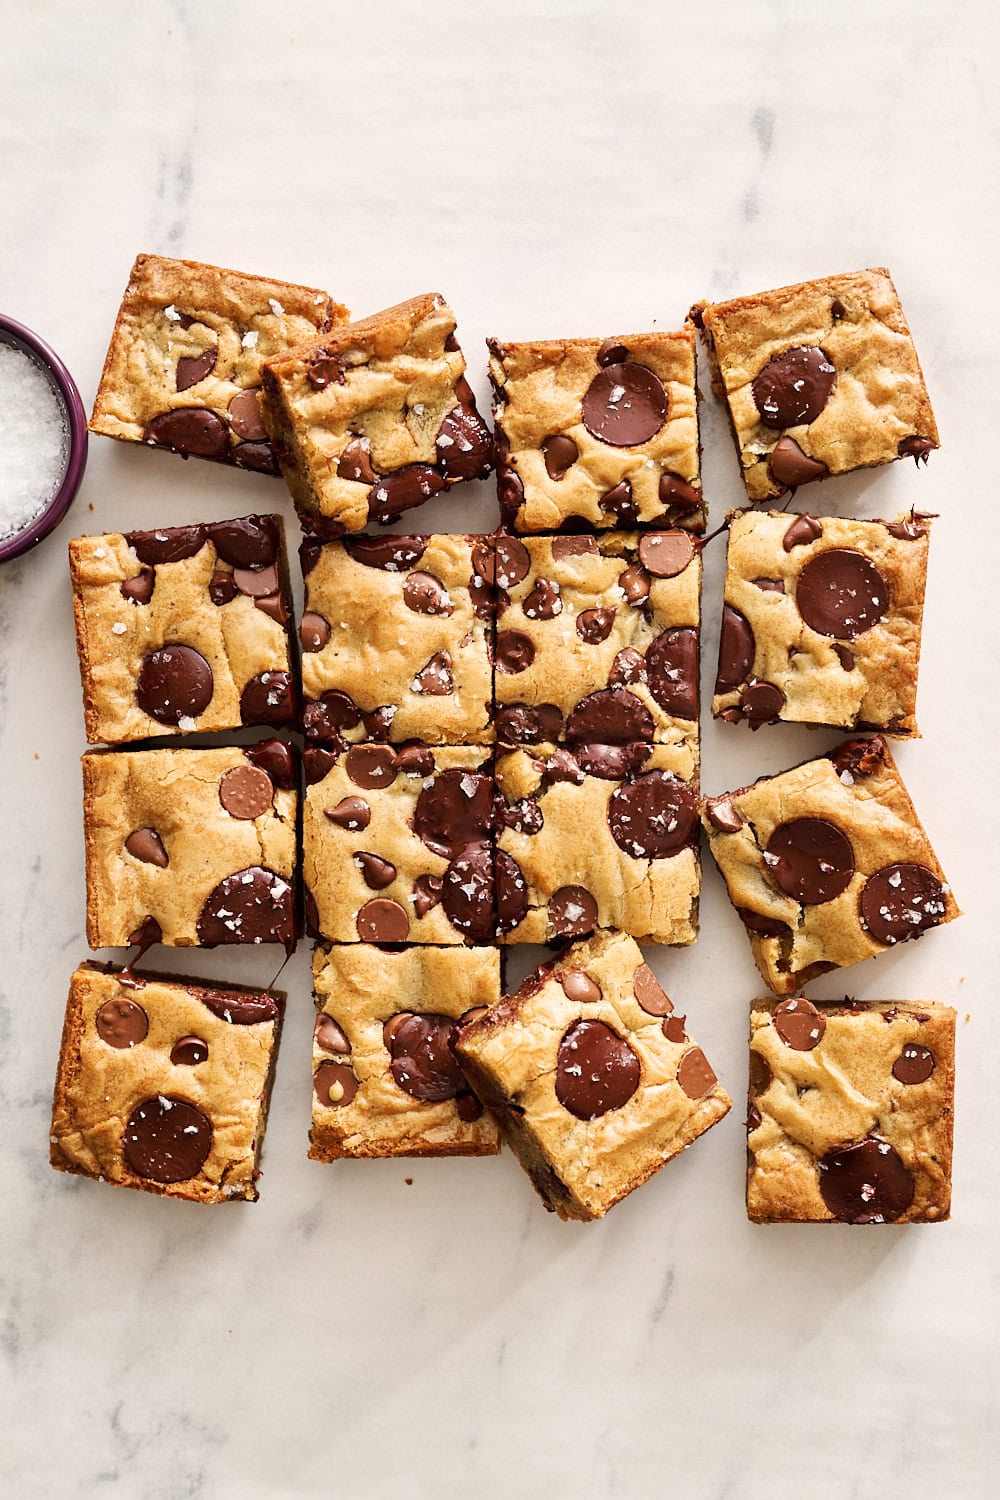
After testing, I think I nailed it. Perfect chewy texture, crisp edges, and tons of toasty, caramelized flavor to complement all three kinds of chocolate. These just may be the best blondies you’ll ever taste!
Another keeper for the recipe box! I didn’t know if this could compete with Tessa’s browned butter chocolate chip cookies (the G.O.A.T of chocolate chip cookies), but it does! A quicker version to throw together in a pinch.
Tessa’s Tips
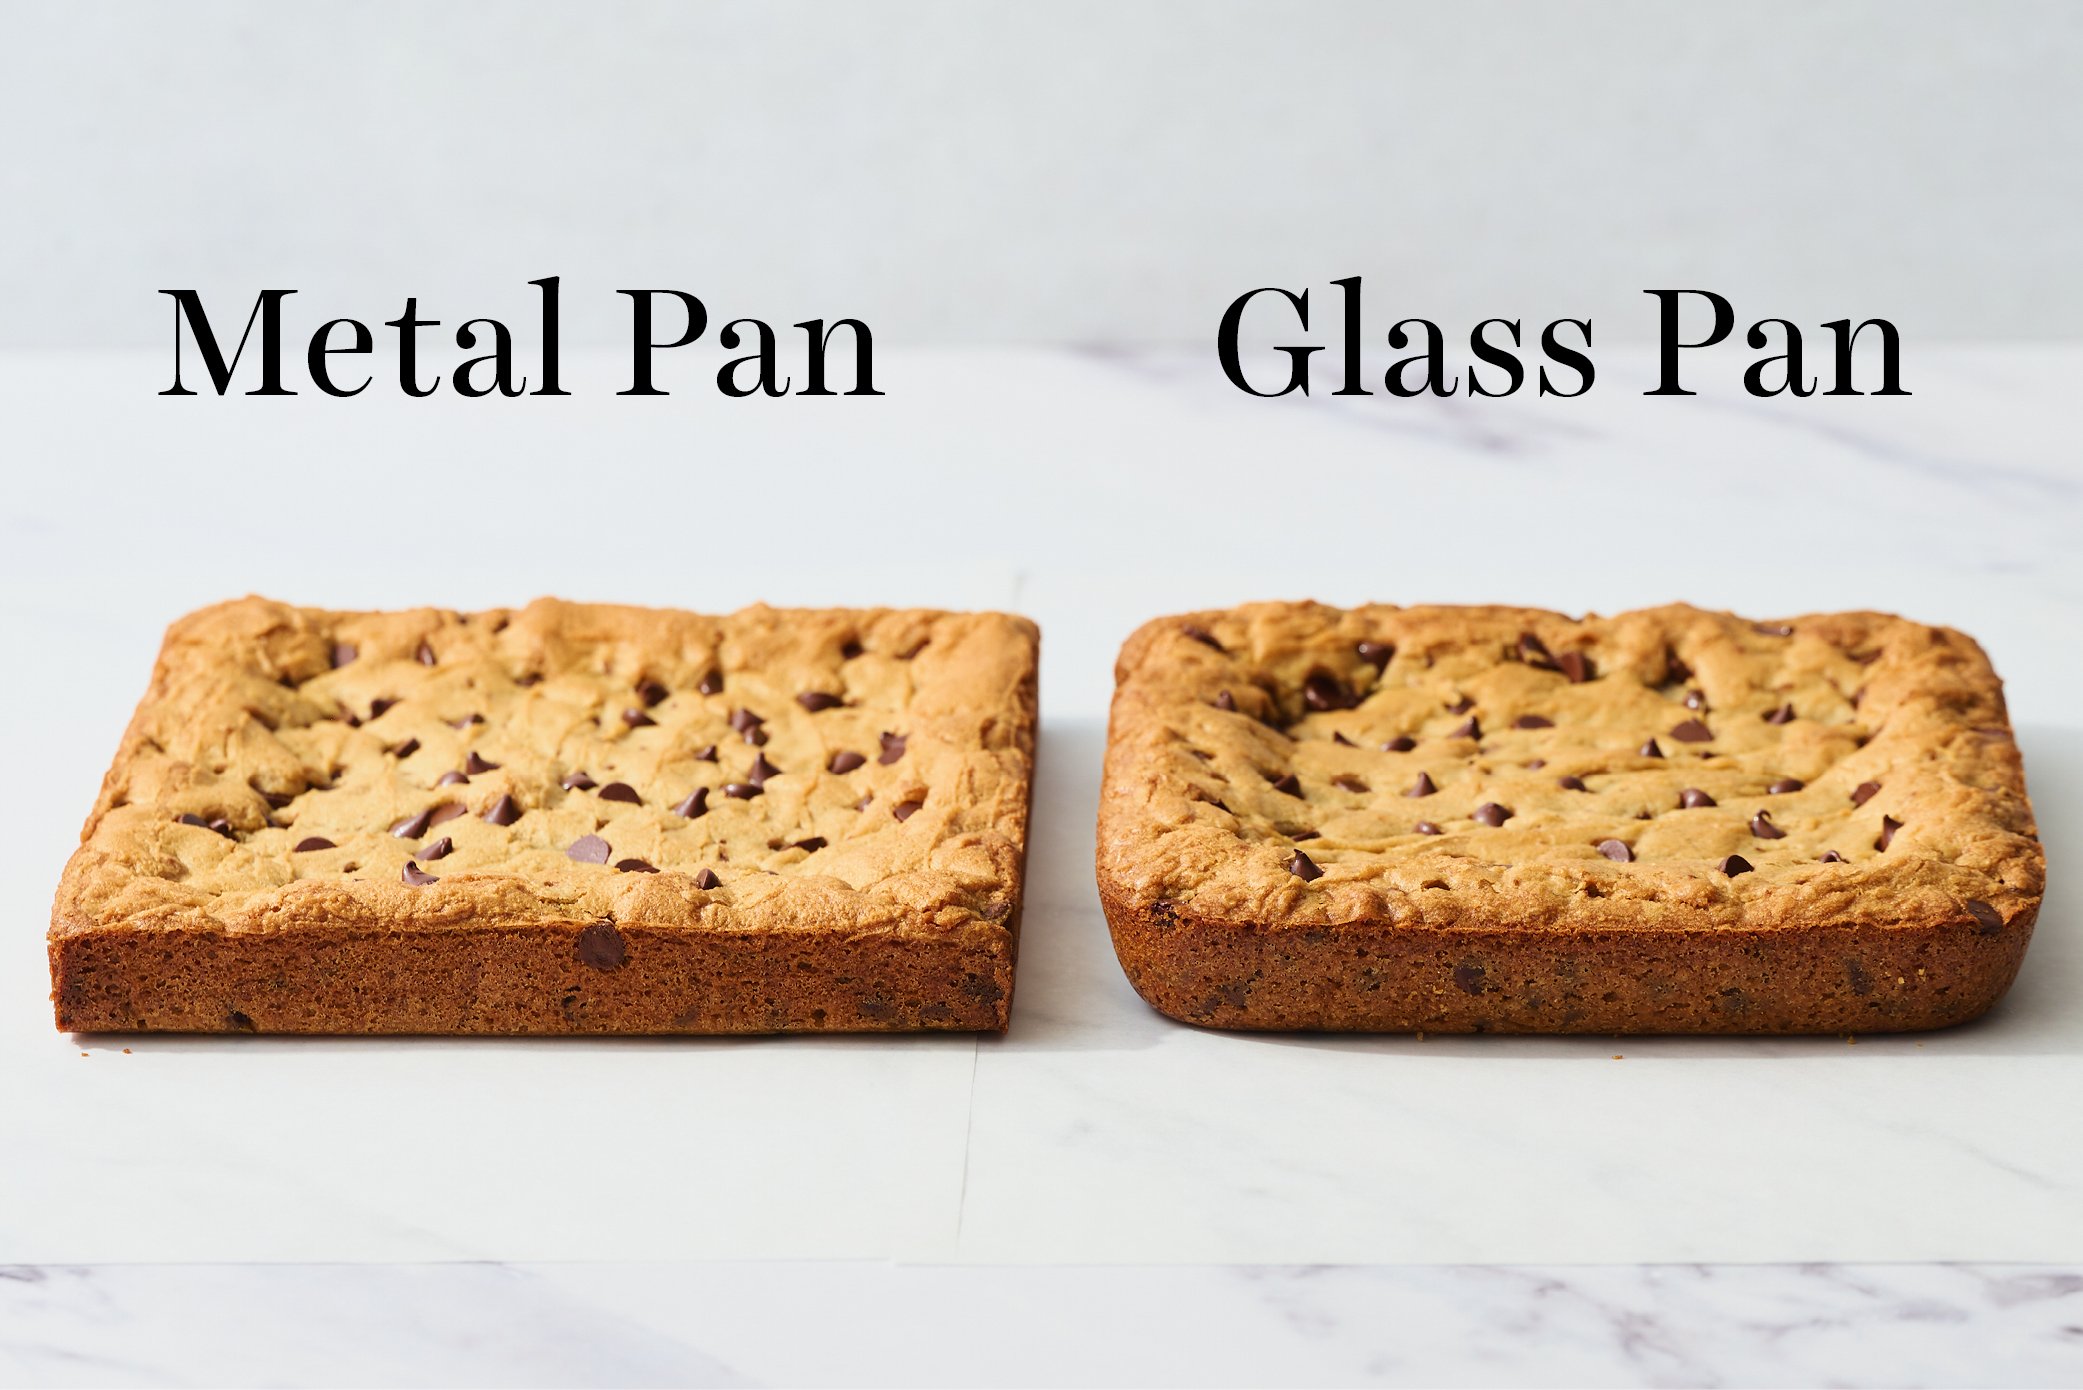
- Use a light-colored metal pan for the most even & speedy bake.
- Don’t walk away while browning butter, it can burn quickly.
- Whisk the eggs in vigorously for a shinier top crust.
- Underbake slightly if you want gooey centers; they’ll firm up as they cool.
- Wait until fully cool before cutting for clean slices, chewy texture, & balanced flavor.
How to Make Brown Butter Blondies (Step-by-Step)
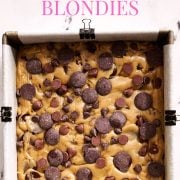
Prepare your pan: Line an 8×8-inch metal pan with parchment (or foil), leaving an overhang for easy removal. I like to secure the parchment to the pan with metal binder clips so they stay put (no, they don’t burn!).
Brown the butter: In a medium stainless-steel sauté pan over medium heat, melt the butter. Avoid cast iron or nonstick, as it’s harder to see how brown the butter is getting. Read my How to Brown Butter Guide if it’s your first time.
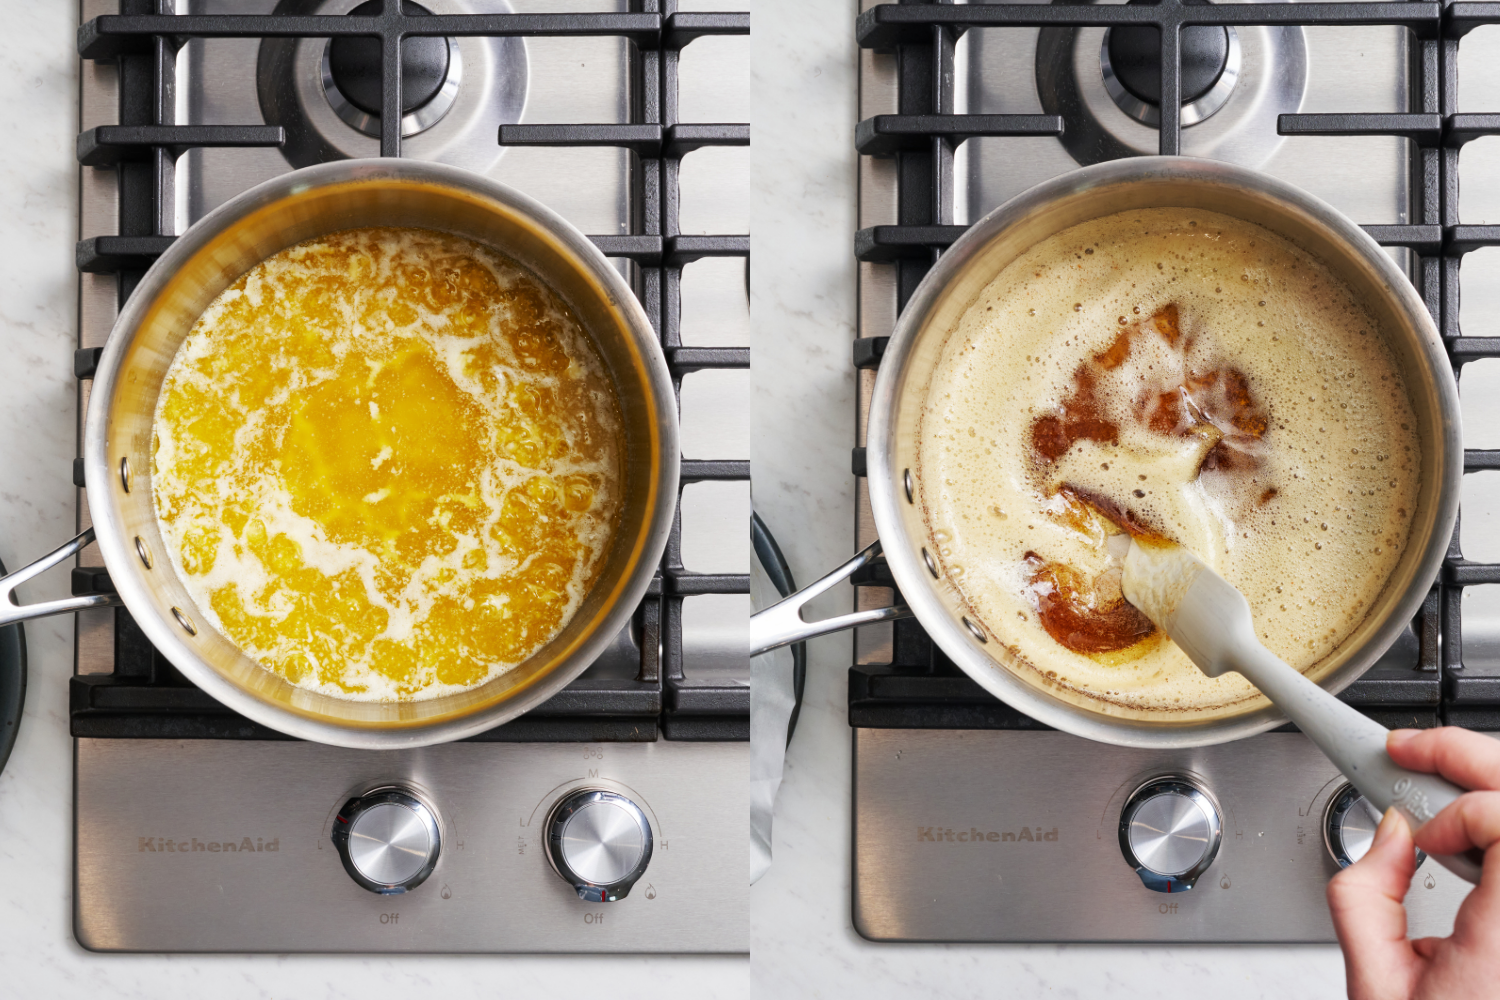
Add wet ingredients: Whisk in the milk and vanilla extract. Let cool until just warm before adding the egg and yolk. If the butter is too hot, the eggs may scramble. Whisk vigorously until very smooth and glossy. This helps create a nice thin and shiny crust on top.
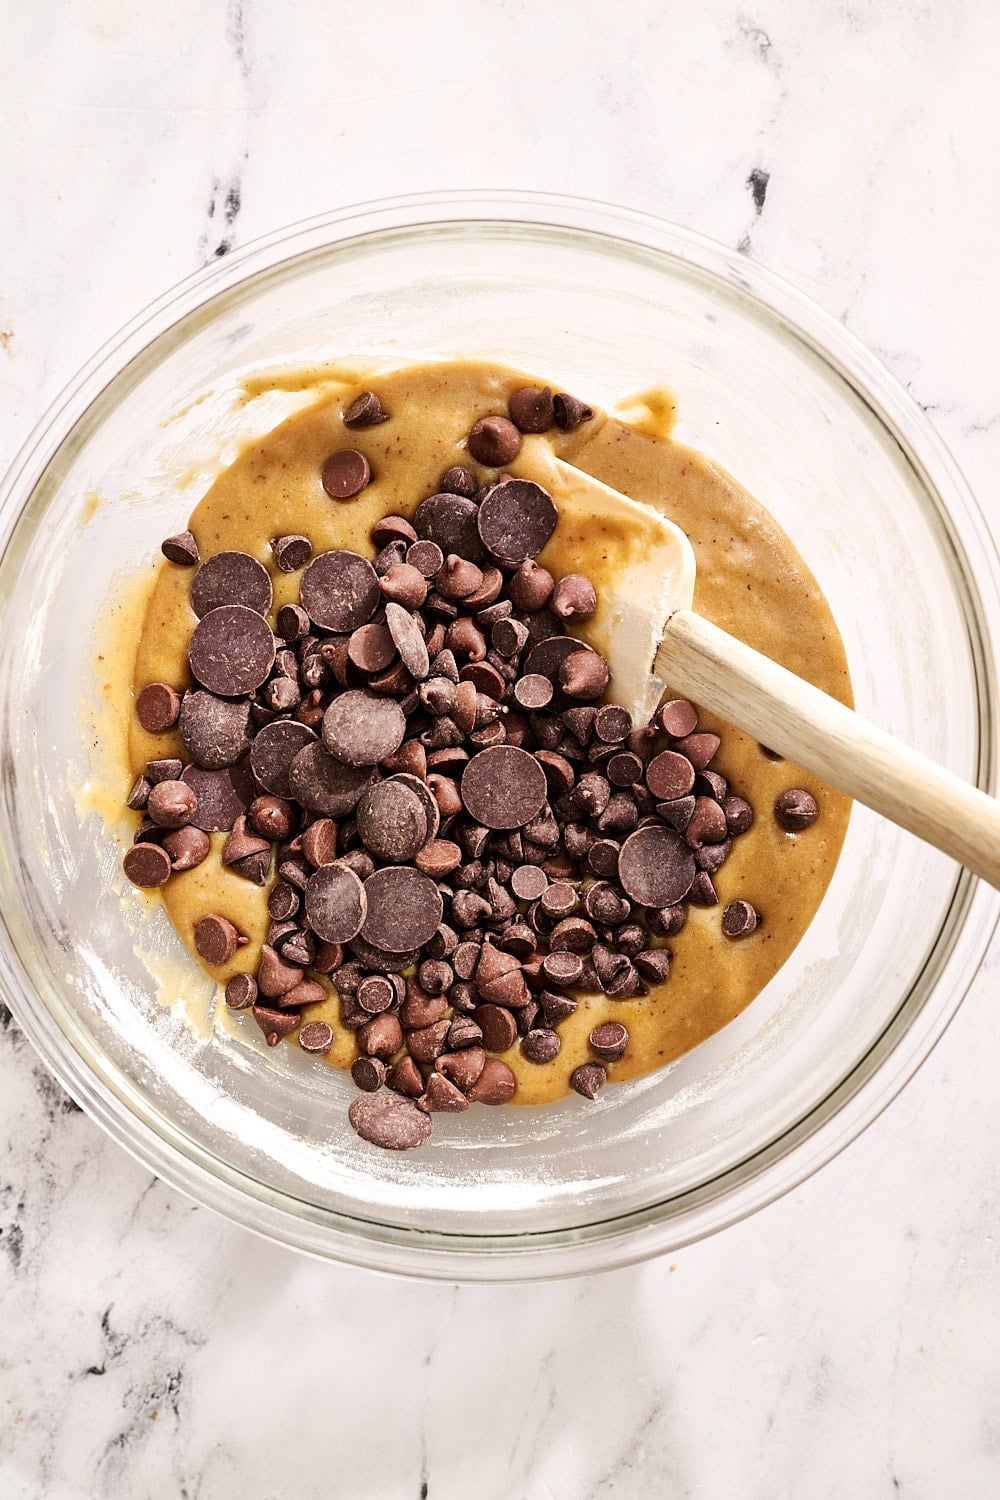
Add dry ingredients + chocolate: Stir in the flour, salt, and baking powder. Overmixing isn’t a concern here, if anything, a little extra gluten from stirring means chewier blondies. Stir in the chocolate, reserving some for topping.

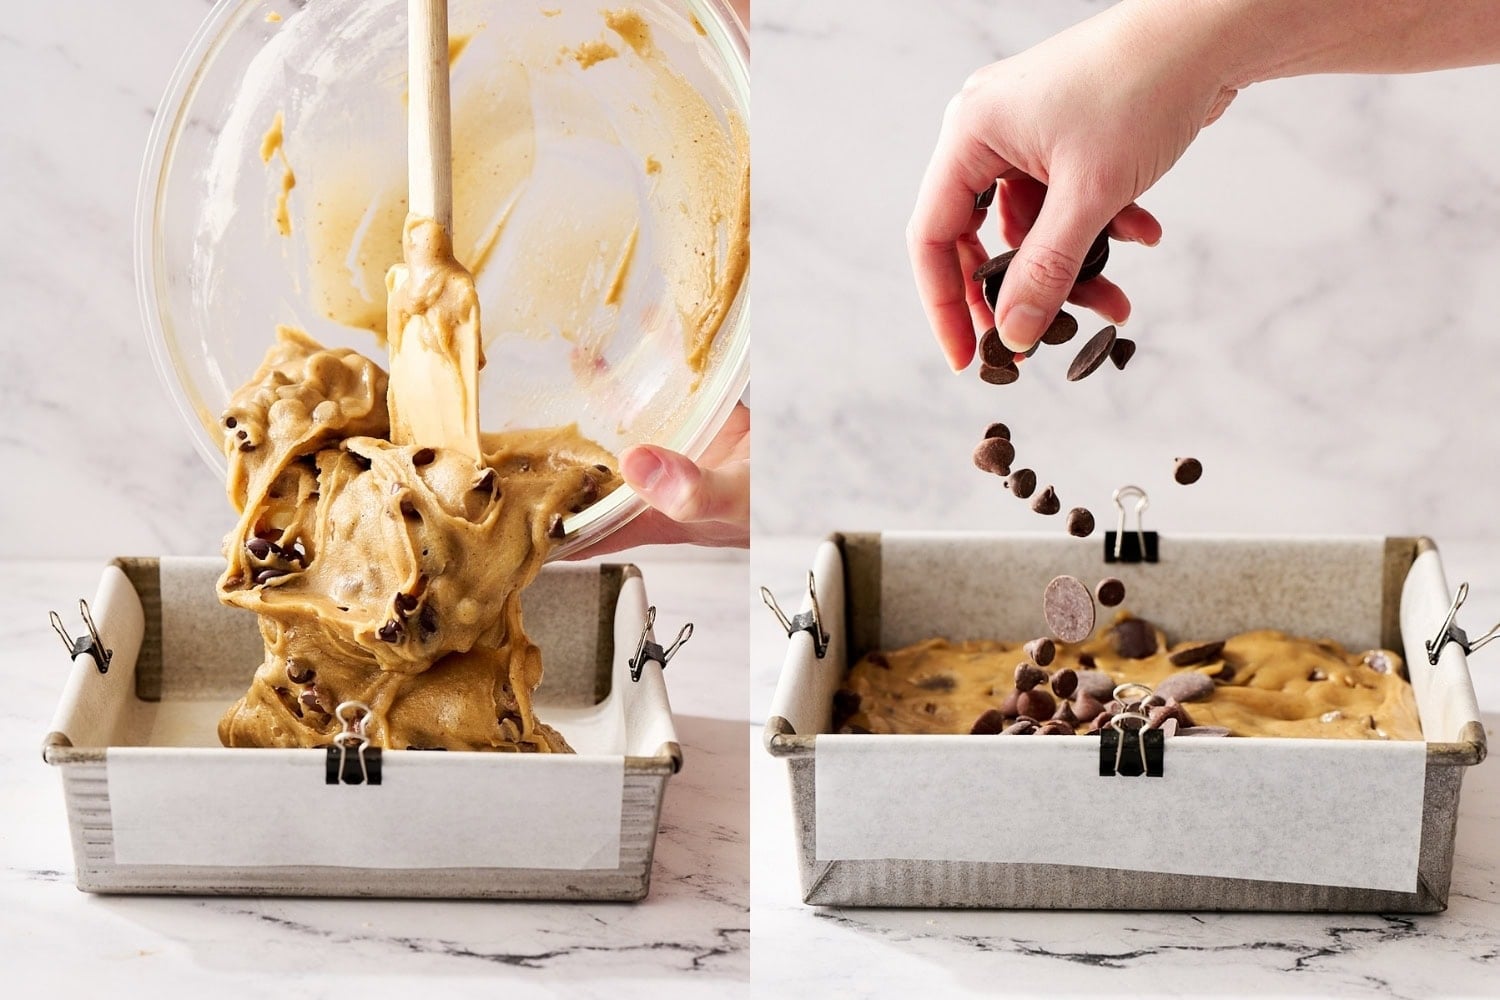
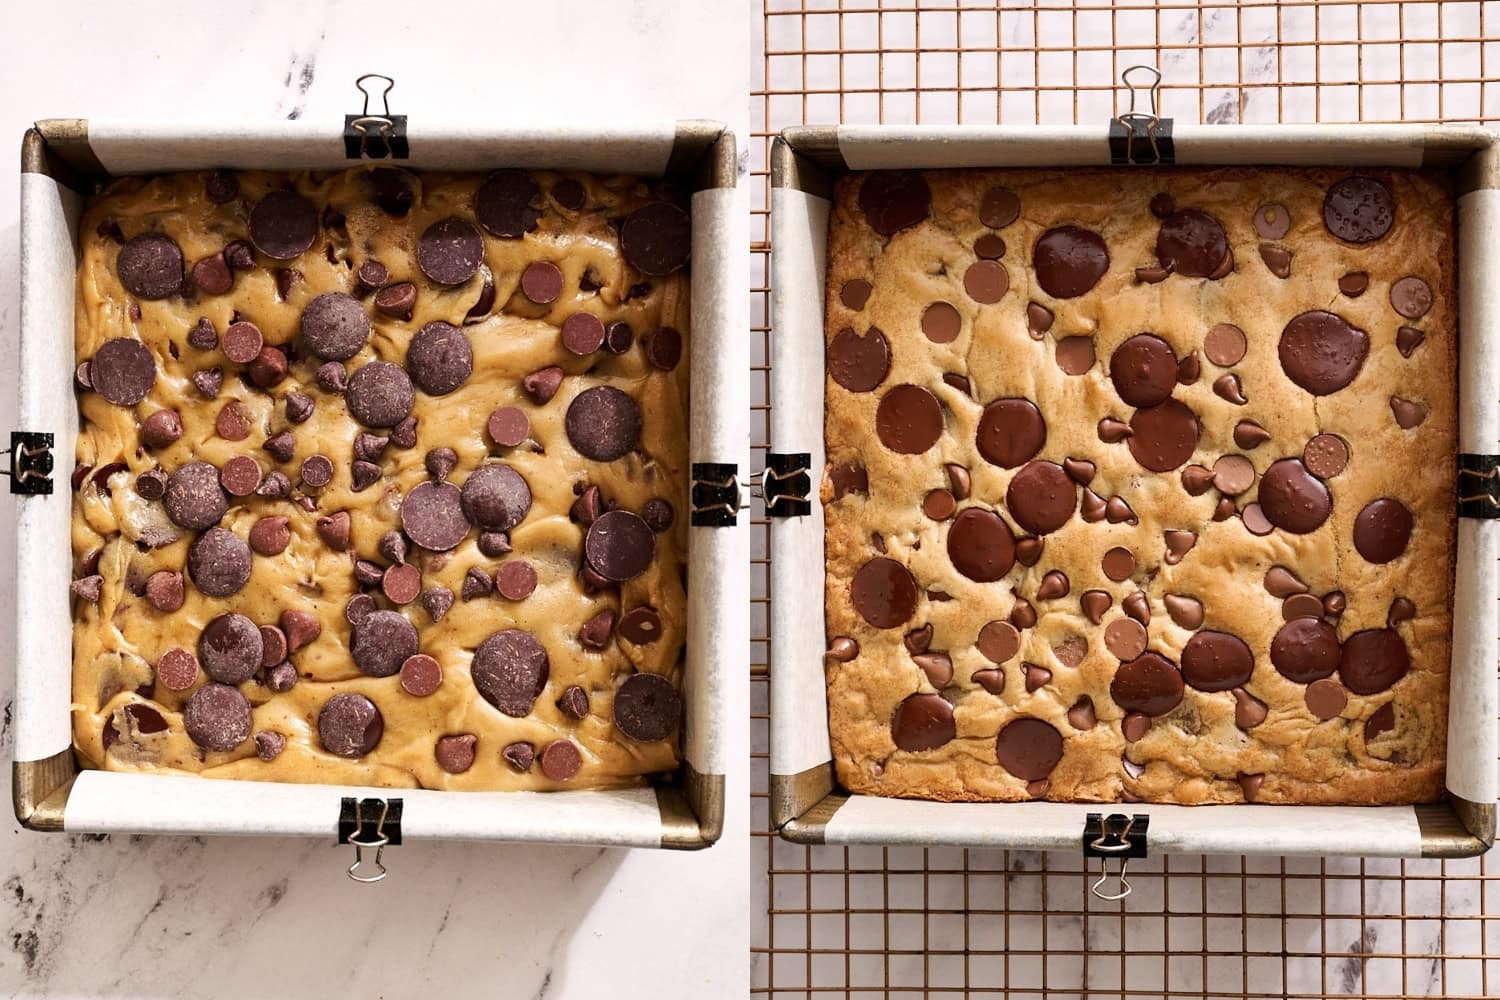
Bake: Spread the batter evenly into the prepared pan. Sprinkle with remaining chocolate and press in slightly. Bake until the edges are golden and set but the center still looks slightly soft:
- 25 minutes: Gooey center
- 27 minutes: More set center
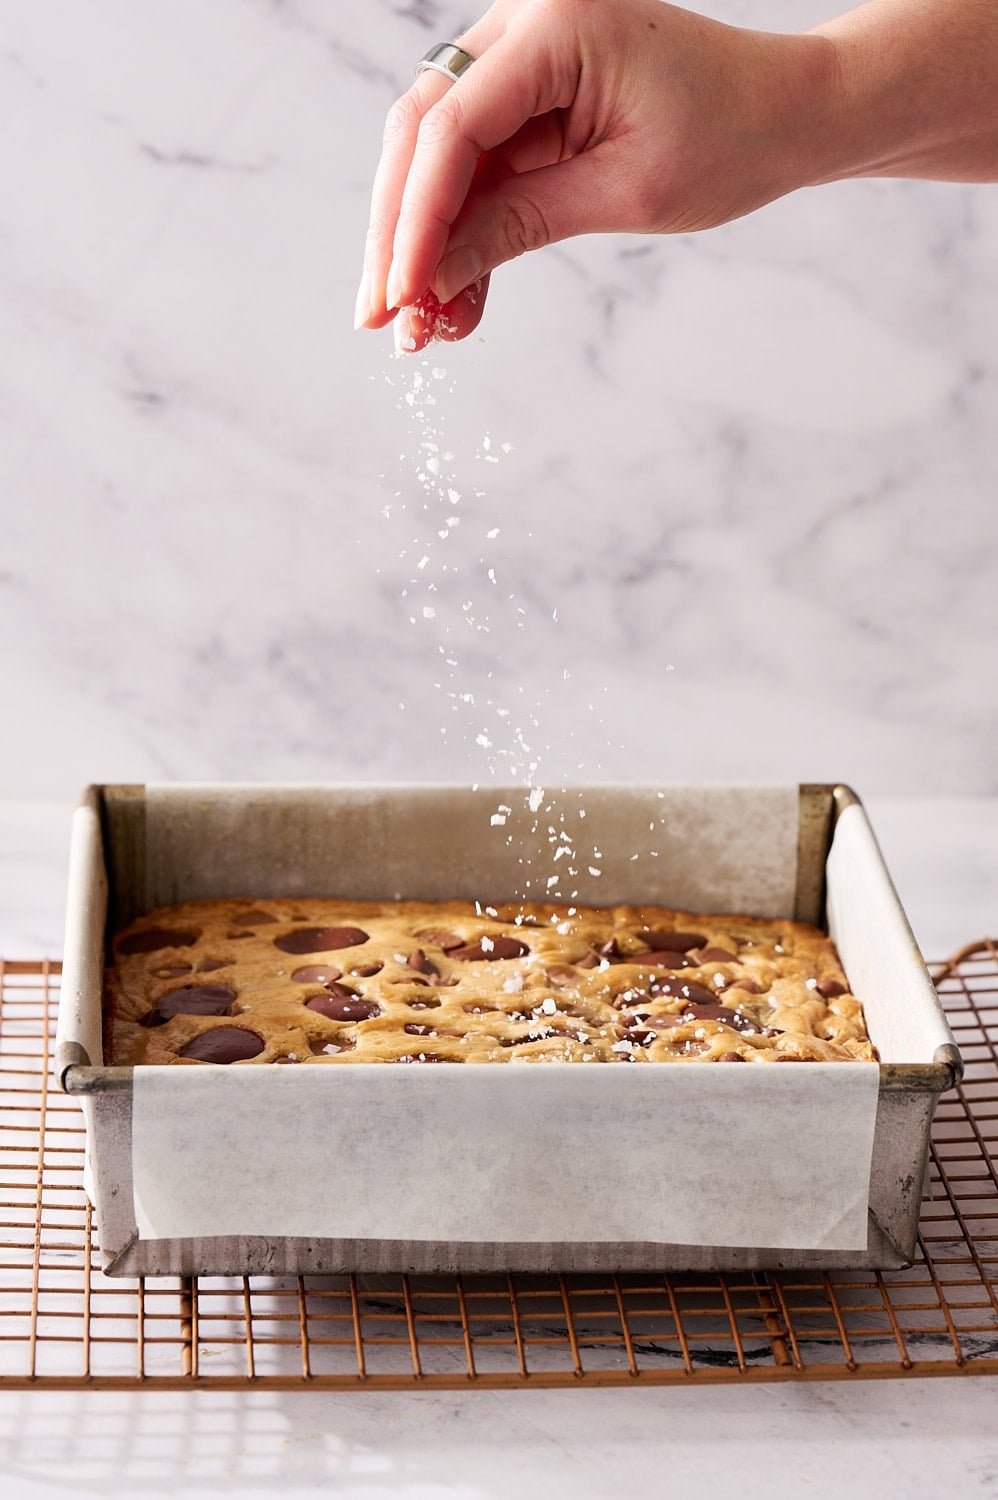
Glass & ceramic pans will take longer to bake. Sprinkle with sea salt immediately after they come out of the oven.
Cool and slice: Don’t try to cut these warm! They need the full cooling time to set up before they’re easily sliceable. They will also taste more flavorful and balanced once cooled.
Ingredient Notes
This recipe is straightforward, but since baking is a science, each ingredient was chosen carefully. Here’s why:
Butter: I like to use unsalted butter to control the salt content. If you only have salted, then reduce the amount of salt in the recipe to ½ teaspoon. No need to soften the butter since it’s being browned!
Dark Brown Sugar: The extra molasses adds moisture, creating a chewier texture that stays soft for days. Plus a deeper butterscotch flavor. Light brown sugar works in the same amount, but the flavor will be slightly less rich.
Granulated Sugar: Just a small amount balances the sweetness and overall flavor for this blondie recipe.
Milk: One tablespoon loosens the batter so it spreads evenly in the pan. Any kind works, even dairy-free (I tested with 2%).
Eggs: One whole egg plus one egg yolk adds richness and chew while creating structure. Cold eggs are fine. I have not yet found a reliable egg substitute for this recipe.
Flour: Measure carefully with a digital scale or use the spoon-and-level method. Too much flour will create dry or crumbly blondies.
Gluten Free: I haven’t yet tested this, but a 1:1 gluten-free flour blend should work. Add ¼ teaspoon xanthan gum if your blend doesn’t contain any binders.
Salt: Fine sea salt in the batter (table salt works too) and flaky sea salt (like Maldon) to finish. Feel free to omit the sprinkling of salt on top if you prefer, but I highly recommend it.
Baking Powder: Just a touch of baking powder gives a little bit of lift so these blondies stay fudgy, not cakey nor dense, gummy, or gooey.
Chocolate: Equal parts milk chocolate chips (Ghirardelli), semisweet chocolate chips (Ghirardelli), and bittersweet baking wafers (Guittard) or chips for maximum chocolate flavor. White chocolate chips, butterscotch chips, or nuts also work. Keep total mix-ins to 1 ½ cups.
Sprinkle of Science
I LOVE my USA pan. It yields perfectly square edges which satisfies my inner desire for everything to be neat and pretty.
Glass and ceramic conduct heat more slowly and unevenly, which often means longer bake times (5 to 15 minutes more) and a higher chance of under-baked or sunken center and dry, overbrowned edges.
Storage & Make ahead
Room Temperature: Store blondies in an airtight container for up to 3 days. For best texture, keep them unsliced until just before serving (less exposed surface area keeps them softer for longer).
Freezing: Blondies freeze beautifully! Freeze fully-cooled blondies in an airtight container for up to 2 months. Thaw at room temperature before serving, or gently warm them if you prefer a softer, just-baked texture.
FAQs
A light-colored metal pan works best for even baking. Glass or ceramic may be used, but they require a longer bake time and may result in underdone or even sunken centers. Learn more here.
I haven’t tested it yet, but a 1:1 gluten-free flour blend should work. Add ¼ teaspoon xanthan gum if needed.
Yes! Feel free to add chopped toasted walnuts or pecans in place of some or all of the chocolate.
Absolutely. In addition to nuts, butterscotch chips, peanut butter chips, or even chopped chocolate candy bars would be fun options. Keep total mix-ins to 1 ½ cups, with no mix-ins larger than about ¼-inch in size.
Yep! Simply double all ingredients and bake in a 9×13-inch metal pan, adding a few minutes to the bake time.
Email This Recipe
Enter your email, and we’ll send it to your inbox.
Ingredients
- 1 ½ sticks (170 grams) unsalted butter
- 1 cup (200 grams) dark brown sugar
- ¼ cup (50 grams) granulated sugar
- 1 tablespoon milk, any kind
- 2 teaspoons vanilla extract
- 1 large egg plus 1 egg yolk
- 1 ½ cups (191 grams) all-purpose flour
- 3/4 teaspoon fine sea salt
- ¼ teaspoon baking powder
- ½ cup (85 grams) milk chocolate chips
- ½ cup (85 grams) semisweet chocolate chips
- ½ cup (85 grams) bittersweet chocolate chips*
- Flaky sea salt, for sprinkling

Instructions
- Preheat the oven to 350°F. Line an 8 by 8-inch metal pan with foil or parchment paper, leaving an overhang for easy removal. Spray with nonstick cooking spray.
- In a medium stainless steel sauté pan set over medium heat, melt the butter. It should become foamy with audible cracking and popping noises. Cook, stirring occasionally, until it smells nutty and brown bits start to form at the bottom. Once the bits are amber in color, remove from heat and pour into a large mixing bowl, scraping in the brown bits.
- Add both sugars to the hot butter and whisk until combined. Whisk in the milk and vanilla. Let cool until just warm (so the eggs don’t scramble).
- Whisk in the egg and egg yolk vigorously until very smooth.
- With a rubber spatula, stir in the flour, salt, and baking powder. Stir in all the chocolate chips, reserving about ¼ cup total (43 grams) for topping.
- Spread the batter evenly into the prepared pan. Sprinkle remaining chips on top, pressing into batter slightly.
- For gooier blondies, bake until the edges are lightly golden but the center still has a slight jiggle, about 25 minutes. For firmer blondies, bake until the edges are deeper golden and the center is set, about 27 minutes.
- Note: If baking in a glass or ceramic pan, you will likely need to extend the baking time by at least 5 minutes.
- Place pan on wire rack and let cool completely before slicing and serving. Blondies can be stored in an airtight container at room temperature for up to 3 days.
Notes
More Blondie Recipes You’ll Love:
- Classic Blondies (One-Bowl)
- Peanut Butter S’mores Blondies (So nostalgic)
- Caramel Pecan Blondies (Incredibly gooey)
- Gingerbread White Chocolate Blondies (Save for Christmas)
This recipe was originally published in 2015 and updated with a complete recipe overhaul, baking tips, and new photos. Photography by Joanie Simon.


Another keeper for the recipe box! I didn’t know if this could compete with Tessa’s browned butter chocolate chip cookies (the G.O.A.T of chocolate chip cookies), but it does! A quicker version to throw together in a pinch.
Woohoo, we’re so happy to hear that! Your blondies look great!
Hi…recipe looks yummy. Do you have a video of this recipe somewhere? Love to try lemon Blondie’s can I use this recipe as well? Thank you 🙏🙏
Hi Prem! We don’t have a full step-by-step video yet. We also haven’t tried incorporating lemon into the recipe, but feel free to experiment!
These were incredibly easy to make-no waiting for butter to come to room temp. They were quick too. So delicious that I ate like 4 in one day. Thanks for the recipe!
Your recipes never disappoint, Tessa. These are a 10/10 and were the perfect Super Bowl treat served alongside vanilla ice cream. Unreal.
Thanks so much, Hope! 🙂
Why is it necessary to spray the pan if you already have parchment paper lining it?
Can this recipe be doubled for a 13×9 baking pan?
Yes! Just add a few minutes to the baking time 🙂
This recipe was amazing. I even messed it up, I missed the step to add the milk and they still came out great! I can’t wait to try again with the milk.
I am never disappointed by your recipes. When I need a delicious,semi foolproof dessert this is the very first place I check and our guests are always looking forward to the next gathering. I made the brown butter triple chocolate blondies minus 2 of the chocolates. We seem to be having a big snowstorm so there’s no store run. I used strictly semi sweet chips and they are pretty darned delicious. I can’t wait to try these with the other two chocolates.
Thanks so much for the lovely comment, Deb! We agree, these blondies are so versatile, and just one type of chocolate works perfectly in a pinch! So glad you enjoyed them, and we hope you stayed cozy and safe during the winter storm! 🙂
These are AMAZING. 15/10
Can this recipe be doubled, so it can be baked in a 9×13 pan? A 8×8 isn’t big enough for my family!!
Yep! Just double the recipe and add a few minutes to the baking time 🙂
Do you lift them out of the pan as soon as you take them out of the oven, or let them cool in the pan?
Great question! We kept them in the pan to cool completely before slicing. I just updated the recipe to include that!
Yuuuuummmm!! I have made this recipe probably a dozen times, and I get rave reviews each time. Thank you for the awesome recipe.