


Tessa’s Recipe Rundown
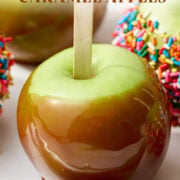
Taste: I’ve never had a tastier Caramel Apple in my life. The caramel is outrageously delicious – rich, perfectly sweet, and full of flavor.
Texture: Crunchy, crisp, juicy apple and perfectly slightly-sticky caramel.
Ease: The caramel takes some patience, but it’s totally doable.
Pros: SO fun to make and decorate. And these Caramel Apples are perfect for gifting at parties or during the holidays. Bonus, they can be made ahead of time!
Cons: It can be frustrating if the caramel isn’t setting properly after dipping the apple, so make sure to read my tips below on how to ensure the caramel sticks.
Would I make this again? Absolutely.
This post may contain affiliate links. Read our disclosure policy.


I’ve honestly never been a huge Caramel Apple fan. That is… until we created this recipe! It took MANY test batches to get the recipe just right.
And oh my word. This is the absolute BEST Caramel Apples recipe I’ve ever tried.
Team HTH worked tirelessly to perfect the caramel so that it’s ultra thick and sticks to the apple perfectly. No artificial-tasting store-bought caramels here!
The apples themselves are ultra juicy and crisp. The homemade caramel tastes buttery, perfectly sweet and salty, and ultra flavorful. Basically, fall dessert perfection.
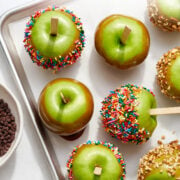
What I love most about these gourmet Caramel Apples is they’re just SO FUN. You can pick whatever toppings you’d like (I’ve listed lots of topping ideas below!) and it’s so fun to get kids involved with the dipping and decorating.

They’re especially cute when placed on my Halloween Charcuterie Board, along with my Halloween Cookies and spiderweb-decorated Halloween Brownies.
These easy Caramel Apples are a perfect treat for gifting during the holidays, too.
Check out my tips below – a couple may surprise you!

Sprinkle of Science
How to Make Caramel Apples
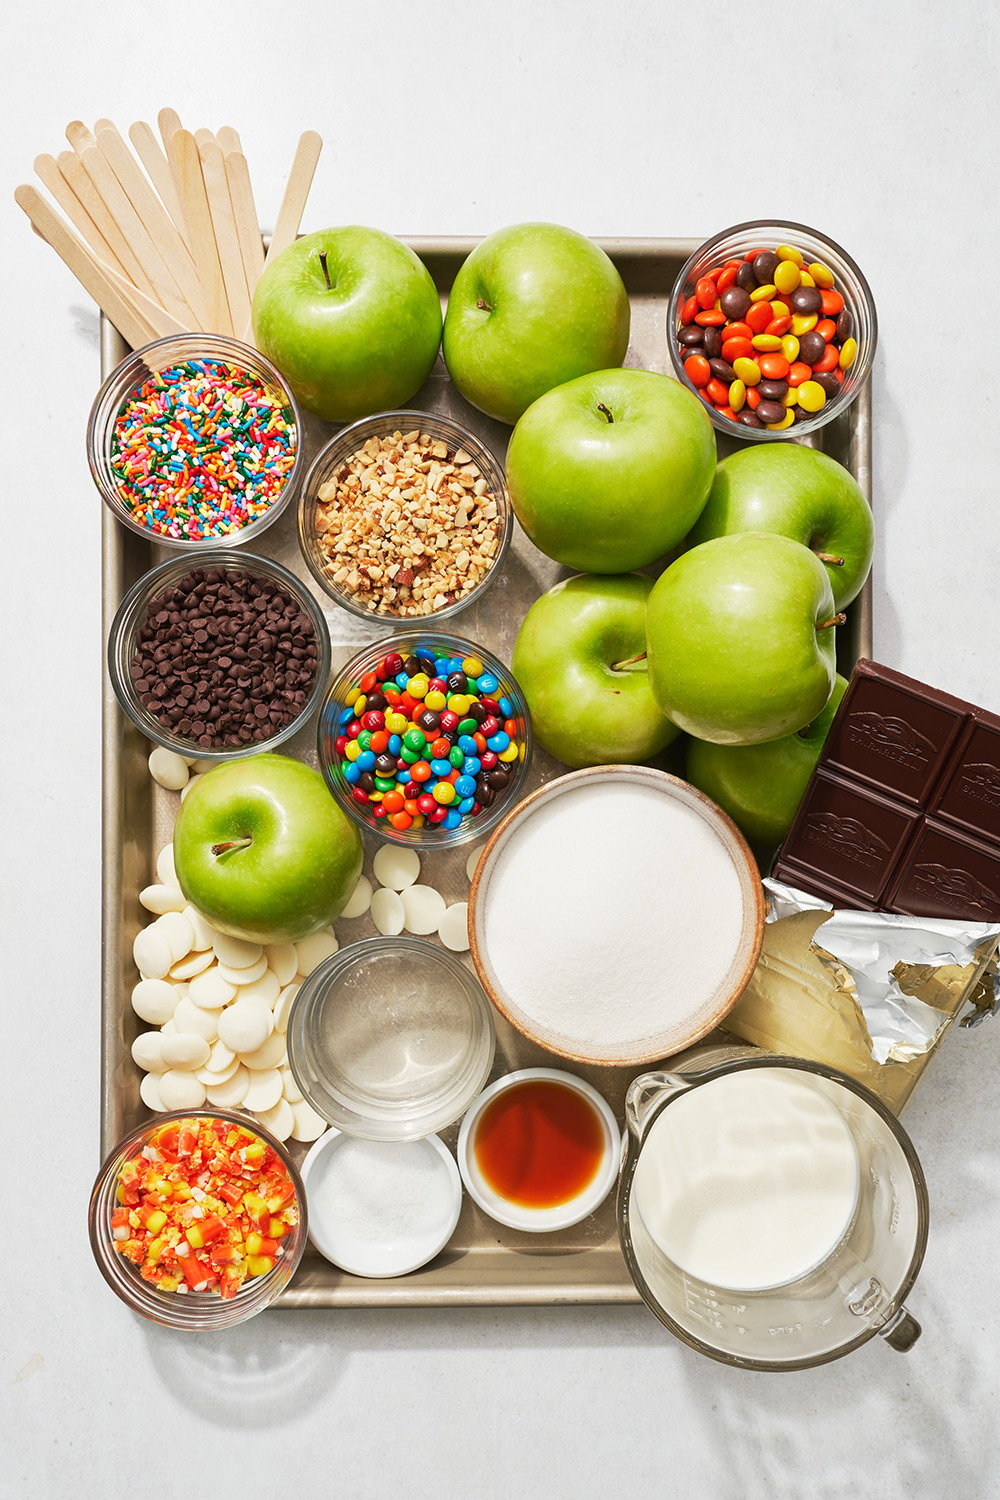
Ingredients for Caramel Apples
- 6-7 apples – The number of apples needed may vary due to differences in size. Be sure to refrigerate the apples until cold.
- Granulated sugar – The base for our caramel!
- Water – This is a “wet caramel,” meaning we use water to help melt the sugar.
- Heavy cream – This is necessary to create a luscious caramel coating. Half and half or milk will not work here.
- Vanilla extract – For flavor.
- Kosher salt – Also for flavor.
- Toppings – Anything you would like to use for topping/coating your caramel apples!
What Type of Apples for Caramel Apples?
- I recommend using Granny Smith apples, which are a little tart and pair perfectly with the sweet, rich, buttery caramel.
- Honeycrisp apples also work well.
- Feel free to use your favorite apple variety, if preferred.
- For perfectly pretty caramel apples, try to find apples without any soft spots or bruises on them.
Homemade Caramel for Caramel Apples
There are two basic methods of making caramel: wet and dry. The basic difference between the two methods is water. Essentially both methods are heating sugar, then adding fat (typically cream and/or butter); but the wet uses water to dissolve the sugar faster.
Wet caramel can more easily crystallize on the sides of the pan, which is disastrous for your caramel, so be careful to mix gently to avoid too much splashing. Keep a silicone pastry brush and a small bowl of water nearby – if you do start to notice splashy bits hardening on the sides of your saucepan, you can brush them away with the wet pastry brush, and avoid the crystalized bits ending up on your caramel apples!
Why Did My Caramel Seize?
If too many bits of sugar get stuck to the side of the pan, they will harden and can cause the caramel to seize or become gritty or grainy when you add the cream. Prevent this by using a silicone pastry brush dipped in a small bowl of water to brush away any pesky crystallization that starts to occur.
How to Fix Seized Caramel
Crystallized caramel sauce can usually be rescued! Just melt the chunks of hardened caramel back into the sauce over a very low heat, then strain with a fine mesh strainer before using. It may not set up correctly to coat the apples, but it will still taste great poured over sliced apples or vanilla ice cream.
Why Do My Caramel Apples Have Bubbles?
Sometimes it just happens. It’s no biggie. Your caramel apples will still taste perfect! However, if you prefer to prevent them, I have a couple tips:
- Prevent your apples from releasing gasses that cause bubbles by soaking in hot water. Instructions on how to do this are in the recipe.
- When you’re making your caramel, be sure not to stir too vigorously. While stirring the caramel is necessary to prevent the caramel from scorching on the bottom of the pan or crystallization forming on the sides of the pan, you want to be sure to stir continuously but gently, to prevent bubbles from forming.
- If all else fails, and you still have some bubbles forming, coat the caramel apple in chocolate, crushed nuts, candies or sprinkles, to hide the bubbles (and increase the fun)!
Tools for Making Caramel Apples
- The right saucepan. Make sure you’re using a light-colored stainless steel pot with a heavy duty base. This is important for two reasons. Firstly, it conducts heat appropriately and will ensure the caramel cooks evenly. Secondly, the light color will help you be able to tell when the sugar has cooked to the right amber color, rather than too dark or too light because you couldn’t tell in a dark pan! Additionally, the high temperature of caramel may damage some nonstick coatings.
- A candy thermometer. This recipe requires specific temperatures to be reached before continuing to the next step and adding other ingredients, so it’s really important to use a candy thermometer for this recipe to eliminate any guesswork.
- A silicone or stainless steel whisk, to mix the hot sugar mixture. Don’t use something plastic that can melt! I love this silicone whisk from OXO.
- A silicone pastry brush. The brush is dipped in water and used to wipe down the sides of the saucepan where any sugar syrup has splashed up. This will help prevent crystalized bits from ending up on your caramel apples. Don’t worry if some of the water drips down into the cooking caramel – that’s okay!
- Popsicle sticks. Try these adorable reusable popsicle sticks (which come in a variety of colors and designs!) or these classic, plain cake pop sticks. Bamboo sticks work well here, or to get even more festive, these reusable branch-style sticks would be so fun!
- Parchment paper-lined baking tray. Be sure to line your baking sheet with parchment paper. Wax paper or foil will stick to the caramel, and make it a real pain to remove. Do not place the wet caramel apple on a baking sheet without parchment paper; you’ll lose half your caramel getting it off the tray!
How Do You Keep Caramel From Sliding Off Apples?
- Make sure you get all the wax and coatings off your apples before beginning (see #3 just below). The wax coating that covers most apples will prevent the caramel from adhering to the apple, and the caramel will slide right off.
- Insert a popsicle stick into each apple, then bring a large pot of water to a boil (the water in the pot should be deep enough to submerge an apple).
- Once the water has come to a boil, turn off the heat. Submerge each apple for 15-20 seconds while holding onto the popsicle stick, being careful not to touch the hot water or pot. This will remove any wax that may remain on the apples, and allow the caramel to properly adhere to each apple.

Do I Have to Use a Candy Thermometer?
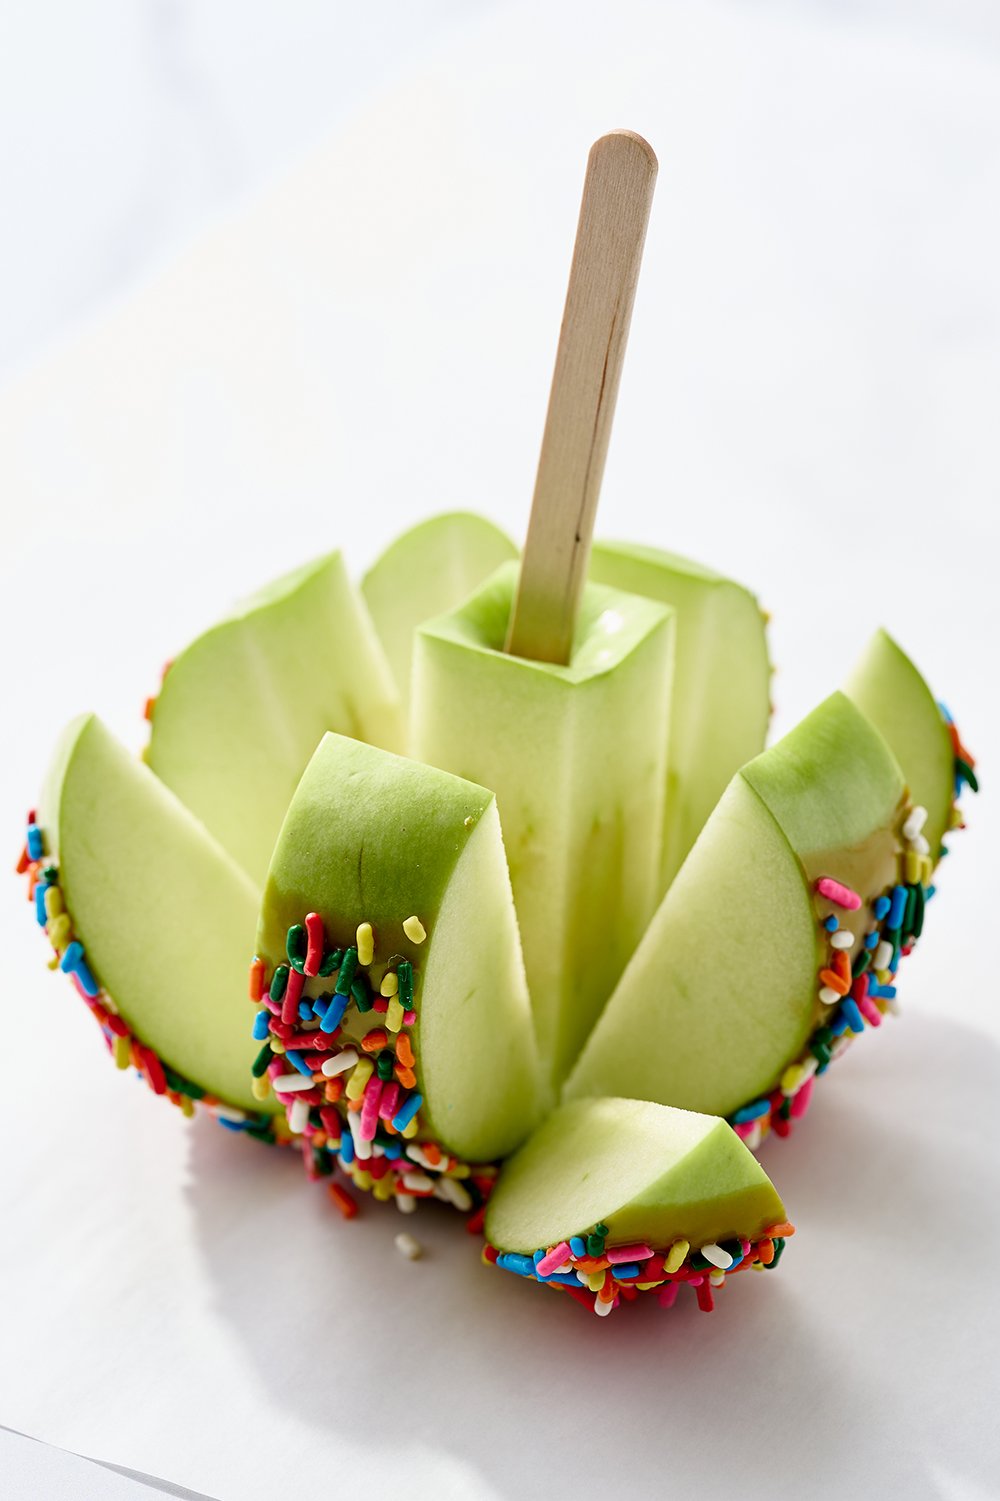
Yes. This recipe requires specific temperatures to be reached before continuing to the next step, so it’s really important to use a candy thermometer and not just eyeball it. Cook it too long and you’ll create caramel apples that are rock-hard with a glass-like candy coating. Don’t cook it long enough, and it will stay as a sauce and not adhere to the apples at all. However, if you did give this a try without a candy thermometer and it didn’t go well, don’t despair – just slice the apples up and enjoy as more of a casual caramel dipping experience!
Caramel Apple Topping Ideas:
- Drizzle with melted chocolate or white chocolate
- Melted peanut butter
- Chopped nuts (pecans or peanuts)
- Chocolate chips (regular or mini)
- Sprinkles (regular or Halloween sprinkles!)
- Crushed Oreos
- Reese’s Pieces
- Shredded coconut
- M&Ms or mini M&Ms
- Chopped candy bars (Butterfinger or Reese’s)
- Mini marshmallows
How Long Do Caramel Apples Last?
Stored correctly in an airtight container, or individually wrapped well in plastic wrap, and uncut, these caramel apples will last at least a week. They will still taste as fresh as the day they were made for at least a week, if not a little longer.
Can you Freeze Caramel Apples?
No, I wouldn’t recommend that. Uncooked apples don’t tend to freeze well, and the caramel would likely go super weird if you tried!
Gifting Caramel Apples
These make terrific gifts for teachers, friends, family or neighbors. Wrap in an adorable Cellophane Bag or use these fantastic Caramel Apple Boxes to easily gift these caramel apples!
More Apple Dessert Recipes You’ll Love:
Email This Recipe
Enter your email, and we’ll send it to your inbox.
Equipment
- Popsicle Sticks for Apples
- Medium heavy-duty saucepan
Ingredients
For the caramel apples:
- 6-7 apples (such as Granny Smith or Honeycrisp), refrigerated until cold (amount of apples used may vary due to differences in size)
- 1/2 cup (115 grams) water
- 1 ⅓ cups (255 grams) granulated sugar
- 1 teaspoon kosher salt
- 1 cup + 2 tablespoons (255 grams) heavy cream, cold
- 1 teaspoon vanilla
Topping ideas:
- Melted chocolate
- Reese's Pieces
- M&Ms
- Oreos
- Rainbow sprinkles
- Mini chocolate chips
- Chopped nuts
Instructions
Prepare the apples:
- Line a baking sheet with parchment paper. Over high heat, bring a large pot of water to a boil (the water should be deep enough in the pot to submerge an apple). As the water heats, remove the apple stems from each apple and insert a popsicle stick about 3/4 down into each apple. Once the water has come to a boil, turn off the heat. Submerge each apple for 15-20 seconds while holding onto the popsicle stick. This won’t cook the apples at all, but will remove any wax on the apples, helping the caramel adhere to the apples. Place the apples on the parchment-lined baking sheet.
- Once they're just warm to the touch, thoroughly dry the apples with a paper towel. Store in the fridge until the caramel is ready for dipping.
Make the caramel:
- In a medium stainless steel heavy-duty saucepan, combine water, sugar, and salt over medium heat. Stir frequently with a whisk until the sugar has dissolved completely. The mixture should begin to boil after approximately 4 minutes.
- Once the mixture has come to a boil, attach a candy thermometer to the pan, making sure it’s not touching the bottom of the pan. Let the mixture simmer without stirring until the syrup has become dark brown in color and the temperature is about 315°F (8-10 minutes).
- Carefully add the cold heavy cream to the pan. The mixture will begin to pop and bubble at this point. Constantly stir the mixture with a silicone whisk until the caramel reaches 250°F (about 7-9 minutes).
- Remove caramel from heat and carefully stir in the vanilla. The mixture will bubble slightly as the vanilla is added. Be careful not to stir too much as this can create air bubbles in the caramel. Carefully transfer the caramel to a heat-resistant bowl. Cool for 5-10 minutes, or until just warm.
- As the caramel cools, prepare your additional toppings, if using.
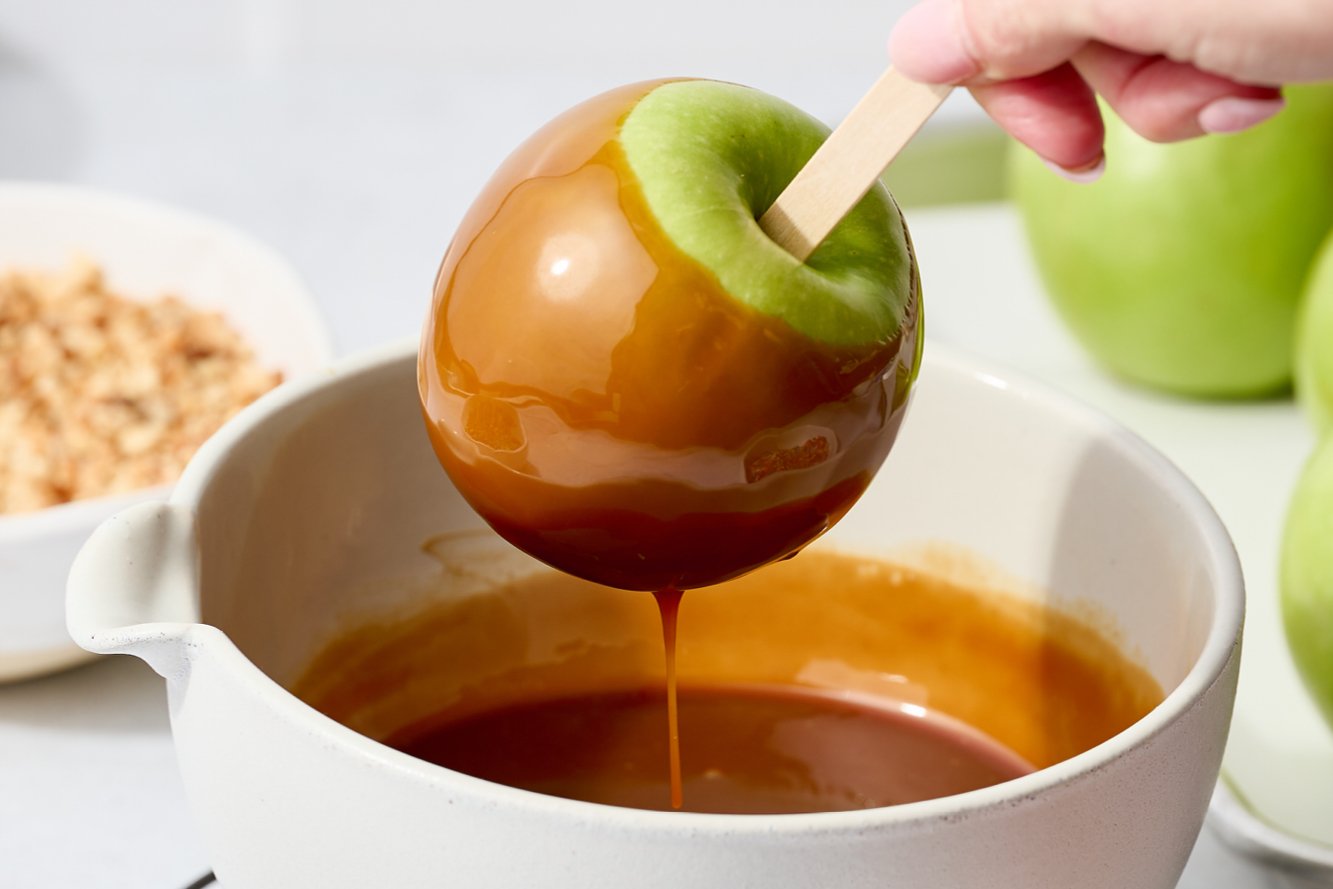
Dip the apples:
- Holding the caramel apple stick, quickly dip the cold apples one at a time into the just-warm caramel, tilting the apple as needed to coat all sides of the apple. Let the excess caramel fall off by either swirling the apple around or gently scraping the bottom of the apple against the edge of the bowl. Place the apple back on the parchment-lined sheet tray to fully set. Repeat with the remaining apples.
- If you wish to add additional toppings (such as nuts, crushed Oreos, sprinkles, etc.), immediately roll the freshly-dipped apples in the toppings after coating in caramel, as the caramel will set quickly. If you’d like to dip your caramel apples in chocolate, allow 10 minutes for the caramel to fully set before dipping in or drizzling with chocolate.
- If at any point you notice your caramel beginning to thicken (the cold apples can cool the caramel quickly), reheat in the microwave for about 10 seconds before dipping the remaining apples.
- Allow caramel apples to fully set. If not enjoying immediately, store the apples wrapped individually in plastic wrap in the fridge. Apples can be stored in the fridge for up to 1 week, tasting just as fresh as the day they were made. Allow to sit at room temperature for about 10 minutes before enjoying.
Notes
This post was originally published in 2022 and has been updated with additional tips. Photos by Joanie Simon.


After dipping the apples, will the caramel harden enough to completely dip in chocolate afterwards?
Hi Jaime, so sorry I’m just seeing this now! Yes, once the caramel sets, you can dip them completely in chocolate 🙂 They are delicious that way! Here’s a great video showing ways to decorate them covered in chocolate, if you’re interested.
Can this be used for large batches of caramel apples?
I don’t see why not!
I was looking for a chewy soft type of caramel and this one turned out to be more of a crunchy toffee. I have made candy and caramel many times and followed the recipe exactly. The taste wasn’t bad, it’s just not a soft caramel I typically associate with caramel apples. I should’ve known when the temp was above 275 degrees and heading into hard candy stage. I was able to chip it off the 3 apples so down just one apple wasted since you can’t bite into it. Would make a great toffee style candy though! Thanks for the recipe 🙂
Thanks so much for sharing your feedback, Areta! This recipe was designed to create a slightly soft caramel that doesn’t stick much to your teeth. Once the cold heavy cream is added to the hot syrup mixture, the temperature will drastically drop, and from there, it’s key to only heat it to 250°F. This ensures a smooth, soft caramel that’s perfect for dipping apples. Is it possible a small step was missed as you made the caramel? That would explain the firmness. I’d love for you to give it another go when you have time! Please keep us posted on how it turns out.
Thank you very much for the suggestion is dipping apples to remove wax!
So happy that tip was so helpful, Ladonna! 🙂
how long can these be stored?
Hi Michelle! Tessa talks about this in the tip box (above the recipe). Check out the answer to your question, along with countless other great baking tips for this recipe, there! Let us know what you think of these caramel apples once you give them a try! 🙂
Solid recipe, however, there are some issues. 250 F is great for sea-level, but there’s no mention of altering the temperature for elevation. Where I live water boils at 9 degrees lower than at sea level, so I need to lower my candy temp by about 9 degrees. 250 would lead to very, very hard caramel for me. Also, the boiling method leaves the apple less than crisp around the outside. One thing that works for me is just taking a textured paper towel and giving each apple a good rub down. Works every time to keep caramel from slipping off.
Love the tip on how to keep the caramel on the apple. That was always my biggest problem in the past.
Glad it helped, Kay!