


Tessa’s Recipe Rundown
Taste: This charcuterie board is filled with delicious treats that will be loved by both kids and adults. Plus lots of fresh cheeses, meats, and fruits! There’s something for everyone here.
Texture: We’ve got a variety of textures on this board from chewy brownies, crunchy green apples, crisp pickles, and tender cheeses.
Ease: So easy since most of this charcuterie board just requires assembling.
Pros: Perfect for serving to friends and family. And the CUTEST Halloween appetizer.
Cons: None.
Would I make this again? Yes – you’ll never get tired of this since you can make it differently every time!
This post may contain affiliate links. Read our disclosure policy.

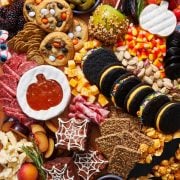
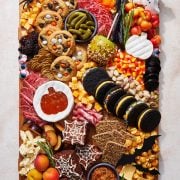

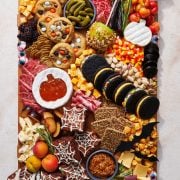
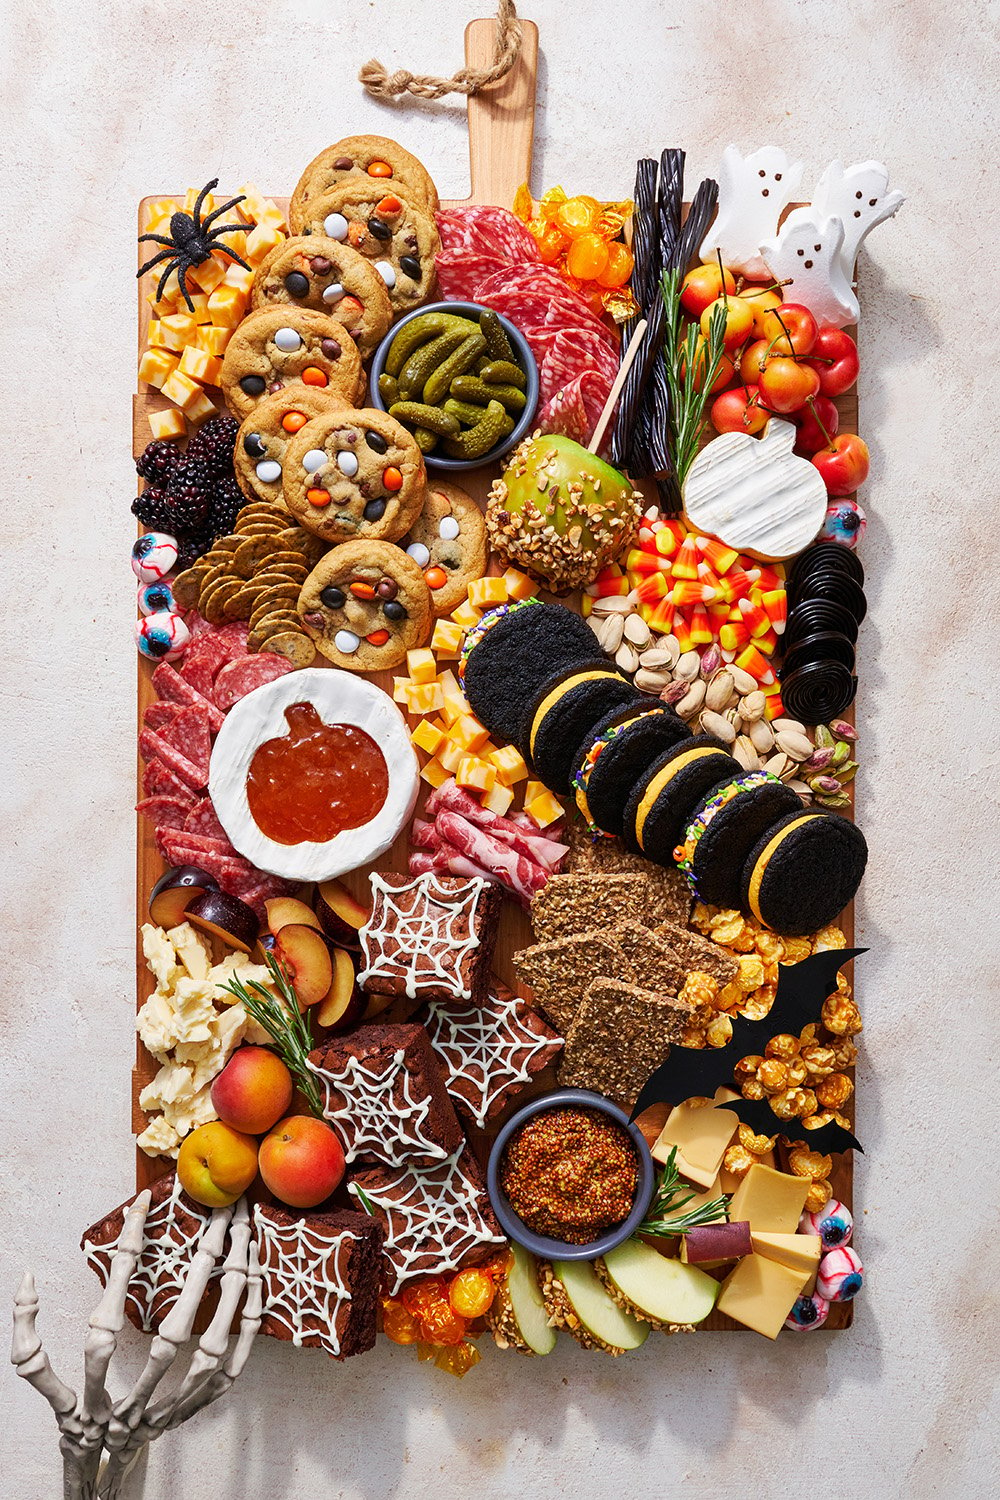
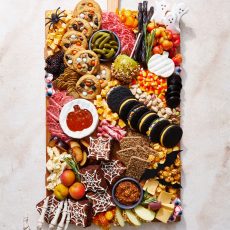
Charcuterie Boards are pretty dang impressive on their own, so this spooky Halloween Charcuterie Board might just be the cutest thing I’ve seen in a while. It combines sweet AND savory!
This easy cheese board is sure to be a hit at your Halloween party with friends or family. In fact, you could even make it a team effort. Ask your foodie friends to each bring over a homemade Halloween treat or their favorite meat + cheese and work on assembling and decorating it together!
The Halloween cheese board is easily customizable, so you can add as many sweets or savory items as you’d like. Make it as big or as small as your party requires.
Go crazy picking out your favorite cheeses, meats, crackers, candies, and any spooky decor you may have for this appetizer tray.

Sprinkle of Science
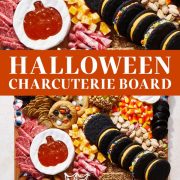
How to Make A Halloween Charcuterie Board
What is Charcuterie?
Charcuterie actually dates back to the 15th century in France. It’s the way meats were preserved long before refrigeration was invented and is a term specific to a branch of cooking devoted entirely to prepared meat products. A person who practices charcuterie (yes, it’s a thing!) is called a “charcutier”, which means “pork butcher”. Charcuterie typically includes specialty meats sold in a delicatessen-style shop, also known as a Charcuterie.
The art of charcuterie has made a huge comeback recently – and for good reason! Nowadays, the term Charcuterie typically refers to an assortment of meats paired with fruit, cheese, breads, sauces, and hand-held desserts. Charcuterie platters are incredibly easy to make and can easily be dressed up or down and kept budget-friendly by keeping it small, or going all out with a massive spread! I love to hit up Trader Joe’s to score some affordable yet delicious meat, cheese, and pairing options.
What to Put on Your Halloween Halloween Charcuterie Snacking Board
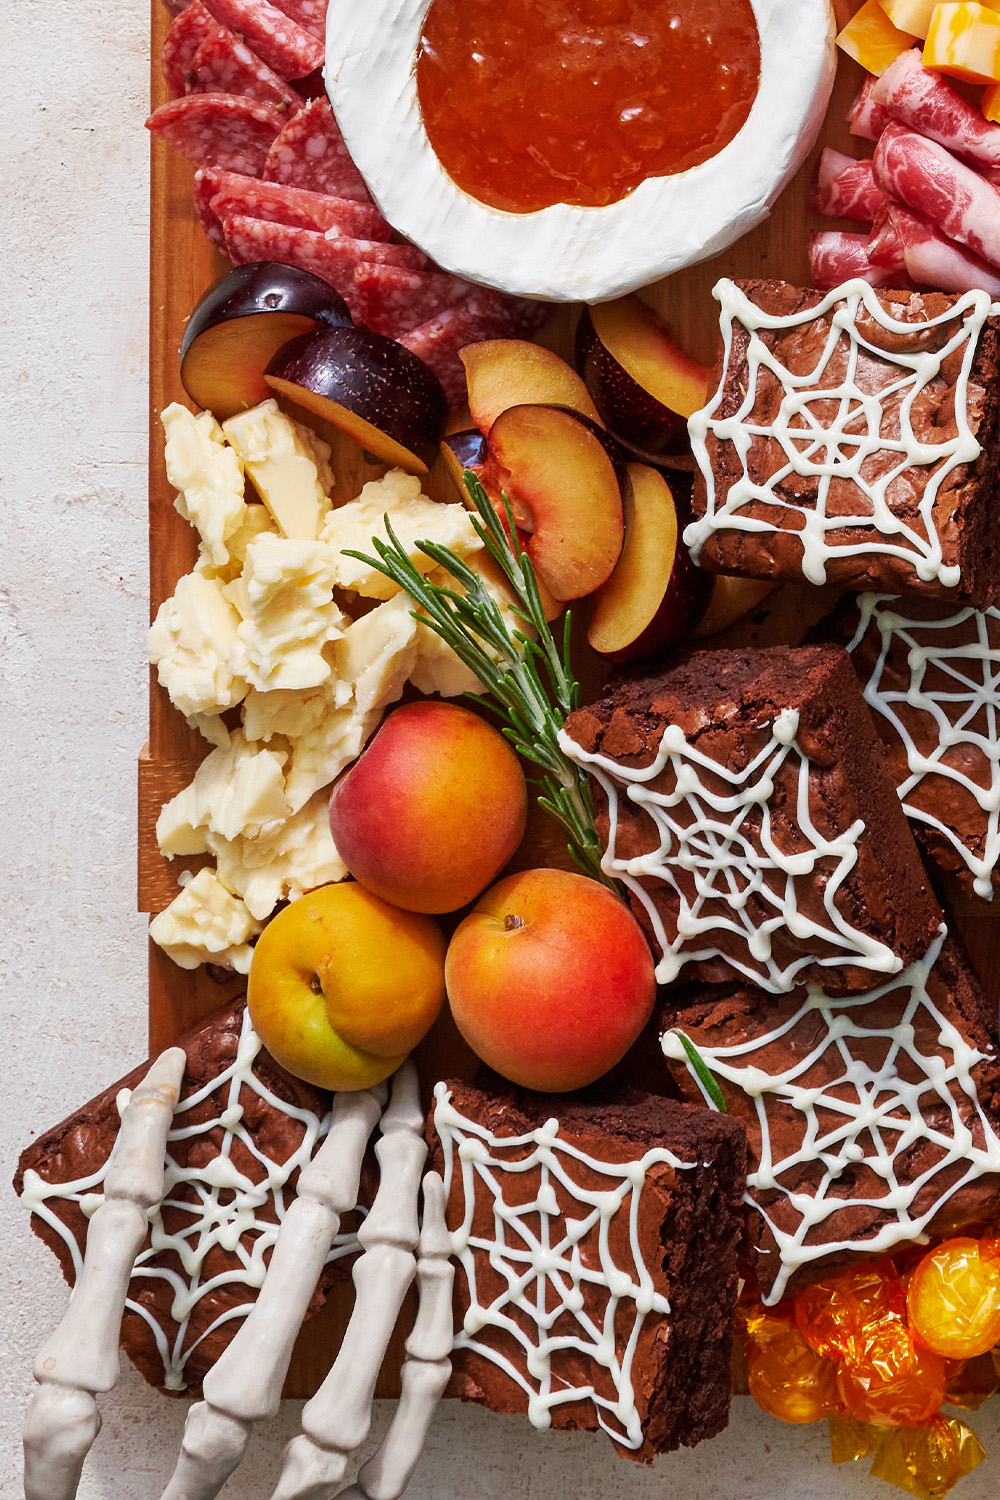
We used an assortment of cheeses, meats, pickles, veggies, and crackers, as well as taking a few of my go-to recipes and giving them a Halloween twist (recipes linked below). The beauty of Charcuterie is there are no rules, so add whatever looks amazing to you and mix it up to suit everyone’s tastes! Your family will be goblin these treats up all night – bone appetit! 😉
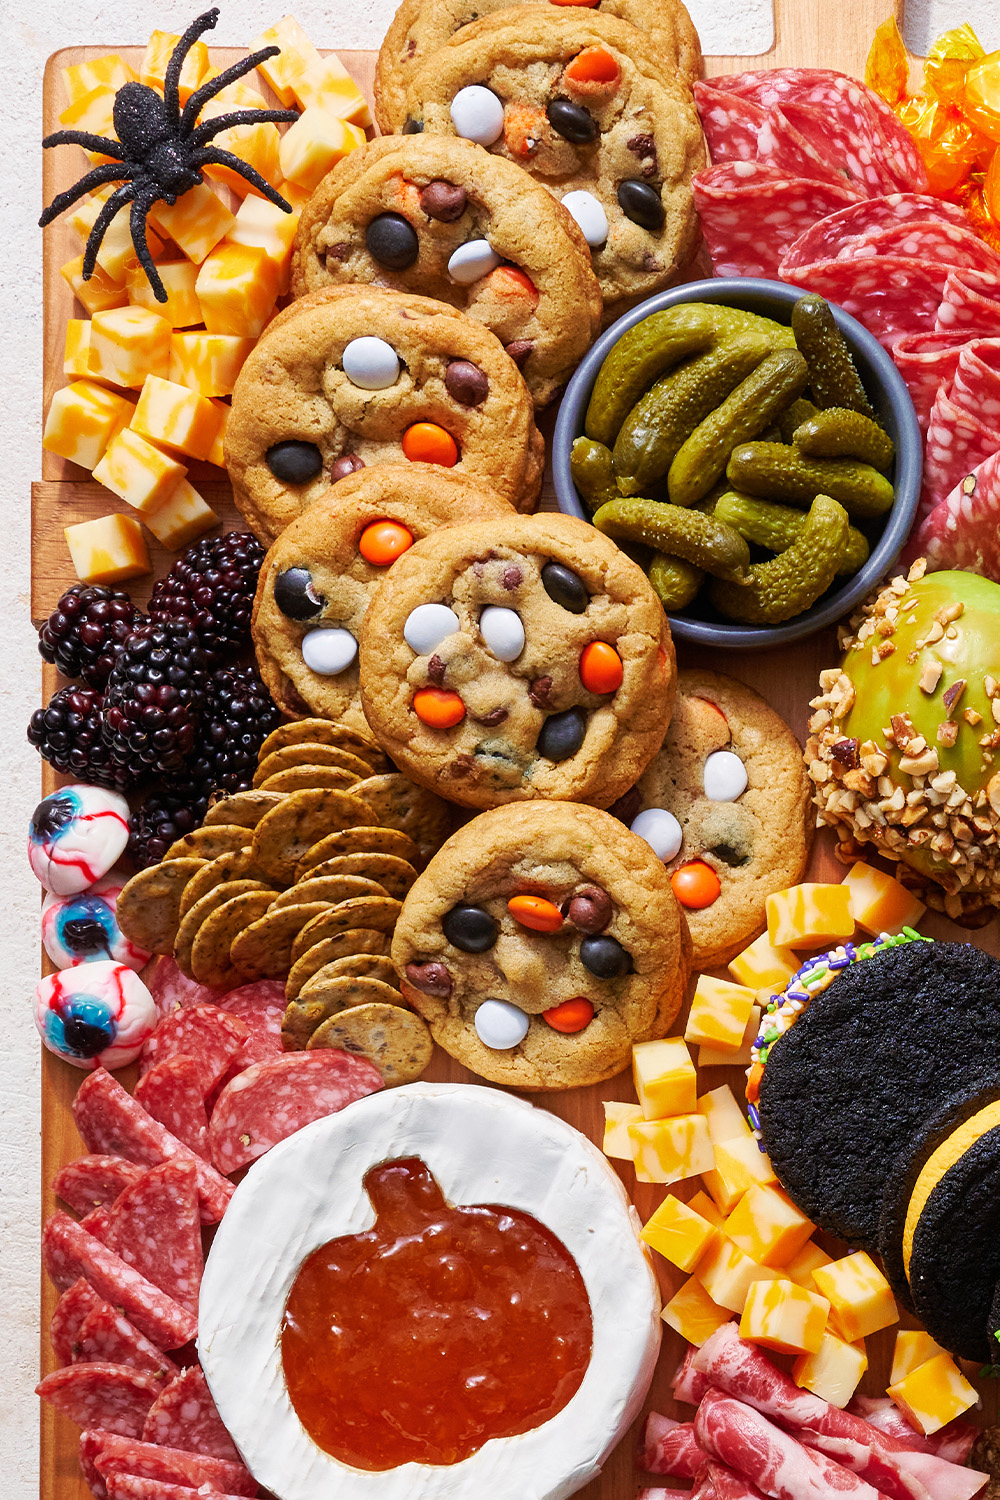
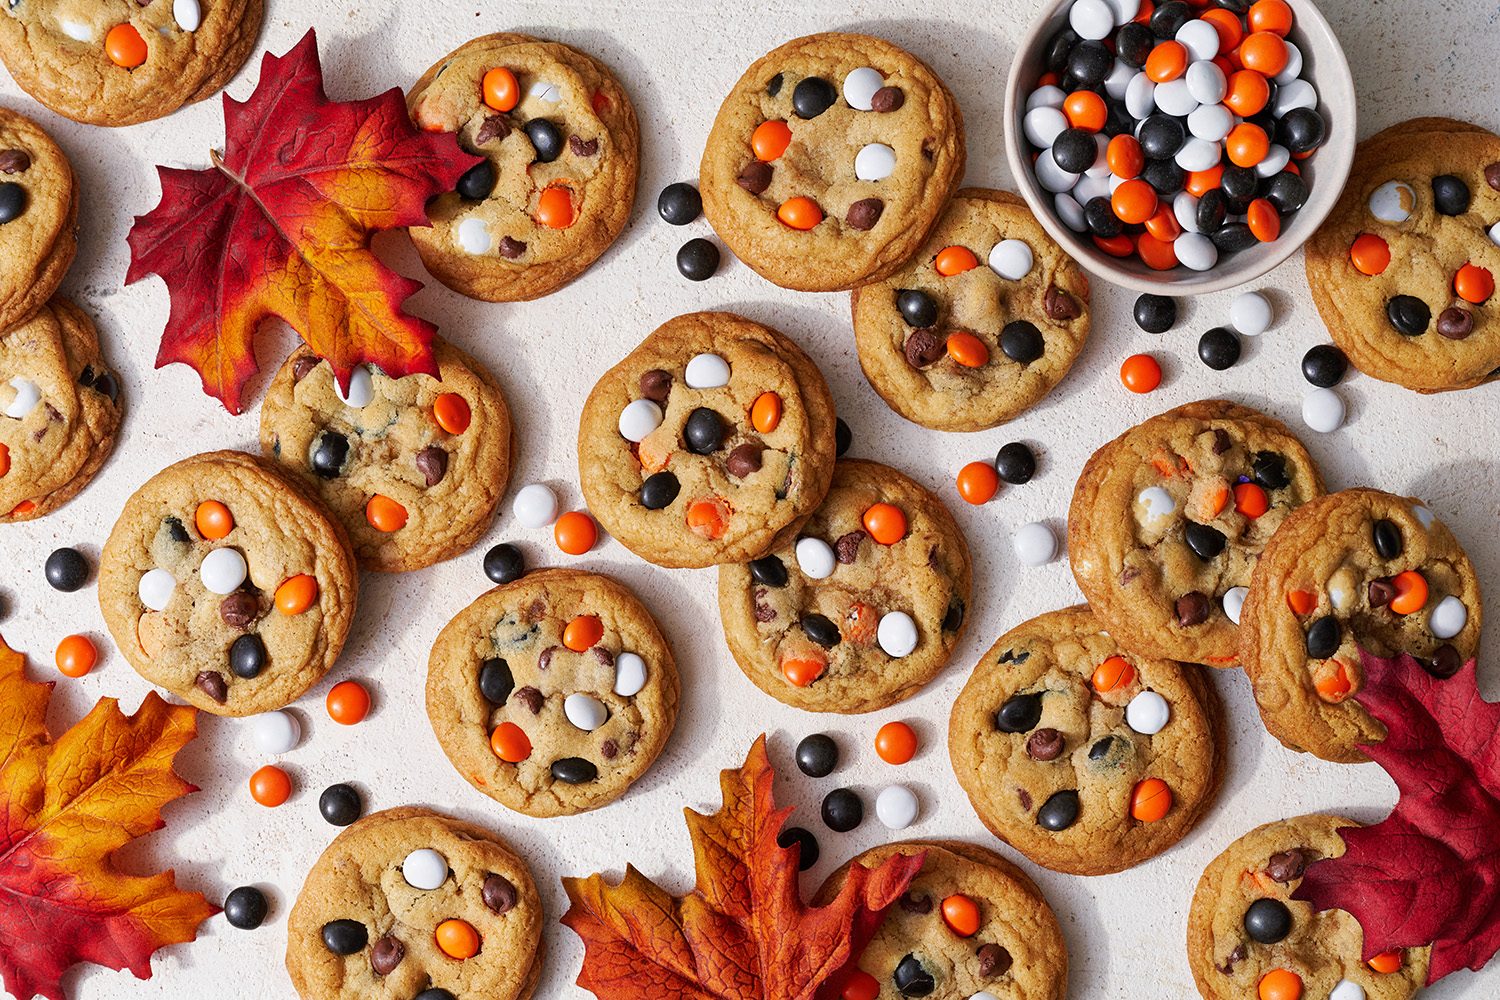
For the Halloween Chocolate Chip Cookies
Make these Bakery Style Chocolate Chip Cookies, substituting half of the chocolate chips for Halloween or fall-colored M&Ms – or get creative and add Reese’s Pieces instead!

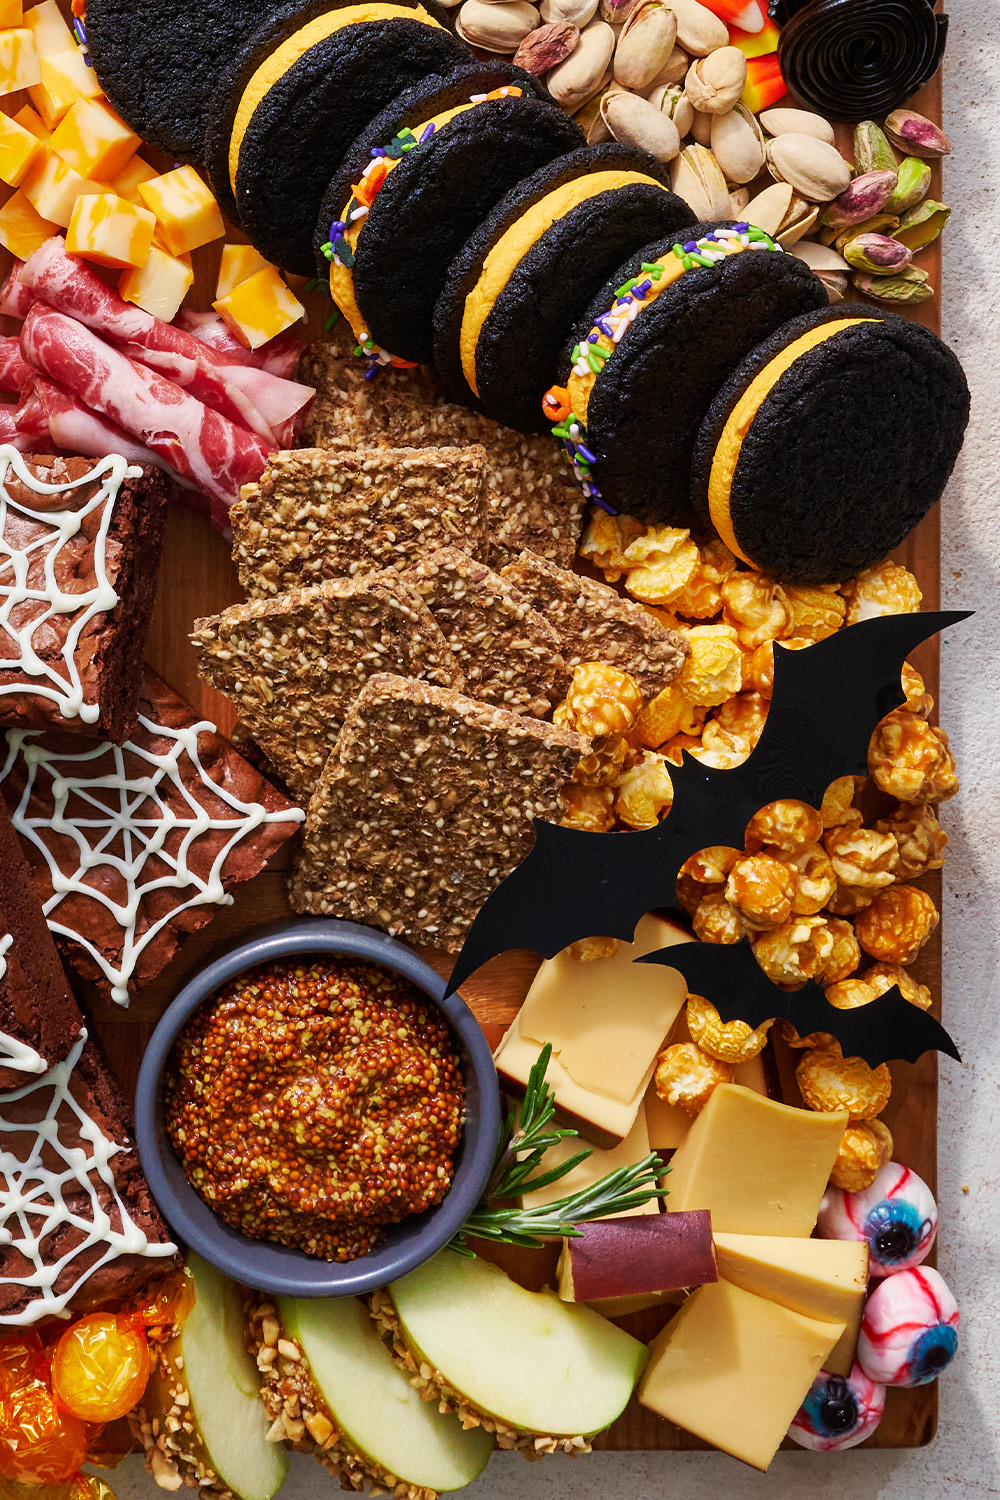
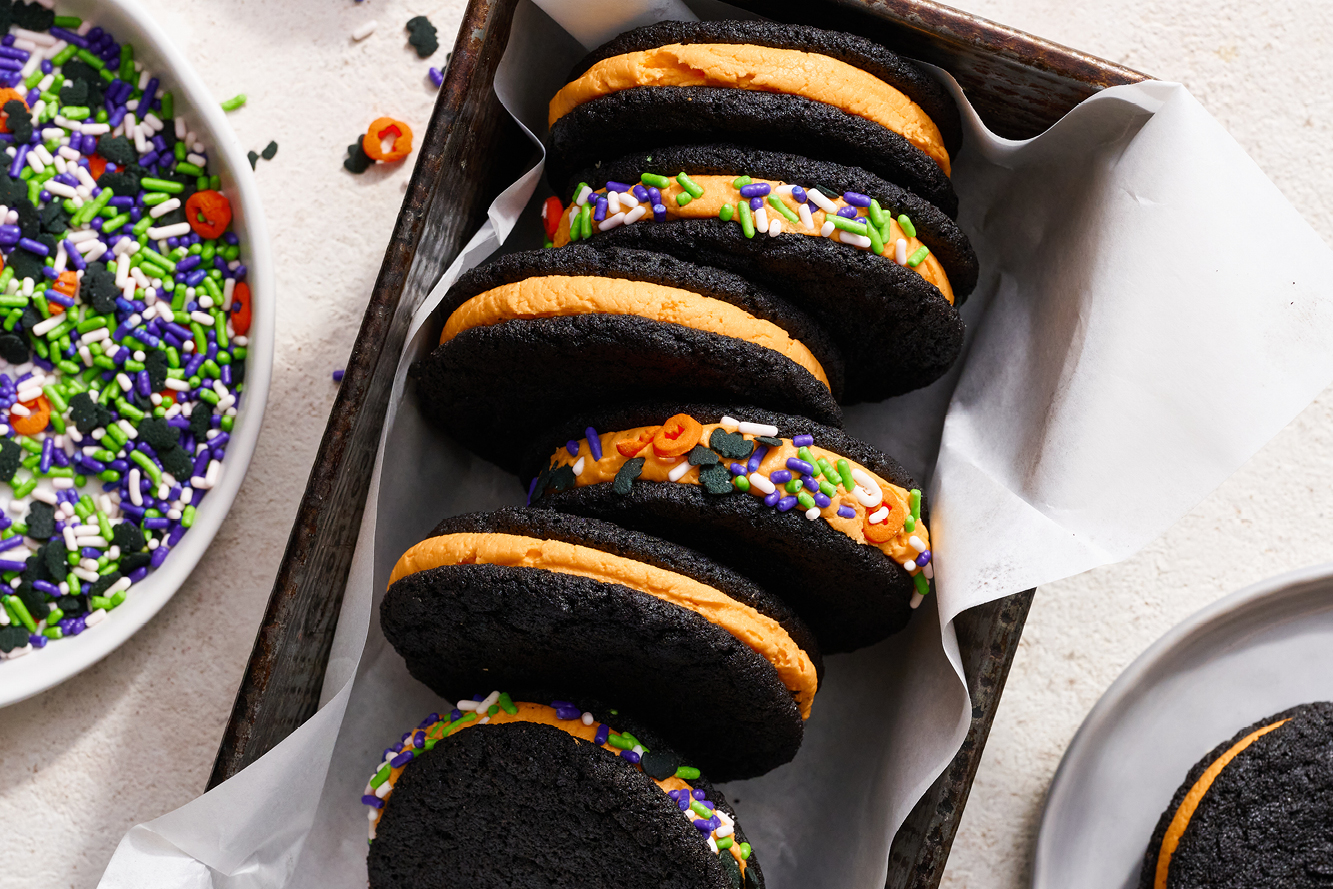
For the Homemade Oreos with Orange Filling
Make these Homemade Oreo Cookies, adding in a few drops of orange gel food coloring to the filling (or any color of your choice!). If you notice the coloring isn’t to your preference, add additional drops of gel coloring until your desired shade is reached.
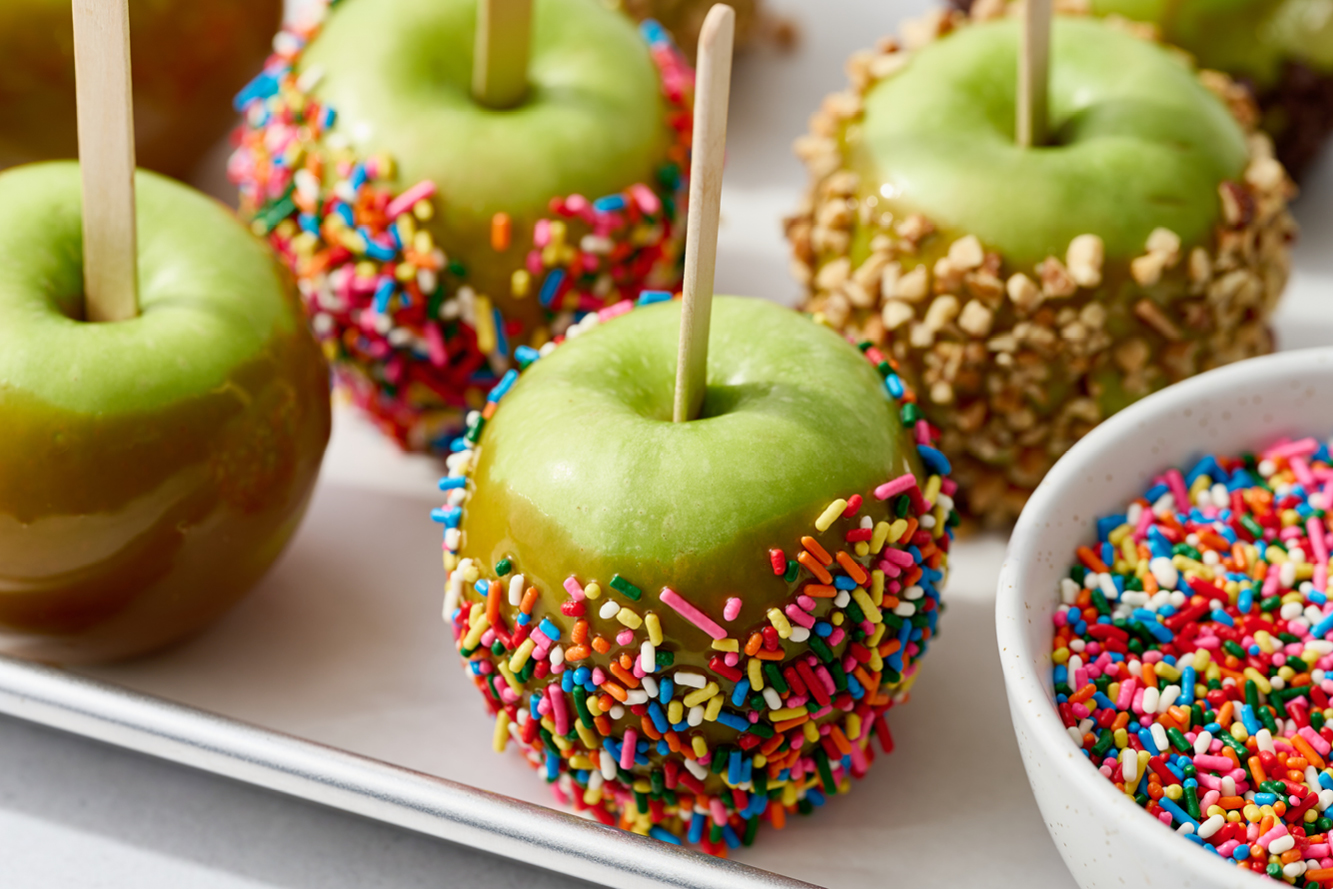
For the Caramel Apples
Simply follow this recipe for Caramel Apples, getting as creative as you’d like with your Caramel Apple toppings.
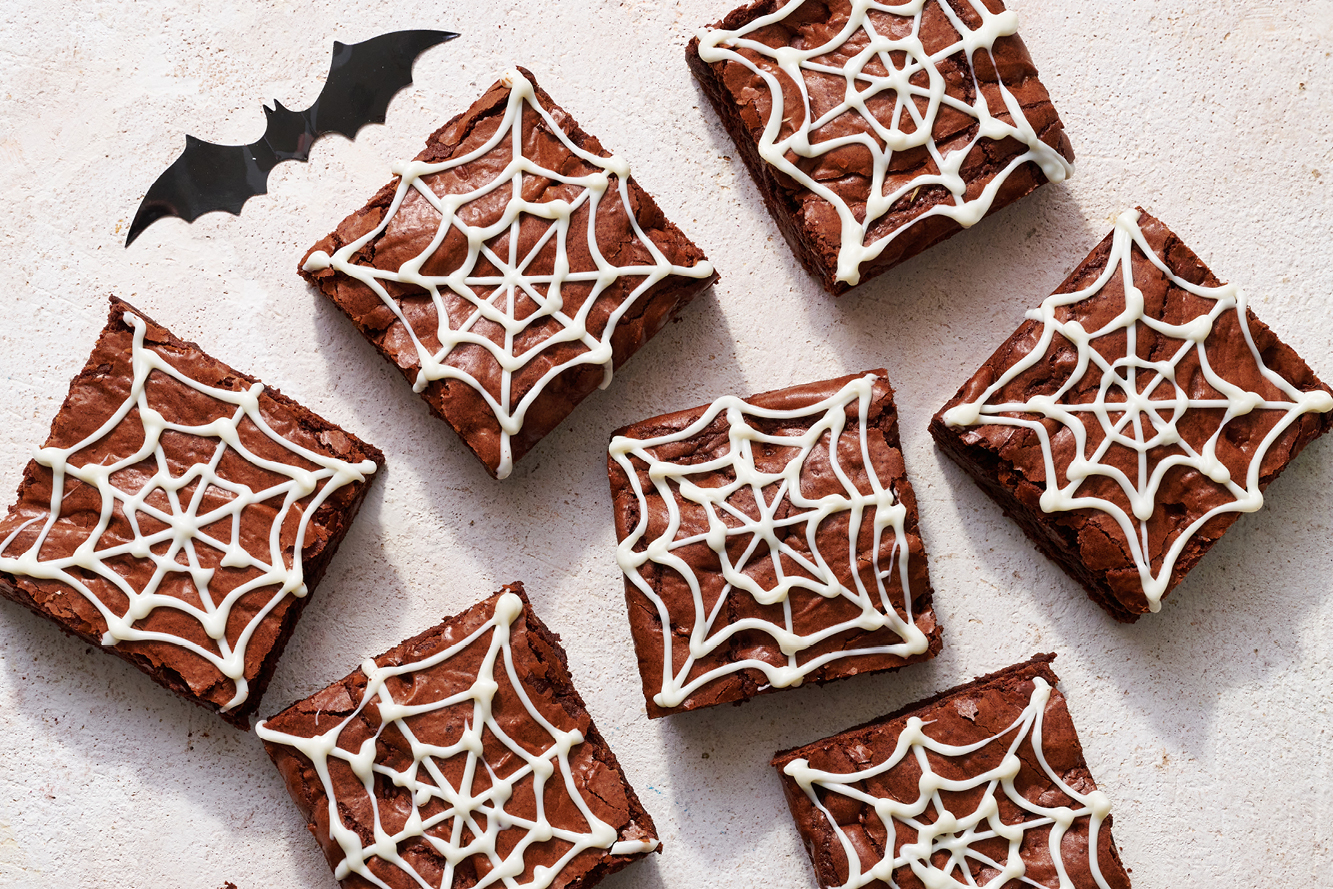
For the Cobweb Chewy Brownies
Make a batch of my Halloween Brownies, which use my super-popular Chewy Brownies recipe as a base, and are decorated for an adorable, spooky addition to our charcuterie board!
Tools & Equipment for Your Halloween Charcuterie Snacking Board
- The Charcuterie Board Itself – Any type of cutting board, large tray, lazy Susan, board with handles, any size/shape board, large serving platter/tray – whatever you have will work just fine!
- Cheese Knife – Optional, but looks so pretty! Any small knife will work just fine to cut up your cheeses when needed.
- Cutlery Set – Toothpicks work here too, but some mini spoons or scoops work great.
- Small Serving Bowls or Ramekins – About 2-3” in size. Use for spreads/sauces and pickled things, so that all of the fixings that aren’t supposed to touch, don’t.
- Dishes for Plating/Serving – No shame here in using paper plates.
- 4” Pumpkin-Shaped Cookie Cutter, to cut the Brie – Once cut, you will have a pumpkin-shaped Brie cutout, and a round piece remaining with a pumpkin-shaped hole, which you can fill with jam or spreads! This makes for an incredibly fun and Halloween-y spin on the typical Charcuterie board!
- Cutting Board – For cutting up your Brie and preparing any other fixings that might need slicing and dicing.
- Optional Halloween Decor – Think small plastic spiders, small bat cutouts, a skeleton hand, googly eyes, or any other fun small Halloween decor you may already have. If possible, wash and dry beforehand, so you can place the decor pieces right into the charcuterie, for maximum fun.
Charcuterie Board Ideas & Ingredients
Charcuterie Cheese Ideas
Brie, goat cheese, fresh mozzarella, cheddar, Gouda, Colby, manchego, Havarti, chevre, Swiss, and cream cheese (topped with fruit or jams) are some of my favorites. Again, you can customize this with any amount of cheese and any type of cheese you prefer. We recommend a round Brie, so you can use the fun pumpkin cutout like we did, and then also a couple of other hard cheeses so you’ll be sure to please all guests. If you’re not familiar with some of these cheeses, ask for samples at the cheese counter of your local grocery store. They’ll likely have some great recommendations, too!
Best Meats for a Cheese Board
Salami, prosciutto, capicola, bacon, ham, sausage, chorizo, pepperoni, pâté, and galantines are all great options. Feel free to skip the meat if preferred.
Fruit
Apples, pears, blackberries, raspberries, plums, apricots, grapes, cherries, figs, pomegranate seeds, dried mango, cranberries, or dates. Utilize various sizes, shapes, and colors to really bring your board to life. Think about how each choice will pair with a cheese on your board for maximum satisfying pairings!
Additional Items
Cornichon/small kosher dill pickles, nuts (Trader Joe’s sells a terrific selection of fun-flavored nuts!), pretzels, chocolate-covered pretzels, or even popcorn!
Spreads
Any type of jams/marmalades, mustards, honey (a spicy honey is fun!), balsamic glaze, hummus, pesto, dips, salsas – anything that’s going to pair nicely with your choice of cheeses or meats will add another fun flavor, texture, and color to your board.
Crackers
Any assortment you like! You can also use sliced baguette instead, or in addition to crackers, if you prefer.
Garnishes
Rosemary or thyme sprigs – purely for decoration, so they’re entirely optional – but they look so pretty!
Additional Halloween Items
Halloween Peeps (Ghosts or Pumpkins), candy eyeballs, gummy worms, black licorice wands or wheels, candy corn, butterscotch/caramel candies, or M&Ms – whatever your favorite festive candies are will work great. Think about the colors these will add to your board.
How Far in Advance Can I Make My Charcuterie Board?
I usually assemble the majority of the board no more than a few hours before serving, but a lot of it can be prepared the night before. It’s not really possible to prepare the whole board the night before because the cheeses and meats need to stay refrigerated, whereas other ingredients such as the baked goods or nuts can dry out in the fridge or get soggy/moist!
Any slicing and dicing can be done the night before, and just wrapped well in plastic wrap to avoid the cheese, meat, etc., drying out. You can also fill any little bowls/ramekins with whatever spreads/dips/pickled things are going in there, and wrap well with plastic wrap and refrigerate. Be sure to bake any baked goods the day before and keep those in an airtight container, if time is an issue. The majority of assembly, as I mentioned before, needs to be done no more than a few hours prior to serving.
How to Assemble a Halloween Charcuterie Board:
- Start with the Largest Items – Start with the round Brie. Once the pumpkin cutout has been placed elsewhere on the board, fill the pumpkin-shaped hole with jam or spread.
- Keep the Sweets Away from the Meats – Place the sweets now, as you’ll want to avoid some of the savory things being placed directly against the sweet items. No one wants ham-flavored cookies.
- Fill Your Ramekins – Place any ramekins/small bowls you’re using on the board. Fill with pickles, olives, spreads, or anything that’s too messy or wet to place directly on the board. Add a small spoon/fork to each bowl.
- Place the Cheeses – Cut up any other cheeses you’re using and place them around the board, with the slices overlapping, so guests can easily grab one slice at a time. Placing these slices in a slightly rounded or semi-circle pattern looks pretty, but you can place them in a line if that’s easier. If your cheese is too crumbly or the wrong shape to slice nicely, simply cut into small bite-sized chunks and pile them onto a section of the board. Leave forks or toothpicks nearby, so people can easily grab just one cube. If you’re using another soft cheese, such as a chevre, place that on the board with a cheese knife so people can easily cut that themselves.
- Prepare Your Meats – Slice up any pepperoni/salami, roll or fold your ham, casually drape or roll any prosciutto, and place these on the board. Be sure to space them evenly, so all the meat isn’t all in one corner.
- Cracker Time – At this point, I like to evaluate if I have enough room for crackers. If not, I’ll reserve those for an additional plate to sit beside the board. If there’s room, go ahead and place those overlapping, similar to how we placed the cheese slices.
- Fill in the Blanks – Fill any spaces that remain with nuts, dried fruit, sliced fruit, or other candies, so that no space is unfilled and the colors and textures are all balanced evenly across the board.
- Decorate – Lastly, place any sprigs of rosemary or thyme in a few places on the board. Now, add any Halloween decor you’d like!
- Dig in! If your board ends up almost too pretty and your friends are too nice, sometimes I’ll make my own plate first from the board to encourage everyone to actually eat.
Can I Make a Dessert Charcuterie Board Instead?
Yes! Simply skip the savory selection, and swap out your small bowl of hummus or salsa for caramel dip or hot fudge. You can add more candies, chocolates, cookies, brownies, or caramel apples in place of the savory snacks. This makes a super fun dessert board for a party, and it’s perfect for kids, too!
More Halloween Recipes to Add to Your Cheese Board:
- Halloween Cookies
- Monster Cookies
- Pumpkin Cookie Butter Truffles
- Jack-o’-Lantern Chocolate Sugar Cookies
- Loaded Cookie Bars (use up Leftover Halloween candy!)
- Halloween Brownies
Check out ALL my Halloween Recipes here!
Email This Recipe
Enter your email, and we’ll send it to your inbox.
Ingredients
Cheeses:
- 8 ounce round Brie, cold
- 6 ounces aged cheddar, sliced
- 6 ounces Gouda, cubed
Meats:
- 4-5 ounces genoa salami (packaged round slices), folded in quarters
- 4-8 ounce log dry Italian salami, sliced
- 4 ounces prosciutto, rolled
Fruits:
- 1 honey crisp apple, thinly sliced
- 1 green pear, thinly sliced
- Small container of blackberries, washed and dried
- 2-3 plums or apricots, sliced
- 6 ounces cherries, washed and dried
Additional items:
- 1 jar orange marmalade
- 1 jar Cornichon, drained and dried
- 1 small jar whole grain mustard
- 2-3 varieties of crackers
- 1 cup pistachios
Sweets:
Caramel Apples, prepared in advance, sliced up or wholeChewy Brownies, prepared in advance, sliced, decorated with white chocolate spiderwebsHomemade Oreo Cookies, prepared in advance, filled with an orange-colored fillingBakery Style Chocolate Chip Cookies, prepared in advance with fall-colored M&Ms- 1 cup caramel corn
- ½ cup candy corn
- A few black licorice wheels and sticks
- Googly eye chocolate balls
- Ghost-shaped Peeps
Garnishes:
- Fresh rosemary or thyme sprigs, washed and dried
- Fake plastic spiders, washed and dried
- Skeleton hand, washed and dried
- Paper bats
Instructions
- While still cold, unwrap the Brie and, using a pumpkin-shaped cookie cutter, cut out a pumpkin shape from the center of the Brie wheel. Place both pieces of Brie on the board, and fill the empty pumpkin-shaped space with orange marmalade.
- Place each of the baked sweets on the board. Overlap any stackable cookies or brownies, developing a slight circular or zigzag shape as you place them.
- Set two small ramekins on the board. Fill one with cornichons and the other with mustard.
- Arrange the sliced cheeses around the board, with the slices overlapping, in a semi-circle or slightly rounded pattern, working your way around the larger items already on the board. Next, place any diced cheeses in small mounds.
- Place the meats on the board (preferably avoiding touching the sweet items). Overlap any folded or sliced meats, and stack the rolled meat into a small pyramid.
- Arrange the crackers on the board, overlapping, around the other larger items.
- Arrange the sliced fruit and any whole fruits, stacking or overlapping where necessary.
- Fill any remaining space with pistachios, popcorn, candy corn or other candies, so that the entirety of the board is covered, and the colors and textures are all balanced evenly across the board.
- Lastly, if using, place sprigs of rosemary in a few places on the board, and add any Halloween decor you like. These decorations can sit on top of any items already on the board.
- Serve immediately, or cover and place in the fridge for no more than a few hours before serving.
Notes
Photos by Joanie Simon.


wow its really awsome thanks dor the post
This is such a fun recipe to make! You can follow it to the letter or you can change it around to suit your tastes and/or your dietary needs. It can also be adapted for any budget. The possibilities are endless!
Thanks so much, Trudi! We’re so glad to hear this.