


This post may contain affiliate links. Read our disclosure policy.
In culinary school we literally had a giant vat of sourdough starter at all times. It was amazing and I wish I had taken a class on just sourdough itself. The idea of creating your own starter is super intimidating and even all the information on this page may seem like too much to deal with. I combined the little bit I learned in culinary school with the amazing knowledge inside The Bread Bible cookbook to create this resource for you. I hope you’ll find it useful! Just know that although creating and maintaining a sourdough starter can seem complicated at times, it’s actually simpler than you probably think. Plus, sourdough starters are actually quite resilient and can bounce back from mistreatment pretty well. As long as it doesn’t become contaminated, it can usually be saved!
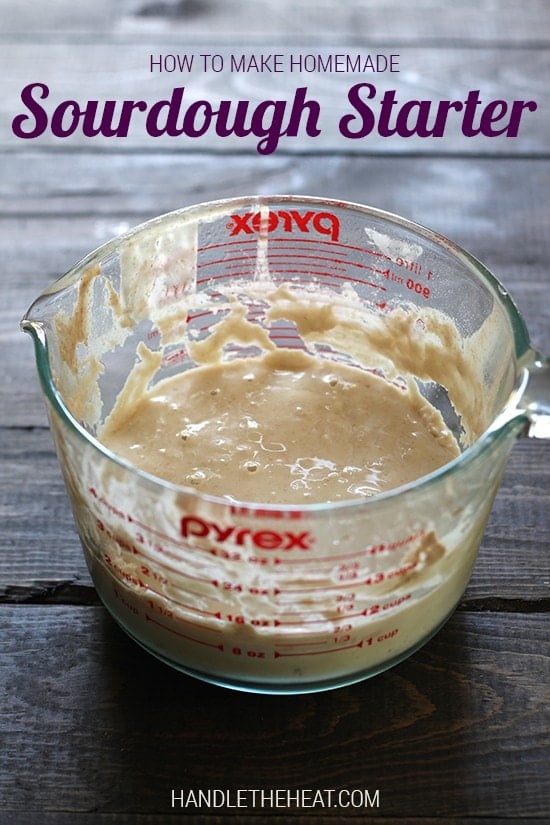
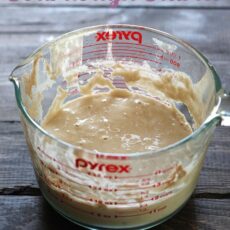
Below is the step-by-step video on how I created my starter so you can see just how simple it is. Underneath the video is every tidbit of information I thought you’d find helpful. Then at the end of the post is the actual sourdough starter “recipe.” It looks long, but that’s just because you have to work on it a little bit everyday for the first week or so. Then it’s just about maintaining!
What is it?
A sourdough starter, also called a pre-ferment, is a mixture of flour, water, and yeast, often wild yeast that occurs naturally. The starter is like a living organism that is cultivated over days and weeks, allowing it to develop a tangy flavor and other properties that helps the sourdough bread to rise.

Time
Although a sourdough starter could not contain simpler ingredients, it is unfortunately not a matter of convenience. To develop such strong flavor, it takes days and weeks to develop. It is basically a living organism that needs your care and attention in additional to regular “feedings” to grow. Don’t begin a starter if you have plans to leave town. It takes about a week to develop enough yeast and bacteria and another two weeks until it is mature enough to be the only leavening of your bread, meaning you won’t need to add any additional yeast. Note that bread risen from a homemade sourdough starter will take much longer to rise than bread risen with commercial yeast.
Yeast
The most flavorful sourdough starters utilize the naturally occurring wild yeast in the air along with the bacteria present on flour. Although you can make a starter with commercial yeast, it will be less flavorful than one made with wild yeast. Either way, it’s important to note that all yeast is natural and cannot be synthesized.
Commercial yeast is a specific strain that is more consistent and reliable. It may surprise you to discover that yeast actually occurs naturally in such abundance that a single gram of flour contains about 13,000 wild yeast cells and 320 lactic bacteria cells. It’s when the yeast and bacteria come together in some complicated chemical reactions that the characteristic flavor of sourdough is created.
Flour
To give your sourdough the best start, use organic whole wheat flour or rye flour. Beyond that, use unbleached bread flour to feed and maintain your starter. If you continue to use a whole grain flour to feed your starter, it may develop off flavors.
Water
Since a sourdough contains just a few simple ingredients, it’s important to maintain a high level of quality with those ingredients. Only use bottled water to start and feed your sourdough. Most tap water is treated with chlorine which will kill the bacteria and yeast a starter needs to thrive.
Helpful Tools
4-cup glass measuring cup or canning jar
Clean wooden spoon
Scale, to ensure accurate measuring
Customization
Making your own sourdough starter allows you to control the acidity and therefore the level of sourness to an extent. Also by making homemade sourdough bread, you control the overall level of starter included in the recipe (anywhere between 15 to 40%) so you can go from mild to very strongly flavored.
Keep it clean!
Sourdough starters can become contaminated and therefore ruined. If streaks of color appear in your starter, it is contaminated and must be thrown out. That is why it’s crucial to keep everything that will touch the starter, including utensils, bowls, and your hands, perfectly clean.
If a brown liquid appears floating on top of your sourdough starter, simply pour it off. Sourdough bakers call this liquid hooch and it is harmless. However, it often signifies that you’ve fed your starter too much water in relation to flour or have let your starter go too long between feedings. Sourdough starters are relatively resilient, and bounce back quickly once you resume proper care of them.
Check out this helpful article from King Arthur Flour on maintaining your sourdough, which includes troubleshooting and reviving tips!
Email This Recipe
Enter your email, and we’ll send it to your inbox.
Ingredients
- Organic whole-wheat flour or rye flour
- Bread flour
- Bottled water
Instructions
Day 1:
- In a perfectly clean bowl, combine a scant cup (120 grams) organic whole wheat flour and 1/2 cup (120 grams) bottled water. With a clean spoon, stir until a stiff dough forms. If the dough is extremely dry, add very small amounts of water until moistened. Scrape the dough into the 4-cup container. You should have about 1 cup (240 grams). Cover tightly in plastic wrap and place in a cool area for 48 hours. If you don’t have a cool area, let it sit for only 24 hours and feed as described for Day 3.
Day 2:
- There will be no visible changes.
Day 3:
- The consistency will now resemble a thick pancake batter and there may be a few bubbles. With a clean spoon, remove and throw away about half the starter, about 1/2 cup (120 grams).
- Stir in a scant 1/2 cup (60 grams) bread flour and 1/4 cup (60 grams) bottled water. Cover tightly with plastic wrap and leave at room temperature for 24 hours. After 12 hours the starter may have increased quite a bit and have lots of bubbles. Don’t be concerned if it deflates and falls back down.
Day 4:
- With a clean spoon, again remove and throw out about half of the starter, 1/2 cup (120 grams). Stir in a scant 1/2 cup (60 grams) bread flour and 1/4 cup (60 grams) bottled water. Cover with plastic wrap, but not tightly, as the gases forming will need to escape. Leave at room temperature for 24 hours.
Day 5:
- If the starter is active, it will have increased in volume to at least 3 cups, even 4. It will dome and start to recede. If this hasn’t happened yet, repeat Day 4 steps until it reaches this stage.
- With a clean spoon, again remove and throw out half the starter (1/2 cup or 120 grams).
- Stir in 1/2 cup (60 grams) bread flour and 1/4 cup (60 grams) bottled water.
- You will now have 1 cup (60 grams) active starter. Cover with plastic wrap and let sit at warm room temeperature for about 4 hours, until it has almost doubled. If you want to bake bread, you can now expand it by feeding it with flour and water. If you want to wait, you can refrigerate it overnight and start expanding it the next day. If you don’t plan to use it for several days, feed it again to double it, let it sit for 1 hour, then refrigerate it.
- The starter will mature over the next few weeks, increasing in strength and flavor. For the first 2 weeks, store at least 1 cup (240 grams) of it and feed it at least three times a week. After 2 weeks of regular feeding at least 3 times a week the culture is mature and bread made from it will be more mellow and complex. Now you can switch to once-a-week feeding if you only make bread once a week.


Could you please explain why you discard half of the mixture? I find this bit most curious!
Hi. I’m new to this and just realized I may have made a terrible mistake. I didn’t cover tightly on day 3, just loosely. Did I mess up the whole thing? Today is day 4.
I’m just growing my starter. I’m at the step: mature for 2 weeks. You (and Beranbaum) say: ‘store it’ during these maturing weeks. But where? In the fridge? At room temp? I’m doing room temp, that’s 18 °C during daytime and about 14 °C overnight. After one week now it’s getint really sour (I can smell). Is this right? Please explain the storing to your
Katja
Hi Katja! I would say since your room temp is pretty cool that it should be just fine. For me, during the warmer months my house can get up to 26°C inside since I live in the desert, so I usually store mine in the fridge. The smell will increase as it matures for the first 2 weeks. After that it will mellow out and smell less sour. Hope that helps!
Hi Tessa,
Thanks to your video, I am trying my very first sourdough starter. I am a bit frustrated here as it has been 48 hours and my starter hasn’t changed a bit. I used organic rye flour and your recipe. Do I need to start again or is there anything I can do.
Thank you sooo much.
Hi Mary! Is it cold in your home?
Thank you for the recipe; can’t wait to try!
I have three whole-wheat flours at my disposal. Which of the three would be best to use? Whole wheat pastry flour, bread or sprouted?
So, if I don’t make bread every week, how long will this last and how would I store it?
Hi Lisa! If you are only making bread say once a month, you can turn the starter into a “stiff” starter to slow down fermentation and keep it longer without needing to feed it. To do this, take 2 tablespoons of your mature starter and add 1 cup flour and 1/2 cup water. Put a lid on the container and place it in the coldest part of your refrigerator. Here it can stay up to a month without being fed at all! However, some people think that a stiff starter has a more mild flavor – just something to keep in mind 🙂
I made a sourdough starter once, but then I couldn’t find a recipe that utilized a starter! Do you have one to recommend?
I’ll be sharing one this week!
Interesting. I usually make mine with half and half water and flour. I prob just end up adding a little more water or less flour to the recipes I add it to.
Wow! Thank you so much for this clear informative video, Tessa! I’ve always wanted to try to make my own sourdough. Can’t wait for the next video and then just maybe I’ll do it myself too! Your blog is amazing! Every recipe so clearly written out. Thank you so much!
Love the step by step video!! The end result looks great!
I’ve had my own starter in my fridge since November! I made KAF buttery sourdough rolls for Thanksgiving and they were amazing! Now i use it to make pizza dough and different breads….so much fun!
My goodness.. i would have to wait a week to even think of trying this recipe. But the end results look totally worth it. I am a big fan of making everything at home, I really gotta give this a sure try. I have always wondered how ur breads look amazing, now I get it