


This post may contain affiliate links. Read our disclosure policy.
In culinary school we literally had a giant vat of sourdough starter at all times. It was amazing and I wish I had taken a class on just sourdough itself. The idea of creating your own starter is super intimidating and even all the information on this page may seem like too much to deal with. I combined the little bit I learned in culinary school with the amazing knowledge inside The Bread Bible cookbook to create this resource for you. I hope you’ll find it useful! Just know that although creating and maintaining a sourdough starter can seem complicated at times, it’s actually simpler than you probably think. Plus, sourdough starters are actually quite resilient and can bounce back from mistreatment pretty well. As long as it doesn’t become contaminated, it can usually be saved!
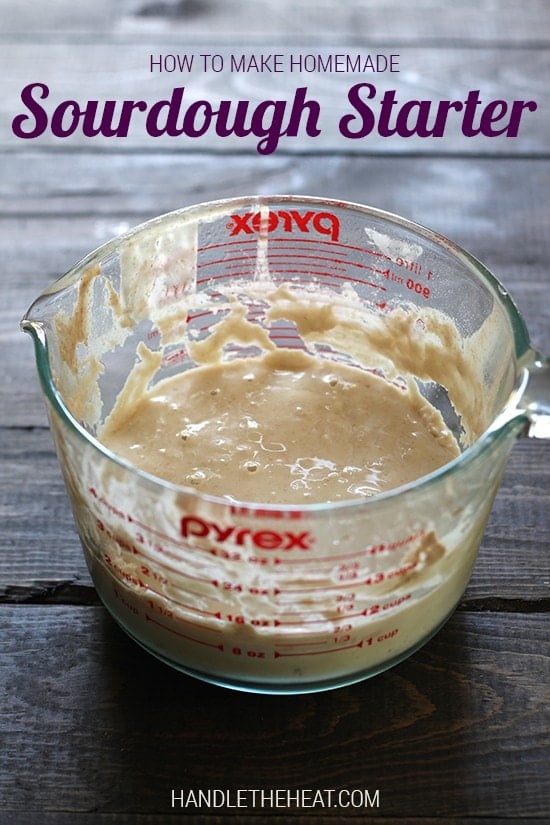
Below is the step-by-step video on how I created my starter so you can see just how simple it is. Underneath the video is every tidbit of information I thought you’d find helpful. Then at the end of the post is the actual sourdough starter “recipe.” It looks long, but that’s just because you have to work on it a little bit everyday for the first week or so. Then it’s just about maintaining!
What is it?
A sourdough starter, also called a pre-ferment, is a mixture of flour, water, and yeast, often wild yeast that occurs naturally. The starter is like a living organism that is cultivated over days and weeks, allowing it to develop a tangy flavor and other properties that helps the sourdough bread to rise.

Time
Although a sourdough starter could not contain simpler ingredients, it is unfortunately not a matter of convenience. To develop such strong flavor, it takes days and weeks to develop. It is basically a living organism that needs your care and attention in additional to regular “feedings” to grow. Don’t begin a starter if you have plans to leave town. It takes about a week to develop enough yeast and bacteria and another two weeks until it is mature enough to be the only leavening of your bread, meaning you won’t need to add any additional yeast. Note that bread risen from a homemade sourdough starter will take much longer to rise than bread risen with commercial yeast.
Yeast
The most flavorful sourdough starters utilize the naturally occurring wild yeast in the air along with the bacteria present on flour. Although you can make a starter with commercial yeast, it will be less flavorful than one made with wild yeast. Either way, it’s important to note that all yeast is natural and cannot be synthesized.
Commercial yeast is a specific strain that is more consistent and reliable. It may surprise you to discover that yeast actually occurs naturally in such abundance that a single gram of flour contains about 13,000 wild yeast cells and 320 lactic bacteria cells. It’s when the yeast and bacteria come together in some complicated chemical reactions that the characteristic flavor of sourdough is created.
Flour
To give your sourdough the best start, use organic whole wheat flour or rye flour. Beyond that, use unbleached bread flour to feed and maintain your starter. If you continue to use a whole grain flour to feed your starter, it may develop off flavors.
Water
Since a sourdough contains just a few simple ingredients, it’s important to maintain a high level of quality with those ingredients. Only use bottled water to start and feed your sourdough. Most tap water is treated with chlorine which will kill the bacteria and yeast a starter needs to thrive.
Helpful Tools
4-cup glass measuring cup or canning jar
Clean wooden spoon
Scale, to ensure accurate measuring
Customization
Making your own sourdough starter allows you to control the acidity and therefore the level of sourness to an extent. Also by making homemade sourdough bread, you control the overall level of starter included in the recipe (anywhere between 15 to 40%) so you can go from mild to very strongly flavored.
Keep it clean!
Sourdough starters can become contaminated and therefore ruined. If streaks of color appear in your starter, it is contaminated and must be thrown out. That is why it’s crucial to keep everything that will touch the starter, including utensils, bowls, and your hands, perfectly clean.
If a brown liquid appears floating on top of your sourdough starter, simply pour it off. Sourdough bakers call this liquid hooch and it is harmless. However, it often signifies that you’ve fed your starter too much water in relation to flour or have let your starter go too long between feedings. Sourdough starters are relatively resilient, and bounce back quickly once you resume proper care of them.
Check out this helpful article from King Arthur Flour on maintaining your sourdough, which includes troubleshooting and reviving tips!
Email This Recipe
Enter your email, and we’ll send it to your inbox.
Ingredients
- Organic whole-wheat flour or rye flour
- Bread flour
- Bottled water
Instructions
Day 1:
- In a perfectly clean bowl, combine a scant cup (120 grams) organic whole wheat flour and 1/2 cup (120 grams) bottled water. With a clean spoon, stir until a stiff dough forms. If the dough is extremely dry, add very small amounts of water until moistened. Scrape the dough into the 4-cup container. You should have about 1 cup (240 grams). Cover tightly in plastic wrap and place in a cool area for 48 hours. If you don’t have a cool area, let it sit for only 24 hours and feed as described for Day 3.
Day 2:
- There will be no visible changes.
Day 3:
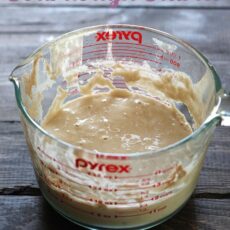
- The consistency will now resemble a thick pancake batter and there may be a few bubbles. With a clean spoon, remove and throw away about half the starter, about 1/2 cup (120 grams).
- Stir in a scant 1/2 cup (60 grams) bread flour and 1/4 cup (60 grams) bottled water. Cover tightly with plastic wrap and leave at room temperature for 24 hours. After 12 hours the starter may have increased quite a bit and have lots of bubbles. Don’t be concerned if it deflates and falls back down.
Day 4:
- With a clean spoon, again remove and throw out about half of the starter, 1/2 cup (120 grams). Stir in a scant 1/2 cup (60 grams) bread flour and 1/4 cup (60 grams) bottled water. Cover with plastic wrap, but not tightly, as the gases forming will need to escape. Leave at room temperature for 24 hours.
Day 5:
- If the starter is active, it will have increased in volume to at least 3 cups, even 4. It will dome and start to recede. If this hasn’t happened yet, repeat Day 4 steps until it reaches this stage.
- With a clean spoon, again remove and throw out half the starter (1/2 cup or 120 grams).
- Stir in 1/2 cup (60 grams) bread flour and 1/4 cup (60 grams) bottled water.
- You will now have 1 cup (60 grams) active starter. Cover with plastic wrap and let sit at warm room temeperature for about 4 hours, until it has almost doubled. If you want to bake bread, you can now expand it by feeding it with flour and water. If you want to wait, you can refrigerate it overnight and start expanding it the next day. If you don’t plan to use it for several days, feed it again to double it, let it sit for 1 hour, then refrigerate it.
- The starter will mature over the next few weeks, increasing in strength and flavor. For the first 2 weeks, store at least 1 cup (240 grams) of it and feed it at least three times a week. After 2 weeks of regular feeding at least 3 times a week the culture is mature and bread made from it will be more mellow and complex. Now you can switch to once-a-week feeding if you only make bread once a week.


Hi Tessa! I made my first starter with your instructions a few weeks ago and my first 2 breads came out AWESOME! However, I continued feeding the starter 3 times a week for 2 weeks, but my started started to smell like straight up alcohol. I tried to feed it a few more times to see if it got better, but it continued to smell like alcohol. I threw it away this week and plan to start again. Do you have any advice, or any idea as to why mine started to smell like alcohol? Also – do you continue to cover the starter tight, or loose after the initial 5 days? Any advice would help as I would love to keep my starter going this time!
Isn’t this recipe from The Bread Bible by Roseevy Barenbaum?
hi Tessa
Do you know about the history of sourdough ?
Or prepare the sourdough in a natural and healthy way
thanks
Hey there! So I am on day 4. Should my batter be thick still? Mine seems to have bubbles, hooch, but it is very runny. What am I doing wrong?
Thanx 4 recipe.
If i need bread that is not fully risen..how long do i make them befor a meal?
I want to make sourdough flatbread..please help!!!
Hello! One question: At the first day I used organic rye flour, so for the next days I used Plain flour until day 5. So, when I should feed it with rye flour again?
Thanks
I know you say to feed the starter three times a week after two weeks but it doesnt say how much to feed the starter each time help please
Dear Tessa,
I have used all purpose flour! And have the starter tightly covered…its been 12 hours i dont see any changes. I live in Pakistan and we do not ger bread flour over hear. We get whole wheat which os ground wheat but seived. Do you think it will work?
I have made my own starter and used it twice now. Once, I made pancakes and the second time, I made bread. I think my starter is too dry. I measure by volume a scant cup flour, half cup water, and half cup starter for my feedings. Since the main moisture component is the starter itself, I’m getting very dry, thick dough and dense crumb. I’m living in AZ and wonder if the lack of moisture in the air is making my starter dry out faster than it should. It’s the consistency of a thick pancake batter 4 hours after feeding. Should I increase water amount at each feeding?
Happy New Year Tessa! Great video, but I didnt see where I could make it more sour..you had mentioned it…Im orginally from California & am used to San Francisco sour dough bread but i dont know how to obtain that. Ant tips ..please??
Thank you in advance hon!
Many BLESSINGS!
Becky
Why do you throw 1/2 away!!
I have tried the Sourdough starter twice now. Each time I have the same results. I store my starter in the oven with the door ajar with the oven light on (74 degrees). I started with 100% whole wheat four by Baker Josef’s and bottled drinking water without chlorine by Arrowhead.
Day 1: mixed 120 grams whole wheat flour with 120 grams drinking water (mix in a 4 cup mixing bowl and cover and set in the oven with the light on and door ajar.
Day 2: pull out mixing bowl and notice a lot of bubbles and has tripled in size and is relatively sticky doughy in texture. Discard 120 grams starter, and add 60 grams Bob’s Red Mill Unbleached Enriched Artisan Bread Flour and 60 grams drinking water and mix. then loosely cover and set in the oven with the light on and door ajar.
Day 3: pull out mixing bowl and notice lots of bubbles and like pancake batter with some hooch to drain off. Drain the hooch and remove 120 grams of starter, and add 60 grams Bob’s Red Mill Unbleached Enriched Artisan Bread Flour and 60 grams drinking water and mix. then loosely cover and set in the oven with the light on and door ajar.
Day 4: pull out mixing bowl and notice some bubbles and like pancake batter with some hooch to drain off. Drain the hooch and remove 120 grams of starter, and add 60 grams Bob’s Red Mill Unbleached Enriched Artisan Bread Flour and 60 grams drinking water and mix. then loosely cover and set in the oven with the light on and door ajar.
Day 5: pull out mixing bowl and notice some bubbles and like pancake batter with some hooch to drain off. Drain the hooch and remove 120 grams of starter, and add 60 grams Bob’s Red Mill Unbleached Enriched Artisan Bread Flour and 60 grams drinking water and mix. then loosely cover and set in the oven with the light on and door ajar.
Day 6: pull out mixing bowl and notice some bubbles and like pancake batter with some hooch to drain off. Drain the hooch and remove 120 grams of starter, and add 60 grams Bob’s Red Mill Unbleached Enriched Artisan Bread Flour and 60 grams drinking water and mix. then loosely cover and set in the oven with the light on and door ajar.
Day 7: pull out mixing bowl and notice some bubbles and like pancake batter with some hooch to drain off. Drain the hooch and remove 120 grams of starter, and add 60 grams Bob’s Red Mill Unbleached Enriched Artisan Bread Flour and 60 grams drinking water and mix. then loosely cover and set in the oven with the light on and door ajar.
Day 8: pull out mixing bowl and notice some bubbles and like pancake batter with some hooch to drain off. Drain the hooch and remove 120 grams of starter, and add 60 grams Bob’s Red Mill Unbleached Enriched Artisan Bread Flour and 60 grams drinking water and mix. then loosely cover and set in the oven with the light on and door ajar.
I do not believe this is working at this point. I tried the teaspoon of tarter in the water to see if it floats and it sinks right to the bottom. Your recommendations would be appreciated.