


Tessa’s Recipe Rundown
Taste: Perfect pumpkin spice flavor that makes you wish fall lasted all year long.
Texture: The pastry is flaky and tender, while the filling is rich and smooth.
Ease: This pastry is ridiculously easy – even kids could get involved in making these!
Pros: Simple and festive homemade treat.
Cons: None.
Would I make this again? Definitely this time next year!
This post may contain affiliate links. Read our disclosure policy.
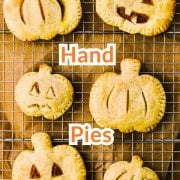
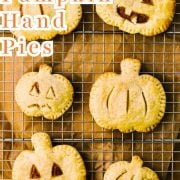

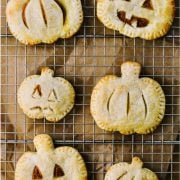
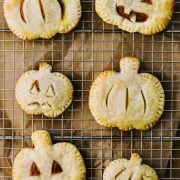
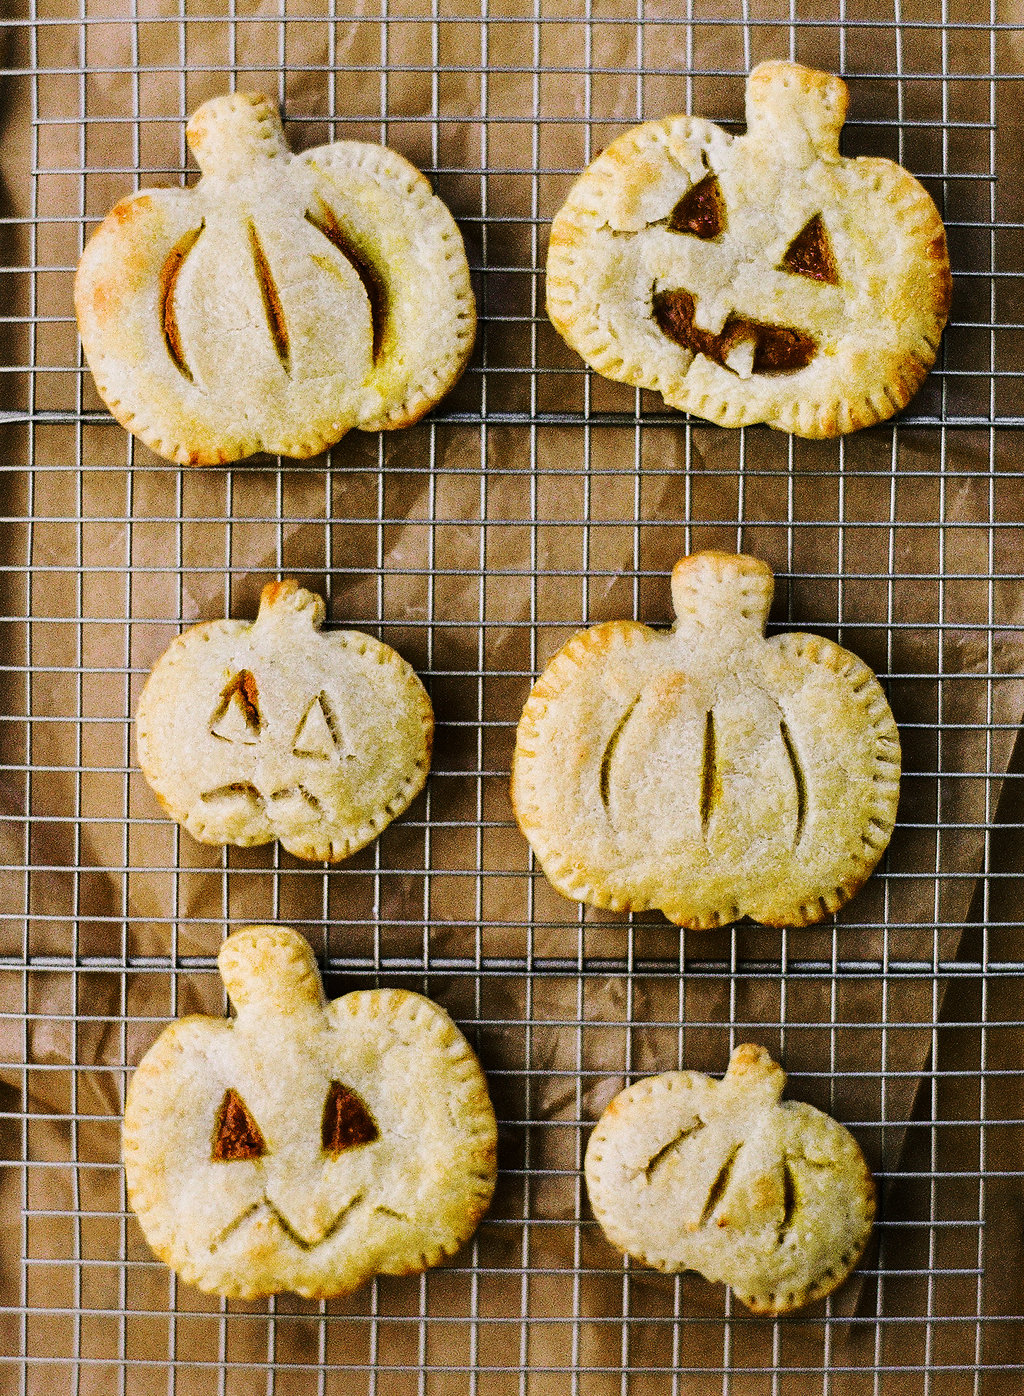
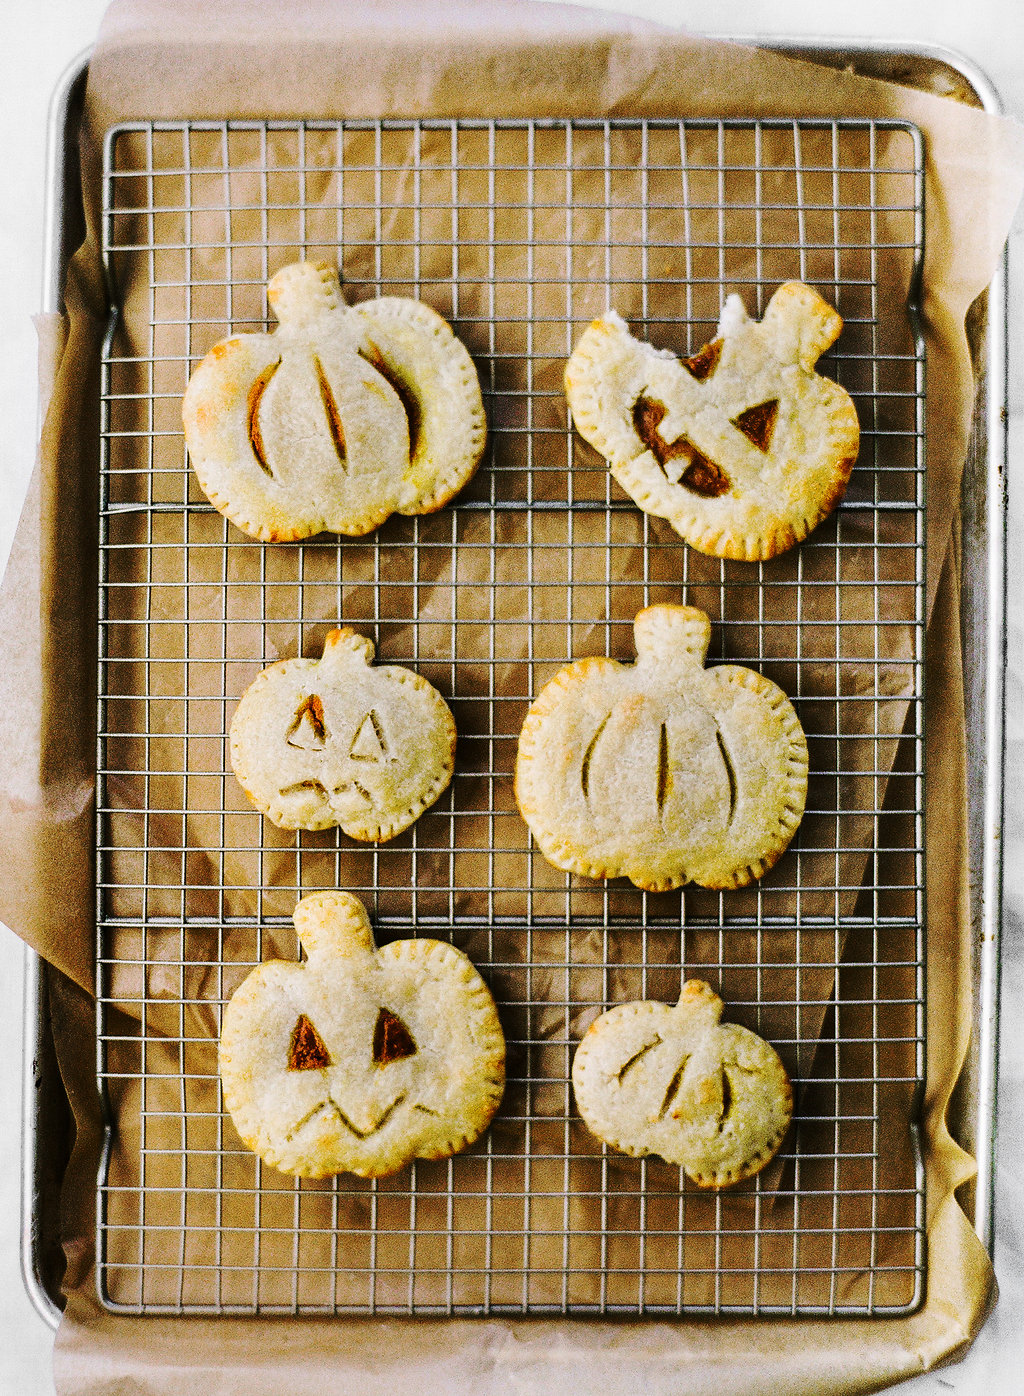
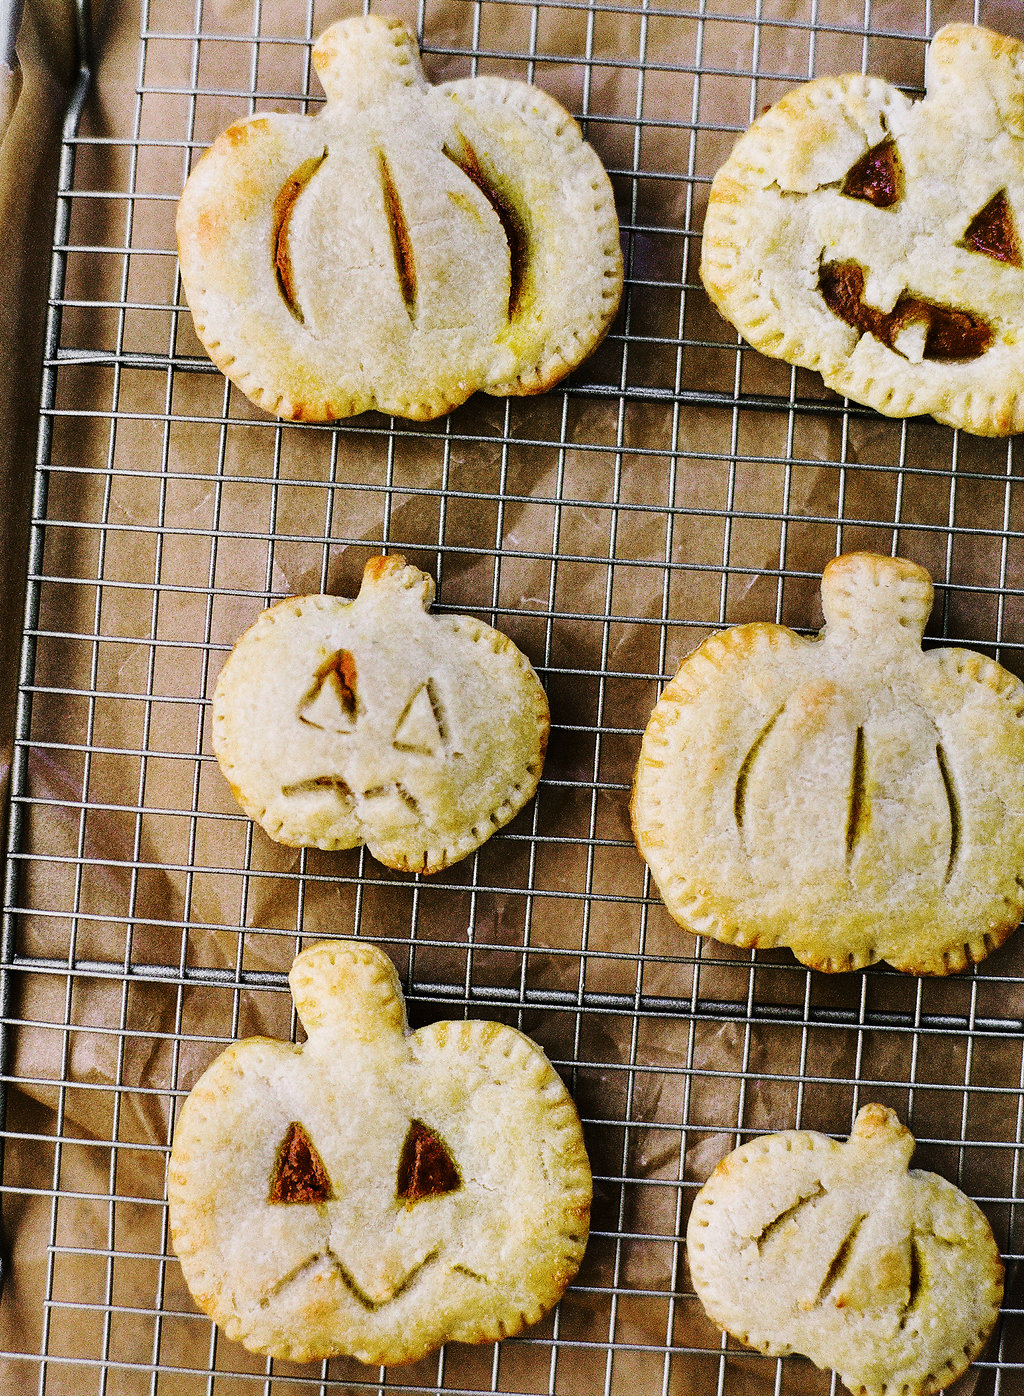
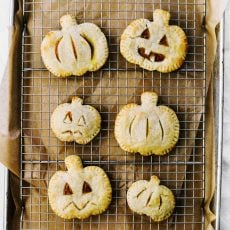
These Pumpkin Hand Pies are the cutest treat for Halloween, or anytime throughout the Fall season.
Pumpkin season is officially upon us and I could not be more excited! No matter how basic that makes me.
There’s nothing more comforting than the aroma of pumpkin and warm spices from delicious treats like Pumpkin Bars with Brown Sugar Frosting or my go-to Pumpkin Spice Coffee Cake. And these little pies are no exception!
This pie dough is a total dream to work with, so even if making pie dough intimidates you, I promise this will be super easy! It’s a terrific beginner-level dough, too.
Feel free to get creative here with your shapes and decorations! Because the dough is such a dream to work with, it makes the whole process so much fun. It’s the perfect Halloween baking project with the kids, too!

Sprinkle of Science
How to Make Pumpkin Hand Pies
What Type of Pumpkin Should I Use?
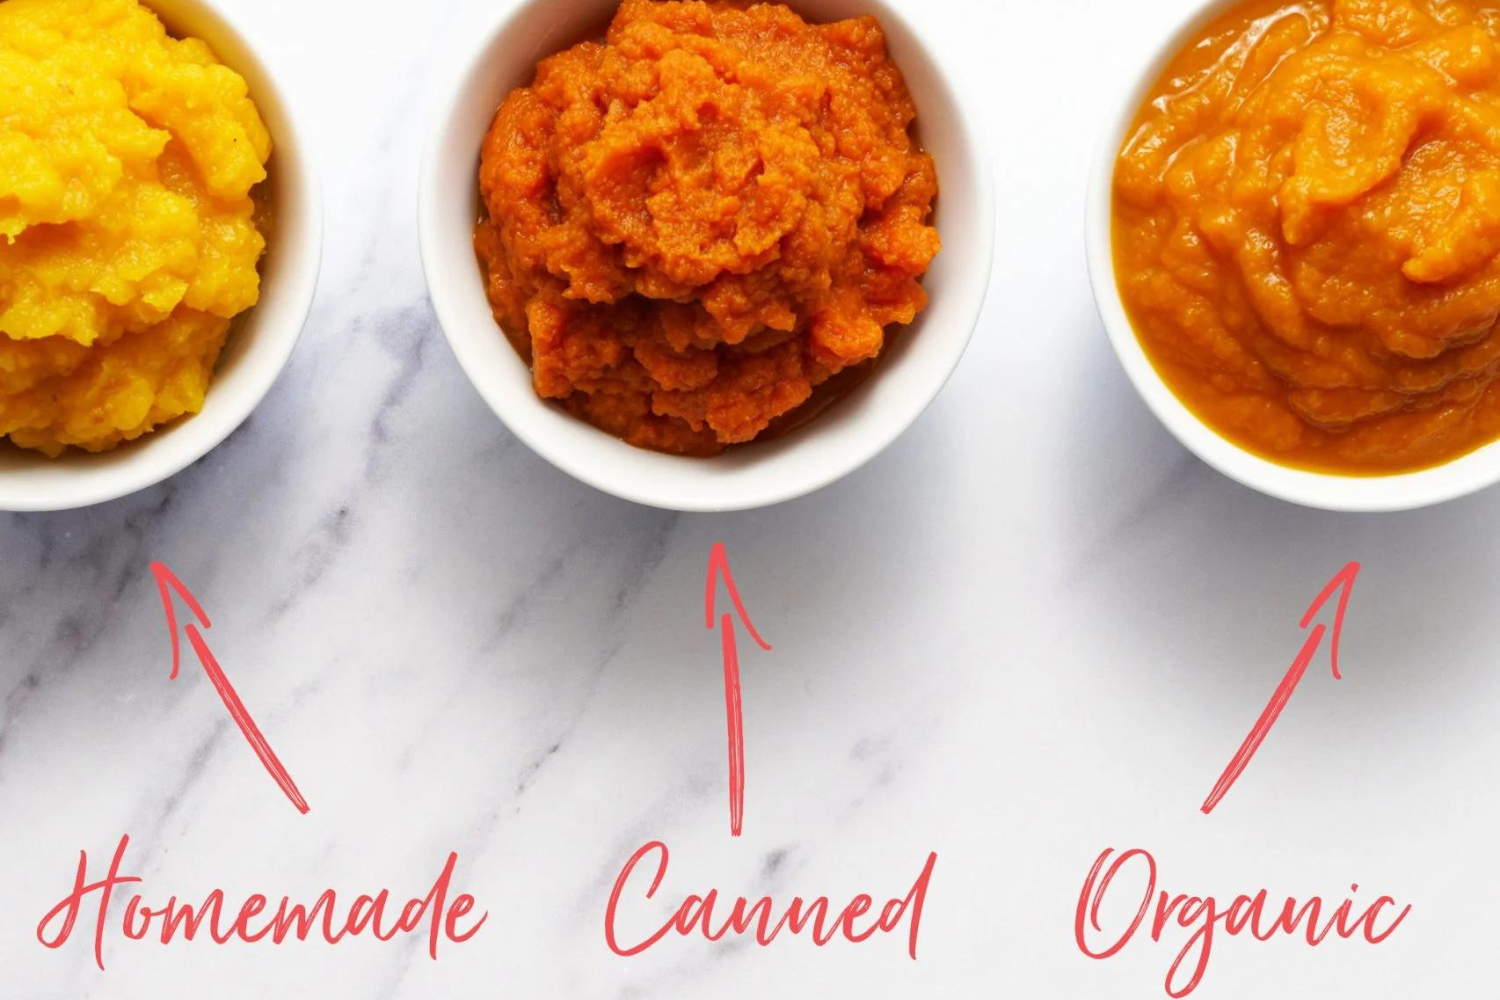
- I used store-bought canned pumpkin puree for these Pumpkin Hand Pies.
- If you’d like, you could use homemade pumpkin puree in this recipe – just be sure to remove any excess liquid before using, to avoid soggy pies.
- Note: Be sure NOT to use canned pumpkin pie filling for this recipe – it is not the same thing as pumpkin puree.
- Check out my Fresh vs. Canned Pumpkin article for the differences between using fresh pumpkin puree, regular canned pumpkin, and organic canned pumpkin, as well as step-by-step instructions for how to make your own!
- See just how different each type of pumpkin puree looks in the image below!
The Spices
This recipe is pretty spice-forward, for a well-rounded pumpkin spice flavor. Feel free to adjust the spices a little if you prefer less spice.
Check your spices to ensure they’re not expired. If they are expired, toss them and purchase new ones – otherwise, your Mini Pumpkin Pies may be bland.
How do I Cut Pumpkin Shapes for Hand Pies?
- I used a larger and a smaller pumpkin-shaped cookie cutter set to cut out pumpkin shapes from the pastry dough.
- Keep in mind that the larger the cookie cutter, the fewer pies you will yield.
- Use a paring knife to slice cute jack-o-lantern designs or lines to accentuate the gourd shape on your top pieces of dough, if desired.
How to Store Pumpkin Hand Pies
These hand pies are best eaten the day they’re baked, but they will keep inside an airtight container in the fridge for up to 2 days. Reheat in the oven at 350°F until warmed through and the pie crust is refreshed, if desired.
Alternatively, shape and fill the pies, and store covered in the refrigerator for 1 day. Bake as directed in the recipe.
Can You Freeze Pumpkin Hand Pies?
Yes! Place shaped, filled, and unbaked pies on a baking sheet in the freezer until solidified, and then remove to an airtight container. Freeze for up to 1 month. Bake straight from the freezer, adding about 3 minutes to the baking time.
Email This Recipe
Enter your email, and we’ll send it to your inbox.
Ingredients
For the dough:
- 1 cup (237 grams) water
- 1 1/2 sticks (170 grams) unsalted butter
- 3 tablespoons granulated sugar
- 1 1/2 teaspoons fine sea salt
- 1/2 teaspoon ground cinnamon
- 2 3/4 cups (350 grams) all-purpose flour

For the filling:
- 1/2 cup (122 grams) pumpkin puree
- 1/4 cup (57 grams) sour cream
- 1 large egg, beaten
- 1/4 cup (50 grams) light brown sugar
- 1/4 teaspoon cinnamon
- 1/8 teaspoon nutmeg
- 1/8 teaspoon cloves
For the egg wash:
- 1 large egg, at room temperature
- 1 teaspoon water
Instructions
Make the dough:
- Heat the water and butter in a medium saucepan over medium heat until butter has melted. Add in the sugar, salt, and flour. Remove from heat and stir with a wooden spoon until a wet and oily dough comes together. Wrap the dough in plastic and refrigerate for at least 2 hours.
Make the filling:
- In a large bowl, beat all filling ingredients together until smooth.
Assemble and bake:
- Preheat the oven to 400°F. Line a large baking sheet with parchment paper.
- In a small bowl, combine the egg and water to make an egg wash.
- On a lightly-floured surface, roll the dough out to about 1/8-inch thickness. Using a pumpkin-shaped cookie cutter, cut out shapes.
- In half of the pumpkin shapes, cut 3 vertical slits or triangle “eyes” for decorative effect. These will become the tops of the pies.
- Place 2 tablespoons filling onto each bottom pumpkin shape, leaving a border around the edge. Use more or less filling depending on the size of your pumpkin shapes, being careful not to overfill. Lightly brush the border with the egg wash. Place the top over each bottom, pressing the edges to seal the filling inside.
- Make ahead: At this point, the unbaked pies can be covered and refrigerated for 1 day. They can also be frozen and baked straight from the freezer, adding about 3 minutes to the baking time.
- Brush the tops of the pies with the remaining egg wash. Bake until golden brown, about 25 minutes. Let cool before serving.
Notes
This post was published in 2017 and has been updated with additional recipe tips. Photos by Constance Higley.


The pastry was interesting, as I’ve never made pastry using melted butter. The dough was a little tricky to handle cuz it got soft very fast, but it was a bit easier to roll out than a normal short crust, and cooked surprisingly well. I wouldn’t use this for a pie per se, but it was fine for hand pies. The filling was a bit too liquidy and tricky to manage with cut out pumpkin faces so we opted to just do enclosed pumpkin shapes instead. Overall pretty good.
These came out pretty well. But, I am making them to bring to Thanksgiving in two days. What’s the best way to store them? Or, should I have made them only the day of?
Great filling recipe, just what I was looking for, thank you!
I’ve been on a hand pie “kick” lately and wanted to make pumpkin, but wasn’t sure how to approach it, because when I make a regular pumpkin pie, the custard filling is completely liquid when I put it in the shell and sets up over an hour of baking, which obviously wouldn’t work for a hand pie. I was thinking of cooking the custard on the stovetop before filling the handpies, but your recipe is quick, easy, and delicious, so I don’t need to bother with the extra step. I will definitely be trying some more of your recipes!
Testing star rating transfer
Hi,Tessa
This hand pies is really looking so good. Just saved it for trying it soon. Thanks for putting it together 🙂
Great idea Tessa. I was looking for new ideas for Halloween baking.
These are so stinkin’ cute!
Thank you, Erica!