


This post may contain affiliate links. Read our disclosure policy.

In this post I’m going to share with you how various ingredients and techniques can affect the taste, texture, and appearance of your chocolate chip cookies. This will hopefully help you understand how chocolate chip cookie recipes work so you can make the PERFECT batch every time, whatever you consider to be perfect. This information will allow you to alter or create your own chocolate chip recipe that produces cookies just the way YOU like them. You’ll be an expert on the anatomy of the chocolate chip cookie.
I used the Nestle Tollhouse Chocolate Chip Cookie recipe as my control and made little changes and variations in techniques and ingredients to show you how they affect the cookie.
I halved and adapted the original Tollhouse recipe. I kept everything the same through each recipe test, changing one key thing to see its effect and photographing the results for you. Be sure to check out my free Cookie Customization Guide to truly perfect your cookies!
Cookie Tools and Ingredients Used:
Tools and Ingredients Used (when applicable):
-Spring-Loaded Cookie Scoop (Medium or 1 1/2-Tablespoon size)
–Chicago Metallic sheet pans
–Escali Digital Food Scale
–KitchenAid 5-quart Stand Mixer
–Oven thermometer
–Unbleached parchment paper
-Gold Medal All-Purpose Flour
-Fine sea salt
-Light brown sugar
-Large eggs
-Unsalted butter at a cool room temperature
Control Recipe
Ingredients:
1 cup plus 2 tablespoons (142 grams) all-purpose flour
1/2 teaspoon baking soda
1/2 teaspoon salt
1 stick (113 grams) unsalted butter, at room temperature
1/4 cup plus 2 tablespoons (75 grams) granulated sugar
1/4 cup plus 2 tablespoons (75 grams) packed light brown sugar
1/2 teaspoon vanilla
1 large egg
1 cup (170 grams) semi sweet chocolate chips
Directions:
Preheat oven to 350°F. Line baking sheets with nonstick baking mats or parchment paper.
In a medium bowl combine the flour, baking soda, and salt.
In the bowl of an electric mixer beat the butter, granulated sugar, and brown sugar until creamy, about 2 minutes. Add the egg and vanilla, beating well to combine. Gradually beat in the flour mixture. Stir in the chocolate chips. Scoop 1 1/2 tablespoon-sized balls and place onto prepared baking sheets.
Bake for 9 to 11 minutes, or until golden brown. Cool for 2 minutes before removing to wire racks to cool completely.
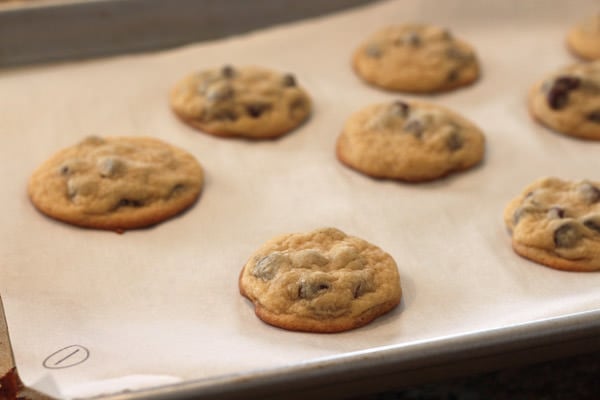
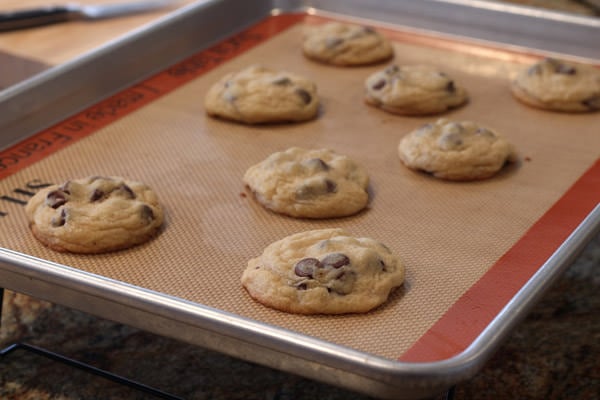
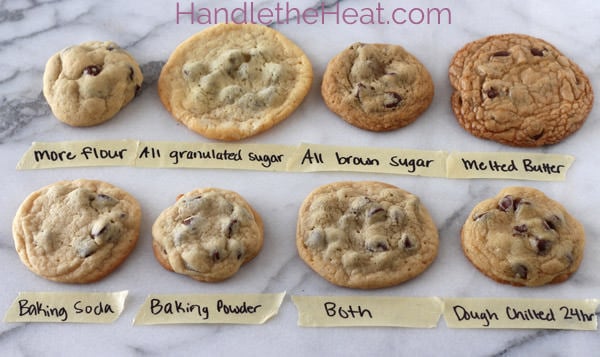
Here is the control, an adapted version of the Nestle Tollhouse recipe. The full recipe I used to base all of the tweaks on is at the bottom of this post.
Baking Powder:
Removed baking soda from recipe and used 1/2 teaspoon baking powder. This produced results that were more cakey and puffed while baking.
Baking Powder AND Baking Soda:
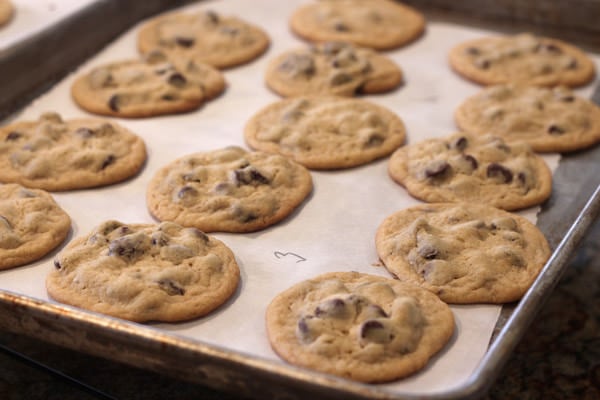
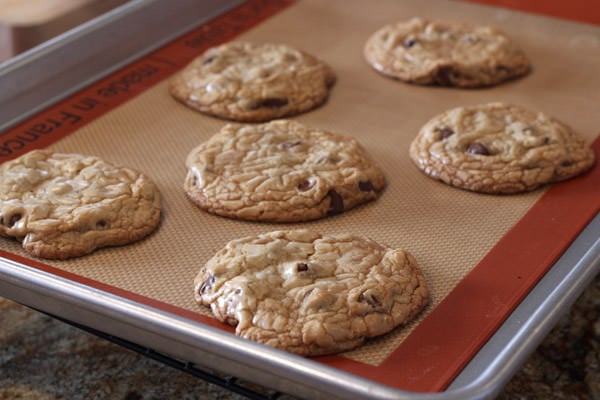
Used 1/4 teaspoon baking powder and 1/4 teaspoon baking soda. This produced results that were crisp at the edges, soft in the middle, with a good amount of spread. The combination of the two leaveners produced the best results in my opinion.
MORE Flour:
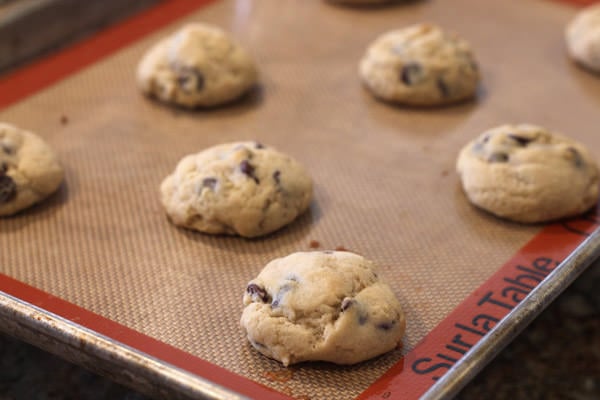
Increased the flour to 2 cups (250 grams) which created a more crumbly dough and very little spread. The cookies were small yet thick and relatively undercooked (ooey and gooey) in the middle.
MELTED Butter:
I replaced the room temperature butter with melted and cooled butter. Instead of creaming the butter and sugar with an electric mixer, I simply stirred the butter and sugars together then let sit for 5 minutes, until the sugar was better absorbed by the butter. This produced flatter cookies that had a shiny, crackled top reminiscent of brownies. They were also more crisp at the edges.
All Granulated Sugar:
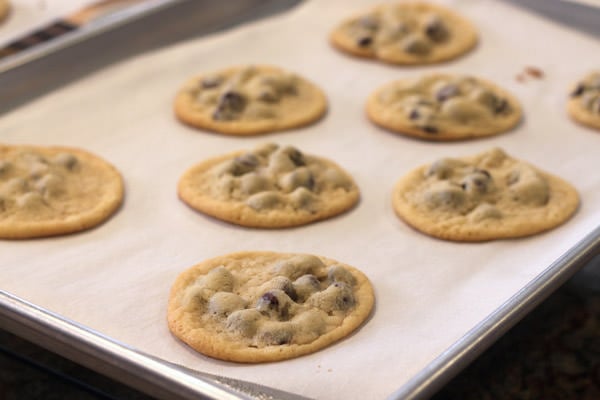
I used 3/4 cup granulated sugar (150 grams) in this recipe which produced flat, white, chewy, and slightly crunchy cookies but with little flavor. Since baking soda (called for in the control recipe) requires an acid (such as brown sugar) to react, these cookies fell very flat as you can see by the way the chocolate chips protrude.
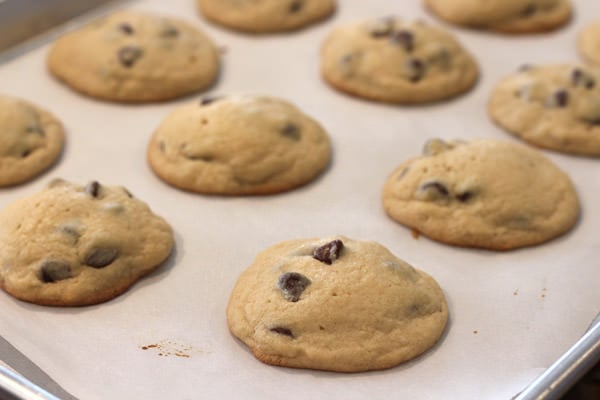
All Brown Sugar:
I used 3/4 cup (150 grams) packed light brown sugar in this recipe which produced thick, brown, and soft cookies with an intense butterscotch flavor. The original control recipe uses an even ratio of granulated and brown sugars. If you prefer your cookies to be flatter, chewier, or crisper, use more granulated sugar. If you prefer your cookies to be softer and thicker and have a pronounced butterscotch flavor, use more brown sugar.
24 hour CHILLED Dough:
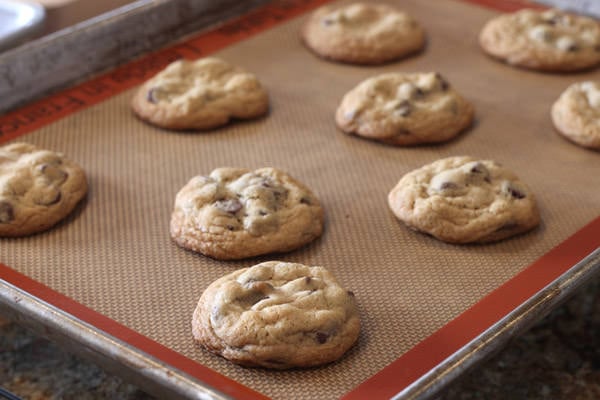
I used the control recipe but chilled it in the fridge for about 24 hours before shaping and baking. This produced cookies that were slightly thicker, chewier, darker, and with a better depth of butterscotch flavor. If you have time, try chilling your next cookie dough for at least 24 hours, or up to 48 hours.
Final Comparison:


You are doing the Lord’s work.
Oh thank you! I was just thinking of doing a grand cookie experiment such as this as I was munching on my favorite bakery cookie and wondering why mine never come out that way. We were on a road trip and so my mind wandered and I wished that someone had written a book or article on cookie tips and then i found this via pinterest…!!! Yay and thank you!
This was excellent research and beautifully shared, thank you! I can imagine the project it was for you, and I’ll surely refer to your tips. Sunset Magazine did similar in 1995 and 1998. I’m not able to find it on-line but I could scan and email if you’re interested.
I like to substitute some whole wheat flour in many of my recipes. Did you consider that for one of your variations? What are your general experiences with such a substitution?
Great test! Interesting how small changes make such a big difference! I have used the Crisco recipe for many years and always get rave reviews. Other tip is to slightly under cook them – if you like chewy cookies! Keep up the great work!
http://www.crisco.com/Recipes/Details.aspx?recipeID=2102
Thank you for such a definitive study (and for all that baking research). I think I’ve made all those cookies, myself, just accidentally! Posting to my “Recipe Box” on Pinterest.
Great post!! I love the comparisons!
What an amazing post! I’ve tried cookie recipes where they came out “not quite right” but I wasn’t sure what made the cookies too crispy or flat or whatever so I ditched those recipes. Now I can go back and try them again with a little tweak from your handy guide. Bottom line: you’re a genius and thank you!~
I was just wondering about what causes various results today. Have you ever decreased the total amount of sugar in the recipe? I like my cookies less sweet and am wondering how that affects the texture.
You didn’t say when to add the vanilla.My cookies turn out puffy when I take them out of the oven but then when they cool they go flat.So I am going to try adding the baking soda,baking powder and cornstarch and use more brown sugar and less granulated sugar.Then chill for at least 24 hours.Thanks for all the test you did.Appreciate it.
Thanks for taking the time to do this. Your experiments answered lots f questions. Thanks again.
Love this comparison! I have always added the extra flour, something I started years ago because the batter just seemed too thin, and left the mix in the refrig for 24 hours before baking (mix one night, bake the next due to work!). Always got compliments on my cookies. But now I want to try the 1/4 baking soda and 1/4 baking powder and also maybe experiment with a little more brown sugar to see how they turn out, Thank you!!