


Tessa’s Recipe Rundown
Taste: Since this recipe isn’t 100% whole wheat, the buns have just the right amount of nuttiness. I also like that they aren’t overly sweet like a lot of store-bought buns.
Texture: Again, since the recipe isn’t 100% whole wheat these buns are still light and fluffy yet firm enough to stand up to a juicy burger.
Ease: Definitely a recipe to make on a free day but there really isn’t much hands-on time.
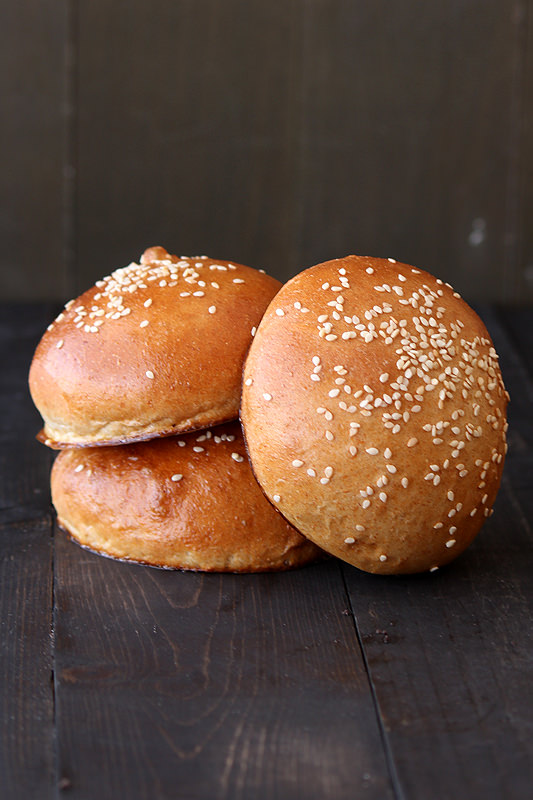
Appearance: I love the beautiful brown crust and how it is offset by the sprinkling of white sesame seeds.
Pros: Great compromise of health and texture/flavor. These buns freeze well too!
Cons: None.
Would I make this again? Absolutely yes
This post may contain affiliate links. Read our disclosure policy.
Do you have any fun 4th of July plans? It’s supposed to get up to 118°F this weekend here in Phoenix so I’m not sure it will be any cooler by the 4th. I may have to just celebrate by listening to the fireworks instead of stepping out into this sizzling heat. That is if I’m not working! At least I can enjoy good food on the holiday. There’s nothing quite like a homemade grilled cheeseburger to celebrate summer holidays and these burger buns would be perfect on any summer cookout table. Have you ever made homemade burger buns? If not, you must do so as soon as possible. They are about a thousand times better than store-bought buns and can elevate almost any burger recipe to gourmet status.
Email This Recipe
Enter your email, and we’ll send it to your inbox.
Ingredients
- 3 tablespoons (44 grams) warm whole milk, between 105° and 120°F
- 1 cup (237 grams) warm water, between 105° and 120°F
- 2 1/4 teaspoons (1 packet, 8 grams) instant yeast*
- 2 1/2 tablespoons (31 grams) granulated sugar
- 1 large egg, at room temperature, slightly beaten
- 2 cups (254 grams) bread flour
- 1 1/3 cups (160 grams) whole wheat flour
- 1 1/2 teaspoons fine sea salt
- 3 tablespoons (43 grams) unsalted butter, at room temperature


For topping:
- 1 large egg beaten with 1 tablespoon water
- Sesame seeds, optional
Instructions
- In the bowl of a stand mixer fitted with the dough hook, combine the milk, water, yeast¹, sugar, salt and egg.
- Add the flour to the bowl, and mix until incorporated. Mix in the salt and butter. Knead on medium-low speed for about 6 to 8 minutes, or until the dough comes together into a soft yet slightly tacky dough (should not be unbearably sticky). Avoid adding too much extra flour because it will create tough buns. It's better to be sticky than dense, I promise!
- Transfer the dough to a lightly oiled bowl. Cover with plastic wrap and let rise in a warm place until doubled in size, 1 to 2 hours².
- Line two baking sheets with parchment paper³. Divide the dough into 8 equal parts. Gently roll each portion of dough into a ball and place four to a baking sheet, 2 to 3 inches apart. If your dough is unbearably sticky, lightly grease your hands with cooking spray or lightly dust the tops of each dough ball with flour before rolling. Cover with a clean towel and let rise again until puffy and almost doubled, 1 to 2 hours.
- Preheat the oven to 400°F. Brush the tops of the buns lightly with the egg wash. Sprinkle with sesame seeds. Bake the buns about 15 minutes, rotating halfway through baking, until the tops are golden brown. Transfer to a rack to cool completely.
- Serve or store in an airtight container in the freezer for up to one month. Let defrost at room temperature before reheating in a 350°F oven until warmed or toasting.


I’m just trying this recipe. Can’t wait to see how it turns out.:)
These were great! Thanks for the recipe. The taste was really good, but my outside was hard like a roll instead of a hamburger bun. Do you know how I can fix it? Thx
My dough is on the first rise right now. I only needed one brown/wholewheat bun for myself for Thai chicken burgers tonight (the rest of my family always demand white hamburger buns), but none of the grocery stores had any! So I decided, “What they hey! I’ll just make my own then and freeze the rest!” Looking forward to getting them into the oven eventually!
My house is filled with the smell of these baking! I added some Dukkah on top for some extra loving. They have a really nice texture. The only problem I had was losing a bit of volume when removing the plastic wrap on the second proofing so didn’t come out as high as I’d like 🙁 but they still make the perfect addition to our home made burgers tonight.
Thanks
I’m not a big burger eater, however, if homemade buns were involved, I’d eat like 18. These look fantastic!
Mom used to bake homemade buns all the time. This reminds me of my childhood 🙂
Man, those buns look perfect!!
I agree, homemade is so much better than store bought! Love that you can freeze these!
You are right – homemade buns are the best. One secret I learned (the hard way) – if you’re going to freeze them, cut them in half first. Then it is a snap to pop them in the microwave to defrost. Cutting a soft, warm roll doesn’t always turn out so well.
Fantastic tip!
This is definitely on my to do list because sometimes I feel like I put all this work into making a beautiful burger with all of the fixings, and then I end up with a boring, storebought burger bun. Womp womp. It’s funny because I don’t mind taking the plunge with a fancy dessert or entree with unusual ingredients, but I’m scared away by baking bread sometimes. I don’t know why, because it always ends up sooo much better than I expect. Thanks for the recipe!
What a grat idea for the fourth! Nothing is better than homemade bread!
I’ve been wanting to make homemade burger buns for-ever now! You’ve inspired me I need to do this asap!!!