


Tessa’s Recipe Rundown
Taste: Like a chocolate chip cookie in pancake form!
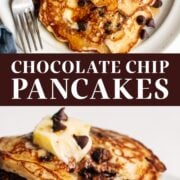
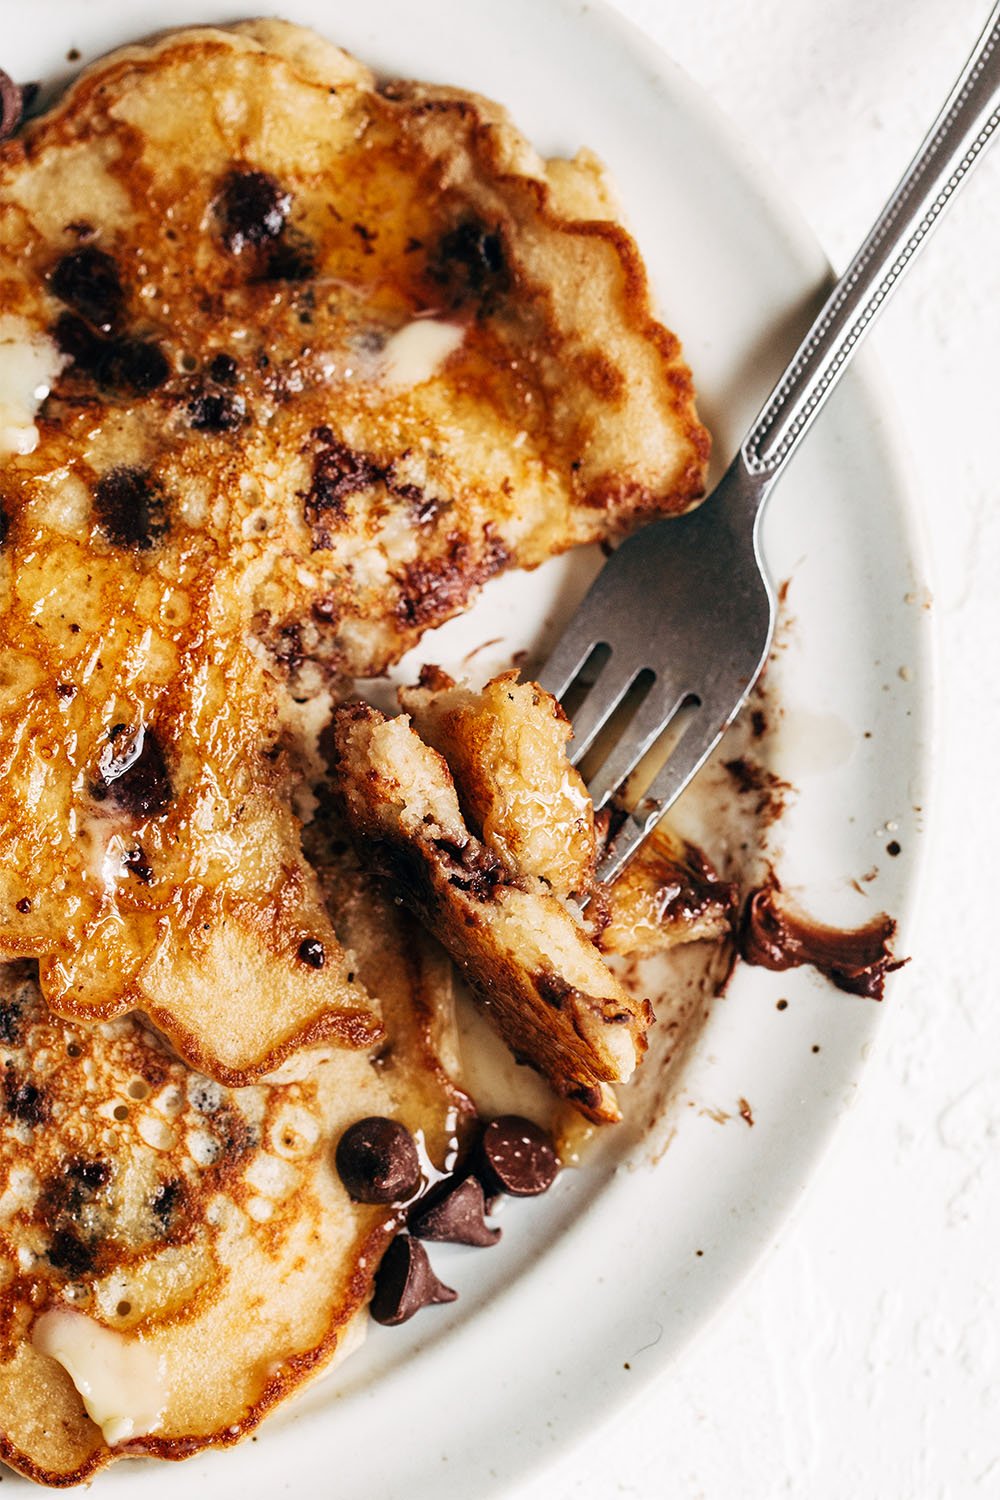
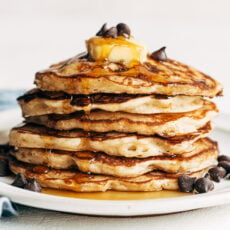
Texture: Fluffy on the inside with crispy edges and bits of gooey chocolate chips throughout.
Ease: Super easy, no need to use a box mix.
Appearance: The first couple of pancakes are always a bit wonky… then you get the hang of it 😉
Pros: One of my favorite Sunday morning breakfast treats.
Cons: None!!
This post may contain affiliate links. Read our disclosure policy.
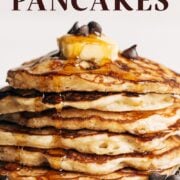
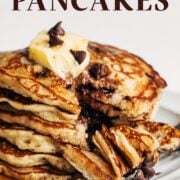


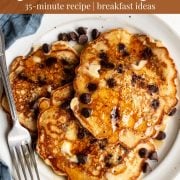
Is there anything more nostalgic than a stack of chocolate chip pancakes?
Homemade pancakes are already a treat on their own… but throw chocolate chips in the mix and I’m in heaven.
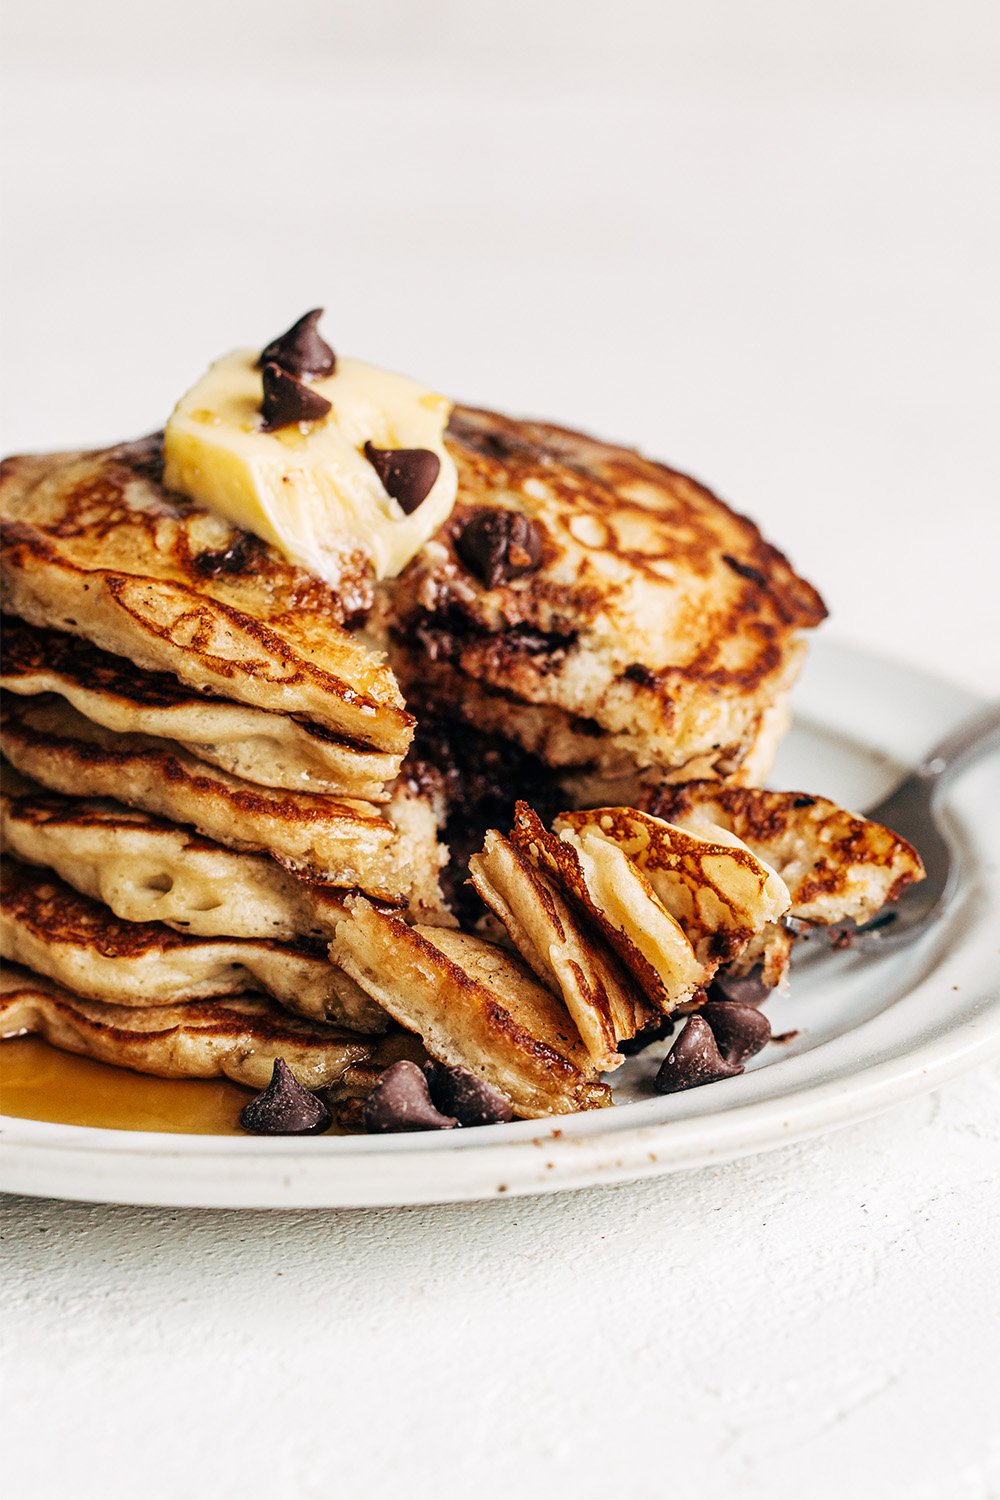
Swap in some brown sugar to the pancake ingredients for that perfect amount of butterscotch sweetness, and these pancakes honestly don’t even need toppings.
But that’s not going to stop me from getting in there with maple syrup and a few pats of butter for good measure. And of course, enjoying with some fresh eggs, bacon or sausage, or a bowl of fruit. This is my ideal Sunday morning treat!

How to Make Chocolate Chip Pancakes
Ingredients for Chocolate Chip Pancakes:
- All-purpose flour: measured accurately.
- Baking powder: this reacts in part to the heat of the skillet for fluffy pancakes!
- Baking soda: this helps elevate the pH level for golden brown pancakes, my favorite. If you want to know more about the science of baking soda & powder, click here!
- Salt: just enough to balance out the flavors.
- Brown sugar: the butterscotch flavor in brown sugar gives this recipe a nod to classic chocolate chip cookies.
- Buttermilk: 2 cups buttermilk helps achieve the fluffiest, most flavorful pancakes. More on this ingredient below!
- Eggs: this is what helps to emulsify the batter and make for rich pancakes.
- Butter: for melting and for frying.
- Chocolate chips: the star ingredient! I used regular semi-sweet chocolate chips, but you could also use mini chocolate chips, milk chocolate chips, or dark chocolate chips.

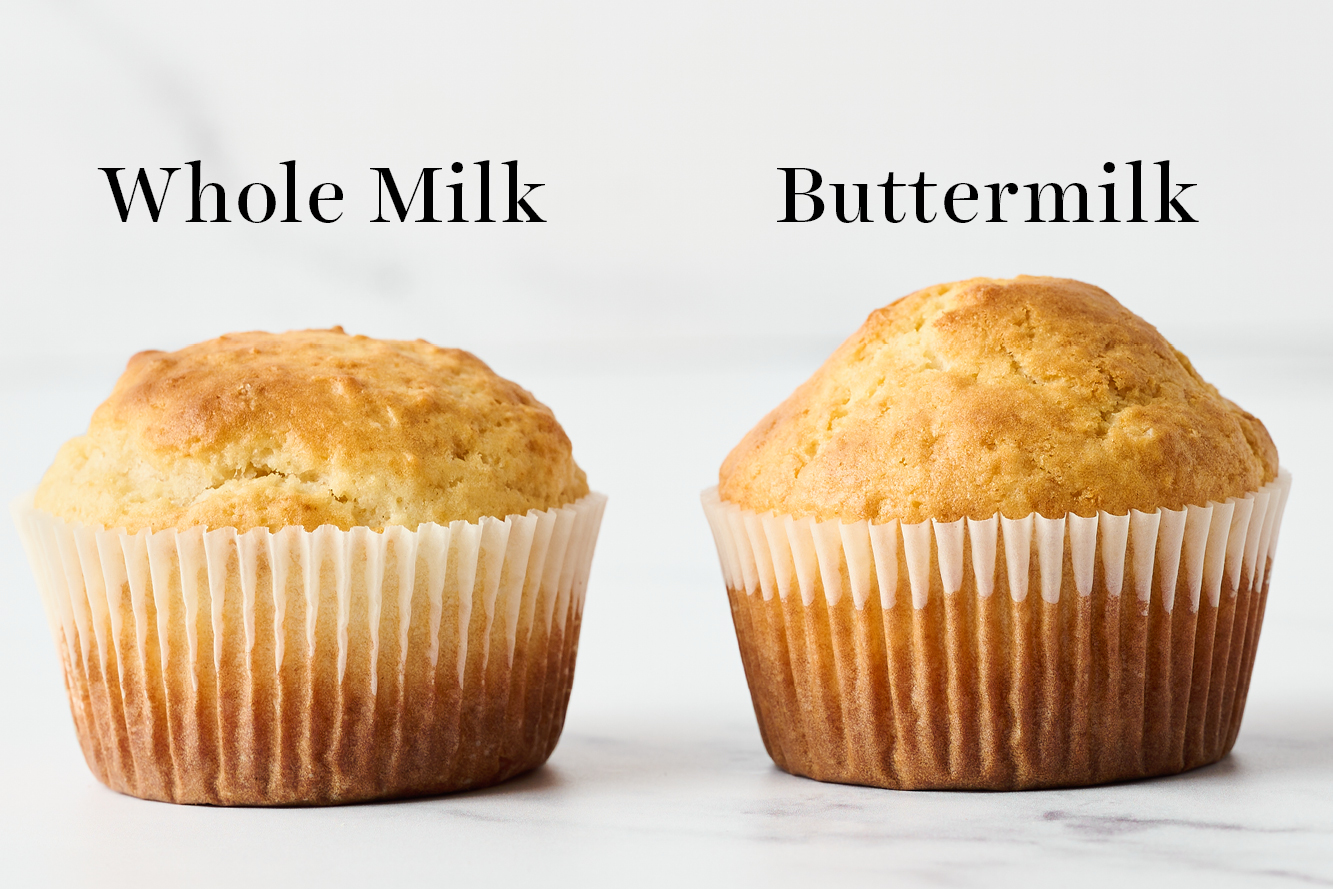
Do I Have to Use Buttermilk for this Chocolate Chip Pancake Recipe?
For the best results, yes. I’ve done extensive side-by-side testing on buttermilk vs. buttermilk substitutes or vs. regular milk. You can read about my experiments here: Buttermilk 101.
At the end of the day, I find nothing quite compares to the taste and thick texture of the real thing. So if you can, I’d recommend using real buttermilk. It functions differently on a chemical level than milk or cream, or even a DIY buttermilk swap.
If you absolutely can’t, you can use this substitute: 2 scant cups whole milk + 1 tablespoon distilled vinegar or lemon juice. Just note that you won’t yield quite the same results for flavor and texture.
When to Add Chocolate Chips to Pancakes?
I stand firmly in the camp of adding chocolate chips to the batter as a final step before cooking your pancakes. I think dotting the batter with chocolate chips while it’s cooking leads to burnt chocolate when you go to flip them. You just want to make sure you fold in the chocolate chips in just before you plan to cook the batter so they don’t sink to the bottom of the bowl.
How to Make FLUFFY Pancakes:
- There are two keys to get fluffy pancakes that rise high. First, make sure your baking powder and baking soda are FRESH. You can learn more about chemical leaveners and how to test if they’re fresh here.
- Second, don’t overmix the batter! There must be some lumps and even streaks of flour remaining in the batter. Be gentle here! Even a little bit of overmixing the dry ingredients and wet ingredients together can produce pancakes that are rubbery and tough instead of tender and fluffy.

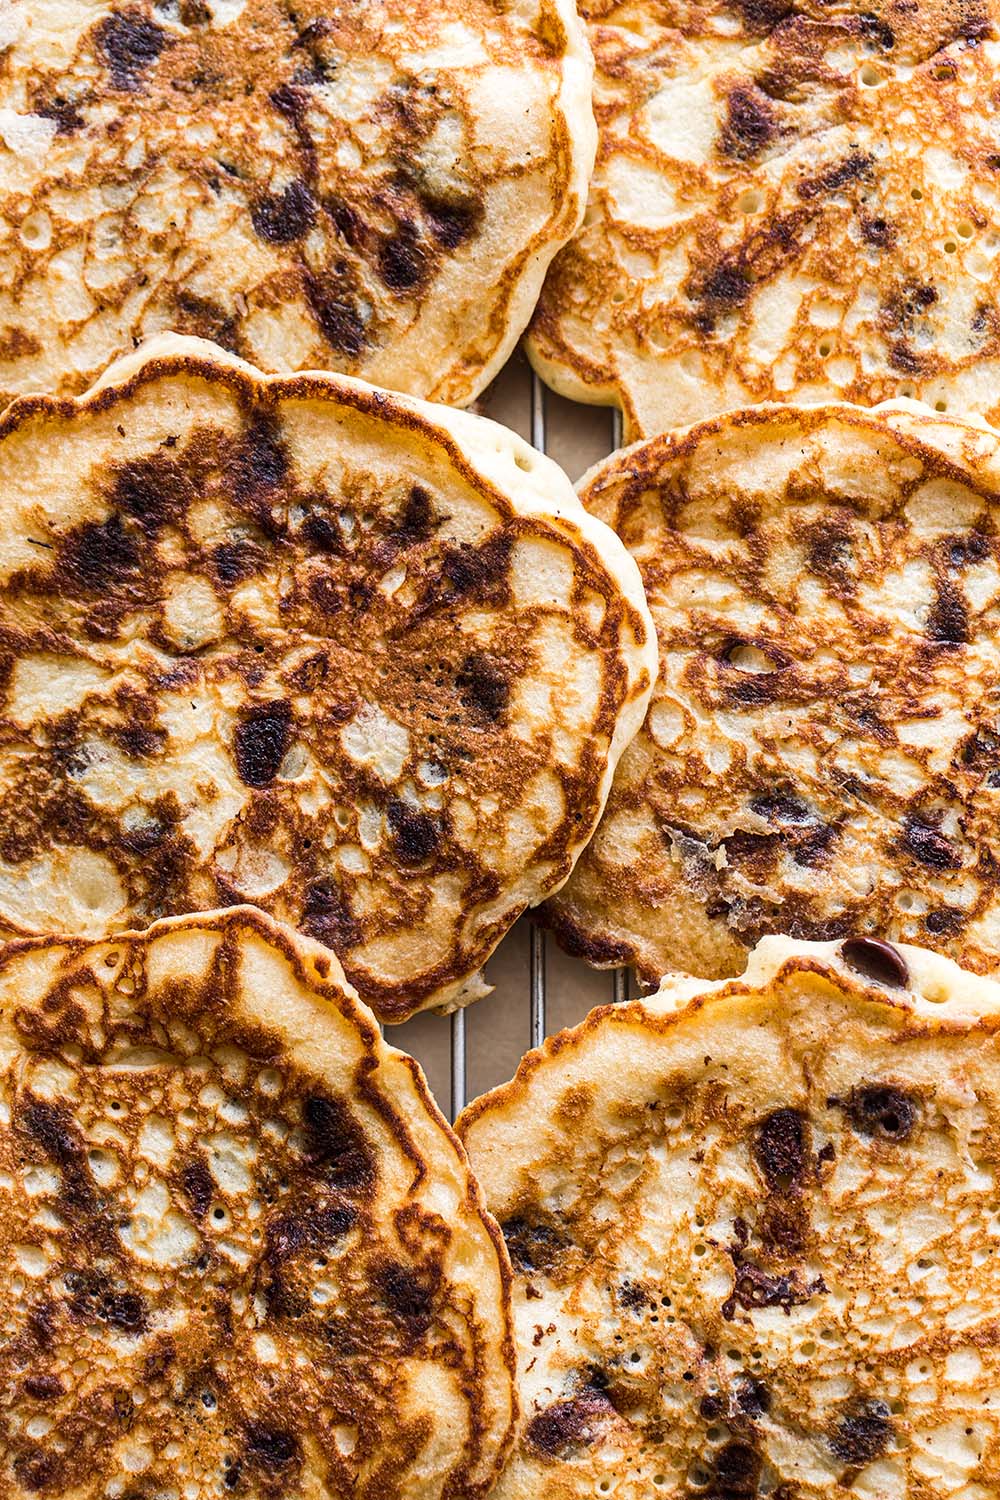
How to Make Pancakes with Crispy Edges:
The key to those crisp browned edges is to make sure the pan is hot but also that the butter is hot before you pour any batter into the pan. However, you only want the pan or griddle heated to medium heat. This will help you get golden edges with pancakes that are perfectly cooked through in the center.
If the pan is too cold, you’ll get flabby pancakes. If it’s too hot, it’ll scorch on the outside before the insides have cooked through.
- Start by heating the pan, preferably nonstick or cast iron, over medium until it feels hot. This will take a few minutes. Place pats of butter on the pan where you will pour out the batter. Don’t cook more than 3 pancakes at once if you’re using a 12-inch pan.
- Allow the butter to melt completely and get hot before ladling the batter by the 1/4 cup into the pan. This will make sure you get those golden crispy edges. However, if you don’t like those edges, you may want to cook a little lower and slower.
- Allow the pancakes to cook without touching until large bubbles appear all over the surface of the batter, about 3 minutes (less time for a paler or smaller pancake). Using a thin, wide plastic spatula, flip the pancakes with confidence through the wrist and continue to cook for 2 to 3 minutes or until done. I find the first one or two pancakes are always the ugliest, and they make great chef’s samples.
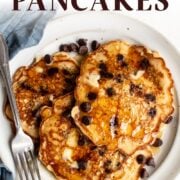
Topping Ideas for Chocolate Chip Pancakes:
- Maple syrup (obviously!)
- Butter
- Whipped cream or coconut whip
- Bananas
- Strawberries
- Raspberries
- Peanut butter
- Nutella
- Powdered sugar
Can You Make Pancake Batter Ahead of Time?
Pancake batter can be made up to 1 day ahead of time. Keep covered in the refrigerator.
How to Keep Pancakes Warm Before Serving:
If you’re making a big batch, keep the oven warm at 200°F and transfer the cooked pancakes to a cooling rack set over a rimmed sheet pan. The cooling rack helps prevent the pancakes from getting soggy. Only keep the pancakes warm for about a half hour using this method.
How to Freeze Pancakes:
Place a sheet of parchment paper between layers of pancakes and place in an airtight container. Store in the freezer for up to 2 months. Reheat in the microwave uncovered for about 1 to 2 minutes, or until heated through. You can also reheat pancakes in the toaster.
More Breakfast Recipes You’ll Love:
- The Best Pancakes
- Lemon Poppy Seed Pancakes
- How to Make French Toast
- The Best Homemade Waffles
- Chocolate Chip Scones
P.S. Check out ALL my breakfast recipes HERE!
Email This Recipe
Enter your email, and we’ll send it to your inbox.
Ingredients
For the pancakes:
- 2 cups (254 grams) all-purpose flour
- 2 teaspoons baking powder
- 1/2 teaspoon baking soda
- 1/4 teaspoon fine sea salt
- 1/4 cup (50 grams) lightly packed light brown sugar
- 2 cups buttermilk
- 2 large eggs
- 1 teaspoon vanilla extract
- 2 tablespoons (28 grams) butter, melted, plus more for frying
- 1 cup (170 grams) semisweet chocolate chips

For serving:
- Maple syrup
Instructions
- In a large bowl, combine the flour, baking powder, baking soda, salt, and brown sugar.
- In a small bowl, whisk together the buttermilk, eggs, and butter. Add to the flour mixture and stir until combined with several streaks of flour remaining. Gently stir in the chocolate chips. Don’t overmix. If not using immediately, cover and refrigerate for up to a day.
- Heat a skillet or griddle over medium-high heat. Add a generous pat of butter and allow to melt and become hot. Ladle batter by the 1/4 cup into the skillet then reduce the heat to medium. Cook until the bubbles form all across the top of the pancakes, then flip and continue to cook until golden brown, about 3 minutes per side. Repeat with remaining batter.
- If not serving the pancakes immediately, keep warm on a cooling rack set over a rimmed baking sheet in a 200°F oven. Only keep the pancakes warm for about a half hour using this method. Serve with maple syrup and extra butter, if desired.
Photos by Ashley McLaughlin


Can I mix the dry ingredients for keeping in the pantry for future use?
We haven’t tried that, but it should work! Just be sure to store in an airtight container in a cool, dry place. The brown sugar may clump a bit over time, and the leaveners can lose some potency, especially if they’re exposed to any humidity.
Thank you for replying! Would also like to gift the dry mix to family and friends that’s why I asked 🙂
5 stars!
This site is my go to for anything sweet.( the cookie recipes are the best). I have always been impressed not only by the recipes, but that I made something that tastes that good! ( with your help of course) The pancakes were buttery and fluffy. I made “buttermilk” by mixing regular milk with a few tablespoons of plain Greek yogurt and it worked beautifully. I added banana extract and whole pecans in the batter and topped with fresh banana slices, it was a delicious addition with the chocolate.😋
These were delicious!! I only put chocolate chips in 1/2 of them. This is such a great base recipe. I’d never added brown sugar to the dry ingredients like this and it was perfect!!
One of the best pancakes I have ever made. Highly recommend if you like chocolate chip pancakes!
These were a hit!! I wanted to make my sissy something special for her birthday and these pancakes did just that! Even with the edits because I didn’t have buttermilk, brown sugar, and ran out of butter for this recipe. This is also toddler approved as one of my 2 yr old twins helped with the ENTIRE recipe! Thanks for sharing this one!
The pancakes came out quite doughy in the center. They weren’t fluffy at all. What did I do wrong?
Hi Susan! How long did you cook your pancakes on each side for? We always recommend following the sensory indications over the timing suggested. So making sure to cook until the bubbles form all across the pancakes before flipping, then cooking until golden brown. I wonder if your pancakes just weren’t cooked enough? Please let me know if I can help troubleshoot further, but I hope you give this recipe another try!
Incredible recipe, best from scratch pancakes I’ve made out of many many different recipes I’ve tried over the years!
So happy to hear how much you love this recipe! Thanks for taking the time to write such a rave review 🙂
These were super easy and came out exactly like the pictures! Will make again!
Perfect! So happy you loved them 🙂
A nice and sweet start at the morning. Soft texture and a little cross at the outside.
Excellent pancake recipe! Super fluffy and moist.
These look scrumptious! Will definitely be making these as soon as possible! 🙂