


Tessa’s Recipe Rundown
Taste: Ridiculously flavorful! I love it when desserts have a beautiful depth of flavor instead of just being sweet.
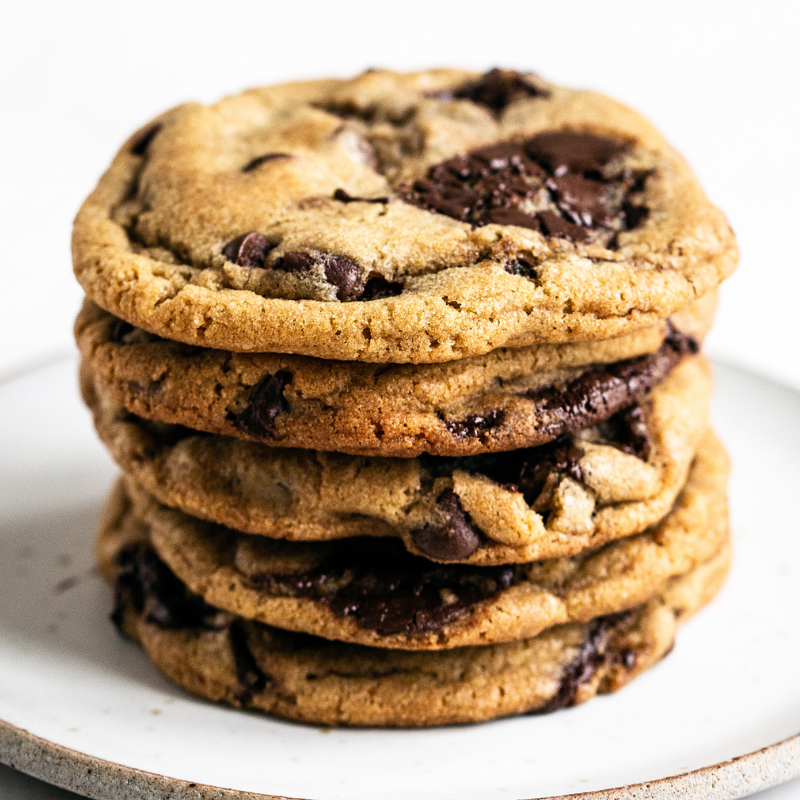
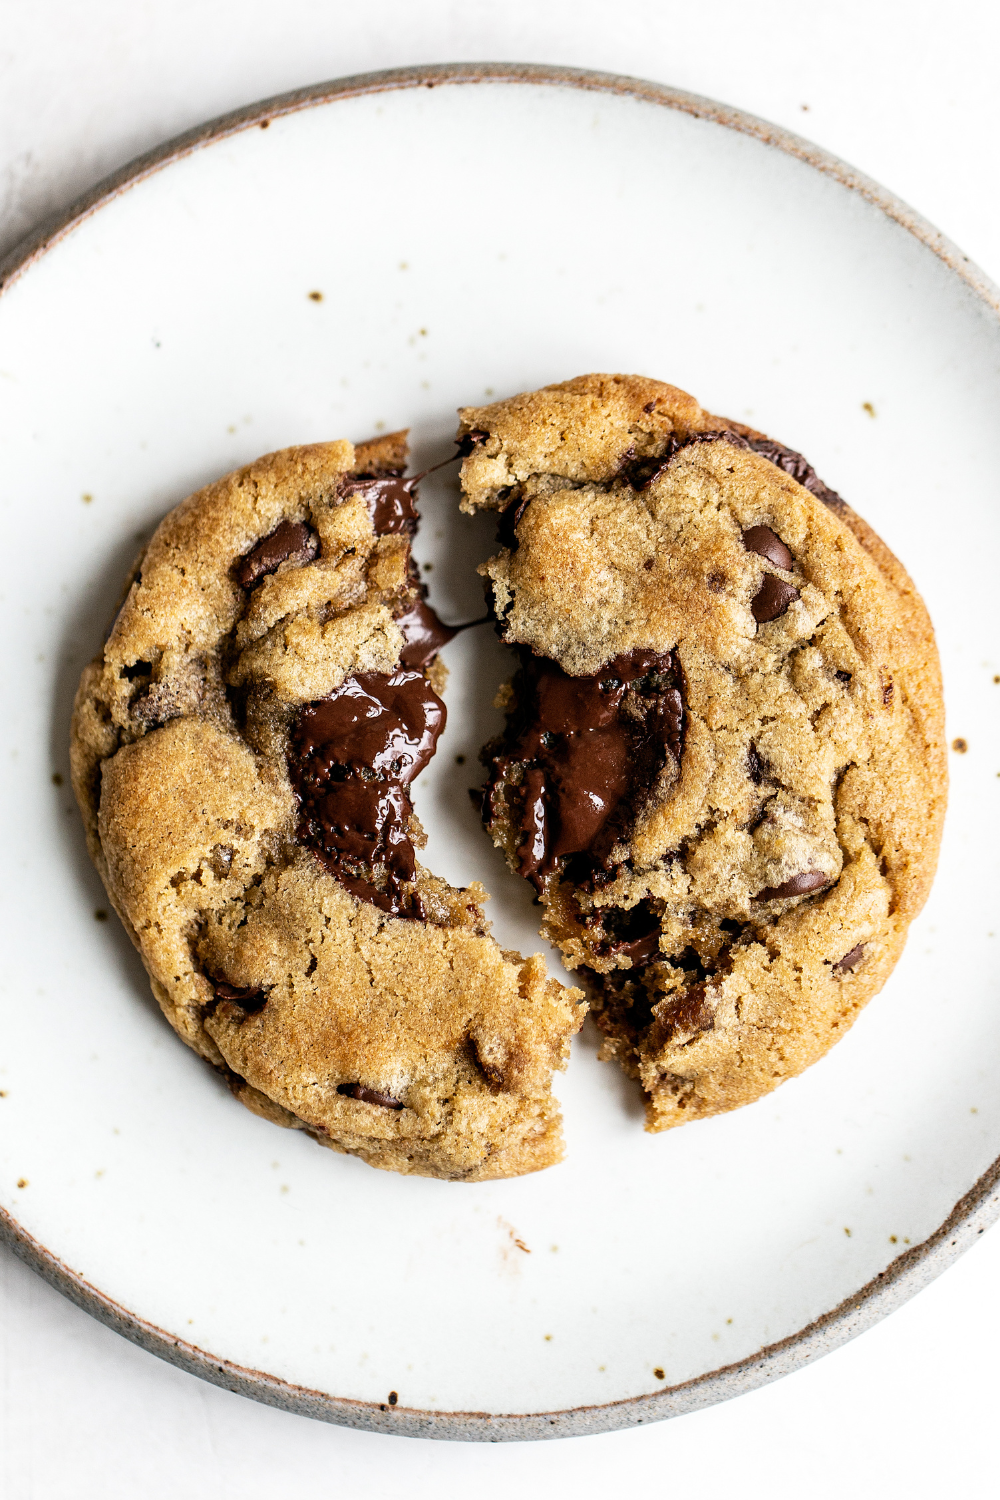
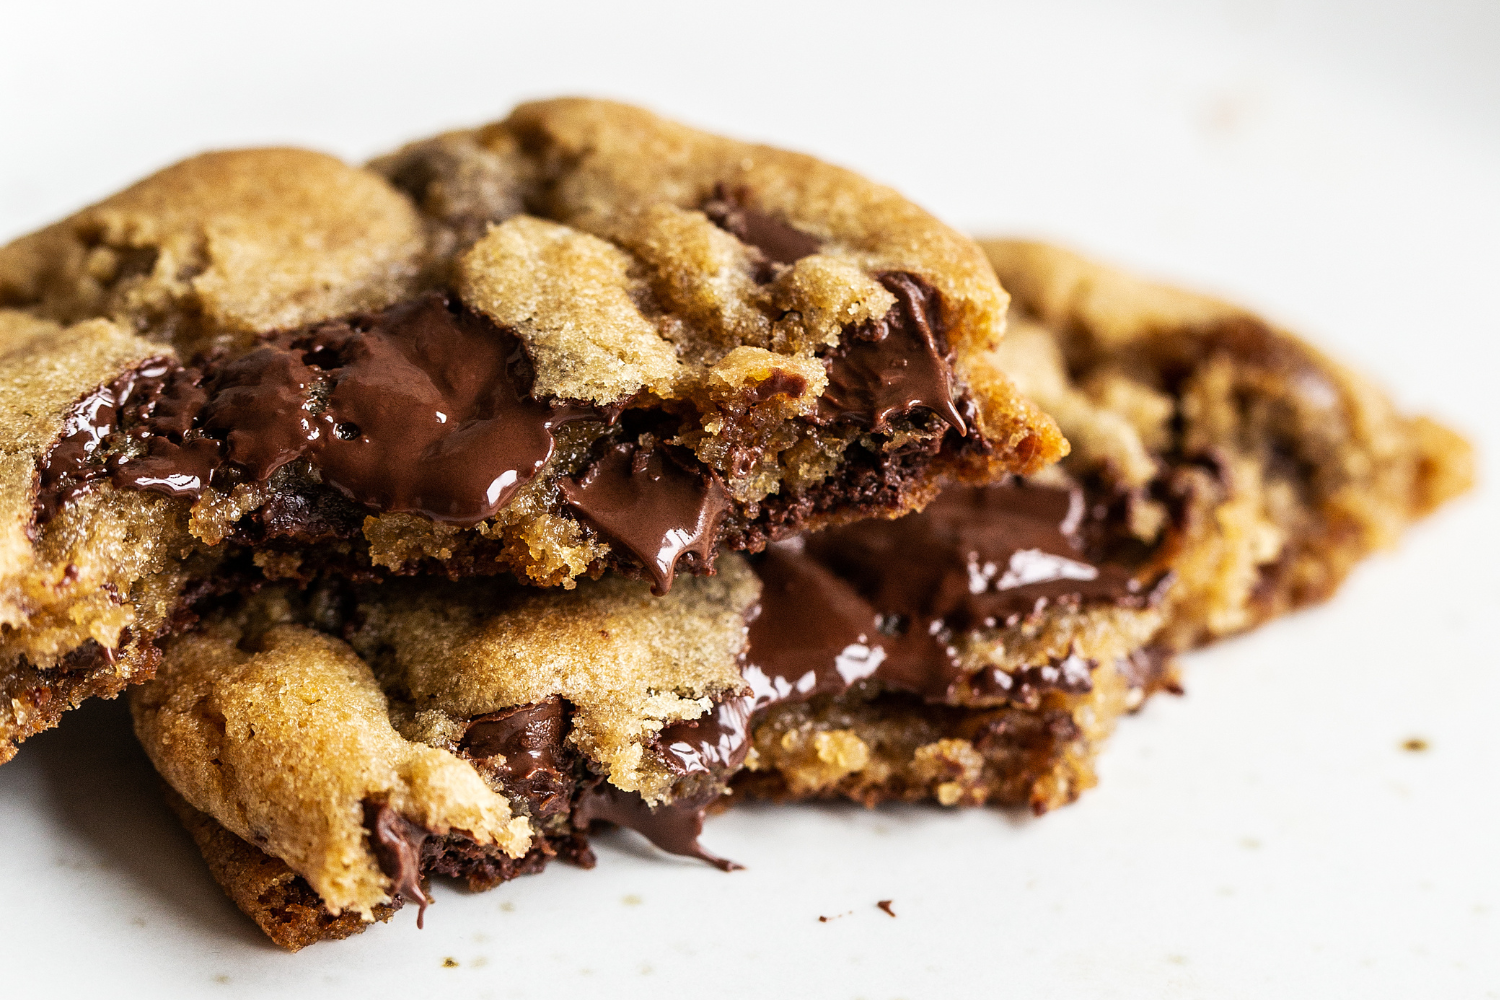
Texture: Incredibly chewy and gooey in the middle, crunchy at the edges. Absolute perfection.
Ease: Browning the butter is an extra step but I find the process fun and adds so much flavor. Other than that, this recipe is simple!
Pros: Amazing cookie recipe.
Cons: None!
Would I make this again? Absolutely yes.
This post may contain affiliate links. Read our disclosure policy.
Brown Butter Chocolate Chip Cookies are pure heaven in a cookie.
Somehow, I never tire of cookies. No matter how many hundreds, maybe even thousands, of batches I’ve made in my life I still crave them regularly.
That’s why I’m always experimenting and tweaking cookie recipes in the kitchen, especially chocolate chip cookies. Sometimes all I want is an ultra-rich, gooey, and chewy chocolate chip cookie1
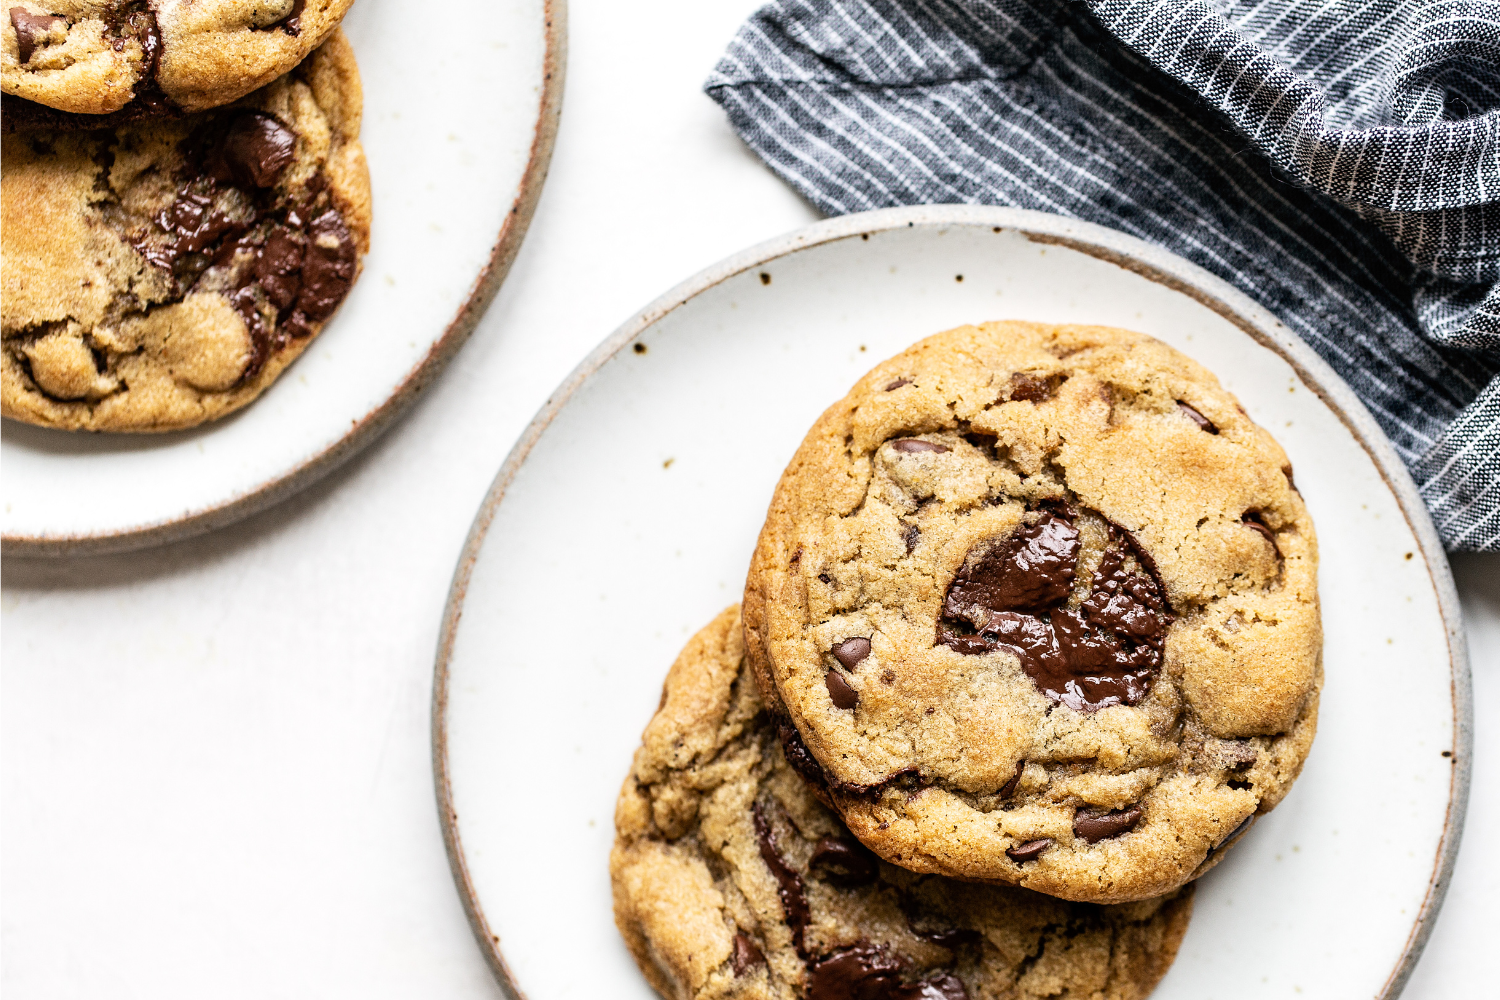
These Brown Butter Chocolate Chip Cookies are absolute perfection because they are loaded with rich and nutty brown butter, butterscotch flavors, and pure chocolate.
Chocolate chunk cookies can easily become too ooey and gooey (too much of a good thing exists!) so I made sure these were the perfect balance of gooey, chewy, and crunchy.
I’ve included tons of tips below so your cookies turn out perfectly! Best of all? These cookies require no electric mixer required.

How to Make Perfect Brown Butter Chocolate Chip Cookies
Browning the Butter
Follow the directions closely for browning the butter. It’s super simple, just be sure not to walk away from it. It quickly goes from browned to burnt. Be sure to scrape all the brown bits into the mixing bowl – that’s where the flavor lives! Learn all my tips and tricks for browning butter in my How to Brown Butter article here.
Do You Have to Use Bread Flour?
You don’t absolutely have to use bread flour, but it adds a ton of chewy texture to these Browned Butter Chocolate Chip Cookies, so I always have some on hand. If you don’t have bread flour, then just use all-purpose flour in place of the bread flour in the recipe, but note that you will lose some chewiness. Make sure to weigh your flour accurately. If you add too much flour, your cookies may end up dry, dense, or crumbly and barely spread.
Sugar
A high ratio of dark brown sugar makes these Brown Butter Cookies moist, chewy, and rich in flavor. I love it. Again if you don’t have any on hand, you can use light brown sugar but your cookies will lose a little bit of awesomeness. Please don’t reduce the sugar in these cookies – learn why here.
Chocolate
- This Brown Butter Chocolate Chip Cookie recipe calls for both regular semisweet chocolate chips as well as chocolate baking wafers.
- I used the Guittard brand of semisweet chocolate wafers. You can also find these specifically at Whole Foods, Williams Sonoma, or Sur la Table.
- You could alternatively use the Valrhona brand of wafers (they call theirs “chocolate feves”). They don’t hold their shape like chocolate chips do. Instead, they turn into little chocolate puddles that are a delight to bite into.
- If you can’t find baking wafers/feves, feel free to use 2 cups of semisweet chocolate chips instead.
Sea Salt
This is optional, but you can add a sprinkling of flaky finishing sea salt to the cookies right after pulling them out of the oven. I love the salty-sweet combination, and I think it really adds something special to these Brown Butter Chocolate Chip Cookies.
My Best Tips for Brown Butter Chocolate Chip Cookies:
- I always use a kitchen scale to weigh my ingredients, especially flour. Incorrectly measured flour can lead to cookies that are tough, crumbly, dry, too thick, or just blah.
- I also swear by using an oven thermometer to ensure baking accuracy. Most ovens run a little hot or cold, so checking the temperature with an oven thermometer ensures the best cookies possible.
- Use a quality unlined light-colored baking tray, like these ones. Line with parchment paper for best results. The pan you bake on has a huge impact on your cookies. Learn more about the best and worst baking pans here.
- Don’t skip the chill period!! More on that just below.
Chilling the Dough
I know it’s annoying to have to wait to enjoy cookies, but I promise you it’s SO worth it. Both the taste and texture of these Brown Butter Chocolate Chip Cookies improve as the dough chills. Freezing does not work the same as chilling, so there are no shortcuts here. Learn more about how and why to chill cookie doughs in this article here.
Size
I’ve found these are best made as big cookies, using a 3-Tablespoon large cookie scoop. This provides the perfect texture: crisp at the edges, slightly gooey in the center, and chewy throughout. If you want to make smaller cookies, use a 1.5-Tablespoon cookie scoop and reduce the baking time to about 10 minutes.
Portioning the Cookie Dough Before vs. After Chilling
- I recommend following the directions in the recipe for chilling the dough in one big mass, and then portioning the dough because it prevents the dough from drying out while chilling.
- However, if you’re finding it too challenging to scoop the Browned Butter Chocolate Chip Cookie dough at this point, feel free to scoop before chilling.
- There’s a bit more risk that your dough will dry out in the fridge this way, so just be sure to store the cookie dough balls in an airtight container or good quality ziptop bag, to prevent them from drying out.
- Then simply bake the pre-portioned Browned Butter Chocolate Chip Cookies straight from the fridge after the 24-72 hour chill time!
Can I Freeze Browned Butter Chocolate Chip Cookie Dough?
Yes – but make sure you chill the dough first, before freezing. Learn why here. I like to portion out the dough and place it on a baking sheet, then freeze just until solid. Transfer the frozen dough balls to a ziptop bag and store in the freezer for up to 6 weeks. This way, you can bake off small batches of fresh cookies whenever you feel like it! Check out my full post on how to freeze cookie dough and bake from frozen here.
More Cookie Recipes You’ll Love:
- Bakery Style Chocolate Chip Cookies (one of my most popular recipes!)
- Peanut Butter Chocolate Chip Cookies
- Oatmeal Chocolate Chip Cookies
- Black & White Chipper Cookies
- S’mores Cookies
- Brown Butter Dulce de Leche Cookie Cups
See ALL of my chocolate chip cookie recipes + tips & insights into the SCIENCE of cookie baking here!
Become a Baking Genius!
Sign up for our free email newsletter for NEW recipes & baking science secrets.

Browned Butter Chocolate Chip Cookies
Ingredients
- 2 sticks (227 grams) unsalted butter
- 1/2 (100 grams) cup granulated sugar
- 1 1/4 cups (250 grams) lightly packed dark brown sugar
- 1 1/2 cups (190 grams) all-purpose flour
- 1 cup (127 grams) bread flour
- 1/4 teaspoon baking powder
- 1 teaspoon baking soda
- 1 teaspoon fine sea salt
- 2 large eggs plus 1 egg yolk, at room temperature
- 2 teaspoons vanilla
- 1 1/2 cups (255 grams) semisweet chocolate chips
- 1 cup (140 grams) semisweet chocolate baking wafers (from Guittard or Valrhona)
Instructions
- In a small saucepan set over medium heat, melt the butter. Swirling the pan occasionally, continue to cook the butter. It should become foamy with audible cracking and popping noises. Once the crackling stops continue to swirl the pan until the butter develops a nutty aroma and brown bits start to form at the bottom. Once the bits are amber in color, about 2 to 3 minutes after the popping stops, remove from heat and pour into a mixing bowl. Add in the sugars, stir, then set aside to cool completely.
- In a medium bowl combine the flours, baking soda, baking powder, and salt.
- To the browned butter mixture, add the eggs, egg yolk, and vanilla and stir with a rubber spatula until combined. Slowly stir in the flour mixture until just combined. Stir in the chocolate chips and wafers.
- Wrap dough in plastic wrap and refrigerate for at least 24 hours but no more than 72 hours. Let dough sit at room temperature just until it is soft enough to scoop.
- Meanwhile, preheat the oven to 350ºF. Line baking sheets with parchment paper.
- Divide the dough into 3-tablespoon sized balls and drop onto prepared baking sheets, leaving about 3 inches between each piece of dough to spread.
- Bake for 11 to 13 minutes, or until golden brown. Let cool for 2 minutes before removing to wire racks to cool completely.
Recipe Notes
This post was originally published in 2015 and recently updated with recipe improvements and new photos. Photos by Ashley McLaughlin.
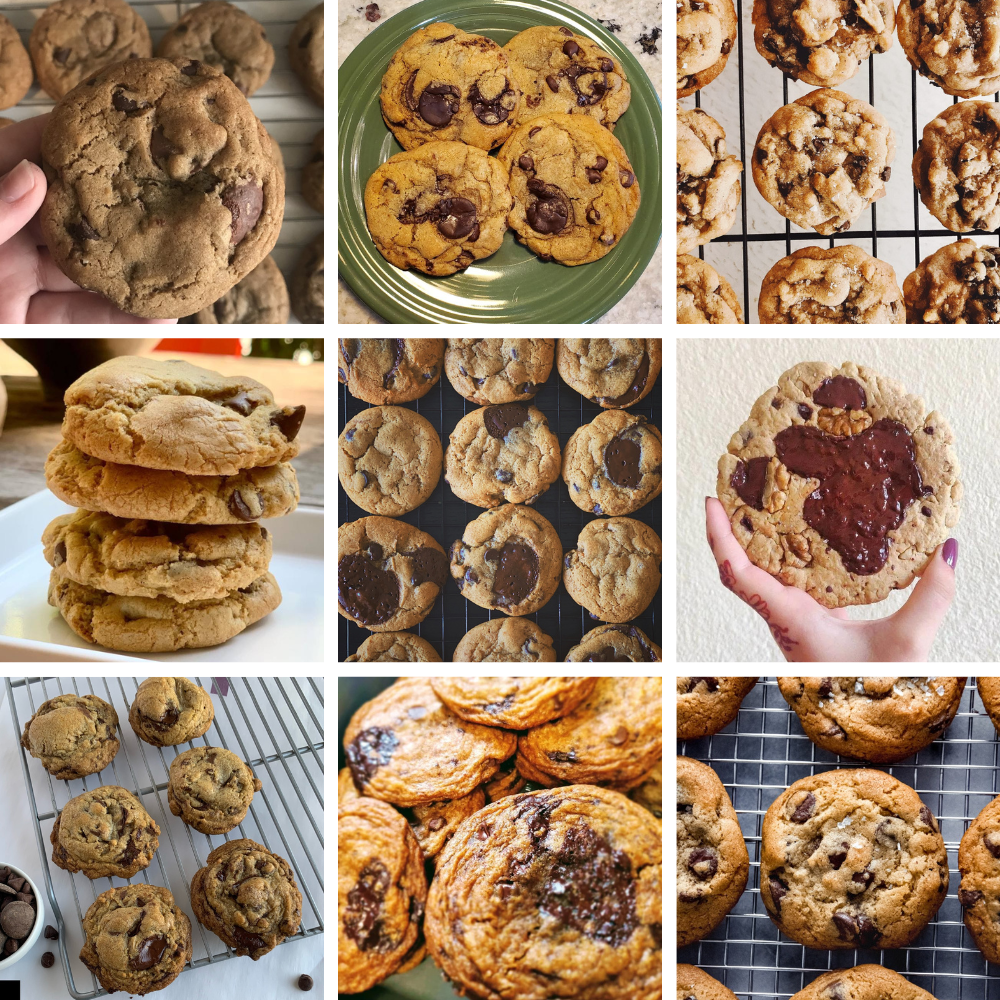
September Baking Challenge
This recipe was the September 2020 selection for our monthly baking challenge. Every month you can join a challenge by baking the recipe and snapping a photo for a chance to win prizes! Learn more about my monthly baking challenges here. Check out everyone’s cookies:


I only have aluminum-free baking powder. 1) do I need to alter the recipe if I use it? 2) is the freshness test the same as you mention in your article on Baking Soda vs. Baking Powder?
BTW, I don’t usually ask questions, but I really enjoy how well you answer them. Your knowledge and passion really shows! <3 <3 Thank you.
Hi Joanne! I’m so glad you enjoy the way our team answers questions! We all try to give the best baking knowledge we possibly can! 🙂
To answer your question, it depends whether or not your aluminum-free baking powder is double-acting or not. Aluminum-free baking powders are sometimes only single-acting, which means they primarily react only with liquid, which makes them react more quickly than most double-acting powders. Double-acting baking powders react with both liquid and heat, which slows the process down, and means they will maintain leavening power, even after your dough has chilled for a length of time. Because these particular cookies contain melted, browned butter, it’s very important that the dough be chilled for at least 24 hours, not just to greatly improve their flavor, but also to improve their structure. You can learn more about chilling dough and the associated benefits here! I believe that this lengthy chill time, if using a single-acting baking powder, would kill most of the rising/spreading power the leavener had, and your cookies therefore might not turn out well. Of course, you’re more than welcome to experiment and see if they still turn out okay – perhaps they’d just be a bit less puffy/flatter, but they may still taste good! There is no adjustment that we are aware of, if using a single-acting baking powder, that would make the cookies turn out exactly as they should. You could instead try using Tessa’s Bakery Style Chocolate Chip Cookie recipe, which doesn’t require refrigeration (although they are definitely better when the dough has been chilled a day or two).
If your aluminum-free baking powder is double-acting, no adjustments are needed and you can proceed with the recipe as written!
Aluminum-free baking powder can be tested for freshness the same way any baking powder can be. As you noted, this is explained in Tessa’s Baking Soda vs. Baking Powder article.
I hope this answers your questions! Feel free to reach back out if you have further questions – and let us know how your cookies turn out 🙂 Happy baking!
These are outstanding! And so, so easy. Love that they didn’t require a mixer. Definitely going to be on repeat at my house. I don’t keep bread flour on hand so I used all purpose for all of it. I made half after 20 mins of chilling and the other half after 24 hours of chilling. Don’t think I could tell the difference in a blind taste test. Both were soooo good. Brown butter for life!
tastes just like the whole foods brown butter cookie!
This is my new go to. First time didn’t refrigerate long but still were heavenly. The batch I just made I refrigerated not quite as long as you’re supposed to. I added Reese’s cups and Lindt white chocolate I had leftover to each and they’re super greasy— assuming because of those ingredient I added before baking. I think the truffle is a big oily and obviously the peanut butter is.
The rest of the dough is still in the fridge. Can I form it in to smaller balls and freeze for future use or is that not recommended?
Hi Ashley! Yes, you can absolutely roll the remaining dough into any sized balls you wish, and freeze in an airtight container for future baking. Learn more about that process (and how to bake from frozen) here! As for your greasiness issue, it could be that your mix-ins were a little greasier than regular chocolate chips, and it could also be from a shorter refrigeration period. A longer chilling time will give the flour more time to absorb the water content in the butter, creating thicker, less greasy cookies. If you continue to have issues with greasiness, I recommend trying out bleached flour (if that’s accessible to you – it absorbs more moisture than unbleached flours), and also perhaps try a different brand of butter, as some butters can be greasier than others. I hope something here helps, Ashley! Happy baking 🙂
These are my new favorite chocolate chip cookies. So good!
I rarely make the same cookie recipes more than once, but I have made these cookies four times now, and I am making more today to add to the cookies trays at one of our holiday parties.
When I took them to my son’s football banquet people were tracking me down to ask how to make them.
They are THAT good!
These are absolutely luxurious! I have the dough chilling now, but I needed to sample one by baking a few right away. Fabulous recipe!!
hi there! these look delicious 🙂 i was wondering if i can make these in the airfryer, and if so, what the temperature and size of the cookies should be? thank you!
Hi D! I’m sorry, but we have never tried baking any of our recipes in an air fryer! I think it would all depend on your specific model, size, etc, so you will need to do some experimenting. I’d recommend starting with one cookie and see how it goes 🙂 Be sure to chill your dough for at least 24-72 hours, too! Let us know how it goes!
I love this cookie recipe! I’ve made it several times and I never stop talking about it. However I do find they come out a little greasy, am I able to reduce the butter to make them less greasy?
Hi Jasmeaux! Hmm, these cookies shouldn’t be greasy. What kind of butter are you using? Butters with a high butterfat content (such as European style butters) can leave a slight greasy feel in some cookie recipes. Do you chill the dough for a few days, or at least 24 hours, before baking? Chilling for this extended period of time can help immeasurably with greasiness, as the flour has time to absorb more of the moisture, therefore making the cookie less greasy. You can read more about this here! Lastly, if you aren’t already, I recommend using a bleached flour for cookies. Bleached flour better absorbs moisture, compared to unbleached flour, which could also help combat this greasiness. Hopefully something here helped – and if not, feel free to reach back out so we can further troubleshoot together 🙂
I made these. The dough is sticky and went so flat in the oven. I froze tow balls for 2 hours and then baked them.
Hi Abeer! Unfortunately, these cookies need to sit in the fridge for 24 hours before baking, and freezing just can’t work the same magic! Find out more about why here!
These are great when made right, but many comments say they’re greasy/runny. It’s because there’s a typo in the weighed ingredients! AP Flour says 190 grams, but I think it should be about 300 grams! Please fix this, I’ve nearly ruined my batch twice when following the directions, but luckily I catch it before baking when I see how runny the dough was! I commented this once before but looks like the recipe was never fixed. Otherwise I love these cookies!
Hi Rachel! No, the recipe’s flour measurements are correct. 1 cup of flour weighs 127 grams, so the all-purpose flour measurement of 1 1/2 cups will weigh 190 grams (technically 190.5 grams), plus the additional cup / 127 grams of bread flour. After the mandatory chill period, these cookies will bake up beautifully soft and chewy, exactly as pictured. Be sure to check out all the tips and information in the pink tip box, above the recipe, for best results 🙂
I find this recipe too sweet. My throat hurt from the sweetness. Made me sad because I spent good money on the ingredients. Sorry.
Hi Martina! I’m sorry to hear that you didn’t enjoy these cookies. How do you measure your ingredients? By volume (using cups), or by weight (using a digital kitchen scale)? When measuring by volume, it’s so easy to mis-measure flour/sugar/etc and throw off the entire chemistry of a recipe – and end up with a baked good with the wrong consistency, too flat, or too sweet. Tessa talks about how to best measure ingredients to ensure accuracy every time, in this article here! I would also recommend using a darker or bittersweet chocolate in these, to balance the sweetness more, if you are sensitive to sweetness. I hope you give these cookies a try another time – they really are delicious! Happy baking 🙂
very yummy