


Tessa's Recipe Rundown
Taste: Chocolaty without being positively overwhelming.
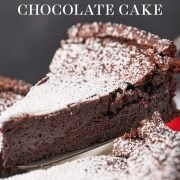
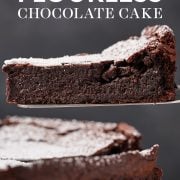
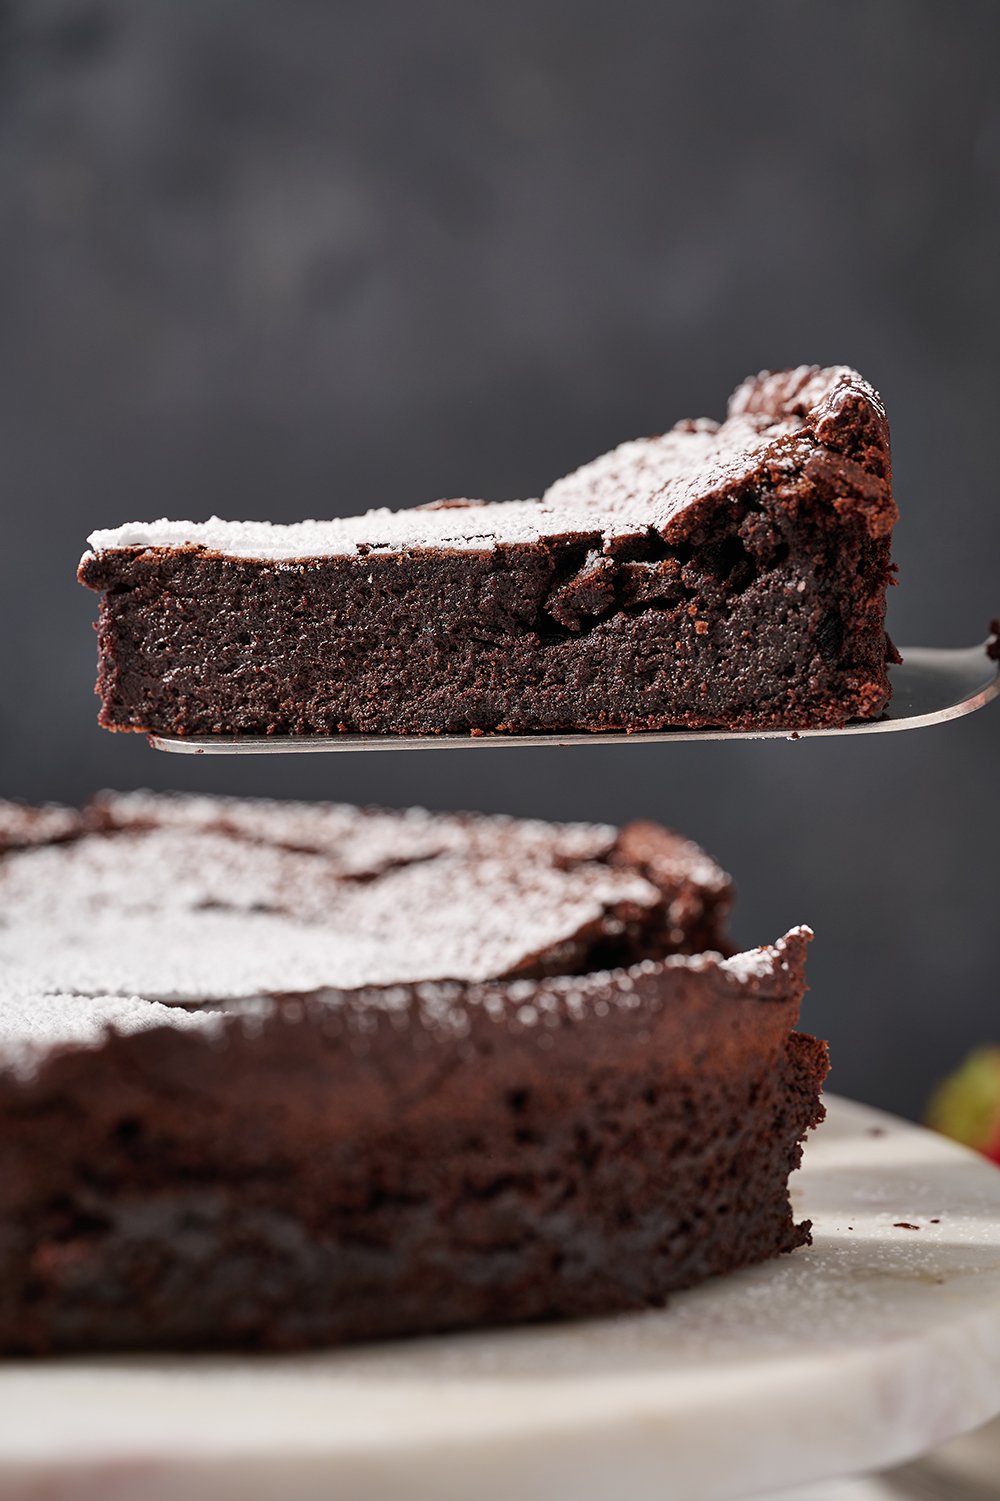
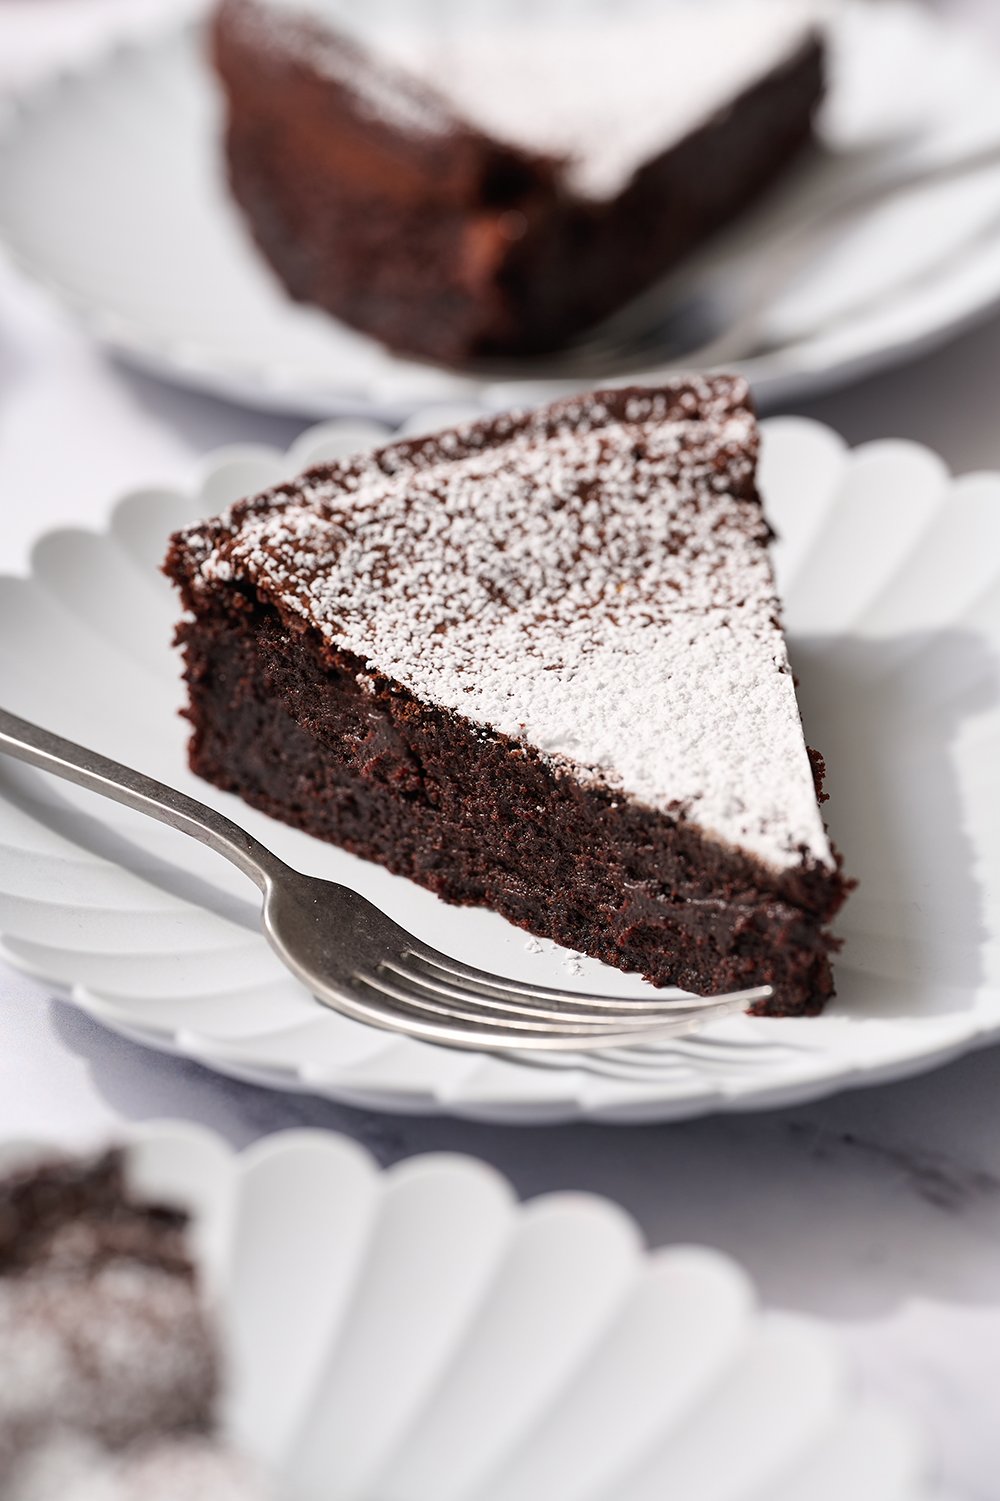
Texture: A cross between a brownie, cake, mousse, and a truffle!
Ease: Deceptively easy.
Why You’ll Love This Cake: This is my go-to elevated easy dessert recipe for entertaining.
This post may contain affiliate links. Read our disclosure policy.


My husband, Joe, calls this a “Hall of Fame” recipe. It’s one of his all-time favorites.
Think of it like a chocolate cake, a brownie, and chocolate mousse had a delicious baby.
Made without flour, it relies on eggs, butter, and chocolate for structure. So it’s the perfect bake for your gluten-free friends and family!
After being inspired on vacation at a restaurant in La Jolla, I set out to create my own version. You’ll also see this recipe called a flourless chocolate torte.
I wanted to avoid having to separate eggs and whip the whites. I also wanted to avoid a cake SO rich and truffle-like that you can only have one or two bites.
I’m happy to say that after much testing, I think I nailed the recipe.
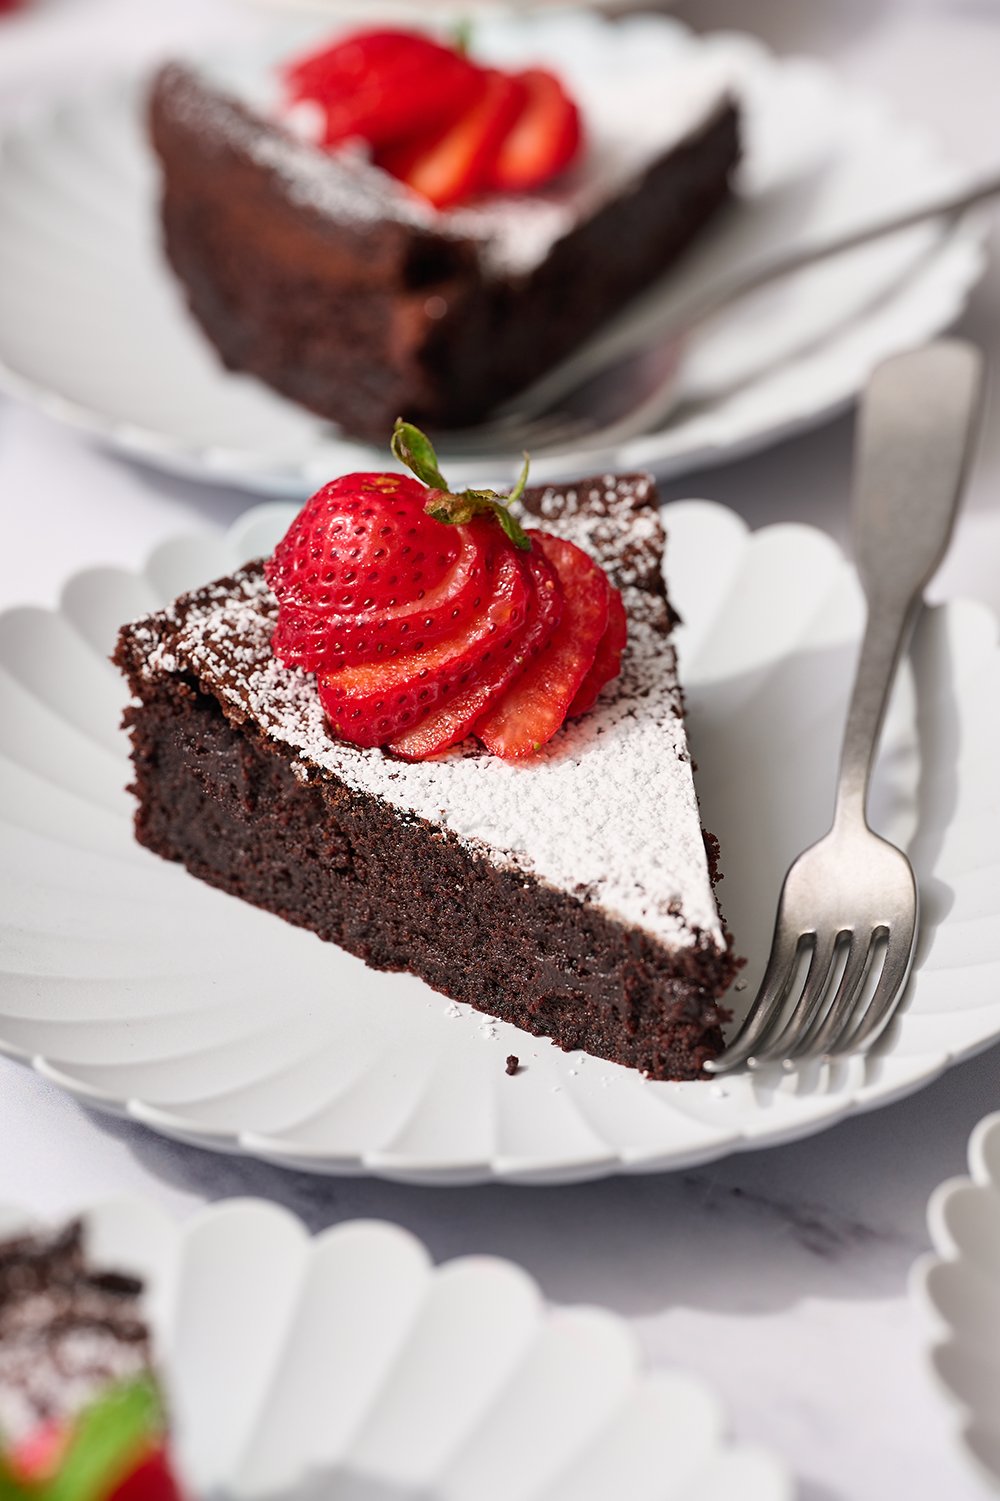
Serve it with fresh fruit and a scoop of vanilla ice cream for a delightful Valentine’s Day dessert. Make it for a special date night at home. This is also my go-to dessert for dinner parties and small groups!

Sprinkle of Science
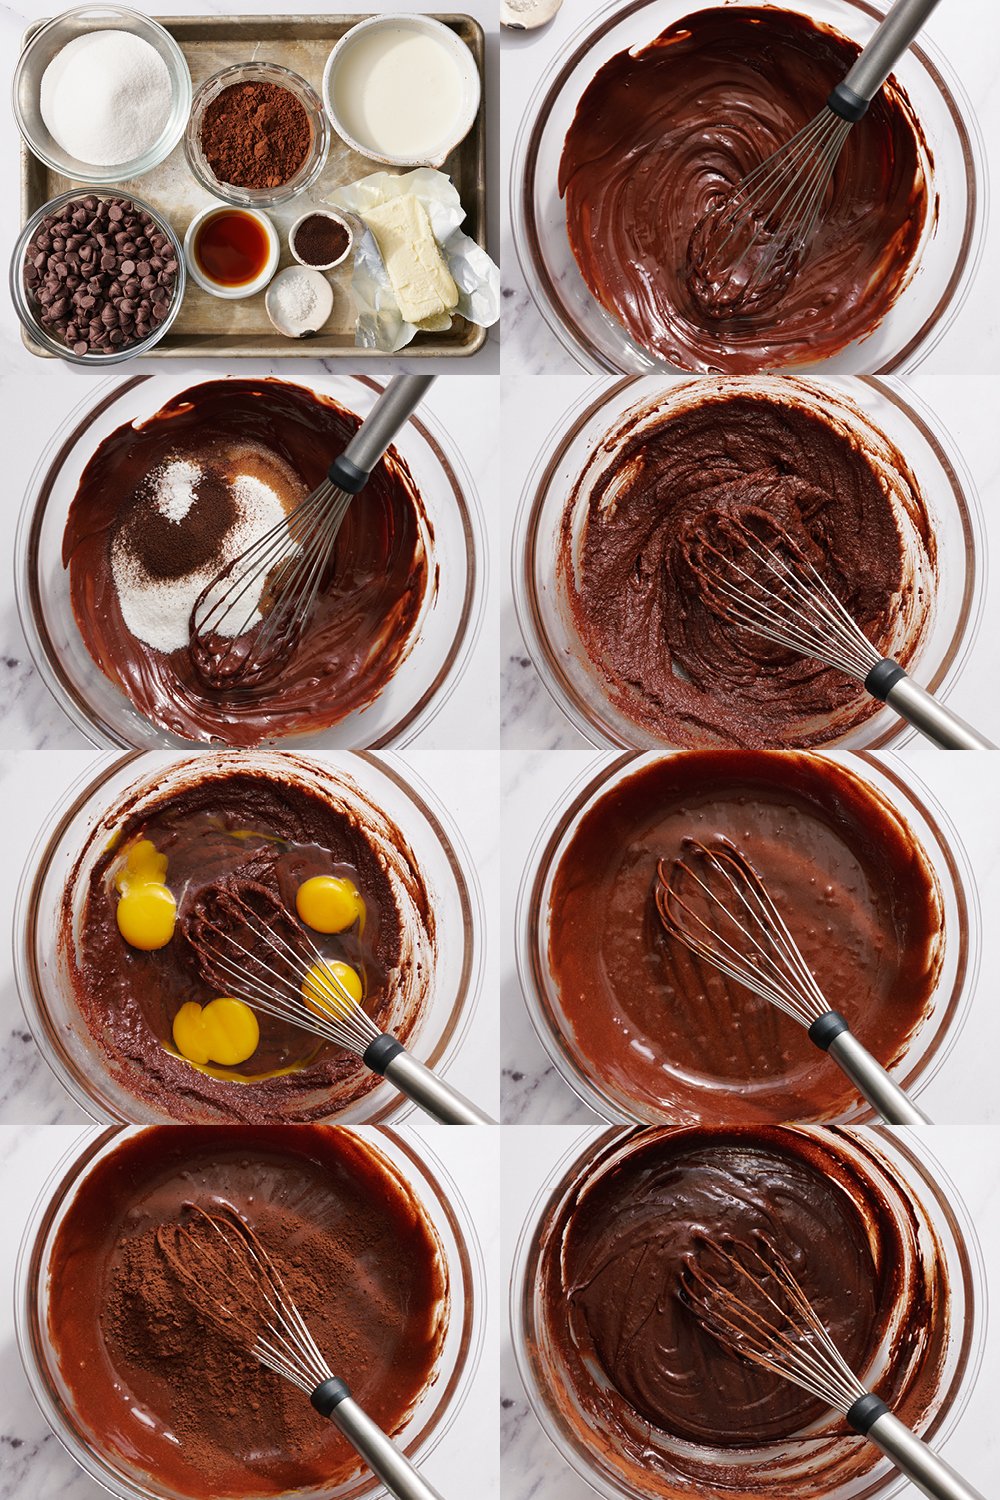
Ingredients Notes
Baking is chemistry, and every ingredient was selected with care. Here are the ones to pay attention to:
- Chocolate – I used Ghirardelli semisweet chocolate chips. Opt for the best quality you can access.
- Sugar – It doesn’t just sweeten, it also creates a moist texture, so reducing will create a drier cake. Read more about the role of sugar in baking here.
- Espresso powder – Optional. It’s super subtle and enhances the chocolate flavor.
- Eggs – Three whole eggs plus an additional egg yolk, for a fantastically fudgy texture. Eggs help provide the structure to this cake because there’s no flour. Be sure your eggs are at room temperature.
- Cocoa powder – I used Dutch-processed cocoa powder to achieve a smooth chocolate flavor and deep color. You can use natural cocoa powder in this recipe instead.
- Heavy whipping cream – Chilled. More on that below.
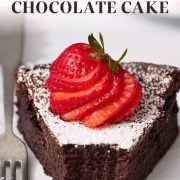
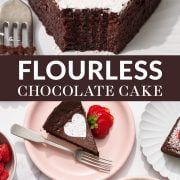
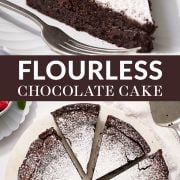
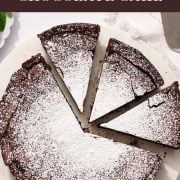
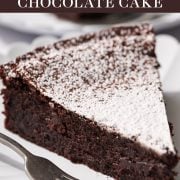
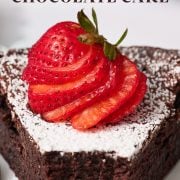
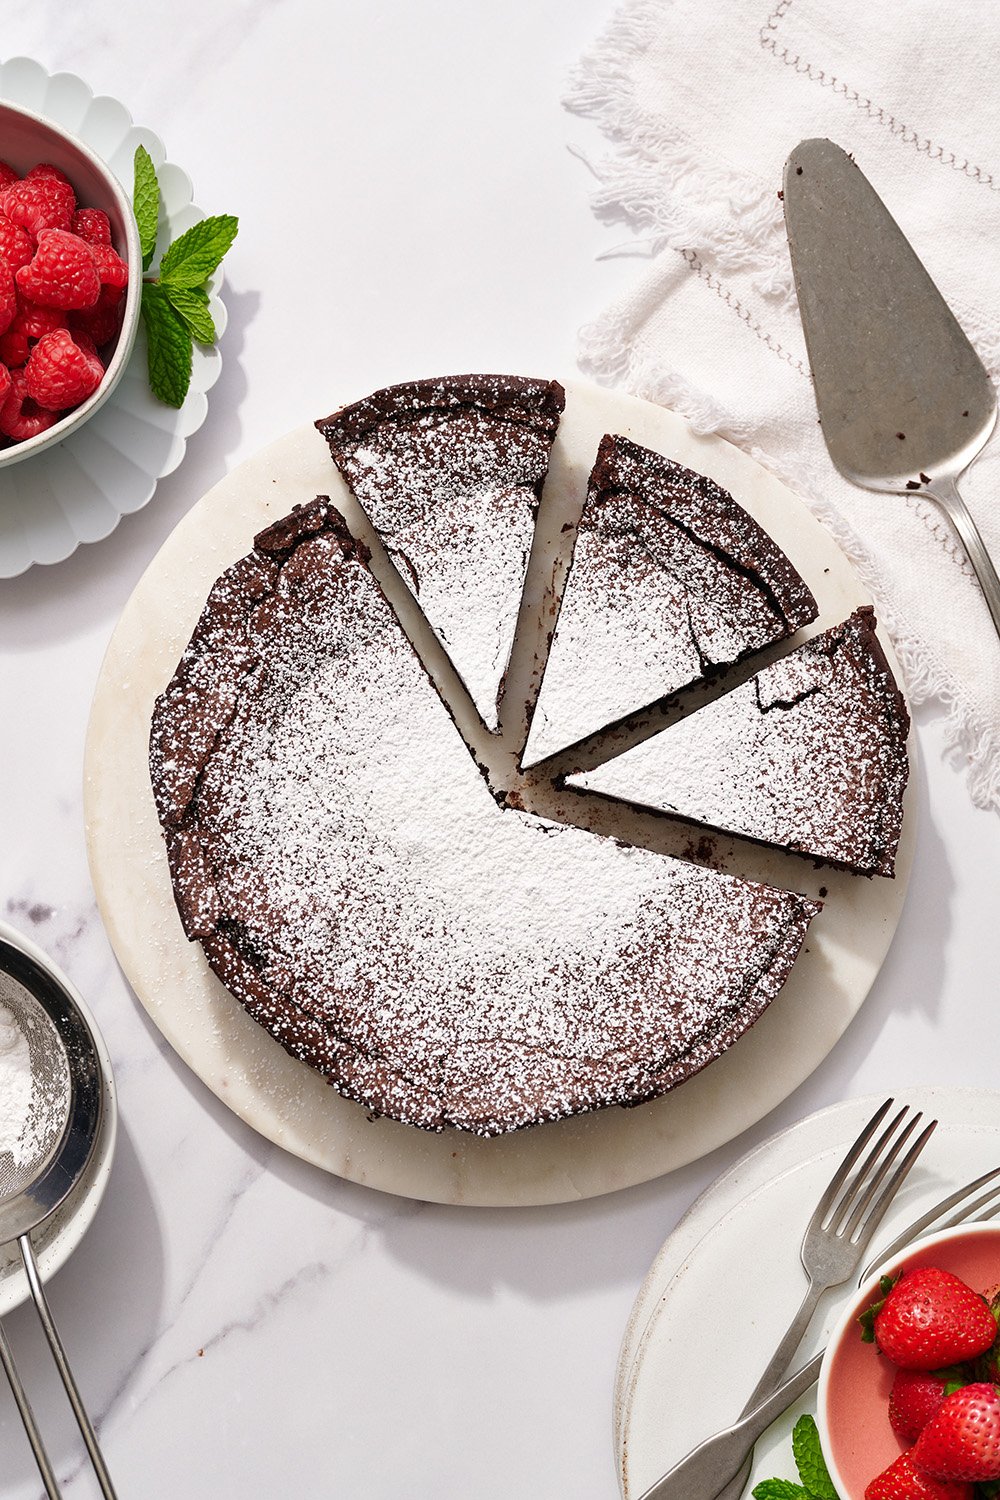
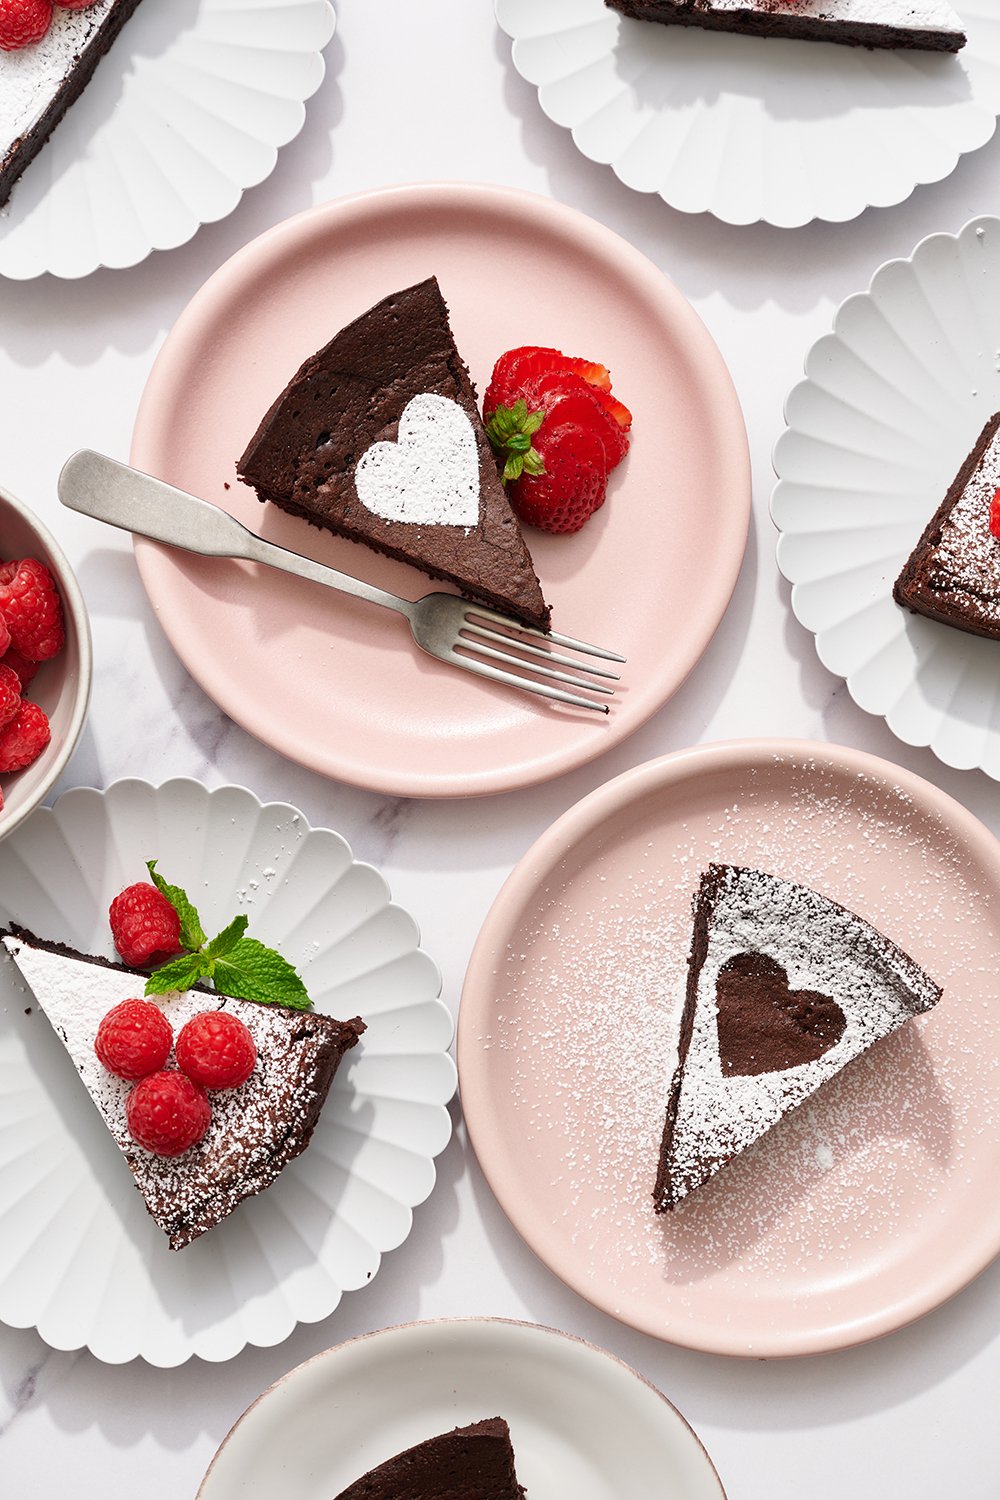
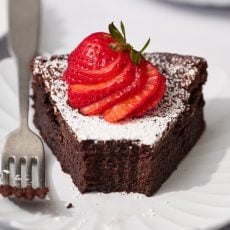
- Powdered sugar and berries – Optional, but it looks so pretty to decorate the baked and cooled cake with either, or both!

How To Make Flourless Chocolate Cake
- Melt the chocolate and butter. In a large microwave-safe bowl, heat the chocolate chips and butter in 30-second increments, stirring between each, until just barely melted. You can also do this step in a double boiler on the stove.
- Add the sugar, espresso powder (if using), salt and vanilla. Whisk until combined. Let cool to room temperature so you don’t scramble the eggs.
- Add the eggs. Add in the eggs and yolk all at once, vigorously whisking until smooth.
- Mix in the cocoa powder. Whisk until just combined.
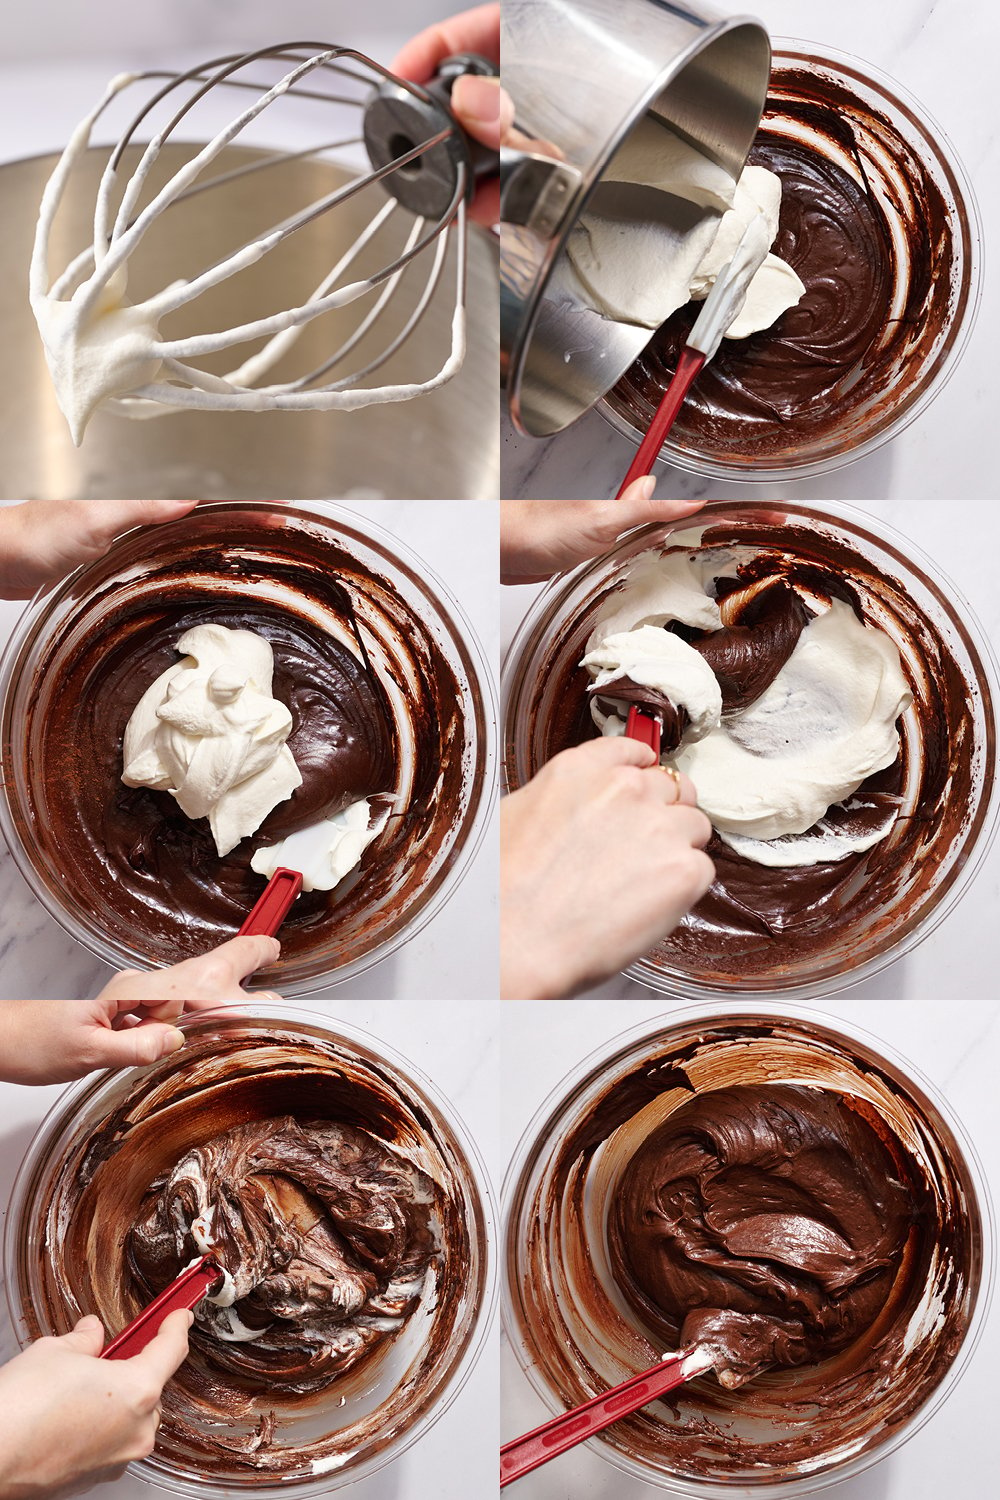
- Whip the heavy cream. Beat the cream to medium peaks. Be careful not to overbeat your cream here. You don’t want stiff peaks for this recipe.
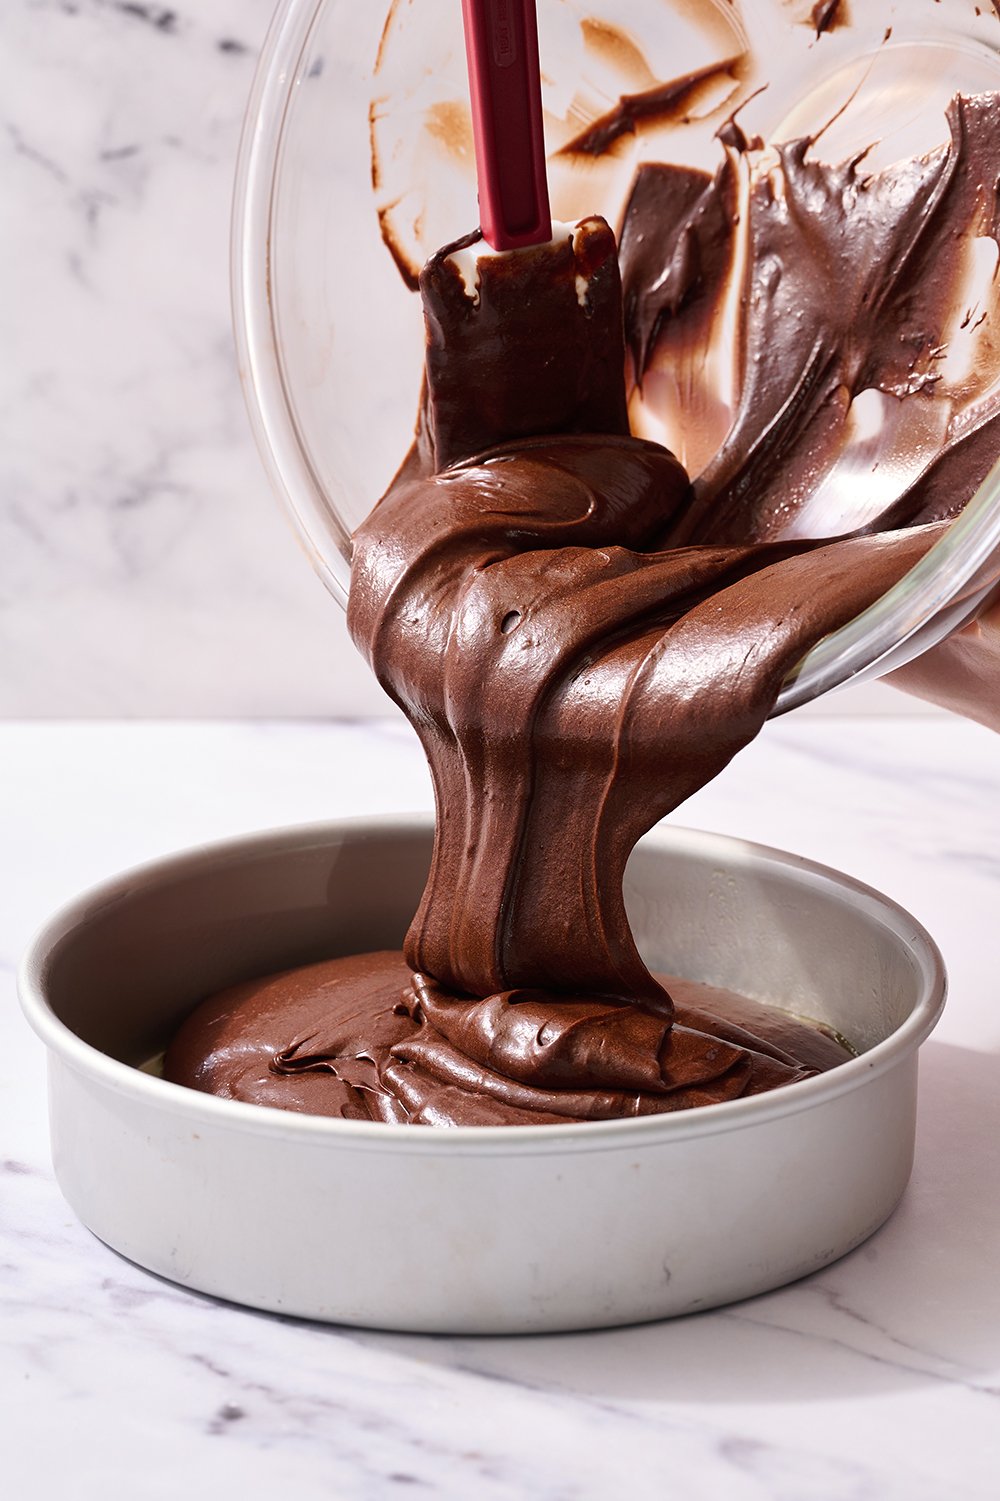
Tip: Although not pictured below, I love using my immersion blender with the whisk attachment to quickly whip small amounts of cream. - Fold the whipped cream into the chocolate mixture. Be careful to avoid compressing all of that air you just whipped into the cream!
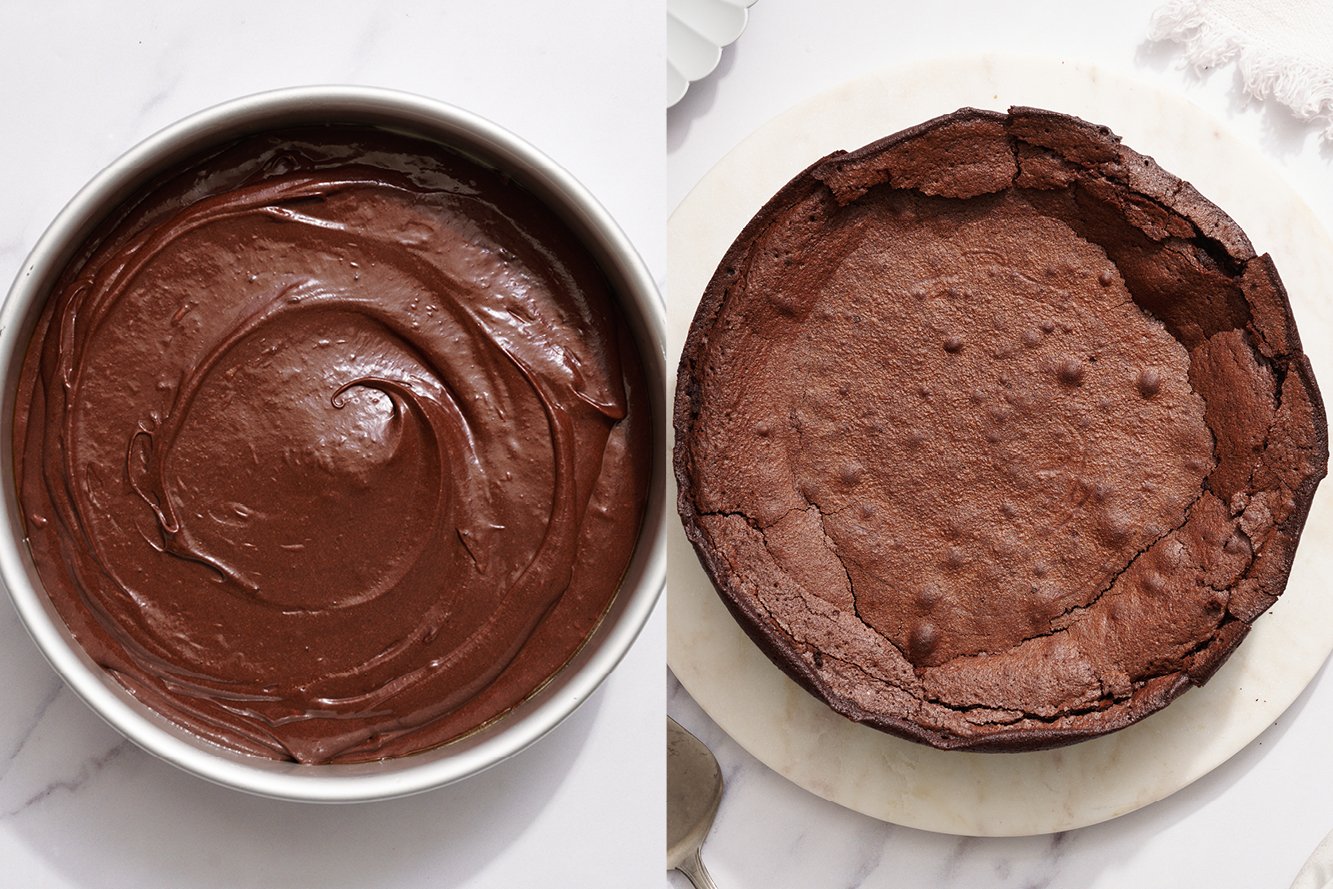
- Pour into the prepared pan and bake. Bake at 350°F for about 25-30 minutes, or until the cake has puffed up, the edges are set but the center is still slightly wobbly, and the center is at least 200°F using an instant-read thermometer.
- Allow to cool completely. Place the pan on a wire rack. Once cooled, cover and refrigerate for at least 6 hours but preferably overnight for the most fudgy texture.
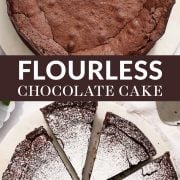
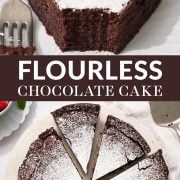
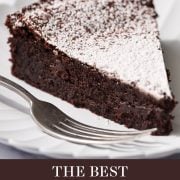
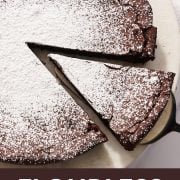
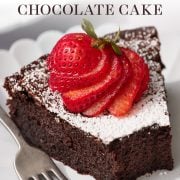
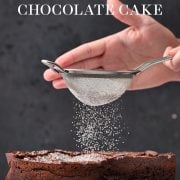
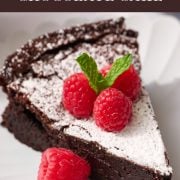
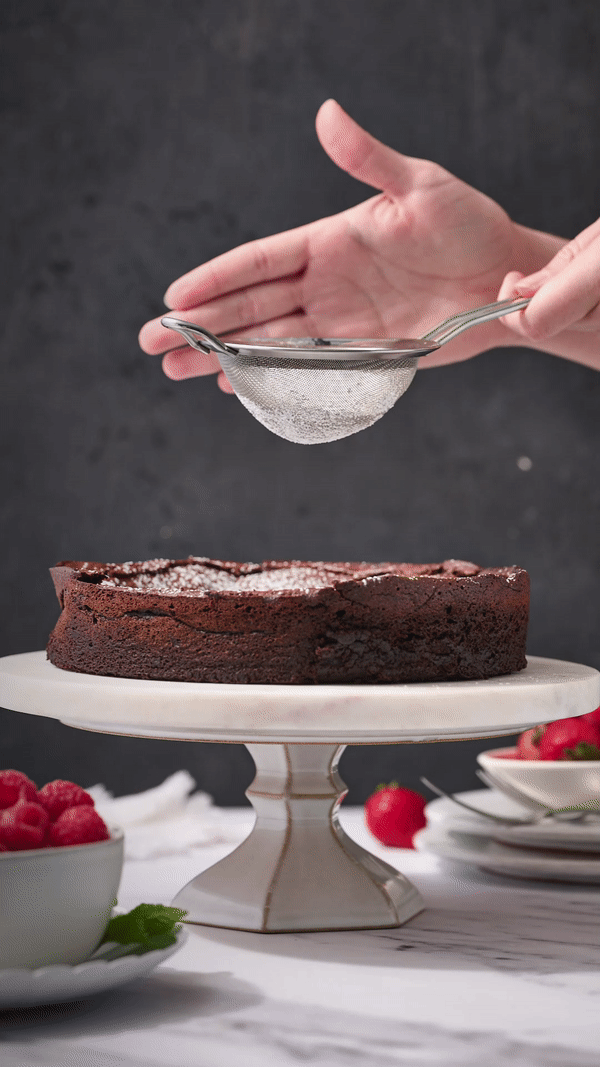
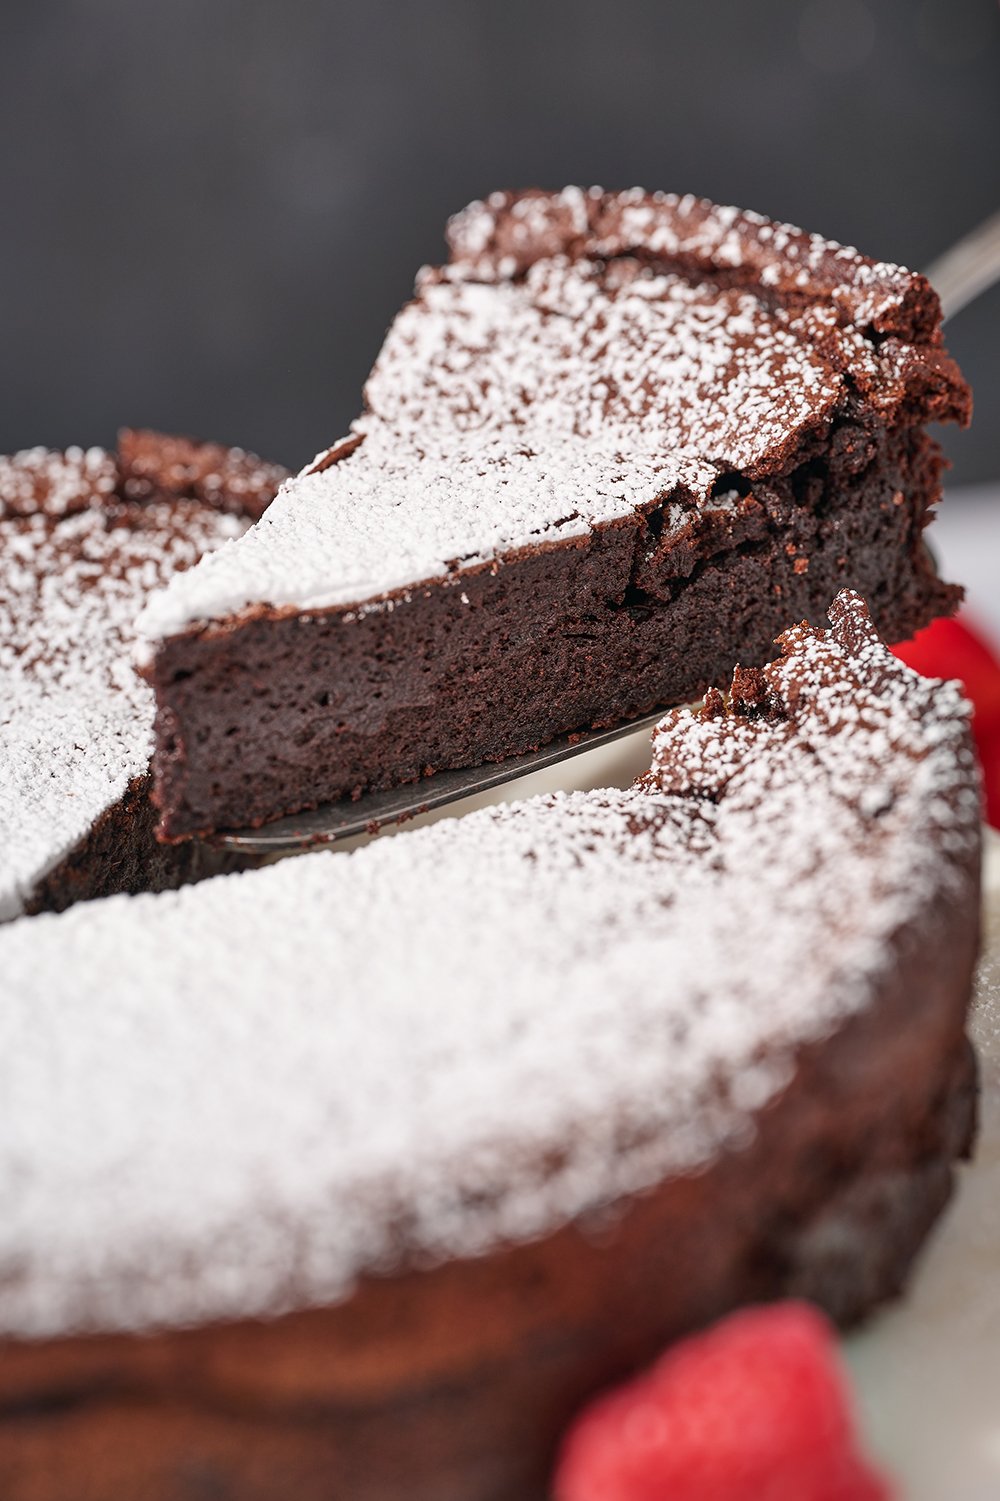
- Serve. Use a sharp knife to cut into slices, running the knife under hot water and wiping off the blade between slices. Top with sifted powdered sugar, whipped cream or a scoop of ice cream and a few fresh raspberries or strawberries. Best served chilled.
Baking Success Tips
- Do not overbake. This will cause a dry or crumbly result.
- Parchment circles with tabs make easy work of removing the cake from the pan without drama.
- Expect sinking. Flourless cakes naturally deflate as they cool. More room for whipped cream, ice cream, or ganache 😉
- Serve chilled. This will make it easier to slice and emphasize a fudgy texture.
Serving Ideas & Tips
- Fresh mint and raspberries or sliced strawberries
- A scoop of vanilla ice cream
- A dollop of freshly whipped cream
- A dusting of powdered sugar
- A dusting of cocoa powder
- Raspberry sauce
- Ganache (1:1 ratio — this is Joe’s favorite!)
To slice, use a sharp knife to cut into slices, running the knife under hot water and wiping off the blade between slices. Feel free to top with garnishes after slicing, too.
Storage & Make Ahead
Store in an airtight container in the fridge for up to 3 days.
To freeze, wrap the entire cake or slices of cake well in plastic wrap and place in an airtight container or a ziptop bag for up to two months. Thaw in the fridge for a few hours or overnight. It tastes great frozen, too!
FAQs
Yes! If you’re worried about serving someone who has celiac disease, you’ll want to check your ingredients to ensure the packaging states that it is gluten-free and that your tools and equipment haven’t recently touched flour to be safe.
Note: Baker’s Joy spray is not gluten-free.
It’s perfectly normal for this cake to fall slightly as it cools. Remember, flour typically acts as the backbone structure support of cake recipes. Without it, some sinking is unavoidable. I think it adds to the rustic charm of this type of cake!
If your cake falls excessively, it’s likely from overmixing. Be sure to gently mix in the ingredients, particularly in the final few steps, and do not over-mix.
Use a light-colored 8-inch round cake pan for this recipe. Note that this recipe makes enough batter to fill the pan quite full, so if you have it, use a 3-inch-deep pan to ensure no overflow. My favorite brand of cake pan is Fat Daddio’s because they bake evenly and wash up easily. Don’t use a dark-colored or coated nonstick cake pan, or you may end up with dry or overbaked cake edges. I also don’t recommend using a larger pan, as your cake will be very thin.
The cake should be puffed up, the edges set but the center is still slightly wobbly, and the center is at least 200°F using an instant-read thermometer.
Yes, but I promise it’ll be worth it in the end! This cake is delicate when warm. Leaving it plenty of time to cool completely in the tin, then a few hours in the fridge (preferably overnight) will allow the cake to set up. It’ll become more rich and fudgy as it chills!
Bonus: you can make this the day before a dinner party or event, and it will be ready to devour without having to make it the day-of!
Email This Recipe
Enter your email, and we’ll send it to your inbox.
Ingredients
For the cake:
- 1 ¼ cups (213 grams) semisweet chocolate chips
- 1 stick (113 grams) unsalted butter
- 3/4 cup (150 grams) granulated sugar
- 1 teaspoon instant espresso powder, optional
- 1/4 teaspoon fine sea salt
- 1 teaspoon vanilla extract
- 3 large eggs plus 1 egg yolk
- 1/2 cup (43 grams) Dutch-process cocoa
- ½ cup (120 grams) heavy cream, chilled

For the topping:
- Powdered sugar
- Freshly whipped cream, vanilla ice cream, or 1:1 ganache (chocolate ganache recipe here)
- Fresh strawberries or raspberries
Instructions
- Preheat the oven to 350°F. Lightly grease a light colored 8-inch round 3-inch deep cake pan with nonstick cooking spray.* Place a parchment round on the bottom of the pan and spray again.
- In a large microwave-safe bowl, heat the chocolate chips and butter in 30-second increments, stirring between each, until just barely melted. Stir until smooth. Whisk in the sugar, espresso powder, salt, and vanilla. Let cool.
- Add in the eggs and yolk all at once, vigorously whisking until smooth. Whisk in the cocoa powder until just combined. Batter will be thick.
- In a small but deep bowl or measuring cup, use an electric mixer or immersion blender fitted with a whisk attachment to beat the heavy cream to medium peaks. Using a rubber spatula, gently fold the whipped cream into the batter until combined.
- Pour the batter into the prepared pan and smooth the top.
- Bake the cake for about 25 to 30 minutes, or until the cake has puffed up, the edges are set but the center is still slightly wobbly, and the center is at least 200°F using an instant-read thermometer.
- Remove from the oven and let cool in the pan on a wire rack for 10 minutes. The cake will deflate slightly as it cools. Loosen the edges of the still-warm cake from the pan with a thin flexible knife or offset spatula so it unmolds easier when ready to serve. Let cool completely in the pan. Once cool, cover and refrigerate for at least 6 hours but preferably overnight. At this point, the cake can be kept covered in the fridge for up to 3 days as well as any leftovers.
- This cake is best served chilled. When ready to serve, remove the cake to a serving plate. Use a sharp knife to cut into slices, running the knife under hot water and wiping off the blade between slices. Place a spoonful of powdered sugar in a small fine mesh strainer and dust over each slice. Top with whipped cream or a scoop of ice cream and a few berries. Serve.
Notes
More Chocolate Dessert Recipes:
This post was originally published in 2009 and updated in 2023 with new photos and recipe improvements. Photos by Joanie Simon.


Made this cake for my brother as he is gluten free. For me it’s to rich but good. My Mom really liked it and I think with ice cream it would be great.
Easy to make and oh so delicious! Fudgy brownie taste but light mousse texture. Amazing!!
Omggg!! At first I didn’t know what to expect with this flourless chocolate cake…but when I tried it it was like the most chocolatey cake I’ve ever had! The richness and moistness is amazing, it’s like the best brownie cake ever! I cut the recipe in half because I didn’t have all the ingredients on hand but I will definitely make the full version next time!
Decadent, rich, and tasty flourless chocolate cake. Growing up my mom would make them for me on special occasions, so this is a real treat. Only complaint is that I had to bake it longer than the recommended time. The extra effort and cooling time is absolutely worth it!
This cake was fantastic! I was very skeptical because flourless cakes haven’t worked out well for me in the past, but this one was super simple!
Velvety-smooth; a thick-chocolate-mousse brownie. Delicious and not too difficult!
I did it! And it came out great!!!
This is very, very good. Buttered the pan and parchment paper as I did not have Pam on hand and forgot to buy it but it still turned out great. Deeply rich/fudgy, you can only eat a little at a time. I heated up some strawberry jam and topped the slices with that. The actual recipe isn’t hard at all but you do need to be very patient with wait times. HUGE hit with the friends we shared with
This cake was so easy and delicious. It turned out better than I thought it would. Will definitely make it again but need to work on a better way to get it out of the pan. I used the same pan and parchment paper Tessa uses and also sprayed with Pam, but the sides still stuck.
Loved the cake it was so light. I made the Ganache ti go with it. So Yummy!!
I love how moist and decadent this cake is. I made a mocha whipped cream to complement its delicacy with a white Chocolate drizzle and a fresh strawberry. Divine.
The cake was decadently delicious! I noticed on the fat daddio pan insert it says to reduce the temp 25*f for max performance, any truth to that?
Hi Debbie! So glad you enjoyed this cake! What type of Fat Daddio pan is it – a light-colored metal one? None of my Fat Daddio pans say that, so I’m wondering if it’s a darker-colored pan (in which case, yes, reducing the heat might help prevent the cake from overbaking at the edges, as darker-colored pans heat more aggressively).