


Tessa’s Recipe Rundown
Taste: Rich, sweet and chocolatey!
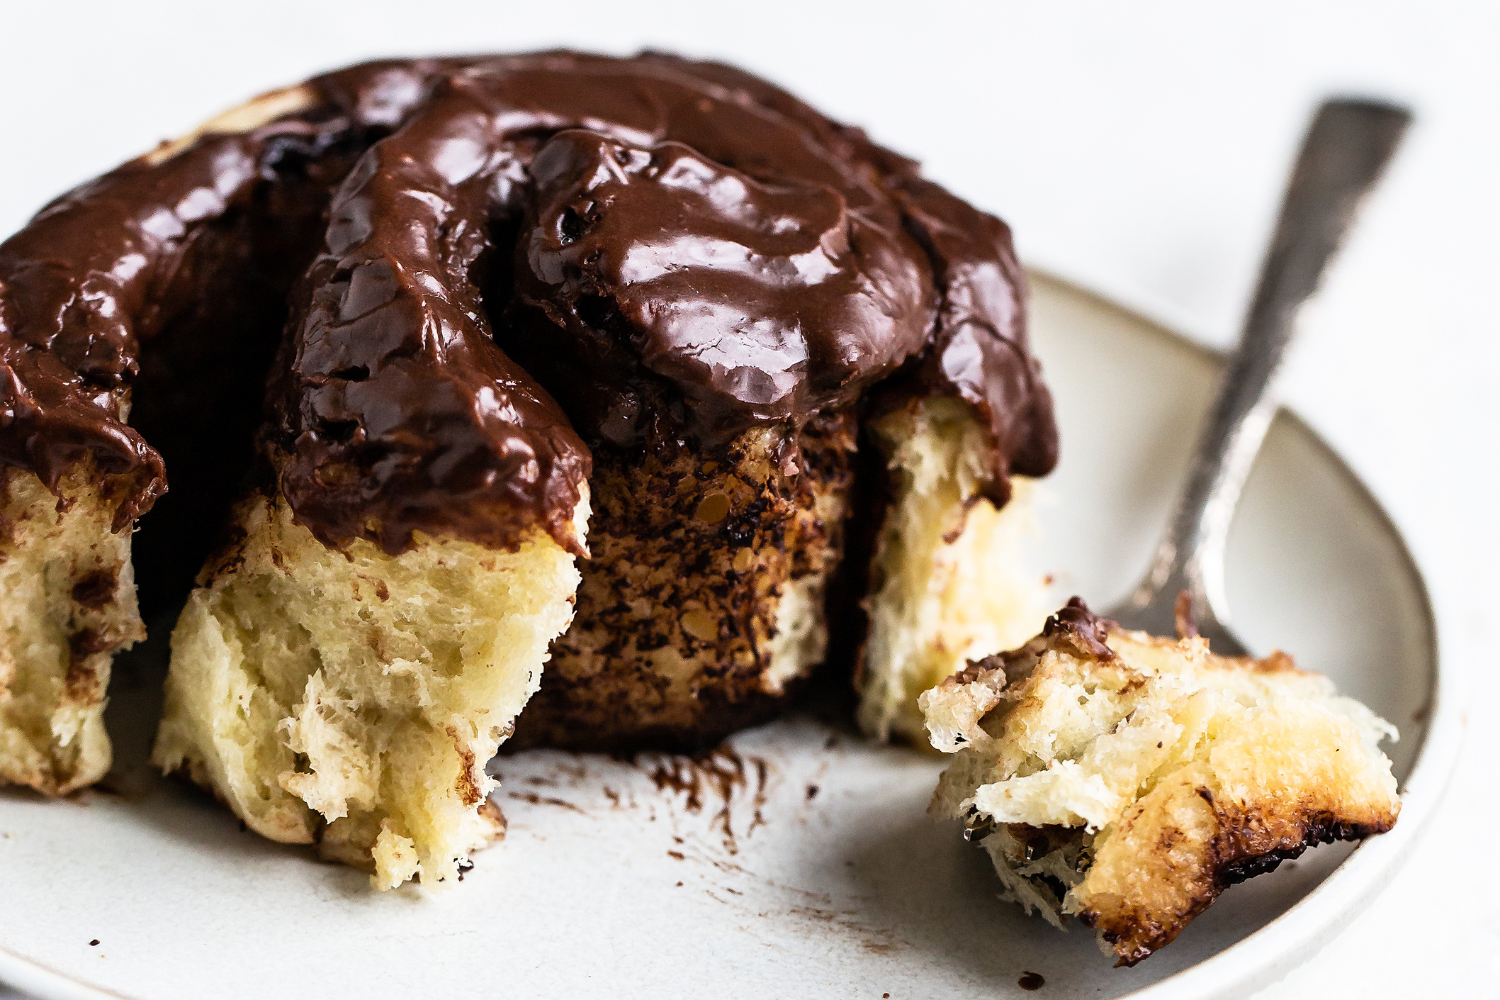
Texture: The dough is ultra soft and fluffy while the filling and icing are perfectly gooey.
Ease: Not difficult, but this is definitely more of a weekend baking project.
Pros: Amazingly mouthwatering.
Cons: Messy and time-consuming, but you can prepare the day before and bake off the next morning!
Would I make this again? Oh yes.
This post may contain affiliate links. Read our disclosure policy.
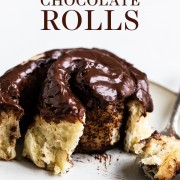


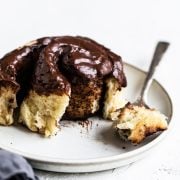
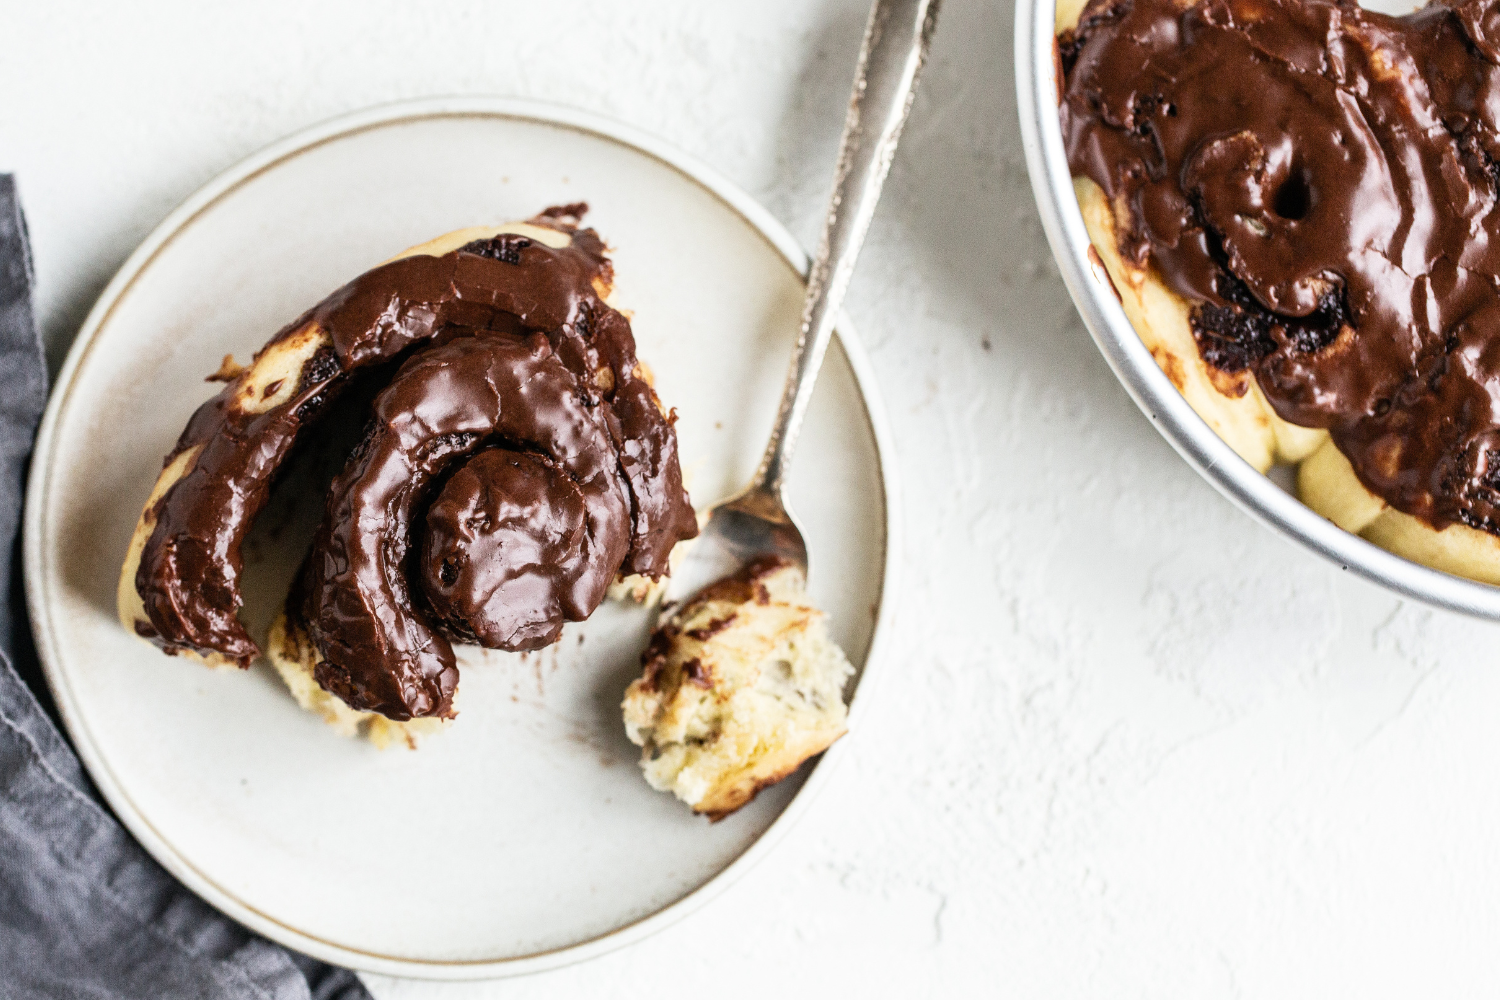
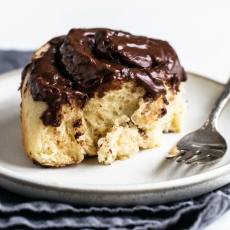
These Gooey Chocolate Rolls are like a cinnamon roll’s deliciously chocolatey sibling.
Every bite is so soft, fluffy, tender, gooey, and rich with chocolate. Perfection in every bite!
You know when you take a bite of something that’s so decadent, so over the top, and so mouthwatering that you wish you could just pause time to savor it?
That’s the exact experience this recipe will spark.
In fact, that first bite reminds me of the sheer joy of Christmas morning.
So much so that I think these rolls would be the perfect Christmas breakfast treat!
Make these for your friends and family this year and you’ll be their favorite person!

Sprinkle of Science
How to Make Soft & Gooey Chocolate Rolls
Can I Knead Chocolate Roll Dough by Hand?
Yes! You can knead this dough by hand without a stand mixer and dough hook – but it will take more time and some upper body strength! Check out my full tutorial on how to knead dough by hand here.
How to Make Soft, Fluffy Chocolate Buns
The key is to only add as much flour as needed to handle the dough. It’s better for the dough to be sticky at the start. If you add too much flour, your rolls will be dense instead of light and fluffy.
Depending on your kitchen environment and the brand of flour you’re using, you may not need all of the flour the recipe calls for. Likewise, you may need a little more. You’re looking for a dough that’s very soft, smooth, pliable and doesn’t stick to the sides of the bowl.
Also, be sure your dough passes the windowpane test after kneading. Refer to my kneading tutorial here for more info on that.
How Long Does This Dough Take to Rise?
This Gooey Chocolate Roll dough is an enriched dough, meaning it contains ingredients like milk, butter, sour cream, sugar, and eggs to make it ultra-rich, tender, and soft once baked. But those ingredients can also increase the rising time.
For our team, the dough took 2 hours for the first rise and 90 minutes for the second rise. Rising times will depend on the warmth and humidity of your kitchen, so keep that in mind.
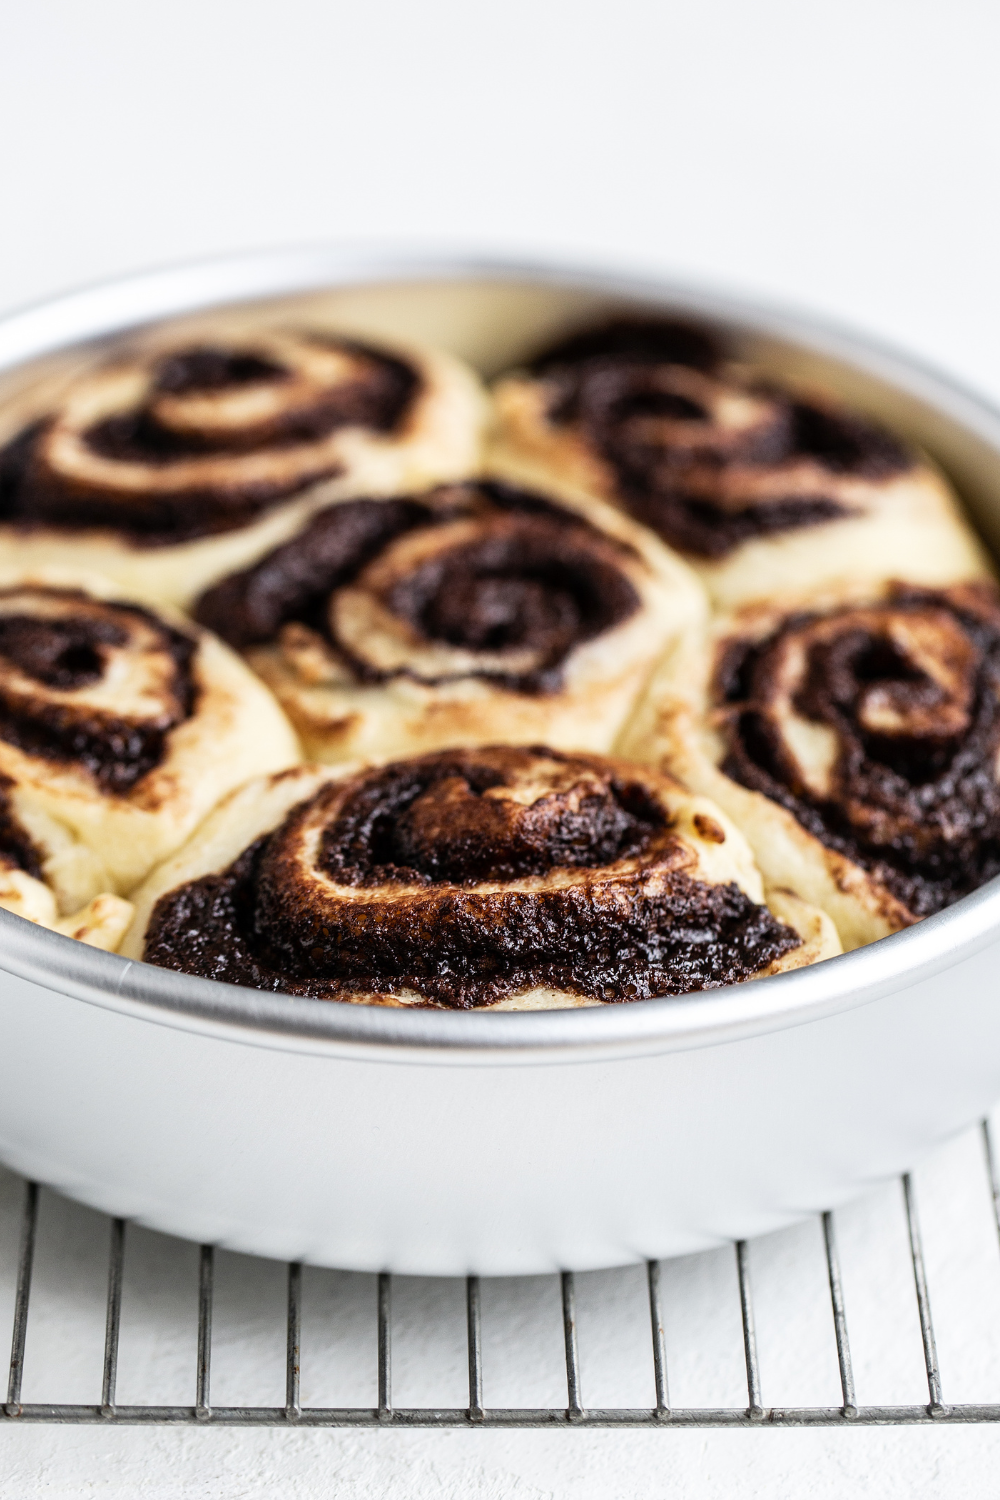
How to Tell When the Chocolate Roll Dough Has Risen Enough:
- Volume: The dough should double in volume for the first rise. I recommend using a glass bowl, if possible, to more easily see how much it’s risen.
- Ripe Test: The best way to tell if the dough has risen enough to shape is to perform the ‘ripe test’. Press two fingers in the risen dough up to the second knuckle and then take them out. If the indentations remain, the dough is ‘ripe’ and ready to punch down. If not, cover and let the dough rise until the indentations do remain.
- Shape and rise again: Once the dough passes the ‘ripe test’, you can roll out and shape your rolls. Allow the shaped rolls to rise again until about doubled in size and a gentle indentation from your finger remains.
How to Make Chocolate Cinnamon Roll Filling
We’re basically replacing the cinnamon with cocoa powder in the filling for this recipe! Beat the butter, brown sugar, cocoa powder, and pinch of salt in an electric mixer until well combined and fluffy. Whipping the filling is an extra step and will dirty more dishes, but it really creates such a gooey filling.
Brown sugar makes for a more gooey and flavorful filling than white sugar, so I recommend sticking with that for most delicious results. For the best chocolate flavor, use a high-quality cocoa powder – learn more about cocoa powder here.
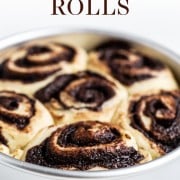
How to Shape Perfect Chocolate Roll Spirals
Rolling up your Chocolate Roll dough nice and tight is the key to beautiful round rolls and visible, pretty spirals. Here’s how to achieve perfect swirls:
- As you roll the dough up, stretch it towards you and then over, so it stays tight instead of floppy.
- Finish off the spiral with the seam side down, to seal in the filling.
- Push the ends into the center slightly with your palms to create an even log shape, then cut off the ends to even out.
What Pan Should I Use?
While I usually prefer metal baking pans over glass or ceramic (metal conducts heat more efficiently – learn more about Metal vs. Glass pans here), I actually prefer the table presentation ceramic pans offer here. Also, because ceramic and glass conduct heat more slowly than metal, it allows these rolls to stay slightly gooey in the centers. This is my go-to baking pan for this recipe.
How to Slice Chocolate Roll Dough
To get picture-perfect Chocolate Rolls and show off that perfect spiral, it’s important to slice the log of dough without squashing it. Here are some of my best tips to ensure perfect slices:
- The best tool for that is a very sharp chef’s knife and use sweeping motions, not sawing motions, to slice.
- If you don’t have a super sharp knife, you can also use a serrated knife and sweeping motions.
- Alternatively, you can use dental floss to slice the dough – but be sure it’s unflavored.
- To get evenly-sized pieces, cut the log exactly in half so you have two equal-sized logs. Then cut each log in half again so you have four equal-sized logs. Finally, cut each of the four logs into 3 pieces, for a total of 12 Chocolate Rolls.
Can I Halve This Recipe? Can I Double This Recipe?
Yes! To make just 6 Chocolate Rolls, divide all ingredients in half. To halve the whole egg in the recipe, crack it into a small bowl, beat it well, then measure out two tablespoons for the recipe. Bake in a 9-inch pie pan or an 8×8-inch square pan.
To double this recipe, I recommend simply making the dough twice and baking in two 9×13-inch pans. This will allow for easier rising, ensuring the dough won’t overflow in the bowl, and is easier to roll out, for 24 evenly-sized rolls.
How to Make Gooey Chocolate Rolls Ahead of Time
These rolls are best served fresh and warm – right out of the oven, if possible! They taste best the day they’re baked and, unfortunately, don’t store very well. Luckily, you can make the dough ahead of time. Here’s how:
- Refrigerate the shaped but unbaked Chocolate Rolls in the pan you plan to bake them in. To give them a jump start on rising, I like to let them rise at room temperature for about 30 minutes before placing them in the refrigerator – especially in the winter when the cold air slows rise times.
- Cover the rolls tightly with plastic wrap and refrigerate for up to 24 hours. The dough should continue to rise slowly in the fridge.
- When getting ready to bake, remove the pan from the fridge and loosen the plastic wrap. Let the Chocolate Rolls rise at room temperature until doubled in size. The time this takes will depend entirely on how much they rose in the fridge and how warm/humid your kitchen is. It may take just 20 to 30 minutes, or it may take over an hour.
- Proceed with baking the recipe as written.
How to Store Chocolate Rolls
Chocolate Rolls are best served fresh and warm. Store inside an airtight container at room temperature for one day. Rewarm in the oven or microwave before serving, if desired.
How to Freeze Chocolate Rolls
Freeze the shaped, unbaked Chocolate Rolls in their pan, tightly wrapped in plastic wrap, for up to 1 month. Defrost overnight in the fridge, then allow to rise again at room temperature. Once doubled in size, proceed with the recipe as written.
More Christmas Breakfast Recipes:
Email This Recipe
Enter your email, and we’ll send it to your inbox.
Ingredients
Dough:
- 1 cup (237 grams) whole milk
- 1 stick (113 grams) unsalted butter
- 1/4 cup (57 grams) sour cream, at room temperature
- 1 envelope (2 1/4 teaspoons) instant yeast*
- 1/4 cup (50 grams) granulated sugar
- 1 large egg, at room temperature
- 2 egg yolks, at room temperature
- 1/2 teaspoon vanilla extract
- 4 to 4 1/4 cups (508 to 540 grams) all-purpose flour, plus more for dusting
- 1 1/2 teaspoons fine sea salt


Filling:
- 10 tablespoons (142 grams) unsalted butter, completely softened to room temperature
- 2/3 cup (133 grams) packed light brown sugar
- 1/3 cup (28 grams) unsweetened cocoa powder
- 1/8 teaspoon fine sea salt
Icing:
- 1 1/2 cups (188 grams) powdered sugar, sifted
- 1/4 cup (21 grams) unsweetened cocoa powder, sifted
- 1/4 cup (49 grams) whole milk
- 2 tablespoons (28 grams) unsalted butter, melted
- 1 teaspoon vanilla extract
Instructions
Make the dough:
- In a small saucepan, heat the milk and butter until the butter is melted. Remove from heat and stir in the sour cream until smooth. Let cool until lukewarm (about 100°F – 110°F).**
- In the bowl of an electric mixer, use a spatula to combine the milk mixture with the yeast, sugar, egg, egg yolks, and vanilla until well combined. Add in half of the flour and the salt and stir with the spatula until combined. Fit the mixer with the dough hook and gradually add the remaining flour until a dough begins to form. Only add as much flour as you need to form the dough. Knead at medium speed until the dough is very soft, smooth, pliable, elastic, and doesn’t stick to the sides of the bowl, about 8 to 10 minutes. If the dough is unbearably sticky, add more flour 1 tablespoon at a time. Only add as much flour as needed to create a smooth dough.
- Lightly grease a large bowl. Shape the dough into a ball and place in the greased bowl. Cover with plastic wrap and let rise in a warm place until doubled in size, about 1 1/2 to 2 hours.
Make the filling:
- While the dough rises, add filling ingredients to a medium mixing bowl. Beat with an electric mixer on medium-high until very well combined, about 3 minutes.
Shape the dough:
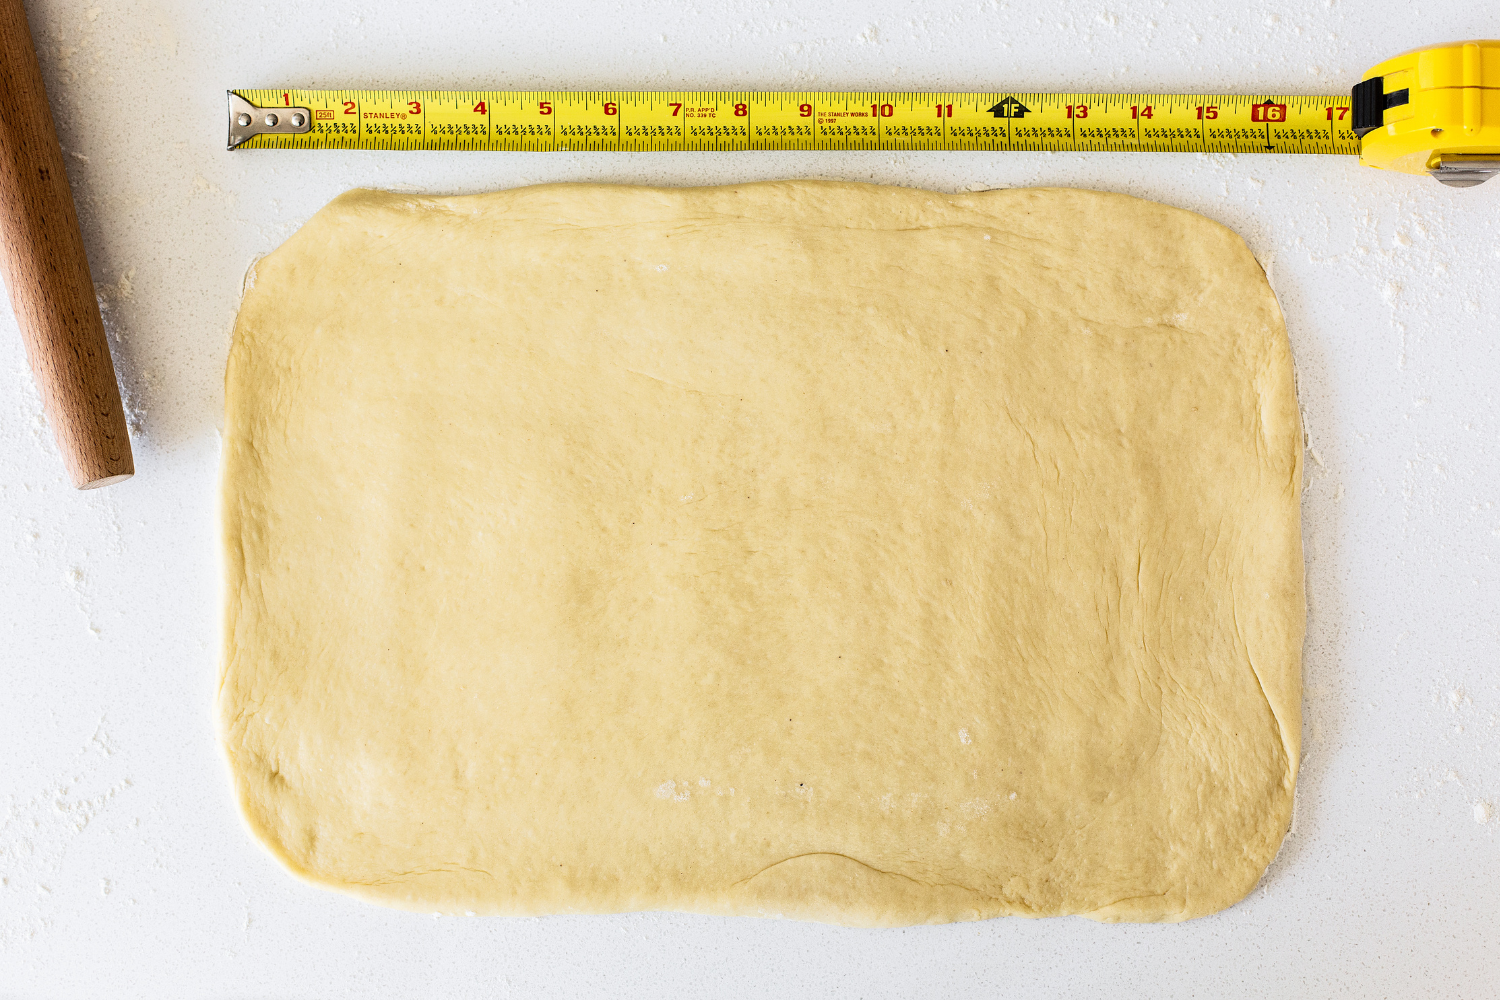
- Punch down the risen dough and turn out onto a lightly floured work surface. Use a rolling pin to shape the dough into a 16×12-inch rectangle, with the long side facing you.
- Spread the filling mixture all over the dough, leaving a 1/2-inch border at the far edge. Brush the border with water to help seal.
- Roll up the dough, pulling with your hands to keep it tightly rolled until it’s an even log shape. Press the border to seal. Trim the edges.
- Grease a 13×9-inch baking dish or two 9-inch pie pans. Cut the roll into 12 equal pieces using a sharp serrated knife or unflavored dental floss. Place the rolls cut side up in the prepared baking dish. Cover with plastic wrap and let rise in a warm place until doubled, about 1 1/2 to 2 hours.
- Make Ahead: Allow the shaped rolls to rise until they’ve grown in size by about 25%. Cover the baking dish well with plastic wrap and refrigerate for up to 24 hours. Allow to come completely to room temperature and continue to rise until doubled in size, about 2 hours, before baking as directed below.
- Meanwhile, preheat the oven to 350°F. Bake the rolls until lightly golden brown, 20 to 22 minutes.
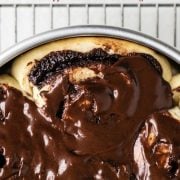
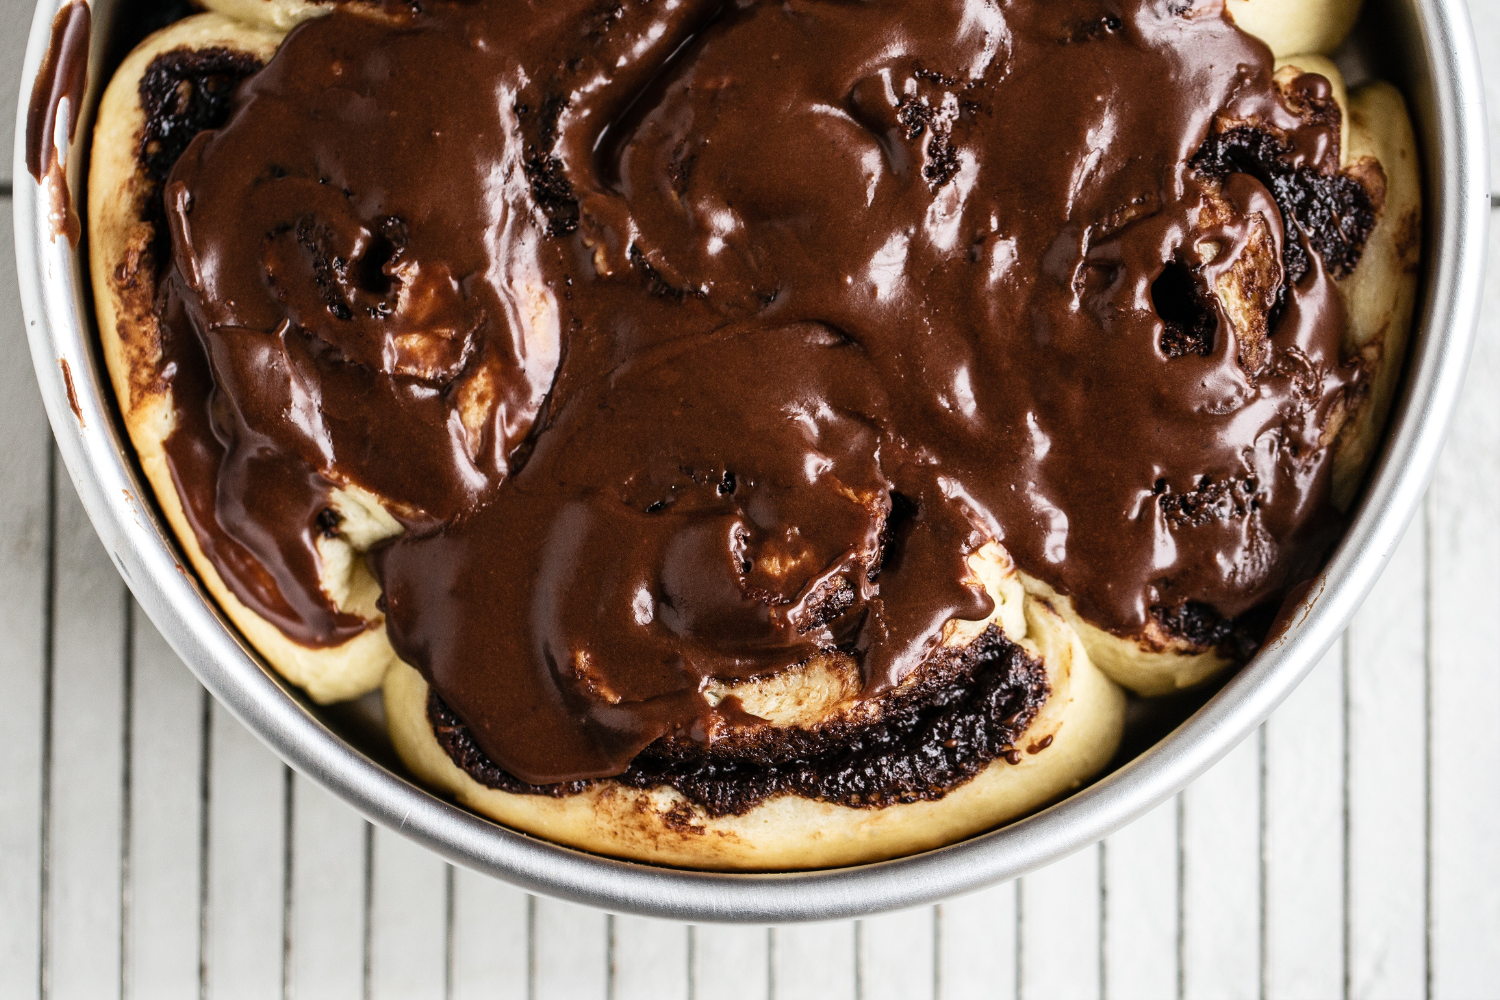
Make the icing:
- While the rolls bake, combine the icing ingredients in a small mixing bowl until a smooth pourable icing forms.
- Spread over hot rolls immediately after they come out of the oven. Serve warm the day they’re baked.
Notes
The post was originally published in 2019 and has been updated with additional recipe tips. Photos by Ashley McLaughlin.


Any recommendations for cutting this recipe in half, I’m good except for the eggs? I just don’t have enough people to eat all 12 fast enough 🙂
Hi Ericka! To half an egg, crack the egg into a small bowl and beat well. Let it settle, then measure out two tablespoons for the recipe. I hope that helps! Enjoy your rolls 🙂
So I made these rolls, and I got 28 rolls instead of 12 what have I done wrong?
They look to be the size of the ones in the picture .
Did you roll your log too tight or cut each individual roll too small? To get evenly sized pieces, cut the log directly in half so you have two logs. Then cut each log in half again. Cut each remaining piece into 3 pieces for a total of 12. Hopefully that helps!
I made your chocolate rolls for Easter and OH. MY. WORD! They are perfect!!! I prepped them yesterday and baked them today. The dough was so easy to work with and baked up amazingly! They are soft but not too gooey and most importantly, they aren’t too sweet!!! We will have these every year now! Thank you for such a fantastic recipe! I weighed everything specified. I used gold medal flour and Ghirardelli Dutch processed cocoa for the glaze and a mixture of hersheys cocoa and the Ghirardelli Dutch for the filling.
Hooray!! I love new traditions 🙂 So happy to hear you enjoyed these chocolate rolls!
I want to make this recipe, however I am short on cocoa powder. Is there any way I can sub semi sweet chocolate in either the icing or filling to make up the difference?
Thanks!
Hi I have two questions.
I really want to make these rolls but I’m wondering: do you use a fan forced oven or just conventional? Also, the only dish I have is a glass pie dish, can I make the rolls in that? If so, how would you suggest I adjust cooking time?
Thank you so much
Hi, how would I go about making this recipe with active dry yeast? I am not able to get instant yeast where I am
Thank you!
Disappointed in myself…for not taking a picture! Made a double batch. Proofed them overnight in the refrigerator & removed an hour before baking. Did have to bake them for 35 minutes (was on convection bake at 325). Took hot out of oven, covered, & straight to work for our Wednesday meeting. Didn’t frost them, but had it available for people to put on themselves. Everyone loved them & appreciated they were still hot….well except for those who are dieting…lol. Definitely a recipe will use again!