


Tessa’s Recipe Rundown
Taste: The longer you let this dough chill, the more flavor it develops. Even crust haters will actually want to eat the crust.
Texture: The. best. part. This dough is crunchy, chewy, bubbly, light, and thin. It’s a million times better than most pizza doughs I’ve ever tasted.
Ease: Seriously so easy. A few ingredients come together in less than 5 minutes.
Why You’ll Love This Recipe: Your new and easy go-to pizza dough!
This post may contain affiliate links. Read our disclosure policy.


I first published this No-Knead Pizza dough recipe a decade ago in 2011. The fact that it’s been that long absolutely blows my mind.
I’ve learned a lot about baking over those years and have become increasingly obsessed with pizza making. Especially after my bestie Ashley (aka Baker by Nature) generously gifted me a Breville Pizza Oven for my 30th birthday. Don’t worry, you won’t need a pizza oven for this recipe!

Pizza became a recurring daily theme among my thoughts! I fell deep down a rabbit hole of researching everything I could about making pizza. This time, I was more inspired by Neapolitan-style pizza. I knew I wanted to tweak and improve this recipe that hadn’t been updated in so long.
So I made it my mission to find ways to add more chewy texture and better flavor to this recipe. It turned out to just need a few small changes. I also needed to test this recipe in a home oven and find the best way to make pizza without a pizza oven. The two keys? A pizza stone and the broiler (more on this below).
I returned to Jim Lahey and also to Kenji Lopez to help guide me on my pizza journey, as well as many other publications, videos, and articles along the way. And the final result? A super easy pizza dough that takes minutes to make and sits in the fridge developing flavor until it’s pizza Friday. Or whatever day you’re ready for a pizza party!


Sprinkle of Science
How to Make No-Knead Pizza Dough
Pizza Dough Ingredients
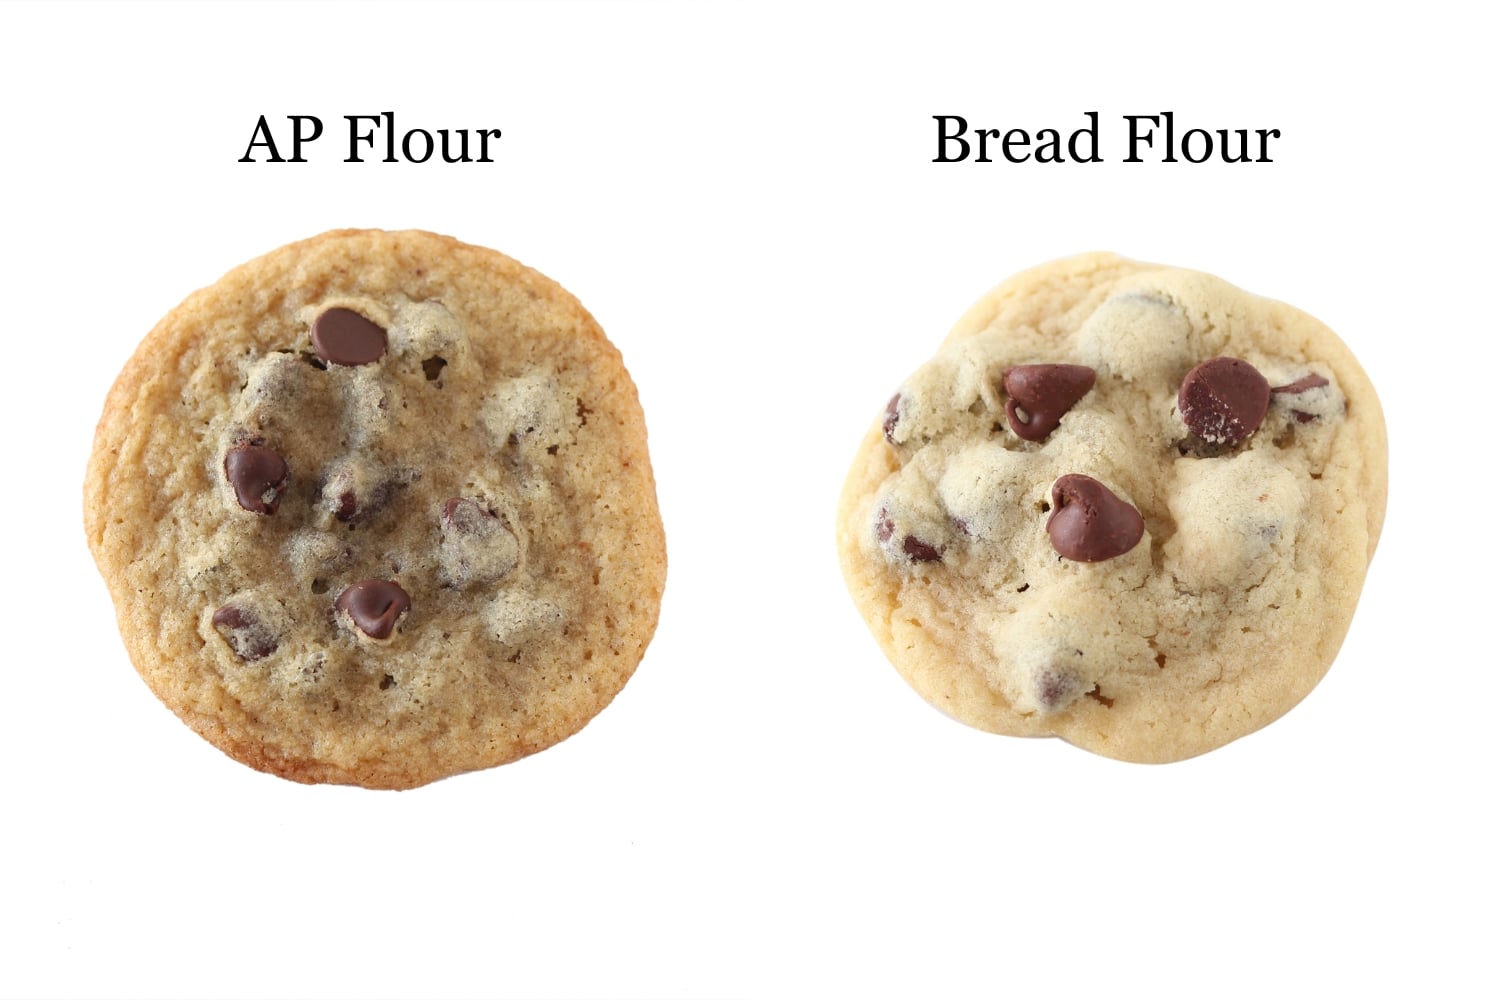
- Bread flour – I recommend using bread flour, as it contains more protein than all-purpose flour, for a sturdy, chewy dough. If you’re able to get it, use more finely milled Italian 00 flour for the most authentic results.
- Instant or active dry yeast – Either will work just fine.
- Salt – I call for Kosher salt in this recipe, but it’s very important to know the brand of salt you’re using! If using Diamond Crystal kosher salt, use 4 teaspoons. If using Morton Salt kosher salt, use 2 slightly heaping teaspoons. Learn more about salt in baking here.
- Water – Make sure to use lukewarm water (about 100°F). If it’s too hot, it can kill the yeast. For this recipe, a longer and slower fermentation helps to develop flavor without needing a sourdough starter.
- Semolina flour – A sprinkling of this for dusting your pizza peel makes it glide right off and onto your pizza stone. If you don’t have any, you can use bread or all-purpose flour.
- Cornmeal – A very small amount of this also makes sliding your pizza off the peel much easier. Don’t use too much though as it’ll alter the texture of your crust and may scorch on your stone!

Since this is a Neapolitan-inspired pizza dough recipe, there’s no oil or sugar!
Can I Use All-Purpose Flour Instead?
I wouldn’t necessarily recommend it, but if you must use all-purpose flour, you may need to slightly reduce the amount of water in the recipe. All-purpose flour has less protein content and will absorb less water.
How to Make No-Knead Dough
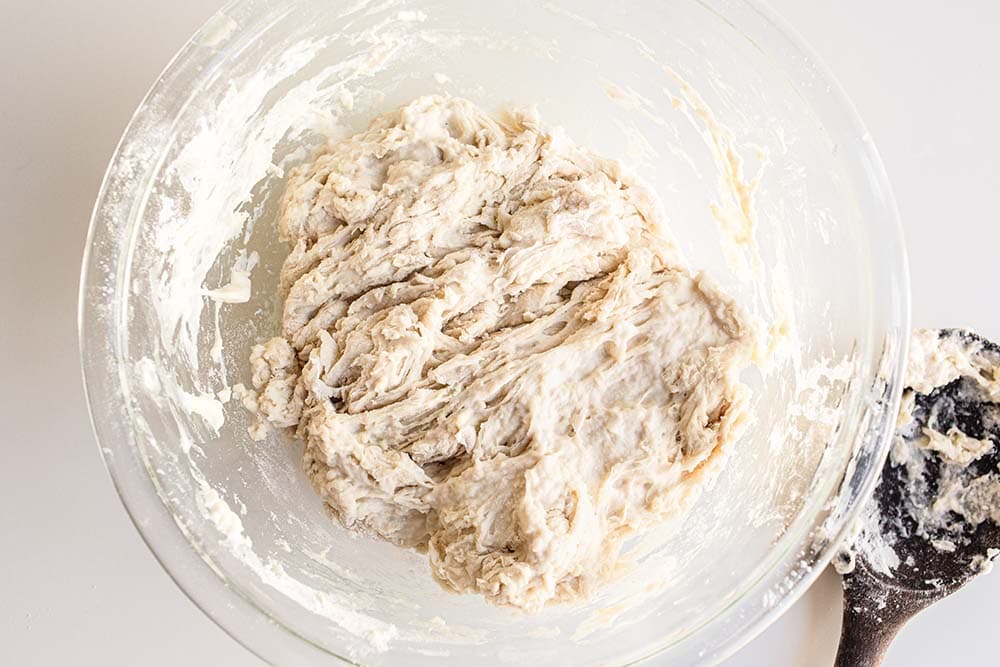
It really couldn’t be easier. Simply combine all the ingredients with a wooden spoon and then your hands if needed. You truly don’t need to knead! It’s going to look rough and shaggy. If it looks extremely dry, don’t worry too much. It should absorb some moisture and hydrate up in a few minutes.
The next steps are what’s critical.
How to Rise & Ferment Pizza Dough
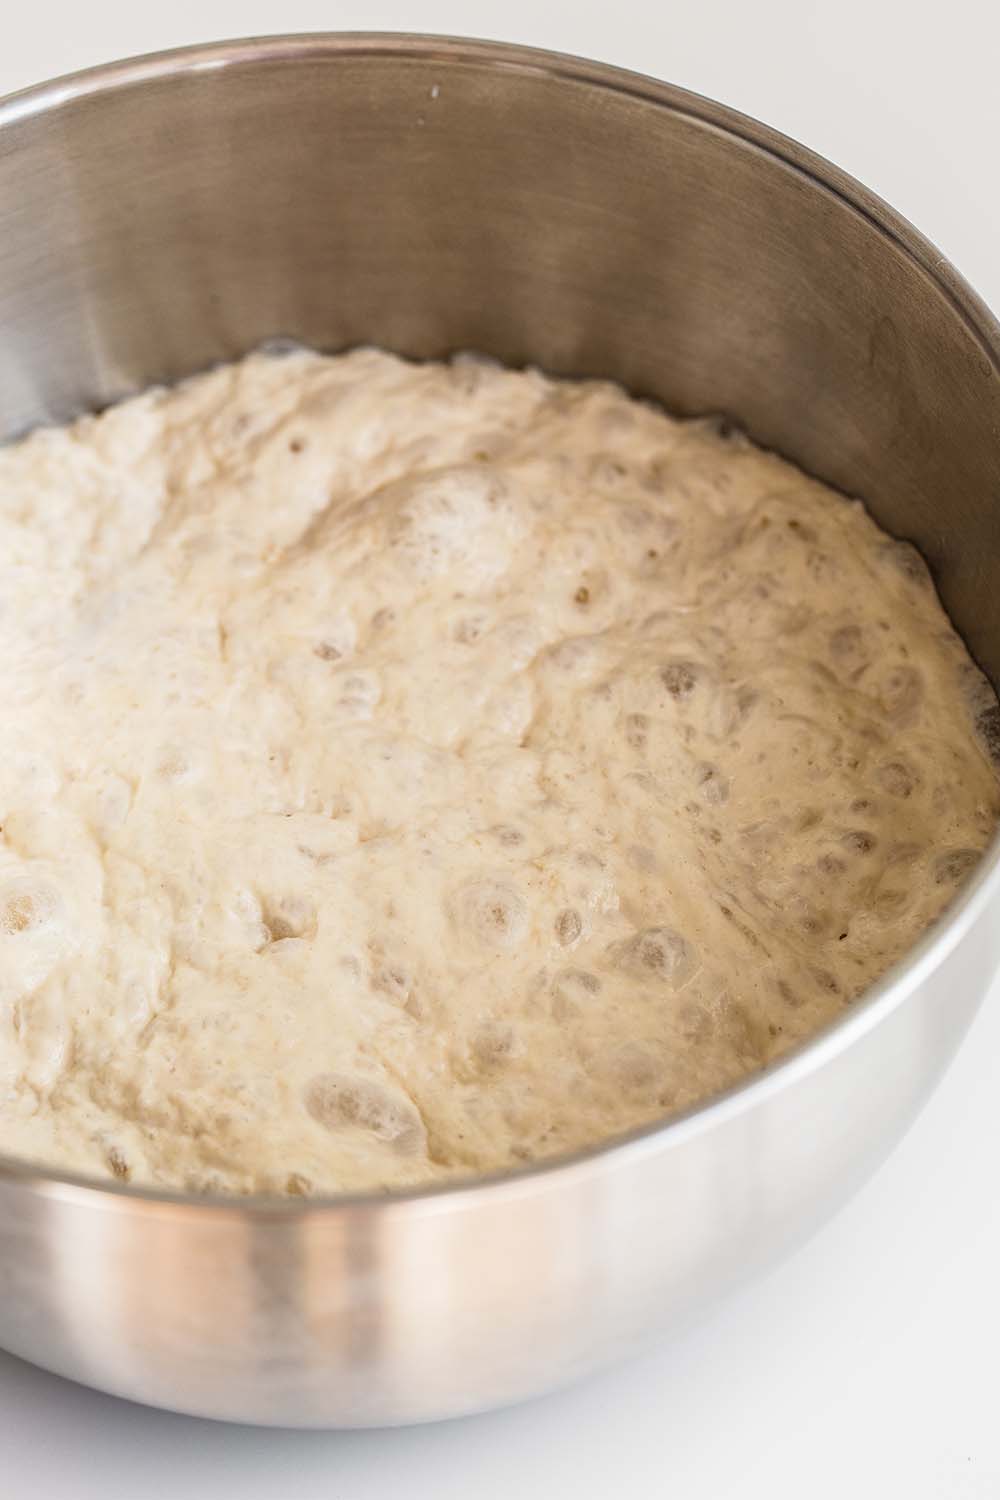
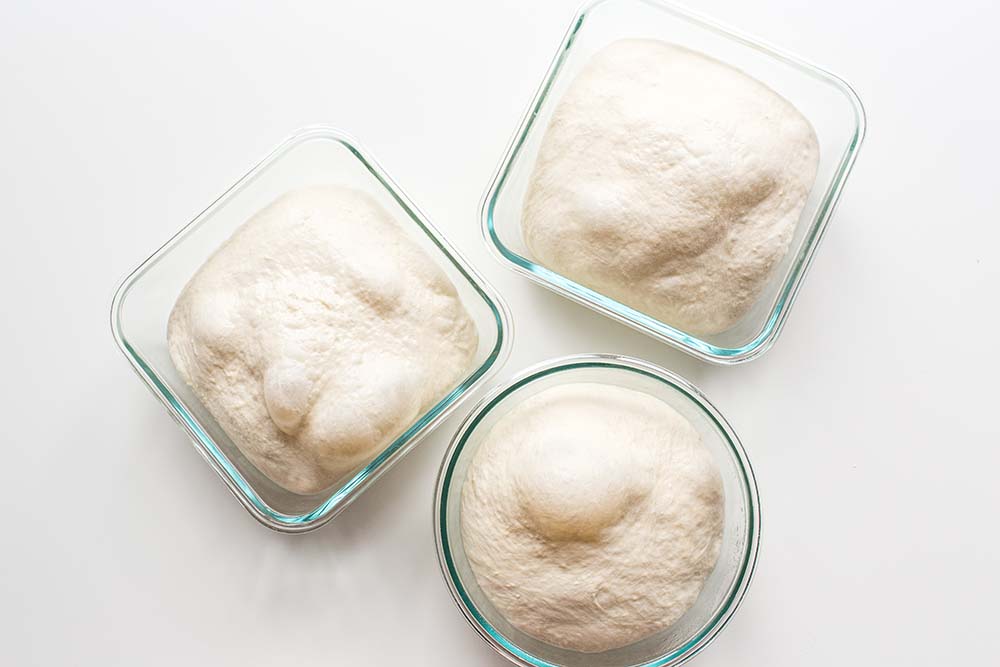
1. Shape the dough into a ball and transfer to a clean, large bowl. Cover with plastic wrap and let rise at room temperature in a draft-free place until the dough is doubled in size. This may take 8 to 12 hours, depending on how warm your kitchen is. Don’t worry too much about the time as this dough is very forgiving. You can quickly bring the dough together before heading out to work, and it should be done by the time you get home!
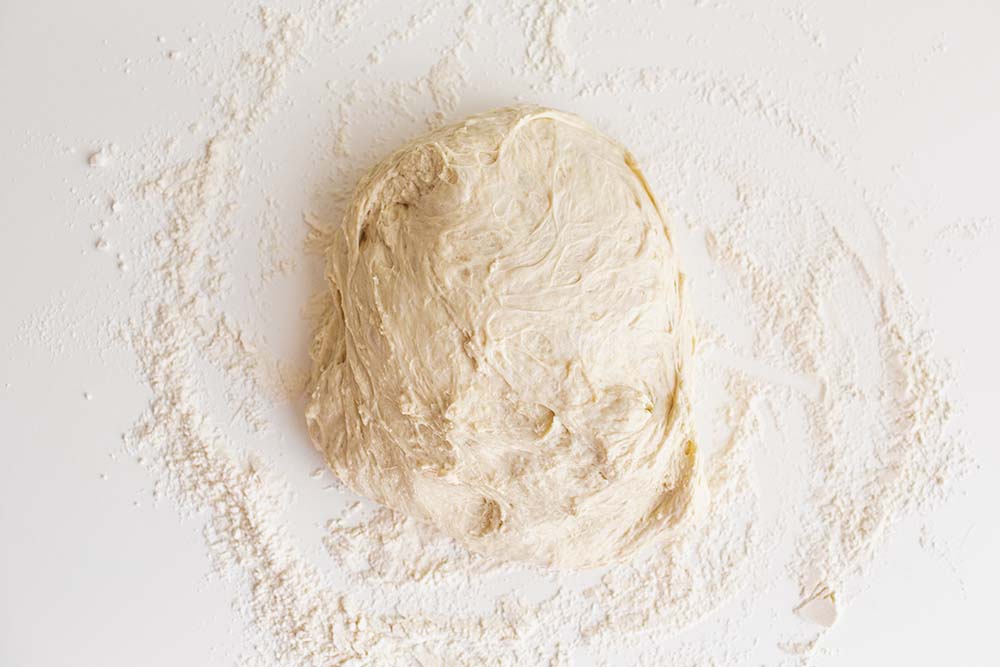
2. Transfer the dough to a floured work surface. Divide into 4 equal portions (a bench scraper makes easy work of this). Take one portion of dough and gather 4 corners to the center to create 4 taut folds. Turn seam-side down and roll into a smooth ball. Repeat with remaining portions.
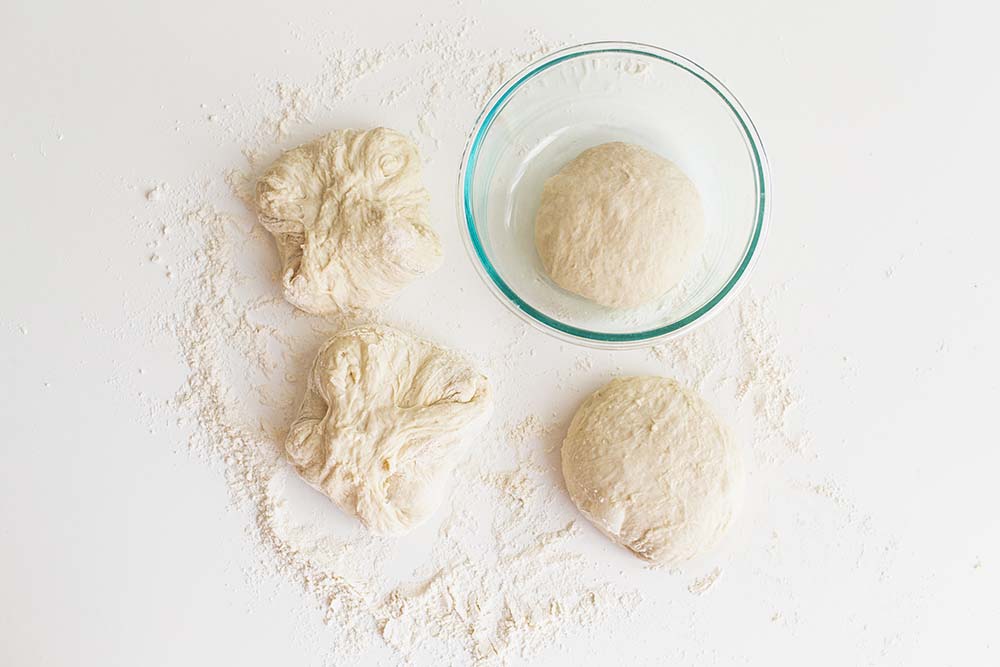
3. Place each portion in a separate quart-sized container or zip-top bag. Be sure to use a freezer-safe container if planning to freeze the dough. Let rise again for another hour.
4. Refrigerate the portioned dough for 4 to 5 days to allow it to cold ferment. This is going to produce the best flavor and texture and is worth the wait, I promise! Let the dough rest at room temperature for 1 1/2 to 2 hours before shaping to bake.
How to Freeze Pizza Dough
After the dough has fermented in the fridge, you can freeze the dough in freezer-safe plastic containers for up to 1 month. Defrost the dough overnight in the fridge, then allow it to sit at room temperature as directed above before shaping.
Equipment Needed for the BEST Pizza!
- Large bowl – I prefer glass or clear plastic so you can see how much the dough has risen and grown in volume.
- Bench scraper – This makes easy work of portioning out and working with the dough.
- Containers – Deli containers, sealable plastic or glass containers, or zip-top bags – whatever will fit best in your fridge!
- Pizza Peel – This is a game-changer for getting pizza into and out of the oven without damaging it. If you don’t have one, a flat cookie sheet or the flat bottom of a sheet pan can work in a pinch.
- Baking stone or steel – I don’t think this is optional. It makes SUCH a difference in achieving a crispy crust and fast baking time for your pizza. I like the Emile Henry pizza stone because I’ve had mine for years, but a baking steel is actually a better choice if you can handle the weight of it.
How to Stretch Out Pizza Dough
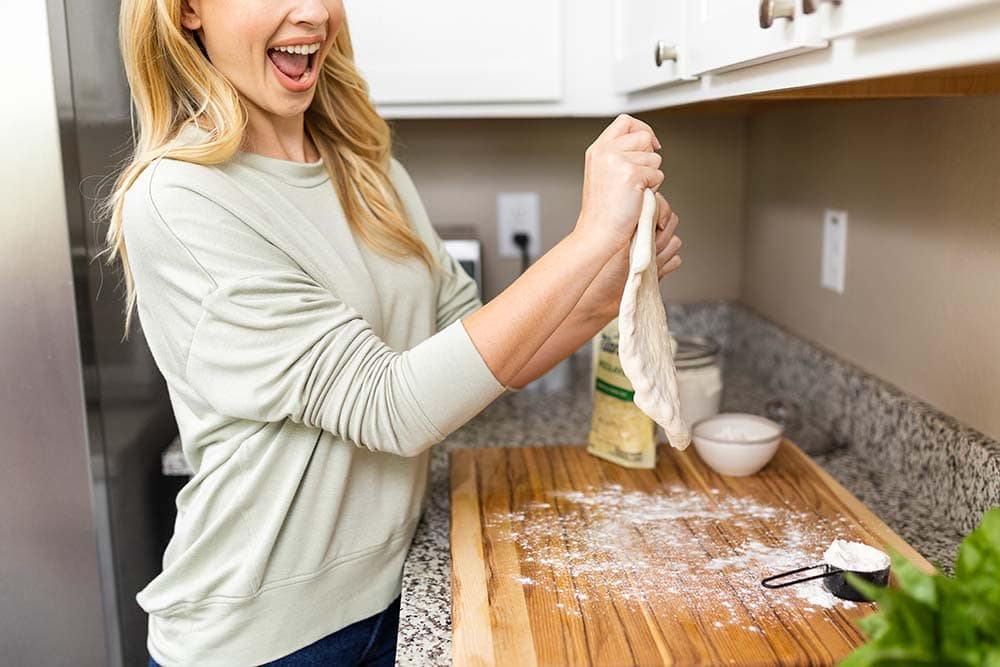
- Place a ball of pizza dough on a lightly floured work surface. Press into about a 6-inch circle with the palms of your hands.
- Pick the dough up and stretch it out by holding one end and letting the other end fall, rotating gently. Or, drape the dough over your knuckles and slowly use your hands to rotate the dough, allowing it to fall and stretch. Continue this until the dough is stretched into about a 12-inch circle.
- If at any point the dough springs back and doesn’t want to stretch out, simply cover it with a clean towel and let it rest for 5 to 10 minutes.
How to Assemble & Top Pizza
There are two rules to assembling a pizza.
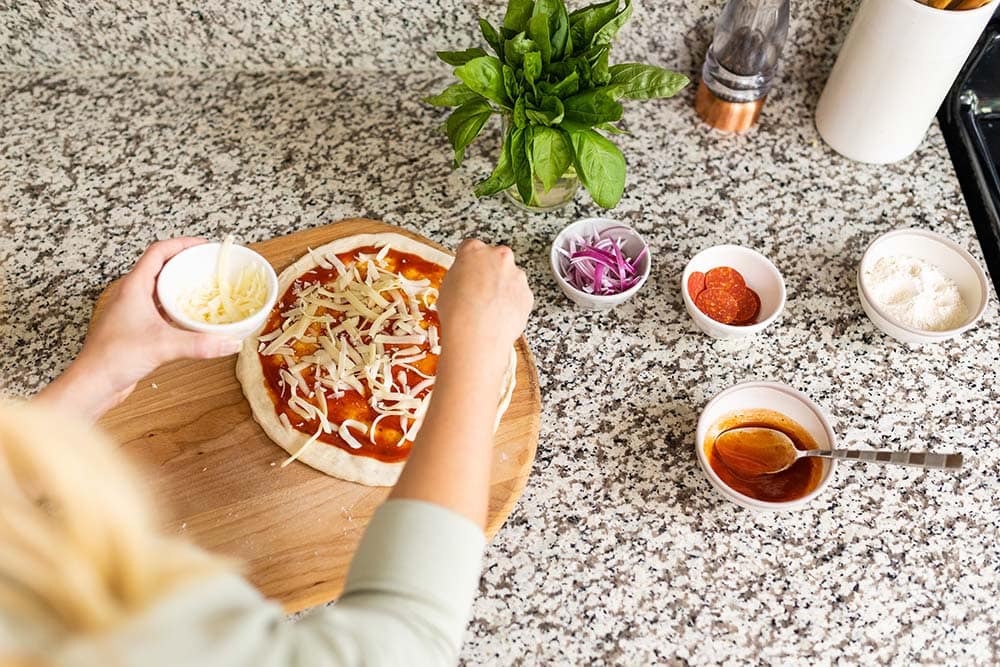
Rule #1: Use slightly less sauce and cheese than you think. The last thing you want is your pizza to be weighed down so much that it is soft or gummy and undercooked in the center. Too many toppings can also slide off when you transfer your pie onto the baking stone.
Rule #2: Assemble each pizza on the pizza peel moments before you plan to cook it. The longer your pizza sits on the pizza peel, the more likely it will get stuck to it and not slide off easily.
Since we’re cranking the oven and using the broiler (detailed below), it’s not a good idea to use parchment paper underneath your dough, unless you want your pizza glued to charred parchment.
Pizza Topping Ideas
Of course, feel free to top your pizza with any toppings your heart desires – but for a classic Neapolitan pizza, use:
- About ⅓ cup canned pureed San Marzano tomatoes, mixed with a splash of olive oil and a sprinkle of salt
- 3 ounces (85 grams) fresh mozzarella (preferably Buffalo mozzarella), sliced into ¼-inch pieces
- Kosher salt
- Fresh basil leaves (sprinkled on after cooking)
Super simple! If your cheese seems extra watery, blot the slices with paper towel and allow to sit for 10 to 15 minutes, then blot again.
I’ve also used this recipe to make pesto pizza with great success! Feel free to get creative!
How to Cook Crispy Pizza at Home
If you don’t have a pizza oven, here are the steps for achieving the crispiest crust in your regular oven.
- Adjust your oven rack to the top position (close to the broiler). Place your pizza stone or steel on that rack.
- Preheat the oven to as high as it’ll go for an hour. This will heat the stone and mimic the environment of an ultra-hot professional pizza oven. In this time, you can allow your dough to come to room temperature and prepare all your toppings.
- Using the peel, quickly and confidently slide the assembled pizza onto the preheated stone. Be sure not to tilt the pizza up too much to avoid the toppings sliding off.
- Bake the pizza for 5 to 7 minutes or until the bottom crust is cooked through and beginning to brown. Switch to broil mode, and broil until the crust blisters and darkens and the cheese bubbles to your preference, 1 to 4 additional minutes. Keep an eye on your pizza during this time as walking away for even a few seconds can turn your pizza from perfect to burnt.
- Use the pizza peel to remove the pizza from the oven. Let cool for a couple minutes before slicing and serving.

More Recipes You’ll Love:
- Garlic Knot Rolls – perfect side for homemade pizza!
- Copycat Olive Garden Breadsticks
- How to Make Burger Buns
- How to Make Empanadas
- Soft Pretzel Bites

Email This Recipe
Enter your email, and we’ll send it to your inbox.
Ingredients
- 4 cups (508 grams) bread flour
- 1 teaspoon instant or active dry yeast
- 4 teaspoons (11 grams) Diamond Crystal kosher salt (or 2 slightly heaping teaspoons for Morton Salt kosher salt)
- 13 ounces (367 grams) lukewarm water, about 100°F
- Flour (preferably Semolina), for dusting
- Cornmeal, for dusting
- Toppings of your choice
Instructions
- In a medium bowl, combine the bread flour, yeast, and salt. Gradually add the water, stirring with a wooden spoon, until the water is incorporated and a shaggy dough forms. You may need to use your hands to fully incorporate the water. If it looks very dry, let it sit for a couple minutes to allow the flour to absorb the water. Just remember, you don't need to knead!
- Shape the dough into a ball and transfer to a clean, large bowl. Cover with plastic wrap and let rise at room temperature in a draft-free place until the dough is doubled in size. This may take 8 to 12 hours, depending on how warm your kitchen is. Don't worry too much about the time as this dough is very forgiving.
- Transfer the dough to a floured work surface. Divide into 4 equal portions. Take one portion of dough and gather 4 corners to the center to create 4 folds. Turn seam side down and roll into an even ball. Repeat with remaining portions.
- Place each portion in its own quart-sized container or zip-top bag. Let rise again for another 45 to 60 minutes. Seal the containers, and refrigerate the portioned dough for 4 to 5 days to allow it to ferment.
- After the dough has fermented in the fridge, you can freeze the dough for up to 1 month. Defrost the dough overnight in the fridge, then allow it to sit at room temperature as directed above before shaping.
To prepare the pizza:
- Remove the dough from the fridge and allow to rest at room temperature for 1 1/2 to 2 hours. Meanwhile, place a baking stone or steel on the top rack of your oven (close to the broiler), and preheat to as hot as it will go for 1 hour.
- Once ready to bake, prepare all of your toppings completely so you can assemble quickly.
- Place a ball of pizza dough on a lightly floured work surface. Press into a 6-inch circle with the palms of your hands. Pick the dough up and stretch it out by holding one end and letting the other end fall, rotating gently. Continue this until the dough is stretched into about a 12-inch circle.
- Lightly dust a pizza peel with semolina flour (or all-purpose flour) and cornmeal. Place the dough on the pizza peel. Quickly place your toppings on the dough. Use slightly less sauce and cheese than you would think. Avoid too much sauce in the center of the pizza.
To cook the pizza:
- Using the peel, quickly and confidently slide the pizza onto the preheated stone. Be sure not to tilt the pizza too much to avoid the toppings sliding off.
- Bake the pizza for 5 to 7 minutes or until the bottom crust is cooked through and beginning to brown. Switch to broil mode and broil until the crust blisters and darkens and the cheese bubbles to your preference, 1 to 4 additional minutes. Keep an eye on your pizza during this time as walking away for even a few seconds can turn your pizza from perfect to completely burnt.
- Use the pizza peel to remove the pizza from the oven. Let cool for a couple minutes before slicing and serving.
This recipe was originally published in 2011 and updated with recipe improvements, more tips, and new photos. Photos by Ashley McLaughlin.
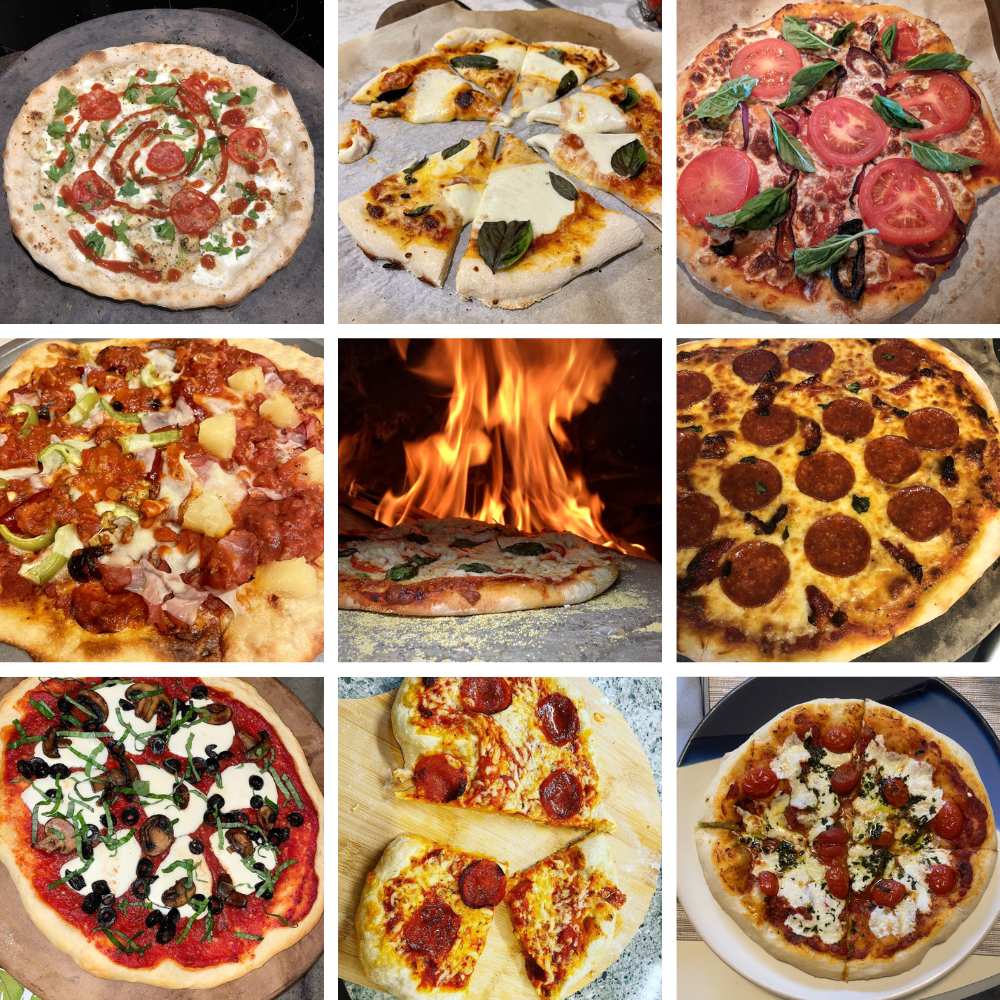
HTH Community Photos
This pizza dough recipe has been used by our wonderful Handle the Heat community to make SO many delicious-looking pizzas! Check out some of their stunning creations below:


This was a very tricky recipe for me. I made two pies. The first was a complete visual fail. The dough was too moist when I was working with it and stuck to everything. Dusting of flour helped, but I was too late in figuring that out. The second was a little better because I dusted with flour earlier, but it was still very difficult to work with. I only burnt myself once during the process – so that’s a plus – and that was on my hot oven mitt. I figured out to use the oven mitt in addition to a cloth towel when handling the baking pan. The second pie was a little better, but still not very visually pleasing. I’m sure with my trial-and-error on this project that the third and fourth pies will each be just a bit better. Tasted good though. My husband participated and loved adding his own toppings to suit his own tastes. So that was fun.
Oh my goodness, I’m sorry to hear of the issues you had, Cynthia! Being completely honest, my first pizza was a fail too visually-mine stuck completely to the peel, and the shaped ended up looking more like an eggplant, but it still tasted good! Hopefully you can try this recipe again with better success, but I’m happy to hear you both enjoyed the taste!
This pizza dough is delicious and so easy to make! I made a medium crust pizza and placed it in a 9″ cake pan. It was so sticky that I put in the pan and flattened it out instead of using the method stated in the recipe.
Yummm
Yumm
This recipe is a little time intensive (make sure to read the recipe first!) but totally worth the wait. I have a go to recipe that I have been using for years. However, what I really loved and what stood out about this particular recipe is the chewy texture – just like a pizzeria! I would definitely make this again.
So happy you enjoyed it, Melissa!
Soft and fluffy and delicious!
This recipe made a nice dough but I did have some questions for you Tessa! I struggled to stretch the dough to the suggested 12″ without tearing it- it really did get paper thin at that size!! Mine averaged around 10″. Also when I baked my first pizza, I noticed that the toppings browned and were done much sooner than the crust- the crust was still pale while the toppings were verging on overdone. With my other pizzas I prebaked the crusts for about 3 minutes and that seemed to be about right. I wasn’t able to finish the pizzas with my broiler because my broiler is in the bottom drawer of my oven, so I just left it in a couple minutes longer in lieu of this. Overall I didn’t notice a more developed flavor with the dough being fermented for 4 days, as opposed to the dough I have made that I refrigerate for overnight. Any tips you can give me would be much appreciated as pizza dough is something I am passionate about too! Thank you for your awesome community!
Interesting to hear of your results! Did you let your pizza stone/steel preheat while the oven was preheating? If so, do you have an oven thermometer? There have been a few other readers who prebaked the crust for a few minutes and then added the toppings, perhaps that might work best with your oven in the future. This is definitely a very thin and somewhat sticky dough, Tessa has some tips in the pink box above the recipe on how to stretch out the dough, hopefully that will help in the future. I hope you give this recipe another try!
Hi Emily! Yes, I do have an oven thermometer and did preheat my stone in the oven! That is good to know that the dough is supposed to be very thin and sticky- I will keep that in mind and definitely will be trying it again!
It is, see if flouring your hands while rolling the dough out, or even using just a bit of oil on your hands helps the process. Good luck!
Instant hit at my house! Absolutely delicious!!!
This dough is out of this world. Texture is perfect and the chew is out of this world. The recipe and tips make all the difference in the recipe and it’s success.
Thanks for the rave review, David! Your pizza looked AMAZING, so happy you loved it! 🙂
This helped restore my faith in my ability to make homemade pizza. Super easy, fast, and yummy!!
Hooray!! So thrilled to hear that!
This crust came out fantastic! I used bread flour instead of 00 flour. I was initially a little worried, as the video I watched of Tessa’s had her dough coming out of the bowl cleaner than mine did, but having experience with this making focaccia bread at work, I knew to add a little bit of flour till it came out of the bowl a little easier. I let it sit covered for 8 hours, and it definitely doubled in size, if not more. It was definitely sticky though, and I had to coat my hands in flour regularly while attempting to do the shaping.
I wouldn’t call my 4 portions “balls” of dough, but more like thick pancakes maybe? 🙂 I put them in containers for the second rise, but didn’t see much increase.
On day 4 I took them out of the fridge, and they were still sticky and wanted to stretch very easily, but with some extra flour and quick rotating, I was able to get the to stretch out.
They cooked wonderfully! So while I was a bit worried during the process that I might have messed something up, they came out great!
So happy to hear yours turned out well! I guess technically while they’re in the fridge they do flatten out, great description haha! Glad you enjoyed this recipe though, it was a winner in my household too!
Such flavorful pizza dough! I’ve made pizza dough many times but never left it in the fridge to ferment for five days. It really does make such a huge difference and gives the dough such great flavor. We made your pizza sauce to go with it and it turned out great too!
So happy you gave this recipe a try, especially with the homemade pizza sauce! Glad you enjoyed it! 🙂