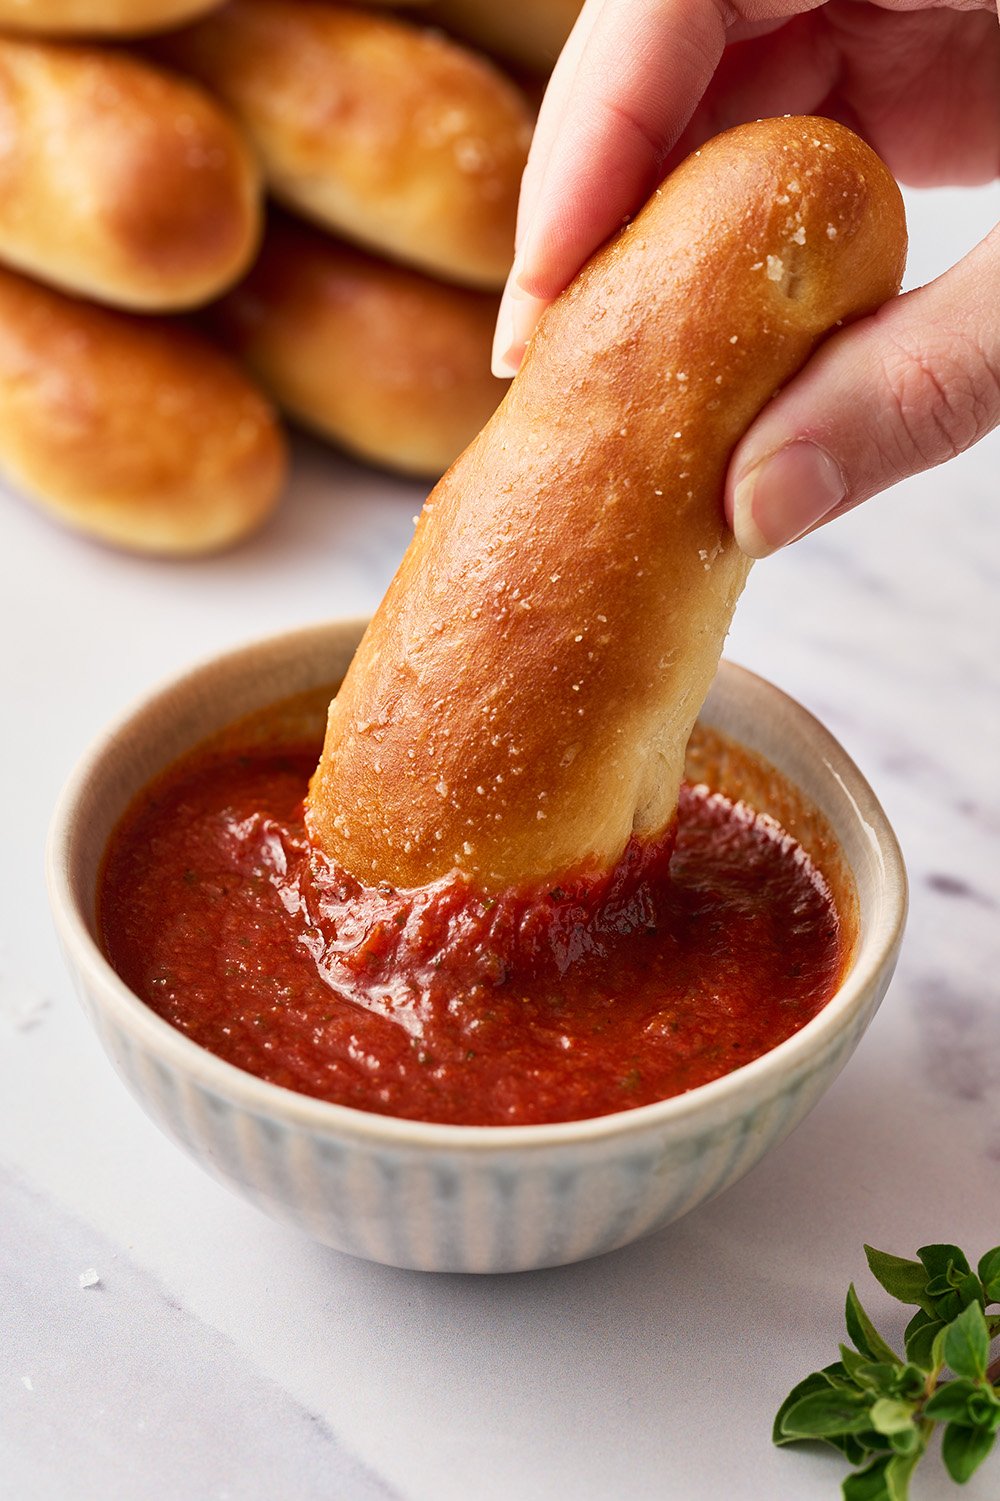
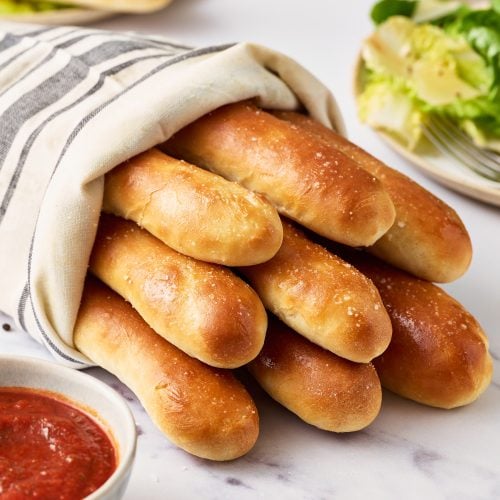
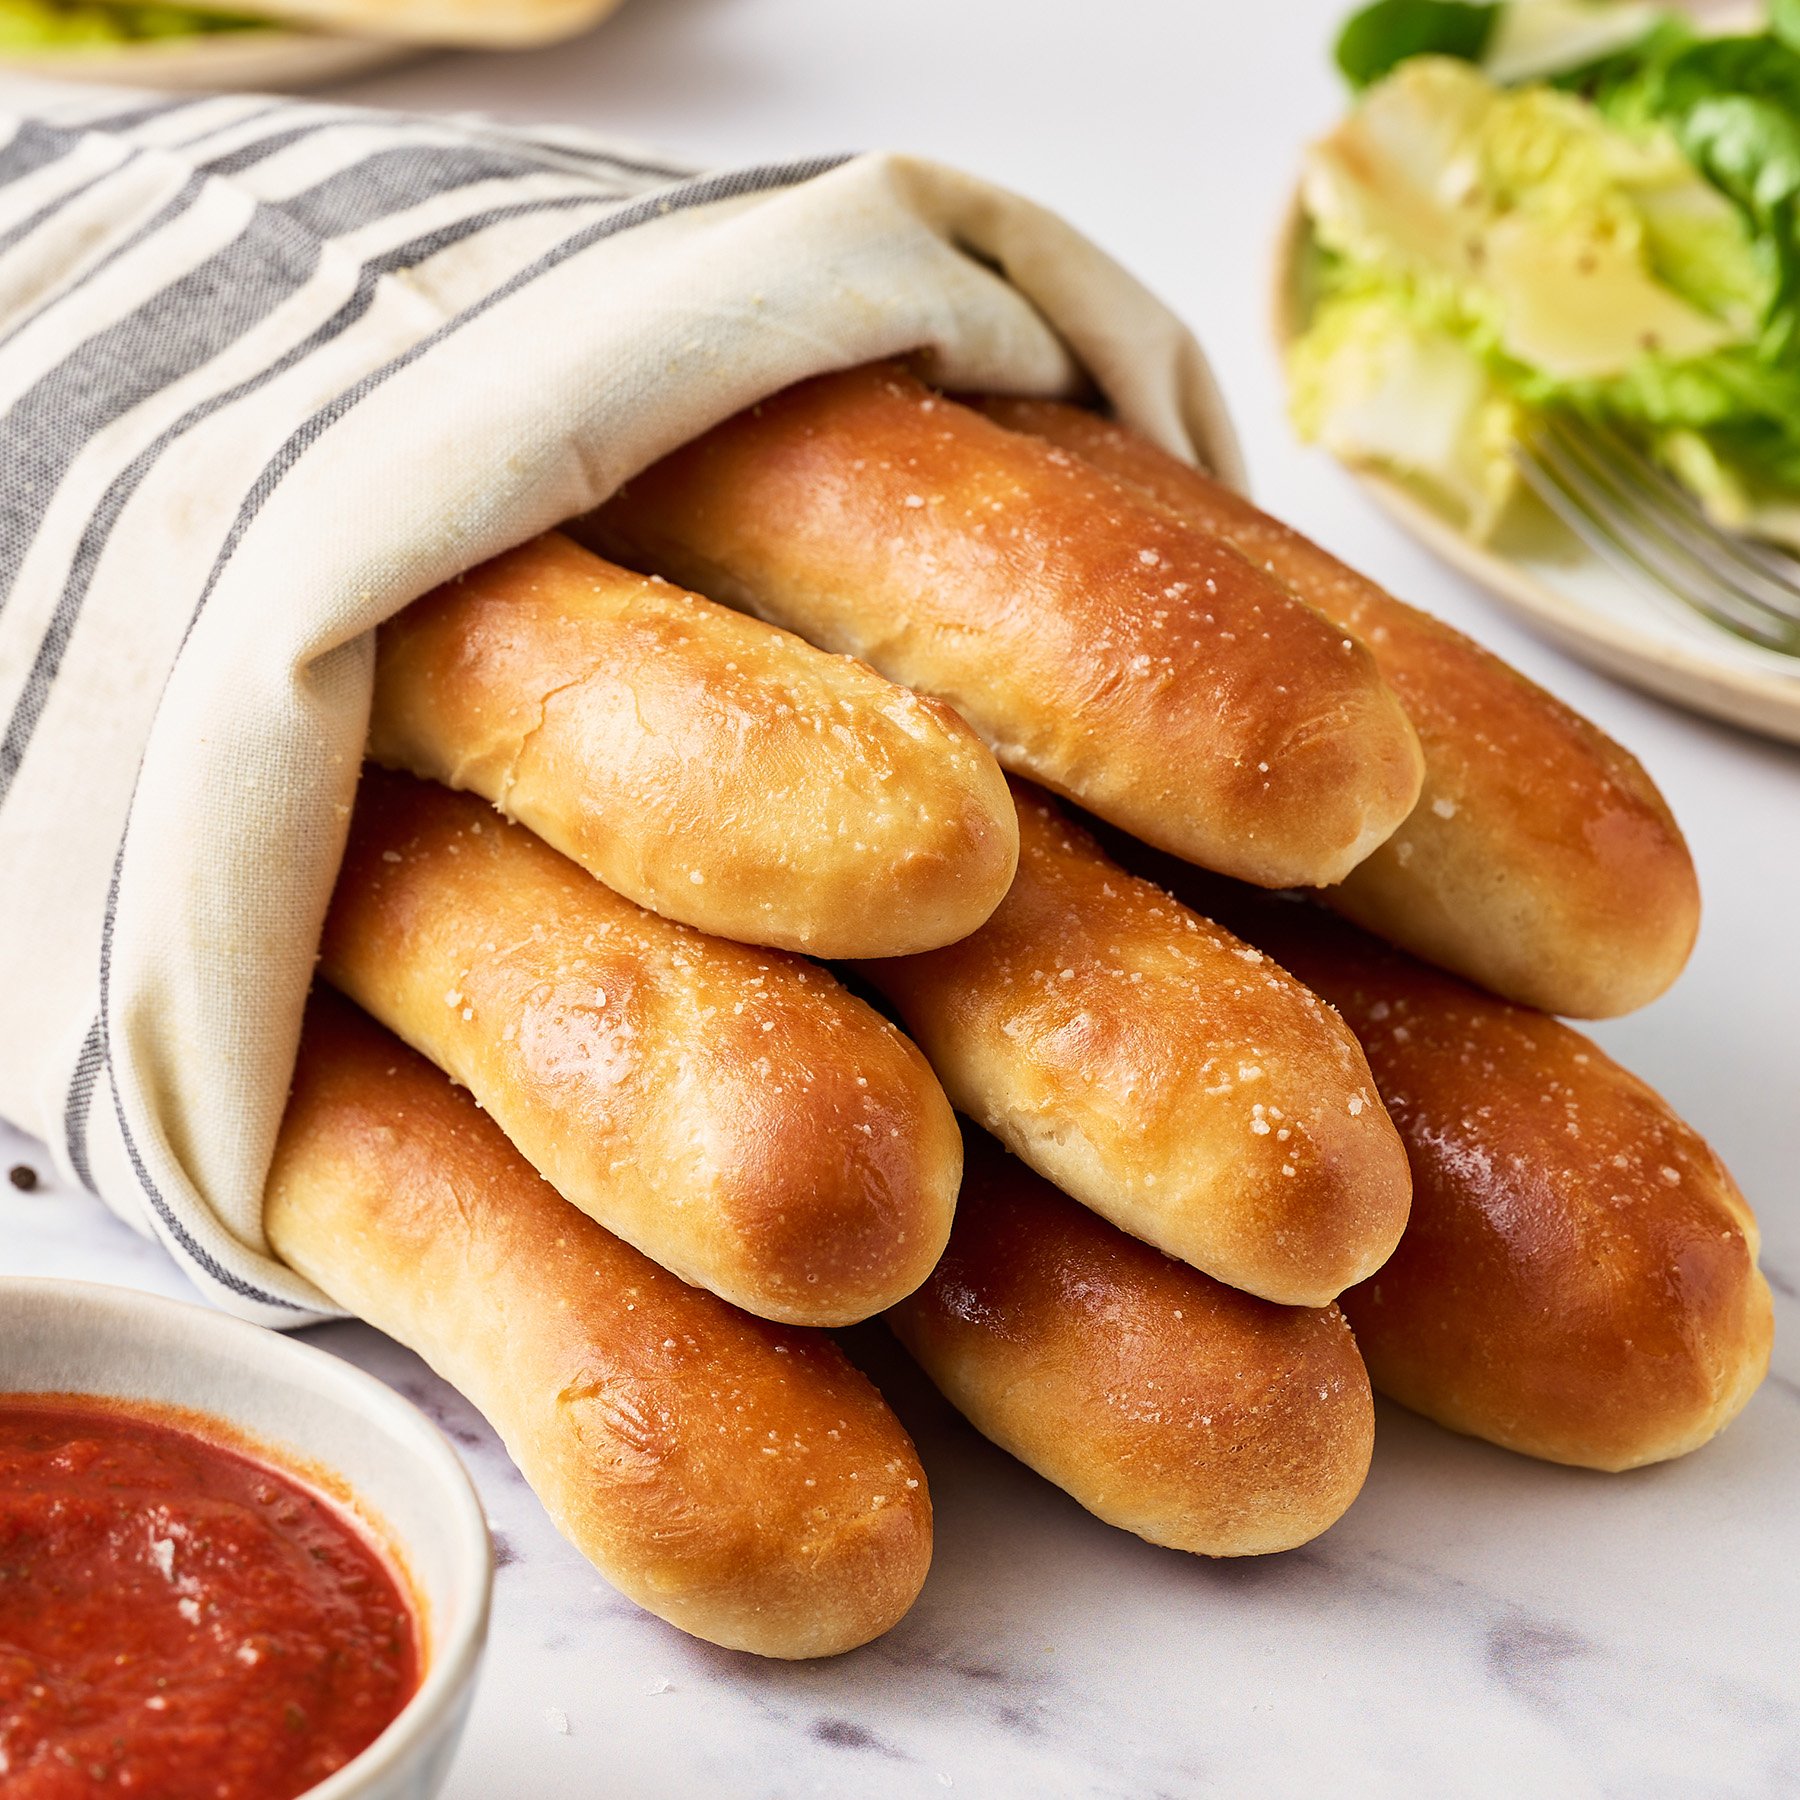
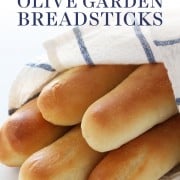
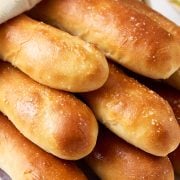
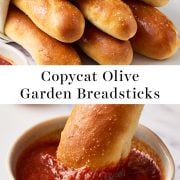
This simple recipe for Copycat Olive Garden Breadsticks makes buttery, garlic-scented, and chewy breadsticks that are utterly addictive! This breadstick recipe is the perfect complement to any meal, or a delicious snack all on its own.
Yield:
12 breadsticks
Prep Time:30minutes
Cook:14minutes
Tessa's Recipe Rundown...
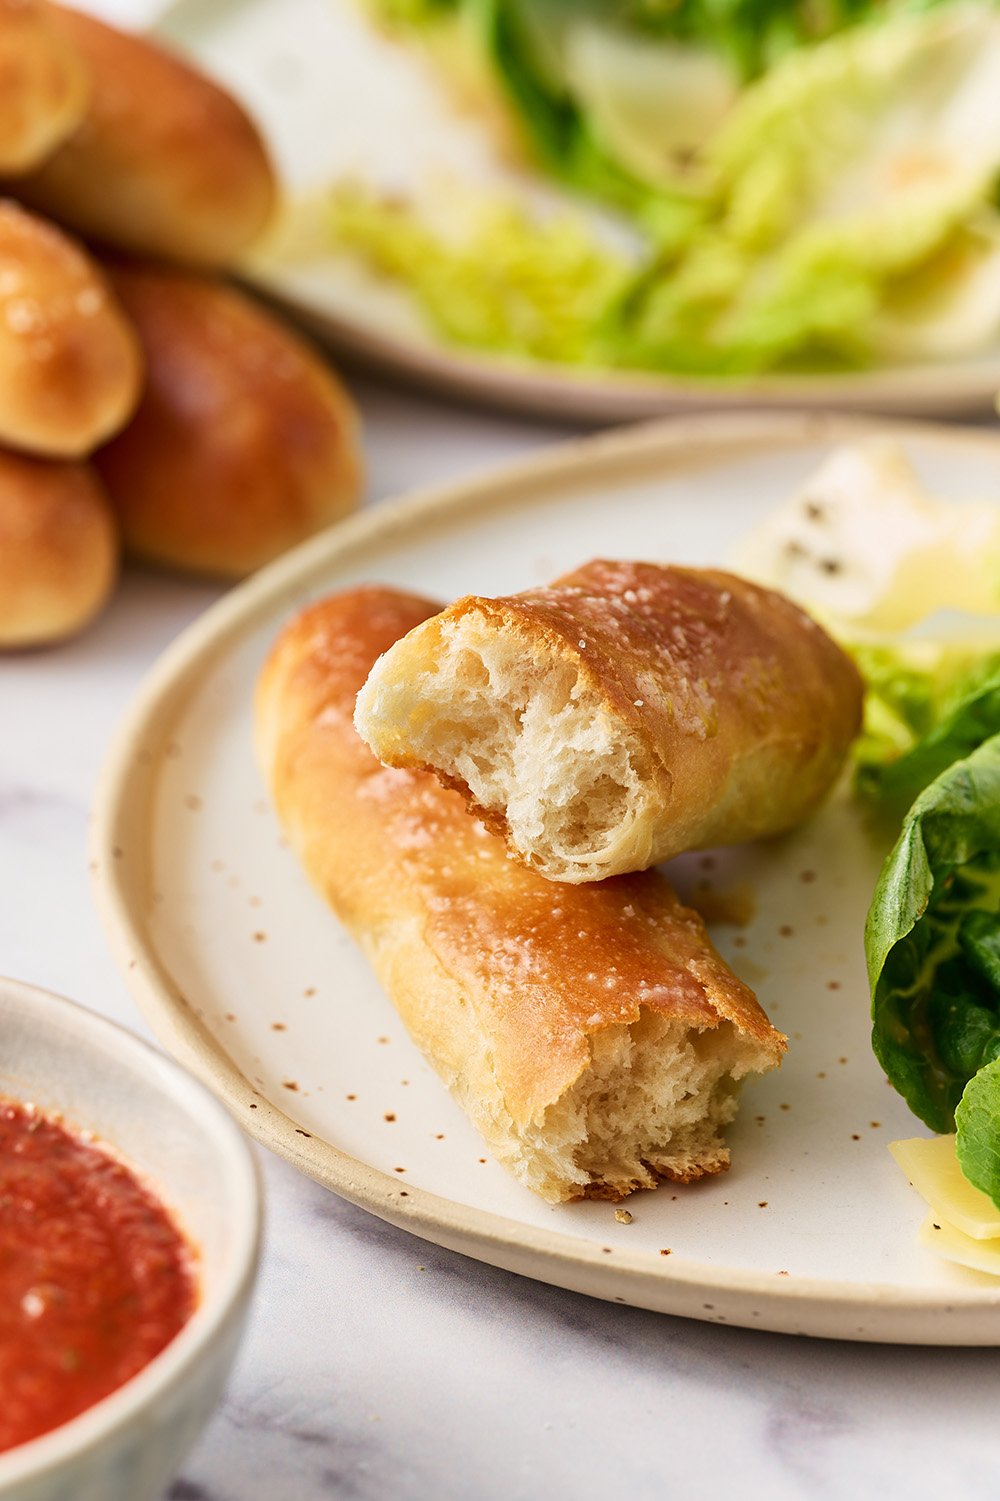
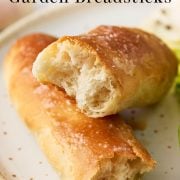
Taste: Buttery and garlicky, AKA amazing! Texture: These breadsticks have a bit of a golden crust but are soft and fluffy inside yet chewy throughout. Ease: Really easy! Homemade breadsticks may sound intimidating but there’s only a handful of ingredients and I’ve included step-by-step photos so you know exactly how to make them. Appearance: Mouthwatering. Pros: Have Olive Garden breadsticks at home whenever you want! Cons: These are dangerously addictive. Would I make this again? Mhmmm.
These Copycat Olive Garden Breadsticks are savory heaven.
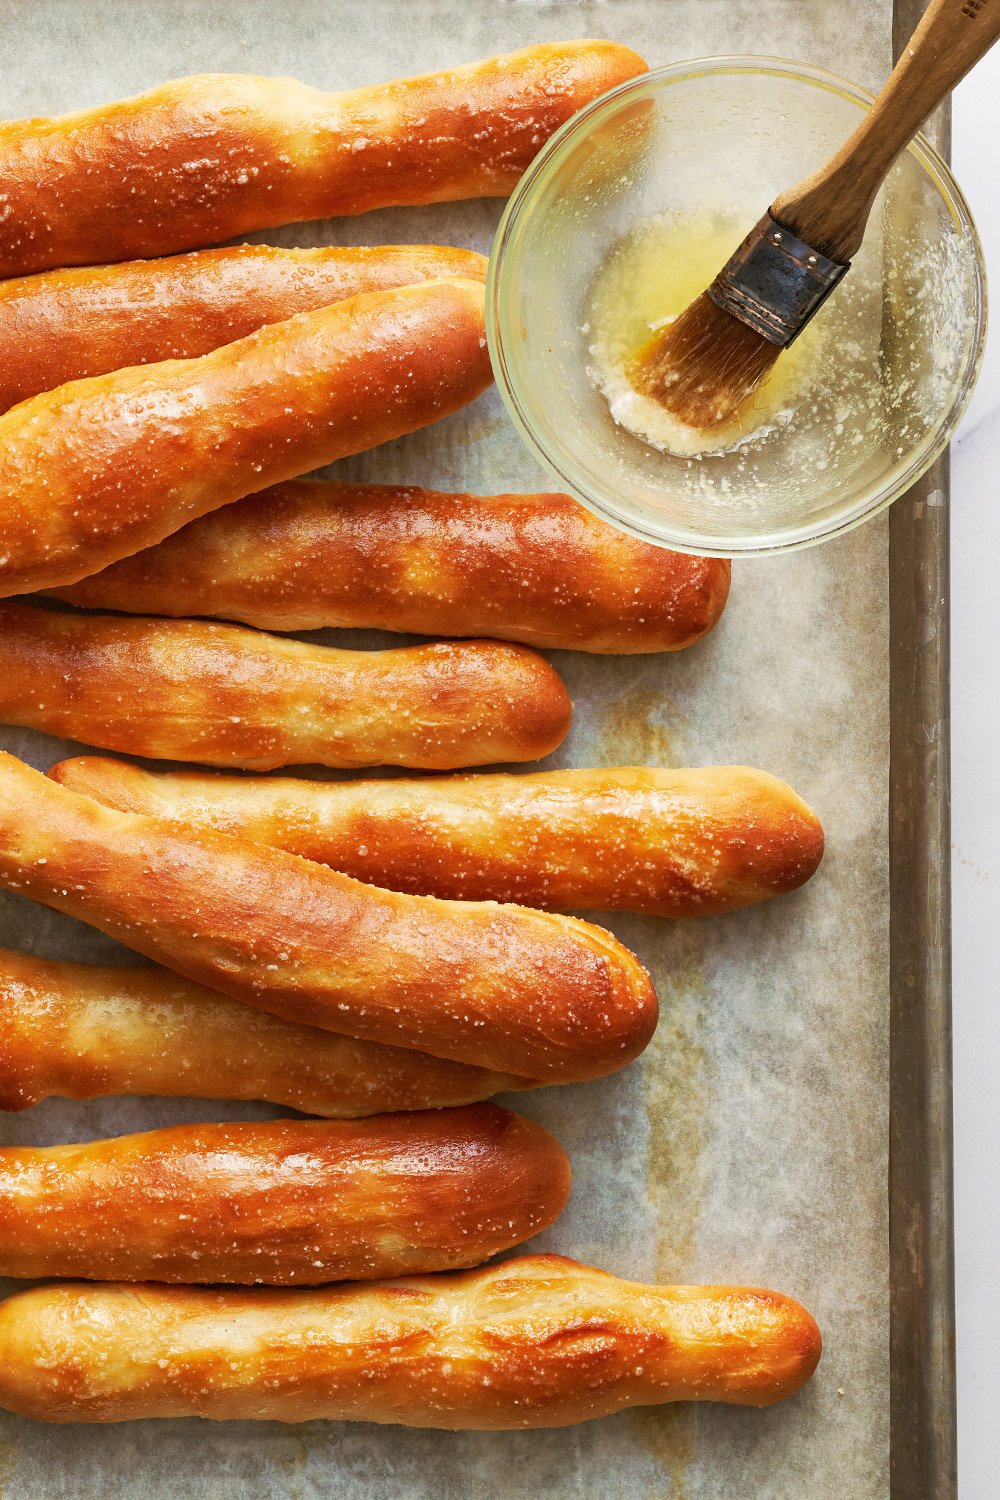
Let’s be honest. The breadsticks are probably the most crave-worthy item on the menu at Olive Garden.
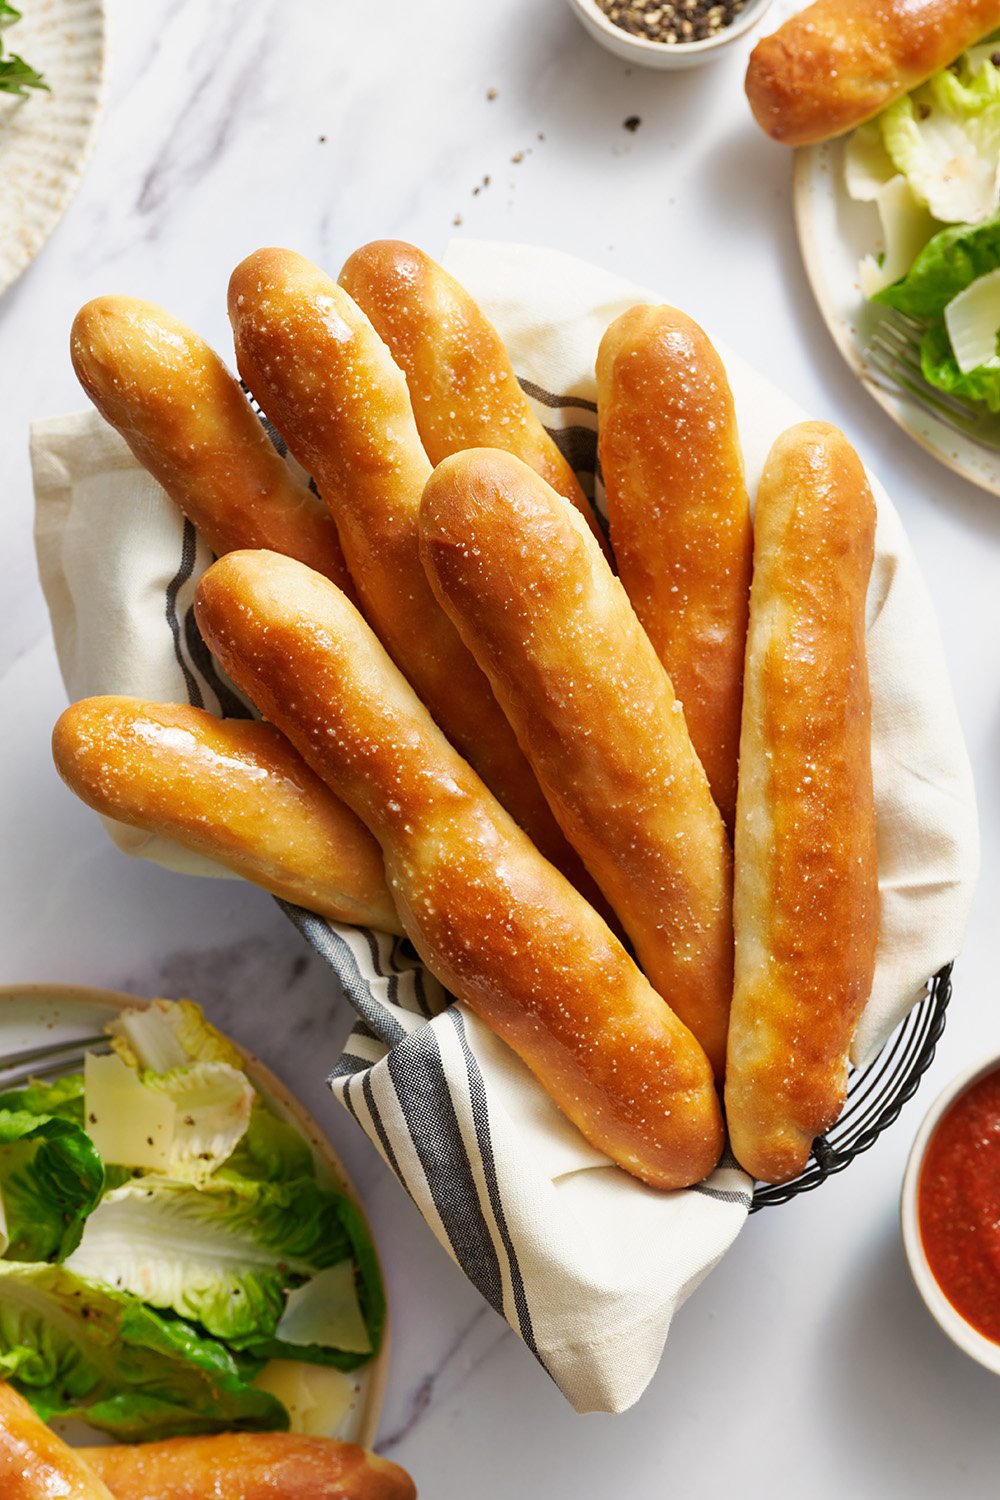
This homemade breadsticks recipe is 1000x better. The whole family will go crazy for this copycat recipe at Sunday night dinner. Especially when paired with a rich soup or sauce for dipping!
The dough recipe only has six ingredients! Get your ingredients and your stand mixer fitted with the dough hook ready to go. You can also make this dough by hand, just be prepared to knead for about 10 minutes.
As soon as the breadsticks come out of the oven, brush with the garlic butter. Serve warm. Be careful, this Olive Garden Breadstick recipe is ADDICTIVE!
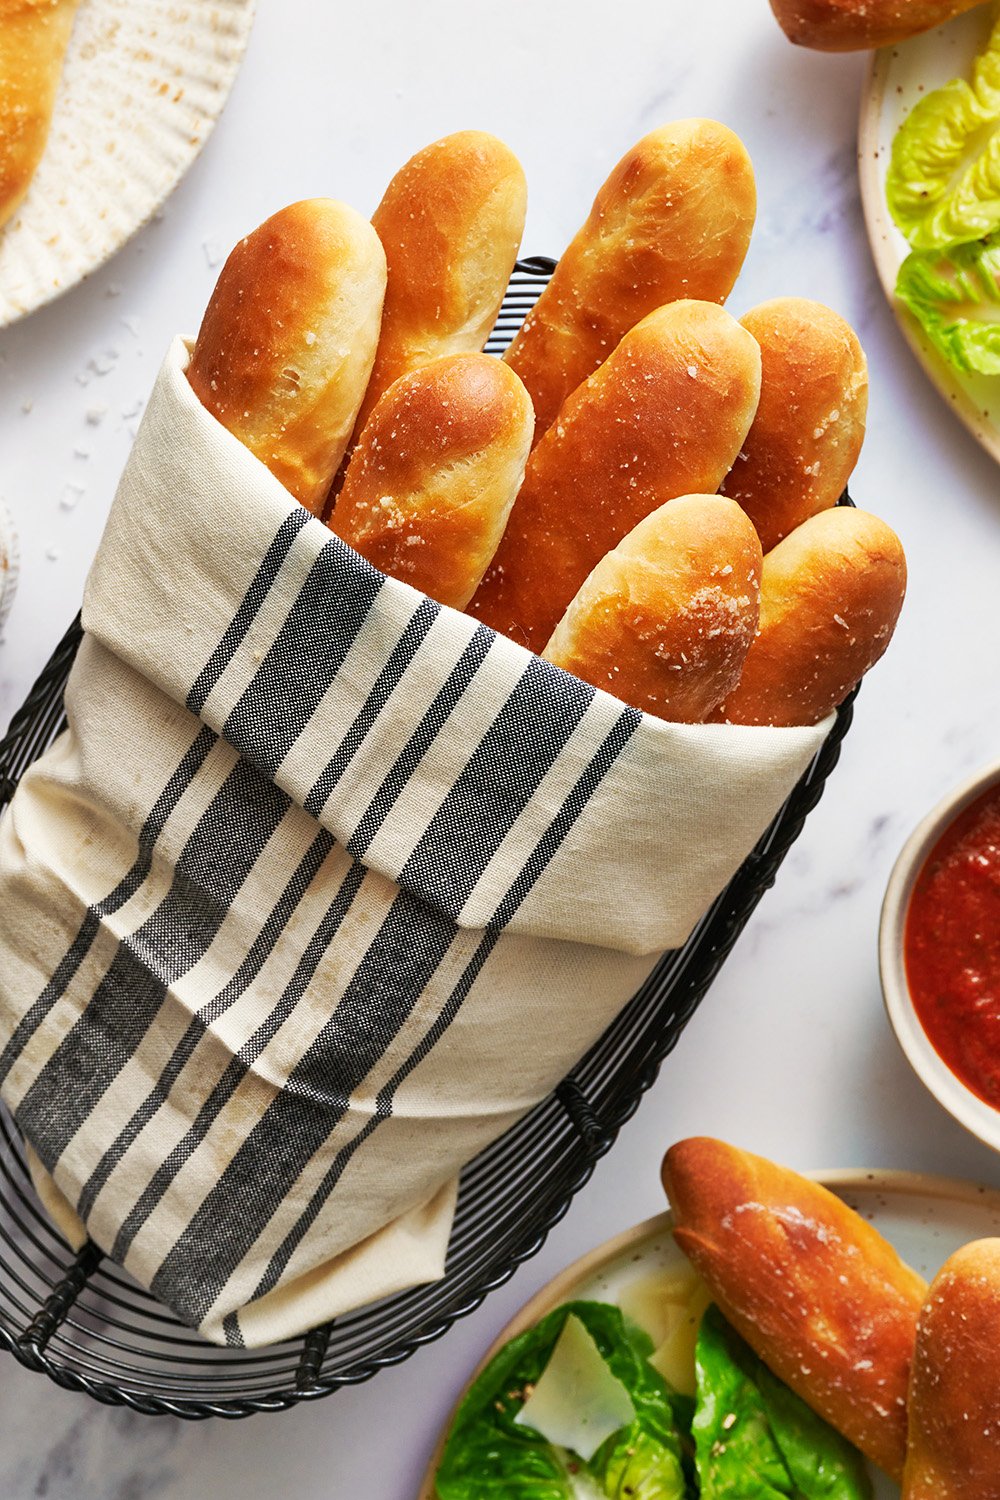
How to Make Copycat Olive Garden Breadsticks
Ingredients for Copycat Olive Garden Breadsticks:
Water – Use warm water to help activate the yeast, but be sure it’s not so hot it kills the yeast. 100-110°F is perfect.
Sugar – Just a little. The sugar helps activate the yeast, tenderize the breadsticks, and makes them a little softer. Don’t skip the sugar! I promise you won’t find the breadsticks sweet.
Butter – Melted and cooled slightly. Always use unsalted butter in baking and especially here because we’re adding salt to the dough and as a topping.
Salt – I prefer to use fine sea salt instead of table salt, simply because I prefer the flavor. Learn more about the differences between types of salt here.
Bread flour –Measured correctly! Bread flour contains a higher percentage of protein, compared to all-purpose flour, so I recommend using bread flour. More on this below.
More butter, plus salt and garlic powder – for the utterly delicious topping, once baked.
Olive Garden Breadsticks Instructions Overview:
Prepare the baking sheets. Prepare two baking sheets lined with parchment paper and set aside.
Begin the dough. In the bowl of a stand mixer fitted with a dough hook attachment, combine the water, yeast, sugar, melted butter, and salt.
Add the flour. Add gradually, while the mixer runs on low speed.
Knead. Increase speed to medium and knead the dough for about 10-15 minutes, or until it is tacky and very elastic.
Proof the dough. Remove the dough and place in a lightly oiled bowl and cover with plastic wrap. Let rest in a warm place until doubled in size, about 1 hour to 1.5 hours.
Portion out the breadsticks. Once doubled in size, divide the dough into 12 portions. Roll each piece of dough into an 8-inch log. Place the dough logs on your parchment-lined baking sheets, about 2 inches apart.
Proof a second time. Cover, and let rise on the prepared baking sheet until doubled in size, about 1 hour to 1.5 hours.
Bake. Bake at 400°F for 12 to 14 minutes, or until golden brown.
Add the toppings. Once removed from the oven, immediately brush each breadstick with melted butter and sprinkle the salt and garlic powder evenly over breadsticks.
Serve warm.
Are Olive Garden Breadsticks Vegan?
These copycat breadsticks are not vegan, and I have not tried using plant-based butter in this recipe. However, several readers have had success with Country Crock plant-based sticks (avocado oil based) or using olive oil in the dough and Earth Balance for the topping. If you give anything else a try, let me know how it goes!
Do I Have to Use Bread Flour? Can I Use All-Purpose Flour Instead?
Bread flour has a higher level of protein content than all-purpose flour, which helps create taller, well-rounded breadsticks with a nice chewy, fluffy texture. If you don’t have bread flour, use the same amount of all-purpose flour, but keep in mind that your breadsticks may turn out super soft.
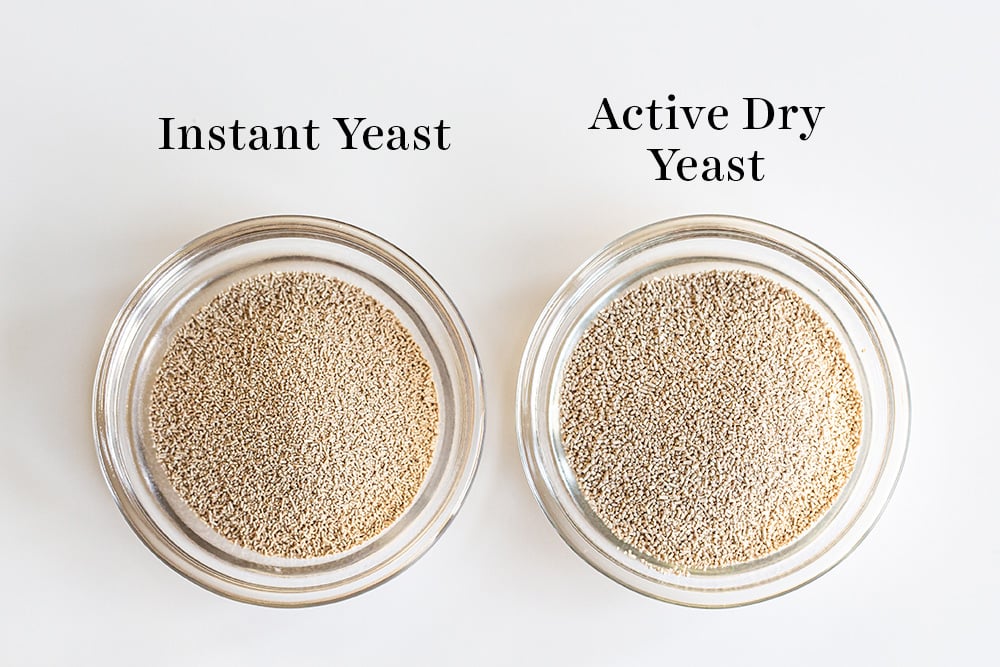
Which Yeast Should I Use for Breadsticks?
This recipe utilizes a shortcut ingredient: instant yeast, also called rapid rise or quick rise yeast. One of the three should be available at most grocery stores or you can buy my all-time favorite yeast on Amazon. These types of yeast are specifically formulated to allow you to skip proofing (aka the step where you combine the yeast with warm liquid for 5 minutes). You can add instant yeast directly into the mix with all of the ingredients.
If you don’t have or can’t find instant yeast, you can easily use active dry yeast instead. Add it right in with the dry ingredients like instant yeast, but just note that the dough will take about 20% longer to rise. Alternatively, you can speed up that rise time slightly; simply combine it with the warm water and a pinch of the sugar called for in the recipe, and allow it to proof until it becomes bubbly (about 5 minutes) before adding into the bowl with the other ingredients. Learn more about the different types of yeast, and how to substitute yeasts, here.
Can I Knead the Dough By Hand?
Yes! Be sure to knead the dough properly so the breadsticks hold their shape and don’t become sad flat sticks. I call for a stand mixer to make easy work of kneading in this recipe, but you can also knead by hand. You can see my full tutorial on how to knead dough here.
How to Tell When Dough Is Risen
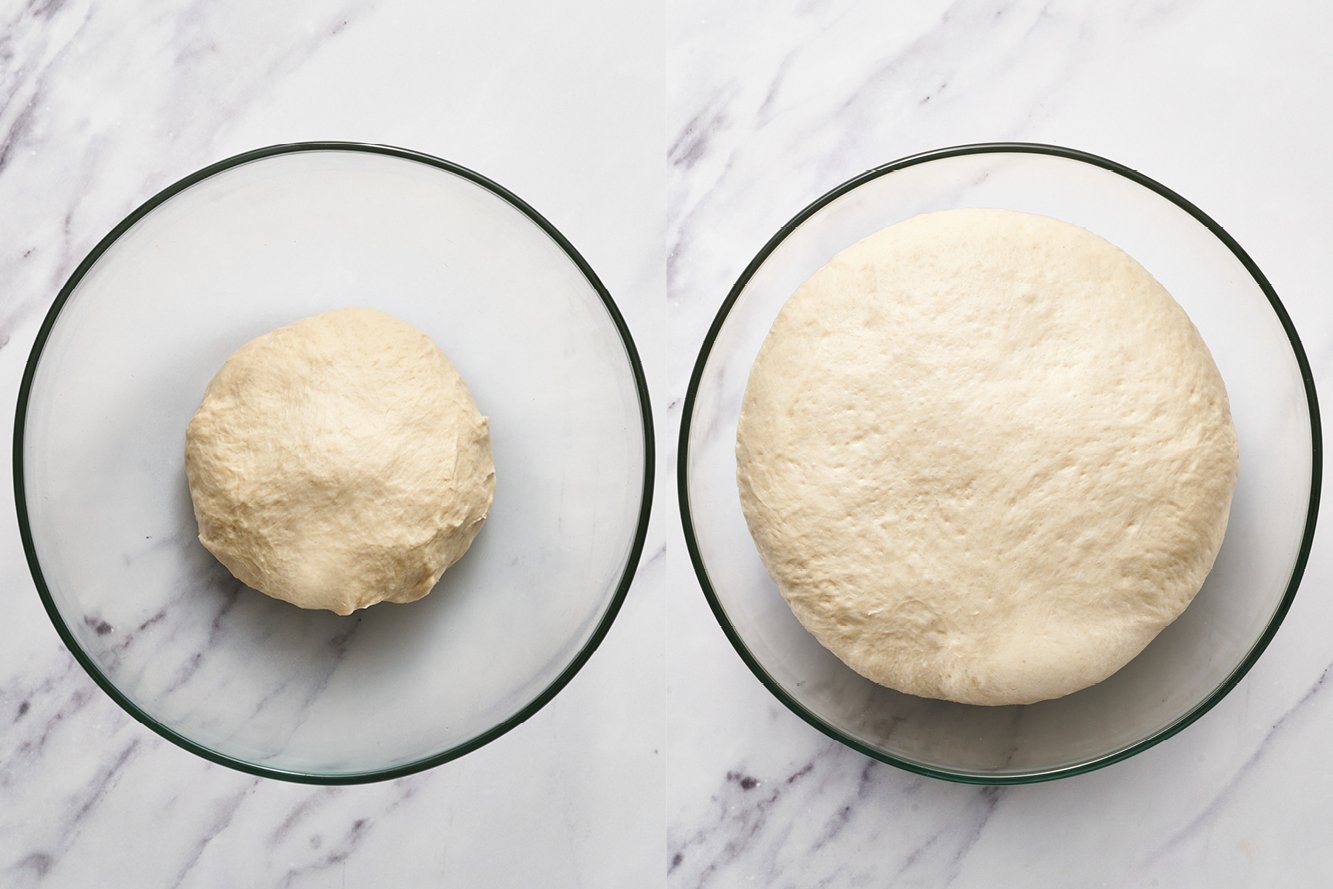
After kneading, shape the dough into a ball. Place in a lightly oiled mixing bowl. I like to use glass so I can see how much it’s rising. I’ll even take a picture of the dough before rising so I can compare later. Cover the bowl with plastic wrap, foil, or a clean kitchen towel. Let the dough rise in a warm, draft-free location. Ideal rise temperatures are between 80°F and 90°F. Lower temperatures will require more rising time.
The dough is done rising when it’s about doubled in volume and passes the “ripe” test. Gently stick two fingers in the risen dough up to the second knuckle and then take them out. If the finger marks remain, the dough is ready for shaping into balls. If not, cover and let the dough rise longer until it is.
How to Shape Breadsticks
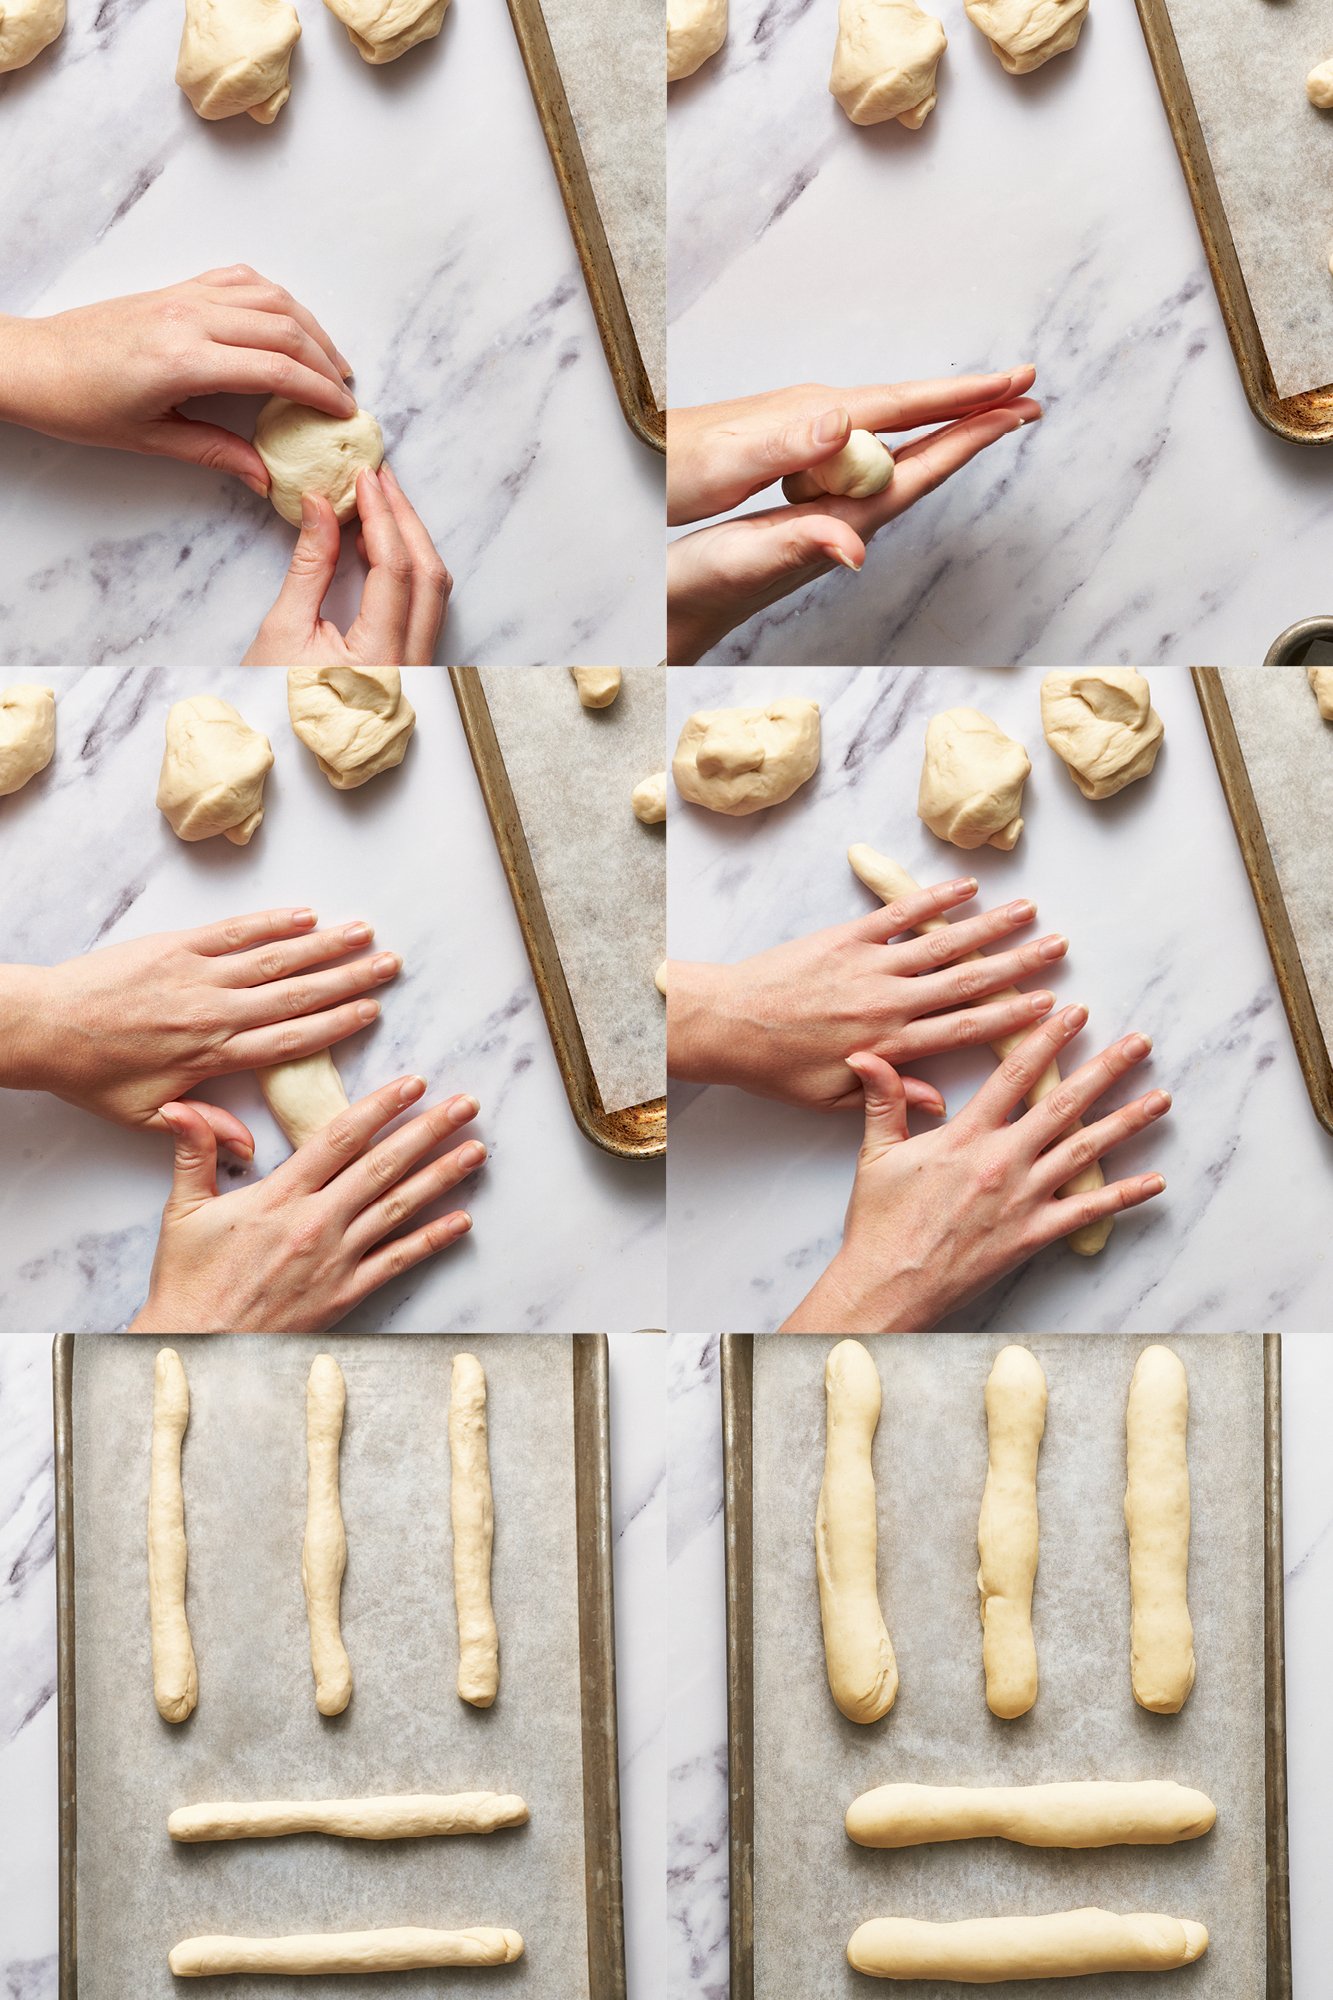
Once the dough is risen, press it down to deflate it slightly.
Place the dough onto a clean surface (not a floured surface).
Use a bench scraper or knife to section the dough into 12 equal pieces. Don’t worry if they’re not perfectly equal in size – but if you prefer, you can weigh the entire mass of dough, divide that number by 12, then portion each piece perfectly by weight.
Roll each piece of dough into a 8-inch log. Don’t worry if they’re not perfectly shaped.
How to Make Breadsticks Ahead of Time
Basically all yeast doughs can be made ahead of time and baked off later. Refrigerating stunts the rise time and can actually allow more flavor to develop!
For this recipe, I like to allow the dough to rise once and shape the breadsticks. Once the breadsticks are shaped, cover them well (so they don’t dry out) and place in the refrigerator for up to 24 hours. Bring to room temperature as the oven preheats before baking as the recipe directs. If the breadsticks haven’t doubled in size yet, allow them to sit at room temperature until doubled.
Alternatively, to make ahead further in advance, you can freeze the dough after it has risen for the first time and been shaped into logs. Place the shaped breadsticks on a baking tray lined with parchment, freezing just until solid, and then transfer to a ziptop bag or airtight container to store in the freezer for up to 2 months. Once ready to bake, place the frozen breadsticks on parchment-lined baking trays and allow to thaw to room temperature. Let rise until an indentation made with your finger into the dough remains. Proceed with the recipe as written.
Can I Double This Recipe?
Yes, if you have a large enough mixer (at least 6 quarts). Most home mixer bowls won’t mix such a big batch of dough well enough. If you’re using a 5-quart tilt head mixer, your mixer may be overwhelmed with that amount of dough and fry itself. If that’s the case, make a single batch of dough twice.
How Long will These Breadsticks Keep?
These breadsticks are best served right out of the oven, but they will keep for 3 days or so in a ziptop bag or an airtight container. To refresh, place the breadsticks on a baking sheet, and reheat in the oven at 425°F for 4-5 minutes, or until warmed through. You can also re-brush with butter and sprinkle with garlic powder and salt at this point, if you wish.
How to Freeze Breadsticks
Place the baked, cooled breadsticks in a ziptop bag or airtight container to store in the freezer for up to 2 months. Thaw at room temperature for a couple of hours, then place the breadsticks on a baking sheet and reheat in the oven at 425°F for 4-5 minutes, or until warmed through. You can also re-brush with butter and sprinkle with garlic powder and salt at this point, if you wish, before serving.
This simple recipe for Copycat Olive Garden Breadsticks makes buttery, garlic-scented, and chewy breadsticks that are utterly addictive! This breadstick recipe is the perfect complement to any meal, or a delicious snack all on its own.
Prepare two baking sheets lined with parchment paper and set aside.
In the bowl of a stand mixer fitted with a dough hook attachment, combine the water, yeast, sugar, melted butter, and salt. Begin to gradually add the flour while the mixer runs on low speed. Increase speed to medium and knead the dough for about 10-15 minutes, or until it is tacky and very elastic. Add more flour, a tablespoon at a time, if the dough is extremely sticky.
Remove the dough and place in a lightly oiled bowl and cover with plastic wrap. Let rest in a warm place until doubled in size, about 1 hour to 1 1/2 hours (the exact proof time will depend on your kitchen environment; the warmer it is, the faster your dough will proof).
Once doubled in size, divide the dough into 12 portions (use your scale for accuracy, but it should be approximately 57 grams per piece). Roll each piece of dough into an 8-inch log. Place the dough logs on your parchment-lined baking sheet, about 2 inches apart. Cover, and let rise until doubled in size, about 1 hour to 1 1/2 hours.
Preheat your oven to 400°F. Bake for 12 to 14 minutes, or until golden brown. Remove from oven and immediately brush with melted butter. Combine the salt and garlic powder and sprinkle evenly over breadsticks. Serve warm.
*To refresh, place the breadsticks on a baking sheet, and reheat in the oven at 425°F for 4-5 minutes, or until warmed through. You can also re-brush with butter and sprinkle again with garlic powder and salt, if you wish.
Recipe Video
Recipe Notes
When it comes to bread baking, the amount of flour you need can vary by the brand used as well as how humid your climate and kitchen environment is! Even the same recipe made in your kitchen during the summer vs. winter may require more or less flour and longer or shorter rising times.
I share trusted baking recipes your friends will LOVE alongside insights into the science of sweets. I'm a professionally trained chef, cookbook author, and cookie queen. I love to write about all things sweet, carb-y, and homemade. I live in Phoenix, Arizona (hence the blog name!)
About Tessa...
I share trusted baking recipes your friends will LOVE alongside insights into the science of sweets. I'm a professionally trained chef, cookbook author, and cookie queen. I love to write about all things sweet, carb-y, and homemade. I live in Phoenix, Arizona (hence the blog name!)
This is the best recipe ever. This is the first time I have made something and it turned out right. Breadsticks turned out just like Olive Gardens. Perfect. The recipe is exact
These are incredible! The texture is amazing. I used kamut flour and couldn’t weigh it, so I wasn’t sure how they’d turn out, but they were perfecting. Light. Chewy. Everything a breadstick should be!
WOW. We call them Crack Sticks because they are so incredibly good. I used my bread machine for the first rising, shaped them, let them rise, then refrigerated them. I took them out of the refrigerator about an hour before cooking. I did triple the salt/garlic powder quantity. When I reheated a few the next day, I just rebuttered them, and followed the instructions to heat them for 5 minutes at 425. I put what was left after 2 days in the freezer, but I doubt they’ll last long! REALLY great recipe and just like Olive Garden’s breadsticks without leaving the house.
i used unbleached all purpose flour and kneaded in the stand mixer for about 16 minutes on medium and rested 1 hour each time. i measured by weight, and the dough was a little sticky near the end of kneading so i only added maybe 1 or 2 tbs! best breadstick recipe by far
M y husband’s first comment was, these are better than Olive Garden’s!! And they were so easy to make.. I it will take a lot of self control for them to last more than a day. thank you!!!
Kiersten @ Handle the Heat
— March 13, 2023 at 9:52 am
Hi Patty! We recommend sticking to bread flour if possible. The extra protein content in bread flour gives your bread structure, and as you (or your stand mixer!) knead the dough, you activate the gluten. Gluten provides the essential structure to breads, allowing the dough to stretch and expand as it rises. It’s also easy to under-knead bread when using all purpose flour, as the lower protein content means it will take longer to build structure. That being said, if all you have is all purpose flour, it will still work (as long as you knead it well), but your breadsticks will be softer as a result. Let us know how it goes 🙂
THE BEST bread I’ve ever made!!! Thank you so much!! I made garlic toast, bread sticks and plain loaf bread with same recipe and it’s marvelous! I made my own garlic butter for the bread sticks & garlic bread & it turned out great.
I made the breadsticks and let them rise, then put them in the fridge so I could make them the next day and I have to say I am disappointed. They went wrinkled and flat and are not puffing up today now that I have let them sit out in a warm kitchen. Otherwise, they tasted great, just flat.
Kiersten @ Handle the Heat
— March 13, 2023 at 9:34 am
Hi Julie! Hmm, that definitely doesn’t sound right! Were the breadsticks well covered with plastic wrap when in the fridge, to prevent them from drying out? Is your yeast fresh and active? Was the dough fully kneaded until it was very elastic? Perhaps they just needed longer in your kitchen to continue to fully rise – which can be difficult at this time of year, when even a warm-ish kitchen is still not super warm, thanks to the cold weather outside! I hope you give these breadsticks another try sometime – they really are delicious!
I double this recipe and after rising it I split in half and freeze tye half I don’t use. just thaw on counter til you’re ready to use it and proceed as normal.
Sorry to hear you experienced issues with your breadsticks! If the dough didn’t rise, I’d recommend checking to make sure the water you used wasn’t too hot (that can kill the yeast), and also that your yeast is fresh. You can learn more on how to do that HERE. Please let us know how it goes when you give this recipe another try!
On a metal cookie sheet, mine came out dark on the bottom, but the overall flavor and effect is 99% identical to the original thing!
I think I’ll try the next set on a room temp pizza stone so they cook evenly top and bottom.
Kiersten @ Handle the Heat
— February 10, 2023 at 9:06 am
Hi Joshua! What type of baking pan did you bake these on? A dark-colored metal cookie sheet will darken the bottoms of the breadsticks (or anything else you bake on it) quickly, whereas a lighter colored metal will cook them more gently. Check out Tessa’s article on baking sheets to see side-by-side pictures of her experiments with this, and find out the sconce behind this!
If you need to make breadsticks….. USE THIS RECIPE!!!! This is my first time making breadsticks (I’m 12) and they where finger licking good. The instructions are crisp clear. Thanks!
Excellent, will be trying more recipes from Handle the Heat. Breadsticks were crisp on the outside (went 13 min) soft on the inside. I appreciate the tip to refresh them. They were great later with dinner. I’m making a batch today to refresh for the Football Games tomorrow.
I’m not sure what is up with the print recipe functionality. I have 3 printers and your print recipe routine does not detect them. I tried printing from Google Chrome and MS Edge. IF I print another internet page it works fine.
These were so delicious. Instantly brought me back to right back to “endless soup and salad and breadsticks”. They were also way easier than I anticipated. I can’t wait to try them again with some soup!
I made these with Country Crock plant-based sticks (avocado oil based) and it turned out perfectly! I did form mine into garlic knots instead of sticks but they were so soft. The vegan ate them all within a few days (they stayed soft and delicious!). She’s already requested more.
I rarely bake anything, but this was super simple, I made a triple batch which was kind of hard with a hand mixer. Overall, they were great, everyone loved them. My only recommendation is a little more garlic and salt in the topping mixture.
I made these yesterday. They were excellent. Tender and tasty. Easy dough to work with. I needed to add a tablespoon more water because I live in a dry area. I will make them again.
Kiersten @ Handle the Heat
— November 18, 2022 at 2:35 pm
Hi Lori! We haven’t tried that with this recipe, but it might work! Otherwise, Tessa has lots of delicious roll recipes here – you could just finish any of those with garlic herb butter, so they taste more similar to these breadsticks, if you like!
Hi Denise! I don’t see on our end that you signed up for the guide – once you’ve entered in your email address, it should take you to a screen that says thanks for signing up and to check your inbox. Can you try again? If it still doesn’t work, try a different browser to see if that helps. If you still experience issues, please email [email protected] for more help.
We LOVE this recipe! I have made these many times now using vegan margarine and they turn out perfectly. At family gatherings, this is always requested as it’s a fav! I’m not vegan either, we just try and have a good balance in our fridge that works for us which includes some plant based items like vegan margarine and almond or oat milk.
This recipe is a keeper! Just made this bread tonight to pair it with my homemade zuppa toscana soup. The family truly enjoyed the delicious food. Thank you!
Kiersten @ Handle the Heat
— August 15, 2022 at 8:50 am
Hi Casara! We never claimed that these breadsticks were vegan. Our website does not make vegan recipes; we just make really, really delicious recipes – and this is no exception! You could try making these with a vegan butter and see if it works, but as we have not tried that, I cannot guarantee the results will be as good as the original recipe as written. Feel free to reach out if you have any questions – we are always happy to help 🙂
Kiersten @ Handle the Heat
— August 4, 2022 at 1:28 pm
Hi Elaine! It can be made without a stand mixer, but, like any bread, it’s going to take a lot of kneading by hand and a lot of elbow grease to get the dough to the right consistency (smooth and elastic). If you’re up for the challenge, go for it! Let us know how it goes 🙂
I made these hand-kneaded and it turned out fine! Plus I got a work out. Didn’t have time to let them rise a second time for the full hour but it was okay.
I have never made any sort of bread in my life so the fact these turned out incredible the first attempt is a miracle. These breadsticks taste amazing! They taste just like Olive Garden but at the same time better. Truly delicious!
Kiersten @ Handle the Heat
— July 21, 2022 at 2:02 pm
Hi Lauren! Yay – I’m so happy this recipe was a delicious success – and good for you for tackling your first-ever bread!!! I hope you continue to bake and experiment – it seems like you’re good at it 😉 Please feel free to reach out to our team anytime you have questions – we are always more than happy to help!! I can’t wait to see what else you make! Happy baking 🙂
Kiersten @ Handle the Heat
— June 27, 2022 at 7:57 am
Hi Mark! We haven’t tested making this recipe ahead, so we cannot guarantee the same wonderful results, but my advice would be to let the dough rise once, shape the breadsticks, and then cover well with plastic wrap (but not too tightly, as they will continue to rise in the fridge, but much slower; you just don’t want the dough to dry out in the fridge!). Pull them out of the fridge a little before you’re ready to bake, and ensure they have had their full second proof. The second proof could take awhile, or not much time at all – it all depends on the ambient temperature in your kitchen (they are fully proofed when an indentation made with your finger into the dough remains). Proceed with the recipe as written. I wouldn’t let the dough sit in the fridge for more than 24 hours (overnight is best). I hope that helps! Let us know how they turn out!
I actually found it easier to let them rise the second time, then cover with Saran Wrap and put in the frig. I let them come to room temperature before cooking.
I made a vegan version of these breadsticks by using olive oil in the dough and Earth Balance for the topping. My family and I loved the breadsticks. My husband said they were the best breadsticks he’s ever had.
I’ve never made bread sticks in my life and I tried this recipe today. It was very easy to follow, very easy to make and they are delicious. I actually like the texture of these more than olive gardens. Thank you for posting this recipe for us!!!
Maybe it’s cuz I’ve never been good at making bread, or maybe it’s cuz I used AP Flour instead of Bread Flour, or maybe even it’s cuz I transferred it to another plate while it was rising.
But one thing’s for certain. It wasn’t a hit at my house. They had a weird kinda crumbly crispiness on the crust, but weren’t browned at all. They had a subtle taste that wasn’t pleasant.
There’s still a reason this isn’t 1-2 stars though. The inside was fluffy just as promised, and the garlic salt kinda just washed out that weird taste.
Kiersten @ Handle the Heat
— June 7, 2022 at 8:53 am
Hi Emma! I think you self-diagnosed a lot of the issues you had here! Firstly, using all purpose flour instead of bread flour will generally result in less-than-perfect bread. The extra protein content in bread flour gives your bread structure, and as you (or your stand mixer!) knead the dough, you activate the gluten. Gluten provides the essential structure to breads, allowing the dough to stretch and expand as it rises! It’s also easy to under-knead bread, especially when using all purpose flour, as the lower protein content means it will take longer to build structure. This could definitely account for the odd exterior texture you mentioned. Tessa talks about the importance of proper kneading, and how to knead, in this post here!
Moving the dough part-way through the rising/proofing process can also mess with the final outcome. If you moved the dough, you knocked some of the air out and it probably needed a lot longer to proof properly after that move.
Another possibility is your ingredients; do you measure by volume, or weight? If you measure by volume, it’s so easy to add too much flour (or other ingredients) to a recipe. Baking really is a science, and too much or too little of anything can throw off the chemistry. Tessa talks about how to best measure your ingredients in this recipe here!
There are honestly several other things that could have gone wrong. Your yeast could be old. Your water could have been too hot at the very beginning and it killed the yeast. Your oven wasn’t hot enough when the bread hit the oven. It’s so hard to know for sure what went wrong here without baking alongside you, but I hope this does not discourage you from trying again! Successfully baking bread is one of the most rewarding baking experiences, and the end result will taste even better for it!
I hope something here helped you, and that you give these breadsticks another try sometime! Please reach out if you need any further help troubleshooting! Happy baking 🙂
Hi, these taste amazing! If I need to make the dough in advance of when I need the breadsticks ready for (ie dough will need to be made on the morning but won’t want the breadsticks until evening time) would it be ok to let them rise for longer or could they be refrigerated before being cooked? And if so would they go in the fridge before rising or after? I’m wanting to prepare the dough then be able to leave it until evening and when I come home just throw it straight in the oven but not sure how it would work.
Kiersten @ Handle the Heat
— May 16, 2022 at 2:04 pm
Hi Zoe! So happy you love this recipe! I would definitely refrigerate your dough, rather than letting it rise for that much longer. Dough will continue to rise in the fridge, but much slower than at a warmer temperature. We haven’t tested making this recipe ahead, so we cannot guarantee the same wonderful results … but my advice would be to let the dough rise once, shape them, and then cover well with plastic wrap (but not too tightly; again, they will slowly continue to rise; you just don’t want them to dry out in the dry fridge!). Pull them out of the fridge a little before you’re ready to bake, and ensure they have had their full second proof. The second proof could take awhile, or not much time at all – it all depends on the ambient temperature in your kitchen. Once they have appropriately risen, follow the baking instructions per the recipe. I hope that helps! Let us know how they turn out!
So good!! These breadsticks were a hit! They were tender, fluffy, just the right texture. They were declared as “Better than Olive Garden’s” by my OG obsessed husband. We’ll be making again!! Thanks fit an awesome recipe!
I made these using my bread machine. I turned my oven to 170 then turned it off to do the 2nd rise. These turned out great. I am making them again but into sub size buns for meatball subs. Definitely worth making over and over
Hi Alexandra! We’ll typically use a bench scraper to divide the dough into the 12 portions, which deflates the dough on its own, but you’re welcome to punch down the dough if you prefer 🙂 Can’t wait for you to try these, let me know if you have any other questions beforehand!
Love this recipe. The first time I followed the recipe exactly. The next time I used Rapid Rise Instant Yeast and skipped the first rise. As soon as the dough was mixed I rolled it out into a 7” x 12” rectangle and using a pizza cutter cut it into 12 – 1 inch strips. They came out delicious and I saved myself a lot of work b
These are amazing! Best homemade breadsticks I have ever had and way better than anything you can buy at the store! I didn’t have a scale to measure the weight of the breadsticks, so mine ended up being shorter and fatter, but that didn’t matter! They are so soft and light, just like the Olive Garden ones. It was also a really easy recipe and I say this as I held my 14 month old the entire time I made them because he was sick and didn’t want to be set down! Thank you for an amazing recipe!
Love this recipe. Have been told by guests that they taste better than Olive Garden. The first time I followed the directions exactly. The second time, I pressed dough out to a 7 x12 rectangle, I used a pizza cutter and cut 1” strips. The breadsticks had a much nicer appearance.
As a trained chef and cookbook author, I share trusted baking recipes your friends & family will love alongside insights into the science of sweets. I help take the luck out of baking so you *always* have delicious results! Learn more here.
Over 200 pages with 50+ cookie recipes that'll make
you a COOKIE PRO. Discover how to turn your biggest cookie flops into WINS by mastering the
sweet science of baking. Even learn how to customize your own recipes! Beautiful, hardcopy,
full color, photos of every recipe so you know EXACTLY how your cookies should look. Order
now to have the book delivered to your doorstep!
Do you want a more delicious life?
Instead of digging through cookbooks and magazines and searching the internet for amazing
recipes, subscribe to Handle the Heat to receive new recipe posts delivered straight to your
email inbox. You’ll get all the latest recipes, videos, kitchen tips and tricks AND my
*free* Cookie Customization Guide (because I am the Cookie Queen)!
This is the best recipe ever. This is the first time I have made something and it turned out right. Breadsticks turned out just like Olive Gardens. Perfect. The recipe is exact
The best breadsticks ever. Thank you for the recipe. My family loved them!
maybe it was just me, but I never saw any measurements
Hi Royce! There are definitely measurements – keep scrolling down. The full recipe is below the pink tip box 🙂
These are incredible! The texture is amazing. I used kamut flour and couldn’t weigh it, so I wasn’t sure how they’d turn out, but they were perfecting. Light. Chewy. Everything a breadstick should be!
little sticks of heaven!!! I make these OFTEN
WOW. We call them Crack Sticks because they are so incredibly good. I used my bread machine for the first rising, shaped them, let them rise, then refrigerated them. I took them out of the refrigerator about an hour before cooking. I did triple the salt/garlic powder quantity. When I reheated a few the next day, I just rebuttered them, and followed the instructions to heat them for 5 minutes at 425. I put what was left after 2 days in the freezer, but I doubt they’ll last long! REALLY great recipe and just like Olive Garden’s breadsticks without leaving the house.
Can these be frozen?
Thanks
Hi Davis! Yes, they can – check out the pink tip box above the recipe for more info + instructions 🙂
i just made these tonight and they are AMAZING
i used unbleached all purpose flour and kneaded in the stand mixer for about 16 minutes on medium and rested 1 hour each time. i measured by weight, and the dough was a little sticky near the end of kneading so i only added maybe 1 or 2 tbs! best breadstick recipe by far
M y husband’s first comment was, these are better than Olive Garden’s!! And they were so easy to make.. I it will take a lot of self control for them to last more than a day. thank you!!!
If I don’t have bread flour, can I use regular flour?
Hi Patty! We recommend sticking to bread flour if possible. The extra protein content in bread flour gives your bread structure, and as you (or your stand mixer!) knead the dough, you activate the gluten. Gluten provides the essential structure to breads, allowing the dough to stretch and expand as it rises. It’s also easy to under-knead bread when using all purpose flour, as the lower protein content means it will take longer to build structure. That being said, if all you have is all purpose flour, it will still work (as long as you knead it well), but your breadsticks will be softer as a result. Let us know how it goes 🙂
THE BEST bread I’ve ever made!!! Thank you so much!! I made garlic toast, bread sticks and plain loaf bread with same recipe and it’s marvelous! I made my own garlic butter for the bread sticks & garlic bread & it turned out great.
I made the breadsticks and let them rise, then put them in the fridge so I could make them the next day and I have to say I am disappointed. They went wrinkled and flat and are not puffing up today now that I have let them sit out in a warm kitchen. Otherwise, they tasted great, just flat.
Hi Julie! Hmm, that definitely doesn’t sound right! Were the breadsticks well covered with plastic wrap when in the fridge, to prevent them from drying out? Is your yeast fresh and active? Was the dough fully kneaded until it was very elastic? Perhaps they just needed longer in your kitchen to continue to fully rise – which can be difficult at this time of year, when even a warm-ish kitchen is still not super warm, thanks to the cold weather outside! I hope you give these breadsticks another try sometime – they really are delicious!
I double this recipe and after rising it I split in half and freeze tye half I don’t use. just thaw on counter til you’re ready to use it and proceed as normal.
Bruh the bread didn’t rise
Sorry to hear you experienced issues with your breadsticks! If the dough didn’t rise, I’d recommend checking to make sure the water you used wasn’t too hot (that can kill the yeast), and also that your yeast is fresh. You can learn more on how to do that HERE. Please let us know how it goes when you give this recipe another try!
These were easy to make and delicious!
On a metal cookie sheet, mine came out dark on the bottom, but the overall flavor and effect is 99% identical to the original thing!
I think I’ll try the next set on a room temp pizza stone so they cook evenly top and bottom.
Hi Joshua! What type of baking pan did you bake these on? A dark-colored metal cookie sheet will darken the bottoms of the breadsticks (or anything else you bake on it) quickly, whereas a lighter colored metal will cook them more gently. Check out Tessa’s article on baking sheets to see side-by-side pictures of her experiments with this, and find out the sconce behind this!
If you need to make breadsticks….. USE THIS RECIPE!!!! This is my first time making breadsticks (I’m 12) and they where finger licking good. The instructions are crisp clear. Thanks!
Excellent, will be trying more recipes from Handle the Heat. Breadsticks were crisp on the outside (went 13 min) soft on the inside. I appreciate the tip to refresh them. They were great later with dinner. I’m making a batch today to refresh for the Football Games tomorrow.
I’m not sure what is up with the print recipe functionality. I have 3 printers and your print recipe routine does not detect them. I tried printing from Google Chrome and MS Edge. IF I print another internet page it works fine.
Hi Robert! I’m sorry to hear that you’re having issues printing this recipe. Hopefully it might work from this direct link here. Good luck!
These were so delicious. Instantly brought me back to right back to “endless soup and salad and breadsticks”. They were also way easier than I anticipated. I can’t wait to try them again with some soup!
Can the dough be made in a bread machine?
Hi Grace! We have not tried that, as this dough is very easy to make using a stand mixer, but feel free to give it a try and let us know how it goes 🙂
I make these often in my bread machine!! What a Lifesaver♡
Absolutely the most delicious thing you’ve ever eaten. Easy to make, smells heavenly. You will be taking requests from friends! Thank you, Tessa!!!
I made these with Country Crock plant-based sticks (avocado oil based) and it turned out perfectly! I did form mine into garlic knots instead of sticks but they were so soft. The vegan ate them all within a few days (they stayed soft and delicious!). She’s already requested more.
I used the same butter! My vegan loved them too! So good!
It was wonderful!
Delicious! So easy to make. Everyone loved them. Thanks for sharing your recipe.
I rarely bake anything, but this was super simple, I made a triple batch which was kind of hard with a hand mixer. Overall, they were great, everyone loved them. My only recommendation is a little more garlic and salt in the topping mixture.
I made these yesterday. They were excellent. Tender and tasty. Easy dough to work with. I needed to add a tablespoon more water because I live in a dry area. I will make them again.
So glad to hear that, Karen!
I was wondering if these can be made into rolls?
Hi Lori! We haven’t tried that with this recipe, but it might work! Otherwise, Tessa has lots of delicious roll recipes here – you could just finish any of those with garlic herb butter, so they taste more similar to these breadsticks, if you like!
These breadsticks are amazing! I have made them many times.
Tried to get the free beginner’s quick guide to bread, but when I put in my email & clicked the link, it did nothing. How can I get this quide?
Hi Denise! I don’t see on our end that you signed up for the guide – once you’ve entered in your email address, it should take you to a screen that says thanks for signing up and to check your inbox. Can you try again? If it still doesn’t work, try a different browser to see if that helps. If you still experience issues, please email [email protected] for more help.
We LOVE this recipe! I have made these many times now using vegan margarine and they turn out perfectly. At family gatherings, this is always requested as it’s a fav! I’m not vegan either, we just try and have a good balance in our fridge that works for us which includes some plant based items like vegan margarine and almond or oat milk.
tried and loved recipe. it has become a staple in our house.
First time making these and they turned out great! I do need to work on my rolling skill though. Lol
This recipe is a keeper! Just made this bread tonight to pair it with my homemade zuppa toscana soup. The family truly enjoyed the delicious food. Thank you!
Amazing!!! We made them 1.5 oz rather than 2 after the first time. 2 oz was just a bit large. So yummy!!!!!
Olive Garden breadsticks are vegan and these most certainly are not.
Hi Casara! We never claimed that these breadsticks were vegan. Our website does not make vegan recipes; we just make really, really delicious recipes – and this is no exception! You could try making these with a vegan butter and see if it works, but as we have not tried that, I cannot guarantee the results will be as good as the original recipe as written. Feel free to reach out if you have any questions – we are always happy to help 🙂
Wondering if this recipe is doable without a standing mixer?
Hi Elaine! It can be made without a stand mixer, but, like any bread, it’s going to take a lot of kneading by hand and a lot of elbow grease to get the dough to the right consistency (smooth and elastic). If you’re up for the challenge, go for it! Let us know how it goes 🙂
I made these hand-kneaded and it turned out fine! Plus I got a work out. Didn’t have time to let them rise a second time for the full hour but it was okay.
So glad to hear they worked out well, Hannah!
I have never made any sort of bread in my life so the fact these turned out incredible the first attempt is a miracle. These breadsticks taste amazing! They taste just like Olive Garden but at the same time better. Truly delicious!
Hi Lauren! Yay – I’m so happy this recipe was a delicious success – and good for you for tackling your first-ever bread!!! I hope you continue to bake and experiment – it seems like you’re good at it 😉 Please feel free to reach out to our team anytime you have questions – we are always more than happy to help!! I can’t wait to see what else you make! Happy baking 🙂
Can I make this ahead is time and refrigerate the dough before baking?
Thank you
Mark
Hi Mark! We haven’t tested making this recipe ahead, so we cannot guarantee the same wonderful results, but my advice would be to let the dough rise once, shape the breadsticks, and then cover well with plastic wrap (but not too tightly, as they will continue to rise in the fridge, but much slower; you just don’t want the dough to dry out in the fridge!). Pull them out of the fridge a little before you’re ready to bake, and ensure they have had their full second proof. The second proof could take awhile, or not much time at all – it all depends on the ambient temperature in your kitchen (they are fully proofed when an indentation made with your finger into the dough remains). Proceed with the recipe as written. I wouldn’t let the dough sit in the fridge for more than 24 hours (overnight is best). I hope that helps! Let us know how they turn out!
I actually found it easier to let them rise the second time, then cover with Saran Wrap and put in the frig. I let them come to room temperature before cooking.
I made a vegan version of these breadsticks by using olive oil in the dough and Earth Balance for the topping. My family and I loved the breadsticks. My husband said they were the best breadsticks he’s ever had.
So happy you enjoyed these breadsticks, Sonja!!
Delicious!
I’ve never made bread sticks in my life and I tried this recipe today. It was very easy to follow, very easy to make and they are delicious. I actually like the texture of these more than olive gardens. Thank you for posting this recipe for us!!!
Woohoo! So happy to hear that, DJ!!
This recipe isn’t the best.
Maybe it’s cuz I’ve never been good at making bread, or maybe it’s cuz I used AP Flour instead of Bread Flour, or maybe even it’s cuz I transferred it to another plate while it was rising.
But one thing’s for certain. It wasn’t a hit at my house. They had a weird kinda crumbly crispiness on the crust, but weren’t browned at all. They had a subtle taste that wasn’t pleasant.
There’s still a reason this isn’t 1-2 stars though. The inside was fluffy just as promised, and the garlic salt kinda just washed out that weird taste.
My question: What did I do wrong?
Hi Emma! I think you self-diagnosed a lot of the issues you had here! Firstly, using all purpose flour instead of bread flour will generally result in less-than-perfect bread. The extra protein content in bread flour gives your bread structure, and as you (or your stand mixer!) knead the dough, you activate the gluten. Gluten provides the essential structure to breads, allowing the dough to stretch and expand as it rises! It’s also easy to under-knead bread, especially when using all purpose flour, as the lower protein content means it will take longer to build structure. This could definitely account for the odd exterior texture you mentioned. Tessa talks about the importance of proper kneading, and how to knead, in this post here!
Moving the dough part-way through the rising/proofing process can also mess with the final outcome. If you moved the dough, you knocked some of the air out and it probably needed a lot longer to proof properly after that move.
Another possibility is your ingredients; do you measure by volume, or weight? If you measure by volume, it’s so easy to add too much flour (or other ingredients) to a recipe. Baking really is a science, and too much or too little of anything can throw off the chemistry. Tessa talks about how to best measure your ingredients in this recipe here!
There are honestly several other things that could have gone wrong. Your yeast could be old. Your water could have been too hot at the very beginning and it killed the yeast. Your oven wasn’t hot enough when the bread hit the oven. It’s so hard to know for sure what went wrong here without baking alongside you, but I hope this does not discourage you from trying again! Successfully baking bread is one of the most rewarding baking experiences, and the end result will taste even better for it!
I hope something here helped you, and that you give these breadsticks another try sometime! Please reach out if you need any further help troubleshooting! Happy baking 🙂
Far and away the best breadstick recipe Ive tried. Soft and pillowy, great flavor, and couldn’t be easier to put together.
Hi Betty! I’m so happy you loved this recipe! Happy baking 🙂
Hi, these taste amazing! If I need to make the dough in advance of when I need the breadsticks ready for (ie dough will need to be made on the morning but won’t want the breadsticks until evening time) would it be ok to let them rise for longer or could they be refrigerated before being cooked? And if so would they go in the fridge before rising or after? I’m wanting to prepare the dough then be able to leave it until evening and when I come home just throw it straight in the oven but not sure how it would work.
Hi Zoe! So happy you love this recipe! I would definitely refrigerate your dough, rather than letting it rise for that much longer. Dough will continue to rise in the fridge, but much slower than at a warmer temperature. We haven’t tested making this recipe ahead, so we cannot guarantee the same wonderful results … but my advice would be to let the dough rise once, shape them, and then cover well with plastic wrap (but not too tightly; again, they will slowly continue to rise; you just don’t want them to dry out in the dry fridge!). Pull them out of the fridge a little before you’re ready to bake, and ensure they have had their full second proof. The second proof could take awhile, or not much time at all – it all depends on the ambient temperature in your kitchen. Once they have appropriately risen, follow the baking instructions per the recipe. I hope that helps! Let us know how they turn out!
So good!! These breadsticks were a hit! They were tender, fluffy, just the right texture. They were declared as “Better than Olive Garden’s” by my OG obsessed husband. We’ll be making again!! Thanks fit an awesome recipe!
I made these using my bread machine. I turned my oven to 170 then turned it off to do the 2nd rise. These turned out great. I am making them again but into sub size buns for meatball subs. Definitely worth making over and over
YUM! That sounds amazing, so happy you love this recipe!
Hello,
I feel so excited to try this recipe. Quick question: o you punch down your dough after the first rise before you weigh and shape the breadsticks?
Blessings!
Alexandra
Hi Alexandra! We’ll typically use a bench scraper to divide the dough into the 12 portions, which deflates the dough on its own, but you’re welcome to punch down the dough if you prefer 🙂 Can’t wait for you to try these, let me know if you have any other questions beforehand!
Love this recipe. The first time I followed the recipe exactly. The next time I used Rapid Rise Instant Yeast and skipped the first rise. As soon as the dough was mixed I rolled it out into a 7” x 12” rectangle and using a pizza cutter cut it into 12 – 1 inch strips. They came out delicious and I saved myself a lot of work b
Thanks for your tip about rolling out the dough and cutting with a pizza cutter. They were beautifully delicious!
Thanks for the tip!!
These are amazing! Best homemade breadsticks I have ever had and way better than anything you can buy at the store! I didn’t have a scale to measure the weight of the breadsticks, so mine ended up being shorter and fatter, but that didn’t matter! They are so soft and light, just like the Olive Garden ones. It was also a really easy recipe and I say this as I held my 14 month old the entire time I made them because he was sick and didn’t want to be set down! Thank you for an amazing recipe!
Aw, yay! So glad this recipe was easy to make and delicious too! Hope your child feels better soon
Best breadsticks. I make them all the time and they come out perfect every time!
Love this recipe. Have been told by guests that they taste better than Olive Garden. The first time I followed the directions exactly. The second time, I pressed dough out to a 7 x12 rectangle, I used a pizza cutter and cut 1” strips. The breadsticks had a much nicer appearance.
Woohoo, the ultimate compliment! So glad everyone loved them 🙂 And great idea about using a pizza cutter!
Wonderful! Dumped everything in my bread maker. Set it on “dough.” Once that was done followed the rest of the recipe instructions.
So happy you loved this recipe!