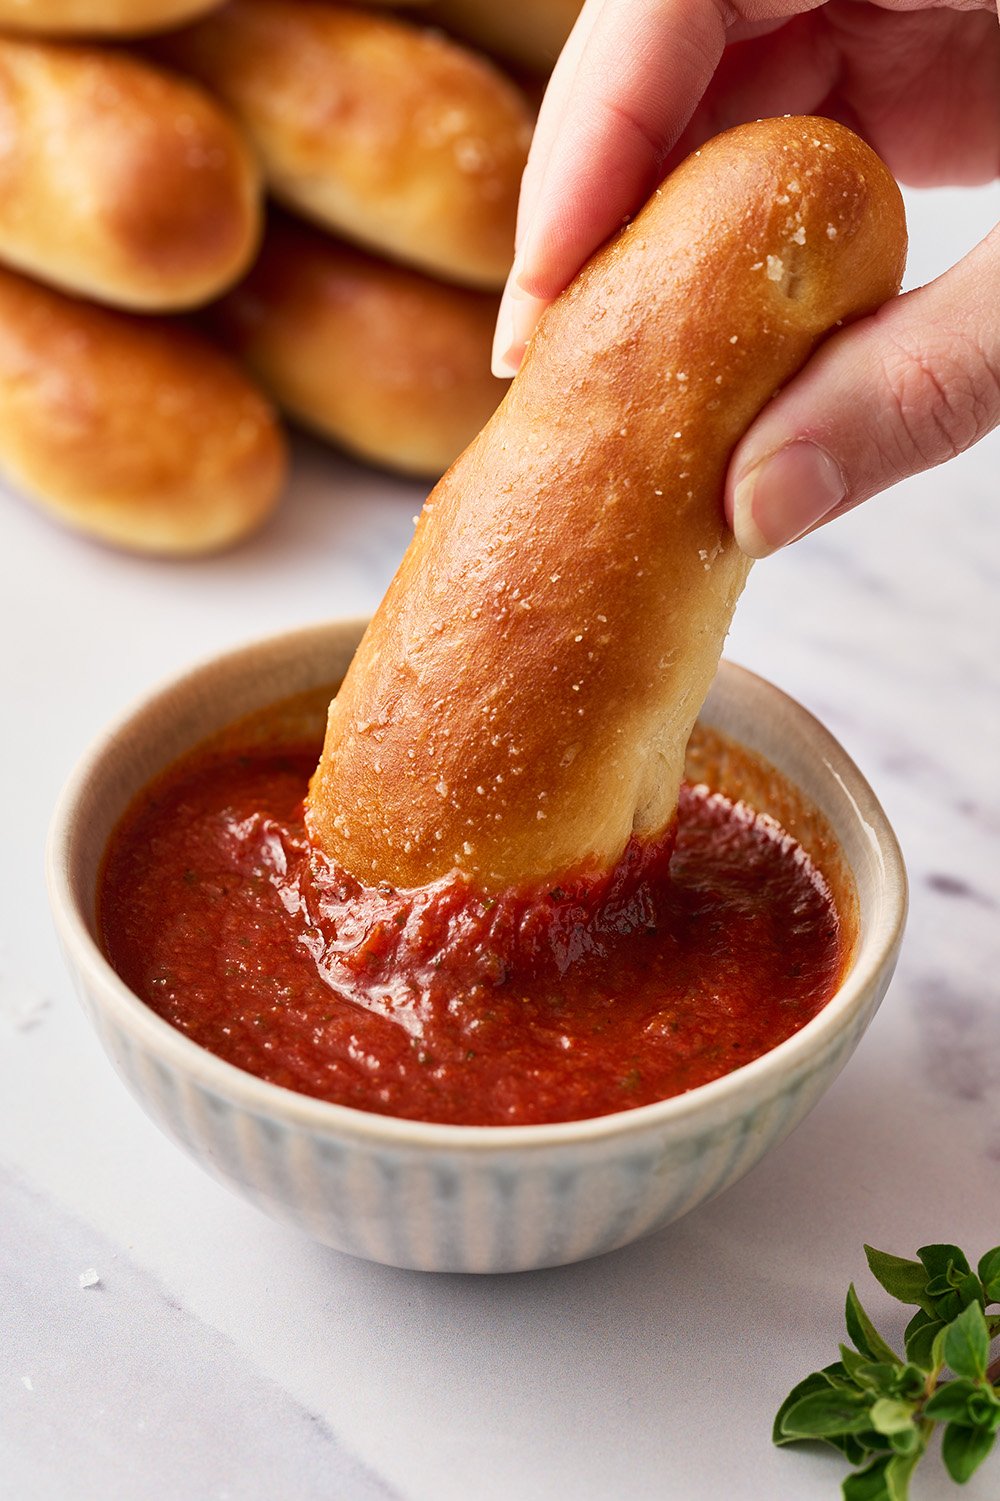
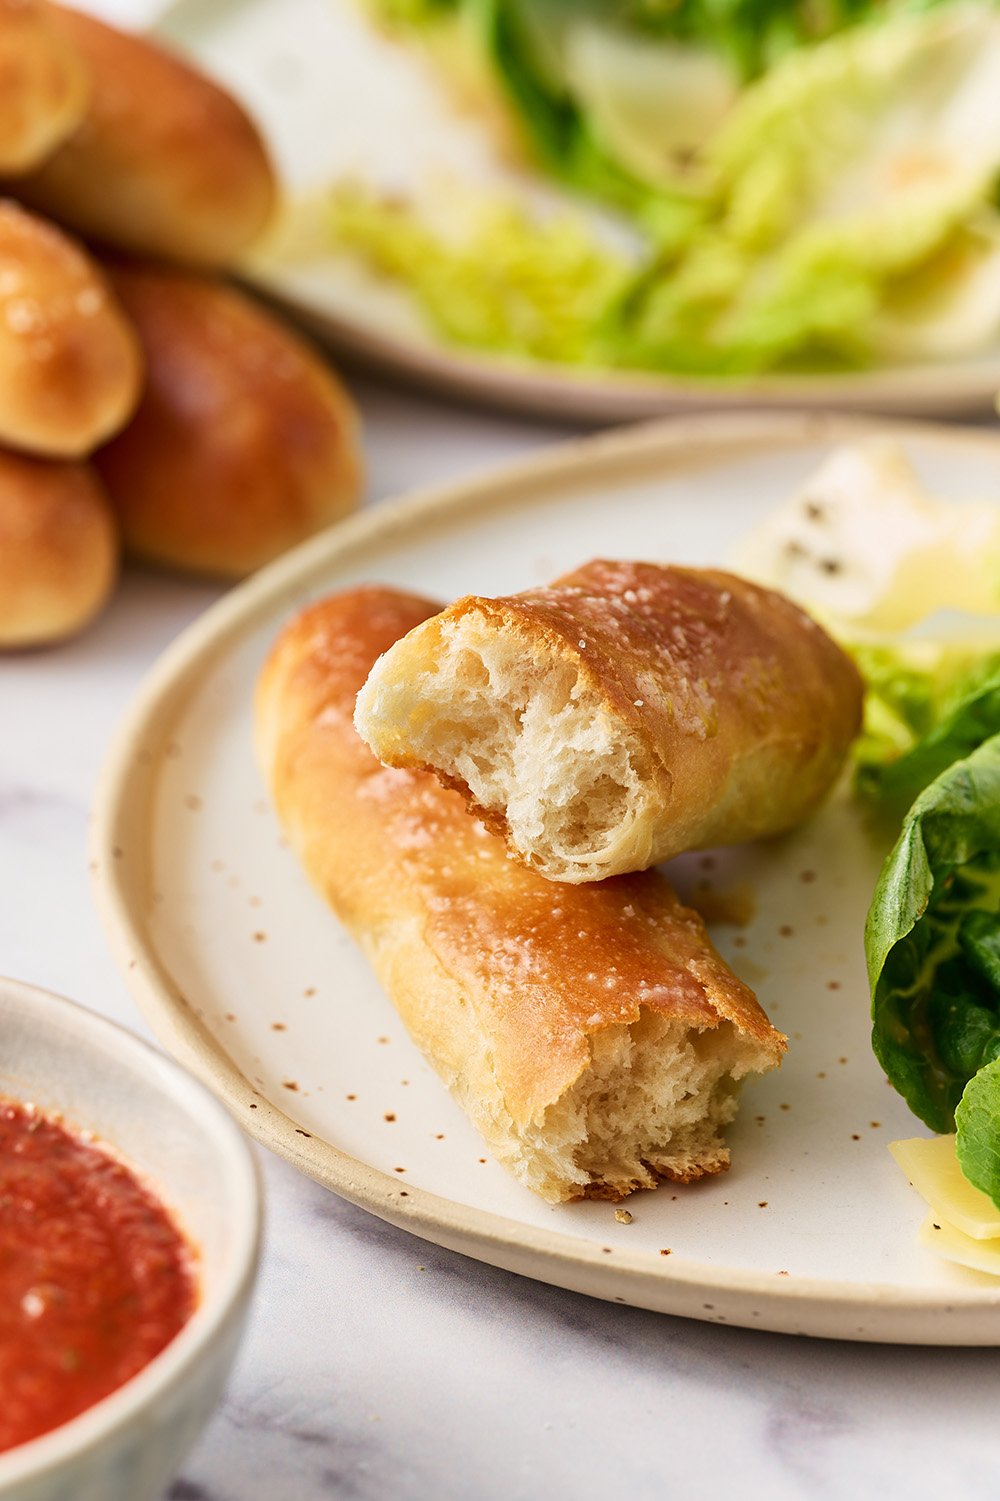
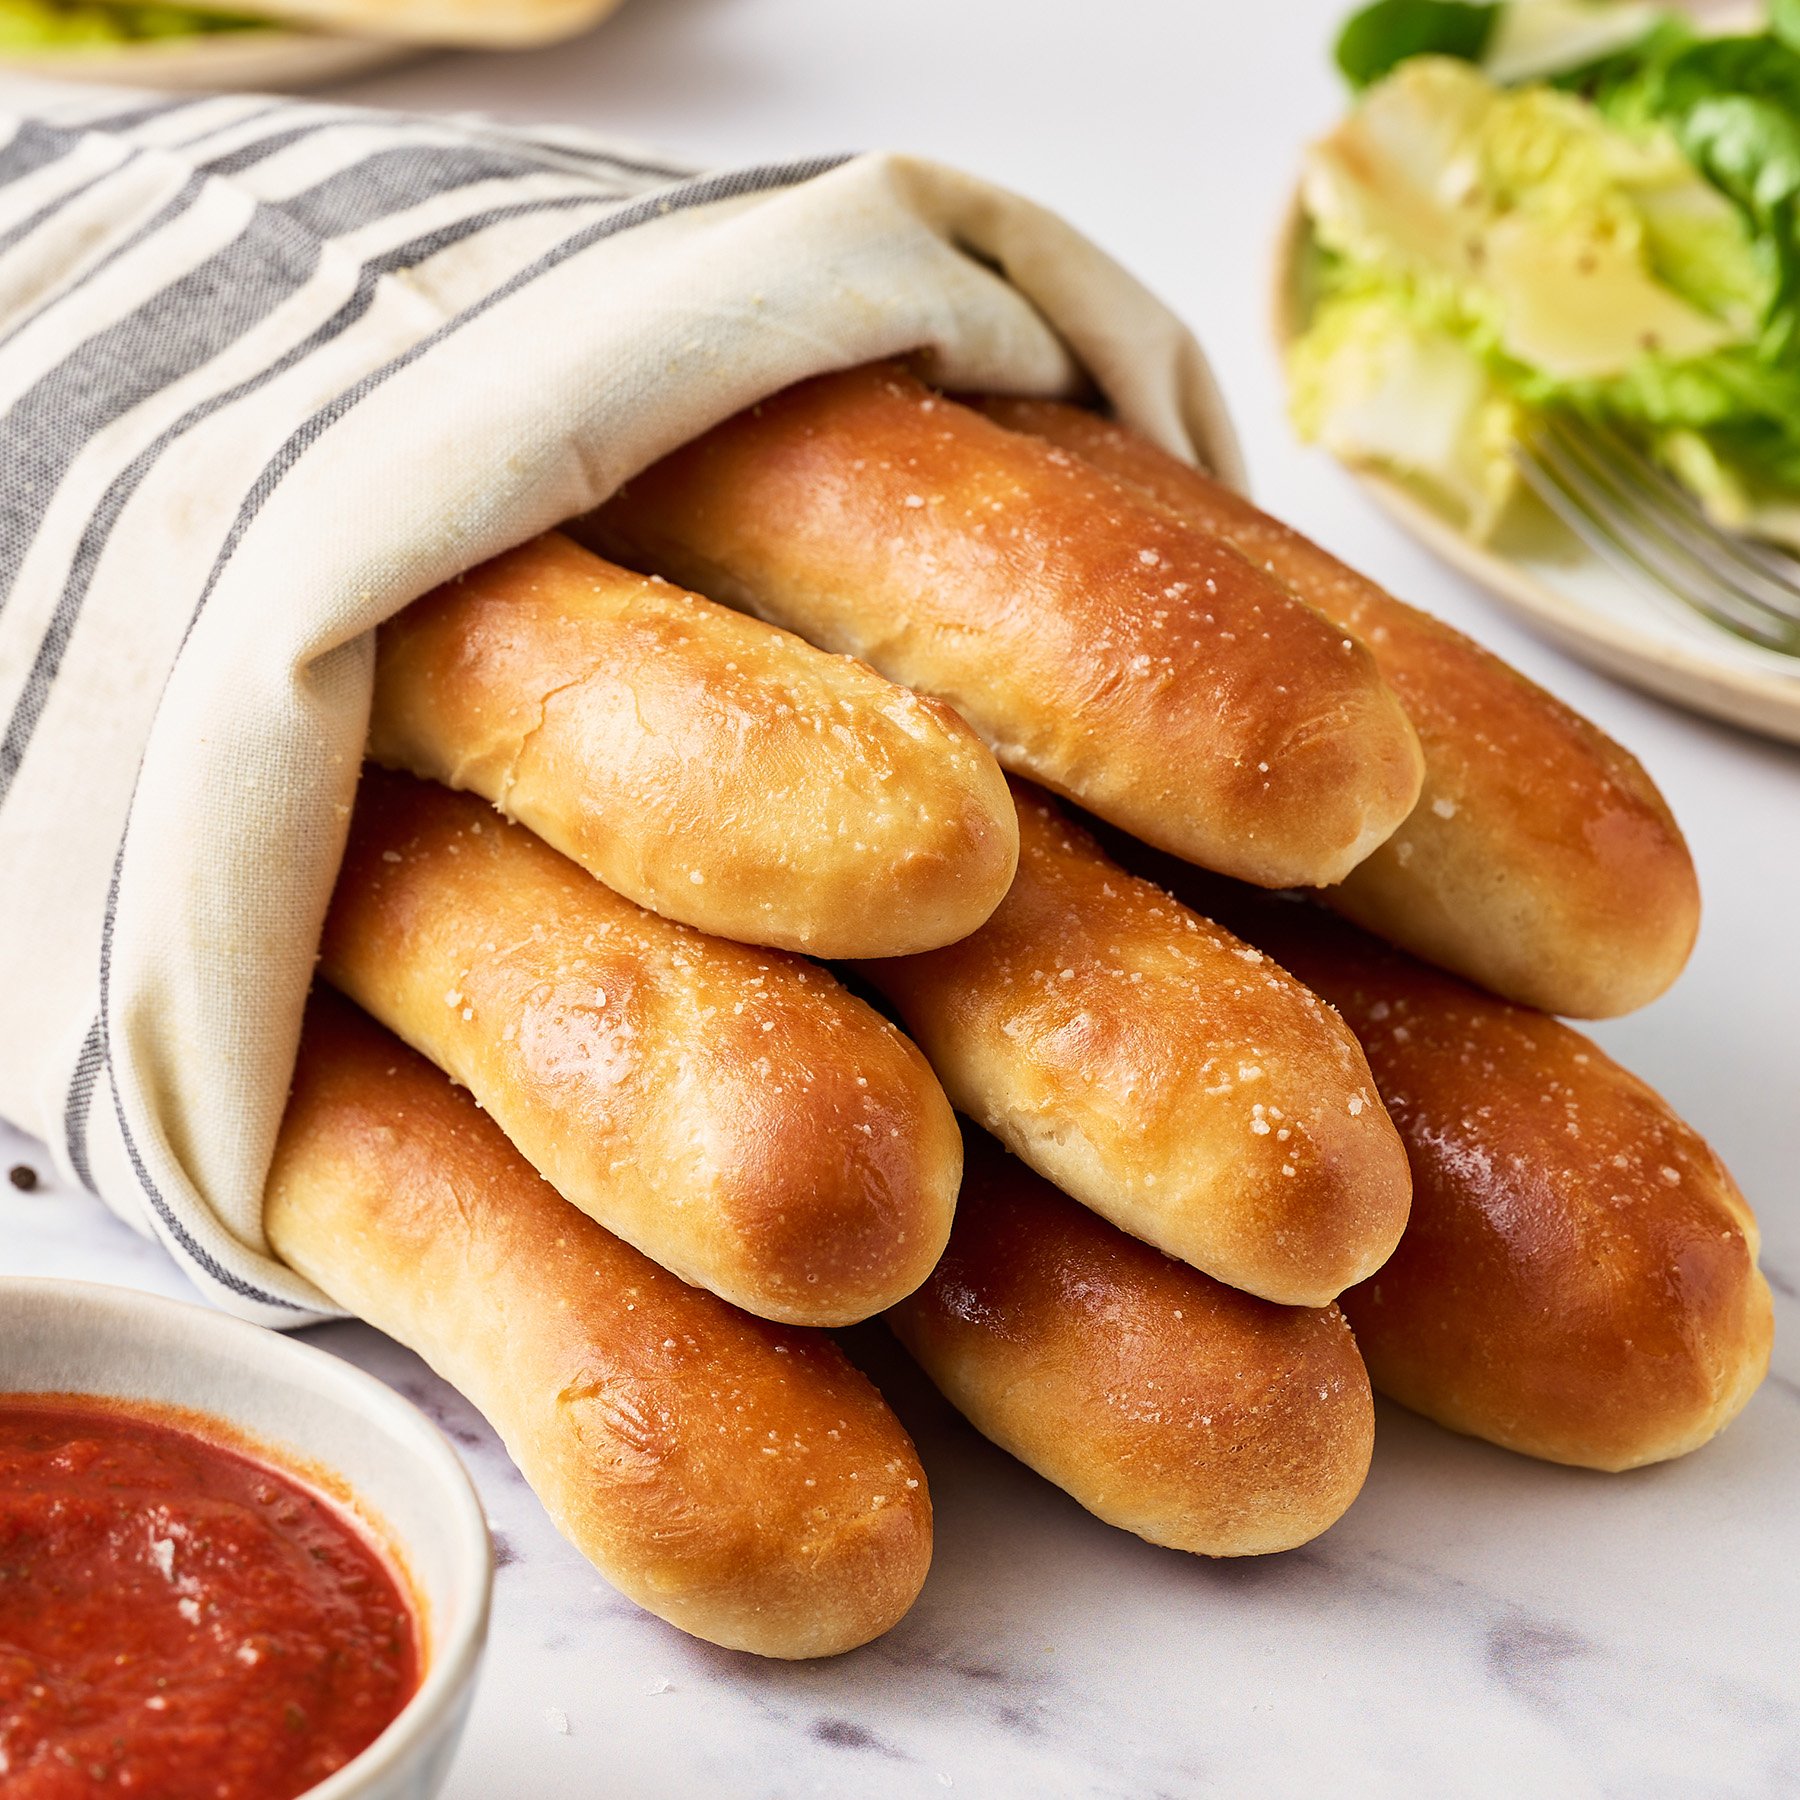
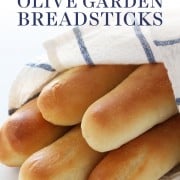
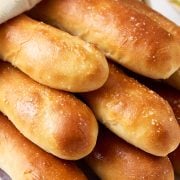
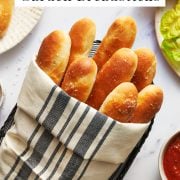
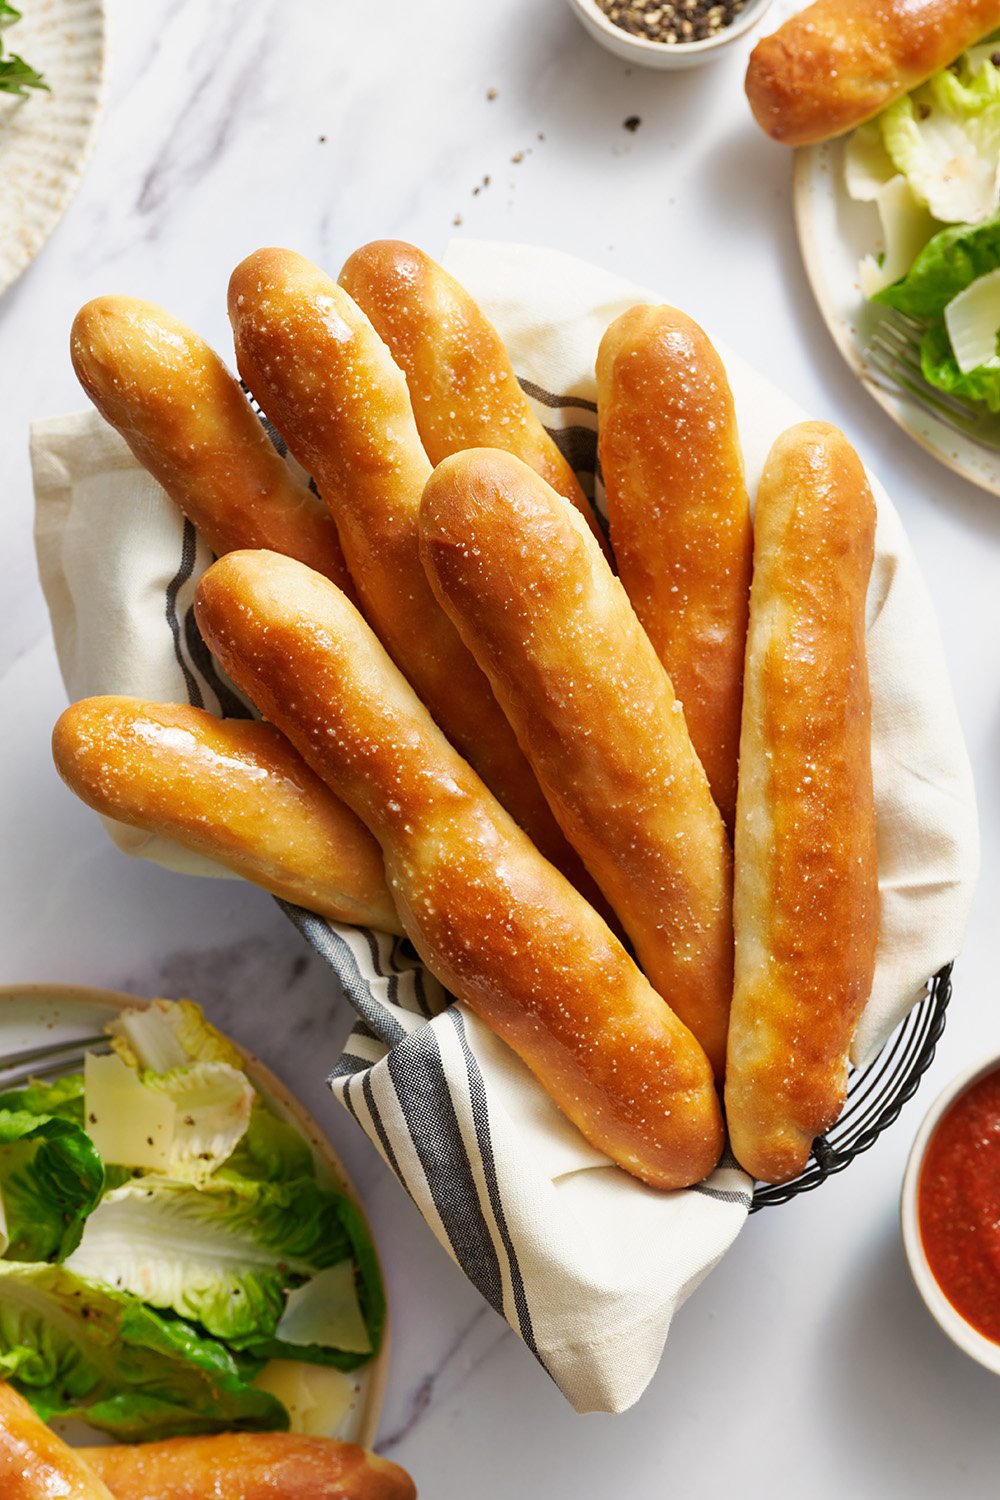
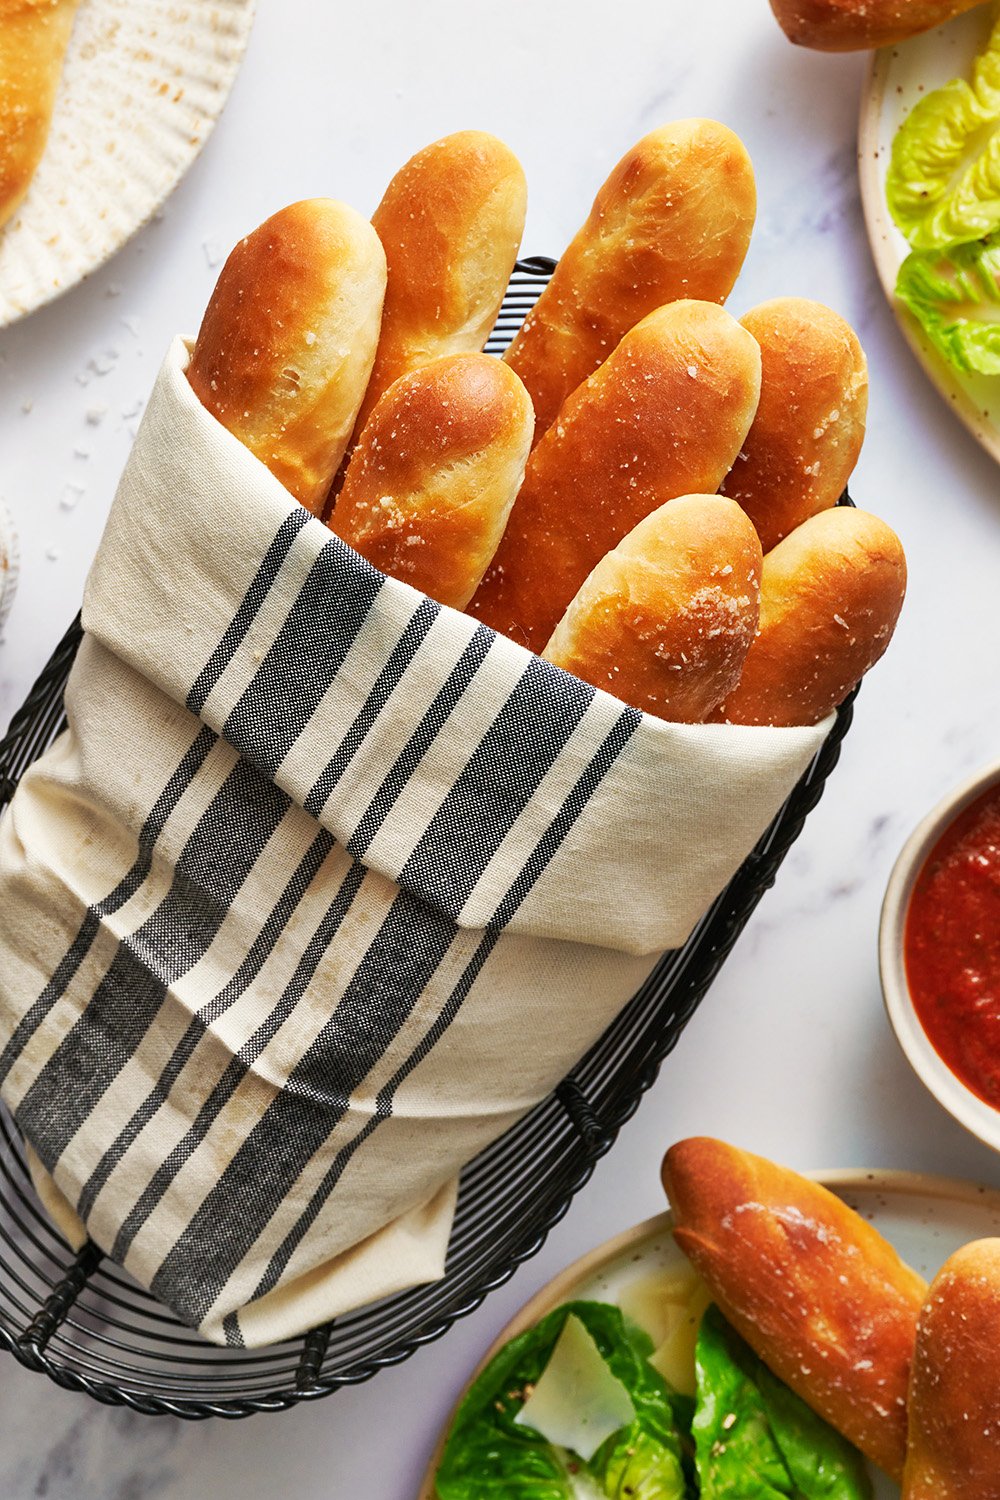
This simple recipe for Copycat Olive Garden Breadsticks makes buttery, garlic-scented, and chewy breadsticks that are utterly addictive! This breadstick recipe is the perfect complement to any meal, or a delicious snack all on its own.
Yield:
12 breadsticks
Prep Time:30minutes
Cook:14minutes
Tessa's Recipe Rundown...
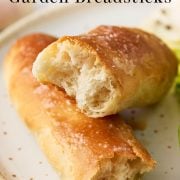
Taste: Buttery and garlicky, AKA amazing! Texture: These breadsticks have a bit of a golden crust but are soft and fluffy inside yet chewy throughout. Ease: Really easy! Homemade breadsticks may sound intimidating but there’s only a handful of ingredients and I’ve included step-by-step photos so you know exactly how to make them. Appearance: Mouthwatering. Pros: Have Olive Garden breadsticks at home whenever you want! Cons: These are dangerously addictive. Would I make this again? Mhmmm.
These Copycat Olive Garden Breadsticks are savory heaven.
Let’s be honest. The breadsticks are probably the most crave-worthy item on the menu at Olive Garden.
This homemade breadsticks recipe is 1000x better. The whole family will go crazy for this copycat recipe at Sunday night dinner. Especially when paired with a rich soup or sauce for dipping!
The dough recipe only has six ingredients! Get your ingredients and your stand mixer fitted with the dough hook ready to go. You can also make this dough by hand, just be prepared to knead for about 10 minutes.
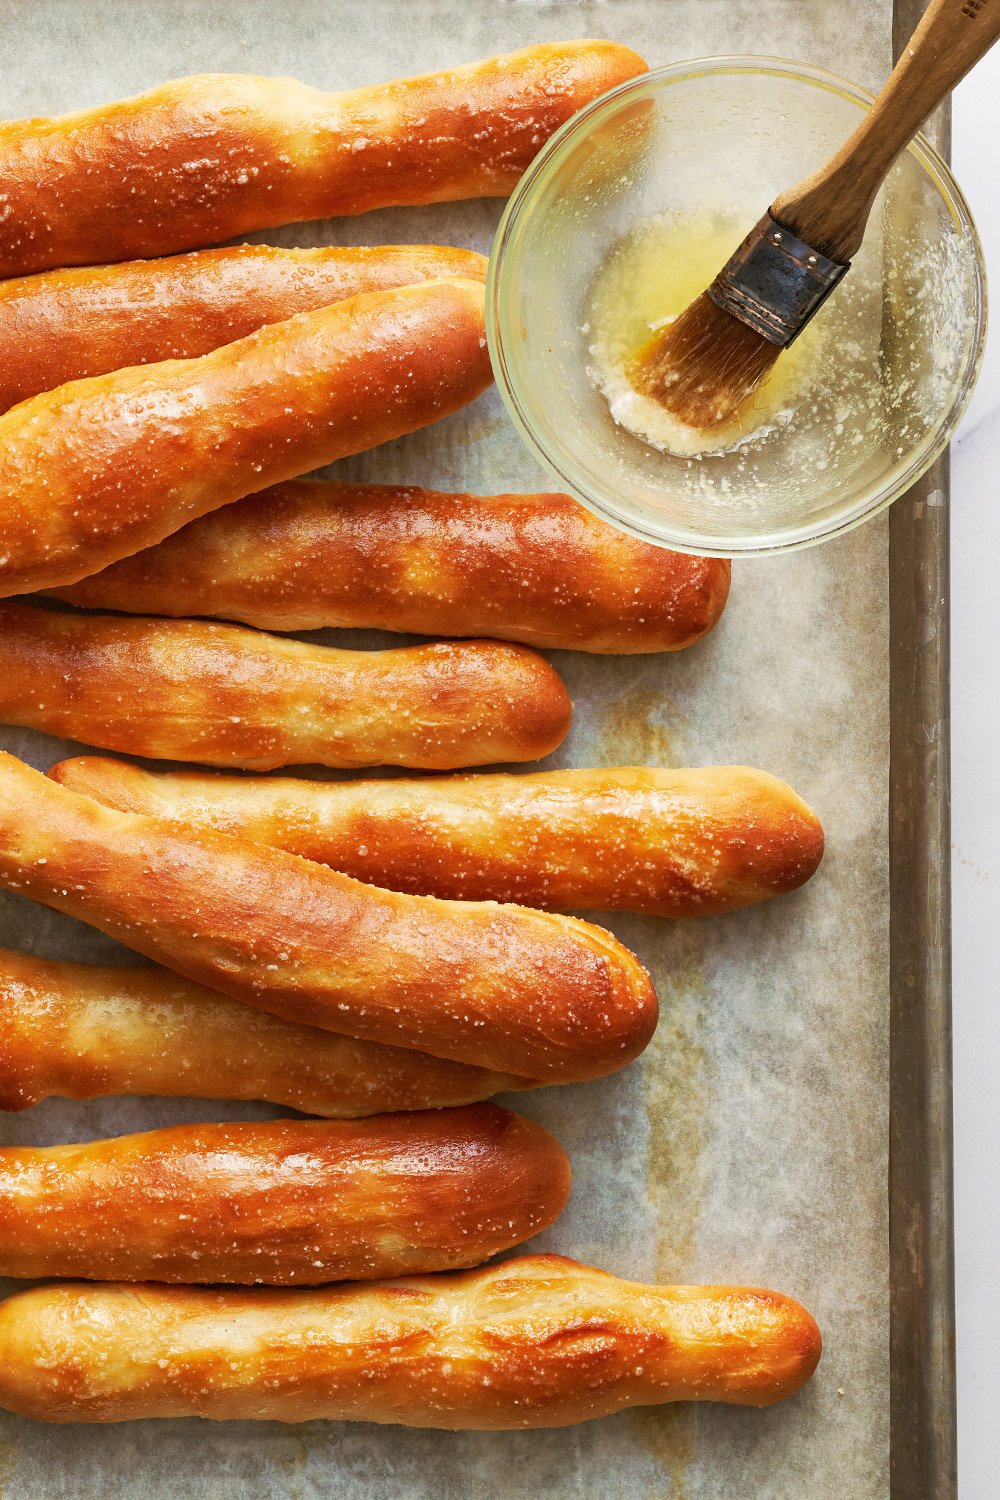
As soon as the breadsticks come out of the oven, brush with the garlic butter. Serve warm. Be careful, this Olive Garden Breadstick recipe is ADDICTIVE!
How to Make Copycat Olive Garden Breadsticks
Ingredients for Copycat Olive Garden Breadsticks:
Water – Use warm water to help activate the yeast, but be sure it’s not so hot it kills the yeast. 100-110°F is perfect.
Sugar – Just a little. The sugar helps activate the yeast, tenderize the breadsticks, and makes them a little softer. Don’t skip the sugar! I promise you won’t find the breadsticks sweet.
Butter – Melted and cooled slightly. Always use unsalted butter in baking and especially here because we’re adding salt to the dough and as a topping.
Salt – I prefer to use fine sea salt instead of table salt, simply because I prefer the flavor. Learn more about the differences between types of salt here.
Bread flour –Measured correctly! Bread flour contains a higher percentage of protein, compared to all-purpose flour, so I recommend using bread flour. More on this below.
More butter, plus salt and garlic powder – for the utterly delicious topping, once baked.
Olive Garden Breadsticks Instructions Overview:
Prepare the baking sheets. Prepare two baking sheets lined with parchment paper and set aside.
Begin the dough. In the bowl of a stand mixer fitted with a dough hook attachment, combine the water, yeast, sugar, melted butter, and salt.
Add the flour. Add gradually, while the mixer runs on low speed.
Knead. Increase speed to medium and knead the dough for about 10-15 minutes, or until it is tacky and very elastic.
Proof the dough. Remove the dough and place in a lightly oiled bowl and cover with plastic wrap. Let rest in a warm place until doubled in size, about 1 hour to 1.5 hours.
Portion out the breadsticks. Once doubled in size, divide the dough into 12 portions. Roll each piece of dough into an 8-inch log. Place the dough logs on your parchment-lined baking sheets, about 2 inches apart.
Proof a second time. Cover, and let rise on the prepared baking sheet until doubled in size, about 1 hour to 1.5 hours.
Bake. Bake at 400°F for 12 to 14 minutes, or until golden brown.
Add the toppings. Once removed from the oven, immediately brush each breadstick with melted butter and sprinkle the salt and garlic powder evenly over breadsticks.
Serve warm.
Are Olive Garden Breadsticks Vegan?
These copycat breadsticks are not vegan, and I have not tried using plant-based butter in this recipe. However, several readers have had success with Country Crock plant-based sticks (avocado oil based) or using olive oil in the dough and Earth Balance for the topping. If you give anything else a try, let me know how it goes!
Do I Have to Use Bread Flour? Can I Use All-Purpose Flour Instead?
Bread flour has a higher level of protein content than all-purpose flour, which helps create taller, well-rounded breadsticks with a nice chewy, fluffy texture. If you don’t have bread flour, use the same amount of all-purpose flour, but keep in mind that your breadsticks may turn out super soft.
Which Yeast Should I Use for Breadsticks?
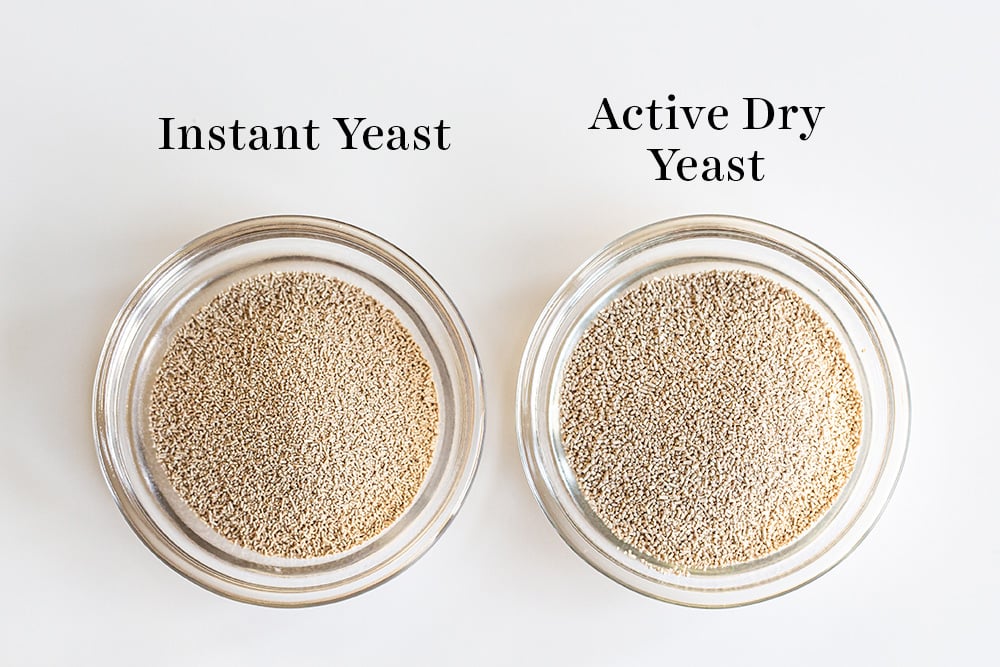
This recipe utilizes a shortcut ingredient: instant yeast, also called rapid rise or quick rise yeast. One of the three should be available at most grocery stores or you can buy my all-time favorite yeast on Amazon. These types of yeast are specifically formulated to allow you to skip proofing (aka the step where you combine the yeast with warm liquid for 5 minutes). You can add instant yeast directly into the mix with all of the ingredients.
If you don’t have or can’t find instant yeast, you can easily use active dry yeast instead. Add it right in with the dry ingredients like instant yeast, but just note that the dough will take about 20% longer to rise. Alternatively, you can speed up that rise time slightly; simply combine it with the warm water and a pinch of the sugar called for in the recipe, and allow it to proof until it becomes bubbly (about 5 minutes) before adding into the bowl with the other ingredients. Learn more about the different types of yeast, and how to substitute yeasts, here.
Can I Knead the Dough By Hand?
Yes! Be sure to knead the dough properly so the breadsticks hold their shape and don’t become sad flat sticks. I call for a stand mixer to make easy work of kneading in this recipe, but you can also knead by hand. You can see my full tutorial on how to knead dough here.
How to Tell When Dough Is Risen
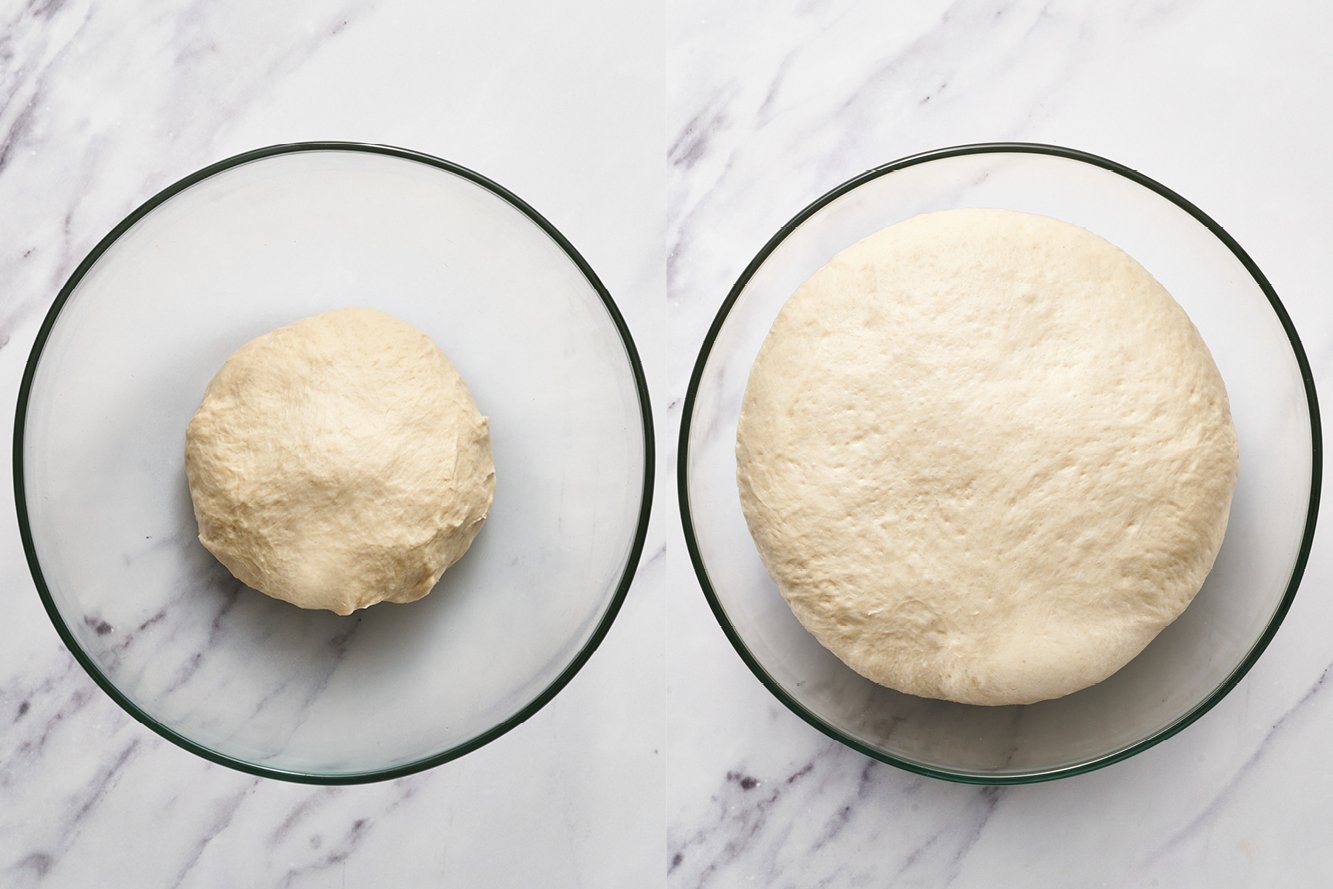
After kneading, shape the dough into a ball. Place in a lightly oiled mixing bowl. I like to use glass so I can see how much it’s rising. I’ll even take a picture of the dough before rising so I can compare later. Cover the bowl with plastic wrap, foil, or a clean kitchen towel. Let the dough rise in a warm, draft-free location. Ideal rise temperatures are between 80°F and 90°F. Lower temperatures will require more rising time.
The dough is done rising when it’s about doubled in volume and passes the “ripe” test. Gently stick two fingers in the risen dough up to the second knuckle and then take them out. If the finger marks remain, the dough is ready for shaping into balls. If not, cover and let the dough rise longer until it is.
How to Shape Breadsticks
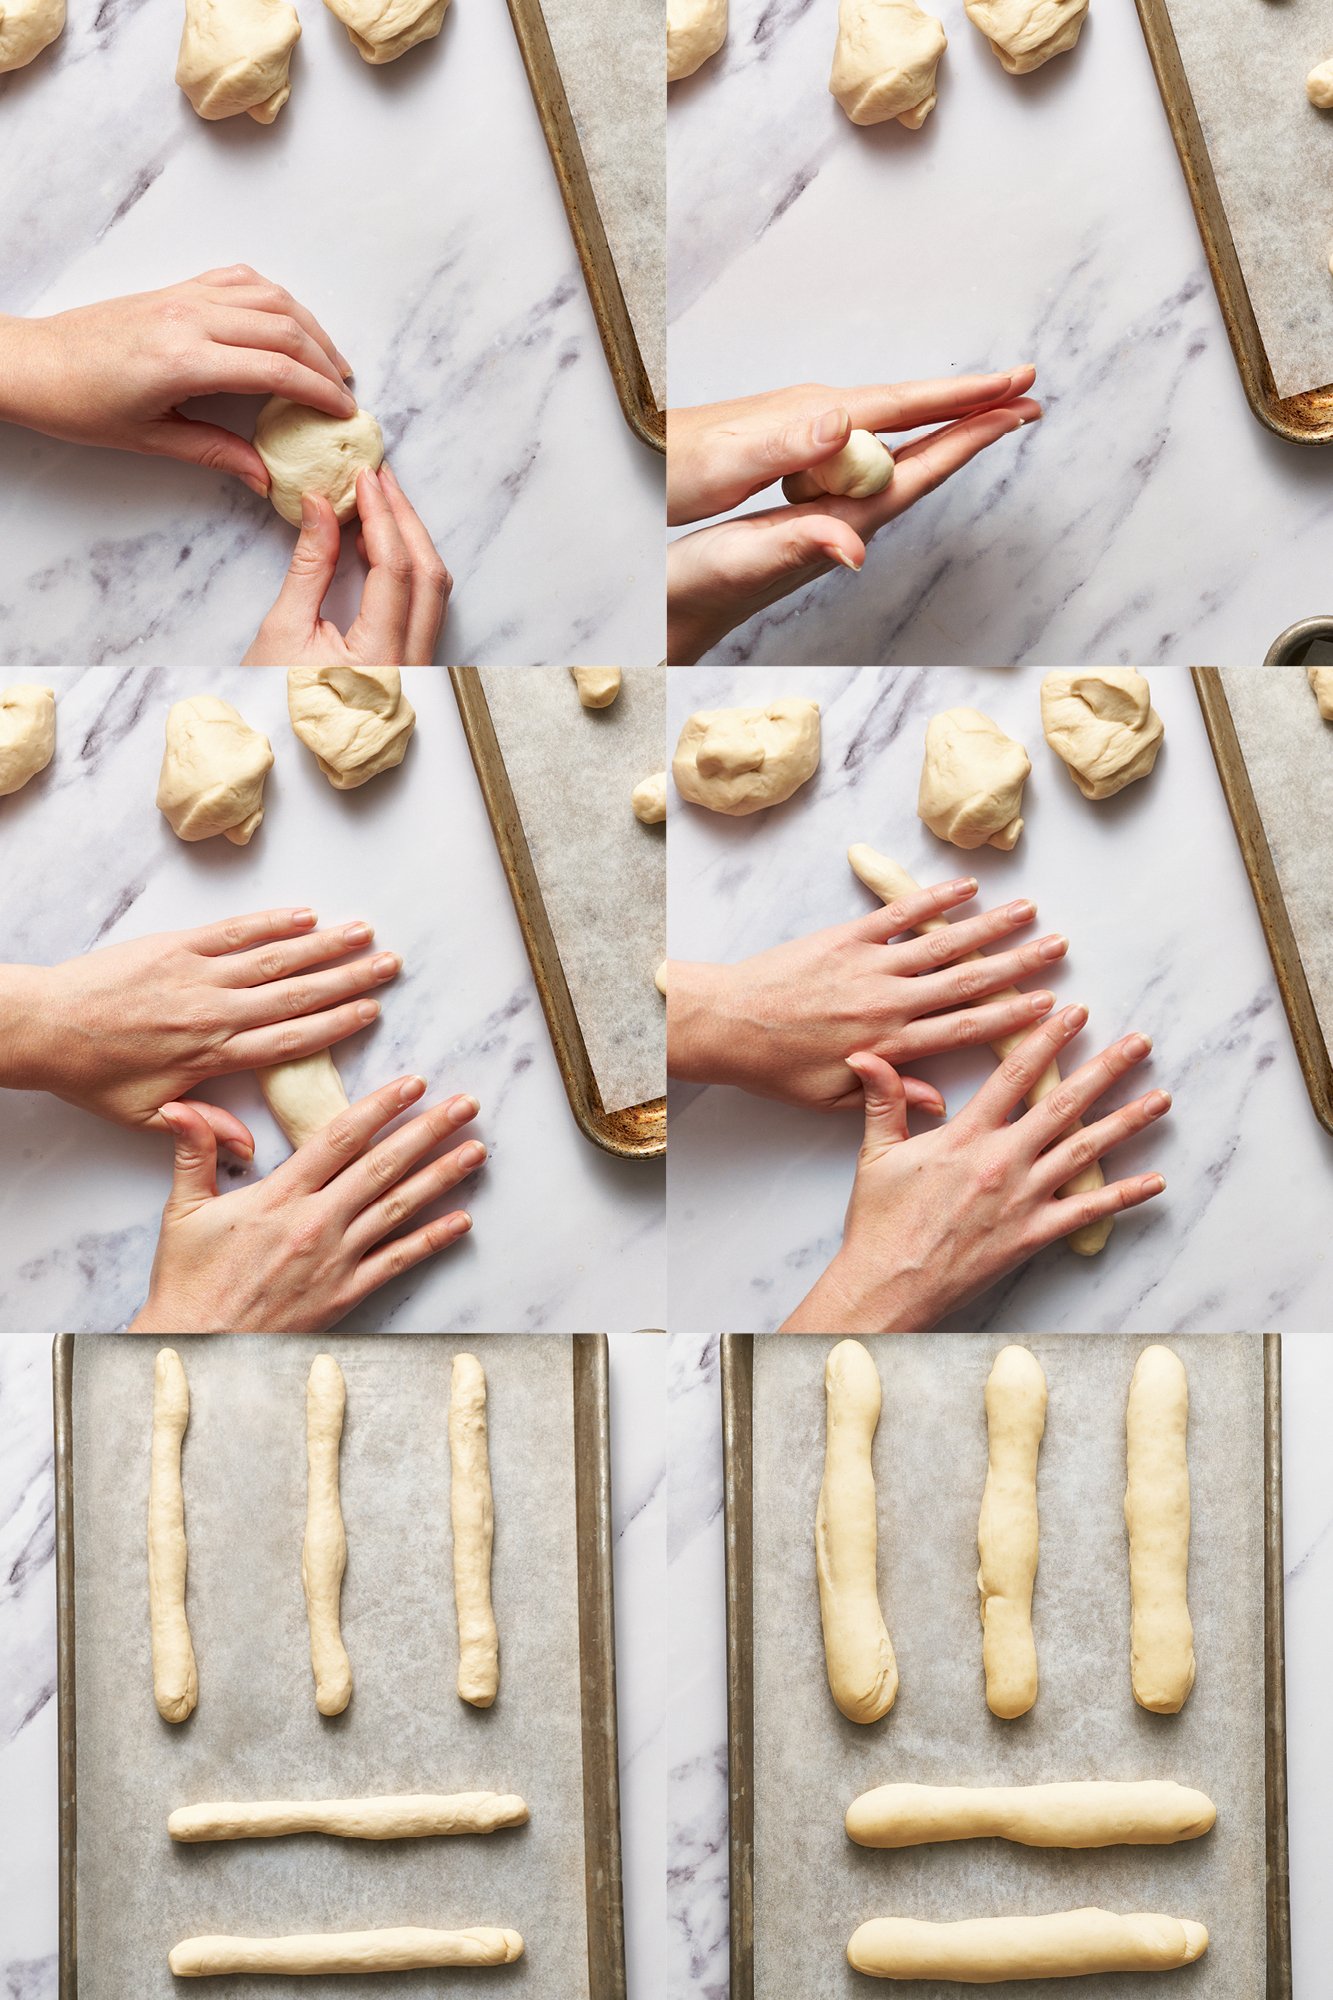
Once the dough is risen, press it down to deflate it slightly.
Place the dough onto a clean surface (not a floured surface).
Use a bench scraper or knife to section the dough into 12 equal pieces. Don’t worry if they’re not perfectly equal in size – but if you prefer, you can weigh the entire mass of dough, divide that number by 12, then portion each piece perfectly by weight.
Roll each piece of dough into a 8-inch log. Don’t worry if they’re not perfectly shaped.
How to Make Breadsticks Ahead of Time
Basically all yeast doughs can be made ahead of time and baked off later. Refrigerating stunts the rise time and can actually allow more flavor to develop!
For this recipe, I like to allow the dough to rise once and shape the breadsticks. Once the breadsticks are shaped, cover them well (so they don’t dry out) and place in the refrigerator for up to 24 hours. Bring to room temperature as the oven preheats before baking as the recipe directs. If the breadsticks haven’t doubled in size yet, allow them to sit at room temperature until doubled.
Alternatively, to make ahead further in advance, you can freeze the dough after it has risen for the first time and been shaped into logs. Place the shaped breadsticks on a baking tray lined with parchment, freezing just until solid, and then transfer to a ziptop bag or airtight container to store in the freezer for up to 2 months. Once ready to bake, place the frozen breadsticks on parchment-lined baking trays and allow to thaw to room temperature. Let rise until an indentation made with your finger into the dough remains. Proceed with the recipe as written.
Can I Double This Recipe?
Yes, if you have a large enough mixer (at least 6 quarts). Most home mixer bowls won’t mix such a big batch of dough well enough. If you’re using a 5-quart tilt head mixer, your mixer may be overwhelmed with that amount of dough and fry itself. If that’s the case, make a single batch of dough twice.
How Long will These Breadsticks Keep?
These breadsticks are best served right out of the oven, but they will keep for 3 days or so in a ziptop bag or an airtight container. To refresh, place the breadsticks on a baking sheet, and reheat in the oven at 425°F for 4-5 minutes, or until warmed through. You can also re-brush with butter and sprinkle with garlic powder and salt at this point, if you wish.
How to Freeze Breadsticks
Place the baked, cooled breadsticks in a ziptop bag or airtight container to store in the freezer for up to 2 months. Thaw at room temperature for a couple of hours, then place the breadsticks on a baking sheet and reheat in the oven at 425°F for 4-5 minutes, or until warmed through. You can also re-brush with butter and sprinkle with garlic powder and salt at this point, if you wish, before serving.
This simple recipe for Copycat Olive Garden Breadsticks makes buttery, garlic-scented, and chewy breadsticks that are utterly addictive! This breadstick recipe is the perfect complement to any meal, or a delicious snack all on its own.
Prepare two baking sheets lined with parchment paper and set aside.
In the bowl of a stand mixer fitted with a dough hook attachment, combine the water, yeast, sugar, melted butter, and salt. Begin to gradually add the flour while the mixer runs on low speed. Increase speed to medium and knead the dough for about 10-15 minutes, or until it is tacky and very elastic. Add more flour, a tablespoon at a time, if the dough is extremely sticky.
Remove the dough and place in a lightly oiled bowl and cover with plastic wrap. Let rest in a warm place until doubled in size, about 1 hour to 1 1/2 hours (the exact proof time will depend on your kitchen environment; the warmer it is, the faster your dough will proof).
Once doubled in size, divide the dough into 12 portions (use your scale for accuracy, but it should be approximately 57 grams per piece). Roll each piece of dough into an 8-inch log. Place the dough logs on your parchment-lined baking sheet, about 2 inches apart. Cover, and let rise until doubled in size, about 1 hour to 1 1/2 hours.
Preheat your oven to 400°F. Bake for 12 to 14 minutes, or until golden brown. Remove from oven and immediately brush with melted butter. Combine the salt and garlic powder and sprinkle evenly over breadsticks. Serve warm.
*To refresh, place the breadsticks on a baking sheet, and reheat in the oven at 425°F for 4-5 minutes, or until warmed through. You can also re-brush with butter and sprinkle again with garlic powder and salt, if you wish.
Recipe Video
Recipe Notes
When it comes to bread baking, the amount of flour you need can vary by the brand used as well as how humid your climate and kitchen environment is! Even the same recipe made in your kitchen during the summer vs. winter may require more or less flour and longer or shorter rising times.
I share trusted baking recipes your friends will LOVE alongside insights into the science of sweets. I'm a professionally trained chef, cookbook author, and cookie queen. I love to write about all things sweet, carb-y, and homemade. I live in Phoenix, Arizona (hence the blog name!)
About Tessa...
I share trusted baking recipes your friends will LOVE alongside insights into the science of sweets. I'm a professionally trained chef, cookbook author, and cookie queen. I love to write about all things sweet, carb-y, and homemade. I live in Phoenix, Arizona (hence the blog name!)
Made these tonight, they were just lovely. Well written recipe, thanks for posting.
Also, after reading through these comments…you deserve some sort of internet award for your restraint. I’d have posted a snarky reply to half of these keyboard warriors.
I too made the dough and my bread machine and let it rise took them out to shape them and let them rise a second time they were absolutely perfect. when shaping them make them long mine turned out great but they were fat and short. I’ve tried many times the copycat these breadsticks this is the first time they’ve ever turned out.
Make the dough in my bread machine through the first rise. Shaped and did second rise. Baked to perfection. Used bread flour, as I always have on hand for bread making and pizza dough. Great recipe, making again tonight.
this was FABULOUS! 1st time I measured and they were heavy..second time I weighed and they were PERFECT! Wish I could post a picture! They looked resteraunt style! THANK YOU!
These were amazing and I made them in under an hour and a half by letting the dough rise in my oven set to 100 with some hot water in a pan below. I used all purpose flour and the texture was so fluffy and light. I measured my flour by weight. I also used olive oil instead of butter for the topping.
The first time I tried these I don’t think I kneaded it long enough and they were pretty dense so I decide to try again and what a difference. I also added less flour than in the recipe because I kneaded by hand and figured the extra flour I used would make up for it it. They were so good. My 7 year old absolutely Ioves them too. Thank you for the wonderful recipe.
I weighed my 16 oz of flour out to make sure it was accurate and put it all in. Bad idea. The dough is dense and was very hard to knead. Next time I will use less and add more while it’s kneading of necessary.
I’m in the midst of making these… so far they have turned out exactly as you said! (I’ve had problems in the past with dough rising, while the rising process was taking place I went grocery shopping.)…I was so excited when I came back to see the dough had risen beautifully. It brought a smile to my face. Thanks for a great recipe!
So, I’m lactose intolerant so I decided to make this recipe using Earth Balance buttery spread and they came out beautifully! This recipe is awesome, I only wish I had a kitchen-aid because I spent 20 minutes kneading and now I can’t feel my hands.
I have made these several times and I change them up alot lol I love them just the way your recipe is wrote BUT me being a HUGE garlic fan has to add more and more somewhere in a recipe lol Try these with roasted garlic OMG bread Heaven! Thanks for the recipe it is almost fool proof has turned out every time i have made them!
This weekend I tried the copycat olive garden breadsticks for a first time and now the whole family love them! They can be a perfect choice for a picnic outside the city or just for an afternoon with the kids in the garden.
I would like to make these for my daughters wedding. I need to make about 250. Can I make them a head of time and warm them up as needed? If so, how far in advance can I start to make them and freeze them
Hi Tessa, I’m new to your blogging site and I love that you have copycat recipes, but I would have liked to have the Alfredo recipe included with the bread sticks 🙁 I hope to try these soon.
I am an experienced baker (50 + years so far) and am increasingly using scales to weigh ingredients such as flour. Especially in bread making, weight matters than volume.
I have been making these at least once a week since I found this recipe. The dough is very easy to work with and very forgiving. My kitchen stays hot in the spring summer and fall thanks to the TX heat so sometimes the dough will get huge during the first rise but in the end they always comes out great. Thanks for the great recipe!
This is a great blog. I love eating and making bread myself. I have been looking for different bread recipes like this one. Thanks for sharing . I’m so excited to try this. Certainly it will be great. I love using my bread machine. After try this one , I will try your other bread recipes for my bread machine. I am looking forward to your other recipes:)
Our local store just started selling Olive Garden brand dressing and croutons so I can replicate their Salad perfectly. I also can perfectly replicate their Zuppa Toscana soup. I was so happy to find this recipe because frankly on a tight budget I can make the entire meal for under $20 vs $75 plus tip when I take my family to the O.G. (Dont worry, I still go there on special occasions but the nearest one is a 2 hour drive). With your recipe, my meal was complete and the family DEVOURED the breadsticks. ThanK you so much! Brava!!!
Hi, I’m just getting into making bread at home and am currently waiting for my first rise on this recipe. Was curious if this is something that can be frozen and used a few at a time? Or do you have to make the whole batch?
Delicious. Easy. I wouldn’ t ever consider making bread sticks but these, all done in my mixer with no hand kneading…. were amazing! Paired with lasagna rolls and copycat Olive Garden salad and dressing. Perfect dinner it’s a keeper. Thinking these would be good with cinnamon sugar too!
Made the bread sticks turned out wonderful. Thank you for making my kid happy she enjoyed her spaguetti Alfredo and meatball paired with your bread stick recipe ! Watch the oven tough I felt the dough undercooked and left them 2 more mins in the oven..almost made a mistake..thankfully breadsticks were rescued just in time LOL.
I’m new to your site and I have tried a few recipes so far. They are all great, including this one. My family loved them and gobbled them up. My husband was so impressed!
I made a batch of these the other day and before I could even have 1 my husband and kids at them all! I turned around and made a second batch so I could have one and they turned out super amazing!! Just curious if you’ve baked then froze them or how I would go about freezing for next time so I can make a few batches at a time!! Thank you for your input!!
Fabulous, Brooke! For these, just shave a few minutes off the baking time then let them cool completely before freezing. I like to freeze them on a baking sheet until solid before removing to a ziptop bag so that they don’t stick together. Reheat in a 300°F oven until warmed through 🙂
I’d like to make these for a family dinner. Do you know how well they will hold up/taste if I make them the day before and reheat? Or could I make the dough the day before and bake the next day? Thanks!
It seems that I cann’t see some pictures from your website, maybe something wrong with my net, but it is very good tip for making bread, I like baking, thanks very much
Hi! Just follwed your recipe and it turned out well. My breadsticks were just as you described- it was soft yet chewy throughout. I didn’t get the golden crust though- my bread was done before it has the chance to brown at the top. (The bottom was a different issue however, it was really browned but not bitter thank goodness. And it was really crunchy which I really liked)
Anyway, is it supposed to be a bit sweet? I can definitely taste the sugar on my batch. Next time, I’ll halve the sugar on the dough.
I only made half the recipe btw because those breadsticks are huge to my liking. I made 12 1-oz pieces instead and it was perfect for us. Thanks for the recipe!
Thank you sooo much for sharing. We don’t have Olive Garden in Germany, but I have been in the US and tried them and was really glad I was able to serve these to my family here. I made them quite a few times and everybody just loves them. Thank you!!
Uhmmm, just want to say that you are missing the alfredo sauce (recipe) that used to be served with the breadsticks at Olive Garden. Now, we have to request the alfredo sauce separately and I’m not sure that we don”t pay extra for it. Little serving dishes of sauce for each person makes it OK to double dip, LOL. I think there is a low fat recipe available on the net. Good breadstick recipe!
Speed method- Make the dough as directed using a metal or glass bowl. Bring a small saucepan of water to a simmer and set the bowl with dough in it on the sauce pan. Make sure you oiled the bowl as directed and oiled the top of the dough and placed plastic wrap over it directly on top of the dough, not across the top of the bowl ( helps keep the warmth in). Let it sit for about 20 minutes, or doubled in size. Reheat the sauce pan of water to boiling and heat your oven to the WARM setting. Roll your dough out as directed and put the sheet of breadsticks and the pan of boiling water in the oven. Let it sit until almost doubled, then remove both pans and heat the oven the rest of the way, keeping the bread sticks warm. Cook as directed.
Makes super soft, light and fluffy, breadsticks in a fraction of the time! I started the recipe at 5 and my family finished eating all the breadsticks by 7 if that tells you anything. Less than 1.5 hours for fabulous breadsticks hot from the oven!
I made these last night and they turned out amazing! AND…I have to confess I probably did everything wrong. (i.e. I used regular flour, I rushed the rising process with a warm oven by almost an hour, and I put them too close together on the baking sheet so they were touching after the second rise). So that’s how good this recipe is…If I can do it all messed up and still get amazing breadsticks you know it’s a ‘keeper’!!! >)
I made this last week and they turned out great I’m making them again right now but this time I put in 1/2 tea garlic will let you know the results
mix the dough smelled great
Hi Rachel, so sorry these didn’t turn out! I know how disappointing that can be. It sounds like you may have used too much flour in the dough. Did you weigh the dough or measure with cups? Shortly after publishing this post I realized there was a small error from the conversion calculator I used to determine the flour’s volume measurement in cups based off the weight of the flour (which is what I used to make this recipe), which I adjusted as soon as I noticed on the same day. I really recommend weighing out your flour when baking, as noted in the headnote of this recipe, because it really helps to guarantee the best and most consistent results. Hope that helps you figure out what could have gone wrong.
Olive Garden breadsticks are my favorite!!!!
That’s mainly the only reason I go to Olive Garden.
But I’m sorry, on your recipe you have 3 cups (16 oz) of bread flour…
But 3 cups is not the same as 16 oz…. So which one is it? 3 cups or 2 cups (16 oz) ???
Hi Emily, every single cup of any dry ingredient does not always weigh 8 ounces. In fact, flour often weighs almost half of that per cup. I’ve slightly adjusted the recipe to more accurately reflect this after weighing a cup of bread flour in my kitchen and getting 4.7 ounces, slightly more than this guide dictates: http://www.thekitchn.com/weight-conversions-for-flour-sugar-and-other-common-baking-ingredients-171316
As a trained chef and cookbook author, I share trusted baking recipes your friends & family will love alongside insights into the science of sweets. I help take the luck out of baking so you *always* have delicious results! Learn more here.
Over 200 pages with 50+ cookie recipes that'll make
you a COOKIE PRO. Discover how to turn your biggest cookie flops into WINS by mastering the
sweet science of baking. Even learn how to customize your own recipes! Beautiful, hardcopy,
full color, photos of every recipe so you know EXACTLY how your cookies should look. Order
now to have the book delivered to your doorstep!
Do you want a more delicious life?
Instead of digging through cookbooks and magazines and searching the internet for amazing
recipes, subscribe to Handle the Heat to receive new recipe posts delivered straight to your
email inbox. You’ll get all the latest recipes, videos, kitchen tips and tricks AND my
*free* Cookie Customization Guide (because I am the Cookie Queen)!
Made these tonight, they were just lovely. Well written recipe, thanks for posting.
Also, after reading through these comments…you deserve some sort of internet award for your restraint. I’d have posted a snarky reply to half of these keyboard warriors.
I too made the dough and my bread machine and let it rise took them out to shape them and let them rise a second time they were absolutely perfect. when shaping them make them long mine turned out great but they were fat and short. I’ve tried many times the copycat these breadsticks this is the first time they’ve ever turned out.
Make the dough in my bread machine through the first rise. Shaped and did second rise. Baked to perfection. Used bread flour, as I always have on hand for bread making and pizza dough. Great recipe, making again tonight.
this was FABULOUS! 1st time I measured and they were heavy..second time I weighed and they were PERFECT! Wish I could post a picture! They looked resteraunt style! THANK YOU!
Woohoo!! Weighing can make ALL the difference. Thanks for sharing this xo
Can I use a bread machine to mix the dough?
These were amazing and I made them in under an hour and a half by letting the dough rise in my oven set to 100 with some hot water in a pan below. I used all purpose flour and the texture was so fluffy and light. I measured my flour by weight. I also used olive oil instead of butter for the topping.
These are a disgrace to Italy. If you call these bread sticks then you dont deserve to eat italian food.
Just wanted to say WOW!! There is absolutely no reason to be cruel!! May God bless you anyway.
These bread sticks are SO good!
The first time I tried these I don’t think I kneaded it long enough and they were pretty dense so I decide to try again and what a difference. I also added less flour than in the recipe because I kneaded by hand and figured the extra flour I used would make up for it it. They were so good. My 7 year old absolutely Ioves them too. Thank you for the wonderful recipe.
I weighed my 16 oz of flour out to make sure it was accurate and put it all in. Bad idea. The dough is dense and was very hard to knead. Next time I will use less and add more while it’s kneading of necessary.
I’m in the midst of making these… so far they have turned out exactly as you said! (I’ve had problems in the past with dough rising, while the rising process was taking place I went grocery shopping.)…I was so excited when I came back to see the dough had risen beautifully. It brought a smile to my face. Thanks for a great recipe!
Yay!! Hope you enjoyed them, Jess xo
So, I’m lactose intolerant so I decided to make this recipe using Earth Balance buttery spread and they came out beautifully! This recipe is awesome, I only wish I had a kitchen-aid because I spent 20 minutes kneading and now I can’t feel my hands.
These look amazing! Definitely will try them these days. Thank you for sharing.
I have made these several times and I change them up alot lol I love them just the way your recipe is wrote BUT me being a HUGE garlic fan has to add more and more somewhere in a recipe lol Try these with roasted garlic OMG bread Heaven! Thanks for the recipe it is almost fool proof has turned out every time i have made them!
You’re right – these are addictive!! I wish I could shape them well though, but I will continue to practice 🙂 Thanks for sharing this recipe!!
Amazing! Made exactly except lightly rolled out and cut into sticks.
This weekend I tried the copycat olive garden breadsticks for a first time and now the whole family love them! They can be a perfect choice for a picnic outside the city or just for an afternoon with the kids in the garden.
I would like to make these for my daughters wedding. I need to make about 250. Can I make them a head of time and warm them up as needed? If so, how far in advance can I start to make them and freeze them
Hi Tessa, I’m new to your blogging site and I love that you have copycat recipes, but I would have liked to have the Alfredo recipe included with the bread sticks 🙁 I hope to try these soon.
Thanks
I wish you would of posted the correct measurements in cups not weight. I’m an experienced baker and never use a scale.
I am an experienced baker (50 + years so far) and am increasingly using scales to weigh ingredients such as flour. Especially in bread making, weight matters than volume.
I just tried it now, it turned out pretty amazing. I’m loving your recipes. Although mine didn’t turned out golden brown, it’s delicious.
I have been making these at least once a week since I found this recipe. The dough is very easy to work with and very forgiving. My kitchen stays hot in the spring summer and fall thanks to the TX heat so sometimes the dough will get huge during the first rise but in the end they always comes out great. Thanks for the great recipe!
OMG. I made these and my family requested for me to make them again. They are amazing. I highly suggest these.
Glad to hear that!
This is a great blog. I love eating and making bread myself. I have been looking for different bread recipes like this one. Thanks for sharing . I’m so excited to try this. Certainly it will be great. I love using my bread machine. After try this one , I will try your other bread recipes for my bread machine. I am looking forward to your other recipes:)
Doesn’t the water have to be a certain range of temperature for yeast fermentation? (100 to 110 degrees)
These are AMAZING!!!!!!! The recipe was easy to follow and the breadsticks came out great my family enjoyed I will be making these again!
Our local store just started selling Olive Garden brand dressing and croutons so I can replicate their Salad perfectly. I also can perfectly replicate their Zuppa Toscana soup. I was so happy to find this recipe because frankly on a tight budget I can make the entire meal for under $20 vs $75 plus tip when I take my family to the O.G. (Dont worry, I still go there on special occasions but the nearest one is a 2 hour drive). With your recipe, my meal was complete and the family DEVOURED the breadsticks. ThanK you so much! Brava!!!
That’s so awesome, Erin! What a savings 🙂
Great recipe! Came out even better than OG. Thanks!
Love to hear that! Thanks!
Hi, I’m just getting into making bread at home and am currently waiting for my first rise on this recipe. Was curious if this is something that can be frozen and used a few at a time? Or do you have to make the whole batch?
Delicious. Easy. I wouldn’ t ever consider making bread sticks but these, all done in my mixer with no hand kneading…. were amazing! Paired with lasagna rolls and copycat Olive Garden salad and dressing. Perfect dinner it’s a keeper. Thinking these would be good with cinnamon sugar too!
Hi, I was wondering if I can use this in the bread machine, then bake them when dough is ready?
Don’t see why not!
Made the bread sticks turned out wonderful. Thank you for making my kid happy she enjoyed her spaguetti Alfredo and meatball paired with your bread stick recipe ! Watch the oven tough I felt the dough undercooked and left them 2 more mins in the oven..almost made a mistake..thankfully breadsticks were rescued just in time LOL.
Thank you Tessa . My family loves ya! Will try this breadsticks.
These were EXCELLENT. I doubled the garlic/salt and butter toppings but other than that the recipe is absolute perfection… nicely done!
I’m new to your site and I have tried a few recipes so far. They are all great, including this one. My family loved them and gobbled them up. My husband was so impressed!
I made a batch of these the other day and before I could even have 1 my husband and kids at them all! I turned around and made a second batch so I could have one and they turned out super amazing!! Just curious if you’ve baked then froze them or how I would go about freezing for next time so I can make a few batches at a time!! Thank you for your input!!
Fabulous, Brooke! For these, just shave a few minutes off the baking time then let them cool completely before freezing. I like to freeze them on a baking sheet until solid before removing to a ziptop bag so that they don’t stick together. Reheat in a 300°F oven until warmed through 🙂
Hi colleagues, good paragraph and nice arguments commented here, I am really
enjoying by these.
I’d like to make these for a family dinner. Do you know how well they will hold up/taste if I make them the day before and reheat? Or could I make the dough the day before and bake the next day? Thanks!
These reheat pretty well in the oven! And you can always make the dough ahead of time 🙂
It seems that I cann’t see some pictures from your website, maybe something wrong with my net, but it is very good tip for making bread, I like baking, thanks very much
Hi! Just follwed your recipe and it turned out well. My breadsticks were just as you described- it was soft yet chewy throughout. I didn’t get the golden crust though- my bread was done before it has the chance to brown at the top. (The bottom was a different issue however, it was really browned but not bitter thank goodness. And it was really crunchy which I really liked)
Anyway, is it supposed to be a bit sweet? I can definitely taste the sugar on my batch. Next time, I’ll halve the sugar on the dough.
I only made half the recipe btw because those breadsticks are huge to my liking. I made 12 1-oz pieces instead and it was perfect for us. Thanks for the recipe!
Thank you sooo much for sharing. We don’t have Olive Garden in Germany, but I have been in the US and tried them and was really glad I was able to serve these to my family here. I made them quite a few times and everybody just loves them. Thank you!!
I’ve been using this recipe for a little while now and my family is absolutely in love with it! Thank you for sharing it!
These came out great! 2 tbsp. of butter for the topping sounded like a lot, but it’s definitely not. Also I added oregano to the topping. Yummy!
Yummy… Bread… butter… garlic… I just can’t have enough of them.
I have a big italian dinner in the spring. I’d like to make these a couple of weeks in advance and freeze them. ANy suggestions?
thankyou very much
Uhmmm, just want to say that you are missing the alfredo sauce (recipe) that used to be served with the breadsticks at Olive Garden. Now, we have to request the alfredo sauce separately and I’m not sure that we don”t pay extra for it. Little serving dishes of sauce for each person makes it OK to double dip, LOL. I think there is a low fat recipe available on the net. Good breadstick recipe!
Speed method- Make the dough as directed using a metal or glass bowl. Bring a small saucepan of water to a simmer and set the bowl with dough in it on the sauce pan. Make sure you oiled the bowl as directed and oiled the top of the dough and placed plastic wrap over it directly on top of the dough, not across the top of the bowl ( helps keep the warmth in). Let it sit for about 20 minutes, or doubled in size. Reheat the sauce pan of water to boiling and heat your oven to the WARM setting. Roll your dough out as directed and put the sheet of breadsticks and the pan of boiling water in the oven. Let it sit until almost doubled, then remove both pans and heat the oven the rest of the way, keeping the bread sticks warm. Cook as directed.
Makes super soft, light and fluffy, breadsticks in a fraction of the time! I started the recipe at 5 and my family finished eating all the breadsticks by 7 if that tells you anything. Less than 1.5 hours for fabulous breadsticks hot from the oven!
I made these last night and they turned out amazing! AND…I have to confess I probably did everything wrong. (i.e. I used regular flour, I rushed the rising process with a warm oven by almost an hour, and I put them too close together on the baking sheet so they were touching after the second rise). So that’s how good this recipe is…If I can do it all messed up and still get amazing breadsticks you know it’s a ‘keeper’!!! >)
I’m so happy they turned out for you despite the changes you had to make. Thanks for leaving a comment!
The results in putting in the garlic is great I will make it again
Glad to hear it!
I made this last week and they turned out great I’m making them again right now but this time I put in 1/2 tea garlic will let you know the results
mix the dough smelled great
Doesn’t Olive Garden use olive oil on top? I could be wrong, but I didn’t think it was butter.
Welcome home sent me
Welcome Home sent me over.
Welcome Home sent me, but you will keep me!
I made these over the weekend and they turned out really dense and doughy, even after I baked them for longer. Any idea what I did wrong?
Hi Rachel, so sorry these didn’t turn out! I know how disappointing that can be. It sounds like you may have used too much flour in the dough. Did you weigh the dough or measure with cups? Shortly after publishing this post I realized there was a small error from the conversion calculator I used to determine the flour’s volume measurement in cups based off the weight of the flour (which is what I used to make this recipe), which I adjusted as soon as I noticed on the same day. I really recommend weighing out your flour when baking, as noted in the headnote of this recipe, because it really helps to guarantee the best and most consistent results. Hope that helps you figure out what could have gone wrong.
These paired with my copycat olive garden salad recipe would be heavenly!
Olive Garden breadsticks are my favorite!!!!
That’s mainly the only reason I go to Olive Garden.
But I’m sorry, on your recipe you have 3 cups (16 oz) of bread flour…
But 3 cups is not the same as 16 oz…. So which one is it? 3 cups or 2 cups (16 oz) ???
Hi Emily, every single cup of any dry ingredient does not always weigh 8 ounces. In fact, flour often weighs almost half of that per cup. I’ve slightly adjusted the recipe to more accurately reflect this after weighing a cup of bread flour in my kitchen and getting 4.7 ounces, slightly more than this guide dictates: http://www.thekitchn.com/weight-conversions-for-flour-sugar-and-other-common-baking-ingredients-171316
These look delicious! Is it possible to use all purpose flour or will that completely change the outcome of the recipe?
The bread flour helps make these breadsticks nice and chewy, though you can use all-purpose flour the texture will just be a little different.
Yum! I love the breadsticks from Olive Garden. Will try out this recipe soon!
These sound amazing, Tessa! I should make some next time we have pizza. 😀
Isn’t it annoying how some days just snowball? Here’s to staying creative! 🙂