


Tessa's Recipe Rundown
Taste: I absolutely adore the fresh, earthy, piney taste of rosemary, especially when combined with salty Parmesan cheese!
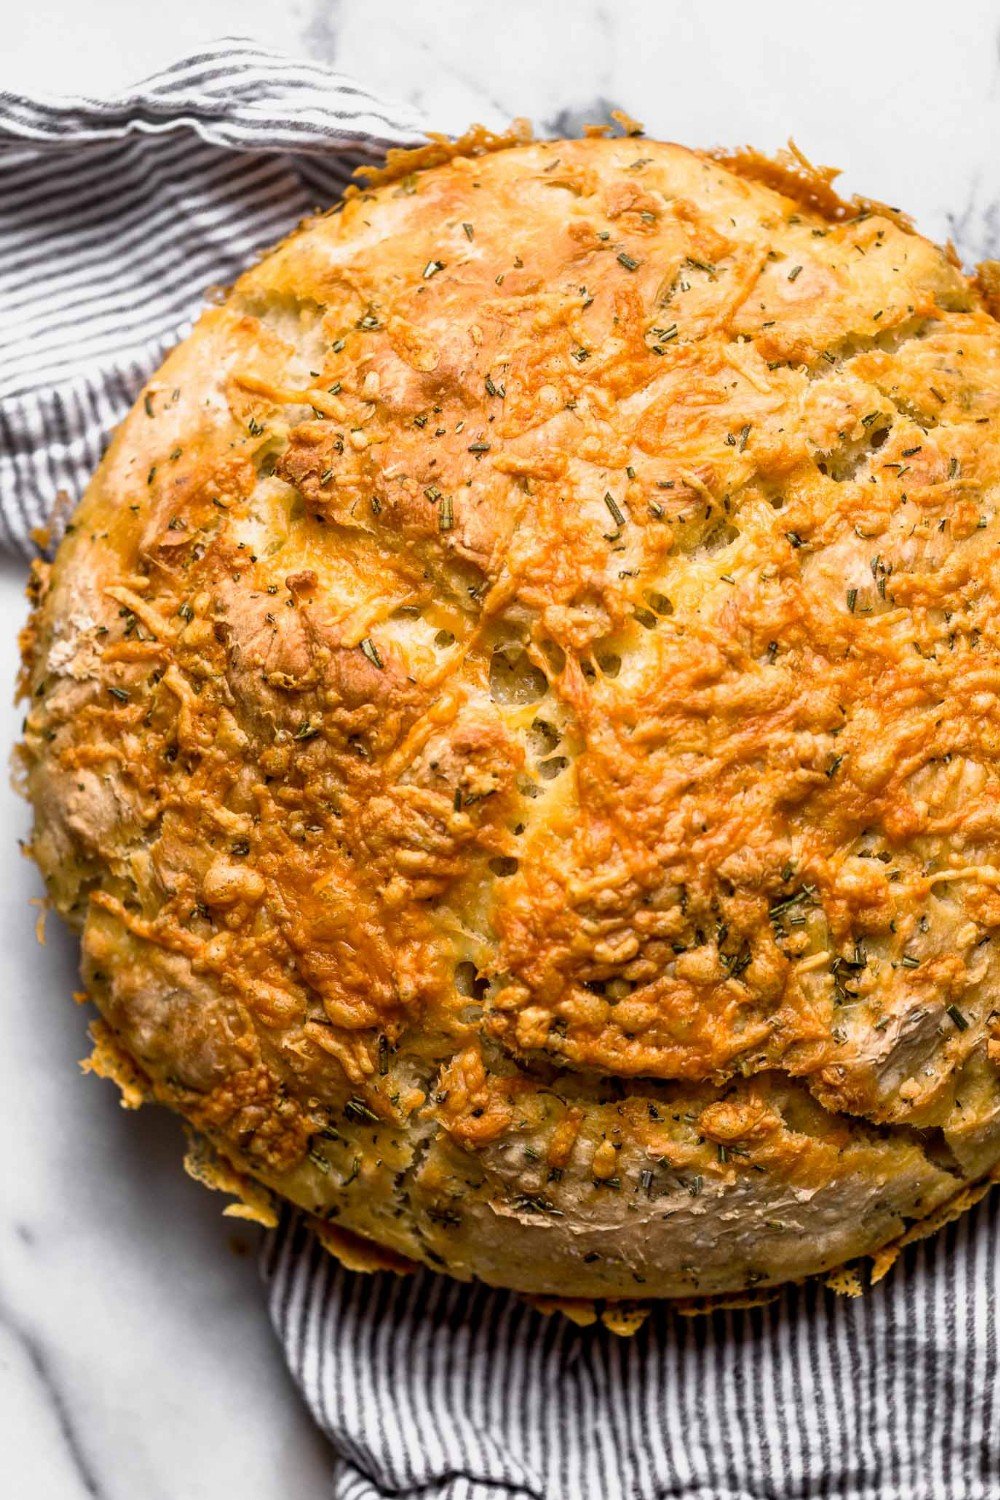
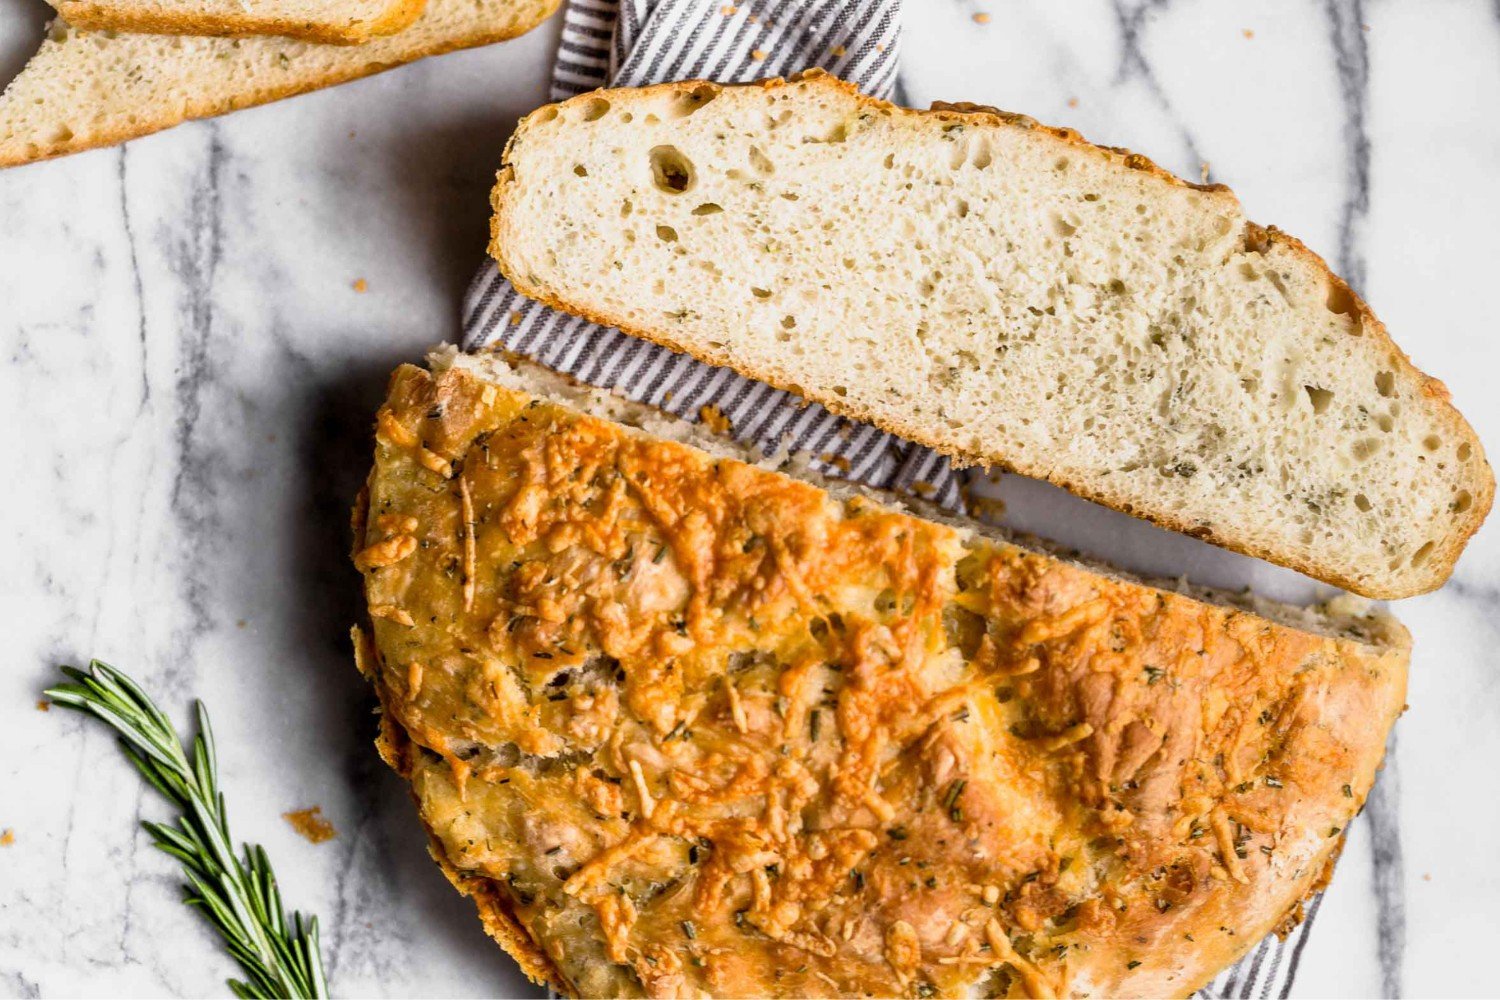
Texture: The bread develops a wonderfully crisp, rich crust, while the inside is light and tender.
Ease: Ridiculously easy.
Why You’ll Love This Recipe: The dough comes together in a matter of minutes and using the cast iron pan means no shaping. Not to mention it creates a beautiful crust!
This post may contain affiliate links. Read our disclosure policy.


Bread really doesn’t need to be intimidating or complicated, which is why I love to share recipes like this super easy No Knead Rosemary Parmesan Skillet Bread!
It’s so simple, and the perfect beginner bread if you’ve never baked your own bread before.
There’s nothing like a loaf of fresh-baked bread, warm from the oven! The smell is absolutely intoxicating. I think I was born to bake bread. It’s one of my very favorite things to do.
Check out my tips and answers to FAQs in the Sprinkle of Science box below!

Sprinkle of Science
How to Make No-Knead Rosemary Parmesan Skillet Bread
Which Yeast Should I Use for Skillet Bread?
- No Knead Rosemary Parmesan Skillet Bread utilizes a shortcut ingredient: instant yeast, also called rapid rise or quick rise yeast.
- One of the three should be available at most grocery stores or you can buy my all-time favorite yeast on Amazon.
- These types of yeast are specifically formulated to allow you to skip proofing (aka the step where you combine the yeast with warm liquid for 5 minutes). You can add instant yeast directly into the mix with all of the ingredients.

What if I Only Have Active Dry Yeast?
If you don’t have or can’t find instant yeast, you can easily use active dry yeast instead at a 1:1 ratio. Add it right in with the dry ingredients like instant yeast, but just note that the dough will take about 20% longer to rise.
Alternatively, you can speed up that rise time slightly; simply combine it with the warm water and a pinch of the sugar called for in the recipe, and allow it to proof until it becomes bubbly (about 5 minutes) before adding into the bowl with the other ingredients. Learn more about the different types of yeast, and how to substitute yeasts, here.
How to Tell When Dough Has Risen
- After mixing, place the dough in a lightly oiled mixing bowl or directly into the oiled skillet.
- I like to take a picture of the dough before rising, so I can compare to see how much it has risen later.
- Cover the bowl or skillet loosely with plastic wrap. Let the dough rise in a warm, draft-free location.
- The amount of time the dough will take to rise depends on your kitchen environment.
- Ideal rise temperatures are between 80°F and 90°F.
- Lower temperatures will require more rising time; hotter temperatures will require less rising time.
- The dough is done rising when it’s about doubled in volume and puffy.
Can I Mix Up the Toppings?
Absolutely! Feel free to add different herbs and spices, change up the cheese, and experiment with adding other toppings. Crumbled feta or goat cheese, torn fresh mozzarella, olives, cherry tomatoes, or fresh garlic cloves are all delicious touches. Homemade everything bagel seasoning also adds a fun flavor.
How to Serve No Knead Rosemary Parmesan Skillet Bread
- Serve alongside a delicious soup, like my Chicken Pot Pie Soup
- Dip the bread in oil & balsamic
- Slather with butter
- Serve with pasta
- Or any other way your heart desires!
More Recipes You’ll Love:
- Garlic Knot Rolls – soft, fluffy, and drenched in garlic butter!
- Copycat Olive Garden Breadsticks
- Red Lobster Homemade Cheesy Garlic Biscuits
- Homemade Hawaiian Rolls
- Ultimate Dinner Rolls
- Focaccia Bread

Email This Recipe
Enter your email, and we’ll send it to your inbox.
Ingredients
- 2 1/4 teaspoons (1 package) instant yeast
- 2 cups lukewarm water (about 100°F)
- 4 1/2 cups (574 grams) all-purpose flour,
measured correctly - 2 tablespoons chopped fresh rosemary, plus more for sprinkling
- 1 1/2 teaspoons fine sea salt
- 3 tablespoons olive oil, divided
- 1/4 cup grated parmesan cheese

Instructions
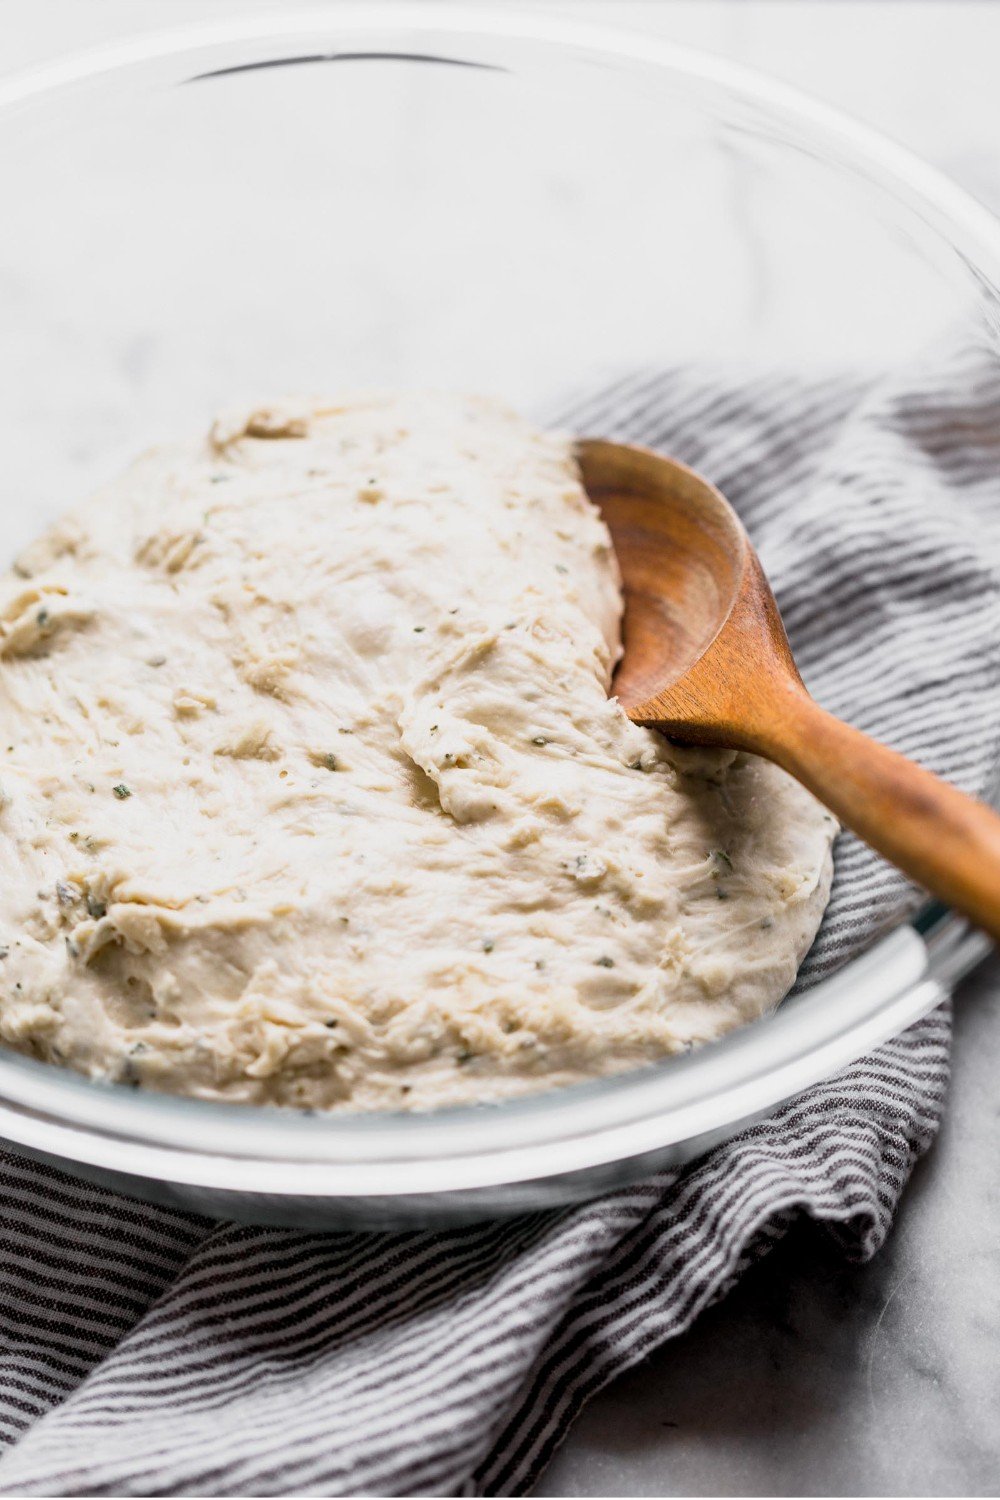
- In a large mixing bowl, combine the yeast and water. Add half the flour in and stir with a wooden spoon. Add the rosemary, salt, and remaining flour and stir until combined. Cover with plastic wrap and let rise in a warm place until doubled in size, about 1 hour. Or, you can let the dough rise in the skillet (next step).
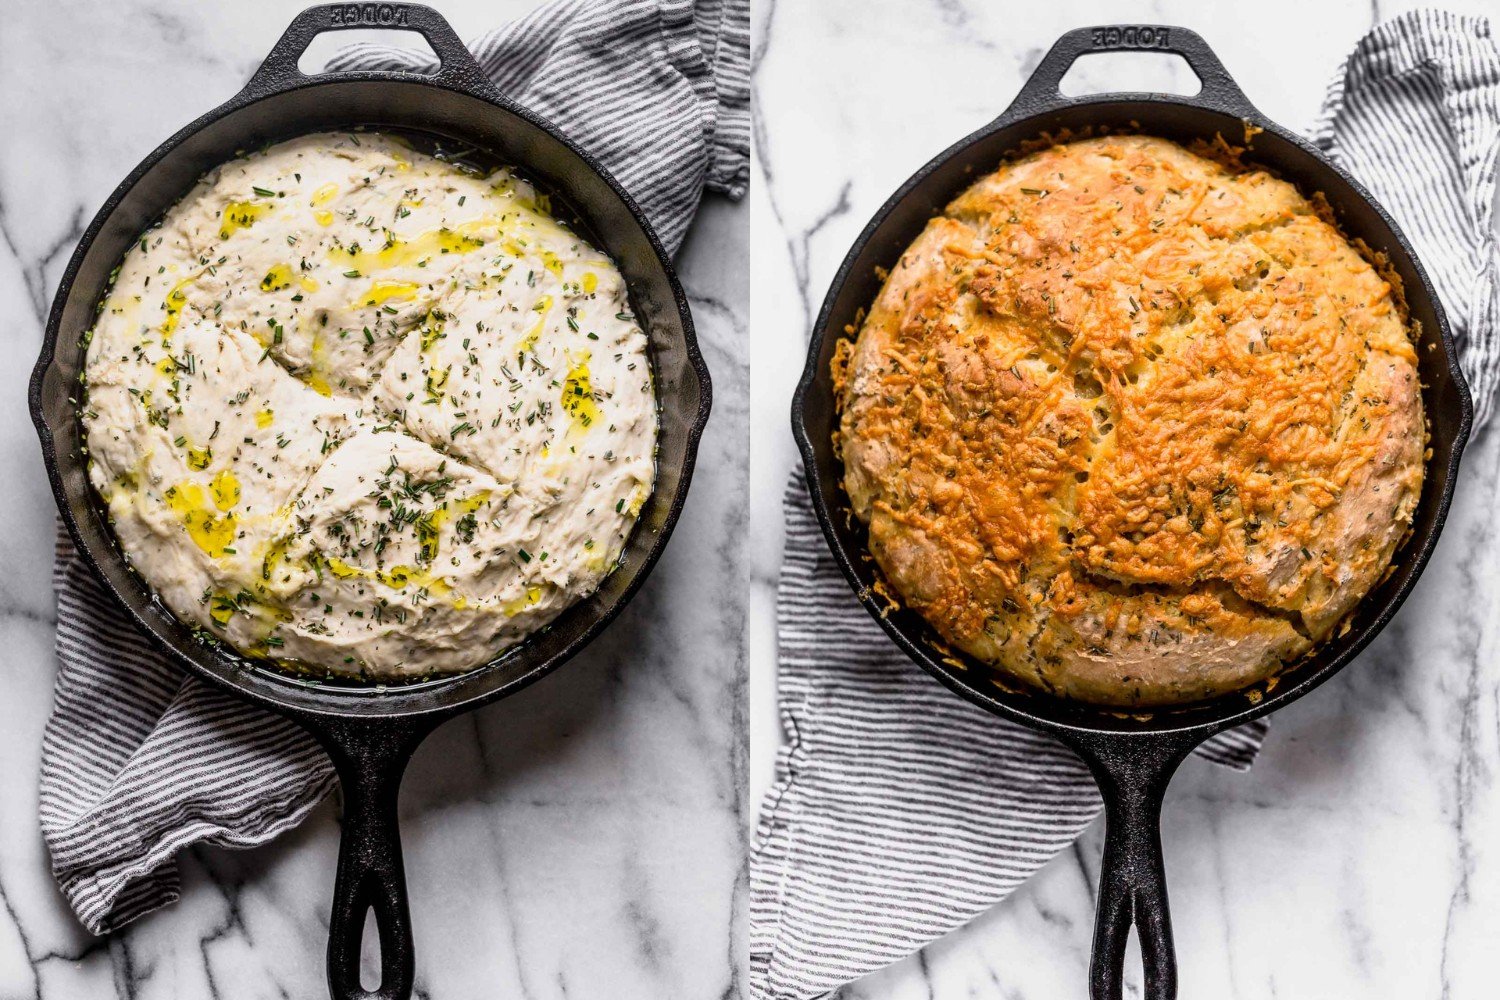
- Brush 2 tablespoons olive oil over the bottom of a 10 or 12-inch cast iron skillet. Sprinkle the dough and your hands with flour before shaping it into a disk. Dough will be sticky, it doesn’t have to be perfectly shaped. Place in the skillet, cover loosely, let rise until puffy, about 30 minutes.
- Meanwhile, preheat the oven to 400°F.
- Drizzle additional olive oil over the top of the bread. Slash the dough with a sharp knife to create an X shape. Sprinkle with rosemary leaves. Bake for 20 minutes. Remove from oven and sprinkle all over with the Parmesan cheese. Return to oven and bake for an additional 20 minutes, or until golden brown.
Notes
This post was originally published in 2016 and has been updated with additional baking tips. Photos by Jess Larson.


After 1st rise, can you refrigerate dough for a few hours before 2nd rise in skillet before baking? I have an appointment in the middle of my day but would like to still serve this warm at dinner.
Hi Torie! We haven’t tested making this recipe ahead, but that should work just fine! Once you have done the first rise and shaped the dough in the skillet, as you noted, be sure to cover well with plastic wrap (but not too tightly, as it will continue to rise in the fridge, but much slower; you just don’t want the dough to dry out in the fridge!). Then you can refrigerate during your appointment! Pull the dough out of the fridge before you’re ready to bake, loosen the plastic wrap, and ensure it’s had its full second proof. The second proof could take awhile, or not much time at all – it all depends on the ambient temperature in your kitchen. The dough is fully proofed when an indentation made with your finger into the dough remains. Proceed with the recipe as written. I hope that helps! Let us know how it turns out! 🙂
I made a gluten free batch of these tonight that are just excellent! I followed the recipe exactly except I used 1/2 Bob’s Red Bill 1 to 1 baking flour and 1/2 almond flour and added 1 tsp of xantham powder. I’ve been cooking GF for many years and tried a lot of bread recipes that were awful so this is very exciting. Especially for my GF husband. 🙂
So wonderful to hear that, Poppy!
hi, I’m confused. you say to let the dough rise, or in the next step, then give someone different directions in one of the comments. please clarify what exactly to do cuz I’d like to make this soon for turkey day. thanks!
Hi Tina! You can follow the directions listed in the recipe! The comment I believe you may be referring to was giving another reader directions for overnight proofing; something we haven’t tested ourselves with this specific recipe, but we were trying to give the best advice we could based on our experience with other breads. I hope that helps! Please let us know what you think of this skillet bread once you have tried it out 🙂 Happy baking!
I’ve made this recipe many times as bread and as rolls. I’ve never been disappointed. In fact, the family requests rosemary rolls for every holiday now lol. I’m going to try making a Gluten Free version.
So glad to hear these are such a hit for you, Poppy!
Do not use commercial powered Parmesan cheese. Looked awful, burnt. Brushed it off and added some Pcheese flakes. Yummy, yummy, yummy!
This bread is very easy and very tasty! I have one complaint——-the recipe says to add “GRATED” Parmesan cheese! Well that is wrong! I used grated Parmesan and it just browned on top of bread and didn’t melt into it. What you need to use is SHREDDED PARMESAN!
Other than that the bread turned out perfect and delicious.
Sorry for the confusion there, Jody! “Grated” vs. “shredded” can be interchangeable terms in some parts of the country/world, so it can definitely get confusing! I’m so glad you still enjoyed your skillet bread!!
Can you proof this over night?
Hi Jean! We haven’t tested making this recipe ahead, so we cannot guarantee the same wonderful results, but my advice would be to let the dough rise once, shape it, and then cover well with plastic wrap (but not too tightly, as it will continue to rise in the fridge, but much slower; you just don’t want the dough to dry out in the fridge!). Refrigerate up to 24 hours. Pull the dough out of the fridge a little before you’re ready to bake, loosen the plastic wrap, and ensure it’s had its full second proof. The second proof could take awhile, or not much time at all – it all depends on the ambient temperature in your kitchen. The dough is fully proofed when an indentation made with your finger into the dough remains. Proceed with the recipe as written. I hope that helps! Let us know how it turns out! 🙂
Great recipe! Fast, easy and delicious. It has become my go-to bread recipe.
So happy to hear that, Connie!!
What a great recipe! I’ve made it a number of times and tried separating the dough into rolls last time which was a big success. In fact tomorrow is Easter and these will be the star attraction if you asked my kids. Thanks so much for the recipe.
Hmmm… my dough did not rise or double
I Followed instructions well
I used captuto 00 flour… could that be why?
What would make dough not rise or double? I used the yeast etc.. any advice
The “bread” tastes great but it’s more like a chubby biscuit rather than a loaf of bread
Ty in advance
Hi Deb! We haven’t tried this recipe using 00 flour, so I can’t say how that would affect the texture, but it shouldn’t have been what prevented the dough from rising. I wonder if your yeast wasn’t fresh. Follow the instructions listed in THIS ARTICLE to test your yeast. Also, do you use a digital scale to measure your ingredients? I’m so glad that the bread tasted delicious, but hopefully you give this recipe another try! I’d recommend making the recipe as written with AP flour next time. Please let me know if you have any other questions, and let us know how your second attempt goes! 🙂
Great recipe! So simple, easy and delicious.
This was a great quick bread to have with pasta. I forgot to pick up rosemary at the store so just used garlic powder and put some Parmesan cheese in the dough (saw another reviewers post). I sprinkled Italian herbs on the bread instead. It was wonderful!
Thanks for the great recipe, I’m sure I will be making it again!!
So glad you enjoyed this recipe!