


Tessa’s Recipe Rundown
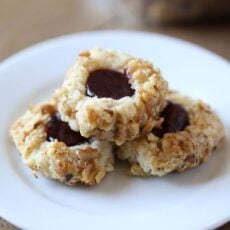
Taste: Fruity, nutty, and sweet!
Texture: Rich, crunchy, and slightly crumbly.
Ease: Super simple, it just takes a few extra minutes for making and filling the jam thumbprints.
Pros: Perfect addition to any cookie tray!
Cons: None.
Would I make this again? Definitely, and next time I’ll use whatever jam or preserves I pick up at the farmer’s market.
This post may contain affiliate links. Read our disclosure policy.
When life feels crazy, the best thing to do is to bake the stress away. Baking is my happy place.
Can you relate?
It’s relaxing, therapeutic, and you’re rewarded with something delicious to share at the end.
When I’m feeling overwhelmed, I like to enter my kitchen to bake away the stress. Usually I go for a tried-and-true recipe I know will turn out delicious. Often I like an intermediate recipe, something that’s easy enough not to screw up if I get distracted, but hard enough that it requires my focus.
That way my time in the kitchen is all about being present in what my hands are doing. It’s a form of meditation, truly!
That’s how I felt when making these Raspberry Walnut Thumbprint Cookies. Chopping the walnuts, shaping the dough, filling the indentations with jam. It’s all extremely relaxing to me.
This recipe was actually developed in partnership with California Walnuts. I knew I wanted to find a fun way to showcase the walnuts on the outside of a treat, not just mixed into the dough or batter.
This Raspberry Walnut Thumbprint Cookie recipe utilizes a simple shortbread dough for its base. To get the walnuts to stick to the outside, we use egg whites as a “glue” of sorts. Although raspberry is my favorite filling flavor, feel free to use whatever jelly, jam, or preserves you have on hand.
Use a kitchen scale to measure your ingredients
Since it’s so easy to accidentally add too much flour to any recipe when measuring with measuring cups, be careful to either use the spoon and level flour method, or use a kitchen scale. You can learn more about proper measuring when it comes to baking here.
Why use a cookie scoop?
Using a stainless steel spring-loaded cookie scoop when portioning out cookie dough is one of the KEYS to beautiful, uniform, evenly-shaped and evenly-baked cookies. My cookie scoop is one of my most frequently used kitchen gadgets. A spring-loaded scoop saves you *so much time* in forming the balls of dough. When using a scoop, you ensure each ball is evenly sized so the cookies bake evenly, meaning you don’t have any small overbaked cookies or large underbaked cookies. Learn more about Cookie Scoops and how to use them here!
Let me see what you make!
If you make this recipe, be sure to tag me on Instagram and use #handletheheat so we can all see your creation!
Email This Recipe
Enter your email, and we’ll send it to your inbox.
Ingredients
- 2 sticks (227 grams) unsalted butter, at cool room temperature
- 2/3 cup (133 grams) granulated sugar
- 1 teaspoon vanilla extract
- 2 cups plus 2 tablespoons (272 grams) all-purpose flour
- 1/4 teaspoon fine sea salt
- 2 large egg whites, beaten
- 1 cup finely chopped California walnuts
- 1/2 cup raspberry preserves or jam

Instructions
- Preheat the oven to 350°F. Line large baking sheets with parchment paper or silicone baking mats.
- In the bowl of an electric mixer, beat the butter, sugar, and vanilla on medium high speed until light and fluffy, about 2 to 3 minutes. Add the flour and salt and beat until just combined.
- Using a spring-loaded cookie scoop, shape the dough into 1-tablespoon balls. Dip each ball in beaten egg whites, then roll in the chopped walnuts. Press the nuts to adhere to the dough. Place on prepared baking sheets, spacing about 2-inches apart.
- Bake for 12 minutes, until cookies are puffy.
- Remove from the oven and make an indentation in the centers with the blunt round end of a wooden spatula or spoon. Continue to bake for about 2 to 3 minutes, or until the edges are golden brown.
- Remove from oven and spoon about 1/2 teaspoon of preserves into each indentation. Let cool on baking sheets for 5 minutes before removing the cookies to wire racks to cool completely before serving.
- Cookies can be stored in an airtight container at room temperature for up to 3 days or in the fridge for 1 week.


Why is there no egg added to the cookie mix?
Hi Marlene! These cookies were formulated to use just 2 egg whites, rather than whole eggs. The egg whites help provide enough structure and stability without making the dough too rich and chewy. Let us know if you give our recipe a try!
These are my daughter in laws fave cookies! Just wondering can I make the dough and freeze it?
Hi Jeanne! We haven’t tried freezing this dough, but that should work just fine. Check out Tessa’s article about freezing cookie dough and how to bake from frozen 🙂 Happy baking!
These are my favorite cookies and I have been making them for years, but it seems each year they spread more and more. I have used your recipe and did all the measuring, resting in the refrigerator actually overnight and then freezing before baking, but they were sad puddles when I baked them. Yummy flavor for sure, but do you have any other tips for making them so they don’t flatten out? I am at high altitude, would that be the problem?
Hi Debbie! It sounds like you’re doing everything right, and I don’t think your high altitude should be messing with these cookies because they don’t contain leavener (forgive me if I’m wrong there – none of us in the HTH team have ever lived at high altitude!) You can read more about baking at high altitude over at King Arthur Baking Co’s website here. Something that could be causing your cookies to become sad puddles like that is the temperature of your butter when creaming (too warm, perhaps), and/or how long you’re creaming your butter/sugar for. Have a look at this article, where Tessa discusses both and the repercussions on the resulting baked goods. If you’ve tried altering these things, I would recommend switching to a bleached flour, if you don’t already use one – bleached flour tends to yield slightly thicker cookies. You can also try adding a couple extra tablespoons of flour, just to give them a little more structure. I hope something here helps, Debbie! Good luck 🙂
I lived in Aspen at around 8,000 ft elevation and every recipe must be adjusted for altitude! Here are some suggestions. Reduce the sugar. Decrease sugar by 1 tablespoon per cup.
Increase the flour. Add 1 tablespoon of flour at 3,500 feet. Add an additional tablespoon for each additional 1,500 feet.
Increase the baking temperature. Increase the oven temperature 15 to 25° F. Also, they may take longer in the oven. You can Google other high altitude cooking tips as well. It was definitely challenging! I hope this helps!
This has been my family’s favorite cookie recipe for the past few years. They are always begging me to make it and I love your easy instructions. Thank you!!
This has been my family’s favorite cookie recipe for the past few years. They are always begging me to make it and I love your easy instructions. Thank you Tessa! P.S. just made some tonight to satisfy my kids cravings.
So happy to hear that, Liza! Glad it’s a family favorite 🙂
I’ve made these cookies regularly for the last three years – to give as gifts, to bring to people’s houses, to snack on! They’re perfectly delicious and so easy to make! They’re always on my holiday cookie list. I’ve never had an issue with the cookies spreading out during baking after following the instructions exactly. Thanks Tessa for the awesome recipe!!
I’m thrilled to hear this! Thank you so much for the kind feedback.
I tried this recipe with out the egg whites and nuts on the outside, I put violet confit in them! Amazing!
One issue I tend to have tho is that my cookies melt out all over the pan/get much flatter and wider than the picture…..
is it because I didn’t do the egg whites and nuts on the outside?
I added more flour and it helped, I also refrigerate my dough and that helped some too,
What else is going on that makes shortbread bleed out like that?
I use a scale for ingredients and do know since I’m in florida my room temp is way warmer than average, should I just refrigerate dough longer?
Even tho my cookies shape was off the flavor was amazing
Love them! Did have to bake a few minutes longer.
I also added a splash of almond extract. Yum! Simple and delicious!
Are the centers in these soft or were mine just underbaked? I even popped them in the oevn a few minutes linger but the middles were still pretty soft.
Can you tell me what I did wrong? Mine spread out too much . I think too much butter?
Hi Rona, your butter was probably too warm when it entered the oven. Be sure to use butter at a cool room temperature, or try freezing the raw balls of dough for 10 minutes before popping in the oven to reduce spread.