


Tessa’s Recipe Rundown
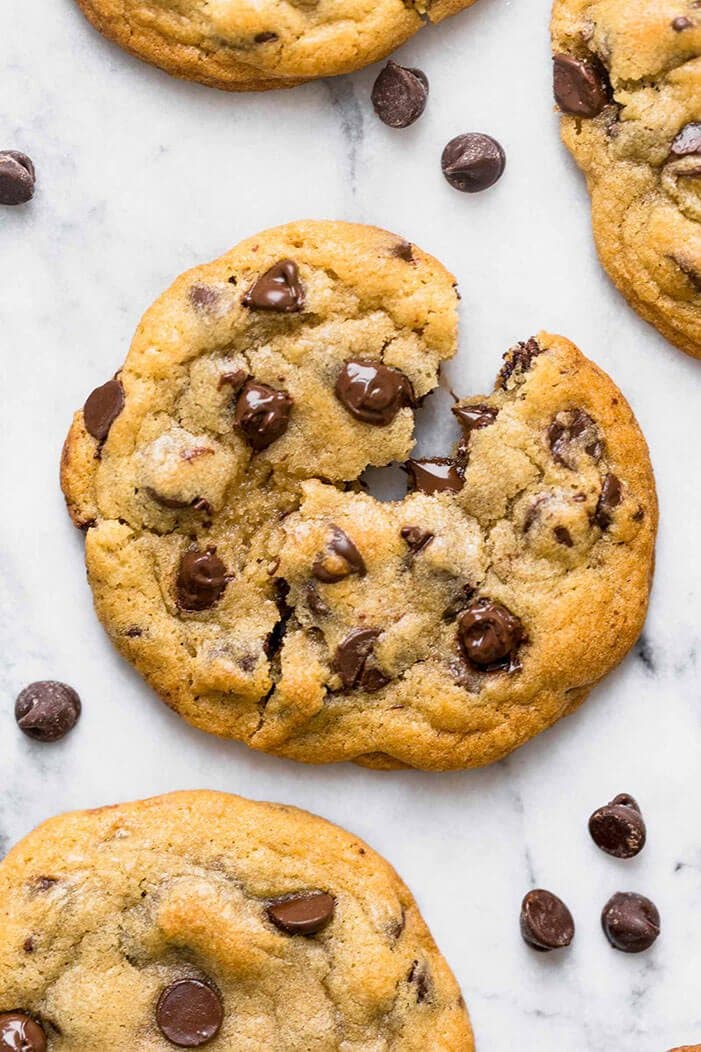
Taste: Full of sweet butterscotch & chocolate flavors, exactly how a chocolate chip cookie should taste!
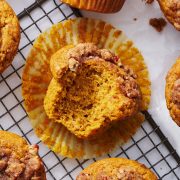
Texture: Thick and chock full of gooey chocolate with slightly crisp edges.
Ease: Super easy 30-minute recipe.
Why You’ll Love This Recipe: Easy, delightful chocolate chip cookie recipe. I’ve made this recipe probably 100 times always have the dough in my freezer for when the craving strikes.
This post may contain affiliate links. Read our disclosure policy.
My favorite type of recipe to bake is absolutely COOKIES. They’re so fun and simple and can teach us SO much about the science of baking.
The Ultimate Guide to Chocolate Chip Cookies is still one of my most popular posts, visited by over three million people!
That post inspired the creation of my second cookbook, The Ultimate Cookie Handbook. And since THOUSANDS of you have purchased that cookbook, I think it’s clear that we’re all obsessed with cookies here.

What Makes Cookies Chewy, Crisp, or Cakey?
My free guide reveals the ingredients and tweaks that matter.
That’s why I’m SO thrilled to share this Bakery Style Chocolate Chip Cookie recipe with you today. In my opinion, it’s the perfect easy everyday chocolate chip cookie recipe. This homemade recipe is simple to make and yields thick, beautiful golden brown cookies, crisp at the edges and gooey at the center.
Watch the video below to step into my kitchen and see exactly how to bake these delicious cookies with me. I give tons of tips and tricks for getting perfectly thick cookies with chocolate chunks, and you can see what every step of this recipe should look like!
I love this time-lapse video of these cookies cooling right after I took them out of the oven. You can see that they hardly shrink or deflate as they cool. If you only beat the butter and sugar for 2 to 3 minutes max, your cookies shouldn’t deflate!


Sprinkle of Science
How to Make The Best Bakery Style Chocolate Chip Cookies
How to Make Soft Chocolate Chip Cookies
The key to the best soft, Bakery Style Chocolate Chip Cookies is to take the chocolate chip cookies out of the oven just before they look like they’re done baking. They should still appear slightly wet in the very center. The residual heat of the oven and pan will finish cooking the cookies through to soft perfection once you allow them to cool completely.
Also, measure your flour correctly to improve your baking forever. Too much flour will lead to dry, dense, or crumbly chocolate chip cookies that barely spread.
Why Are My Chocolate Chip Cookies Flat?
When making cookies, be sure your butter is at a cool room temperature before beating with your sugar. It shouldn’t be greasy or overly soft otherwise it’ll melt and spread the cookies too much.
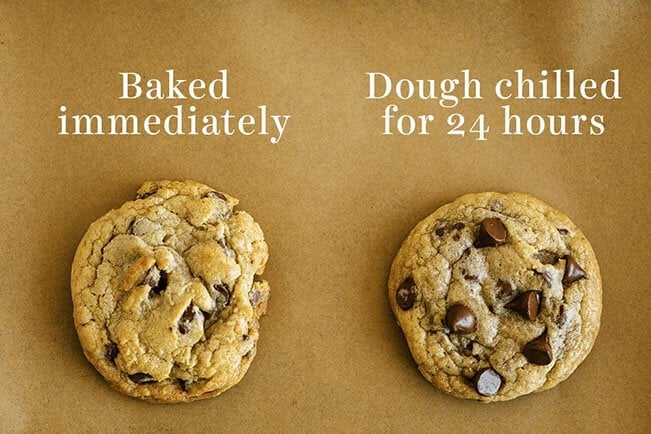
The warmer your chocolate chip cookie dough is when it enters the oven, the thinner and flatter your cookies will be. To prevent flat cookies, try freezing your balls of cookie dough while your oven preheats. Learn more about how to bake THICK cookies here.
Better yet, refrigerate your chocolate chip cookie dough for 24 to 48 hours. This ‘marination’ process will transform your chocolate chip cookies by making them thicker, chewier, and more flavorful! Plus, this is a perfect way to make your delicious cookies ahead of time. Read more about the magic of chilling your cookie dough here. NOTE: chilling is OPTIONAL for this recipe but using chilled dough will enhance your cookies!
How to Make CHEWY Chocolate Chip Cookies
One of the keys to CHEWY chocolate chip cookies is to use more brown sugar than granulated sugar. The molasses in the brown sugar draws in more moisture, making the cookies thicker, softer, and chewier.
For extra chewy cookies, try adding an extra egg yolk to this recipe. You can also replace half or all of the all-purpose flour in this recipe with bread flour for an ultra-chewy bite.
How to Bake Chocolate Chip Cookies
For the BEST Bakery Style Chocolate Chip Cookies, make the recipe below keeping these top tips in mind:
- Use a kitchen scale to measure your ingredients for the BEST most consistent results.
- Make the recipe exactly as written, without substitutions, at least the first time you bake it.
Use the correct baking pan and a spring-loaded cookie scoop for bakery-quality cookies at home. More on that below!
Why Use a Cookie Scoop?
Using a stainless steel spring-loaded cookie scoop when portioning out cookie dough is one of the KEYS to beautifully uniform, evenly-shaped, evenly-baked cookies. My cookie scoop is one of my most frequently used kitchen gadgets. A spring-loaded scoop saves you *so much time* in forming the balls of dough. When using a scoop, you ensure each ball is evenly sized so the cookies bake evenly, meaning you don’t have any small overbaked cookies or large underbaked cookies. Learn more about Cookie Scoops and how to use them here!
What’s the Difference Between Baking Soda and Baking Powder?
Baking powder and baking soda are both chemical leaveners that work to create light textures in baked goods.
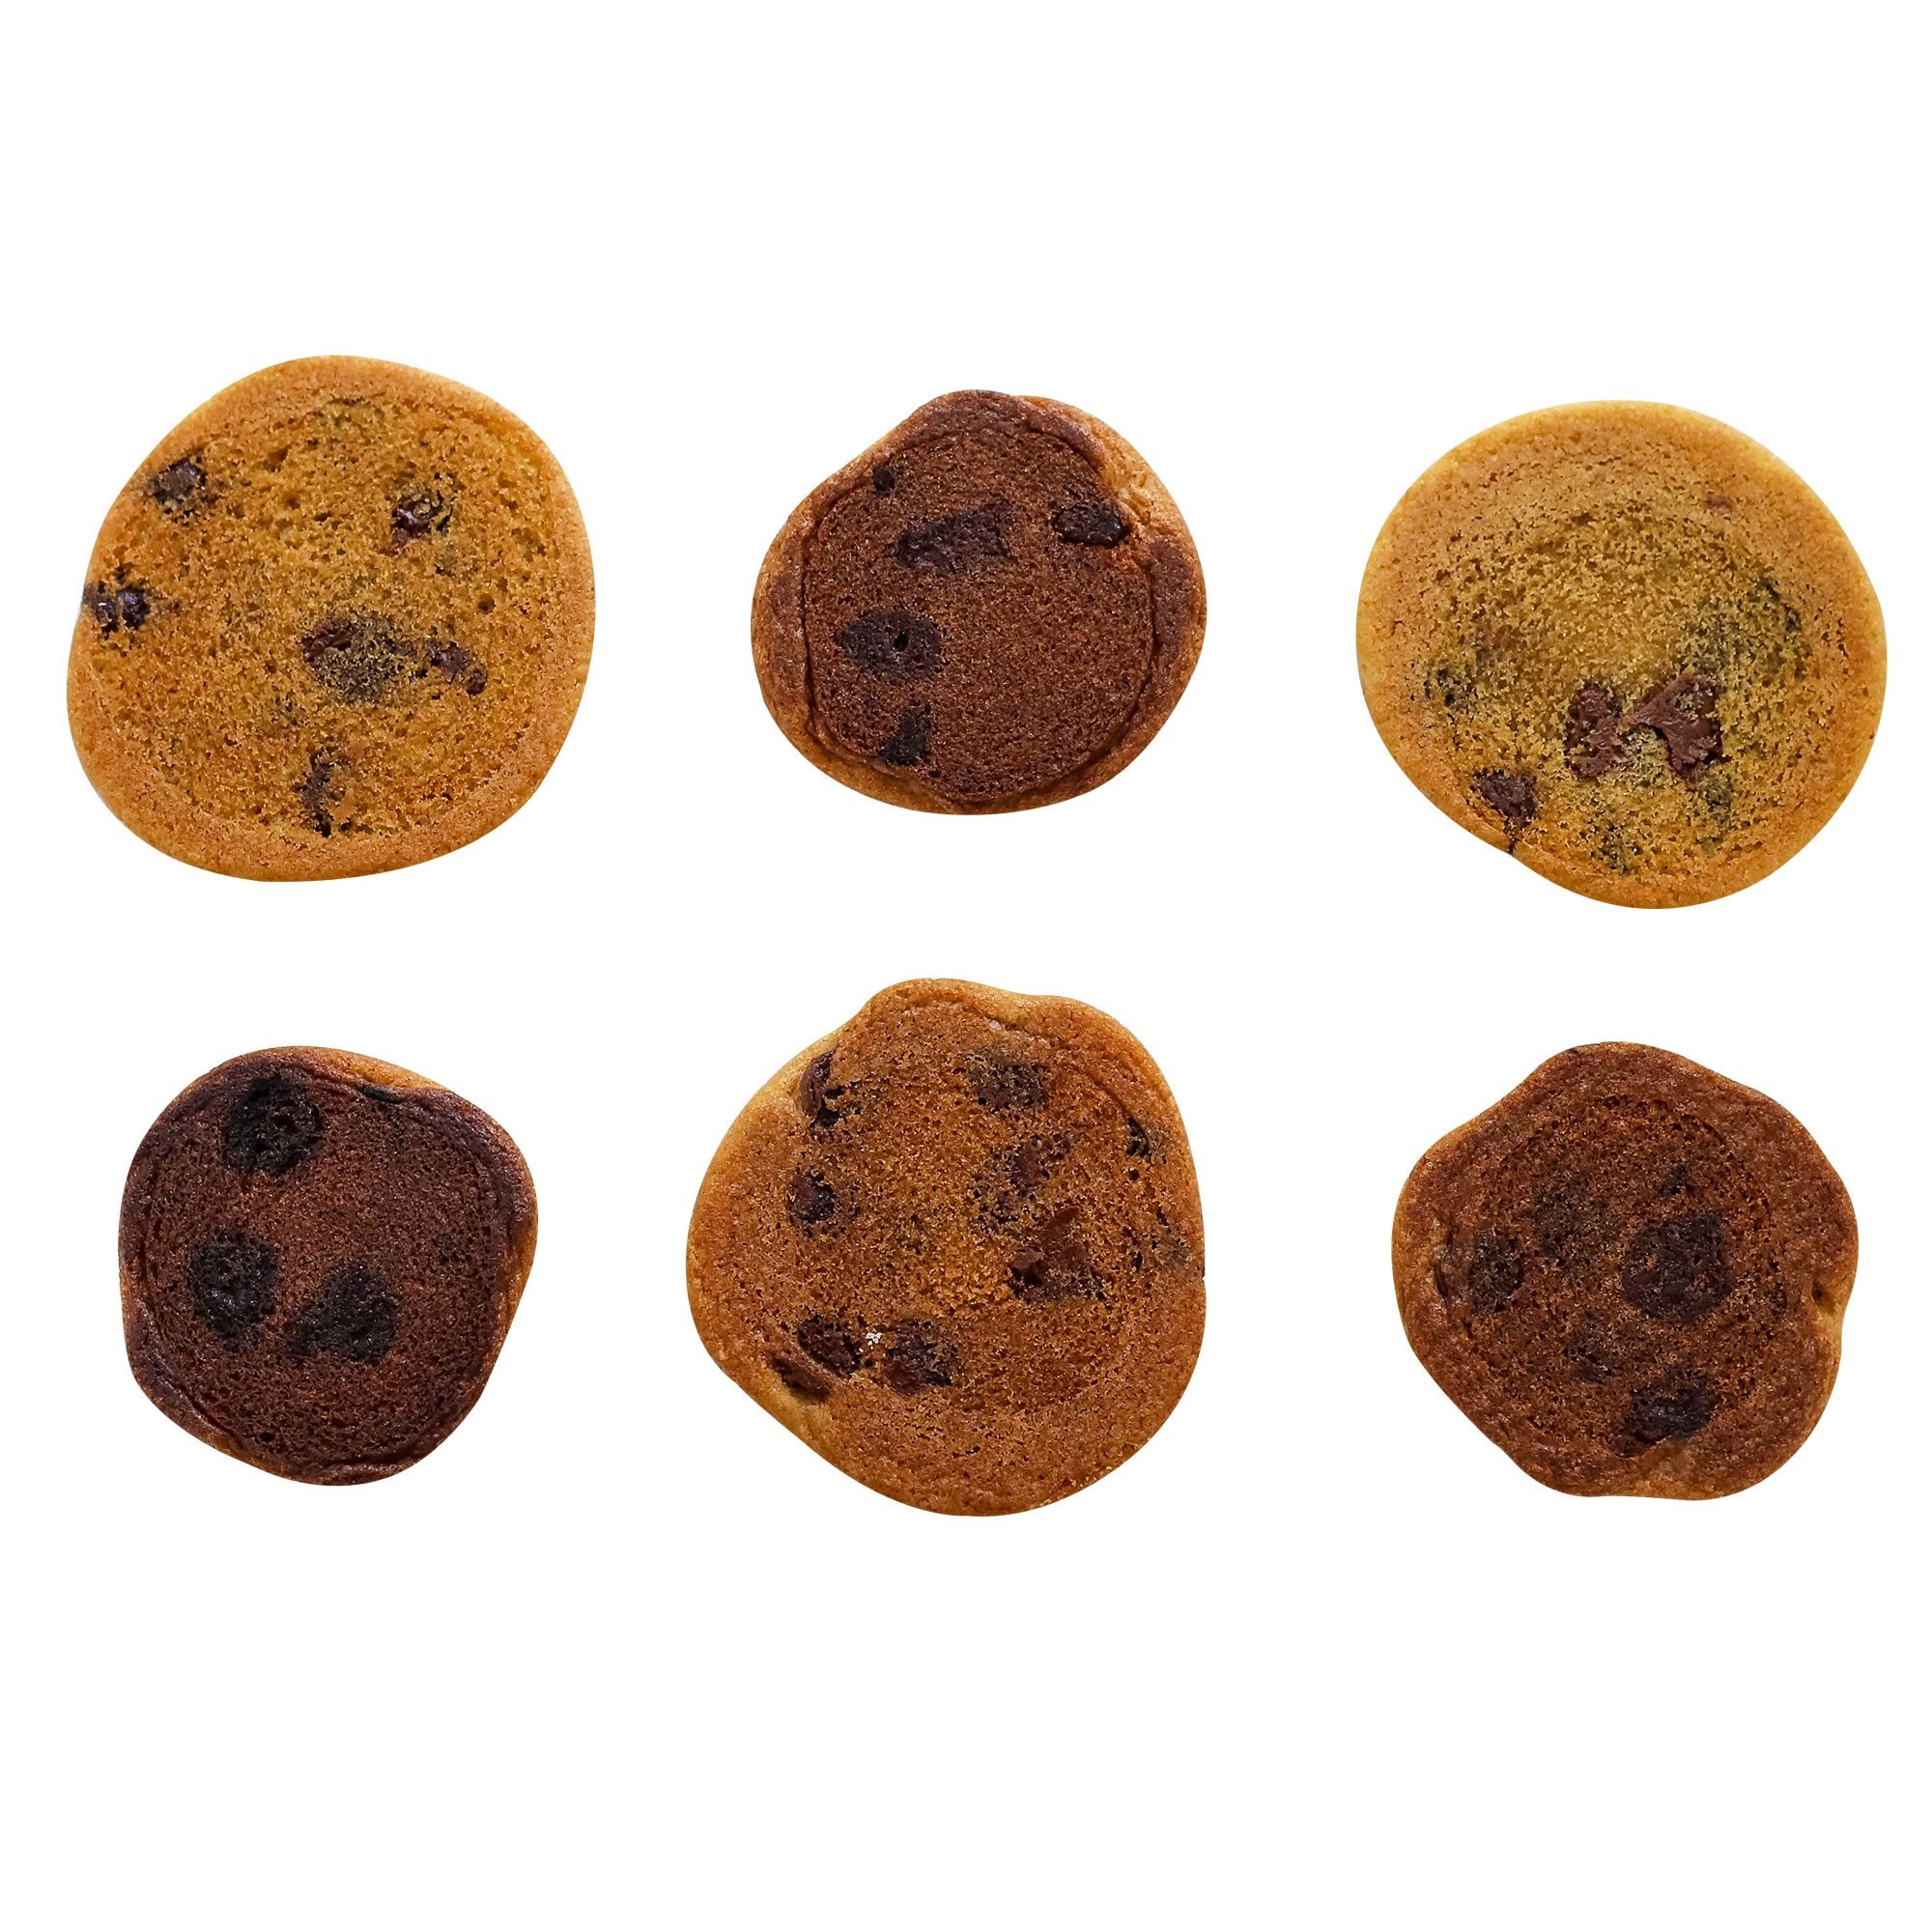
Although baking powder actually contains baking soda, the two leaveners are very different. Baking powder and baking soda are not interchangeable – just take a look at the impact the type of leavener used had on each of the cookies below, and find out more in my Baking Soda vs. Baking Powder article here.

Which Baking Pan is Best for Cookies?
Take a look at the chocolate chip cookies below. These cookies are all the same batch of cookie dough, baked at the same temperature of 350°F, baked for the same amount of time of 12 minutes. The only difference? The type of baking pan used!
Check out my Best (and WORST) Baking Pans article here for more details on the science of baking pans.
How to Keep Chocolate Chip Cookies Fresh
The best cookies are the freshest, there’s no magical way around that. However, here are a few tricks to keeping them fresh and soft for as long as possible!
Can You Freeze Chocolate Chip Cookies?
I love the taste of cookies straight from the oven the best. I always keep pre-scooped balls of chocolate chip cookie dough in a resealable bag in my freezer, so I can bake cookies off and have them warm from the oven in a matter of minutes whenever I want. Here are more tips for freezing cookie dough.
But for those times when you need to keep already-baked cookies soft, see below for my tips. First of all, most cookies can be stored in an airtight container at room temp for up to 5 days. Be sure they are completely cooled before storing.
How to Keep Cookies Soft
To keep your baked chocolate chip cookies soft, you can add an apple wedge, piece of bread, or a tortilla on the top and bottom of the cookies to the container a day or two after baking them, or whenever you find the texture starting to harden. The moisture from the bread or apple will migrate to your cookies, making them soft and chewy again.
A tortilla is a favorite of mine because it takes up much less room than a slice of bread, and doesn’t transfer any flavors or aromas like an apple wedge. Not to mention, it fits into a round cookie tin pretty perfectly.
How to Refresh Stored Cookies
What I like to do is reheat and refresh the cookies in a 350°F oven for 3-5 minutes. Your toaster oven should work just fine. This improves the texture and there’s nothing like a warm chocolate chip cookie!

Tessa’s Favorite Tools for This Recipe:
- Large 3-tablespoon size cookie scoop for that bakery-style texture
- Or use a medium 1.5-tablespoon size cookie scoop and bake only for about 10-12 minutes instead
- Nordic Ware Natural Aluminum Baker’s Half Sheet won our side-by-side comparison of the best baking pans
- 12″x16″ non-stick parchment paper for the best bake and easiest cleanup!
- The Ultimate Cookie Handbook: Your Guide to Baking Perfect Cookies Every Time by Tessa Arias
More Chocolate Chip Cookie Recipes:
- Ultimate Chocolate Chip Cookies (these are CHEWIER than this recipe)
- Coconut Oil Chocolate Chip Cookies (dairy-free)
- Browned Butter Toffee Chocolate Chip Cookies (ultra flavorful!)
- Marbled Chocolate Chip Cookies (classic and double chocolate chip cookie dough in one cookie!)
- Peanut Butter Chocolate Chip Cookies (for serious PB lovers only!)
See ALL of my types of cookie recipes & cookie baking tips here!

Bakery Style Chocolate Chip Cookies

Email This Recipe
Enter your email, and we’ll send it to your inbox.
Ingredients
- 3 cups (380 grams) all-purpose flour**
- 1 teaspoon baking soda
- 1 teaspoon fine sea salt
- 2 sticks (227 grams) unsalted butter, at cool room temperature (67°F)
- 1/2 cup (100 grams) granulated sugar
- 1 1/4 cups (247 grams) lightly packed light brown sugar
- 2 teaspoons vanilla
- 2 large eggs, at room temperature
- 2 cups (340 grams) semisweet chocolate chips
Instructions
- Preheat oven to 350ºF. Line baking sheets with parchment paper.
- In a medium bowl, combine the flour, baking soda, and salt.
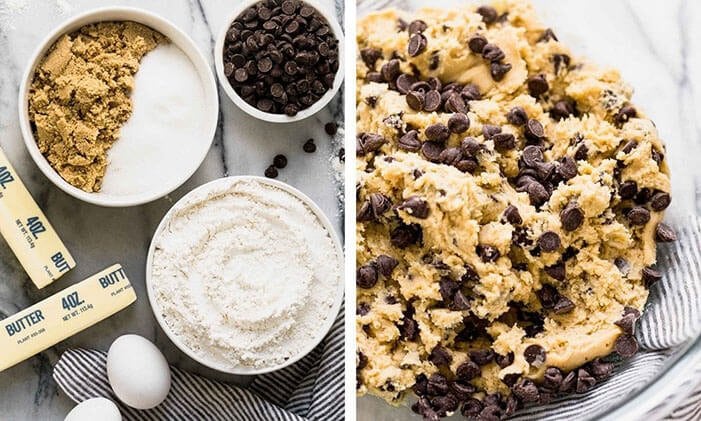
- In the bowl of an electric mixer, beat the butter, granulated sugar, and brown sugar until creamy, about 2 minutes. Scrape down the sides and bottom of the mixing bowl. Add the vanilla and eggs and beat until combined, scraping the bowl down as needed. Gradually beat in the flour mixture. Stir in the chocolate chips.
- If time permits, wrap dough in plastic wrap and refrigerate for at least 24 hours but no more than 72 hours. This allows the dough to “marinate” and makes the cookies thicker, chewier, and more flavorful. Let dough sit at room temperature just until it is soft enough to scoop.
- Divide the dough into 3-tablespoon sized balls using a large cookie scoop and drop onto prepared baking sheets.
- Bake for 11-13 minutes, or until golden brown. Cool for 5 minutes before removing to wire racks to cool completely.
- Although I prefer cookies fresh from the oven, these can be stored in an airtight container for up to 3 days. See post for storage tips.

Recipe Notes

The Ultimate Cookie Handbook
Learn the sweet SCIENCE of cookie baking in a fun, visual way to customize your own recipes frustration-free. Plus, my best 50+ homemade cookies!
Photos by Jess Larson.


Thank you so much for this recipe!!! I tried it and chilled the dough for 24 hours tastes great. But I can’t help but notice the top of my cookies are dome like and don’t have much texture like yours. Anything I could do differently? Thank you!!
Hi Nick! It’s difficult to know exactly what went wrong without having baked alongside you, but I do have a couple of thoughts as to what might have happened. How do you measure your flour? By weight using a digital scale, or by volume using cups? Weighing vs. measuring by volume can have a huge impact on your baked goods. It’s so easy to accidentally add too much flour if measuring by volume, and too much flour can have a huge impact on any baked goods, and this could definitely be why your cookies are domed and don’t have the desired consistency. Tessa talks about how best to measure ingredients in this article here! Another issue could be your leavening agents may not be fresh. If your baking powder or soda are not fresh, this can impact the cookie’s ability to rise and spread properly. Tessa talks about how to test for leavener freshness in this article here! Another thing could be how long you creamed your butter and sugars together for, and how warm your butter was at this time. Both have a huge impact on a cookie’s outcome. Have a look at this article, where Tessa discusses both and the repercussions on the resulting baked goods! Lastly, what type of pan are you baking on? Different materials of pans conduct heat differently, so some will cook the bottom quickly, and not leave the cookie appropriate time to spread out gently and evenly. Tessa discusses and shows the differences between a variety of baking pans in this article here! If you have any other thoughts, please feel free to reach back out to us here, or by emailing [email protected] I’m so glad you still enjoyed this recipe regardless! Thanks for reaching out to let us know!:)
I love these chocolate chip cookies! theyre absolutely delicious! My only question is the sides of my cookie are a little thinner then the middle of my cookie. Any idea why?
Thank you!
Hi Sara! It sounds like the cookies just spread a little in the oven. Especially if the dough is chilled well (or frozen), the outsides can spread a little more than the middles when baking. Tessa has a great hack for solving this issue! Using a round cookie or biscuit cutter that’s slightly larger than the size of your cookies, and swirl the cookie cutter in circles around the cookie edges a few times. Make sure you do this straight out of the oven (before they have a chance to set up). This makes the cookies perfectly round, and pulls those thinner edges back in a little! Here’s a link to a reel on our Instagram, where we shared this fun cookie hack a few months ago 🙂 I hope this helps, and if not, please feel free to reach out again and we can try to troubleshoot with you further! Happy baking 🙂
The best chocolate chip cookie recipe I have ever tried hands down
Wow, what a compliment! So happy you love these cookies, Monica!! 🙂
Hi kiersten 🙂 another quick question. Thank you for answering my previous one, not sure how to get back to that comment its not showing. but my other question was In one of your posts you mention how you should chill your cookie dough before you bake it. I actually want to freeze a good amount of cookie dough for the future. Should I first do 24 hour chill in fridge, then freezer up to 6 months? Or can I just go straight to the freezer? I am a bit confused about that part. I ordered your book so excited for it to be delivered 🙂
Hi Sara! So excited for you to receive the Ultimate Cookie Handbook – there’s sooo much incredible knowledge Tessa drops in there, as well as delicious recipes 🙂
To answer your question, you want to chill your dough for 24-72 hours, then scoop the dough out into balls, and then bake or freeze. Chilling all of the dough together allows the flavors to marinate more deeply, as well as allowing the flour to fully hydrate. Once you put the dough in the freezer, the moisture in the dough will actually freeze; it’s like the dough is in suspended-animation and the flour/starch won’t be able to absorb moisture because the moisture is frozen. Tessa goes into this in more detail about the science behind this, in this article here!
So, we recommend chilling in one big batch for 24-72 hours, and then allow the dough to sit at room temperature until it’s malleable enough to portion out (about an hour, depending on the temperature of your kitchen), and bake, or place in freezer bags or in an airtight container. I hope this helps!
Thank you soo much!! that clarifies things. Does tessa have a certain brands she recommends for the follow?
-baking soda
-unsalted butter
-granulated sugar, light brown sugar
Hi Sara! I’m so happy that helped!! 🙂 Tessa recommends Arm & Hammer baking soda, Challenge unsalted butter, and any standard brand of sugar or brown sugar. Can’t wait to hear what you think of these cookies! Happy baking 🙂
one last question so sorry!! thank you so much for your patience. whats the best way to store baking soda after opening the box?
Hi Sara! No problem at all! Store open boxes of baking soda in a sealed Ziploc bag, or in an airtight container. Make sure you replace it regularly, too! Check out Tessa’s article about how to test for leavening agent freshness, in this article here! I hope that helps 🙂
I need the nutrition facts. Would it be possible to share those? Thank you!
Hi Maria! We don’t have nutritional information for our recipes, but you should be able to find a nutritional calculator online to assist with this, if you wish! 🙂
Sorry, but I am not a fan of this recipe. They were a bit bland. They never flattened and they never browned. Followed recipe to a tee. Had several people taste them and it was a unanimous “thumbs down”.
Hi there! That’s so strange and definitely not how this recipe typically bakes! I personally made these cookies a couple of weeks ago, and they spread perfectly in the oven after a 48-hour refrigerated rest, with beautiful browning and a delicious flavor! It’s so hard to know exactly what went wrong without having baked alongside you, but I do have a couple of thoughts as to what might have happened. How do you measure your flour? By weight using a digital scale, or by volume using cups? Weighing vs. measuring by volume can have a huge impact on your baked goods. It’s so easy to accidentally add too much flour if measuring by volume, and too much flour can have a huge impact on any baked goods, and this could definitely be why your cookies didn’t spread well. Tessa talks about how best to measure ingredients in this article here. Another issue could be your leavening agents may not be fresh. If your baking powder or soda are not fresh, this can impact the cookie’s ability to rise and spread properly. Tessa talks about how to test for leavener freshness in this article here! Lastly, what type of pan are you baking on? Different materials of pans conduct heat differently, so some will cook the bottom quickly, and not leave the cookie appropriate time to spread out gently and evenly. Tessa demonstrates this with lots of pictures in this article here! If you would like to troubleshoot any further, please feel free to reach back out to us here, or by emailing [email protected]
I hope you give these cookies another try sometime – they really are delicious, and even better after a day or two in the fridge, I promise! 🙂
hi! I was wondering, what vanilla extract brand do you recommend? Would you say anything is ok as long as its not imitation?
Hi Sara! Yes, that’s pretty much our rule around here! Real vanilla is so expensive, especially the fancier brands, and you can’t tell much difference once it’s in baking anyway! We typically opt for something I can buy at the supermarket for cookies, cakes, etc, and then splurge a little more on fancier stuff for vanilla frostings or such things, where the pure vanilla flavor will be the real star! I hope that helps! Happy baking 🙂
such a fun and quick recipe I made with my son, but I think I made my ice cream scoops a bit too big. I left them in there for about 5 minutes longer but didn’t want them to burn. Any suggestions?
Hi Brandi! Tessa uses this large Oxo cookie scoop – available on Amazon! Hope that helps 🙂
Hey! Do I have to use brown sugar or can I use only granulated sugar? Thanks!
Hi Tori! The brown sugar adds moisture and flavor to the cookies, and a little acid to activate the leavening agent, so we do recommend it! If you don’t have any brown sugar, you actually can add molasses to granulated white sugar to make DIY brown sugar! Tessa recommends adding 1 Tablespoon of molasses per cup of white sugar. Happy baking! 🙂
Although the cookies tasted pretty yummy, they didn’t flatten in the oven. I’m not sure what went wrong because we followed the recipe exactly as said. The only thing we didn’t do was place the dough in the fridge, but the directions said that putting them in right away would make them flatter, which didn’t happen. Is there anything I can do to fix this in the future?
Hi Kathy! That’s so strange and definitely not how this recipe typically bakes! It’s so hard to know exactly what went wrong without having baked alongside you. I personally made these cookies last weekend, and they spread perfectly in the oven after a 48-hour refrigerated rest. I do have a couple of thoughts as to what might have happened. How do you measure your flour? By weight using a digital scale, or by volume using cups? Weighing vs. measuring by volume can have a huge impact on your baked goods. It’s so easy to accidentally add too much flour if measuring by volume, and too much flour can have a huge impact on any baked goods, and this could definitely be why your cookies didn’t spread well. Tessa talks about how best to measure ingredients in this article here. Another issue could be your leavening agents may not be fresh. If your baking powder or soda are not fresh, this can impact the cookie’s ability to rise and spread properly. Tessa talks about how to test for leavener freshness in this article here! Lastly, what type of pan are you baking on? Different materials of pans conduct heat differently, so some will cook the bottom quickly, and not leave the cookie appropriate time to spread out gently and evenly. Tessa demonstrates this with lots of pictures in this article here! If you have any other thoughts, or would like to troubleshoot any further, please feel free to reach back out to us here, or by emailing [email protected] I hope you give these cookies another try sometime – they really are delicious, and even better after a day or two in the fridge, I promise! 🙂
Egg substitute for cookies and donuts?
Hi Nidhi! Sorry, we don’t test with egg substitutes! Feel free to experiment, though – I know others have had some luck in the past! Good luck 🙂
These were absolutely prefect! My chocoholic family said they were their favorite cookies they’ve had yet! The cookies were thick and chewy, with crispy edges, just as promised! I will definitely be baking these again soon!!
Thrilled to hear your whole family loves these cookies, Victoria!! 🙂