


Tessa’s Recipe Rundown
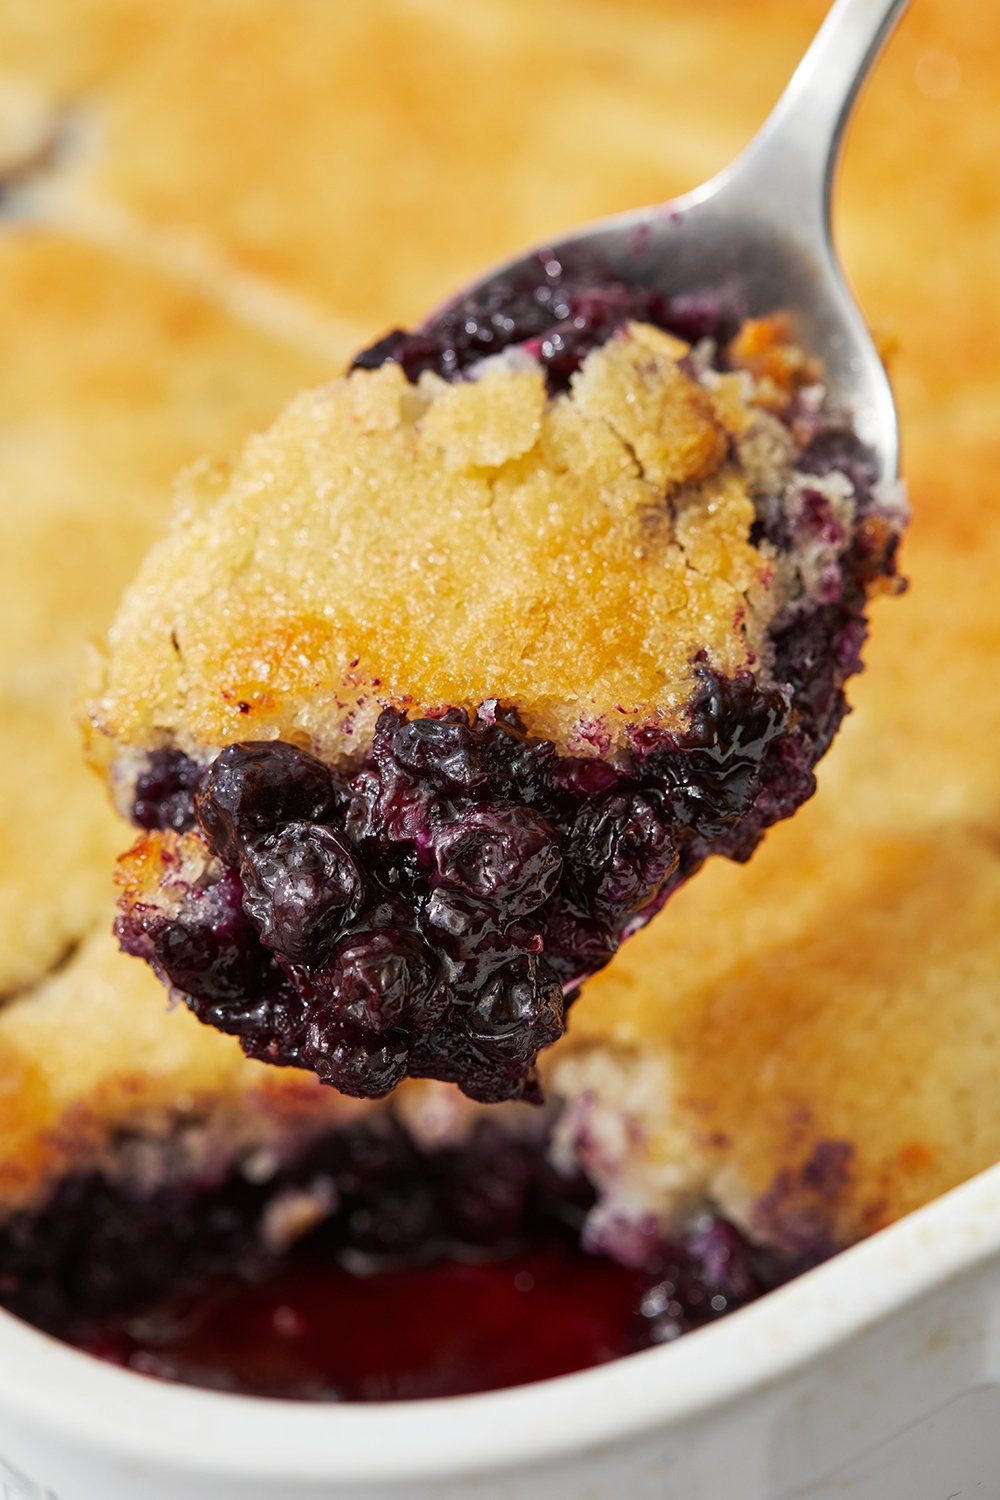
Taste: So fresh and flavorful. Tons of blueberry flavor, with a burst of brightness thanks to the lemon in the filling.
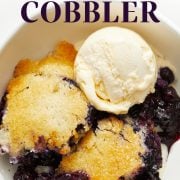
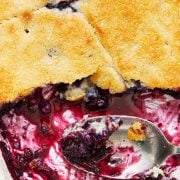
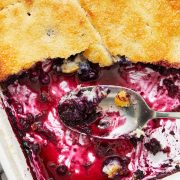
Texture: Perfectly-softened blueberries with a light cakey yet crunchy topping.
Ease: So easy!
Appearance: Rustic beauty.
Pros: Such a perfect summer recipe.
Cons: None.
Would I make this again? Absolutely!
This post may contain affiliate links. Read our disclosure policy.
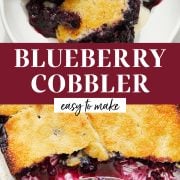
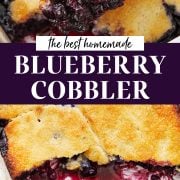

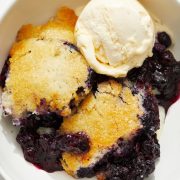
This Blueberry Cobbler recipe is so quick and easy – perfect for any last-minute gathering, picnic, or dinner party. It practically screams summertime.

While I absolutely love my Blueberry Pie recipe, it’s quite a weekend project. So I set out to create a blueberry cobbler recipe that offers the same hit of summertime freshness in far less time.
I thought this would be a super straightforward recipe to nail down.
I was wrong.
This blueberry cobbler took over TEN batches to perfect! Those ten batches were baked across three different kitchens in three different states. It was a group effort!
As always with HTH recipes, we did all this work so you can be confident that this cobbler will turn out perfectly.
So grab your blueberries and let’s make the perfect summer dessert!
How to Make Easy Blueberry Cobbler
What is a Cobbler? Is it Different From a Crisp or a Crumble?
Cobblers, crisps, and crumbles are all fruit bases with topping – but the toppings vary. The definitions of each are surprisingly highly-debated regionally. As I see it, here are the differences:
- Cobbler: Fruit base with a biscuit topping, a cake-like topping, or a cake-like base and topping, like my Peach Cobbler.
- Crisp: Fruit base with a namesake topping consisting of flour, sugar, butter, spices, and sometimes oats, which completely covers the fruit – like my Apple Crisp Recipe.
- Crumble: Think streusel topping. No oats, but sometimes there are nuts instead. A crumble topping can be sandy in texture, or made in large clumps, to partially or completely cover the fruit.
Ingredients for Easy Blueberry Cobbler Filling:
- Blueberries – I highly recommend using both regular blueberries and wild blueberries, for the best taste and texture. You can use fresh or frozen blueberries. More on this below.
- Sugar – Granulated, for sweetness and to help make the filling perfectly juicy.
- Cornstarch– To help thicken the blueberry filling. Skip if using fresh blueberries – they don’t need the additional thickening agent. More on this below.
- Lemons – Blueberries and lemons are the perfect pairing, so don’t skip this! Use both the zest and fresh juice for a beautiful burst of freshness in this filling. If you’re not a fan of lemon, simply omit the zest and reduce the juice to 1 tablespoon.
- Cinnamon – This very slight hint of spice complements the blueberries perfectly.
- Salt – I prefer fine sea salt, but you can use table salt. Learn about the differences between salt types here.

Ingredients for Blueberry Cobbler Topping:
- Sugar – Granulated sugar, for sweetness, flavor, moisture, and more. Learn more about all that sugar does in your baking here.
- All-purpose flour – Measured correctly! This cobbler topping is designed to be light and fluffy, and too much flour will ruin that. Use a digital scale for precision.
- Salt – To help balance the sweetness.
- Baking powder – To lift and lighten this cobbler topping. Be sure to use fresh baking powder. Learn how to test for freshness in my Baking Soda vs. Baking Powder article.
- Butter – Use unsalted butter, for flavor and moisture in this cake topping.
- Buttermilk – This brings the best flavor and texture to the cake topping. More on this below.
- Vanilla extract – For flavor.
- Coarse sugar – Optional, but I love the slight crunch this brings to the cobbler.

How to Make Easy Blueberry Cobbler Recipe:
- Preheat the oven and prepare the baking dish. Preheat the oven to 400°F. Spray a 9×13-inch glass pan with nonstick spray and set aside.
- Prepare the batter. In a 2-cup measuring glass or medium-sized bowl, stir together the wet ingredients. In a separate medium bowl, whisk together the dry ingredients. Add the wet mixture to the dry mixture, stirring until combined and no clumps are visible. Set aside.
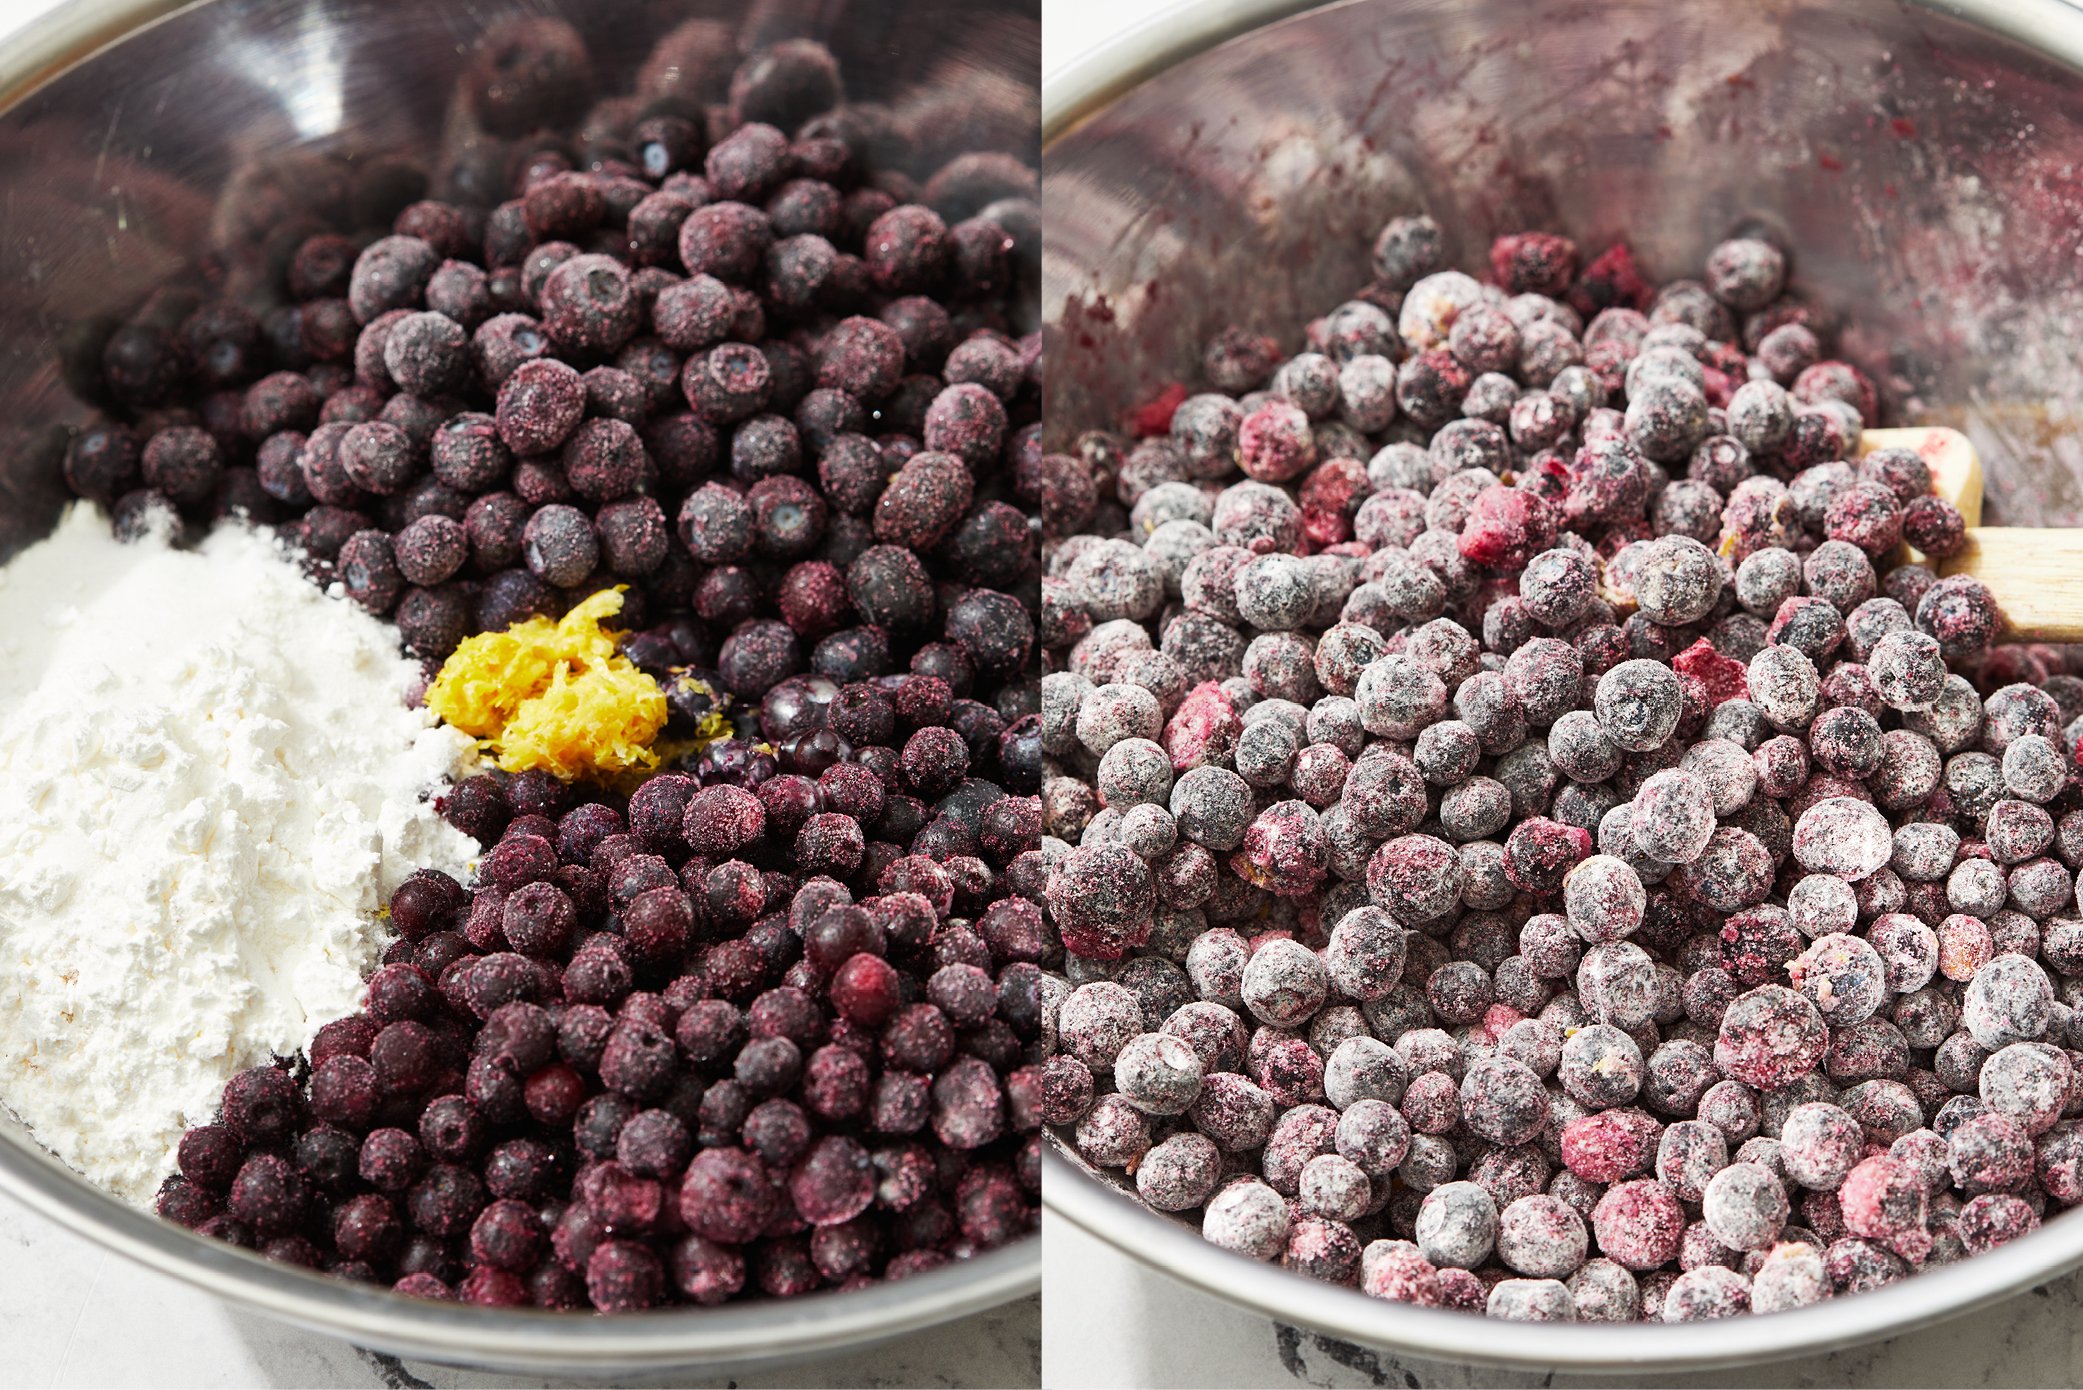
- Prepare the filling. In a large bowl, toss together all filling ingredients.
- Assemble. Spread blueberry mixture evenly into the prepared pan. Pour batter on top of the blueberries, carefully spreading across the top of the berries if needed (but don’t worry if it’s not all the way to the edges!). Sprinkle coarse sugar evenly over the batter.
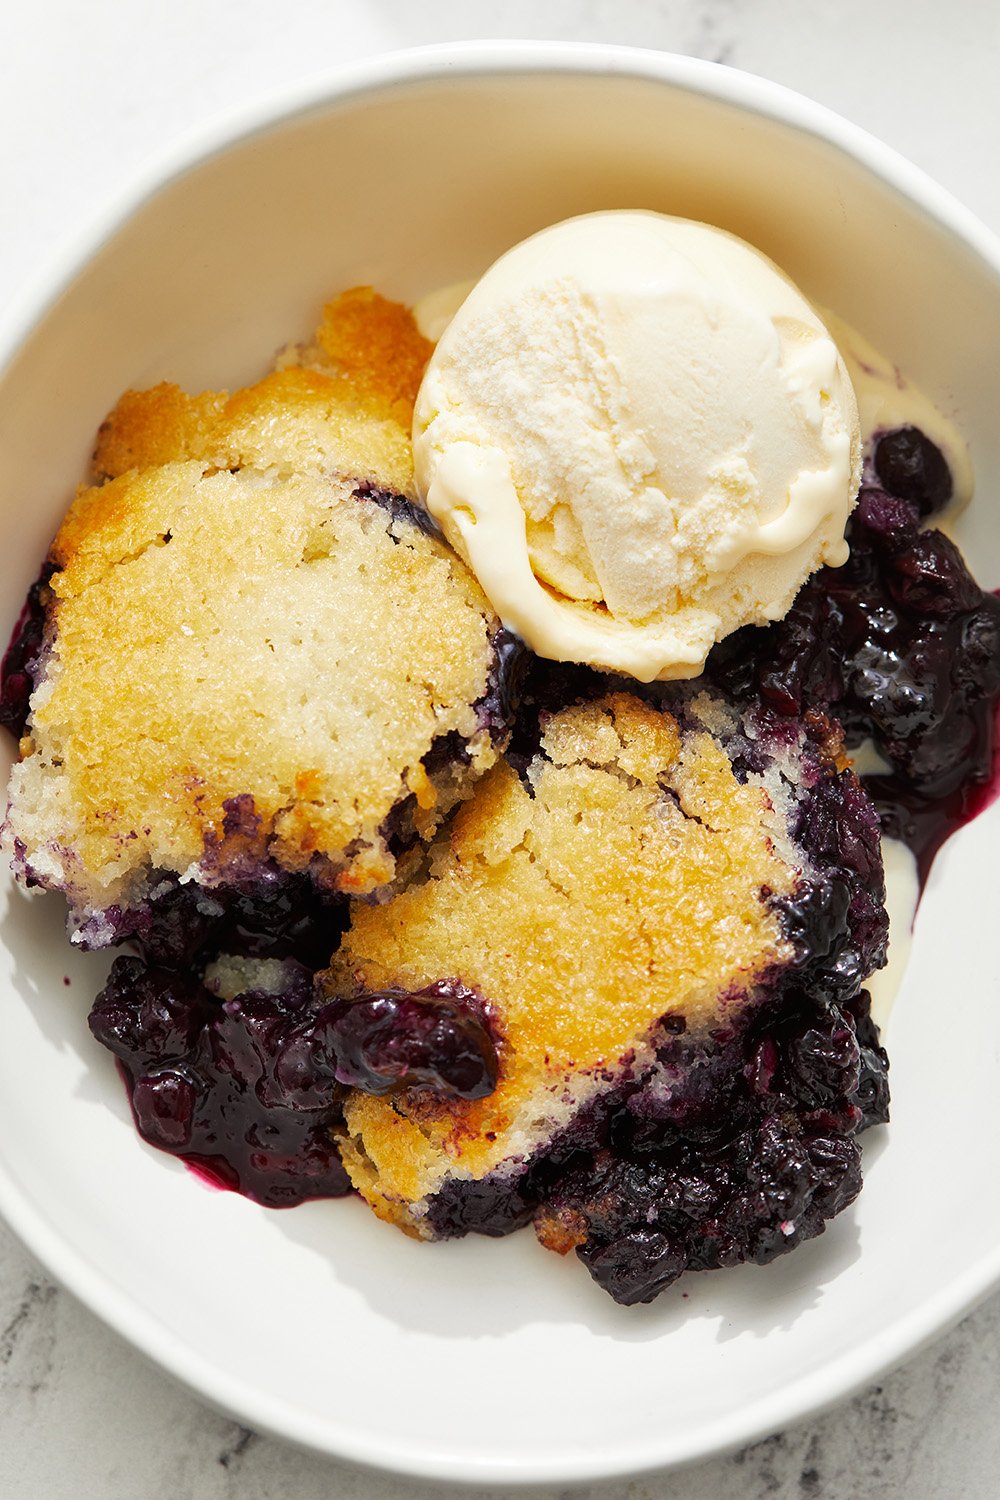
- Bake. Bake for 45 minutes, or until the top is golden brown and set. Use a toothpick or cake tester in several places to check for doneness. Allow to sit until just warm before serving. Serve fresh with vanilla ice cream or homemade whipped cream.
Should I Use Frozen Blueberries or Fresh Blueberries for This Cobbler Recipe?
You can use either! I have included directions in the recipe for using fresh or frozen blueberries. Don’t thaw if using frozen blueberries. If using fresh blueberries, be sure to wash and dry the berries first, and discard any stems.
Can I Use Regular Blueberries Only, Instead of Regular + Wild Blueberries?
Yes – but you’re missing out! Simply use regular blueberries for the total volume/weight of both wild and regular blueberries listed in the recipe.
Here’s Why I Love Wild Blueberries:
- They have an intensely blueberry flavor with a slight tartness.
- They’re smaller in size, so they fill all the little gaps in the filling so you get MORE blueberries and the filling is held together more uniformly.
- Wild blueberries contain less water, so they help the filling set up perfectly.
- You can find frozen wild blueberries in the frozen fruit section at most grocery stores.
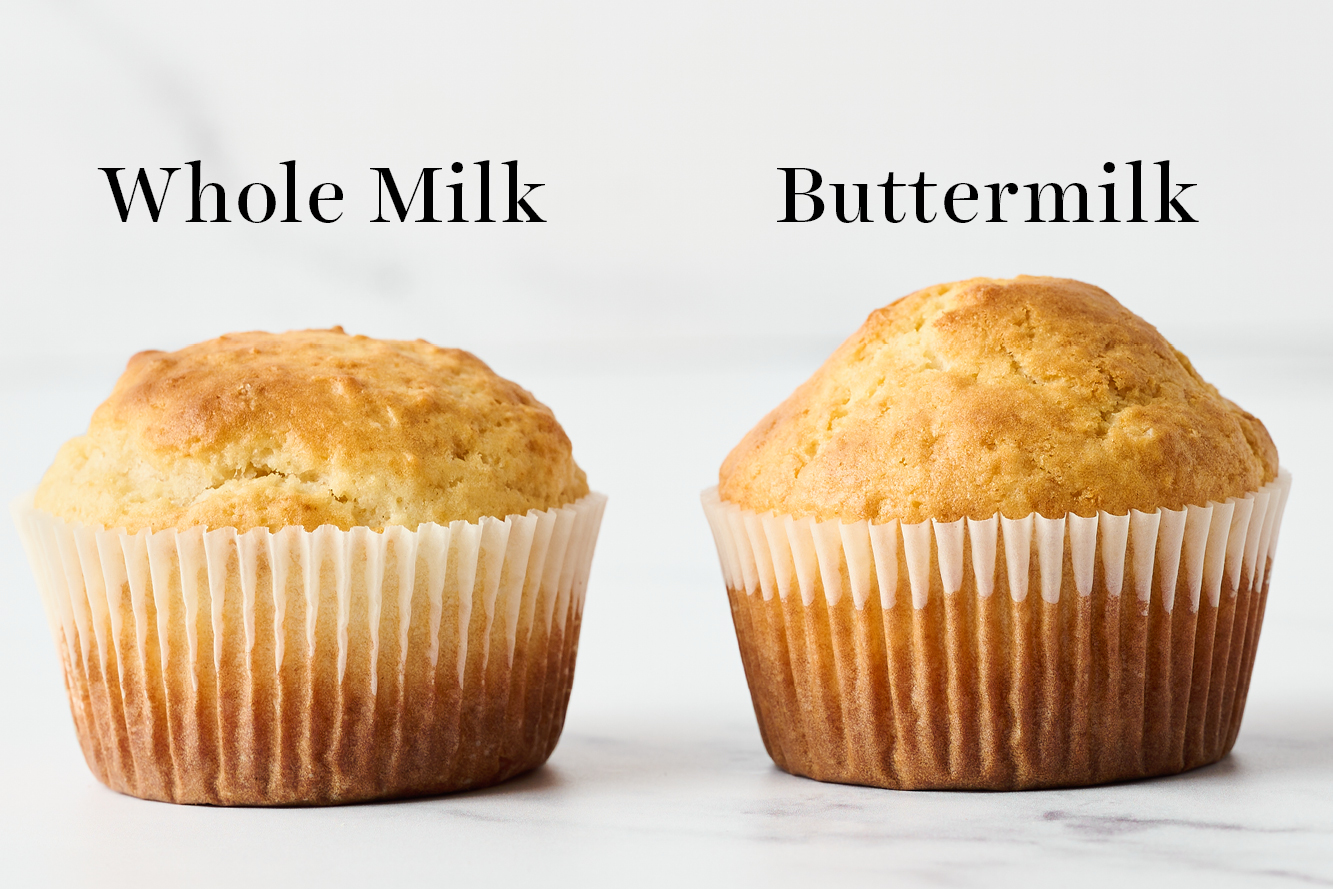
Do I Have to Use Buttermilk?
No – but I highly recommend it. I have included directions for making DIY buttermilk in the instructions, but as demonstrated in my experimenting, nothing compares to real buttermilk. It will yield a thicker, lighter, fluffier topping that sits beautifully on top of the fruit, and it brings a pleasant tang to help balance the sweetness.
Can I Use a Different Fruit?
We haven’t tested this recipe using anything other than blueberries – but let us know in the comments below if you give blackberries, raspberries, or strawberries a try. Just note that the sweetness level and lemon and spice pairing may need some adjustment. Alternatively, check out my Brown Butter Peach Cobbler recipe.
What Pan Should I Use for Blueberry Cobbler?
This is a rare occurrence where I don’t prefer a metal pan! Metal can react to the acidity in the blueberries and lemon, giving an unpleasant metallic taste. We tested this recipe using this 9×13-inch glass pan as well as this ceramic dish. Don’t use a smaller baking dish or your cobbler will overflow.
Can I Halve This Blueberry Cobbler Recipe?
Yes! Halve the recipe, bake in an 8×8-inch glass pan, and shave a few minutes off the recommended bake time.
How Do You Make Blueberry Cobbler Not Runny Or Mushy?
- If using frozen berries, don’t skip the cornstarch. The cornstarch will help thicken those juices that release while baking.
- Be sure to cook it fully, too, as cornstarch doesn’t activate its thickening properties until just over 200°F, so you want the filling to bubble in the oven.
- Cornstarch isn’t needed if using fresh blueberries, as they won’t release as much juice.
How to Store Blueberry Cobbler
To store leftover cobbler, place in an airtight container (or use the lid this pan comes with!) and store in the refrigerator for up to 4 days. Reheating instructions are below, but I also enjoy this cobbler straight from the fridge!
Can You Freeze Blueberry Cobbler?
This recipe isn’t best suited for freezing. For best results, make blueberry cobbler the day you plan to serve. If you need to make this cobbler ahead of time, follow the reheating directions below.
How to Reheat Blueberry Cobbler
To reheat blueberry cobbler leftovers, cover the pan with aluminum foil and bake at 400°F for 10-15 minutes, or until heated through. Reheating in the microwave will result in more of a soggy texture.
Recommended Products:

Email This Recipe
Enter your email, and we’ll send it to your inbox.
Ingredients
For the batter:
- ¼ cup (57 grams) unsalted butter, melted and cooled
- 1 cup (237 grams) buttermilk, or full-fat milk¹
- 1 teaspoon vanilla extract
- 1 cup (200 grams) granulated sugar
- 1 cup (127 grams) all-purpose flour
- 2 ¼ teaspoons baking powder
- ¾ teaspoon fine sea salt
For the filling:
- 4 cups (560 grams) blueberries, don’t thaw if frozen
- 2 cups (280 grams) wild blueberries, don’t thaw if frozen²
- 1/2 cup (100 grams) granulated sugar
- 4 tablespoons (32 grams) cornstarch³
- 1 heaping teaspoon fresh lemon zest
- 1 1/2 tablespoons fresh lemon juice, don't omit⁴
- 1/4 teaspoon fine sea salt
- 1/4 teaspoon ground cinnamon
- Coarse sugar, for topping, optional
Instructions
- Preheat the oven to 400°F. Generously spray a 9×13 glass⁵ or ceramic pan with baking spray.
Make the batter:
- In a 2-cup measuring glass or medium-sized bowl, mix together the cooled butter, buttermilk (or milk and vinegar), and vanilla until combined. In a separate medium bowl, whisk together the sugar, flour, baking powder, and salt. Add the wet mixture to the dry mixture, stirring until combined and no clumps are visible. Set aside.
Make the filling:
- In a large bowl, toss together all of the blueberries with the sugar, cornstarch (if using frozen berries), lemon zest, lemon juice, salt, and cinnamon.
Assemble:
- Spread blueberry mixture evenly into the prepared pan. Pour batter on top of the blueberries, carefully spreading across the top of the berries if needed (but don’t worry if it’s not all the way to the edges!). Sprinkle coarse sugar evenly over batter.
- Bake for 45 minutes, or until the top is golden brown and set, then use a toothpick to test in several places throughout for doneness. The golden brown crust on top can be deceiving. If the toothpick doesn’t come out clean, tent the pan with aluminum foil and place back in the oven for about 5-10 minutes, or until the tester comes out clean.
- Once the cobbler has been removed from the oven, let sit until just warm before serving, about 30 minutes.
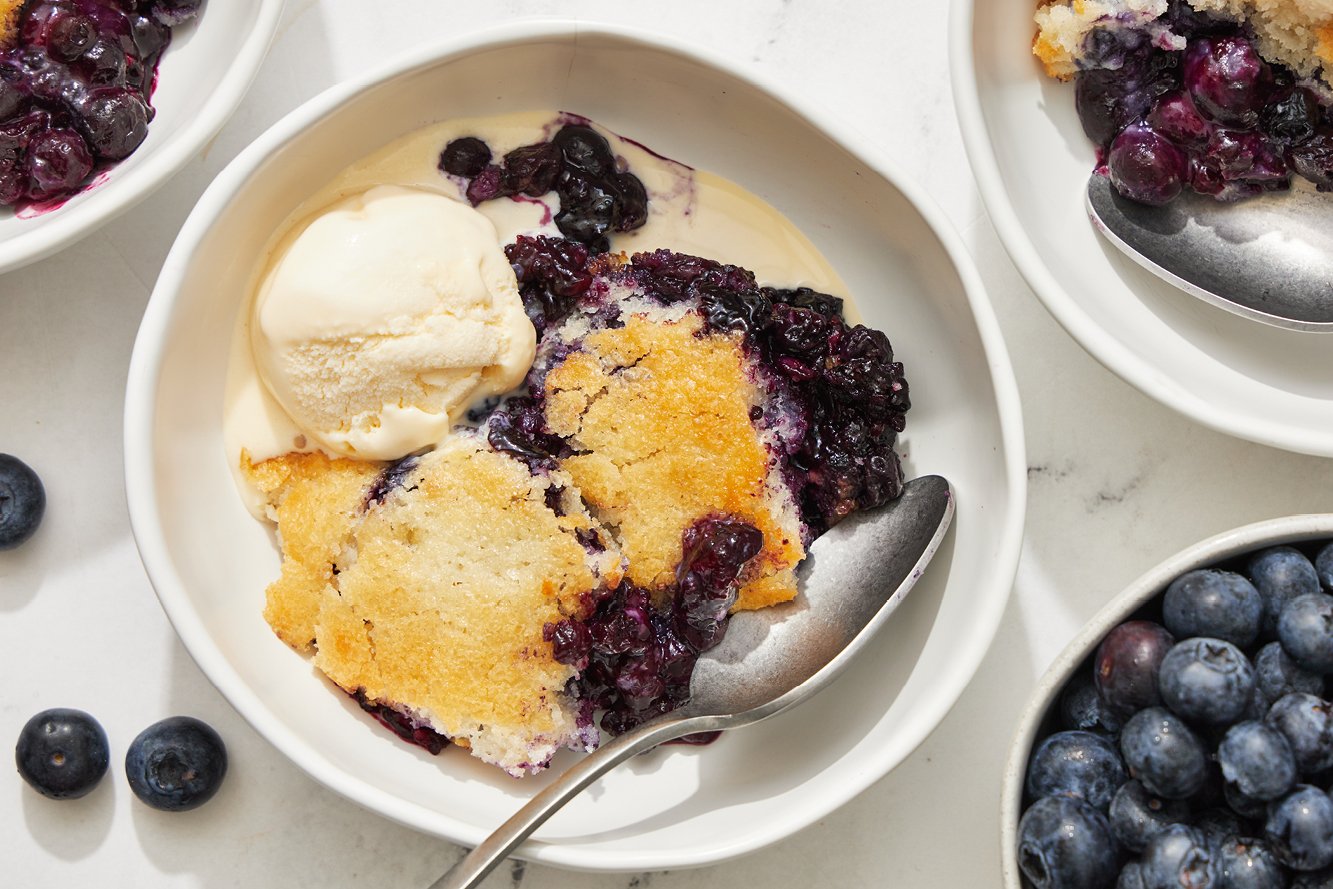
- Serve fresh with vanilla ice cream or homemade whipped cream. Enjoy!
Notes
Photos by Joanie Simon.


I didnt care for the cake on top. I think itd be better as a crisp. The filling was tasty however.
Made this last night and it is delicious! My in-laws, husband, and daughter raved about it, too. I ended up using 4 C. wild blueberries and 2 C. peaches, because I wanted that mix and that was what I had on hand. Didn’t change anything else in the recipe. It turned out perfect!
Well the flavor was delicious! I did add a touch more sugar. But like some of the others my crust was not great. It also did not get thick. It all went down into the berries. Seems like there was too many berries for the amount of crust.
I’m not sure what I did wrong- but the 1 cup of flour, 1 cup of milk yielded a soupy batter… it wasn’t thick- rather it was runny and it sank into the blueberry mixture
Hi Lucy! Oh no, I’m sorry to hear that this cobbler didn’t turn out as it should! How old is your baking powder? If your baking powder is not fresh, it can’t do its job and cause all sorts of issues, such as your cobbler topping failing to set up and sinking. Leavening agents can also lose their effectiveness long before the expiration date on the packaging. Tessa talks about the science behind leavening agents, and how to test for leavener freshness, in this article here. I also highly recommend using real buttermilk here whenever possible – especially full fat buttermilk if you can find it (Target typically sells it). Real buttermilk helps this cobbler topping thicken, for a fantastic texture, and gives a wonderful flavor too. I hope you’ll give this cobbler another try – it really is delicious!
I made this last night and it was absolutely delicious. It was easy to make. Cobbler crust was not too thick like a biscuit; it was perfect for the blueberries. So glad I found this recipe. It’s a keeper.
Delicious and easy to make! Frozen blueberries can also be good in this recipe or not?
Hi Angela! We actually tested this recipe using frozen blueberries, so we know they work great! As mentioned in the recipe, if using frozen berries, don’t thaw them prior to baking. I hope that helps! Happy baking 🙂
Followed the recipe to a T (using weight not volume) using frozen berries that I’d previously picked. I was a little worried about the amount of liquid, since they’d accumulated a bit of ice in the freezer, but it did not affect the consistency. Baked for 45 minutes on convection and did not need any extra time. The flavor was perfect – absolutely delicious and rave reviews from my guests! However I deducted 1 star because the topping was much more liquid as what was pictured before baking, and then it did not rise in the oven. I used real buttermilk purchased just for this recipe AND tested my baking powder, and my house is climate controlled. The overall result was quite thin and flat (no more than 1″ max across the bottom of the pan) and was better served with a spatula than a spoon.
Cobbler tasted absolutely delicious! Although my batter sunk into the filling and was not that distinct layer like in your photo, any idea what went wrong?
Hi Carly! We’re so glad to hear that your cobbler was delicious! It’s so hard to say exactly what went wrong with your cobbler without having baked alongside you, but here are a couple initial thoughts:
– While we did include some substitution tips if you don’t have buttermilk, using real buttermilk will yield the best results and help the cake part thicken beautifully. Definitely give the real thing a try next time, if you didn’t this time 🙂
– How do you measure your ingredients? By volume (using cups), or by weight (using a digital kitchen scale)? When measuring by volume, it’s so easy to mis-measure ingredients (particularly flour) and throw off the entire chemistry of a recipe. Check out Tessa’s article here, where she talks about how to best measure ingredients to ensure accuracy every time.
– How old is your baking powder? If your baking powder isn’t fresh, this can cause a whole bunch of issues. Tessa talks about the science behind leavening agents, and how to test for leavener freshness, in this article here!
I hope something here helped, Carly! Happy baking 🙂
Mine too!
I have used this batter recipe with many fruits. I’ve used whole milk and buttermilk. I’ve used self-raising flour and AP flour. It’s all the same. Batter is too thing. I think ratio of 1c milk and 1c flour is not a good ratio if you’re wanting a thicker crust or a crust that doesn’t mix with berries. I would suggest 1/4c more flour with same milk. It will be a bit thicker thus it dripping or mixing with berries. It really depends on how you like your cobblers.. mixed or crustier topping and l do prefer SR flour and I’m not a fan of buttermilk flavor in my crust so l prefer whole milk. I haven’t tried but I do wonder how half’n-half would work. That would be an experiment to try.
Hi just tried this recipe last night and it was delicious! I used whole milk and added 1/4 cup extra flour as the mix seemed to be too soupy. Thanks for this users recommendation it came out perfect to me and my loved ones!
I would like to make this in a smaller 8 x 8 pan. how do you adjust this recipe? thank you. Bonnie
Hi Bonnie! Yes, you can make a half batch – instructions for this in the pink tip box above the recipe 🙂 Let us know what you think once you’ve given this cobbler a try 🙂